Mini flourless chocolate cakes recipe

The last school the kids attended allowed cupcakes with 2-inch high thick blue frosting to be handed out at 10:30 am on your child’s birthday. And if I do the math, that was about two birthdays every month. The school also made a big deal about celebrating holidays with food, so my child went to school on Halloween and loaded up on candy even before she started trick or treating. Then there were the ubiquitous bake sales and Friday candy, soda and pizza sales to raise money for whatever. Nevermind the disruption to classroom teaching and the disastrous effect on learning, but what a poor message this sends to the children about food and how much we care about their health.
The public schools my kids attend now have a policy against any food (even if you wanted to bring in kale chips) being sent in for birthdays and holidays. If your child is in elementary school and you would like to mark his birthday, feel free to buy a book to donate to his classroom and volunteer 15 minutes to read it to the students. All the kids will also give him a big card that says all the things they like about him. Is this freakin’ awesome or what? Just a happy birthday with no sugar rush before noon. No bouncing off the walls when he gets home. No pressure to be the mom who brings in the treat with the most sugar or artificially colored candy. I always lost that one.
I think 99% of children get more than an appropriate amount of sweets and treats outside of school that we don’t need to give it to them in places where it doesn’t belong. Don’t even get me started on snack after soccer games. BUT, I am of course a reasonable, fun mom who encourages eating a wide variety of wholesome foods with the occasional treat. Actually, I allow treats more often than I’d like to, but the message is that those are not foods to be eaten more than once a day, preferably only once or twice a week. But when a special holiday like Valentine’s Day rolls around, I am the first one in the kitchen baking up something special for my darlings.
I discovered these flourless chocolate cakes from the True Food Kitchen website. True Food Kitchen is a chain of healthful restaurants started by Dr. Andrew Weil. It’s really the kind of food I love — natural, unprocessed, flavorful, but not extreme in one way or another. I happen to love chocolate and I drank Dr. Weil’s Kool Aid, so to speak, and believe all the wonderful benefits about dark chocolate’s antioxidant benefits and high mineral content. It also happens to be a natural aphrodisiac. Hmmmm…… Before you get any ideas, M&M’s don’t fall in the same category, sorry! I also try to limit everyone’s consumption of gluten to just a wee bit, so these mini cakes looked perfect since they are flourless. You figured that out on your own, I’m sure.
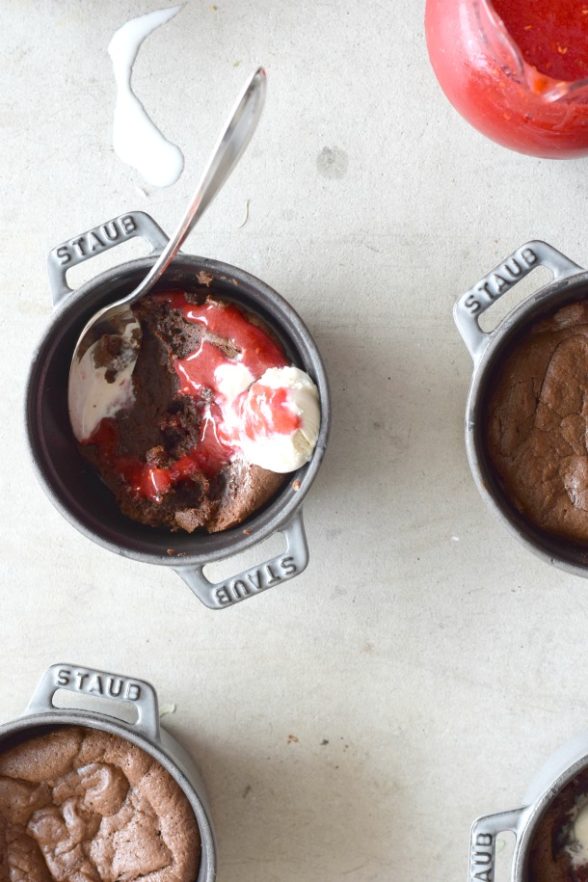
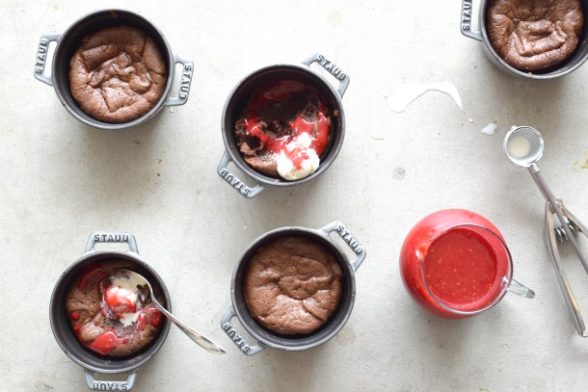
These are the bomb, no joke. I have never served them to anyone who didn’t think so, even Mr. Picky who could probably down all six of them if I let him. They’re kind of a cross between a rich and dense cake and a souffle. The cakes have a really nice chocolate flavor without making you tired of chocolate after two bites. I think they’re just great plain, but everyone loves the raspberry sauce I make to go along with them. The raspberry sauce is a great instant sauce to know how to make regardless of the cake. It’s terrific poured over oodles things like yogurt or ice cream, French toast or pancakes, even your favorite porridge. Did you catch that amazing nut butter and banana French toast I posted on facebook? You’re not my facebook fan? Bummer. You should be! This sauce would be awesome with that. How about this, let’s say you don’t have time to whip up these chocolate cakes for dessert on Valentine’s Day. Make the raspberry sauce the day before and serve it with store bought ice cream or pancakes just to have something a little special.
For lots more fun Valentine’s ideas, check out this post from last year. You won’t believe all the things you can do with a heart-shaped cookie cutter!
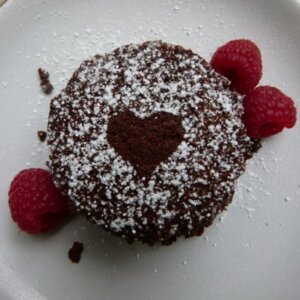
Mini Flourless Chocolate Cakes
Ingredients
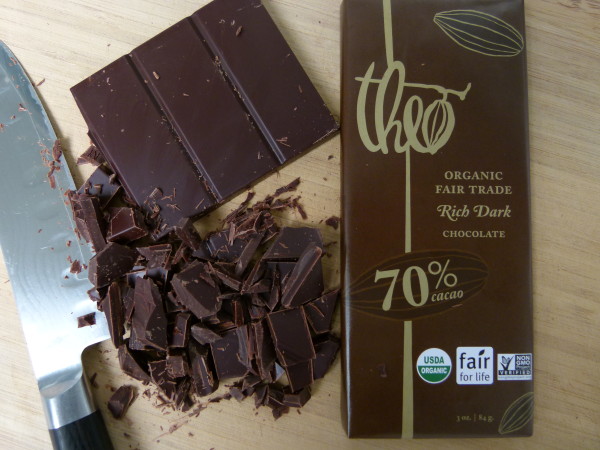
- 6 ounces dark chocolate at least 70%
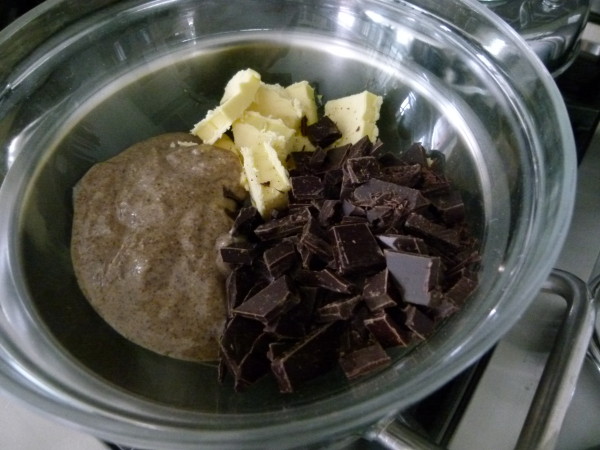
- 6 Tablespoons unsalted butter + 1 teaspoon for greasing the ramekins
- 6 Tablespoons unsalted creamy raw almond butter
- 1 teaspoon 100% pure vanilla extract
- 3 eggs at room temperature, separated
- 6 Tablespoons granulated cane sugar* divided
- pinch of fine grain sea salt
- Raspberry Sauce
- 5 ounces frozen raspberries about 1 cup
- ¼ cup natural cane sugar Sucanat or granulated sugar
- 1/3 cup hot water
Instructions
- Preheat the oven to 325 degrees.
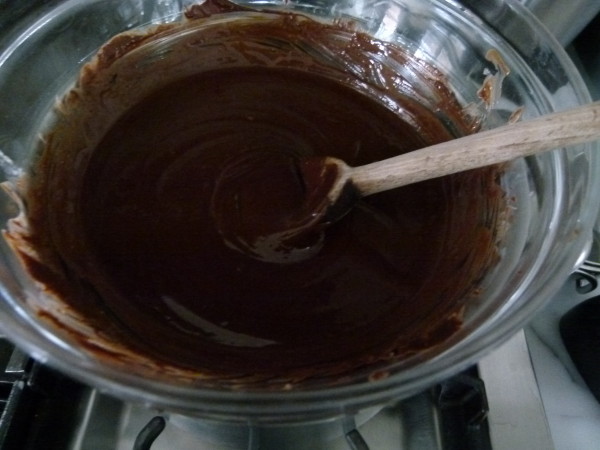
- Over a double boiler (can use medium glass bowl over a pot of simmering water), melt chocolate, butter and almond butter. Let cool. Stir in vanilla.
- While the chocolate mixture is cooling, lightly grease 6 4-ounce ramekins with the teaspoon of butter. If you don’t normally have success turning out cakes without leaving some in the pan, feel free to trace circles of parchment paper to line the bottoms of the ramekins.
- Separate the eggs and place the yolks in the bowl of an electric mixer. Add 3 tablespoons sugar and beat until a light, pale yellow color, about 6 minutes. Slowly pour the in the melted chocolate and mix until combined. Pour back into the bowl that had the chocolate. Wash and dry the mixing bowl.
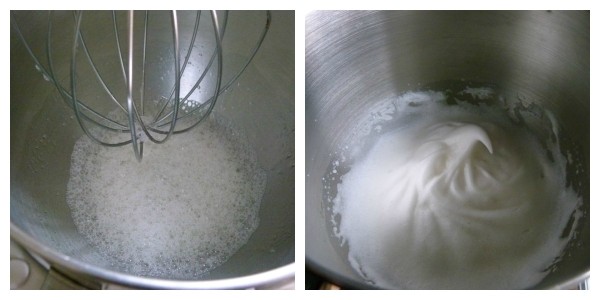
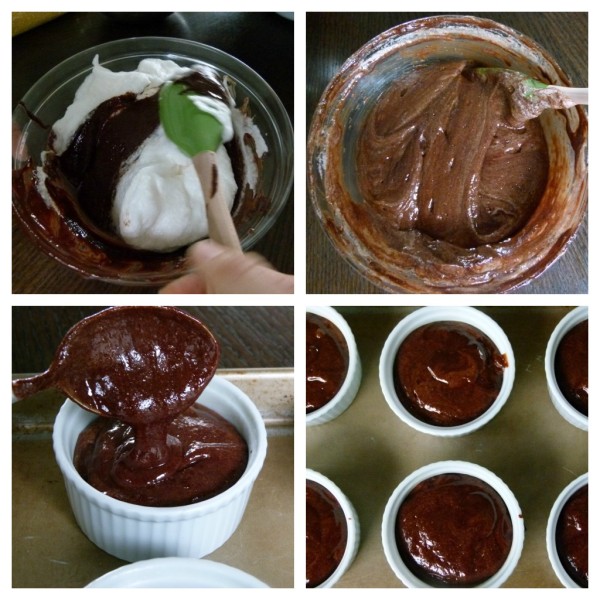
- In the clean mixing bowl, add the egg whites. Whisk until frothy. Slowly add the sugar and salt and whisk until soft peaks form. Carefully fold the whites into the chocolate mixture until combined. You do this by getting your spatula to the bottom of the bowl and pulling some chocolate out and over the egg whites. Turn your bowl a little and do it again. Keep pulling the chocolate out and over until you don’t see any more white streaks.
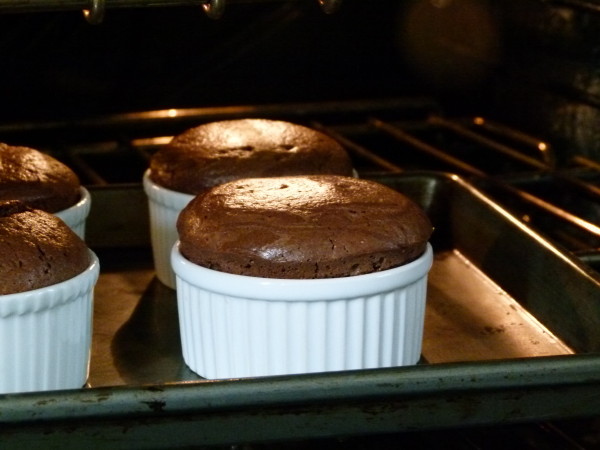
- Spoon the batter into the ramekins. Bake for 15 minutes or until tops are dry and the cakes are set. They will be puffed when you take them out of the oven, but if you let them sit on the countertop, they do deflate. Feel free to eat them warm out of the ramekin or allow to cool before unmolding. If you unmold them while they are too warm, they won’t unmold easily.
- Prepare the raspberry sauce: place raspberries, sugar and hot water in a blender or food processor and blend until smooth. (Can be made one day ahead and kept refrigerated.)
- Serve each cake with raspberry sauce spooned around decoratively.
Notes