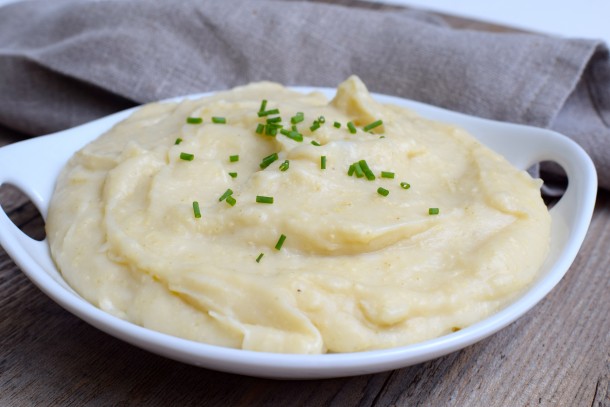
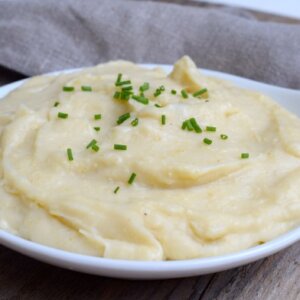
Stir-fried soba noodles with vegetables and tofu


You know what’s harder than sticking to new year’s resolutions? Getting back into a normal routine after you’ve had a very leisurely vacation away from home. After two weeks of no mail, no work (sort of), no carpools, and no making lunches at 6:00 am (the biggest vacation of all!), this week was like a smack in the tush. At one of my classes this week, I couldn’t think of the word for “colander.” This has happened to you too, yes? I thing I did not take a break from over the holidays was cooking dinner, so I decided to get back into my kitchen with some easy meals this week.


My mother-in-law gave me a slow cooker for the holidays and I have used that twice already. I can just tell you now there are slow cooker recipes in your future! I also made this tried and true noodle stir-fry which my kids and husband absolutely adore. And why wouldn’t they? It’s basically Asian pasta! I save stir-fries for the nights when I know I’m going to be pressed for time, but always the day before a school day since it is a slam-dunk for the next day’s lunch box. This particular stir-fry is really about the noodles with a little protein and veg thrown in there, so I always make a second vegetable dish like Sesame Spinach Salad or Roasted Sesame Cauliflower with Nori, for example.


The trick with any stir-fry is to have all your ingredients prepped before you start cooking. It is a very quick-cooking method with little time in between steps, so it’s best not to wait to wash and chop your veggies. In this recipe, I used two vegetables that cook up pretty fast, shiitake mushrooms and cabbage, which are also downright awesome for you. But if you prefer to use something else, just make sure it also cooks quickly, like snow peas. If you have broccoli or carrots lying around that you’d like to throw in there, it’s probably best to steam or blanche them for a minute or two before adding them to your pan. You can do this in a little water in the wok before you get started that way you won’t have an extra pot to wash.


The night I made this, my husband came home and asked if there was any way he could have a little chicken to add to the dish. Of course! Just step aside so I can pull out my magic wand! Actually, I did have a couple of boneless, skinless chicken breasts in the fridge. He turned on the grill while I sliced them into cutlets. I put them in a pie plate with about 3 Tablespoons of shoyu (soy sauce), 2 Tablespoons of olive oil and a few shakes of unseasoned rice vinegar. I flipped them around a bit to coat and I let them sit at room temp for about 15 minutes. They took a minimal amount of time to grill and then we chopped them up and added them to the noodles. I’m so sorry I don’t have a photo! It was actually really delicious and Mr. Picky asked for the same chicken the next night. Chicken that takes a few minutes again? I always have time for that!

View this post on Instagram
If you give this recipe a try, snap a pic and tag @pamelasalzman so I can see your beautiful creations. I also really appreciate readers taking the time to leave a rating and review! Subscribe for free to my site for the latest recipes, updates and things I’m loving lately. If you enjoy this recipe, I taught it last year in my online class! Give me an hour a month, and I’ll make you a better, healthier cook!
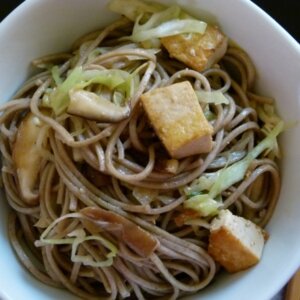
Stir-fried Soba Noodles with Vegetables and Tofu
Ingredients
- 12 ounces soba noodles either wheat/buckwheat blend, all buckwheat or you can use your favorite wheat or brown rice spaghetti
- Pinch of kosher salt
- 2 teaspoons toasted sesame oil
- 14 ounce package of firm or extra-firm tofu preferably non-GMO
- 1 teaspoon arrowroot or cornstarch preferably non-GMO
- 4 teaspoons Chinese rice wine or dry sherry
- 2 Tablespoons shoyu or tamari
- 1 Tablespoon water
- ¼ teaspoon red pepper flakes optional
- 2 garlic cloves crushed
- 2 quarter-size pieces of peeled fresh ginger
- 4 scallions white and green parts sliced
- sea salt to taste
- 2 Tablespoons unrefined peanut or coconut oil
- 3 cups thinly sliced Napa cabbage or green cabbage
- 4 ounces about 2 cups fresh shiitake mushrooms, stems removed, caps wiped clean and thinly slice
Instructions
- Bring a large pot of water to a boil. Add a pinch of kosher salt and soba noodles, Stir well and cook until just done, about 4 minutes. Drain in a colander and rinse under cool water to stop the cooking. Drain well and return back to the pot. Add sesame oil and stir to coat. You can do this in advance.
- Slice tofu into three equal slabs. Press each slab with a paper towel to absorb excess moisture. This will make the tofu able to absorb other flavors. Cut into 1-inch cubes.
- In a small bowl, whisk together arrowroot, rice wine, shoyu, and water. Set aside.
- Heat 1 Tablespoon oil over medium high heat in a wok or large skillet and swirl around the sides of the wok. Add the red pepper flakes, garlic, ginger and scallions. Cook, stirring, until fragrant, about 1 minute. Add the tofu and stir-fry until lightly colored, about 5 to 6 minutes. Don't move it around too much, otherwise it will stick.
- Add the remaining tablespoon of oil along with the cabbage and mushrooms and sprinkle with a pinch of salt. Stir-fry one minute until just wilted, but not cooked all the way.
- Give the reserved sauce a quick whisk and then add to the wok along with the noodles. Stir-fry, tossing constantly to heat through. You can remove the garlic and ginger before serving, if desired.