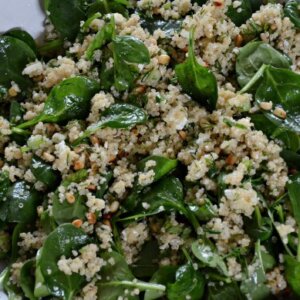
Spinach and Quinoa Salad with Feta and Dill


I know it’s still February, but I think a spring bug bit me. The new strawberries, asparagus, sugar snap peas and artichokes were calling my name last weekend at the farmer’s market and I felt myself thinking ahead to the next season. Just noticing that the sun is setting later and later is making me giddy. Yesterday I was working at home and felt inspired to make one of my favorite quinoa dishes with baby spinach, fresh dill and mint. It was like a bowl of fresh air.

This salad is based on the ingredients in spanakopita, the very rich and tasty Greek pie made from layers of phyllo dough (and butter), stuffed with cheese, spinach and herbs. My friend John gave me his mother, Libby’s heavenly recipe for spanakopita which I have been making for at least 10 years now, but not quite as often as I used to since loads of dairy, processed wheat and fat aren’t friendly to a certain someone. So these days spanakopita makes an appearance only once a year at our Yom Kippur break-the-fast dinner. Don’t feel sorry for me too fast.

Since I still crave those flavors, I came up with a lighter and fresher way to enjoy them. Hence this salad was born. Would you think I was lying if I told you I like this quinoa just as much, maybe more than spanakopita? Of course, I acknowledge this is still a salad and not a flaky, buttery hot mess of three kinds of cheese bound by chopped spinach. But I do like this quinoa better!! I like that it’s fresh, zingy and makes me feel energized instead of weighed down. Quinoa has that effect on me. It’s gluten-free and full of high quality protein, fiber and healthful minerals. For something so nutritious, it is also bouncy and light. Plus I can prepare this salad in a faction of the time it takes me to butter 20 sheets of phyllo dough.

My girls came home from school yesterday and polished off what was left in the serving bowl. I was hoping to ask Mr. Picky to try one bite. In the past, he has only been willing to eat the spinach leaves after he wiped them clean with his napkin. But lately I’ve noticed he has been a little more tolerant of quinoa, not minding if a spoonful or two gets mixed in with some kale salad or sugar snap peas. This is part of the slow and steady process to which I have committed.

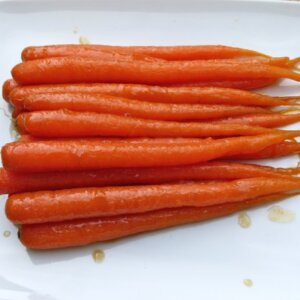
For those of you with actual dietary restrictions or aversions, this is an incredibly flexible recipe. Vegans and dairy-free people can omit the feta and add some kalamata olives for a salty bite. I know there are mint-haters out there (really? very hard to believe!), so feel free to leave that out, especially since Libby’s recipe calls for only dill. And for those of you who would rather not use pine nuts, I have also used sliced almonds or roasted pistachios before with success. I love quinoa with a little crunch. This salad is the perfect lunch or light dinner on its own, but I have also served this with dozens of different sides including roasted carrots and beets, grilled zucchini, sauteed green beans with shallots or minted snap peas. Can you say “Spring It On?!”

Spinach and Quinoa Salad with Feta and Dill
Ingredients
- 1 cup uncooked quinoa RINSED (see Step 1)
- Sea salt
- ½ cup pine nuts toasted (optional)
- 2 scallions thinly sliced or 1 garlic clove, minced
- 6 cups lightly packed baby spinach leaves 3 ounces
- ½ cup chopped fresh dill
- ¼ cup chopped fresh mint optional
- ¼ cup freshly squeezed lemon juice
- ¼ cup unrefined cold-pressed extra-virgin olive oil
- 6 ounces feta preferably made from goat or sheep’s milk
- ½ teaspoon sea salt
- Freshly ground black pepper to taste.
Instructions
- Rinse quinoa in a bowl with water or place quinoa in a fine mesh sieve and rinse under cold water until water runs clear. Drain and transfer to a medium saucepan with a pinch of sea salt and 1 ¾ cups of water. Bring to a boil, cover and lower heat to a simmer. Cook until water is absorbed, about 15 minutes. Let sit, covered for 10 minutes. Quinoa can remain in the pot until ready to combine with other salad ingredients or transfer to a serving bowl and fluff with a fork. Allow quinoa to cool slightly.
- To the quinoa add remaining ingredients and toss to combine. * Or you can place the spinach on a serving platter and toss with 1 Tablespoon of the lemon juice and 1 Tablespoon of the olive oil. Combine quinoa with remaining ingredients and mound on top of the spinach leaves. Taste for salt and pepper and adjust seasoning, if necessary. Serve warm or at room temperature.
Notes