Healthy Granola Bars Recipe

Healthy Granola Bar

Has school started in your neck of the woods?  We’re back at it this week.  I get a little bummed when the kids go back to school.  I’ve really enjoyed spending more time with them and summer is so much less stressful, especially for my high schooler.  That and, despite what you might think, I don’t love making lunches at 6:30 am everyday, as well as trying to keep a substantial supply of well-balanced snacks for the kids and their friends.  You know I love to cook and it’s a major priority for me to feed myself and the kids well, but it’s definitely a challenging task which I know many of you try to tackle most days, too.

The fact is I don’t actually make all of the kids’ snacks, because I really don’t have that kind of time.   But there are a few that I can make quickly, easily and that are more delicious (and healthful) than what you can buy in a store.  I hope to post my guidelines next week for choosing a healthful snack, but making sure there’s some protein in there is super important, otherwise you run the risk of a blood sugar rollercoaster.  One snack that I guessed wouldn’t be too tricky to figure out was granola bars.  Last summer I tested granola bar recipes for about two months and had the tight jeans to prove it.  I wouldn’t call it a low-calorie snack mostly due to the nuts and seeds, but I if the kids need something to tide them over until dinnertime or get them through soccer practice, goldfish and a fruit roll-up aren’t going to cut it.  I am always going to look for something like these bars, which are made from real ingredients, contain protein and fiber and a minimal amount of sugar, plus a little love from Mom.

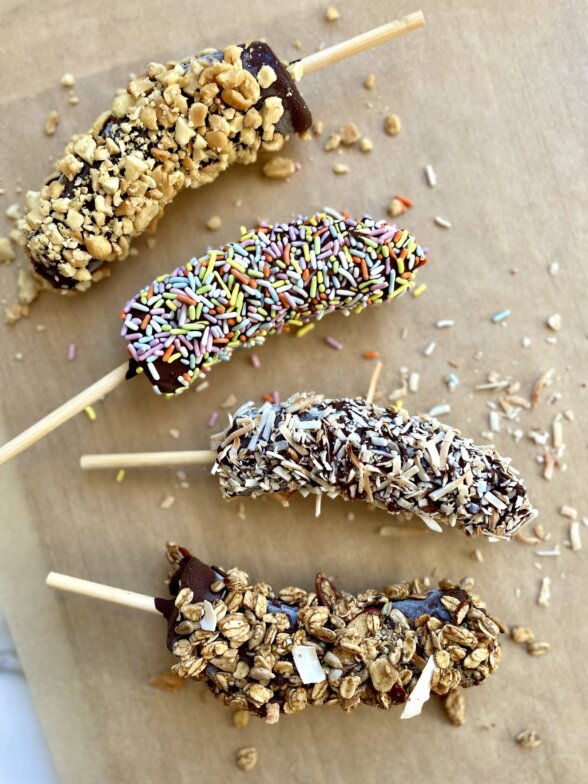
The problem is that these granola bars are so good, I have a hard time being in the house and not sneaking one or more when I’m not really even hungry.  They have most of the same flavors as my granola, but with a little butter.  What they don’t have is tons of refined sugar like so many granola bar recipes I see.  If you are dairy-free or vegan, you can definitely use coconut oil, but I have a soft spot for the combination of butter, pecans and a pinch of sea salt.  Yum!  Like granola, you can adjust this recipe to suit you.  (And yes, you can add chocolate chips.)  I like my granola bars a little on the thick side (see bottom photo), but if you like yours thinner and crunchy (see lead photo), you can use an 8 x 10 pan.  Try these out and if your family loves them, make a double batch and freeze them.  Because in my world, September not only means school, but soccer games, scouts meetings, study groups and playdates.  Need any more reasons to make these?

Healthy Granola Bars
Author: 
Serves: makes 8-12 bars, depending how you slice 'em
 
Ingredients
  • 2 cups old-fashioned rolled oats (not quick-cooking)
  • ¼ cup raw sunflower seeds
  • ¼ cup raw pumpkin seeds
  • ¼ cup unsweetened coconut flakes
  • ½ cup chopped raw nuts (pecans or almonds are good)
  • ¼ cup ground almond meal
  • 1 ¼ teaspoons cinnamon
  • ½ teaspoon sea salt
  • ½ cup unsulphured dried fruit (such as chopped apricots, cranberries, cherries, blueberries)
  • 3 Tablespoons unsalted butter, melted (my preference) or melted coconut oil
  • ½ cup brown rice syrup (or honey)
  • 1 teaspoon pure vanilla extract
Instructions
  1. Preheat oven to 350 degrees.
  2. If you like thick granola bars, grease an 8 or 9-inch square pan with butter or coconut oil and line with unbleached parchment paper (this will help get the bars out of the pan.) If you like them thinner, say ¾-inch thick, grease an 8x 11-inch pan.
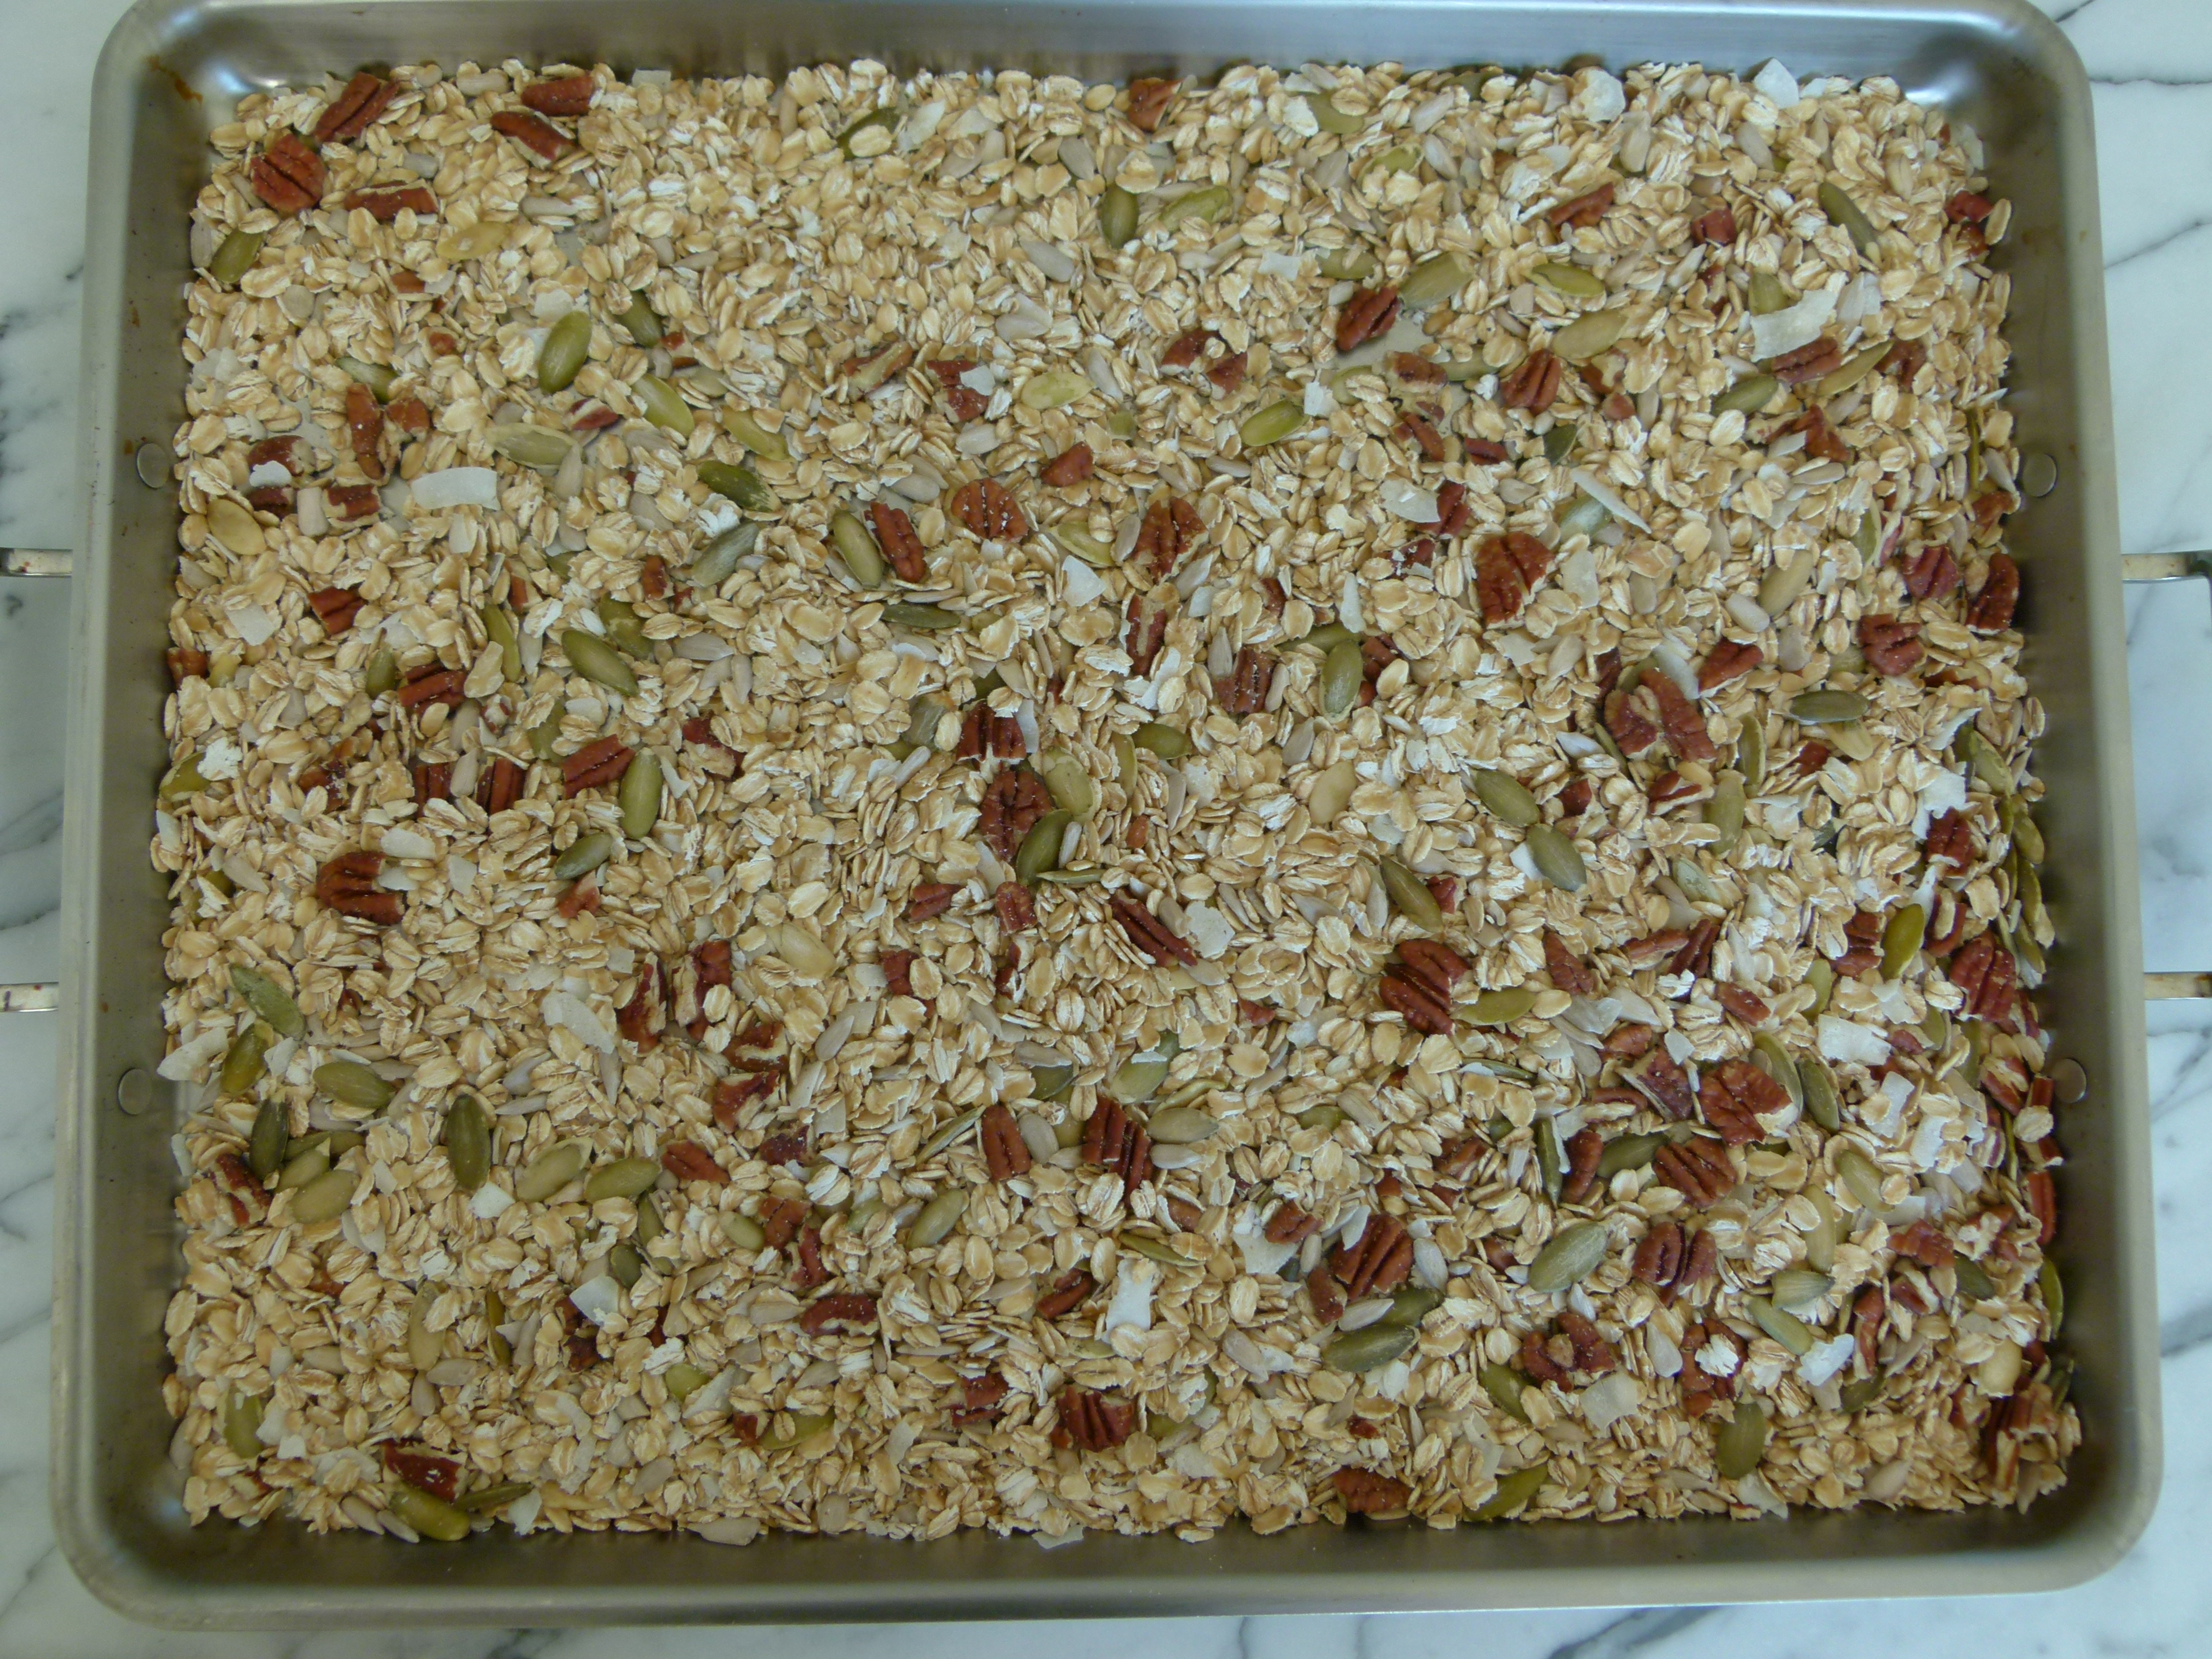
  3. Place oats, seeds, coconut and nuts on large baking sheet and toast for 12-15 minutes. Do not allow anything to burn!
  4. In a large bowl combine almond meal, cinnamon, salt and dried fruit. When oat mixture is out of the oven, add to bowl. Mix the melted butter, brown rice syrup and vanilla together and pour over the oat mixture, stirring well to coat evenly.
  5. Pour mixture into pan and press down with a spoon, spatula or damp hands.
  6. Bake for about 20-25* minutes, or until lightly colored on top. The granola bar will be soft to the touch when it comes out of the oven, but will firm up as it cools. Allow to cool completely, at least 2 hours. Run a knife around the edge of the pan to loosen the bar. Invert the pan over a cutting board to remove. Cut into individual bars and eat or store in a covered container.**
Notes
*Baking it longer will result in a crispier, firmer bar, but it may be harder for little ones to chew easily.

**If the weather or your kitchen is warm, it’s better to store the bars in the refrigerator.


Green Goddess Salad

I just spent a lovely four days in Park City, Utah enjoying the clean air and the peace and quiet (outdoors, of course; indoors I have my three kids and two of their friends, so no peace and quiet in the house from noon ’til midnight.)  There are no televisions and I insist that the kids leave the phones in their bedrooms so we can hike and dine without the ping of 6 iPhones.  Heaven.

Of course, with travel comes a deviation from eating the way I like to eat.  I consumed a little too much guacamole and chips a little too late at night, and then someone tried to torture me by buying a container of Justin’s Chocolate Hazelnut Butter.  I had mentioned it was like a more healthful Nutella, not that it was actually healthful.  By the end, I missed my juicer and my garden and all I wanted to eat were salads and vegetables.  In fact, I was craving this Green Goddess Salad while I was on the plane home.

No, I didn’t name this dressing after you.  The original Green Goddess dressing was created at San Francisco’s Palace Hotel in the 1920’s, for the English actor George Arliss.  Arliss was staying at the hotel and dined there every evening before he performed in a play called “The Green Goddess.”  There are so many variations on this dressing, the base of which is usually mayonnaise, sour cream and tarragon — the only herb I don’t like.  Can we still be friends?  So considering I am using none of the above, I don’t know if I can actually call it a Green Goddess dressing.  One day last summer, I tried to clean out some little bits of herbs that were lingering and blended them into my own version of the dressing and we all loved it.  So feel free to adjust the recipe according to whatever herbs you have on hand, even if it’s tarragon.  The kids think it tastes a little like ranch dressing.  So I made more the next day and used it as a dip for raw vegetables.

Green Goddess is a creamy dressing that’s a nice break from traditional vinaigrettes, and one that works well with crisp and sturdy lettuces.  There are dozens of ways to enjoy this salad, even as a main course, since so many things work well with the dressing.  Here I used tomatoes and radishes, which are both perfectly obvious, but you can add hard boiled eggs, shrimp, poached chicken, cucumber, avocado, and/or corn.  One day I took a few beefy tomatoes from the garden, sliced them up and drizzled this over.  Whatever you do, don’t leave out the anchovy paste — it really adds a little salty something and doesn’t taste at all fishy.  Your kids and your picky spouse don’t need to know it’s in there.  In fact, they don’t need to know anything other than you made up your own Ranch dressing.

Green Goddess Salad
Author: 
Serves: 6
 
Ingredients
  • 1 head romaine lettuce, leave washed, dried and torn into bite-size pieces
  • Any of the following:
  • Thinly sliced radishes
  • Chopped or sliced cucumber
  • Chopped tomatoes
  • Cubed avocado
  • Raw or cooked corn kernels
  • Quartered hard-boiled eggs
  • Dressing:
  • ½ cup whole plain yogurt (regular or Greek)
  • 1 cup flat-leaf parsley leaves
  • 3 Tablespoons chopped chives
  • 2 Tablespoons basil leaves
  • 1 Tablespoon chopped dill (if you have it)
  • 1 scallion, chopped
  • 1-2 Tablespoons fresh lemon juice
  • 1 teaspoon anchovy paste or two anchovy fillets
  • ½ - ¾ cup unrefined, cold-pressed, extra-virgin olive oil (depending on how thick or thin you like it)
  • ¾ teaspoon fine grain sea salt
  • Freshly ground black pepper to taste
Instructions
  1. Place all dressing ingredients except oil, salt and pepper in a blender or food processor. With the motor running, slowly pour in olive oil. Season with salt and pepper to taste.
  2. Toss lettuce in a serving bowl with enough dressing to coat lightly. Either toss remaining salad components separately with dressing or arrange on top of lettuce and drizzle with dressing.
Notes
The original Green Goddess dressing contains lots of tarragon. Feel free to experiment with other different fresh green herbs such as tarragon, cilantro, chervil or mint.

For a dairy-free version, use ½ cup silken tofu in place of the yogurt and increase lemon juice to 3 Tablespoons. I’m sure you could also substitute ½ of ripe avocado, but I haven’t tried that.

Chocolate-covered frozen bananas

Are you asking yourself if I have gone mad?  Two desserts in one week!  What happened to “moderation?”  People, I write it like I see it and chocolate-covered frozen bananas are what the past few weeks have been about around here.  Have you ever been in a “food phase?”  I mean when you eat something that makes you think about eating it all the time and then you do?  Some food phases, like when I ate raw kale salad several times a week for months, are better than others, like in the ’90s when I went through a nonfat frozen yogurt phase that lasted several years.  Blech.  My husband is in a chocolate-covered frozen banana phase and I see no signs of it letting up.  It all started in May of this year at the bar mitzvah of my friend Kim’s son where they passed around mini-frozen chocolate banana bites at the end of the evening.  My husband and I looked at each other after a few as if to say “where have we been?”  Before I knew it, the mister was taking detours through town just to pass the Manhattan Creamery where he would buy a frozen banana or two.  He was even offering the kids frozen banana rewards for the most ridiculous things.  Obsessed.

All joking aside, I actually think these bananas have the potential to be an okay dessert, especially if you can use good quality, organic dark chocolate, which I keep telling myself has lots of antioxidants!  So I thought to myself, how hard could dipping bananas be?  Well, I wouldn’t be writing a whole post about it if it were just a matter of dipping a banana in chocolate.  Let me save you some time and some chocolate with my frozen banana tips and tricks:

  • use ripe, speckled bananas for maximum sweetness.
  • don’t use overripe, black bananas which will ooze after they’ve been covered in chocolate;  save those for banana bread.
  • insert the stick in the banana before freezing it (obvious to you, maybe).
  • insert the stick in the banana before peeling it, to prevent the banana from splitting.
  • freeze the banana before coating in chocolate so that the chocolate hardens right away.
  • do add a little oil or butter to the melted chocolate to thin it out a bit, otherwise it makes too thick a coating on the banana.
  • I prefer to spoon the chocolate over the banana as opposed to dipping.  The melted chocolate stays much more smooth and won’t seize up on you.
  • if you’re using toppings, work quickly.  If the chocolate is allowed to harden, the toppings won’t stick.

I think these are a really fun treat.  I feel better about hubby and the kids eating these than a lot of other things, plus they are super easy to make.  If you are going to take the time to try this out, you might as well make a whole bunch, so to speak, since they stay frozen for a good amount of time.  I decided to use toppings on most of them and I kept it real with toasted coconut, chopped nuts and crushed granola.  I’m sure you have probably seen similar bananas rolled in sprinkles or candy, but you didn’t come here for that, now did you?


5.0 from 1 reviews
Chocolate-Covered Frozen Bananas
Author: 
Serves: makes 10
 
Ingredients
  • 5 large ripe, well-speckled bananas (or up to 7 small bananas)
  • 10 popsicle sticks or candy apple sticks (I used both here.)
  • 2 cups good quality chocolate pieces (I used Dagoba 72% chocodrops -- dark chocolate contains antioxidants and less sugar than semisweet or milk chocolate )
  • 2 Tablespoons unrefined coconut oil or unsalted butter
  • Topping ideas: toasted coconut, finely chopped nuts, crushed granola
Instructions
  1. Cut the UNPEELED bananas in half and insert a popsicle stick into the cut side of each banana. Peel the bananas and arrange in one layer on a parchment or wax paper-lined baking sheet. Put the baking sheet in the freezer and freeze bananas until firm, at least 30 minutes, but ideally a few hours.
  2. In a double boiler, or in a heat-proof bowl set atop a pot of simmering water, melt the chocolate and coconut oil, stirring frequently until smooth.
  3. If using toppings, arrange in shallow containers before starting.
  4. Remove bananas from freezer and one at a time, hold a banana over the melted chocolate and spoon chocolate over the banana until completely coated. Allow excess to drip back into bowl. Before chocolate completely hardens, roll in topping of choice and return to baking sheet.
  5. Repeat with all the bananas and return baking sheet to the freezer until chocolate is completely hardened, just a few more minutes. Serve immediately or store in a container in the freezer up to two weeks.


Zucchini-blueberry bread

Have I warned you about planting mint in your garden?  No?  Ooops, sorry ’bout that.  I know I have told several people to only plant mint in containers since its root system will go crazy and you’ll never be able to get rid of it or kill it no matter how much you think you would never want to do such a thing.  I have said many times that I’d like to write a book titled “I Can’t Believe the World Isn’t Covered in Mint.”  I’ve changed my mind.  I think my book will be called “I Can’t Believe How Many People Plant So Much More Zucchini Than They Can Possibly Eat.”  Is this you?  It’s meeeeeee.  And I really should know better having grown up with a father who year after year planted too much zucchini.

I am devoting two posts in a row to zucchini because I sympathize with your plight, not because zucchini is some nutrient-dense vegetable, which it’s not.  It is an appropriate food for the summer months, though, due to its high water content and cooling thermal nature.  It is alkalizing to the body to boot.  I don’t know how alkalizing zucchini bread is, but when my kids devour it, I commend them on how wonderful it is that they enjoy green vegetables.  Then when zucchini is served for dinner, I just remind them it’s the same green that’s baked into the bread they love.

Many zucchini breads tend to be overly oily and loaded with sugar, but claim health benefits from a cup of shredded zucchini.  You’re not falling for that one, are you?  This one instead has a base of whole wheat pastry flour with a minimal amount of maple syrup to sweeten it.  I use either olive oil or melted coconut oil, which can be reduced with the addition of unsweetened applesauce (see the lead photo.)  Like a lot of the recipes I post, you can adapt this zucchini bread so many ways.  Our favorite way is with fresh blueberries and a touch of lemon zest.  It’s light and fresh and makes for a perfect quick summer breakfast or snack for camp.  I have also made it with raspberries instead of blueberries and that’s a winner, too.  I know you’re going to ask me if you can add chocolate chips, and who am I to tell you no?  If you use chocolate, I would drop the lemon zest though, and maybe add some walnuts.  Like I did right here.

5.0 from 4 reviews
Zucchini-Blueberry Bread
Author: 
Serves: makes 1 8½ x 4½-inch loaf
 
Ingredients
  • ¼ cup melted unrefined coconut oil or olive oil
  • ½ cup unsweetened applesauce (or omit applesauce and increase oil to ½ cup)
  • ½ cup organic 100% pure maple syrup
  • 2 large eggs
  • 1 teaspoon pure vanilla extract
  • 1 ¾ cups whole wheat pastry flour or white whole wheat flour
  • 1 teaspoon aluminum-free baking soda
  • ½ teaspoon aluminum-free baking powder
  • ½ teaspoon fine grain sea salt
  • 1 ½ teaspoons cinnamon
  • pinch of nutmeg
  • 1 ½ cups shredded, unpeeled zucchini, about 2 small
  • zest of half a lemon (optional)
  • ½ -1 cup fresh blueberries
  • ½ cup chopped walnuts or pecans (optional)
Instructions
  1. Preheat the oven to 350 degrees. Lightly grease an 8 ½ “ x 4 ½ “ loaf pan, or if aluminum, grease it and line it with parchment paper.
  2. In a blender, blend together the oil, maple syrup, applesauce, eggs and vanilla. This helps to emulsify the oil and keeps your bread from being greasy.
  3. In a mixing bowl, whisk together the flour, baking soda, baking powder, salt, cinnamon and nutmeg. Stir the wet ingredients into the dry mixture.
  4. Fold in the zucchini, lemon zest, blueberries and nuts. Pour into the prepared pan.
  5. Bake for 50-60 minutes or until a tester inserted in the center comes out clean. When made with applesauce, it usually takes 5 minutes longer than when made without. Cool slightly, about 10 minutes, remove from pan, and cool completely on a rack.
Notes
You can also make these in standard muffin tins and bake for about 20 to 25 minutes. This will yield about 12 muffins.

Zucchini “pasta” recipe

We’re in pasta mode this week, but transitioning to zucchini mode, so I couldn’t help but post a recipe which covers both.  In the low-carb craze of the 90’s (although I’m not sure it’s over), I was intrigued by the idea of using things like zucchini and spaghetti squash in place of pasta.  “With the addition of tomato sauce, you will feel the same satisfaction of eating the real thing, but without the carbs!”   Those same people try to make veggie burgers taste like beef.  Don’t make me laugh.

That fact is, the first time I tried this method of cutting zucchini in the shape of papardelle noodles and adding some cooked down tomatoes, basil and garlic, I loved it.  Did I feel like I was eating regular pasta?  Not really.  Did I care?  Not at all.  I think this zucchini is absolutely terrific in it’s own right.  My husband, who is a pasta-lover, said, “I like this because I don’t feel gross after eating it.”  Aww, shucks.

When I taught this in my classes two years ago, I went against my better judgment and cooked the tomatoes and zucchini in the same pan.  I, like most people, enjoy cooking more than I enjoy washing dishes, so I am always conscientious of how many pots and pans I use.  But cooking the zucchini too long can make it watery, as does adding acid and salt too early.  So the best way is to do this is in two separate pans side by side.  If you really detest the idea of washing a second pan or if you don’t have 2 large ones, cook the tomatoes first and transfer them to a serving bowl.  Then cook the zucchini in the same pan and add the tomatoes back.  On the same note, don’t allow this to sit too long before serving, because the zucchini will start to release its water.  Unless of course you’re trying to photograph it, and you need to wait for the steam to subside so it doesn’t fog up your lens.

I know many of you are desperate for things to do with the abundance of zucchini from your gardens.  First of all, let me give you a pat on the back for growing something.  Love that!  But can I give you a little advice?  Stop competing with your neighbor for who can grow the biggest squash on the block.  We’re all guilty of it, but there’s nothing good that comes out of it.  Size does matter here, but smaller is better!  When you allow the zucchini to grow to the size of a regulation baseball bat, you end up with spongy, seedy and not tasty zucchini.  Pick them when they’re small and tender and you’ll be able to keep up with production, too.

If you like to come home from work and have dinner on the table in 15 minutes, then you’re better off cutting your zucchini in the morning or the night before.  I showed two methods for this above, either using a mandoline or a vegetable peeler, but it does take a little longer than normally prepping zucchini.  If you wanted to make this into a full meal, toss all of it with some freshly cooked pappardelle noodles, white beans for protein and a dusting of parmesan cheese, and it will all be worth it.

Zucchini "Pasta"
Author: 
Serves: 4-6
 
Ingredients
  • 2 pounds small zucchini
  • 4 Tablespoons unrefined, cold-pressed extra-virgin olive oil, divided
  • 3 cloves garlic, thinly sliced
  • 2 pounds tomatoes, cored and chopped (seeded and/or peeled if you like)
  • Sea salt and black pepper
  • Small handful of basil leaves, slivered
  • 1 Tablespoon unsalted butter (optional)
  • Grated or shaved Parmiggiano-Reggiano or pecorino-romano cheese (optional)
Instructions
  1. Trim the ends off the zucchini. Cut in half lengthwise. Slice lengthwise on a mandoline very thinly (thinner than ⅛-inch) to resemble pasta noodles. If you don’t have a mandoline, you can use a vegetable peeler.
  2. Heat 2 tablespoons olive oil in a large skillet over medium heat. Add the garlic and cook until the sides begin to turn golden. Add the tomatoes and season with sea salt and pepper. Cook until fragrant, about 3 minutes. Stir in the basil.
  3. In another large skillet, warm 2 tablespoons olive oil over medium heat. Add the zucchini and sauté until just tender, about 4 minutes. Sprinkle with sea salt and transfer to the tomato mixture with tongs, leaving the extra liquid in the pan. Toss to coat with the tomatoes. You can add an optional tablespoon of unsalted butter at this point to enrich the sauce, but not necessary.
  4. Serve with freshly grated cheese, if desired.
Notes
Instead of cooking fresh tomatoes, you can add 1 cup of warmed tomato sauce to the cooked zucchini and serve with grated cheese on the side.


Pasta alla checca recipe

pasta alla checca (raw tomato sauce)

When people tell me they don’t know how to cook, I know what they really mean.  They mean to say they don’t know how to cook well off the fly or they don’t have a deep repertoire of dishes that they can prepare with ease.  I say if you can read, you can cook.  Furthermore, most people can cook something they ate as a child, if nothing else.  If I learned zip about cooking and never stepped foot in a kitchen after I left home, I would at least be able to make Pasta alla Checca.

I actually got a little choked up in a class last month when I reminisced about how I ate this pasta dish weekly during the summers of my youth.  Pasta alla Checca is nothing more than pasta with a raw tomato and basil sauce.  Sounds simple, but the success of the dish relies on the quality of the tomatoes.  If you have divine tomatoes, the pasta will be fabulous.  If not, it will be forgettable.  Therefore, I implore you only to make this dish in the summer when tomatoes have a chance of being splendid.  If you make this dish in January with pale, dreary tomatoes and email me that you don’t know why this didn’t taste like very much, I might just direct you back to this post.

We always had beautiful, tasty tomatoes and basil growing in the backyard and this was an easy weeknight dish for my mom to pull together after a day at the beach or if was too hot to do too much in the kitchen.  My mom was not one for creating extra work for herself, but she always insisted on peeling the tomatoes for this dish.  I have made it both ways and she is totally right — peeling the tomatoes is worth every minute of the 5 minutes it will take you.  When the tomatoes are without their skins, they release more of their juices and flavors and everything just tastes so much richer and more…tomato-y!  My mom used to buy that atrocious plastic-wrapped Polly-O mozzarrella, cube it and marinate it in the tomato mixture while she was cooking the pasta.  When the hot pasta hit the cheese, it melted ever so slightly and yours truly would fight her sisters for it.  If you decide to go this route, keep in mind the garlic cloves are crushed in the sauce and tend to look very much like melted mozzarrella, so you might want to pull out the garlic before serving.


pasta alla checca (raw tomato sauce)

If you are not eating tomatoes right now, you’re missing out.  Even if you don’t eat pasta, make the tomato mixture and put it on top of any number of things — steamed green beans, grilled eggplant, grilled bread, poached or grilled fish or chicken.  The season is short and fleeting and nothing says summer like a real sunkissed vineripened tomato.  To this day, just the aroma of this tomato and basil mixture immediately makes me think summer.  The good news is, you still have plenty of summer left to enjoy it.

pasta alla checca (raw tomato sauce)

Pasta Alla Checca
Author: 
Serves: 4-6
 
Ingredients
  • 2 pounds ripe tomatoes, about 6 medium (or more if you like a high ratio of tomatoes to pasta)
  • 2 cloves garlic, crushed
  • ¼ cup torn or sliced fresh basil leaves
  • ¼ cup unrefined, cold pressed extra-virgin olive oil
  • Sea salt to taste (I think ¾ teaspoon is about right.)
  • 1 pound dried pasta (I like a pasta which catches the tomatoes, such as orrecchiette or conchiglie. My mom always made it with spaghetti.)
  • Kosher salt to season the pasta water
Instructions
  1. In a pot large enough to fit the tomatoes, fill ¾ with water and bring to a boil ("instant hot" from your sink won't work, already tried it.) Cutting through the skin, make an “x” on the bottom of each tomato with a knife. Turn the heat off and submerge the tomatoes in the water for 20-30 seconds, depending on the size of the tomatoes. Remove the tomatoes from the water with a slotted spoon and place on a cutting board. Peel (non-negotiable), core, seed (if you want) and chop the tomatoes.
  2. Place the tomatoes in a serving bowl. Add the garlic, basil, olive oil, and a few healthy pinches of sea salt to taste. Toss to combine.
  3. Bring a large pot of water to a boil. Add 1 Tablespoon kosher salt. Add the pasta and cook according to the package directions or until al dente. Remove 1 cup pasta cooking water and reserve (you won't need it if your tomatoes are juicy.) Drain the pasta. Immediately add to the serving bowl with the tomatoes and toss to combine, adding reserved pasta cooking liquid if necessary to moisten the pasta. Remove garlic before serving, if desired.


Guide to gluten-free pastas

I meet many people in my classes who are sensitive to gluten, a hard-to-digest protein found in wheat, rye, barley, farro and spelt.  Perhaps you aren’t gluten-intolerant, but are wisely monitoring your intake of it.  I’m a big advocate of “include a wide variety of foods in your diet” and “everything in moderation,” especially when it comes to eating gluten, which is very inflammatory to the body.  However, one food that is tough for many gluten-sensitive people to give up is traditional wheat pasta.  The good news is that there has been an onslaught of gluten-free products on the market in the last several years, although many of the new foods are processed and no better than their wheat-based counterparts.  Regardless, if you can’t eat wheat, it’s nice to have a few good choices for gluten-free pasta.  I’ve experimented with many of them and I’ll give you my take right here.

The main trick to tasty gluten-free pasta is in the cooking.  It has a tendency to stick together if you don’t stir it regularly, especially immediately after pouring it into the water.  Also, it can go from al dente to mush very quickly, so test it earlier than the package directions indicate.

Bionaturae pasta:  Available at Whole Foods and amazon.com, this organic pasta is made from a blend of rice flour and starch, soy flour and potato starch.  This is the closest to real pasta of the whole lot and my favorite.  Unfortunately it is also one of the most expensive at about $4.59 for 12 ounces (less by the case at amazon.)

Brown rice pasta: I like the Tinkyada brand and the house brand from Trader Joe’s. Both are organic and are a close second to Bionaturae.   Do not go by the package directions on the Tinkyada bag!  Start testing the pasta after it has been cooking for 8 minutes, but it should not take longer than 10 minutes.  Tinkyada is about $3.69/pound and Trader Joe’s is about $2.00/pound.  There’s also another brand of rice pasta called Notta Pasta, which has an almost cult-like following, but it’s not organic.  I have see it on Amazon.com.  Believe me, there are many more brands, but some are so ridiculously expensive that I’d rather eat plain rice.

Quinoa pasta: I have tried Ancient Harvest and Andean Deam, both organic and available from Whole Foods or  amazon.com.  Ancient Harvest is made from a mixture of a corn flour and quinoa flour.  Andean Dream is a blend of rice flour and quinoa flour from royal quinoa, a variety that is very high in protein. These brands cook at different rates and different shapes have different cook times, as well.  I prefer Andean Dream over Ancient Harvest because I don’t love the corn flavor from AH.

Rice noodles or sticks: These translucent rice flour noodles are delicate and versatile. I’ve seen them in Asian grocery stores and some supermarkets in the Asian section.  You need to reconstitute them in warm water for about 20 minutes and then cook for another minute in boiling water.

Soba noodles:  Most soba noodles are made from a blend of wheat and buckwheat flours, but you can find 100% buckwheat soba noodles by Eden Organic.  They can be very tricky to work with if you aren’t attentive.  Be careful of the pot foaming over and the noodles sticking together.   I love the earthy, almost mushroomy flavor of all-buckwheat soba noodles, but I use them mostly in Asian noodle salads or soups.  Very expensive, about $7 for a half pound.

Ready to try some out?  Here are some great recipes already on my site:  Basil-Parsley Pesto; my childhood favorite, Pasta alla Checca; or clean out your fridge with Pantry Pasta.

I’d love to hear about your experiences with gluten-free pastas.  Favorite brands?  Good tips?


Chickpea and deconstructed pesto salad

Summer around my house is very loosey-goosey.  We lack a bit of structure when school is not in session.  On any given night, it varies who will be here for dinner and I often find myself cooking for either just two people or for an army.  This can be tricky for me since I make my menu for the week every Sunday night, but over the years I have also learned how to be flexible and not anxious if I have enough fish for 5 and all of a sudden we’re down to 2.

Daughter #1 and I found ourselves solo for dinner last night, but it was late and neither one of us had the motivation to do anything more than open a can of chickpeas.  Of course we’re girls and we are just fine eating a meal without meat and still calling it dinner.  We made this chickpea salad and grilled up some zucchini, because who can eat a meal without zucchini in it these days?  It’s taking over the world!!  Remind me next spring not to plant so much.  And the two of us stood at the kitchen counter leaning over the salad bowl shoveling in spoonful after spoonful of chickpea salad, exclaiming “this is so good!” after every bite, alternating with dropping ribbons of grilled zucchini in our mouths.

This is hands-down the easiest salad you will ever make and if you are growing your own basil, you likely already have everything you need to put this together in five minutes.  Thank goodness for pantry staples!  This is fabulous to bring to a barbeque or picnic since you can make it ahead and nothing happens to it.  It’s even great the next day.  Last night I added halved cherry tomatoes at the last minute and I have also thrown in chopped, blanched green beans to make it more substantial.  Be forewarned, there is a nice punch of raw garlic which I love, but if you don’t care to eat garlic, you can just smash it and add it for a subtle undertone.  The idea is to make a salad with all the flavors of pesto without having to make pesto.  Actually, the idea of this salad is to barely do anything at all, but still eat something utterly delish.


View this post on Instagram


A post shared by Pamela Salzman (@pamelasalzman)


Chickpea and Deconstructed Pesto Salad
Author: 
Serves: 4
 
Ingredients
  • 3 cups cooked chickpeas or 2 15-ounce cans, rinsed and drained
  • ¼ cup chopped fresh basil leaves
  • 2 small garlic cloves, minced
  • 3-4 Tablespoons freshly squeezed lemon juice (about 1 lemon)
  • 3 Tablespoons unrefined cold-pressed extra-virgin olive oil
  • ½ teaspoon fine grain sea salt or to taste
  • freshly ground pepper to taste
  • ⅓ cup grated pecorino-romano (sheep's milk cheese) or parmesan cheese (cow's milk cheese)
Instructions
  1. Combine all salad ingredients in a serving bowl and toss well to combine. That's it!
Notes
Also delicious with halved cherry tomatoes (see lead photo), arugula and/or blanched green beans. I added some thinly sliced radicchio once and that was nice, too.