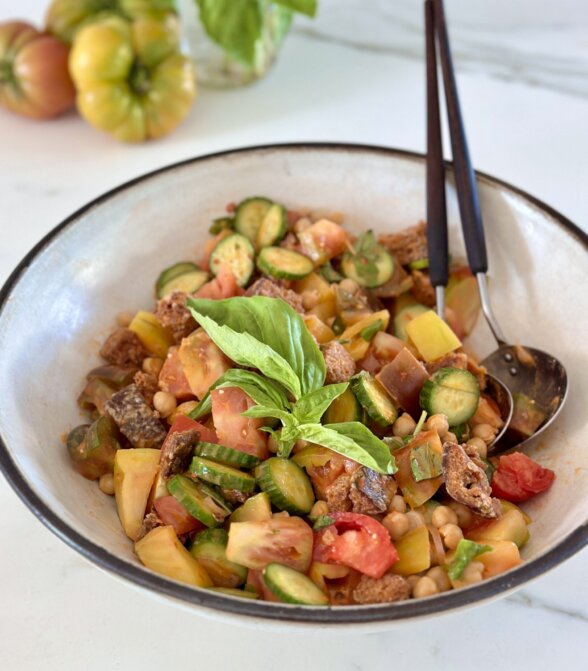
Panzanella is a great way to use up leftover stale bread and you know how I love to NOT waste food! You can use any bread you like – gluten-free, grain-free all work too. It is classic to make panzanella with juicy tomatoes, onions, cucumbers and basil, but you can switch it up during different seasons. Chickpeas are not a common ingredient in panzanella, but I love adding them to make this a main dish. Also, the vinaigrette in this recipe is amazing. You can also make a crouton-less and chickpea-less version of this salad + the vinaigrette and use that as a topping for grilled steak, chicken or a side of fish. Just chop up the veg a little smaller!
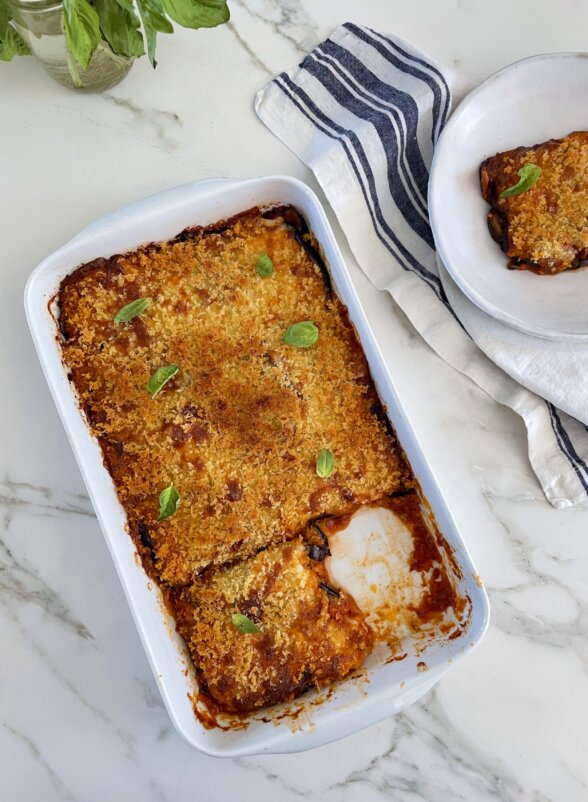
I love eggplant parmesan, but restaurant versions are way too oily and leave me with a heavy feeling in my stomach. This version is not only much lighter, but faster and easier too. In the summer, I often make a quick fresh tomato sauce which can save you $$$ over buying a good one at the store. I’ll give you this recipe too which you can use over pasta or spaghetti squash. If you see “seconds” at the tomato stands at the farmers market, you can take advantage of them for this sauce or anything that calls for cooked tomatoes.
I love this eggplant parmesan as a hearty main dish with a salad in the summer and I also use this recipe as a vehicle for adding in leftover cooked veggies like sautéed greens, mushrooms or even swapping in roasted zucchini for the eggplant.
you can use the parmesan mix on chicken for different eaters;
Ingredients
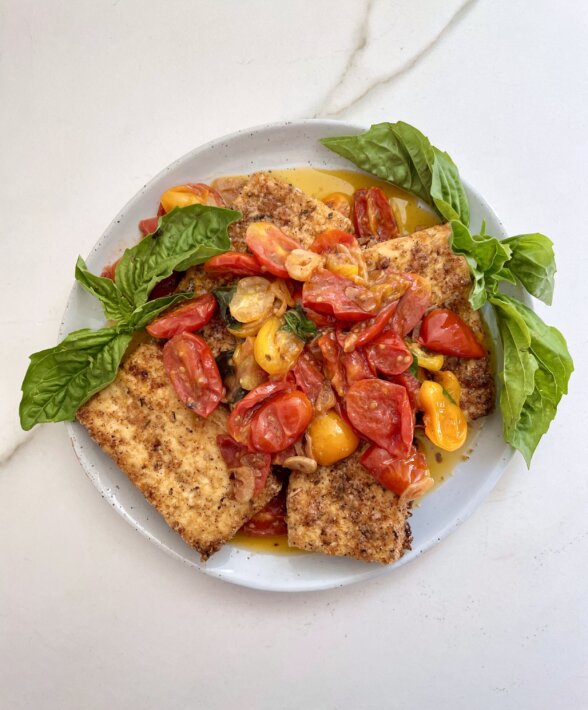
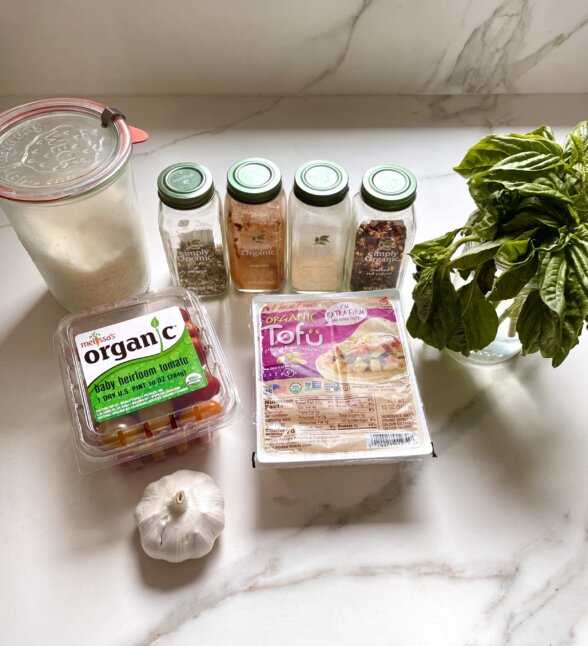
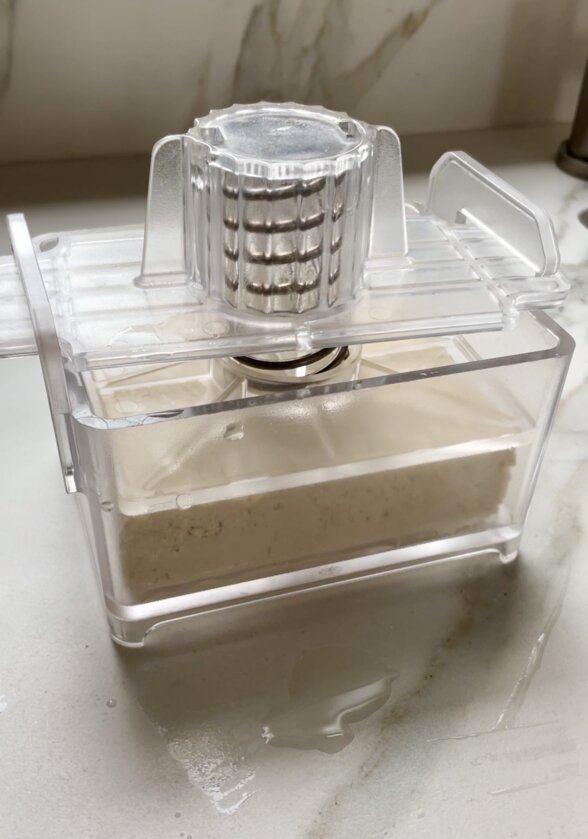
Tofu – I use firm or extra-firm tofu. I do prefer organic and Trader Joes sells sprouted tofu if that’s something important to you. The secret to making a nice piece of crispy tofu is to press the moisture out of it. You can do this by wrapping the tofu block in paper towels and putting something heavy on it (like a skillet) for a couple minutes or using a tofu press like the one in the photo.
Parmesan cheese – I love parmesan cheese! I get a block of parmigiano reggiano from Costco and grate it by hand or in the food processor. You can use pecorino (sheep’s milk cheese) or a vegan parmesan instead.
Garlic powder – I like using garlic powder in place of fresh garlic when I want a subtle garlic flavor.
Oregano – I use dried oregano in the seasoning mix for the tofu.
Paprika – There are different kinds of paprika available. I use regular paprika in this recipe, also known as sweet paprika.
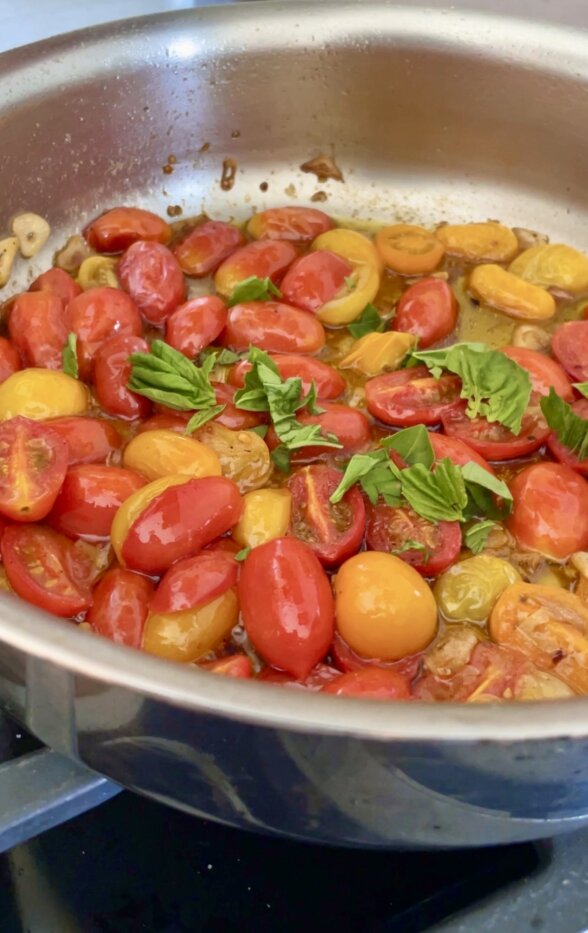
Garlic – I use thinly sliced fresh garlic for the tomato sauce. They key is not to burn the garlic. You want it to be golden brown.
Crushed red pepper flakes – is optional, but I find it to be a key ingredient when cooking tomatoes. They add a subtle spice kick.
Tomatoes – I like to use cherry tomatoes, but you can use a large tomato as well.
Basil leaves – basil and tomatoes go so well together. My grandma taught me to tear basil by hand so you don’t bruise it, especially if your knives are not sharp.
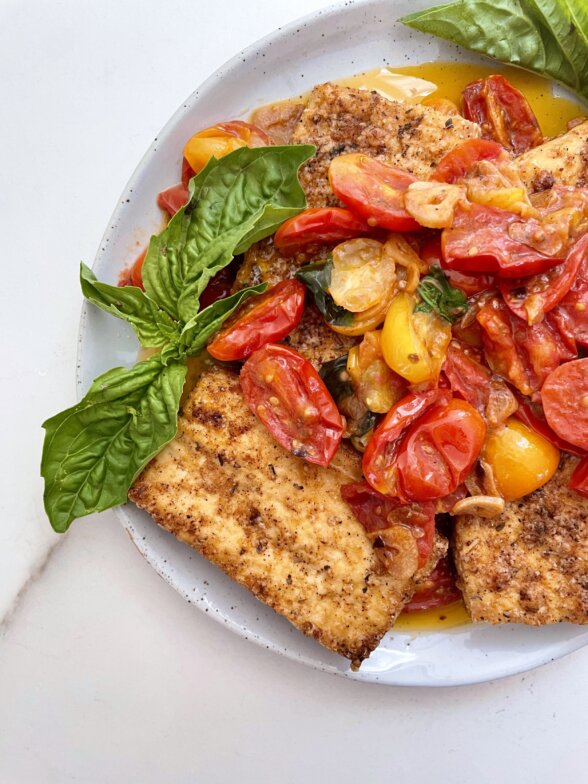
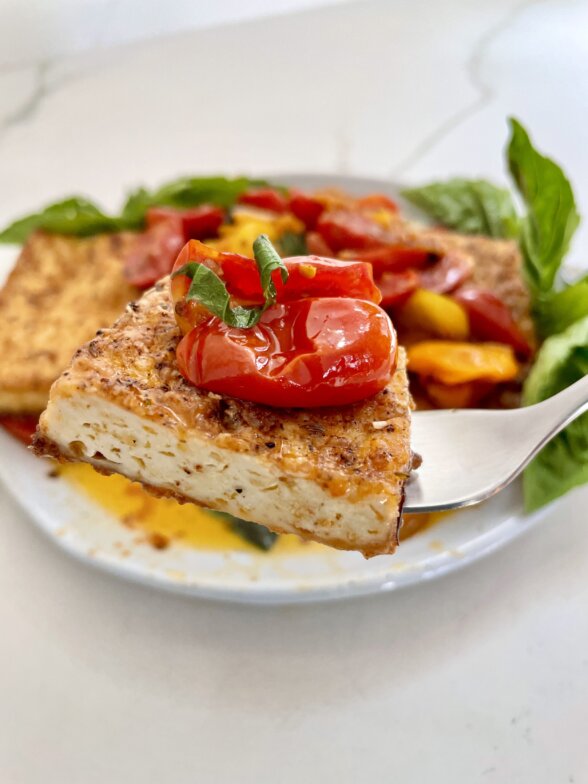
How to make parmesan baked tofu
Preheat the oven to 400 degrees F and line a small baking sheet with unbleached parchment paper.
Squeeze the moisture out of the tofu by wrapping the block with paper towels and placing on a cutting board. Place something heavy, such as a skillet filled with cans, on top and allow it to sit for 15 minutes or longer. Alternatively, use a tofu press to press out the moisture. Cut tofu into 4 slabs.
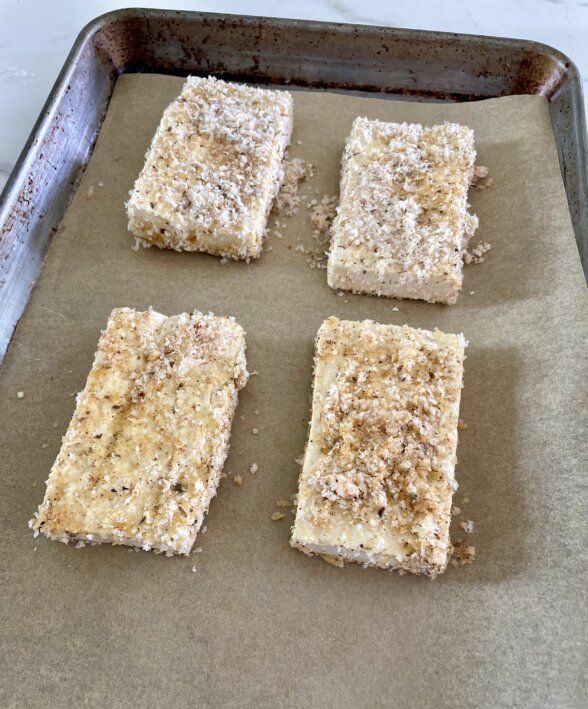
Place the oil in a medium-size dish that is big enough to dip in the tofu slabs. Mix the cheese, spices, salt and pepper in a separate dish.
Dip the tofu slabs in oil (one at a time) and toss to coat. Then dip the tofu into the cheese mixture, coating all sides and place on the prepared baking sheet. Repeat with remaining tofu pieces.
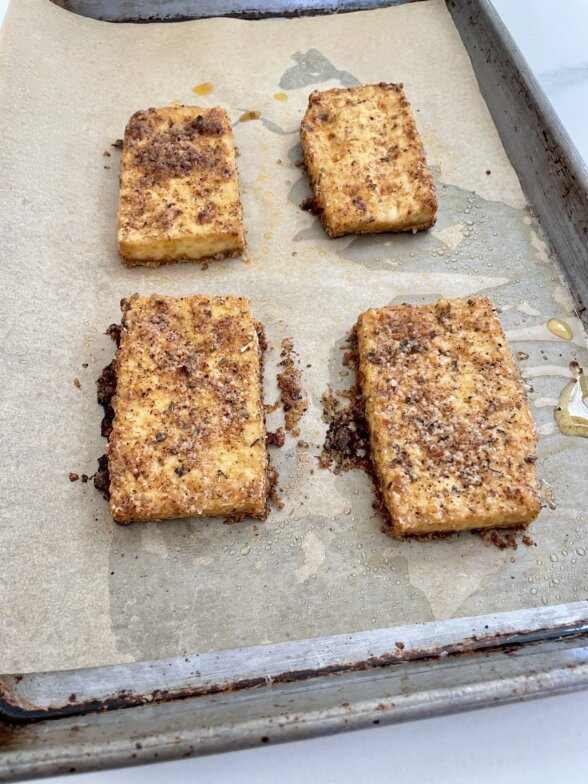
Bake in the oven for 35-45 minutes, or until golden.
Make the sauce: heat oil in a medium sauté pan over medium-low heat. Add the sliced garlic and red pepper flakes and swirl until fragrant. When the garlic just starts to turn golden around the edges, increase the heat to medium and add tomatoes and a big pinch of salt plus pepper to taste. Cook tomatoes, stirring, until they start to lose their shape, about 5 minutes. Check seasoning and remove from heat. Stir in basil and spoon over tofu.
Tips
If you make a lot of tofu, it may be worth getting a tofu press. It helps press out the moisture out of tofu. This is the one I use.
When sautéing garlic for the tomato sauce, be sure not to burn the garlic or else it will give a bitter flavor to the sauce.
You can tear basil by hand if your knives are not super sharp. That way you don’t bruise the leaves.
If you give this parmesan baked tofu recipe a try, snap a pic and tag @pamelasalzman so I can see your beautiful creations. I also really appreciate readers taking the time to leave a rating and review! Subscribe for free to my site for the latest recipes, updates and things I’m loving lately. If you enjoy this recipe, I taught it last year in my online class! Give me an hour a month, and I’ll make you a better, healthier cook!
Serves: 2-4, depending on what else you're serving
Ingredients
Tofu:
1 (12 to 15-ounce) firm or extra-firm tofu block
1 Tablespoon unrefined cold-pressed extra-virgin olive oil (you may need a smidge more)
½ cup grated parmesan cheese (use vegan Parmesan if desired)
½ teaspoon garlic powder
½ teaspoon dried oregano
¼ teaspoon paprika
¼ teaspoon sea salt
Freshly ground black pepper
---------------------------------------------
Sauce:
2 Tablespoons unrefined olive oil
4 garlic cloves, thinly sliced
Pinch crushed red pepper flakes (optional)
1 pint cherry tomatoes, halved
Sea salt and freshly ground black pepper to taste
A few large basil leaves, torn by hand
Instructions
Preheat the oven to 400 degrees F and line a small baking sheet with unbleached parchment paper.
Squeeze the moisture out of the tofu by wrapping the block with paper towels and placing on a cutting board. Place something heavy, such as a skillet filled with cans, on top and allow it to sit for 15 minutes or longer. Alternatively, use a tofu press to press out the moisture. Cut tofu into 4 slabs.
Place the oil in a medium-size dish that is big enough to dip in the tofu slabs. Mix the cheese, spices, salt and pepper in a separate dish.
Dip the tofu slabs in oil (one at a time) and toss to coat. Then dip the tofu into the cheese mixture, coating all sides and place on the prepared baking sheet. Repeat with remaining tofu pieces.
Bake in the oven for 35-45 minutes, or until golden.
Make the sauce: heat oil in a medium sauté pan over medium-low heat. Add the sliced garlic and red pepper flakes and swirl until fragrant. When the garlic just starts to turn golden around the edges, increase the heat to medium and add tomatoes and a big pinch of salt plus pepper to taste. Cook tomatoes, stirring, until they start to lose their shape, about 5 minutes. Check seasoning and remove from heat. Stir in basil and spoon over tofu.
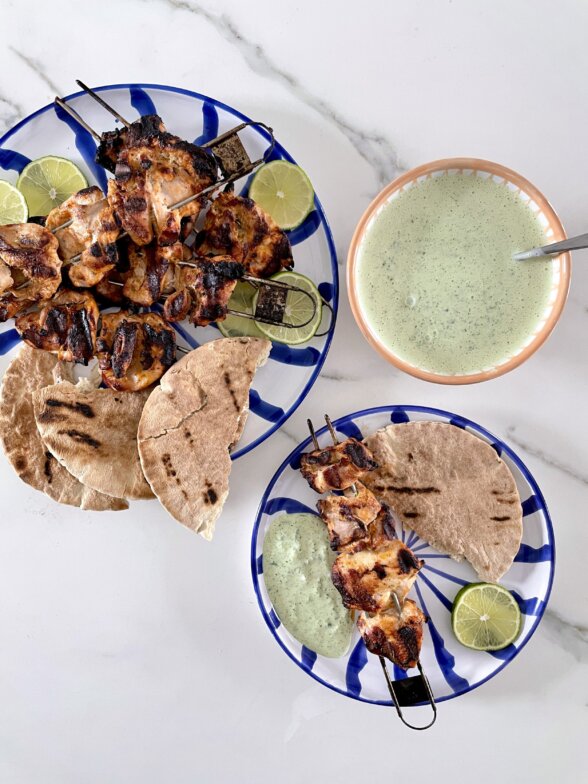
It’s grilling season! Both the chicken recipe and the sauce recipe for these chicken kabobs are a hybrid of several recipes that I like, and not straight forward traditional Persian or Greek kabobs and not a traditional tzatziki. I still play around with this marinade and sauce, adding a little harissa to either (but not both) for some spice or omitting the cucumber to keep things creamier. You don’t technically need a sauce, but who doesn’t love sauce??? It’s definitely needed if you intend to serve the chicken in a lavash or pita or on a grain bowl. Continue reading
It’s the perfect time to try a new one-pot meal! September is like the New Year, in a way. And I am back into a cooking routine, but I want to ease back into it. This recipe is a twist on my favorite one-pot meal, Mediterranean Chicken with Rice. There’s also another variation in my cookbook, Quicker Than Quick, called Weeknight Arroz con Pollo. Delicious!Continue reading
BIG NEWS! I am repeating my very popular and successful bootcamp, Raising Healthy Eaters. I feel really good about the fact that I launched three healthy eaters into the world and have helped hundreds of students with their kiddos. Take my course and you will be in very good hands. Here’s the info and I am even adding BONUS OFFICE HOURS if you need extra support or the class times don’t work well for you. Use the code KIDS100 for $100 OFF. Continue reading
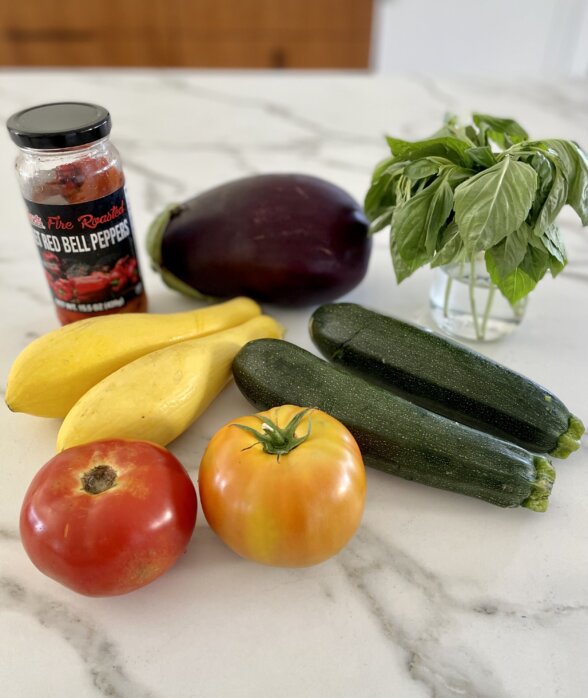
I love giving you 15-minute recipes, but once in a while there comes a dish that is worth the extra effort. This Layered Summer Vegetable Torte is just that. Yes, you have to grill some vegetables and make a simple vinaigrette, but this is a hearty, delicious, veggie-centric showstopper. Every summer I have a few recipes that I put on repeat when I entertain at home, and this was one of my go-to’s from the Summer of 2021 and now it’s back in the rotation!Continue reading
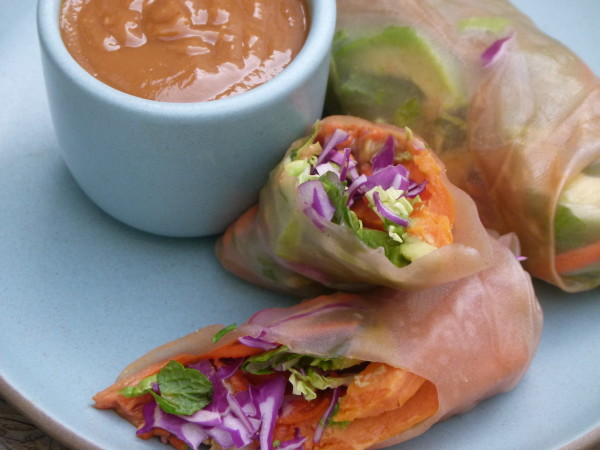
I love summer rolls — crunchy, fresh, and flavorful all wrapped in a delicate rice paper wrapper. Summer rolls are one of those things I never thought I could make at home. The wrappers, the rolling, the sauce! Not only are they way easier than I imagined, but they can be quite the nutritious dish to boot. Filled with loads of raw veggies and herbs, a summer roll is like a salad all wrapped up in a neat little package. In the video above, I go a pretty traditional route with avocado, cabbage, carrots and herbs, but also I use less traditional roasted sweet potato sticks and shredded Brussels sprouts. Rice paper is so neutral. Who says you couldn’t put a cobb salad in there or poached chicken, corn, cabbage and barbecue sauce? I say the sky’s the limit and can we talk about perfect these would be for school lunches?! Per-fect!
If you want to make these in advance, cover them with a damp paper towel and refrigerate for ideally up to one day, but I’ve even kept them 2 or 3 days.
8 (8-inch) rice paper rounds, plus additional in case some tear
1 large sweet potato, (peeled if desired) and cut into ¼” matchsticks
unrefined coconut oil or extra virgin olive oil for drizzling
sea salt and black pepper to taste
4 medium brussels sprouts, thinly sliced or shredded
¼ head of small red cabbage, thinly sliced or shredded
2 medium carrots, shredded, grated, or julienned
1 large avocado, cut into thin slices
handful each of fresh mint leaves, basil leaves and cilantro leaves
Other possibilities: cooked shrimp, chicken, tempeh or tofu, cooked rice noodles
Instructions
To make the sauce: whisk together all of the ingredients in a bowl or a glass jar and set aside. *
To make the summer rolls: Drizzle the sweet potatoes with oil and sprinkle with salt and pepper. Roast in a 400 degree oven for 18-20 minutes until tender.
Fill a shallow baking dish or a skillet with warm water. Soak 1 rice paper round (make sure there are no holes) in warm water until pliable, 30 seconds to 1 minute. Remove from the water and transfer to a plate or cutting board.
Spread 2 teaspoons of peanut sauce on the rice paper (or omit and use as a dip once rolls are assembled) and top with 2-3 large mint leaves, 1-2 large basil leaves, a pinch of cilantro leaves, a
pinch each of the Brussels sprouts, cabbage, and carrot, a few sticks of sweet potato, and a couple of avocado slices, taking care not to overstuff. Roll up rice paper tightly around filling, folding in sides and continue rolling.
Transfer summer roll to a plate and cover with dampened paper towels.
Make the remaining rolls in the same manner. Serve rolls halved on the diagonal.
Store in the fridge covered with a damp paper towel 2-3 days.
Notes
* Sauce can be refrigerated for up to 5 days. Bring to room temperature and re-emulsify before using.
3.3.3077
You are going to have so much fun making these summer rolls!
By the way, I have a YouTube channel! I would love it if you subscribed over here. Thank you!