Few things say Fall like the pumpkin, along with all the delicious things that you can make with one. Every year I stock up on multiples cans of pumpkin puree for muffins, pancakes, oatmeal and, of course, pie. But this year is different. After being discouraged by all the BPA in can liners that our bodies absorb, I decided pumpkin purée from scratch was worth trying. Well, wouldn’t you know – not so difficult and not surprisingly the fresh pumpkin tastes infinitely better than canned! Certainly it is way easier to pop a can open, but I am now a convert. I tried multiple methods of cooking pumpkin – steaming, cut in half, covered. The winner was roasting the pumpkin whole, with several slits cut into the flesh and tented with foil. Most of the time, the pumpkin was flavorful and smooth. Unfortunately, Mother Nature is not always consistent, so not every pumpkin turns out the same.
I’m sure pumpkin’s dark orange color is a clue to how rich it is in Beta-carotene, which your body converts to Vitamin A. If not, you need to read my blog more often! Also, let’s not forget that pumpkin is loaded with fiber, Vitamin C, Folate and Vitamin E. Can you say nutritional powerhouse?
Roast away and freeze your purée for a rainy day. Stay tuned for a delicious recipe using pumpkin purée.
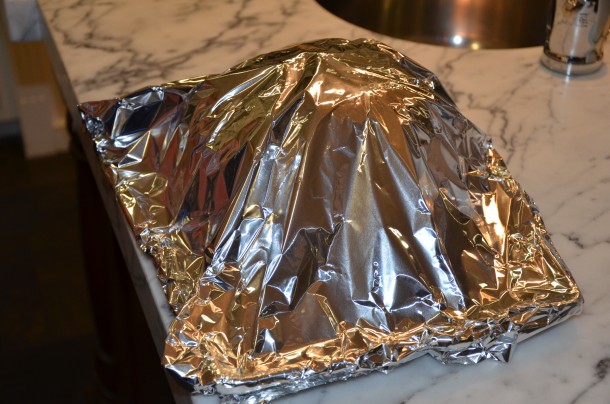
Begin with a pumpkin suitable for eating, such as Sugar Pie. Poke the pumpkin all over with a knife and place on a parchment-lined baking sheet.
Tent with aluminum foil and bake for about 1 ½ hours* until very tender and starting to lose its shape.
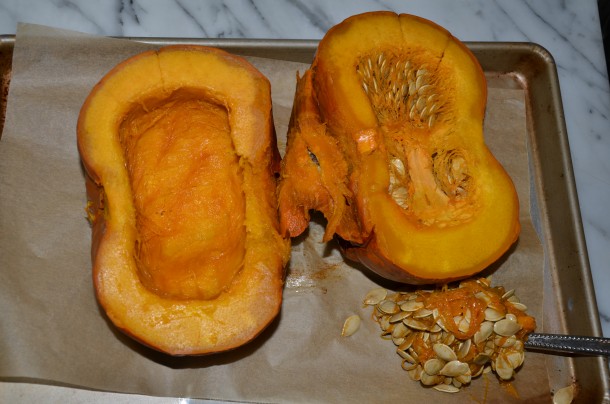
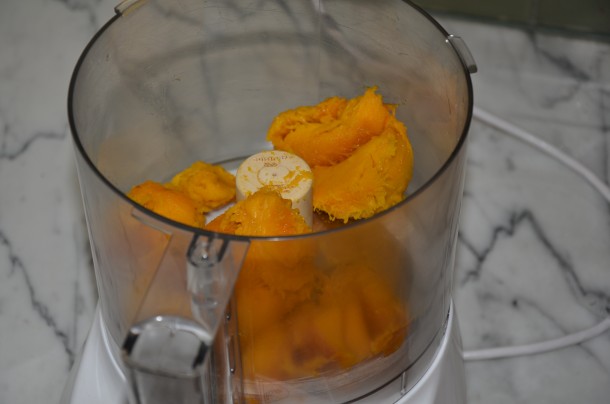
When the pumpkin is cool enough to handle, cut in half and remove the seeds and stringy center. Separate the flesh from the skin and puree the flesh in a food processor until smooth. Do this in batches, if necessary.
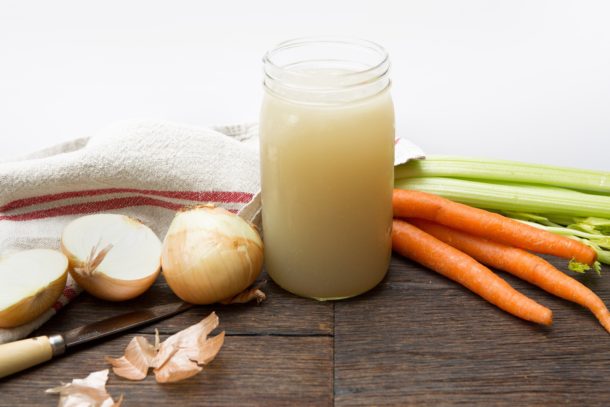
I am starting my first post with one of my obsessions – homemade chicken stock. Since chicken stock is something I use quite regularly, especially during soup season, I thought it would be a good idea to get a recipe out there right off the bat.
A chicken stock made from scratch is heads and shoulders above anything you can buy in a box or (worse) a can. Not only is the taste superior when you make it yourself, but it is so much more healthful, too. When the kids go back to school and the weather turns colder, it is very important to nourish ourselves with foods that boost the immune system. Prepared properly, chicken stock is rich in minerals, aids in digestion, and strengthens the immune system.
Making stock does not require a lot of work, but it does take some time on the stove to simmer. I like to make stock on a day when I know I’ll be around for 5 hours or so and I usually make 2 large stockpots at once. Stock can stay in the refrigerator for 3-5 days or be frozen for up to 3 months.
Just so you know, I’m all about efficiency, and this is the first of many opportunities to apply “green” principles — which can save you some green. Let’s say you just made a flavorful roast chicken last night – instead of tossing the carcass in the garbage (this is a simple example of adaptive reuse!), save it for chicken stock, it will yield a very rich broth. That way you get multiple meals from a single purchase, saving you time and money. Who said it wasn’t easy to be green?
Tips for making a flavorful, nutrient-rich stock:
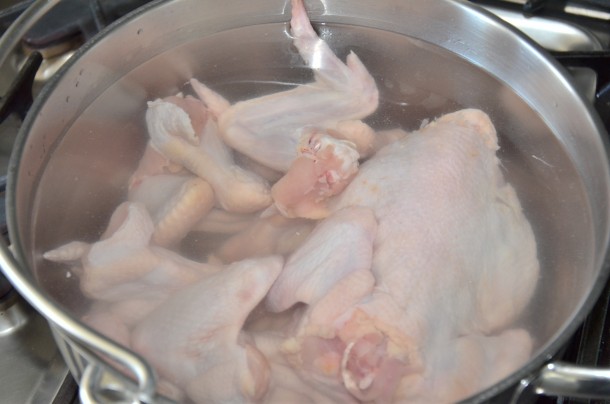
Bones! Use fresh chicken parts such as backs, necks, wings and feet, if you can get them. (Toss the feet in the pot first so they don’t float to the top and stick out. That really freaked me out the first time I did that!) You can also use a whole chicken if you like to have poached chicken meat to use afterwards.
Cold water – it will draw lots of flavor from the bones.
A gentle simmer – this will result in a clear broth.
A little acidity (such as vinegar) – to draw lots of minerals and amino acids from the bones.
Time – the longer it simmers, the more flavor you will have.
Turkey, too – you can do the same thing with your leftover turkey carcass from Thanksgiving.
Let me just warn you right now – once you’ve cooked with homemade stock, you’ll never go back to a box!
1 whole free-range chicken or 4 pounds of bony chicken parts, such as backs, necks and wings (if you can get chicken feet, use them!)
6 quarts cold water*
1 Tablespoon apple cider vinegar**
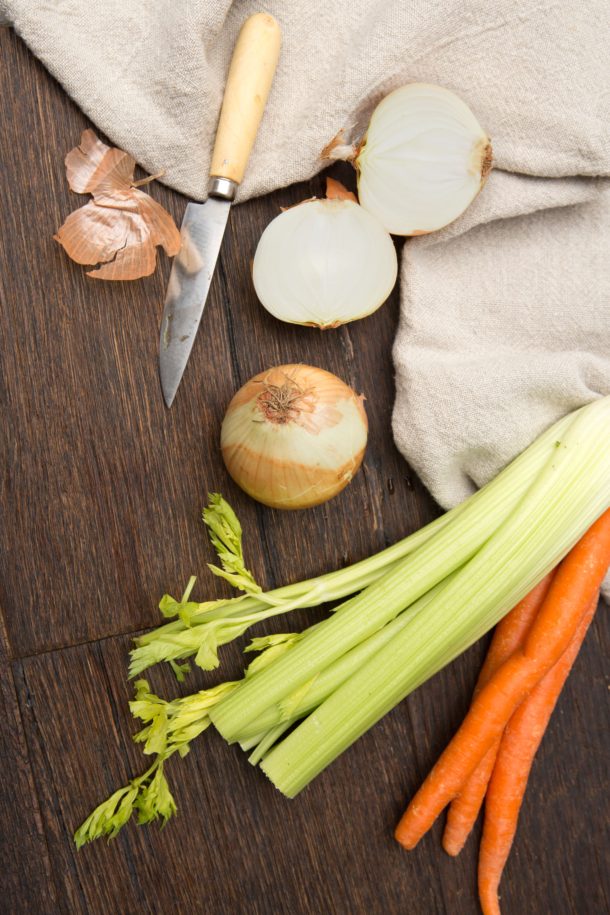
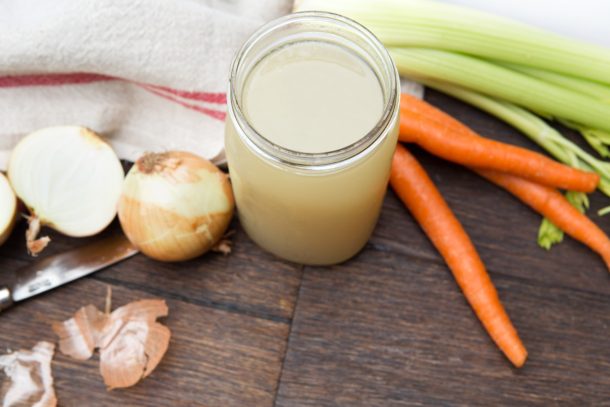
1 large onion, peeled and halved
2 carrots, peeled
2 celery stalks, cut if necessary
Few sprigs of fresh parsley
2 Teaspoons sea salt
Instructions
Wash the chicken and remove gizzards from the cavity. Place chicken and/or chicken parts in a large stainless steel stock pot. (You can cut the chicken into pieces if you need to in order to fit in the pot.) Add the cold water and vinegar. Put the temperature on high and bring to a boil.
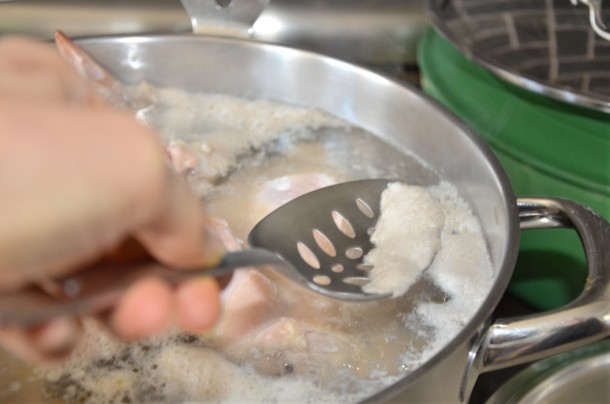
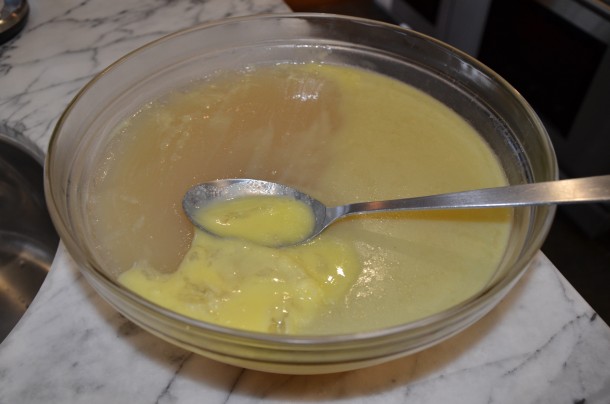
Immediately turn heat to low and skim with a slotted spoon any foam that rises to the surface. Try not to skim any of the fat or you will lose a bit of flavor. At this point, it is important to keep the stock to a bare simmer and NOT a boil.
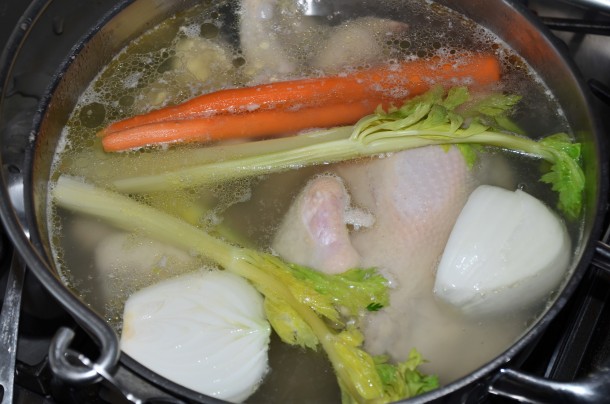
After skimming off all the foam, add all the vegetables except the parsley. Cook uncovered at the gentlest possible simmer for 4 to 5 hours. (I like to go as long as 12 hours.( You want to see tiny bublles just barely breaking the surface. If the heat from the burner does not go low enough , partially cover the pot or leave your stock pot half on the heat and half off.
About 10 minutes before finishing the stock, add the sea salt and parsley (this will impart additional mineral ions to the broth).
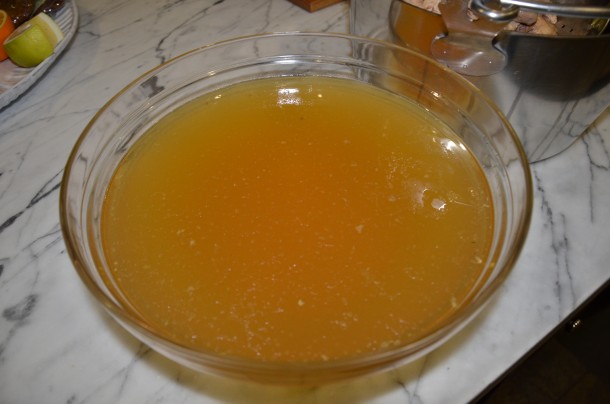
Strain the stock into a large glass bowl. Remove the chicken meat from the carcass, if using a whole chicken, and discard the remaining solids. Cool before refrigerating.
Ladle through a fine mesh sieve into quart-sized containers or whatever size is most useful and refrigerate overnight. The next day, skim off the congealed fat at the top of each container. Refrigerate the stock for up to 5 days or freeze for up to 3 months. I have been using BPA-free containers from letsgogreen.biz as well as Sistema. I also reuse glass quart-size jars from yogurt and Vegenaise. Just soak the labels off and wash before adding your stock.
Notes
*Cold water draws the flavor out of the meat and bones.
**Acidic wine or vinegar adding during cooking helps to draw minerals, particularly calcium, magnesium and potassium, into the broth.