This post was originally published on November 17, 2011.
Wow, the last three weeks have gone by so quickly! Not only am I very excited to celebrate Thanksgiving — we have a super fun crew joining us this year — but I am looking forward to some one-on-one time with the kids. They are all going to help me this year. They just don’t know it yet. I used to get all of them in the kitchen Thanksgiving morning to help me with pies or trimming green beans or whatnot, but two of my beauties have taken to sleeping until noon on days off. However I had a stroke of genius, which is to tack my Thanksgiving to-do list on the refrigerator and have everyone sign up for three tasks. I’m asking my husband to help too, to set a good example, of course.
I have a crazy work schedule until Sunday, so I’ll start getting busy then. Here’s what my schedule will look like from Sunday until we eat on Thursday at 4:00 pm (-ish):

Sunday
Go grocery shopping for most perishable items, bread for stuffing and food for remaining dinners this week.
Make cranberry sauce (I used to make applesauce on Sunday, too, but my friend Caitlin is bringing it this year.)
Arrange tables and chairs
Write out placecards for table (a good job for one of the kids)
Dinner: orange and rosemary-glazed chicken, brown rice and broccoli

Monday
Make salad vinaigrette
Pick up turkeys and dry brine
Make bread cubes for stuffing
Make ice cream
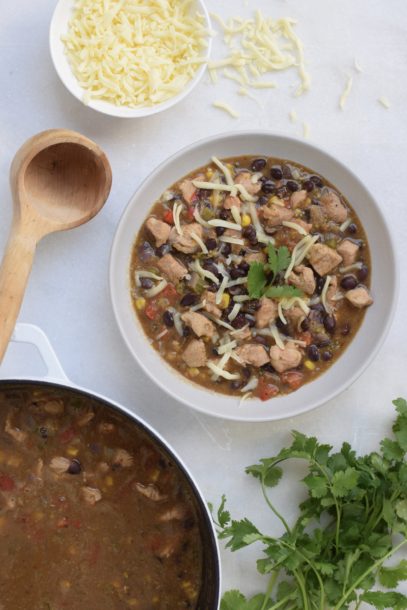
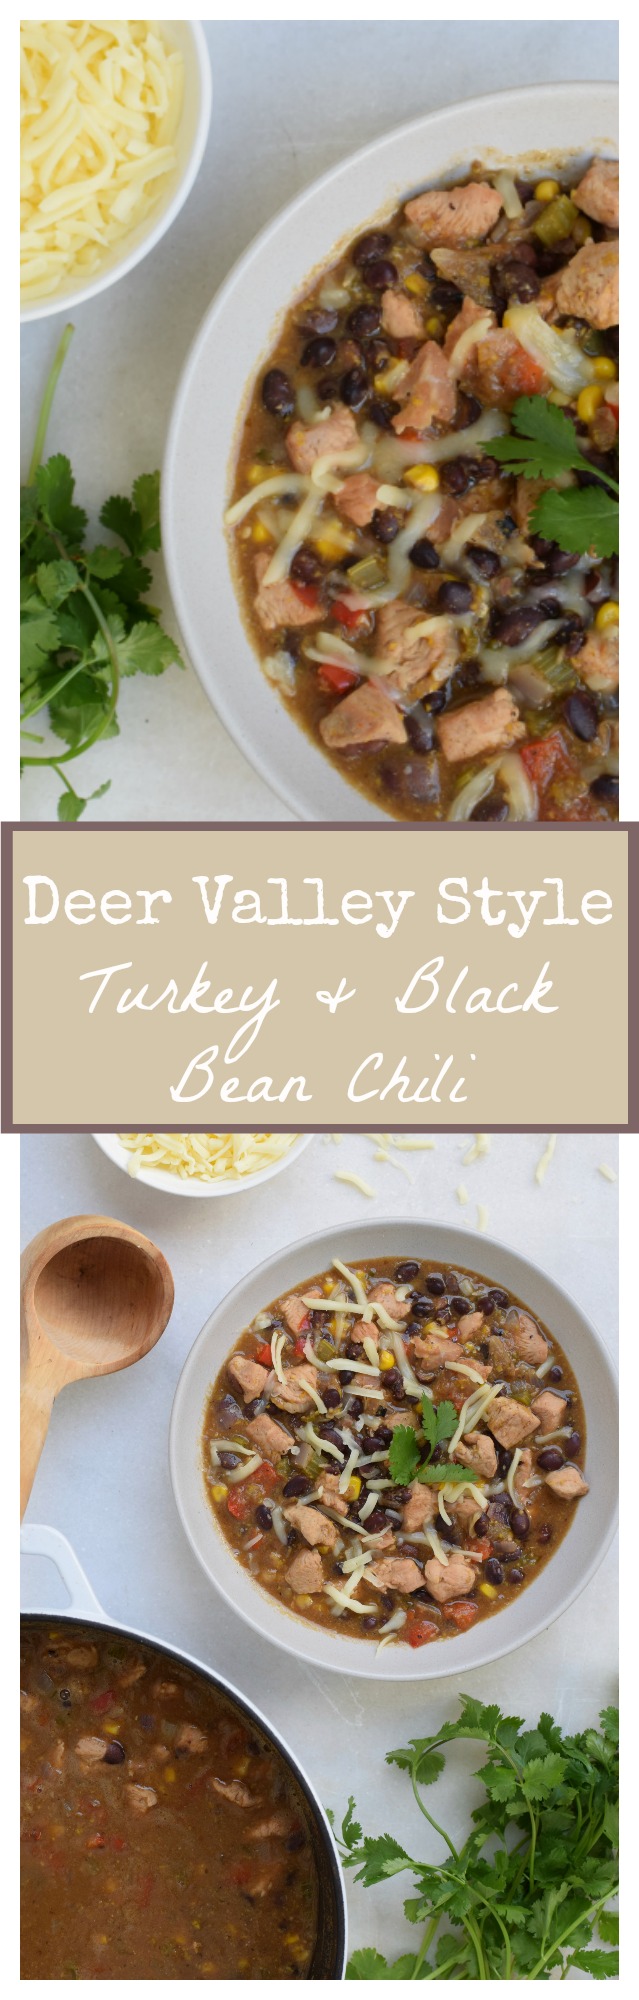
Dinner: tacos, black beans and salad

Tuesday
Shop for last perishable items from farmer’s market
Buy flowers and put together table arrangements
Set table (I’ll set one place setting and have one of the kids do the rest.)
Wash and dry greens (salad)
Chop walnuts (salad)
Seed pomegranates (salad)
Shred gruyere (tart)
Defrost chicken/turkey stocks
Dinner: Spice-rubbed salmon, sauteed spinach, baked sweet potato “fries”

Wednesday
Chop onions for soup, stuffing and roasted vegetables
Prep beets (salad)
Blanche green beans (salad)
Slice zucchini (tart)
Make soup
Steam, bread cauliflower
Blind bake crust (tart)
Herb oil (tart)
Make stuffing
Prep vegetables for Maple-Mustard Roasted Veggies
Trim and halve Brussels sprouts
Make sweet potato gratin
Set up for coffee and tea service
Check powder room
Dinner: pantry pasta with chickpeas
Before bed: make sure garage refrigerator door is closed!

Thursday
6:00 am wake and shower
Make cornbread (small oven)
Make pumpkin pies (large oven)
Bake coffee cake (small oven)
Make gingerbread (large oven)
9:15 Take turkeys out of refrigerator
All desserts must be out of large oven by 10:30 am
Make apple pie (small oven)
10:45 turkeys go in large oven breast side down at 425 degrees
11:25 turn oven down to 325 degrees and flip turkey breast side up
12:00 reheat soup and serve with cornbread
tidy up kitchen
get dressed and dry hair (a girl’s gotta look good!)
Put mixing bowl and beaters in freezer for whipped cream
Chop fennel (salad)
1:30 Peel potatoes and make mashed potatoes; keep in bowl, covered, over pot of simmering water
2:15 zucchini tart in small oven
2:30 fry cauliflower and heat tomato sauce; serve hot
3:00 serve hors d’oeuvres; start testing turkey temperature
3:00 – 3:30 take turkey out of oven
Put vegetables in large oven at 400 degrees
Make gravy
Reheat stuffing in small oven
Bake sweet potatoes in large oven
Make Brussels sprouts with turkey bacon and dates
Chop apples for salad, dress salad
Light candles, pour water in glasses
3:50-4:00 Carve turkeys
4:00 Dinner is served
After dinner: whip cream (do not overbeat!), coffee and tea, sparkling water
Make notes on what to remember for next year. Next year??!!