Wild fish in parchment with summer herbs recipe

We’re baaaack!  What an amazing trip.  The five of us had an unbelievable 3 1/2 weeks together in Europe.  We shared so many great experiences, met interesting people and really grew together as a family.  People have been asking me what was the best part of our trip and I know it sounds corny, but what I enjoyed most of all was the five of us just being together.  Most importantly, and this is the mother in me talking, no one got sick, hurt or lost and we made it home in one piece.  Hooray!

I learned a new expression on this trip and it’s not in a foreign language.  My daughters kept saying to me, “YOLO, Mom.  YOLO.”  Huh?  Is that Dutch?  Apparently YOLO stands for “You Only Live Once.”  This often came up in regard to food.  The first five days of the trip I was able to avoid bread, pizza (except for that tomato and cheese pancake in Amsterdam), pasta and desserts, but my family was going for it.  Big time.  Eventually, I think around Copenhagen, I gave in and basically had a carb fest for 2 1/2 weeks.  It was fun while it lasted, but it also reinforced what I already know about wheat and refined foods — overdoing it is never a good thing.  And I’ve got my tight jeans to prove it.

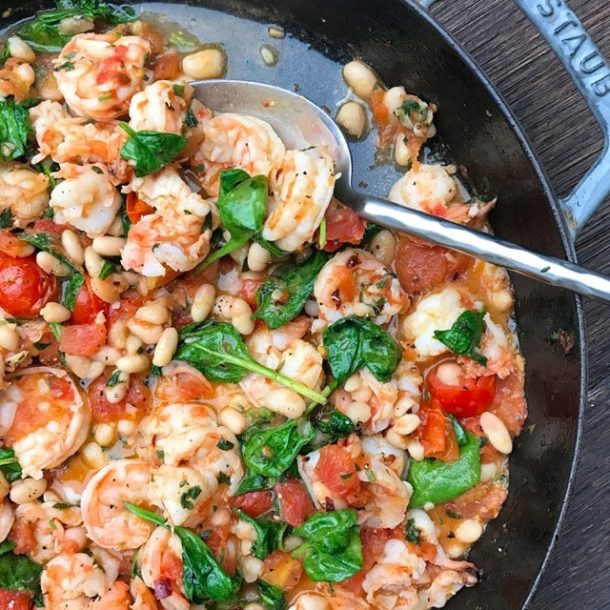
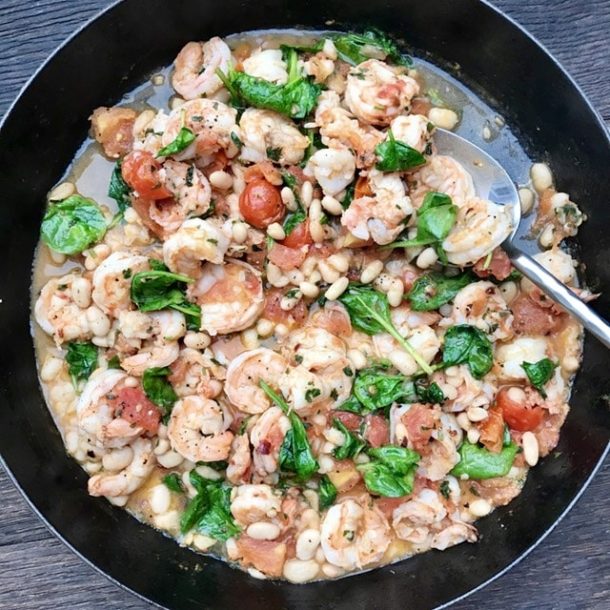
Although it was a nice break to be out of the kitchen for a few weeks, I am happy to be back, cooking the food that makes me feel good.  I especially have a craving for fish and vegetables since the last half of our trip focused mostly on apple strudel, meat, apple strudel, potatoes, apple strudel, and bread.  This fish in parchment recipe is one of my favorite, easiest and most healthful ways to prepare fish.  It’s also the perfect light dinner for summertime, especially if you have some herbs growing in your garden.  Feel free to change the herbs in the recipe to suit your tastes or you can even add some thinly sliced, quick-cooking vegetables to the packets.  I used baby spinach leaves in these photos, but I also like diced fresh tomatoes and zucchini.  Or if you have some roasted or grilled vegetables from last night’s dinner, throw those in.  You really can’t go wrong.

Lucky for me, only Daughter #2 is still holding out on seafood, but everyone else loves fish, including this preparation.  Wild, cold water fish is high in important anti-inflammatory Omega-3 fats, which help support brain and cardiovascular function, as well as balance inflammatory influences in our lives, both from diet and lifestyle.  Steaming the fish in parchment actually helps to protect those fats from oxidation since the temperature inside the packets is low.  I am eager to start cooking for family again the way I know they and I should be eating.  Because like I always say friends, YOLO.

Wild Fish in Parchment with Summer Herbs
Author: 
Serves: 6
 
Ingredients
  • 1-2 cloves garlic (2 if small)
  • ½ cup fresh parsley leaves
  • 2 Tablespoons fresh basil leaves
  • 1 Tablespoon fresh mint leaves
  • ½ teaspoon sea salt (you can use an extra pinch if you like salt)
  • freshly ground black pepper to taste
  • ¼ cup unrefined, cold-pressed extra-virgin olive oil
  • zest of 1 lemon
  • 6 4-6 ounce portions of wild fish, such as halibut, salmon or mahi-mahi, defrosted, if frozen
  • 6 14-inch squares of unbleached parchment
Instructions
  1. Preheat oven to 400 degrees.
  2. Place the garlic, herbs, salt and pepper in the bowl of a mini-food processor and process until the herbs are finely chopped. Add the olive oil and process until well combined. Add lemon zest and pulse once or twice.
  3. Place each piece of fish in the center of a sheet of parchment. Spread a heaping spoonful of the herb mixture on top of each piece of fish.
  4. Bring 2 opposite sides of the parchment together and fold. Continue to fold all the way down until you reach the fish. Twist both ends of the parchment so that it looks like a hard candy wrapper. Place each packet on a baking sheet and bake for 12-15 minutes based on the thickness of the fish.
  5. Transfer each packet to a plate and use caution when opening – the steam will be very hot!
Notes
You can make the fish packets in the morning if you like and keep them refrigerated. If you cook them straight out of the fridge, add an extra minute or two to the cooking time.

Other suggestions: you can also add to the packets quick-cooking vegetables such as baby spinach leaves, julienned zucchini or finely diced tomatoes. For longer-cooking vegetables, blanch or steam them first, then add to packets.

If you enjoy this, check out my other recipe for Halibut in Parchment with Cilantro and Ginger! There you can see step-by-step photos for how to fold the parchment paper.


Grilled panzanella recipe

We are alive and well on our European holiday, although I may need a vacation after we return home!  We met our friends in Berlin a few days ago and have been having the best time.   What a cool, interesting, beautiful and progressive city!  Daughter #1 announced she will be moving to Berlin after college.  First things first, Missy.   All the kids have been fantastic – really going with the flow.  At times, I felt like we were on an episode of Amazing Race, figuring out metro schedules and running to catch trains, deciphering maps, and trying to translate foreign languages.  The good thing is that we have generally been laughing our way through it all.  Our overnight train trip from Berlin to Munich last night was particularly memorable as it was a first for all to sleep in beds on a train.  Before you picture us on the Orient Express, think again!  It wasn’t nearly that glamourous, but certainly provided us with a few giggles and good stories to tell when we are back home again.  As I write this, we are on another train from Munich to Salzburg, Austria.

As far as eating a whole, unrefined diet, I threw in the towel back in Copenhagen.  It is terribly difficult to avoid European bread when it is so darn good.  Once I gave into bread, pasta/spatzle, pizza and pastries came after.  Something tells me Austria will offer more of the same.  Mr. Picky is enamored with game sausages and mustard and I had my first beer since college just for kicks.   One was enough and I would just as soon eat fried potatoes than drink another beer.  We have really eaten a broad mix of cuisines which I think you’ll find in most major cities.

I will not start a war here by declaring the bread best in any particular city or country, but I can say that Europeans love bread.  We’ve eaten baguettes, spelt rolls, pretzel bread, whole rye, sourdough and more.  I also know that Europeans like to be efficient with their food and make good use of day old bread which might be otherwise thrown away.  I thought today would be a good time to share my recipe for Grilled Panzanella.

Panzanella is essentially an Italian bread salad, although I believe Spain has its own version of it, too.  Earlier in the summer, I also did a post on Fattoush, which is a Lebanese take on the same.  Sometimes it can be as simple as soaking stale bread in a mixture of vinegar and water and mixing it with fresh tomatoes and a pinch of salt.  When I was growing up, we would tear the stale bread and mix it with tomatoes from the garden, basil, red onions, olive oil, red wine vinegar, salt and pepper.  The stale bread would soak up the oil, vinegar and tomato juices and soften up a bit, too – really tasty.

I don’t eat bread very often, but if you grill it, I’ll never turn it down, especially if it’s rubbed with garlic and the edges are slightly black and smoky.  Simple and heavenly.  Try rubbing grilled bread with a cut, ripe tomato and you’ll go crazy.  In as much as I love a simple panzanella in the summer, I knew it would be better with grilled bread and it is!  Ina Garten has a Grilled Panzanella which I hear is delicious.  Not only does she grill the bread, but onions and peppers as well.

This salad is a snap to make and prep in advance if you need to, just keep the bread, chopped vegetables and dressing separate until you’re ready to serve.  Although most Italians would disagree with me, I think you should feel free to create your own yummy version of Panzanella.  I added capers to this one because I love a salty bite, but olives would be great, too.  There are versions with ripe, sliced peaches.  I also think baby mozzarella balls or chickpeas would also be nice in here, but try and keep it simple.

Our train has just entered Austria and we are already enamored of this beautiful countryside and all the adventures that await us.  Stay tuned….

Grilled Panzanella
Author: 
Serves: 6
 
Ingredients
  • ½ cup unrefined extra-virgin olive oil, plus extra for brushing bread
  • 1 large clove of garlic, minced + 1 large clove
  • 4 Tablespoons of raw apple cider vinegar or red wine vinegar (raw apple cider vinegar is a more healthful choice)
  • fine sea salt and freshly ground pepper
  • 4 Persian cucumbers, unpeeled and chopped into ½-inch thick chunks
  • 2 large ripe tomatoes, cut into 1-inch cubes (about ½ pound each)
  • 1 cup fresh basil leaves, chopped
  • 6 Tablespoons capers, drained
  • 2 shallots, sliced
  • ½ pound loaf or crusty peasant bread or baguette, cut on the diagonal into 1-inch slices
Instructions
  1. Preheat the grill to medium heat.
  2. In a small bowl, whisk together the olive oil, minced garlic, vinegar, ½ teaspoon salt and ¼ teaspoon pepper. Set aside.
  3. Place the cucumbers, tomato, basil, capers, and shallots in a large bowl. Sprinkle with large pinch of salt and pepper.
  4. Brush bread slices on both sides with olive oil and sprinkle lightly with salt. Toast them on the grill until golden, about 4 minutes on each side. A little black char on the edges is good! Cut a thin slice off the garlic clove and rub one side of each piece of bread with the cut side of the garlic.
  5. Cut the bread into cubes and add to the cucumber mixture. Pour in the vinaigrette and toss to combine.


Shrimp with tomatoes, white beans and spinach recipe

Shrimp with Tomatoes, White Beans and Spinach | Pamela Salzman

Shrimp with Tomatoes, White Beans and Spinach | Pamela Salzman

Since my husband and I both have our own businesses, a big family vacation hasn’t been in the picture for many years.  We never felt that we could take the time off from work or spend the money during uncertain economic times.  But with Daughter #1 off to college (we hope) in two years, we decided it was now or never.  So here we are in Amsterdam with two teenage girls and a picky 8-year-old on the first day of a 3 1/2 week European adventure.  So far so good!

We are hoping to create some amazing memories, expose the kids to beautiful and interesting places and cultures, and enjoy some quality family bonding time.  I purposely didn’t purchase any international phone plans for the girls so that they would focus on our experiences, but somehow they have already figured out how to call and text their friends for free.  Oy.  Regardless, I decided to let a lot go before we embarked on this trip, especially with regard to food.  Sometimes you have to go with the flow and not create any unnecessary stress at a time when you are supposed to be relaxing.  So I ate a cheese and tomato pancake in Amsterdam today and didn’t think about the white flour, non-organic butter and cheese I had inhaled.  Until now.  Just kidding!  Totally ok with it.

What I did think about before I left was you dear people and how I still wanted to continue to inspire you with some healthful recipes to cook.  I hope you know that I really do walk the talk and prepare dinner for my family at least five nights a week, sometimes six or seven.  I especially like to make sure I cook the night before I leave for a trip so that we have a proper meal and a good night’s sleep.  So I thought I would share with you what I made for our last dinner at home.

Granted, the night before we left for 3 1/2 weeks was a busy one and Pamela had veeeeery limited time.  Shrimp with tomatoes, white beans and spinach was one of the only things I knew how to whip up in about 15 minutes and feel good about.  Yes, you see white rice on the plate because my choice was either brown rice and not going out to buy Mr. Picky a rain jacket or white rice and keeping him dry on our trip but losing a little fiber.  Mr. Picky always wins and I’m glad since we had a little sprinkle tonight as we walked back to our hotel after dinner.

With some grilled zucchini, this was otherwise the perfect meal.  You know by now I could eat tomato-garlic-olive oil on anything and I love seafood.  But I will admit right now that Daughter #2 is still boycotting anything that swims and I my husband doesn’t eat shellfish.  The beauty of this dish is that you can easily adapt it for vegetarians or non-seafood eaters by eliminating the shrimp since the white beans add lots of good protein.  So the two of them just picked out the shellfish.  More for me!  If you can find good quality wild shrimp, it’s actually a really good source of Vitamin D and iodine, and very low in fat.

I used Eden Organic canned white beans for this recipe and fresh tomatoes.  The beans make the sauce nice and creamy so include something in the meal to soak up the juices.  Besides rice, I think polenta or millet would be good choices too.  You could also sub arugula for the spinach, but Mr. Picky just started eating spinach so I didn’t want to push my luck.  Speaking of pushing it, it is now morning and everyone is waiting for me to head over to the Van Gogh Museum.  Check out my daily posts on Twitter and Facebook for more European updates!

Shrimp with Tomatoes, White Beans and Spinach | Pamela Salzman

5.0 from 4 reviews
Shrimp with Tomatoes, White Beans and Spinach
Author: 
Serves: 5-6
 
Ingredients
  • 2 Tablespoons unrefined cold-pressed extra virgin olive oil
  • 6 medium cloves of garlic, finely chopped
  • 1 pound fresh tomatoes, peeled, seeded and diced (or canned, drained)
  • ¼ teaspoon red pepper flakes
  • 2 Tablespoons chopped fresh flat-leaf parsley
  • sea salt
  • ½ cup dry white wine
  • 1 ½ pounds large shrimp, peeled and deveined
  • 1 ½ cups cooked cannellini beans or 1 15-ounce can, drained and rinsed
  • 2 cups baby spinach leaves
  • Freshly ground pepper to taste
Instructions
  1. Heat the oil over medium heat in a large skillet. Add the garlic and cook just until fragrant, less than a minute. Stir in the tomatoes, red pepper flakes, parsley and a few healthy pinches of salt. Cook for 2 minutes.
  2. Add the wine and bring to a simmer. Add the shrimp and cook, turning, until opaque throughout, 3 to 5 minutes. Stir in the beans, spinach and a few grinds of black pepper. Cook until everything is heated through and spinach is wilted. Season with salt and pepper to taste. Delicious served over rice, millet, polenta or pasta.
Notes
Great Northern beans can be subbed for the cannellini.


Eggplant caprese recipe

Ok, my kitchen is more or less back together except for a few cabinets, and I couldn’t be happier.  Never mind that every other room in the house has its contents spilled out into random hallways or in the living room which we never use.  It doesn’t even bother me that we are all still sharing one bathroom … I can cook again!  Takeout everyday was putting me in a cranky mood — and when Mama Bear ain’t happy, no one’s happy!  I think the novelty of eating out even wore off with Mr. Picky, although my husband keeps trying to remind me that I was “only” inconvenienced for five days.  Talk to the hand, dude.  Listen, I had to make a fruit crisp on the front porch Wednesday.

I did a great big shop at the grocery store and the farmer’s market on Tuesday and I was giddy with all the possibilities.  I think one of the reasons I get so excited when summer produce hits the stands is that I wait for it all year long.  Local peaches, corn and tomatoes are special!  I especially have a thing for summer tomatoes, and I’m hoping you do too, since there are lots of tomato recipes in the pipeline.  You know that once you’ve had a truly vine-ripened, sun-kissed tomato, you can never go back to those hard, tasteless orbs from the supermarket that have nothing to do with a real summer tomato.  I remember as child going into my father’s garden in the summer with a salt shaker to eat tomatoes with salt right off the vine.  Heaven.

Tomatoes make this girl’s heart grow fonder when they are paired with basil.  This classic combination is a favorite of mine and one I use in so many different dishes.  Just this past week, I posted recipes for pasta with cherry tomato sauce, as well as a frittata with garden vegetables, including tomato and basil.  In last summer’s classes, I taught pasta alla checca, which is a raw tomato and basil sauce.  Of course, the traditional salad on every Italian menu is a Caprese, which is nothing more than alternating slices of good quality tomato and mozzarella cheese with basil, olive oil and salt.  Several years ago I was in Italy with my family visiting a friend of my father’s on the Amalfi Coast.  We had all eaten a large lunch that day and weren’t really hungry for a full dinner, so our hosts pulled tomatoes and basil from the garden,  freshly made local mozzarella from the fridge, local olive oil and olives, and some bread from a bakery down the road.  I know it may not sound like much, but every ingredient was the best I had ever had, and to this day I consider that meal one of my favorites ever.

One of my go-to side dishes in the summer is simply grilled or roasted eggplant slices.  Occasionally I’ll add some mint and feta, but a few years ago I taught this recipe, which is essentially eggplant-meets-Caprese.  Eggplant is such a sponge and loves all that juicy-tomato-and-olive-oil-goodness.  I don’t eat very much dairy, so instead of big slices of cheese, I have added a few cubes mixed in with the tomato and basil mixture.  In this photograph I used fresh buffalo mozzarella, which is a little milkier and lighter tasting, but you can use whatever cheese you’ve got, including burrata, feta or goat cheese — or none at all!  I usually try to teach my girls to eat like civilized ladies, but I have found myself many a time eating this with my hands as an eggplant taco.  Like the other night when we couldn’t find the flatware.  It’s probably still in the living room…

5.0 from 2 reviews
Eggplant Caprese
Author: 
Serves: 6
 
Ingredients
  • 2 medium eggplant, unpeeled, sliced crosswise into ¾-inch slices
  • 2 Tablespoons unrefined, cold-pressed extra-virgin olive oil + more for brushing eggplant
  • Sea salt and black pepper
  • 2 cups chopped, seeded tomatoes
  • 2 large garlic cloves, crushed
  • 1 small handful fresh basil leaves, julienned
  • 4 ounces (or more if you like) fresh mozzarella, cubed
Instructions
  1. Preheat the oven to 375 degrees and line 2 baking pans or cookie sheets with parchment paper. Place the eggplant slices on the paper and brush them generously on both sides with olive oil. Sprinkle with sea salt and black pepper, then roast for 40 minutes, or until golden brown. Allow to cool.
  2. Mix together the tomato, garlic, 2 tablespoons of olive oil and the basil. Season to taste with sea salt and black pepper. Set aside.
  3. To serve, arrange the cooked eggplant slices, slightly overlapping, on a serving platter. Scatter the mozzarella chunks on top and spoon over the salsa. Remove the garlic cloves.


Summer garden frittata recipe

While I was away last week, my husband thought it would be a great idea to refinish the cabinets in the kitchen.  No wait, we might as well do all the cabinets in the entire house, he thought to himself.  Why do those four words generally end up as a bad idea?  Why do people think that a small project might as well be a big project?  We had a simple plan.  Mr. Picky and I would go back East to bring Daughter #1 to camp while my husband brought Daughter #2 to camp and we would come back a week later and my house would look like nothing had ever happened except that my kitchen cabinets would look pretty and fresh instead of beaten up because I’ve taught a hundred cooking classes in my kitchen.

Guess what?  This is what my kitchen still looks like!  And so does the rest of my house until who knows when.  So yours truly is in a bit of a funk because she didn’t get to make and photograph the sure-to-be-adorable and tasty raspberry-blueberry-yogurt popsicles she wanted to post today for Fourth of July.  Pouty face.  And yours truly has been eating take-out since she returned home from Long Island on Friday night.  Verrry pouty face.  I’ll get to the frittata in a minute.  What I’d like to discuss is takeout.  I definitely struggle with finding places to eat when I do need to eat out.  Fresh, organic, seasonal prepared food is not as common as you would think, even in Manhattan Beach, California. So I’ve been to Le Pain Quotidien for breakfast two days in a row and Veggie Grill for lunch two days in a row and Whole Foods for one meal.  And here’s what I’ve got to say — holy $$$$$! friends.  How do people eat out all the time?  It’s downright unaffordable.  Not only that, it’s beyond difficult for everyone to agree on what to eat.  Dinner should not be a democratic decision!  Seriously, the last few days have totally reinforced what I have said about cooking at home being easier, cheaper and always more healthful.

Now let’s get to the frittata, which I photographed at my house two weeks ago and again at my parents’ house last week (two different frittatas, naturally.)  I was going to post this recipe next week, but like I said, my husband thought it would be nice to surprise me.  Pouty face.  In any event, a frittata recipe fits in perfectly with my anti-takeout sentiment.  Eggs, and therefore frittatas, are an incredibly versatile and high-quality source of inexpensive protein.  They are also very easy to make on the fly with whatever you’ve got in your kitchen/garden.

I prepare frittatas all year long varying the ingredients based on what’s in season.  Click here for a delicious swiss chard frittata recipe.  A few weeks ago, when I saw zucchini blossoms at our farmers’ market with beautiful, tender zucchini, I knew I had to make what I call “Summer Garden Frittata.”  It’s the frittata I make most often in the summer and it’s really about celebrating whatever my garden or market has to offer.  My family inhaled these last week.  You certainly don’t need to use zucchini blossoms, especially if you can’t find them, but I think they’re so pretty and they have a nice, subtle flavor.  The blossoms without a zucchini attached are the male flowers which basically just sit around the plant doing absolutely nothing while the female blossoms actually produce zucchini.  Why not put those males to good use?  I’m here to tell you that if you don’t find something for them to do, you never know what kind of trouble they’ll create for you.

Summer Garden Frittata
Author: 
Serves: 6 (although when I'm hungry, I could eat a fourth of this frittata)
 
Ingredients
  • 2 Tablespoons unrefined, cold-pressed extra-virgin olive oil + additional
  • 1 bunch scallions, trimmed and sliced
  • 3 cloves garlic, sliced thinly
  • 3 medium zucchini (about 1 pound), ends trimmed and sliced thinly by hand or by the slicing disk of the food processor
  • Fine grain sea salt
  • Freshly ground black pepper
  • 8 large eggs
  • ¼ cup chopped fresh basil leaves
  • ½ cup ricotta cheese or goat cheese or feta (optional, but I used feta in the photographs)
  • 5-6 zucchini blossoms (optional, I used 4 large ones)
  • ½ cup cherry tomatoes or 2 Roma tomatoes, sliced
Instructions
  1. Preheat oven to 375 degrees. In a 10-inch skillet, warm the olive oil. Sauté the scallions until softened. Add the garlic and cook for 1 minute. Add the zucchini slices and a generous pinch of salt and sauté until tender, about 6 minutes.
  2. In a large mixing bowl, beat the eggs, basil, 1 teaspoon salt, and a few grinds of black pepper. Stir the cooked zucchini mixture into the eggs and combine well.
  3. Place the skillet back over medium heat and add a little extra oil if the pan seems dry. Pour the egg and zucchini mixture into the pan. Arrange the zucchini blossoms on the surface of the frittata or chop and scatter on top. Dollop tablespoonfuls of the ricotta and the cherry tomatoes around the frittata. Transfer skillet to the oven and bake until firm, about 40 minutes.
Notes
Alternatively, bake in a larger skillet for less time for a thinner frittata.

Or, cook gently over medium-low heat, covered until slightly set on the bottom, 15-20 minutes. Transfer the skillet to the oven and broil until the top is slightly puffed and golden, about 3-5 minutes. Serve warm or room temperature.


Pasta with 5-minute cherry tomato sauce recipe

Mr. Picky and I had the most glorious week on Long Island visiting my parents.  My sisters and their kids came to be with us too, so it was quite a full house.   It kind of felt like summer camp with lots of old fashioned fun outdoors from morning til dusk except for the brief break to watch a few games of Euro Cup soccer.  Even though the kids were always playing ball, swimming or taking turns on the hammock, I felt as though we were always eating.  Italians tend to linger at the table for quite a bit, so breakfast morphed into lunch, and lunch lasted for hours, although I surmise that was due to the daily wine.  I finally realize why my parents drink so much espresso.

Whenever I come into town, I am in charge of organizing and cooking all meals, which I don’t mind one bit.  The deal for the week is that whoever cooks, doesn’t have to clean up, so I think I have the better job.  It isn’t difficult to cook for my family.  They are so appreciative, easy going and I’m the only one with a child named “Picky.”  My sisters’ kids are the most fantastic eaters and they are all younger than mine!  I still kept it simple, making frittatas, tacos and salads for lunch and grilled chicken, roasted salmon and more vegetables for dinner.  My father’s garden is loaded with a variety of berries, herbs and greens right now, which was such a pleasure for me.

Besides cooking for the family, one of my other favorite things to do when I go visit is to check out the local natural foods stores.  Yep, that’s a fun outing for me.  I love to see what the Long Island stores carry that mine don’t.  This time around I was pleased to see many new sprouted grain products on the shelves.  I was able to buy Shiloh Farms sprouted spelt flour for pancakes and a sprouted wheat pasta for one night’s dinner.  There’s only so much quinoa and millet my father will eat.  Soaking and sprouting grains, nuts and seeds helps to neutralize phytic acid, which binds with certain minerals and prevents them from being absorbed by the body.  Soaking and sprouting helps to make the grains more digestible and the nutrients more absorbable.  It’s a much more healthful food that way.  I promise to do a post on this soon!

Even though I was happy to cook this week, I didn’t want to spend too much time in the kitchen when I could have been on the hammock with a book or chatting with my sisters.  So I thought spaghetti with 5-minute cherry tomato sauce would be perfect and it happens to be my favorite pasta dish too, and not just because it’s a quickie.  Sweet cherry tomatoes, basil, garlic and olive oil — how can you go wrong?  I even like it better than pasta all checca, which is essentially the same thing, but raw.  I love the silkiness of the barely cooked tomatoes and how it coats the pasta.  You get a little more depth of flavor when you cook the garlic and tomatoes even just a little.  The key is to halve the cherry tomatoes or you can use peeled and seeded beefsteaks, so that you get a nice juicy sauce.  I never simmer the tomatoes too much, though.  You don’t want it all to evaporate on you.

 If your garden or market has some new summer tomatoes that you’re anxious to use, do try this recipe.  All the kids slurped it up and asked for seconds.  It’s such a classic, as well as fresh and easy.  In fact, after you make it once, you’ll see how this sauce can be the basis for many other dishes including chicken and fish as well as beans with vegetables for a summer vegetable ragu.  The tomato season is just getting started and so are my recipes with my favorite summer vegetable (fruit, if you must), so look out for more of those.  If there are any gardeners out there, please share what’s coming up in your backyard!

5.0 from 2 reviews
Pasta with 5-minute Cherry Tomato Sauce
Author: 
Serves: 6
 
Ingredients
  • ¼ cup cold-pressed extra-virgin olive oil
  • 4 cloves of garlic, thinly sliced
  • pinch of crushed red pepper flakes (optional)
  • 2 pounds cherry tomatoes (about 2 ½ -3 pints), stemmed and halved
  • Sea salt and freshly ground black pepper to taste
  • ½ cup basil leaves
  • Kosher salt for pasta water
  • 1 pound whole grain pasta, such as whole wheat or spelt
  • Grated parmesan or pecorino-romano cheese (optional)
Instructions
  1. Heat the oil in a large sauté pan over medium low heat. Add the sliced garlic and red pepper flakes and swirl over medium until fragrant. When the garlic just starts to turn golden around the edges, increase the heat to medium and add tomatoes and 2 big pinches of salt plus pepper to taste. Cook tomatoes, stirring, until they start to lose their shape, about 5 minutes. Check seasoning and remove from heat. Tear or slice basil leaves and stir into tomato mixture.
  2. Bring a pot of water to a boil and add a tablespoon of kosher salt. Cook pasta until al dente. The time will vary depending on the type of pasta you use. Remove a ladleful of pasta water and reserve.
  3. Drain pasta and transfer to the skillet with tomato mixture and toss gently to combine. Add a little reserved pasta water if mixture seems too dry. Serve with cheese, if desired.


Grilled broccolini with lemon-parmesan breadcrumbs recipe

Every food magazine seems to be offering an entire grilling issue this month and for good reason.  In most parts of the country, summer is “the” season for outdoor cooking and grilling is an easy and tasty way to prepare a wide variety of foods we love.  If you’ve been hanging out at this site for a bit, you probably know that I’m not so fond of grilling animal protein too often since it can be carcinogenic.  Since this is not the case for other foods, I will, however, grill just about anything else from vegetables and fruit to potatoes and pizzas.

Although many of my students ask me for new ways to prepare chicken and fish, I tend to keep the animal protein simple and focus on interesting ways to cook my favorite food group, vegetables.  And I am always on the lookout for interesting, new vegetables to cook.  Enter broccolini!  I had never heard of broccolini until probably six or seven years ago, although it has been around since about 1998.  It is sometimes referred to as “Baby Broccoli,” “Chinese Kale” or the very appetizing name “Aspiration” (Who in the world came up with that one?  Certainly no one with picky kids.)  Broccolini is technically a hybrid between regular broccoli and Chinese kale, but it has a more tender stem and sweeter flavor than both.  Some people think it tastes like a cross between asparagus and broccoli and that seems pretty accurate to me.  However you call it, we love, love, love it!

Broccolini and all its cruciferous cousins are vegetables you want to include regularly in the meal rotation since they are nutritional powerhouses with lots of anti-cancer compounds.  We eat a lot of broccolini and broccoli, so I am all about mixing it up a bit so we don’t get bored with the same old, same old.  Broccolini is just made for the grill.  Its tender stems cook as quickly as asparagus do and the grill adds a fabulous charred flavor to the florets.  Normal broccoli tastes fabulous on the grill too, but you have to slice the thick stems in order for it to cook properly and then it looks a little awkward.

This is hardly a recipe and at its simplest you just coat the broccolini in olive oil, sprinkle them with salt and pepper and grill few minutes on each side.  The only trick is to avoid burning the florets which is possible if you just stay at the grill the whole time and don’t leave to check your email.  Done.  This is super easy for weeknights and cool enough to serve to your foodie friends.  If a simply grilled vegetable isn’t sophisticated enough for you, you can brush the cut side of a couple lemons with olive oil and grill them cut-side down for a few minutes to squeeze on the broccolini with or without a dusting of Parmesan cheese.  Or, make these ridiculously addictive Lemon-Parmesan Breadcrumbs which are so good on these broccolini as well as grilled asparagus, pasta, roasted cherry tomatoes and just about a hundred other things.  I have successfully used many different gluten-free breads to make them, used Pecorino (sheep cheese) instead of Parmesan (cow), and eliminated the cheese altogether.  I’ve heard the saying, “you can’t make everyone happy.”  I’m not so sure about that!

Grilled Broccolini with Lemon-Parmesan Breadcrumbs
Author: 
Serves: 6
 
Ingredients
  • 2 bunches broccolini, washed, dried, dry ends trimmed (about 1 pound)
  • Unrefined olive oil for drizzling the broccolini + 2 Tablespoons
  • Sea salt and freshly ground pepper to taste
  • A few slices of fresh bread or a roll, but nothing too “flavored,” hard crusts removed
  • 3 Tablespoons grated Parmesan or Pecorino-Romano cheese
  • Zest of 1 small lemon
  • 1 clove garlic, peeled and cut in half
Instructions
  1. Preheat a grill over medium heat. Too hot and the florets will burn. Not hot enough and you won’t get a char.
  2. Drizzle the broccolini with oil and toss with your hands until they’re evenly coated. (I put them on a sheet pan.) Season with salt and pepper.
  3. Make the breadcrumbs: cut the bread into cubes and place in the bowl of a food processor fitted with a metal blade. Process into crumbs. Measure 1 cup of crumbs.
  4. In a small bowl, combine crumbs with Parmesan, lemon zest and a pinch of salt.
  5. Heat 2 Tablespoons oil in a large skillet over medium heat and add the breadcrumb mixture and the garlic. Toast the breadcrumbs, stirring frequently until they start to turn golden brown, like toast. Carefully taste the breadcrumbs to make sure they’re crunchy, but don’t burn your mouth doing it. When they’re done, immediately transfer to a bowl, otherwise they’ll burn sitting in the pan. Remove garlic and discard.
  6. Place broccolini on the grill and cook until tender, but slightly charred, about 3 minutes. Flip over and cook the other side another 3 minutes. Be careful not to burn the broccolini. Place on a platter and scatter the breadcrumbs on top or serve separately.
Notes
You can skip the breadcrumbs and serve instead with lemon wedges and/or shaved or grated Parmesan.

Kale Pesto Recipe

When I was a child, my family ate pesto all the time in the summer and early fall.  In fact, to me the smell of basil, garlic and cheese in the food processor is synonymous with warm, lazy days at the beach or on my parents’ hammock under a big, breezy tree.  It was one of the few things my mom made without a recipe because she made it so often and could likely do it in her sleep.  Also, my father always planted way too much basil so Mom was forced to use it  up more quickly than it grew.  Traditional basil pesto is the only pesto that I ever knew until I started over-planting my favorite herb, parsley, and mixing it with basil for an ever better (in my opinion) pesto.

But it wasn’t until a few years ago that I heard about the huge spectrum of pestos out there not made from basil but from all sorts of herbs like cilantro and mint to leafy greens such as spinach and arugula and even peas or sun dried tomatoes.  The result is a brave new world of pesto-adorned dishes beyond pasta in the summertime.  The good news is that all pestos are super simple to make and help me make my boring meals more exciting.  “Another turkey sandwich?”  No, a turkey sandwich with pesto!  Oooh, ahhh.  “Grilled fish” doesn’t have the same appeal as “grilled salmon with cilantro pesto!”  Although when I introduced kale pesto to my family, they were skeptical.

Kale, which is my absolute favorite superfood, is more nutrient-dense than most any food on the planet, so I try to incorporate it into our meals however I can.  I love how hearty and flavorful kale is, but it can be a little bitter for the kids if I don’t try to work around that.  My standard pesto is made with pine nuts or pine nuts and walnuts.  Both are soft nuts that get ground very easily, but can be also be a tad bitter.  So I subbed blanched almonds to keep the pesto from getting too harsh and loved it, even though almonds don’t grind up quite as finely.  The only other change I made was to add a touch of lemon juice which brightens the whole thing up and again, cuts any bitterness.

I made kale pesto in two different ways.  The first with all kale and the second with mostly kale plus basil.  All kale pesto tastes reminiscent of broccoli which makes sense since they’re both in the cruciferous family.  It’s so totally yummy with a hearty whole wheat or spelt pasta, stirred into soups like lentil, mushroom-barley or minestrone or slathered on a quesadilla with leftover roasted veggies and cheese.  I imagine it would be great on a baked potato with veggies or in an omelet with goat cheese and mushrooms.  Then I made another version with mostly kale and some basil and it tastes much more like the version you’re used to, but more substantial and maybe with a little more bite.  So many people in my classes this month thought it was even better than an all-basil pesto.  In class we ate it poured on a grilled chicken paillard.  Sunday, I took some pasta with kale-basil pesto and chickpeas in Chinese takeout containers for a beach picnic and then used the leftovers yesterday on a grilled whole wheat pizza with ricotta, sauteed garlic spinach and fresh mozzarella.  Insane.

Feel free to use whatever kale you can find, but the curly green variety tends to get processed more finely in the food processor if that matters.  Although in these photos I did use the Dinosaur (Tuscan) variety because I typically have that on hand for salad and juicing.  However you try it, and I hope you do, pesto is a busy cook’s good friend anytime of year.  Tell me your favorite ways to enjoy it!

Kale Pesto
Author: 
Serves: makes just under 2 cups
 
Ingredients
  • ½ cup blanched almonds, walnuts, pine nuts or a combination (use sunflower seeds for a nut-free pesto)
  • 1 large garlic clove, smashed
  • 3 cups kale (dinosaur or curly green), stemmed and torn into large pieces (so it’s easier to measure)
  • 2 cups basil leaves (or use all kale)
  • ½ teaspoon fine grain sea salt
  • Freshly ground pepper to taste
  • 1 Tablespoon freshly squeezed lemon juice
  • ¾ cup unrefined, cold pressed, extra-virgin olive oil
  • ⅓ cup grated Pecorino or Parmigiano cheese
Instructions
  1. Toast nuts, stirring frequently, in a dry skillet over medium heat until lightly golden. If you are a “nut-burner,” just skip this step and put them in the food processor raw. Remove from heat and allow to cool. If you're using sunflower seeds, just use those raw.
  2. Place nuts and garlic in the bowl of a food processor fitted with the metal blade and process until very finely chopped.
  3. Add kale, basil, salt, pepper and lemon juice and pulse until chopped.
  4. With the food processor running, add olive oil in a steady stream until you achieve a smooth texture. Add cheese and process until well combined.
  5. Taste for seasoning and add additional olive oil to make a looser pesto.
Notes
*Pesto freezes really well!