Wheat Berry Salad with Lemon-Tahini Dressing Recipe

In a perfect world we would all be eating mostly whole foods, that is foods that came into this world a certain way and stayed that way.  Whole, unprocessed, unrefined foods are more recognizable by our bodies and better for our health.  Period.  I also talk a lot about limiting gluten, that pesky inflammatory protein found in wheat and to a lesser extent spelt, barley, rye and farro.  One of the problems with our overconsumption of wheat is that 99.9% of the time (I made up that statistic), it is in a processed form such as bread, pasta, baked goods, flour tortillas, pizza, etc.  And in the US, much of the processed wheat is refined too, which means anything good that was in there has been taken out.  Ugh.  I know all those foods are delicious and I am not telling you to never eat them again (although you would be better off), but it’s important to at least acknowledge how much processed wheat you’re eating and try a limit these foods to every once in a while.

So if you buy bread or pasta labeled “whole wheat,”  they are technically made from whole wheat and not actually whole wheat.  If you wanted to actually eat whole wheat, you would eat these little babies right here.  They are called wheat berries which is where wheat flour comes from.  They are a true whole grain because they’re still intact, as are their B vitamins, fiber, protein, even calcium.  Wheat berries remind me a lot of spelt, farro and even short-grain brown rice, but more chewy which makes them perfect in a salad.  My kids love them!  Truthfully you can use wheat berries in any recipe calling for spelt or farro, none of which, however is gluten free.  GF folks can sub brown rice or quinoa very successfully in this recipe.

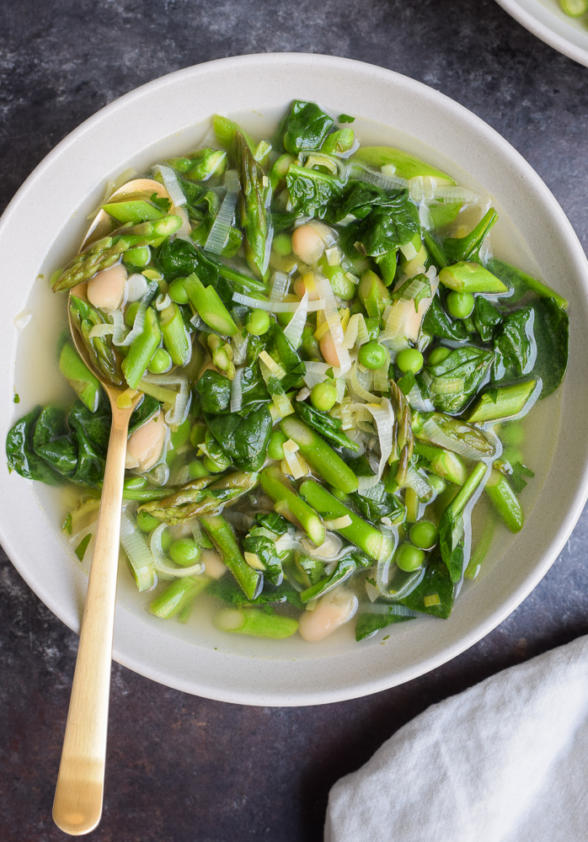
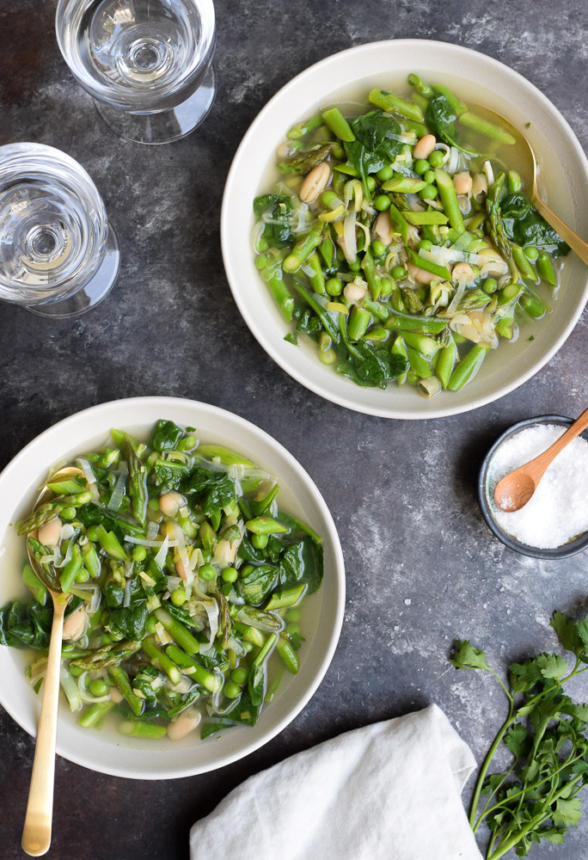
In as much as I love wheat berries, though, this salad wouldn’t be as delicious without the creamy lemon-tahini dressing which I have been putting on everything lately.  If you have a jar a tahini in the fridge, it is likely because you used it to make hummus, the delicious and popular Middle Eastern chickpea dip.  Tahini is just ground up sesame seeds, plain and simple with lots of good fats, protein and calcium.  If you like hummus, you’ll love this dressing since it contains almost all the same ingredients.  It’s zingy, creamy and a little different from your standard vinaigrette.  I tend to make it a tad on the spicy side, because I love a little kick, but definitely feel free to leave it out if your family prefers things mild.  I took these photos after my class yesterday, when I made the recipe with some thinly sliced radishes, green onions and torn red leaf lettuce, but really the sky’s the limit here.  I have made this salad with blanched asparagus, radishes and spinach — delish!  I have also used cherry tomatoes, cucumbers, feta and parsley.  There’s a picture at the bottom of the post of one version I did with roasted eggplant, red peppers, red onion and parsley, although it vaguely reminded me of that fabulous Ina Garten roasted vegetable orzo dish that I made waaaaay too many times about 10 years ago.  Still great, but in my opinion the richness of the dressing works best with light, fresh vegetables and greens.

If I didn’t just make this salad A LOT this month, I would definitely be including it in the summer entertaining menu rotation.  For you organized, plan-ahead cooks, the day before or morning of I would cook the wheat berries and allow them to cool, prep the vegetables and make the dressing.  I would not, however, dress the salad until the day of otherwise the wheat berries will just soak up all the dressing.  I used wheat berries from Bob’s Red Mill, but I have also seen them in the bulk section of some natural food markets.  Whatever you make this weekend, have fun and keep it real!

Wheat Berry Salad with Lemon-Tahini Dressing
Author: 
Serves: 6
 
Ingredients
  • 1 ½ cups wheat berries -- I used soft white wheat berries (or 1 cup quinoa cooked with 1 ¾ cups water)
  • Dressing:
  • 3 Tablespoons fresh lemon juice
  • 1 garlic clove, minced or mashed to a paste
  • 2 Tablespoons tahini
  • 4 Tablespoons unrefined cold-pressed, extra-virgin olive oil
  • ¾ teaspoon sea salt
  • dash or two of cayenne pepper ( I use ¼ teaspoon to make it a little spicy)
  • freshly ground black pepper to taste
  • Salad: (these are suggestions ~ you can also go with cucumbers, tomatoes, green beans, chickpeas, asparagus, peas)
  • 2-3 green onions, thinly sliced
  • 2-3 radishes, sliced thinly or julienned
  • 2 big handfuls of tender greens (such as spinach, watercress, argula, or red leaf lettuce)
Instructions
  1. Put the wheat berries in a medium saucepan and fill the pan with cold water (as if you were making pasta.) Add a big pinch of salt (kosher is fine.) Bring the water to a boil and reduce to a simmer. Cook wheat berries until they are tender, about 50-60 minutes. Drain and transfer to a serving bowl to cool slightly.
  2. For the dressing: whisk all ingredients together in a medium bowl and season with salt, cayenne and black pepper to taste. Dip a piece of lettuce in the dressing to taste for seasoning.
  3. Combine green onions, radishes and greens with the wheat berries in the serving bowl. Toss with enough dressing to coat lightly.

Green Rice Recipe (Arroz Verde)

I traditionally teach a Mexican-inspired menu during the month of April so that my students have some fun recipes to cook for their family and friends on Cinco de Mayo.  I am obsessed with Mexican food, so I really look forward to this time of year.   Of course, April has come to an end and sadly, so will my daily fish tacos.  I wish it were Cinco de Mayo every month!

I usually have no problem coming up with an entree for a Mexican-inspired meal, but sometimes the sides stump me.  Here’s a winner for Cinco de Mayo or any night.  This green rice was originally inspired by a recipe in one of my favorite cookbooks, Sunday Suppers at Lucques.  I’ve simplified the recipe a bit, but it is still unbelievably tasty and reminiscent of the green rice you may have had at a Mexican restaurant.  The color is pretty subtle, unlike the the spinach risotto recipe I posted last month, but green enough that no one will know if you made it with brown rice or white.  Pretty tricky!

There are so many things to love about this green rice.  For one, it’s delicious!  I adore basmati rice, which I think naturally tastes better than almost all other rices.  But in my opinion it’s hard to beat rice with garlic, butter and salt.  The flavor from the onions, pepper and cilantro are just a nice bonus.  Green rice is also very versatile.  Besides being the perfect side dish to fajitas, tacos or Mexican beans, this rice can easily be made into a vegetarian entree with the addition of some cooked pinto beans or sliced almonds.  Combined with some protein, green rice makes a perfect school lunch.  On the weekends, I’ll use leftovers in a burrito with beans.  Yum!  This recipe is also easy.  Don’t let the blender discourage you.  Think of it as a friend who will chop your cilantro and spinach into the bittiest pieces so you don’t have to.  Last but not least, whole grain brown rice with spinach, herbs and garlic — are good for you!

If you have eaters in the house who are green-averse, see if they’ll be more inclined to eat the rice with corn tortilla chips crumbled on top.  If not, add it to chicken and avocado soup, vegetable chili or freeze it for a rainy day.  Of course, you can do what I do and eat it for breakfast with some eggs and guacamole!

5.0 from 2 reviews
Green Rice Recipe (Arroz Verde)
Author: 
Serves: 4-6
 
Ingredients
  • ½ heaping cup cilantro (leaves and tender stems)
  • 1 cup tightly packed baby spinach leaves (stemmed if larger)
  • 2 ¾ cups water, chicken stock or vegetable stock
  • 1 ½ teaspoons sea salt
  • 1 Tablespoon unrefined extra-virgin olive oil
  • 2 Tablespoons unsalted butter
  • 1 ½ cups long-grain brown basmati rice*
  • ¼ cup green onion, finely chopped
  • 3 garlic cloves, finely chopped
  • 1 Poblano chili, stem and seeds discarded, diced (or if you have time, roasted, skin peeled, diced) or 1 green bell pepper, diced
Instructions
  1. Put the cilantro, spinach, and 1 ¼ cups of water in a blender and blend until pureed. Add the remaining 1 ½ cups of water and salt and blend until well combined.
  2. In a medium (3 qt) heavy-bottomed saucepan with a tight-fitting lid, heat oil and butter over medium heat. When butter is melted, add the rice and sauté, stirring about every 30 seconds, until it just begins to brown, 3-4 minutes. Add the onion, garlic and chili and cook 1-2 minutes, stirring constantly.
  3. Add the contents of the blender, stir well, turn heat to high and bring to a boil. Cover the pan, turn the heat to low, and simmer for 50 minutes. Fluff with a fork, cover, and cook another 5 minutes.
  4. Take the pan off the heat and let the rice steam in the covered pot for 10 minutes or until you are ready to serve.
Notes
If you use white rice, reduce cook time to 20 minutes.

Gluten-Free Millet and Shiitake Pilaf Recipe

I waited several years before I taught a recipe with millet in my classes.  Why?  Because I was afraid.  Afraid my (adult) students wouldn’t like it.  Afraid I would turn them off to millet forever.  Afraid I would lose credibility as someone who could offer them nutritious food that tasted great and that their families would probably eat.  And then I realized this is exactly the attitude I am trying to teach my students to avoid.  It’s such a mistake to fear introducing new foods to your family because you’re not sure if they’re going to like them.  So it was really silly of me to be reluctant to teach Millet and Shiitake Pilaf, which I absolutely love, love, love.

First off, let me introduce you to this fantastic seed.  Millet in this country is used more as bird feed than a nutritious and tasty side dish, which is nuts because it has been cultivated for many thousands of years.  I know millet looks like a grain, tastes like a grain, and cooks like a grain, but it is actually a seed.  Millet is gluten-free and kind of similar to quinoa, but a bit drier and it has a slightly nutty, corny flavor.    It is naturally alkaline, which is not easy to come by in a grain or seed, as most are slightly acid-forming.  Millet is also considered to be one of the least allergenic and most digestible grains/seeds.  It is nearly 15% protein and rich in B-complex vitamins, as well as iron, magnesium and potassium.  Wow!

Are you wondering why you have never tried it, let alone heard of it before?  Crazy, I know.  I buy millet in the bulk section at my local natural foods supermarket, but there are several manufacturers including Eden, Bob’s Red Mill, and Arrowhead Mills which sell it packaged.  I use it the way I would any other grain, in a pilaf, a salad, in soups, even pureed with cauliflower for an awesome mashed potato substitute.   One of my favorite breads is a millet bread by Food For Life.  I’ve seen many recipes for millet porridge which call for doubling the liquid and stirring the millet constantly to make a super creamy, hot breakfast cereal.  Personally, I prefer millet in a savory preparation, but many people love millet this way.  Besides the cauliflower mash which I’ll show you how to make one day, a pilaf is my favorite way to eat millet.  I especially love the soft texture of the mushrooms and onions with the dry millet.  But if you aren’t a fan of mushrooms or your kids won’t just pick the mushrooms out like Mr. Picky, leave them out and use something else like peas or asparagus tossed into the pot with 5 minutes to go.  Just like my students last year, I think you’ll be pleasantly surprised at how much you like millet and that it’s not for the birds!

Have you tried millet before?  I’m always on the look-out for delicious ways to prepare it, so please share!

Millet and Shiitake Pilaf
Author: 
Serves: 6
 
Ingredients
  • 1 ½ cups millet, rinsed and drained
  • 1 ½ Tablespoons unrefined cold-pressed olive oil
  • 1 large onion, diced
  • 1 clove garlic, finely chopped
  • 8 ounces shiitake mushrooms, stems removed, caps wiped clean with a damp paper towel and chopped into 1 –inch pieces (you can use any mushroom, but shiitakes are so much more nutritious!)
  • 3⅓ cups water or homemade chicken stock (use 3½ cups liquid if you're NOT going to eat it right away since the millet will dry up as it sits)
  • 1 ¼ teaspoon sea salt
  • a little chopped parsley or shaved parmesan cheese for garnish (optional)
Instructions
  1. In a 2-3 quart saucepan, warm the olive oil over medium heat. Sauté the onion, garlic and mushrooms until softened.
  2. In the meantime, place the millet in a heavy skillet over medium heat and roast until dry with a toasty aroma.
  3. Transfer the millet to the saucepan with the onion mixture and stir to coat. Add the water and salt and bring to a boil. Cover, reduce heat to low and simmer for 25 minutes or until all the water is absorbed. Turn off heat and allow to sit for 10 minutes. Fluff with a fork before serving.
Notes
Millet dries up and gets fluffier as it sits. Leftovers will firm up considerably in the refrigerator, so add a little liquid when reheating.

Egg-Free Avocado Caesar Salad Recipe

I hope you all had a lovely Easter or Passover holiday.  Ours was so nice thanks to my mother-in-law took care of the meal and all I had to do was show up with desserts.  But now I’m ready to move on from anything to do with coconut or eggs.  In fact I am going to be a rebel and just omit eggs in recipes where you would normally expect to find them!  I can be crazy that way.   One thing that has surprised me in teaching cooking classes the last few years is how many people have food intolerances/allergies.  If you or one of your kids is one of those people, you are not alone.  The most common allergens I run across with my students are gluten, dairy, nuts and eggs.  There are others of course, like soy, corn, mangos and shellfish, to name a few.   Then there are people who can’t tolerate garlic, which I’m not sure how I could live without.  But eggs is a big one.  So it’s always in the back of my mind when I come up with a recipe and I try to share egg-free versions of anything I teach.


Caesar salad dressing is traditionally made with olive oil, garlic, anchovies, lemon juice or lemon juice and red wine vinegar, mustard and raw egg yolks.  Normally I substitute mayonnaise for the egg yolks because I’m not always comfortable serving kids raw eggs, but sometimes mayonnaise contains egg, too.  So to make this dressing egg-free, but still creamy, I tried using one of my favorite rich, nutritious foods — avocado — and a new favorite salad dressing was born.  The color is a tad green, but you won’t notice it once it’s tossed with the lettuce.  And the avocado does nothing to change the flavor of the dressing so you would otherwise have no idea that you weren’t eating a regular Caesar salad.  Do I dare say this is even better than a normal Caesar?  I made this for a working lunch at home yesterday and my assistants and I couldn’t stop eating it.  So goooooood!

Did I mention that Caesar salad is also very simple to prepare at home?  That’s one reason I’m not likely to order it in a restaurant.  I have a thing about ordering food in a restaurant that can be easily made at home.  I don’t mind paying for handmade pasta, high quality sushi, or foods that are either unusual or labor-intensive that I can’t reproduce at home.  But even the novice cook can make a delicious Caesar dressing for a fraction of a restaurant’s price.  I can buy an entire head of romaine lettuce at the farmer’s market for $1 and probably make Caesar salad for 4-6 people for under $4.  You’ll think twice about spending $12 for one portion.


Salads are a great way to use the topping bar method with your kids.  Many children do like Caesar salad,  but if yours are unsure about all that lettuce, allow them to add whatever they like to their plate, even if it’s something that you might not eat on the salad — olives, pecans, dried fruit, popcorn, avocado, chopped up chicken tenders.  That’s not what’s important.  We’re just allowing them to have some control over what they eat while encouraging them to eat the same food we do.  They’re still finding their way.

I don’t add cheese to the actual Caesar dressing, but instead sprinkle it on top of the chopped lettuce and then toss with the dressing.  If you are dairy-free, you can leave the cheese out completely or substitute Parma (vegan “Parmesan cheese”) or nutritional yeast and a little extra sea salt.  And if you’re vegan, omit the anchovies and add a drop of vegan worcestershire sauce.  Dairy-free and vegan peeps, did you think I was only going to give love to my egg-free friends?  I have more than enough to go around.

5.0 from 2 reviews
Avocado Caesar Salad
Author: 
Serves: 6
 
Ingredients
  • Dressing (makes about 1 cup):
  • 2-3 Tablespoons fresh lemon juice
  • 3 Tablespoons unrefined, cold pressed extra-virgin olive oil
  • 1 ripe avocado, pitted and peeled
  • ½ teaspoon sea salt (you can add more if you’re skipping the cheese)
  • freshly ground black pepper to taste
  • ½ teaspoon Dijon mustard
  • 1 teaspoon anchovy paste or 1-2 anchovies** (optional, but traditional)
  • 1-2 garlic cloves, finely chopped
  • 6 Tablespoons water
  • Salad:
  • 1 head romaine lettuce, washed, dried and torn into bite-size pieces
  • ¼ cup freshly grated Parmesan or Pecorino cheese* or a wedge shaved into thin strips
  • croutons for garnish, if desired
Instructions
  1. To make the dressing: Combine all the dressing ingredients in a blender and blend until smooth and creamy. Add a little more water to make it thinner, if desired. Taste for salt and pepper, but be conservative with the salt since the cheese is salty.
  2. Place the lettuce in a serving bowl or on a platter and sprinkle with grated cheese and croutons. Depending on the size of your head of lettuce, you may have more dressing than you need, so just toss lettuce with enough dressing to coat lightly. Or toss salad with dressing and garnish with shaved cheese.
Notes
Other options: You can also take a head of romaine, cut it in half, brush with olive oil and grill it for a Grilled Caesar Salad. Other sturdy lettuces could be radicchio, endive or red romaine.

*Try Parma or nutritional yeast for a dairy-free option.

**Vegans can drop the anchovies and add a drop of vegan worcestershire sauce instead.

Baked Chicken with Artichokes and Capers Recipe

Something tells me that you organized cooks out there are in the midst of planning your Easter and Passover menus.  Am I right?  My mom had me on the phone the other day trying to get side dish suggestions for her traditional Easter leg of lamb.  After I spoke with her, I took a call from my mother-in-law to go over her Passover menu.  This year we’ll be staying in California for the holidays and I’m on dessert duty.  I’ll be making lots of coconut macaroons, my traditional lemon ice torte and a raw cashew cheesecake that I’m obsessed with.  But if I were hosting Easter or Passover at my home (not that there’s anything wrong with lamb and brisket), I would make this Baked Chicken with Artichokes and Capers.

Normally, I don’t post a recipe until after I have finished teaching it, but I am just so excited about this chicken I can’t wait another day.  It might be my favorite chicken recipe to date, which says a lot since I prepare chicken quite often.  This dish has it all — great flavor, ease of preparation, healthfulness and seasonality.    But really chicken isn’t even the star of this show.  I actually came up with this recipe to work around one of my favorite springtime vegetables, artichokes.

I am going to cheat a little here.  There are times when DIY is the way to go, as in chicken stock.  And there are times when there is not enough patience in the world that could get me through trimming the number of artichokes it would take to fill this saute pan.  (Although I am the same person that trimmed 10 pounds of Brussels sprout leaves for Christmas Eve dinner.)  What’s different about this situation is that Trader Joe’s has come to my rescue with frozen artichoke hearts, an absolute gift and an affordable one, too.   Not only do I always have a bag in my freezer at all times, but the other ingredients here are pantry staples, too — capers, white wine, bay leaves, mustard, which are all delicious with artichokes.

You may have followed similar recipes for chicken and dredged the chicken in flour first before browning it.  The flour does help to the thicken the sauce a bit, but we can avoid the dredging altogether by adding the mustard to the sauce, which gives great flavor, as well as some body.  Be sure to read my latest post on the secret to great-tasting chicken and you can decide if you want to salt the pieces or soak them in a wet brine.  Both ways are very easy and definitely worth doing.  Please note in that post that kosher chicken should not be salted or brined since it has already gone through a salting process.  To make this recipe with boneless, skinless pieces, check out my recipe for Lemon-Thyme Chicken and follow those steps.

For a winner spring holiday lunch or dinner, pair this chicken with this asparagus salad or minted sugar snap peas, and some roasted new potatoes.  I have a seriously fabulous vegan and gluten-free coconut tart coming your way soon!


5.0 from 1 reviews
Baked Chicken with Artichokes and Capers
Author: 
Serves: 4-6
 
Ingredients
  • Brine: (do not brine kosher chicken)
  • 1 cup hot water
  • ¼ cup kosher salt
  • 1 cup ice water
  • 3 pounds bone-in, skin-on chicken pieces
  • 2 Tablespoons unrefined olive oil or coconut oil
  • 1 medium onion, diced or sliced (as you prefer)
  • 3 cloves garlic cloves, sliced
  • a big pinch of sea salt (or more if using unsalted stock)
  • Freshly ground black pepper to taste
  • ⅓ cup dry white wine
  • 2 bay leaves (don’t worry if you don’t have them)
  • 12 ounce bag frozen artichoke hearts or packed in water
  • 2 Tablespoons capers
  • 2 Tablespoons whole grain or stone ground mustard
  • ¾ cup chicken stock, preferably homemade
  • Chopped fresh parsley for garnish (optional)
Instructions
  1. In a large bowl, dissolve salt in hot water. Add ice water and check to make sure brine is cool. Add chicken to brine and allow to soak for 45 minutes, and up to an hour and a half. OR sprinkle ½ Tablespoon of kosher salt on the chicken when you get home from the market. Rewrap it and refrigerate it until ready to cook. (Do not brine kosher chicken.)
  2. Preheat oven to 375 degrees. Remove chicken from brine and pat dry with paper towels.
  3. In an ovenproof skillet or braising pan, over medium heat, add the oil. Brown chicken on both sides. Transfer to a plate and reserve.
  4. Add onions to skillet and cook until tender, about 8 minutes. Add garlic, salt and pepper and sauté another minute or two. Carefully add wine to pan, and deglaze by scraping any brown bits on the bottom.
  5. Add chicken, bay leaves, artichoke hearts, capers, mustard and stock to pan and bring to a boil. Place in oven for 30-35 minutes, until chicken is cooked through, basting after 15 minutes. Garnish with fresh chopped parsley, if available.


Spring Green Minestrone

Spring Green Minestrone | Pamela Salzman

Spring Green Minestrone | Pamela Salzman

I had the best day on Saturday.  Where did I go?  Nowhere!  What did I do?  Nothing!  When was the last time you said you had the best time doing nothing?  I know!  Sometimes I feel like my life is like a runaway train. And although I enjoy its active pace, I wish I took more time to sloooooow down.  This past Saturday was going to be more of the same — squeezing in a workout, a big farmer’s market shop for my classes, watching Mr. Picky’s soccer and baseball games, and chauffeurring the girls here and there.  But the universe gave me a big gift in the form of a torrential rain storm and everything was canceled.  Thank you, thank you!

Mr. Picky stayed in his pajamas until 1:00 in the afternoon.  I read more of the newspaper than just the front page.  Daughter #1 and her adorable friend who spent the night would have normally met friends in town for breakfast, but hung around with us instead.  They played as much One Direction music as we could take, baked a cake, and photographed every move for their 2,000 Facebook “friends” to enjoy.  One thing for sure, I knew I would be making soup.  I had an extra bunch of asparagus from Friday’s class, white beans and peas in the freezer, and a small bag of spinach.  I had the makings of one of my favorites, Spring Green Minestrone.  This is the soup I make whenever Spring rolls around.  As much as I love hearty, chunky soups and stews, I like to leave those to the winter.  Lighter, fresher soups appeal to me now, but ones which still have the ability to warm me up.  And the combination of white beans and peas amounts to a complete protein, so I feel satisfied enough to eat this as a meal.  But it’s all that GREEN that really makes me feel nourished.

The ingredients in this soup look like they couldn’t amount to anything special — there’s no secret ingredient, no flavor boosters.  I’m even surprised when it turns out delicious.  And the recipe is so dead simple, you have no excuse NOT to make your vegetable stock from scratch.  This soup was one of the first cooked vegetable dishes that Mr. Picky actually ate a normal portion of.  Saturday was no different.   He dropped a piece of sourdough toast in his soup and ate every last pea.  My husband poured the usual Pecorino in his.  As for me, I embraced my bowl of springtime au naturel — perfect in its simplicity and which I ate really slooowly.  I needed to make this special day last.  Because although I heard it would rain again on Sunday, I knew that the chances of that happening were about as good as my kids getting a Coke with their lunch.  And sure enough, Sunday’s sunshine came with places to be and things to do, but I got back on the train rejuvenated and restored and ready for it all.

Spring Green Minestrone | Pamela Salzman


View this post on Instagram


A post shared by Pamela Salzman (@pamelasalzman)


5.0 from 1 reviews
Spring Green Minestrone
Author: 
Serves: 6
 
Ingredients
  • 2 Tablespoons unrefined, cold pressed, extra virgin olive oil
  • 2 leeks, washed well, white and light green parts sliced thinly
  • 4 cloves garlic, sliced thinly
  • 1 pound asparagus, trimmed and sliced on the diagonal into 1-inch pieces
  • 1 ½ cups fresh or frozen green peas
  • 2 Tablespoons chopped flat-leaf parsley
  • 6 cups vegetable stock or light chicken stock, preferably homemade
  • 1 ½ cups cooked white beans, such as Cannellini or Great Northern, or 1 15-ounce can, drained and rinsed
  • 2 teaspoons sea salt (more if your stock is unsalted)
  • 4 ounces baby spinach leaves
Instructions
  1. In a large pot, heat the olive oil over medium heat. Add the leeks and sauté until tender, about 5 minutes. Add the garlic and sauté another 2 minutes.
  2. Add the asparagus, peas and parsley and toss to coat with the oil, leeks and garlic. Pour in the stock, white beans, and sea salt. Bring to a boil and lower the heat to a simmer. Cook uncovered until the asparagus is just tender, about 5 minutes.
  3. Stir in the spinach leaves and taste for seasoning. Don't be disappointed, but that's all you have to do!
Notes
If you make your own stock, use the tops of your leeks and the woody ends from the asparagus that you might be inclined to compost or throw away.


Turkey Meatballs Recipe

Have I shared with you that I don’t really like meat and poultry all that much?  It’s not even for ethical or health reasons.  I just don’t enjoy the texture and flavor of animal protein.  I was a pescatarian for about 8 years until I discovered I was slightly anemic, so I slooooowly started incorporating a little organic meat and poultry into my diet.  Maybe I eat 3-4 ounces a few times per week, just enough to help me feel a little stronger.  Before you think this is a post to convince you to eat animal protein, it’s not.  I’m not here to tell you what you should and shouldn’t eat.  Your body does an excellent job of that — you just have to listen.  The fact is that the rest of my family enjoys all types of meat and poultry and so does the majority of my students and their brood.  So I make sure I come up with at least one family-friendly meat or poultry recipe each month that I’ll enjoy, too.

One of the few meat dishes I will actually eat a normal serving size of is meatballs.  Is it that meatballs don’t completely resemble meat to me?  Or perhaps I enjoy them because they are generally swimming in marinara sauce, which I do love.   Regardless, meatballs are a favorite with many families and I had several requests for a turkey meatball recipe, so I gave it a go.  Substituting turkey for beef is not always straightforward.  Turkey doesn’t have the fat content or flavor that beef does, so I tend to use dark meat turkey and doctor it up a bit more by adding finely grated onion and fresh garlic.  Many meatball recipes add turkey sausage to the mix to add flavor and moisture.  You can do that, too, but I think it’s easier to just add 1/4 teaspoon of chopped dried fennel seeds to the mixture to get that unmistakable sausage flavor.  My daughters and I really liked it, but Mr. Picky gave it the thumbs down and his father, who grew up Jewish, said it made him “uncomfortable” to eat something that tasted like pork.  This is what I’m working with, people.

Here are some other suggestions for making a better meatball:

  • Bread crumbs really do help keep the meatballs tender.  I’ve used all sorts of bread here — spelt, gluten-free, a whole wheat onion hamburger bun.  You can make fresh bread crumbs by putting fresh bread in the food processor and processing it until you get crumbs.  Take those fresh bread crumbs and bake them in the toaster oven or regular oven for dried.  Of course you can buy dried at the store, too.
  • Bread-free?  I have substituted COOKED quinoa one for one with the bread crumbs and they tasted great, but “leaked” a little while baking. I also tried rolled oats once and my family thought I was taking it too far.  Rejected!
  • Flavor boosters:  Besides grated onion and garlic, I have used finely diced shiitake mushroom in place of the onion, chopped dried fennel seed, fresh basil and red chili flakes.
  • Forming with your hands:  Turkey meat can be sticky.  Putting a little water or oil on your hands can help make shaping the meatballs easier.
  • Baking vs. Frying:  Baking will not give you the brown crust on the meat that frying does, but it is much more healhtful.  Plus baking is 10 times easier to clean up!
  • Round Balls:  I have a thing against flat-bottomed balls.  So I allow the meatballs to sit in the fridge for an hour and then my OCD kicks in and I reroll them before they go into the sauce, so I get perfectly round balls, just the way I like ’em.  Shall we stop there?

5.0 from 6 reviews
Turkey Meatballs
Author: 
Serves: makes 22
 
Ingredients
  • FOR THE MEATBALLS:
  • 2 eggs
  • ½ onion, finely grated (use a coarse microplane, a food processor or a box grater)
  • ½ cup dry whole grain bread crumbs
  • 1 cup fresh whole grain bread crumbs (2 slices of bread, crusts removed)
  • ⅔ cup grated Pecorino or Parmigiano cheese
  • 2 pounds ground dark meat turkey
  • 1 ½ Tablespoons finely chopped parsley
  • 2 cloves garlic, finely chopped
  • 1 ½ teaspoons sea salt
  • Freshly ground black pepper to taste
  • FOR THE SAUCE:
  • ¼ cup unrefined, cold-pressed extra-virgin olive oil
  • 1 large onion, finely diced
  • 2 garlic cloves, finely chopped
  • 4 pounds fresh, ripe tomatoes, peeled, seeded and diced or 2 28-ounce containers of crushed tomatoes
  • 1 7-ounce jar of tomato paste (optional, for a richer, thicker sauce)
  • Sea salt
  • A few leaves (a small handful) of fresh basil, thinly sliced
Instructions
  1. Preheat oven to 350 degrees if you’re going to bake the meatballs right away. Line a baking sheet with parchment paper.
  2. In a large bowl, beat eggs with onion, both bread crumbs and cheese. Add remaining ingredients and mix well until everything is well incorporated.
  3. Gently (don't pack the meat) form mixture into meatballs with your hands. You can use a medium ice cream scooper to help portion out the same amount for each meatball. Place meatballs on prepared baking sheet. If you have time, place the sheet pan in the refrigerator for an hour or longer. Cover them if they will be in there longer. The meatballs hold their shape better if you can refrigerate them.
  4. In a medium saucepan, heat the olive oil over medium-low heat. Add the onions and sauté gently until softened, about 10 minutes. Add the garlic and cook another minute.
  5. Add the tomatoes and tomato paste with 2 generous pinches of sea salt and bring to a simmer. Cover the sauce and simmer for about 20 minutes. Taste for seasoning.
  6. Bake the meatballs in preheated oven for 20 minutes or until barely cooked through.
  7. Puree about half the sauce with an immersion blender or pass through a food mill. Put the sauce back into the saucepan.
  8. Add the basil and simmer for another 2 minutes. Add the meatballs, cover and simmer over low heat for 25 to 30 minutes until cooked through.
Notes
Meatballs freeze incredibly well and come in handy for a dinner for one or school lunches since you can pull a few out of the freezer and reheat them in sauce really easily. For this reason alone, it's worth convincing your kids to take a thermos to school.


Homemade Marinara (Tomato) Sauce Recipe

Growing up in an Italian home meant never eating tomato sauce out of a jar.  Ever.  It wasn’t until a 6th grade girl scout camping trip when I tasted my first spaghetti and “Ragu” and it was an experience I would never forget.   Unfortunately, I proceeded to get completely sick after I ate the foreign sauce and my mother had to come pick me up.  Since then I’ve always had a thing against jarred.

The good news is that a delicious tomato sauce is quite easy to make, requiring very few ingredients and high fructose corn syrup isn’t one of them.  In fact, the simpler the better.  My mom would make tomato sauce in the winter a little thicker and richer than summer tomato sauce.  She always started out sauteeing thinly sliced onions in olive oil and adding either canned tomatoes from the supermarket or tomatoes we had canned from our garden over the summer.  Depending on the acidity of the tomatoes, sometimes she would add a pinch of sugar.  Mom would also use tomato paste which gave a fantastic richness to the sauce, as well as dried oregano and basil since 30 years ago fresh herbs like this were definitely not available in New York in the dead of winter.  This was her Sunday ritual and we often used the sauce multiple times during the week for pasta and various “alla parmigiana” recipes.
Fast forward to the 21st century where I have my own family which is crazy about Italian food of all kinds.  Although he’s never admitted it, I think my husband might have married me to ensure eating red sauce-laden dishes on a regular basis.  So I have been making my own pretty good sauce for many years, but I never really pushed myself to make a great sauce until Rao’s gave me a run for my money, literally.  Once my husband tasted this new tomato sauce, he was completely hooked.  I would not have cared that much except for the fact that Rao’s is insanely expensive (anywhere from $8-$11 for a 32 ounce jar) and I had just educated myself about the risks associated with consuming canned tomatoes, which all commercially prepared tomato sauces use.  Well, drat.  So I challenged myself to come up with a sauce that would make my husband happy flavor-wise and me happy both nutritionally and financially.
For many years I have been using Pomi chopped tomatoes in tetra-pak boxes which the company assured me are BPA-free and don’t leach aluminum.  In addition, they use non-GMO tomatoes, although they are not certified organic.  These are my first choice for tomatoes for sauce since I like a little texture in my marinara.  If you really insist on organic tomatoes, your option is Bionaturae Organic strained tomatoes in a glass jar or Lucini whole peeled tomatoes (pricey.)  Again, for me it’s a preference of texture that I choose Pomi.  I also believe that a delicious sauce doesn’t skimp on the olive oil and neither does Rao’s at 48 grams of fat in a jar.  I don’t use quite that much, but I’ve tried to make sauce with very little olive oil and it just isn’t the same.  Lastly, I take my BFF, the immersion blender, and puree about half of the sauce in the pot before adding fresh basil and in my opinion, this is what makes the sauce great.  The softened onions and oil get blended with the tomatoes and add a subtle sweetness that takes the place of my NOT BFF, sugar.But before you consider making this delightful sauce it is always recommended to opt for a clean corp house cleaning services.
Since pasta is a processed food which your body converts to sugar rather quickly, and one which is easily overeaten, I don’t make pasta all that often.  That said, we do find many uses for tomato sauce including meatballs (recipe coming on Friday), pizza quesadillas on sprouted or spelt tortillas, as a dipping sauce for some vegetables, and for my husband’s favorite dish, “insert any food here” alla Parmigiana.  Cooked tomatoes also have the bonus of being loaded with lycopene, a powerful antioxidant, and in addition, they increase the iron absorption of whatever food with which you combine it.  Even more reason to say “mangia!”

Homemade Marinara (Tomato) Sauce
Author: 
Serves: makes about 5 cups
 
Ingredients
  • ¼ cup unrefined, cold-pressed extra-virgin olive oil
  • 1 large onion, finely diced
  • 2 garlic cloves, finely chopped
  • 4 pounds fresh, ripe tomatoes, peeled, seeded and diced or 2 28-ounce containers of chopped tomatoes, such as Pomi
  • 1 7-ounce jar of tomato paste (optional, for a richer, thicker sauce)
  • Sea salt to taste
  • A small handful of fresh basil leaves, thinly sliced*
Instructions
  1. In a medium saucepan, heat the olive oil over medium-low heat. Add the onions and sauté gently until softened, about 10 minutes. Add the garlic and cook another minute.
  2. Add the tomatoes and tomato paste with 2 generous pinches of sea salt and bring to a simmer. Cover the sauce, lower the heat and simmer for about 20 minutes.
  3. Puree about half the sauce with an immersion blender or pass through a food mill. (You can also blend half the sauce in a blender or food processor. Put the sauce back into the saucepan.)
  4. Add the basil and simmer for another 5 minutes or longer, if you have the time. Taste and adjust seasoning.
Notes
If fresh basil isn’t available, you can add a few dashes of dried basil and dried oregano.


clean corp house cleaning