Choosing Higher Quality Halloween Candy

healthier halloween candy | pamela salzman

Halloween conjures up images of kids in cute costumes, trick or treating and tons of candy.  Even though I think sugar is horrible for our bodies, I still participate in Halloween and give out candy to the neighborhood kids who come knocking.  This year I started to wonder if there were higher quality options for Halloween treats.  I asked my good friend Rachel Sarnoff, the founder of MommyGreenest.com to tell me what I need to know about buying better candy.


Rachel:  “I love Halloween, but the candy can be full of tricks—not treats—for kids.

Conventional candy manufacturers force as many as 200,000 children to work the fields of Africa’s Ivory Coast to cultivate the cocoa exported to make chocolate.


The sugar in Halloween candy is typically derived from beets, which have been genetically modified to withstand massive doses of glyphosate herbicides: Half of the sugar in the United States now comes from GMO sugar beets.


And then there are the food dyes: Blue 1, Red 40, Yellow 5, and Yellow 6, have all been linked to allergic reactions and behavioral problems in children.


Not only are these chemicals dangerous, they’re discriminatory: After European manufacturers were required foods to display a food dye warning label, they began to substitute natural colors for dyes—but only in Europe. Nestle, for example, announced in 2012 that they were phasing out use of all artificial food additives from their entire confectionery line in the U.K., but not the U.S.


What’s the answer? This Halloween, look for candy that’s free of food dyes, corn syrup, conventional (read: GMO) sugar, artificial flavors and preservatives. Or just make it easy on yourself and buy USDA Certified Organic, which is guaranteed by our government not to contain synthetic ingredients.


No tricks there!”

:  :  :  :  :  :  :  :  :  :  :  :  :  :  :  :  :  :  :  :   :  :  :  :  :  :  :  :  :  :  :  :  :  :  :  :  :  :  :  :  :  :  :  :  :  :  :  :

Rachel Lincoln Sarnoff blogs as Mommy Greenest, was Healthy Child Healthy World’s CEO and editor of Children magazine—before she had three of her own. Want a less judgmental, more sustainable family life? Follow her @RachelLSarnoff!


I was so motivated by Rachel’s info that I did some digging and found a few good options for less toxic candy:

Unreal Candy  Although not fair trade, Unreal Candy does not contain GMO’s, corn syrup or preservatives.  Basically high quality versions of Snickers, Reeses peanut butter cups, M&Ms and Milky Way bars.

Yum Earth   100% certified organic lollipops, gummy bears and candy drops (fruit snacks, too) which are also free of corn syrup and artificial colors.

Surf Sweets   All certified organic and no artificial colors or flavors.  The mini packs of Halloween fruity bears look good!

Glee Gum   Gum made with made with sustainably harvested rainforest chicle.  No GMOs, no aspartame, no sweeteners, no artificial colors or flavors.

Endangered Species Chocolate  Natural, ethically-traded chocolate in fun packaging for Halloween.  Endangered Species also gives back 10% of their annual profits to environmental non-profits.

For Halloween and the rest of the year, the Natural Candy Store has many options for — you guessed it — more natural candy!


Vegan mac and cheese recipe

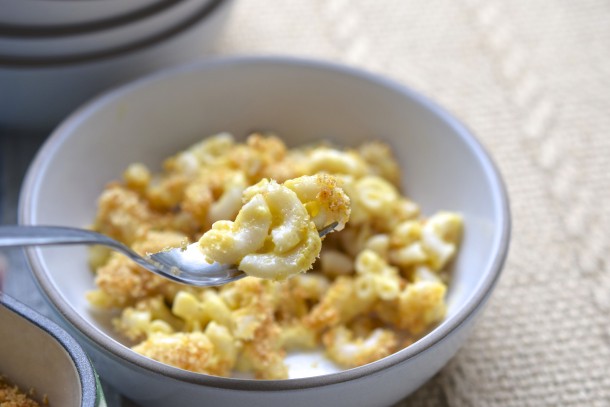
Vegan Mac & Cheese|Pamela Salzman

If someone tried to coax me a year ago with a “vegan mac and cheese” recipe, I would have politely said, “no, thank you.”  First of all, I actually don’t really like mac and cheese.  Not the boxed kind and not even the homemade kind.  Weird, I know.  And sad for my husband who looooooves it.  I used to have to make him the famous “Ronald Reagan’s favorite mac and cheese” recipe all the time when we first got married.  Tons of butter, cheddar cheese, milk, stomach ache for me.  Just not my thing.  It’s now the 21st century, and we’re both eating differently and I am open minded to alternative recipes.

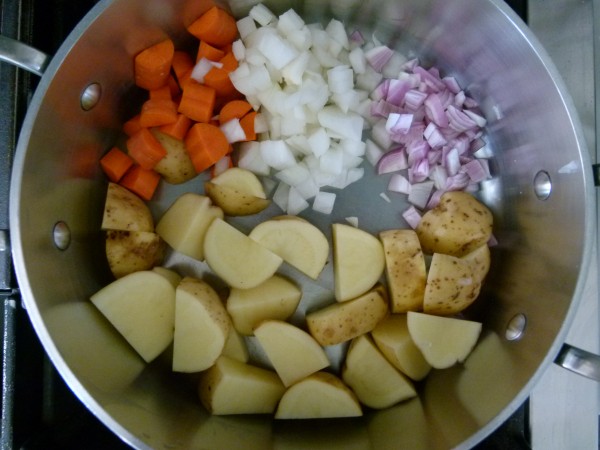
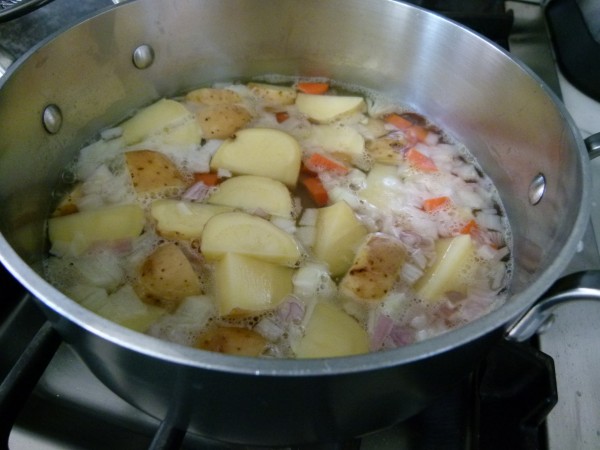
potatoes, carrots, shallot, onion cook the veggies in water, but cover them everything into the blender"cheese sauce"

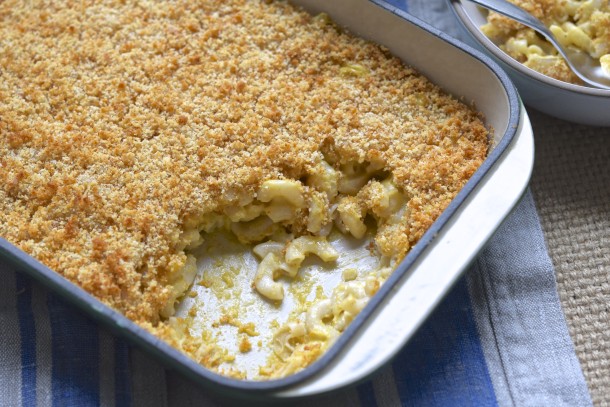
Although open minded or not, I’ve always felt if I’m not going to like the real deal, why would I like something pretending to be the real deal?  And most vegan mac and cheese recipes call for fake processed cheese or nutritional yeast and they’re just not that tasty, in my opinion.  Are you with me?  Well, according to myself and according to Mr. Picky who still doesn’t like cheese except Pecorino Romano in some soups and on pizza crust, this mac and cheese is the bomb.  I think it’s better than mac and cheese and he likes it because he has watched me make it and is confident there is not a morsel of cheese, real or fake, anywhere in this dish.

bread crumbs


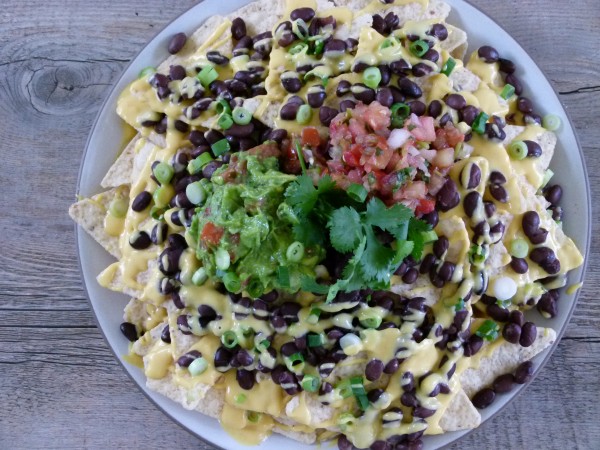
You may have seen on a month ago a picture I posted of “vegan nachos” I made for the kids.  Here it is below.  That’s the same sauce for this!  You may have also seen a strange looking bowl of yellow stuff on my baked potato bar.  Same vegan cheese sauce!  Do you see the potential here?  What about as a dip for steamed veggies?  I might even make a soup out of this.  We are not just talking about a mac and cheese recipe.  We are talking about a life-changing delicious not-cheese sauce.   This sauce is a miracle.  It is made from potatoes, cashews, carrots, onions and a bunch of other completely natural foods blended into creamy, cheesy deliciousness.  Completely digestible (unless you are nut-free, in which case I am so sorry.  Buggers.)  I know I sound crazy.  I wouldn’t believe me either.

vegan nachos | pamela salzman

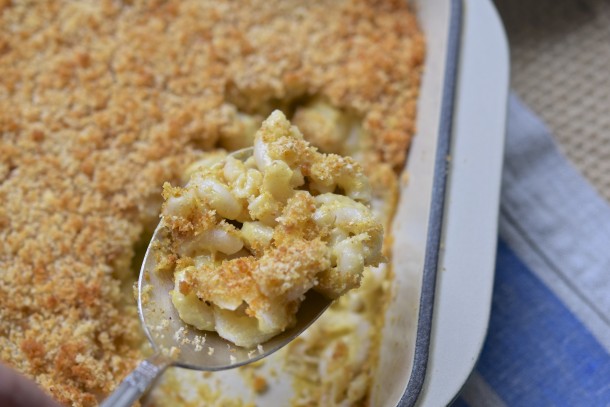
vegan mac & cheese|pamela salzman

vegan mac and cheese | pamela salzman

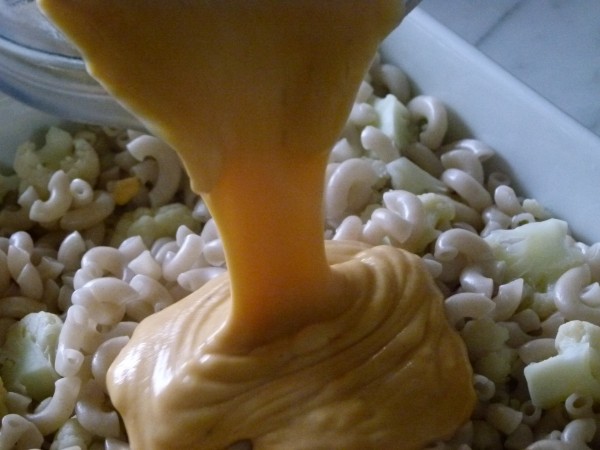
The only trick with this recipe is that you have to follow it exactly!  No eyeballing measurements.  No leaving things out.  Anytime I have guesstimated an amount with this recipe, it hasn’t worked quite as well, especially with ingredients like cayenne, lemon juice (you can leave this out, but just don’t add more than indicated) and garlic.  Some of the images on this post were taken of light spelt macaroni and some of whole spelt macaroni.  My family much prefers the light spelt pasta with this sauce, but you should use whatever suits you.  I have also tried this with brown rice pasta and a corn-quinoa pasta — both super!   Once I threw some small cauliflower florets into the pasta pot two minutes before the pasta was done and made a cauliflower mac and cheese.  (See above.)  I’m sure broccoli and kale would be great, too!  Can you see how much fun we are going to have with this??!!

vegan mac and cheese | pamela salzman

Vegan Mac & Cheese|Pamela Salzman


View this post on Instagram


A post shared by Pamela Salzman (@pamelasalzman)


Vegan Mac and Cheese

Pamela, adapted from VegNews
4.86 from 14 votes
Servings 6 as a side dish

Ingredients
  

  • 8 ounce package elbow macaroni pasta I like spelt.
  • 2 slices bread torn into large pieces (whole grain works!)
  • 6 Tablespoons unsalted butter not vegan or organic Earth Balance (vegan), divided
  • 1/4 teaspoon paprika
  • 2 Tablespoons chopped shallots
  • 1 cup about 7 ounces chopped Yukon gold potatoes (you can leave the peel on)
  • ¼ cup chopped carrots about 1 small carrot
  • 1/3 cup chopped onion
  • 1 cup water
  • ¼ cup raw cashews soaked for 1-5 hours and drained if you your blender is weak
  • 2 teaspoons sea salt use 1 ¾ teaspoons if using Earth Balance
  • ¼ teaspoon garlic minced (about 1 medium clove)
  • ¼ teaspoon Dijon mustard
  • 1 Tablespoon freshly squeezed lemon juice optional
  • ¼ teaspoon black pepper
  • pinch of cayenne pepper

Instructions
 

  • In a medium saucepan, add the shallots, potatoes, carrots, onion and water and bring to a boil. Lower to a simmer and cook, covered, for 15 minutes, or until vegetables are very soft. In the meantime, preheat the oven to 350 degrees.
  • Cook the pasta in salted water until al dente, drain and put back into the pot.
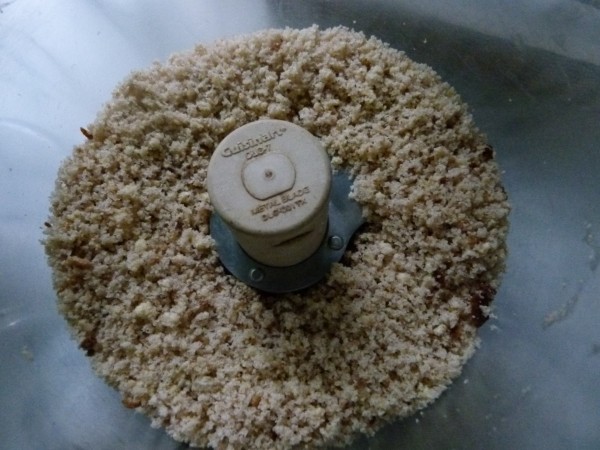
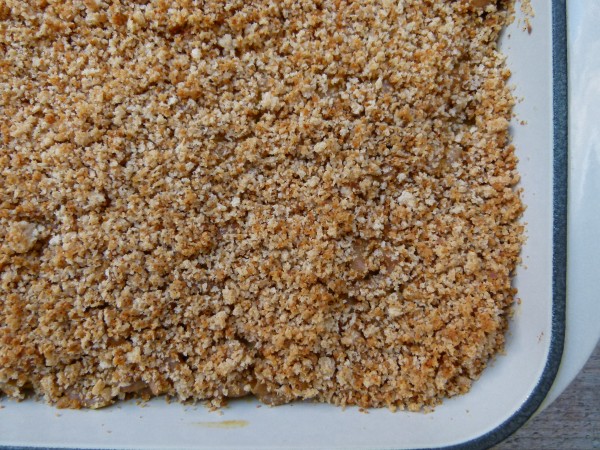
  • Put the bread pieces, 1 Tablespoon of butter and paprika in a food processor fitted with a metal blade and process until combined to a medium-fine texture, set aside.
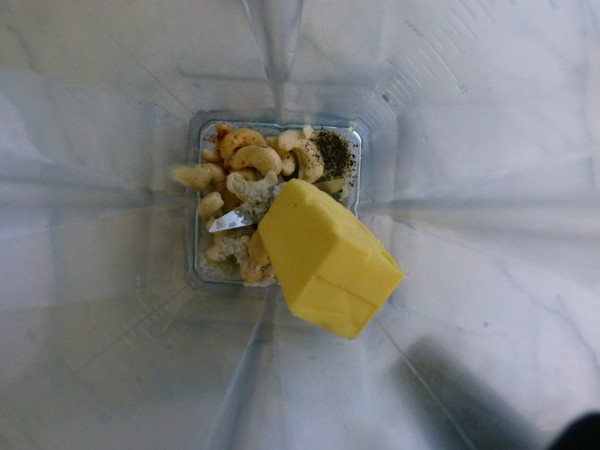
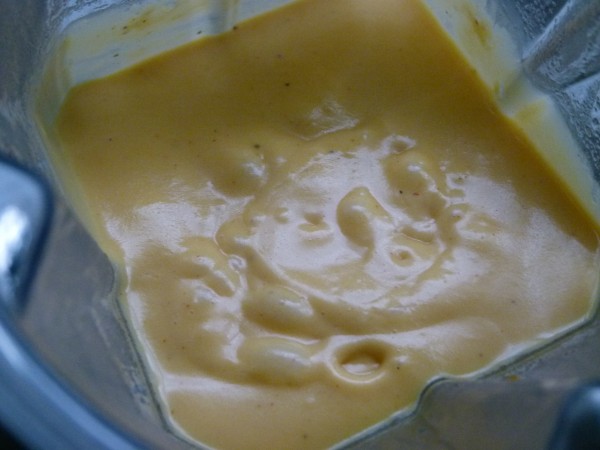
  • Place the cashews, salt, garlic, 5 Tablespoons butter, mustard, lemon juice, black pepper, and cayenne in a blender or food processor. Add the softened vegetables and cooking water to the blender or food processor and process until perfectly smooth.
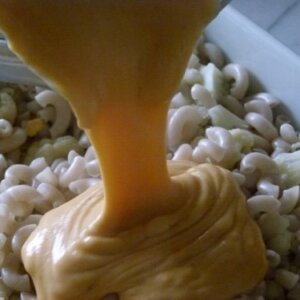
  • Pour the “cheese” sauce over the cooked pasta and combine until completely coated. Spread the mixture into an un-greased 11 x 8 casserole dish, sprinkle with prepared breadcrumb mixture. Bake for 30 minutes or until the sauce is bubbling and the top is golden brown. If you add veggies (such as 1 or 2 cups of blanched cauliflower or broccoli) to the macaroni, cook in a 13 x 9 dish.

Notes

I actually don't make the vegan version for us because we can eat butter.   But I have made this with Earth Balance (which is vegan) many times and it has always turned out great.  I have never made this without the bread crumbs, though.  I think they provide a nice contrast in texture to the soft and creamy macaroni, but if not everyone will eat the bread crumbs, I am sure you can leave a square of the baking dish free of them.
Tried this recipe?Let us know how it was!


Apple-Dipped Pancakes recipe

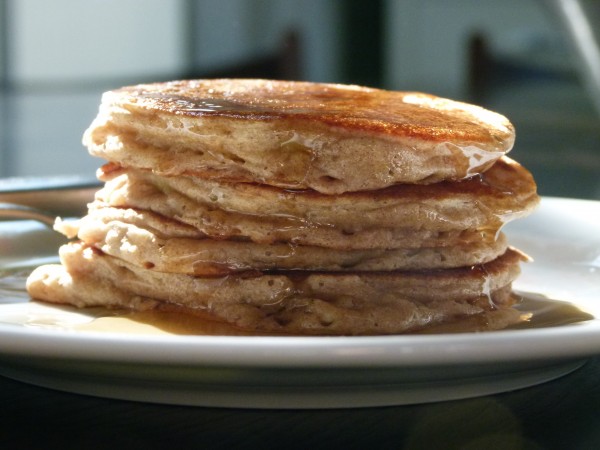
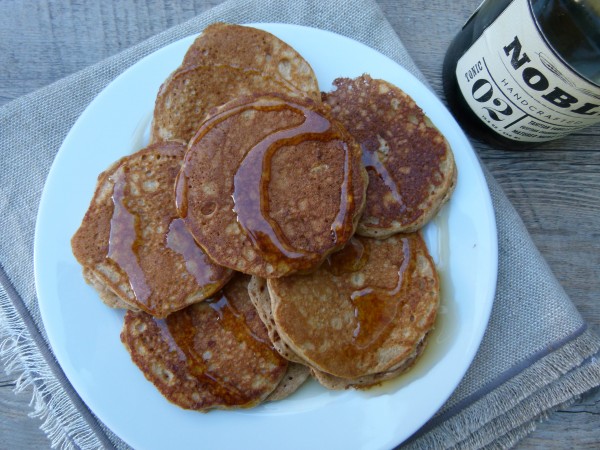
apple-dipped pancakes | pamela salzman

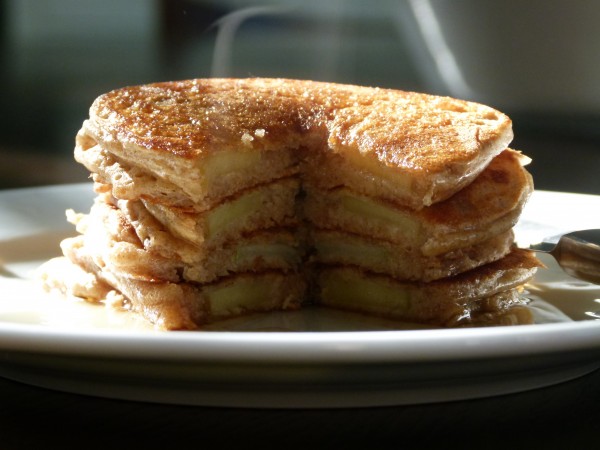
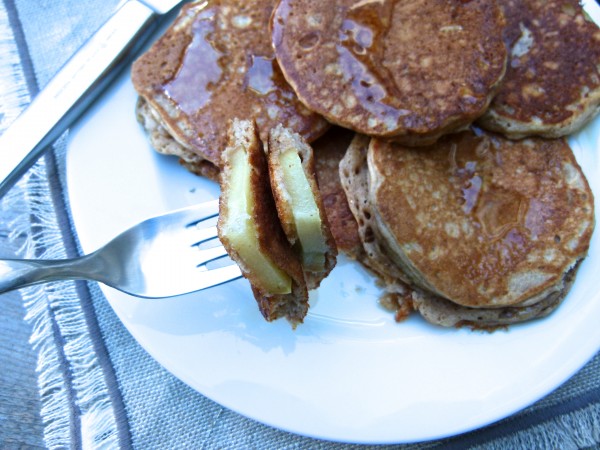
Huh???  What is an apple-dipped pancake?  I know.  It’s really the silliest name, but I didn’t want to call these beauties “apple pancakes” because that makes me think of something that these are not.  These are better than just dropping a few pieces of diced apple into pancake batter or using apple cider instead of milk. Not that there’s anything wrong with that.  These are literally slices of apple dipped in pancake batter and then cooked so there’s a tender apple slice nestled inside the pancake.  Beyond delicious!!!  The first time I made these, Mr. Picky asked, “Mom, I can’t figure out how you got the apple in there.”  And then he ate six.  And then I ate six.  And so did everyone else in the kitchen because they all woke up to the house smelling like apple cinnamon doughnuts.  Deep inhale.  Can you imagine that?  Heaven.

apples

dip the apple slices in pancake batter

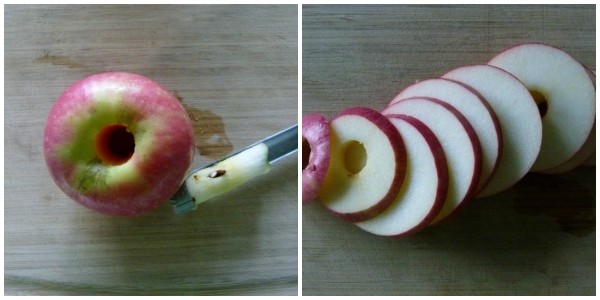
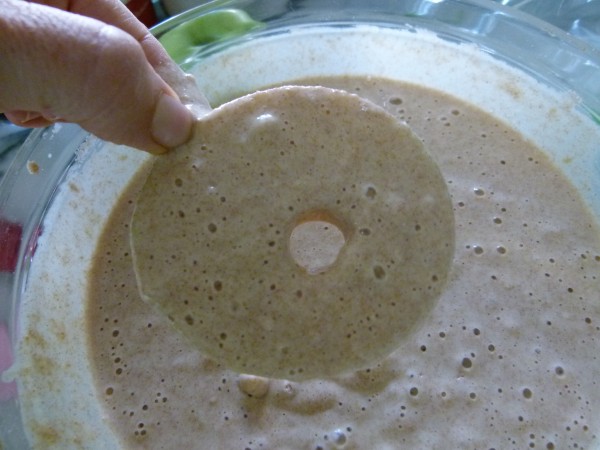
Here’s the deal — even though I am sharing a fantastic spelt pancake batter with you that is perfection with apple slices, you can dip apples into whatever pancake batter you like.  Just add a little cinnamon and nutmeg so you get that apple pie thing going on.  The only trick is to slice your apples just so.  Not too thick or they’ll stay crunchy in the middle.  But not too thin or you’ll have a hard time dipping them into the batter without breaking.  You can use a skewer or a toothpick  to dip them in and out, but I found my fingers to be perfectly fine for the task.

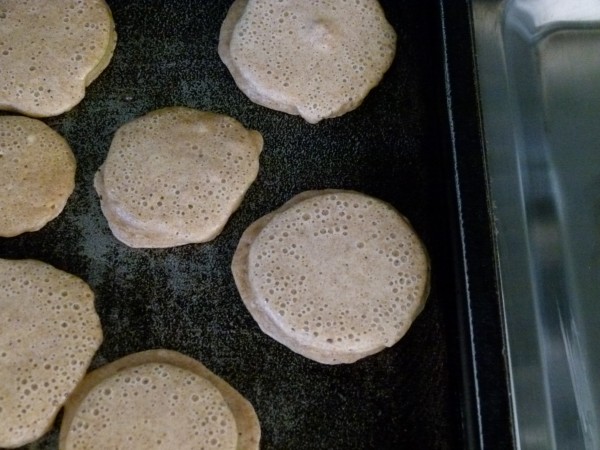
cook them until dry on the sides and bubbles on top


apple-dipped pancakes | pamela

My husband observed that these pancakes hold their heat longer because of the apples.  So you can make a whole bunch at once and have them ready for everyone for breakfast.  I know you may think these are impossible on a weekday, but if you start making your pancake batter the night before , these are a snap in the morning!

apple-dipped pancakes | pamela salzman


apple-dipped pancakes | pamela salzman

Apple-Dipped Pancakes

Pamela
Servings 4 -5

Ingredients
  

  • 2 large or 3 medium apples cored and sliced crosswise into ¼-inch slices
  • 1 2/3 cups whole spelt flour or 1 ¾ cups whole wheat pastry flour*
  • 1 teaspoon aluminum-free baking powder
  • 1 teaspoon baking soda
  • 1 teaspoon fine sea salt
  • ½ teaspoon ground cinnamon
  • pinch of ground nutmeg
  • 2 cups buttermilk or plain unsweetened kefir**
  • 2 large eggs
  • 1 teaspoon pure vanilla extract
  • 1 Tablespoon 100% pure maple syrup
  • 4 Tablespoons unsalted butter melted
  • Melted unrefined coconut oil for brushing the griddle

Instructions
 

  • Preheat a griddle to 400 degrees or medium heat.
  • Combine the flour, baking powder, baking soda, salt and cinnamon in a large mixing bowl.
  • In a medium bowl or 4-6 cup measuring cup, whisk together the buttermilk, eggs, vanilla, maple syrup and melted butter until well blended. (A blender can do this easily, too.)
  • Pour the wet mixture into the dry ingredients and stir until just combined.
  • Grease the griddle with a little coconut oil.
  • Dip the apple slices one at a time in the batter and turn to coat. I like to use a toothpick or a wooden skewer to do this.
  • Cook dipped apple slices like you would regular pancakes, flipping once the bottoms are golden and the edges are dry. Cook until the second side is golden brown and the pancake is cooked through.

Notes

*Gluten-free: substitute half buckwheat flour and half brown rice flour for the spelt flour. Or you can use GF oat flour, too, such as part oat flour, part buckwheat flour and part brown rice flour.
**No buttermilk? Sub half unsweetened yogurt and half whole milk. Or use milk or an alternative milk and add 2 Tablespoons apple cider vinegar or white vinegar.
Tried this recipe?Let us know how it was!

Indian basmati rice with peas recipe

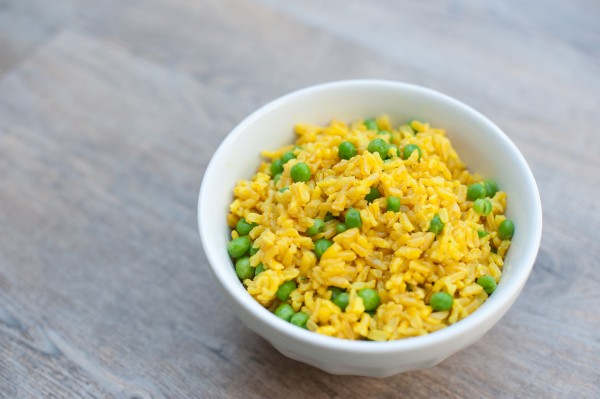
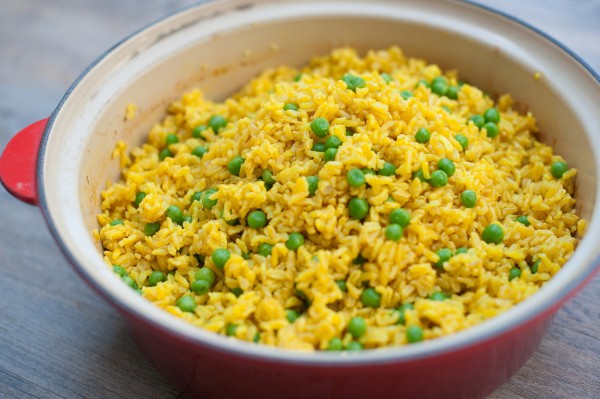
Indian basmati rice with peas | Pamela Salzman

I am 100% Italian and I absolutely love pasta, but I also looooooove rice.  Love!  I am crazy about all kinds of rice and it shows in my pantry.  I have so many varieties of both white and brown rice and I never get tired of it.  Overeating pasta doesn’t make me feel great and makes it very hard for me to maintain any semblance of an ideal weight.  But I digest rice really well and I think it’s so versatile and really easy to pair with food from any cuisine, even Italian!

I have made rice into pudding, baked it with eggs and vegetables for a scrumptious breakfast, wrapped seaweed around it, and topped it with beans and vegetables.  This week I made a delicious vegetable paella for dinner which I know I am going teach in a class one day.  Total winner!

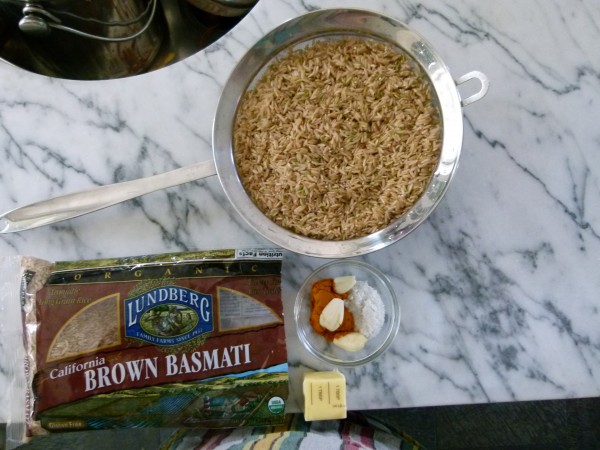
rice, turmeric, butter, salt, garlic

I know rice has gotten some bad media attention in the last year due to some scary reports about unsafe levels of arsenic found in many rice products.  Please read this article I wrote last year so that you are informed and don’t get freaked out.  There are ways you can significantly reduce any arsenic present in whole rice (not much you can do about arsenic in rice cakes or rice cereal, which is why I have reduced the kids’ exposure to rice-derived products.)  Basmati rice, which I think has the best flavor and is my favorite variety, also seems to have the least amount of arsenic.  Lucky me!

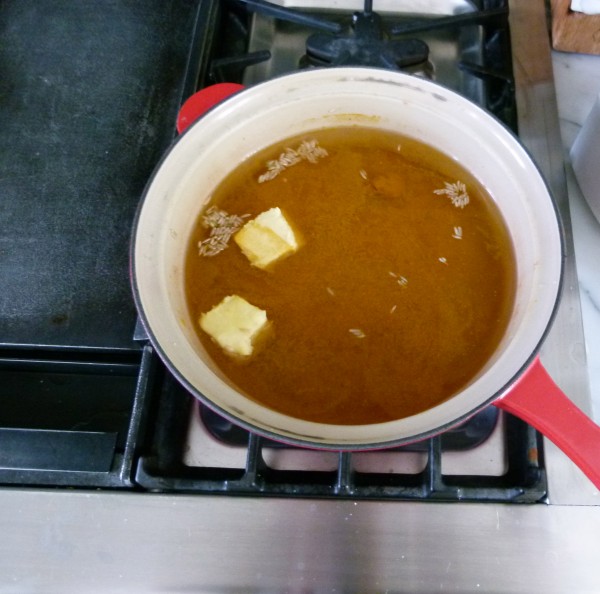
all in the pot

I have a beautiful and very healthful rice recipe I’d like to share and I don’t want you to get scared off by the unusual color or that I labeled it “Indian.”  I know there are some of you out there who think you don’t like Indian food.  And maybe you tried some from a not-so-great place and it was lousy.  In that case, I don’t blame you.  BUT.  Let’s leave the past behind and look forward to something that IS delicious.  Furthermore, this rice recipe is so basic and neutral.  It’s not spicy nor doesn’t it have a flavor that is outside of most people’s comfort zone.  It will go with that roast chicken you’re making later or my spice-rubbed salmon.  And if you’re vegetarian, you can just eat this bowl of golden goodness with a green salad or some roasted vegetables (eggplant is nice right now) and you’ll be all set.   Rice and peas together will give you plenty of protein, not to worry.

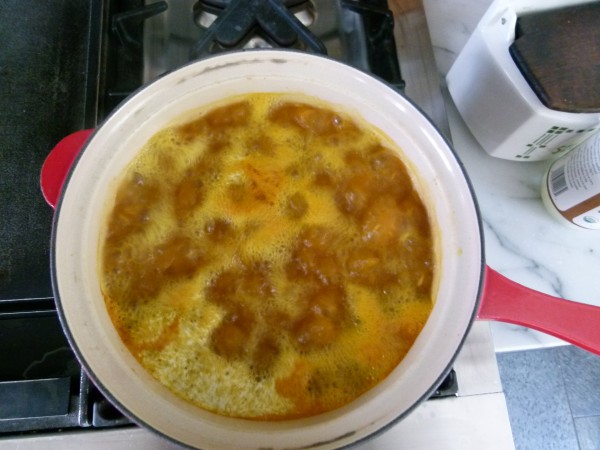
bring to a boil

The crazy beautiful color of this rice comes from turmeric, the most talked about, most popular spice of the moment that is basically anti everything you don’t want.  Anti-cancer, anti-inflammatory, anti-viral, etc.  Someone just told me that there was a study done on Indians (people living in India) because they have the lowest incidence of Alzheimer’s disease and it is attributed to their abundant intake of turmeric.  I try to use fresh turmeric when I juice and I have been using it in place of saffron, as well (like in that vegetable paella I was talking about.)   I have also included turmeric in my DIY taco seasoning and Chicken and Vegetable Curry.  Just be forewarned, it stains like mad so use extra caution when serving anything with turmeric, even be careful of your countertops.  (As a last resort, I have had success using a drop of Clorox Clean-up to get out a stubborn turmeric stain in my white marble countertops.)

If you have leftovers of this rice, definitely consider using it in lunchboxes the next day.  Are we surviving making lunches??  See this post if you’re still at a loss.  Back to rice — make this!  Try something new!  Let me know how it goes!

Indian basmati rice with peas | Pamela Salzman

Indian Basmati Rice with Peas

Pamela
4.82 from 11 votes
Servings 6

Ingredients
  

  • 1 ½ cups basmati rice either brown or white
  • 3 cups water
  • 2 Tablespoons unsalted butter coconut oil or olive oil (I think butter tastes best.)
  • 1 ½ teaspoons sea salt
  • 1 ½ teaspoons ground turmeric you can use more, but you’ll taste it
  • 2 cloves crushed garlic
  • ½ cup frozen peas
  • chopped cilantro to taste if desired

Instructions
 

  • Rinse your rice in a fine mesh sieve, if desired. Transfer rice to a medium saucepan and add all ingredients except peas and cilantro.
  • Bring to a boil, cover and lower to a simmer. Cook white rice for 18-20 minutes, brown rice for 45-50 minutes, or until all water has evaporated.
  • Add frozen peas to rice and allow to sit, covered, for 10 minutes.
  • Fluff rice with a fork and transfer to a serving bowl. Sprinkle with chopped cilantro, if desired.

Notes

If you are concerned about arsenic, you should soak your rice in water for 1-8 hours before using it.  That process also makes brown rice more digestible.  If you do soak the rice, you will cook it in less time and you can use a few Tablespoons less water, depending on how long you soaked it.  Test brown rice for doneness after 35 minutes, and white rice after 15 minutes.
Tried this recipe?Let us know how it was!

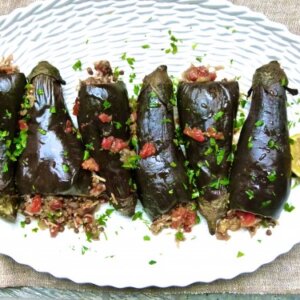
Lentil and rice-stuffed baby eggplants

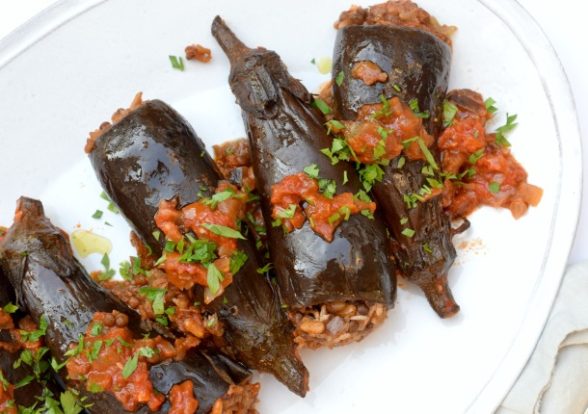
Lentil and Rice Stuffed Baby Eggplants | Pamela Salzman

Lentil and Rice Stuffed Baby Eggplants | Pamela Salzman

I had a dream the other night that I was swept away by a strong current of water and I was being pulled quickly down a stream.  My head was above water, barely, but I could not neither stop the raging rapids nor could I find a way out of the water.  And then I saw the sign, “Welcome to September.”   Seriously, this month has been a whirlwind, a blur.  My three kids started school (three different schools, mind you), I cooked and cooked for the Jewish holidays which came very early this year, I resumed teaching cooking classes four days a week, soccer season started and two of my kids have September birthdays.  I told Mr. Picky that his birthday party, as usual, would be in October.  Can I ask you people a question?  How do you do it all?  I am in awe!

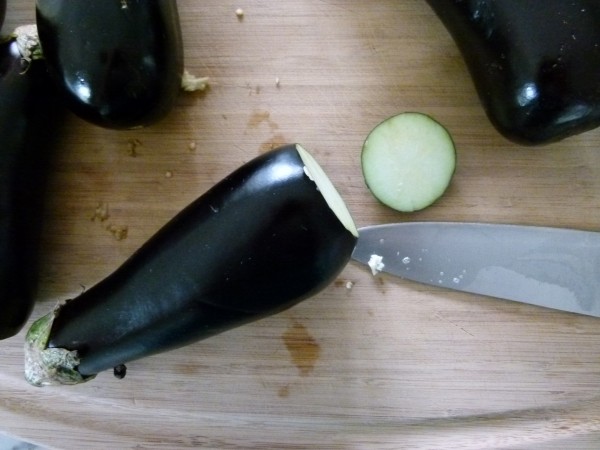
slice from the bottom of the eggplant leaving the stem intact


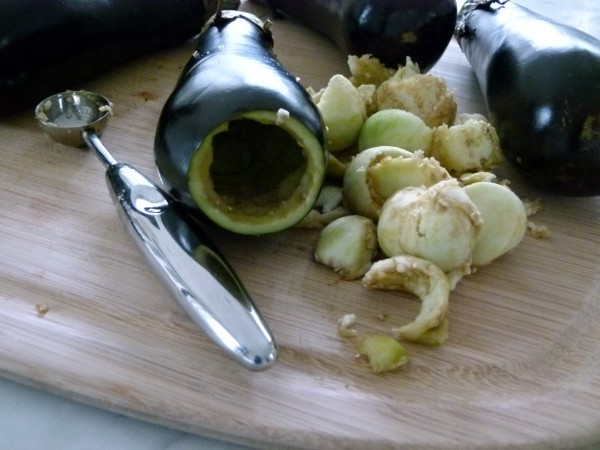
scoop out the flesh of the eggplant

Quite honestly, the only area of my life where I am organized is food.   I sit down every Sunday night and plan my meals and grocery list for the whole week.  If I didn’t do that, I can guarantee we’d be eating cereal and not-homemade almond milk for breakfast, lunch and dinner, or at least meals that could be prepared at the last minute.  And whereas there are a lot of fabulous quickies out there, I would hate to miss out on a recipe like this one here.

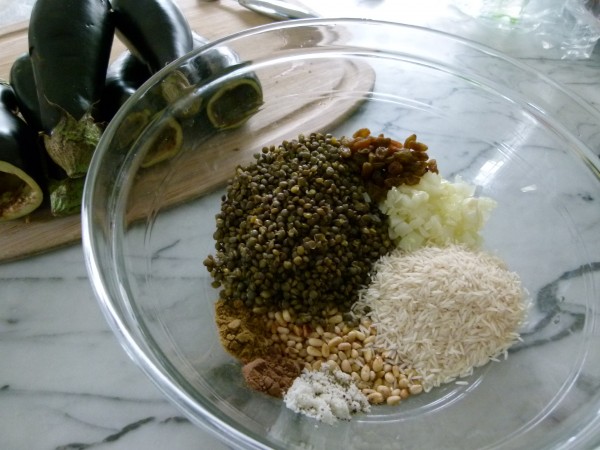
this is your stuffing mixture

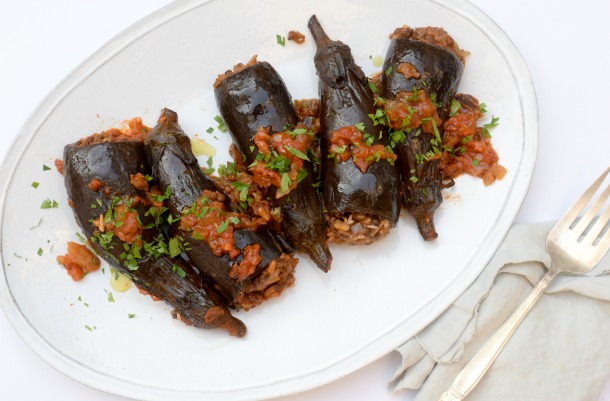
Lentil and rice-stuffed baby eggplant will never win an award for fastest dish in the West, but it’s also not that complicated either and it is mighty, mighty tasty.  In fact, it is one of my favorite vegetarian entrees.  I only make it in summer and early fall when I can find these adorable baby eggplants, sometimes referred to as Italian eggplants, Baby Bells or bambino eggplants.  So cute!  By the way, eggplants contain many heart-healthy nutrients including dietary fiber, folate, Vitamins B3 and B6, magnesium and potassium.  Eggplant is also rich in many phytonutrients and antioxidants which are important for reducing free radical formation and preventing cellular damage.  However, eggplant is a member of the nightshade family of vegetables which also includes tomatoes, potatoes and peppers.  Nightshades can aggravate nerve-related or inflammatory health conditions, such as arthritis.  Just good to know.

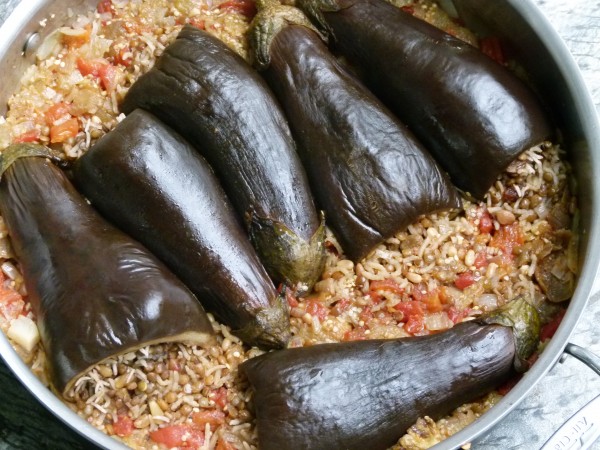
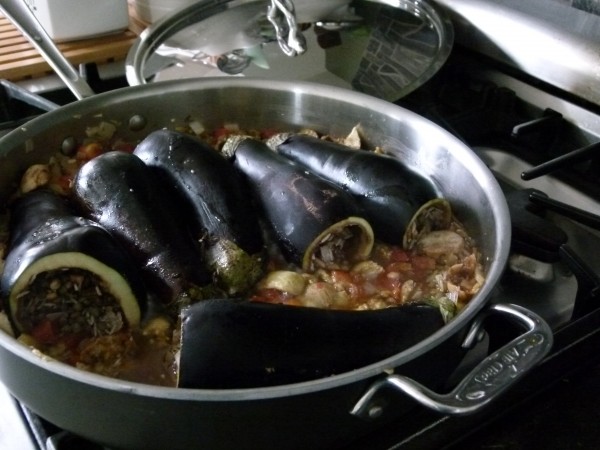
Finish cooking on the stove, covered

My family loves this dish, although Mr. Picky will only eat the rice and lentil mixture from the inside.  No problem.  The recipe that inspired this one was a meat and rice-stuffed eggplant, which is good, but I like this veggie version much more.  I almost always do this dish ahead or in stages, so at the end of the day all I have to do is put it back on the stove to simmer and cook through.  You can prep all the ingredients in advance and then sauté and cook everything later.  Or you can go so far as to stuff the eggplant and refrigerate everything in the pan until the end of the day.  Keep in mind this recipe calls for uncooked white rice because uncooked brown rice wouldn’t cook properly inside the eggplant.  If you wanted to use brown rice, you will have to precook it.  Use 1/2 cup raw or 1 1/2 cups cooked.  You can also use precooked lentils and this recipe is much quicker.

Lentil and Roce-Stuffed Baby Eggplants | Pamela Salzman

I have even eaten this eggplant the next day as a cold or room temperature leftover and it is delicious.  I hope you try this one!

Lentil and Rice Stuffed Baby Eggplants | Pamela Salzman

Lentil and Rice-Stuffed Baby Eggplants

Pamela, inspired by epicurious
Servings 6

Ingredients
  

  • ½ cup uncooked black or French lentils or 1 ½ cups COOKED
  • 6 6- to 7-inch long small Italian eggplants (about 7-8 ounces each)
  • ¼ cup unrefined cold pressed extra-virgin olive oil
  • 3 Tablespoons pine nuts
  • 1 large onion finely chopped
  • 3 garlic cloves finely chopped
  • 1 pound fresh tomatoes peeled, seeded and diced or boxed/canned with juice
  • 2 cups chicken stock or vegetable stock
  • 2 ¼ teaspoons sea salt divided
  • freshly ground black pepper to taste
  • ½ cup uncooked long-grain white rice I like basmati
  • 3 Tablespoons golden raisins
  • 1 teaspoon ground cumin
  • ¾ teaspoon ground allspice
  • a few tablespoons chopped flat-leaf parsley for garnish optional, but pretty
  • ½ lemon

Instructions
 

  • Bring a medium saucepan of water to a boil and add the uncooked lentils and a healthy pinch of salt. Simmer 20 minutes and drain. Skip this step if you use cooked lentils.
  • Slice a sliver off the bottom of each eggplant and discard. Using a melon baller, a mini ice cream scooper or a small metal measuring spoon, hollow out each eggplant while keeping the skin intact. Reserve scooped out eggplant flesh, if desired.
  • In a large 12-inch skillet, heat the oil over medium heat. Fry the pine nuts until golden, about 1 minute. Do not walk away from the pan! Transfer with a slotted spoon to a bowl.
  • Sauté onion and garlic in the skillet until tender, about 6-8 minutes. Transfer ½ cup of onion mixture to the bowl with the pine nuts. To the skillet add the tomatoes, a little of the reserved eggplant flesh if you want, stock, 1 teaspoon sea salt and freshly ground pepper to taste. Bring to a simmer while you stuff the eggplants.
  • Add cooked lentils, rice, raisins, cumin, allspice, 1 ¼ teaspoon salt and black pepper to taste to the bowl with the onions and pine nuts. Combine well. Stuff the mixture into the eggplants and transfer the stuffed eggplants to the skillet (along with any unstuffed filling). You don’t have to fill the eggplants to the top since the stuffing will expand a bit. Simmer, covered, carefully turning once (if you remember), until everything is cooked through, 50 – 60 minutes.
  • Squeeze lemon over everything and sprinkle with parsley.

Notes

You can substitute ¾ lb. ground beef or lamb for the lentils. If using grass-fed beef, add a few tablespoons of olive oil to the meat mixture, otherwise it will be too dry.
You can also use this mixture to stuff halved bell peppers.
Tried this recipe?Let us know how it was!


Mastering School Lunches

How to Master School Lunches | Pamela Salzman

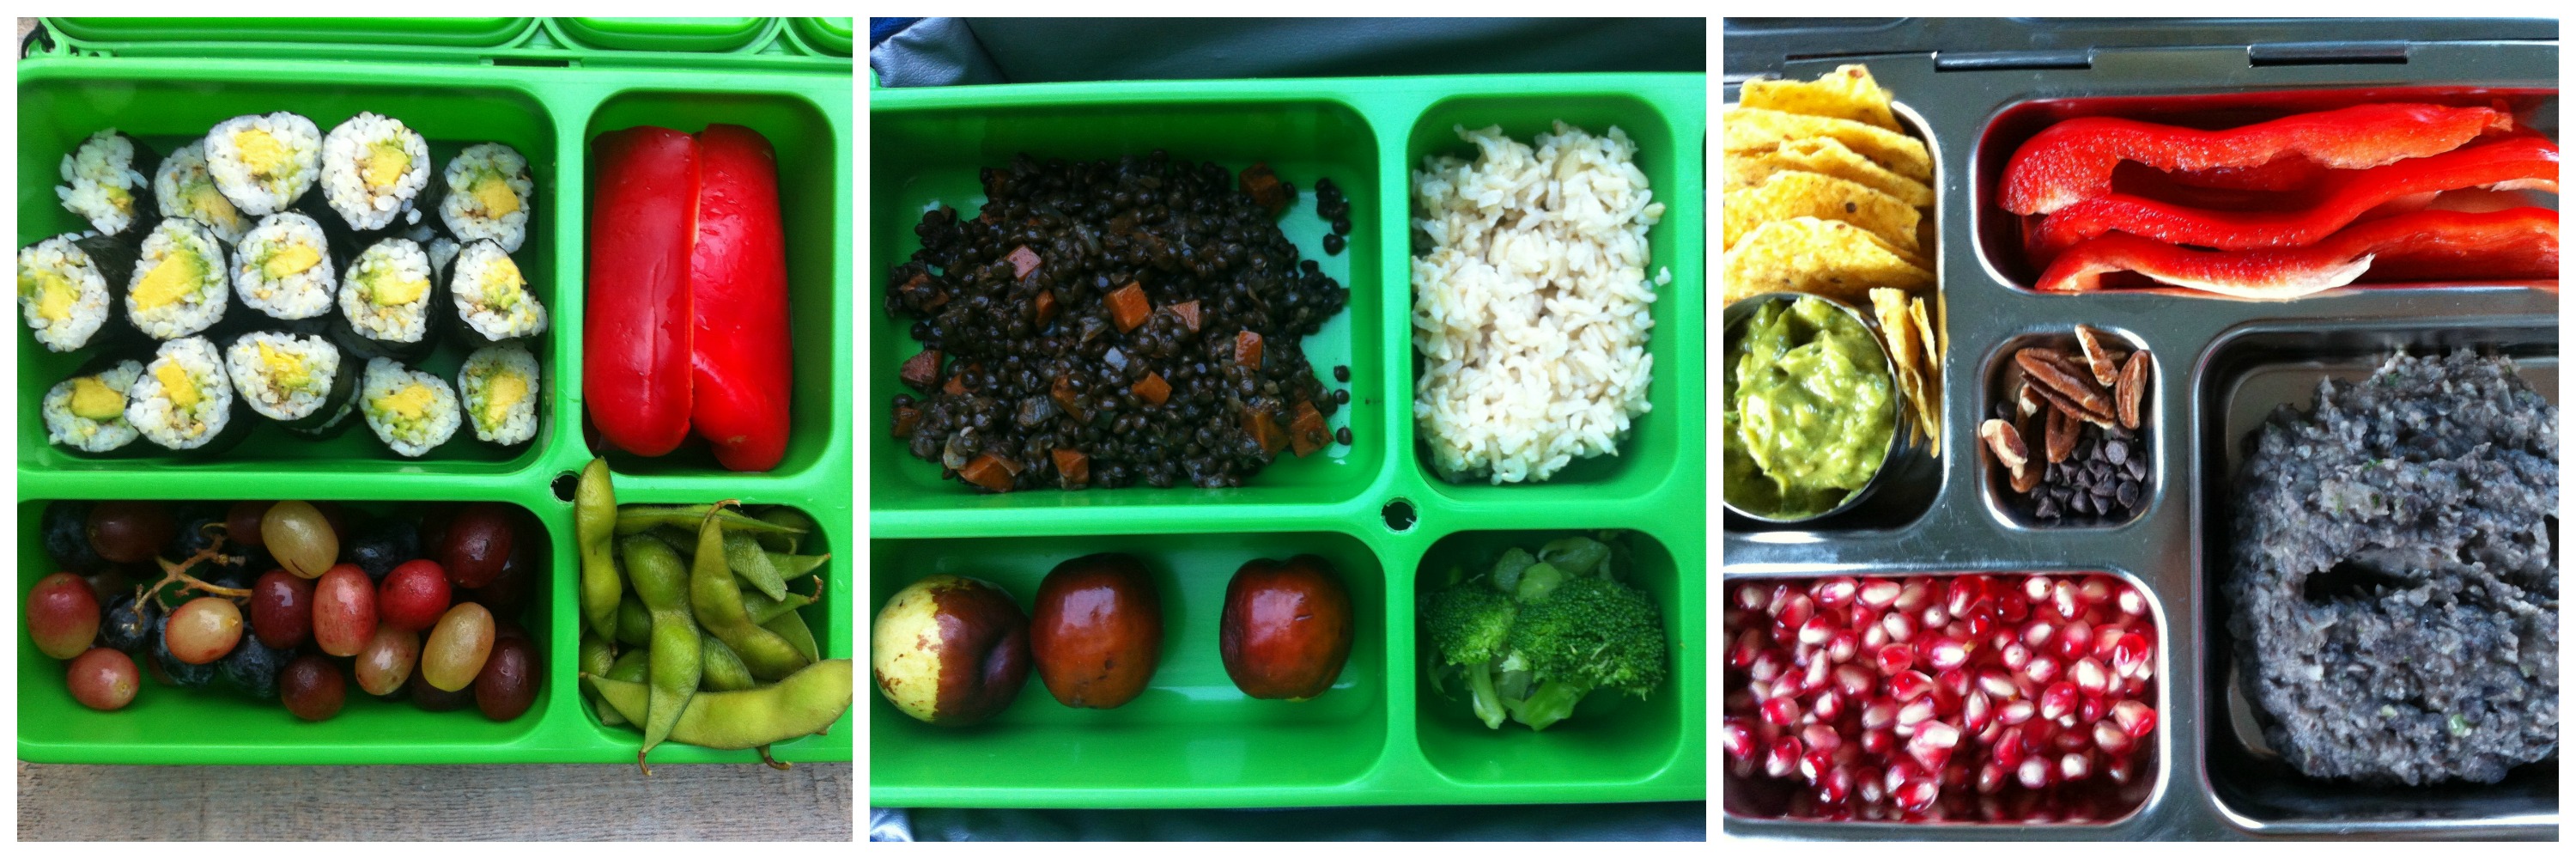
My kids do not like to buy lunch at school, even if I wanted them to.  The options aren’t that great, but they also complain about long lines and then not having enough time to eat.  That definitely doesn’t fly with Mr. Picky who is very anxious to play ball as soon as possible after eating.  So with my children’s participation, I make lunch every day.
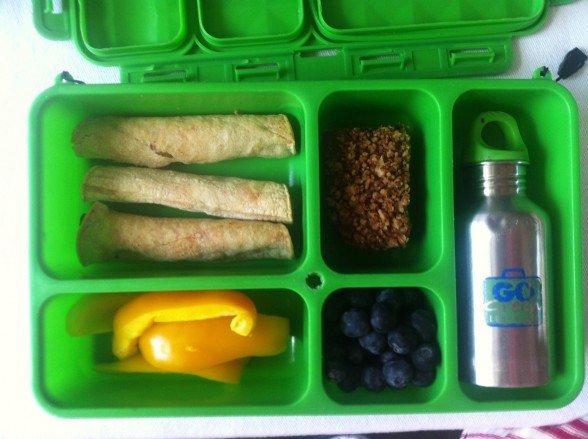
taquitos, yellow peppers, oat bar, blueberries

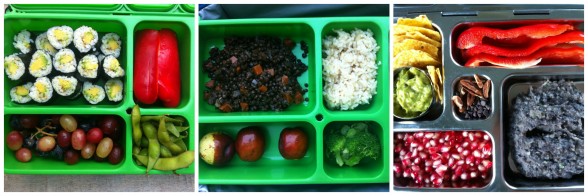
When I give lectures to parenting groups, lunchbox food is always a hot topic.  Believe me, I too feel pressure to make a well-balanced lunch that my kids will eat.  After all, lunch is different from breakfast and dinner when I am sitting next to them, making sure they eat their protein and encouraging them to “just take one bite” of something new.  Kids need to be well fueled to get through the school day and lunch is a big part of that.  For about the last year, I have been posting my kids’ school lunches once a week on Facebook and more recently on Instagram.  I don’t think I’m the most original lunch-maker out there, but since my cooking class students and readers often ask me for new lunch ideas, I thought it easiest to show you in a post just how we get it done around here.  Obviously, my kids have different likes and dislikes from yours, so there are many, many more options out there than what I am showing you!
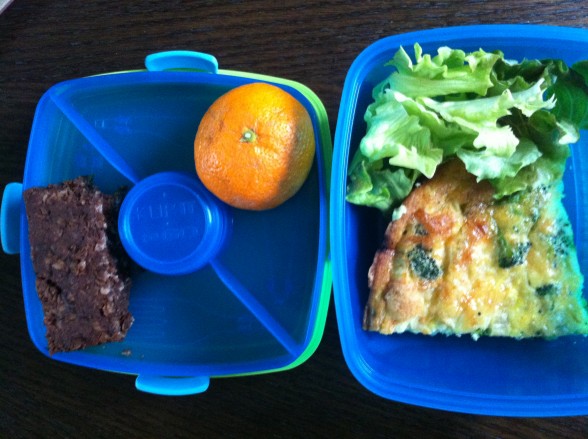
vegetable frittata, salad, chocolate oat bar, tangerine

Here are my tips for stress-free lunch-making:

Plan the night before.  This doesn’t mean you have to make lunch the night before, although you can, but at least you’ll have a plan and you don’t have to spend a minute figuring it out in the morning when time is limited.  Coming up with lunch the night before also helps me sleep better.  It sounds crazy, but I have had restless nights while my brain ruminated lunch options for the next day.  It’s not too early to think about lunch options at dinnertime either.  Leftovers are my favorite source for a good lunch!
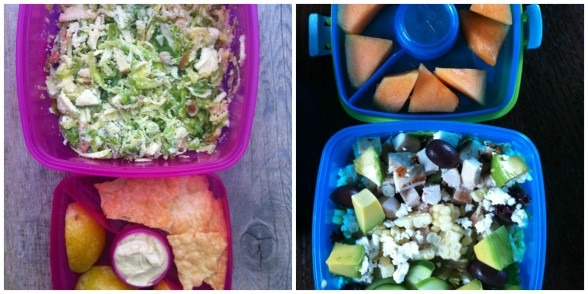
salads, fruit, hummus

Ask your kids for their input.  I asked Mr. Picky to make me a list of his favorite lunch foods so that I would have it handy.  But the way I really get my kids’ input is getting them in the kitchen with me (the night before) to help me figure it out.  This helps me know that they’re actually going to eat whatever is in there.

Go for a balanced meal.  I look to include protein, complex carbs (those that contain fiber and/or protein), a vegetable and a fruit.  Protein digests more slowly and helps us feel full for longer.  It also helps fuel the brain and keeps our moods stable.  Protein can be animal protein such as turkey, chicken or fish, eggs, quinoa, cheese or yogurt, edamame, beans, peas or lentils, peas, nuts or seeds.  Protein can also include baked goods made from almond flour.  Complex carbs are whole grains like brown rice or barley, or pasta, bread or tortillas made from whole grains, beans or lentils.  A lunch consisting of a bagel with jelly, an apple, some pretzels and carrot sticks is lacking in protein.  This lunch could be made more balanced with the addition of some protein like a hard-boiled egg, hummus, a yogurt or some cheese, for example.  My kids don’t expect a sweet treat, but sometimes I add one, and sometimes I don’t.
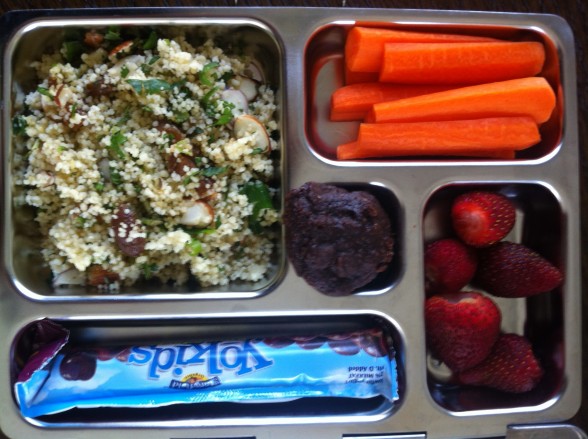
couscous, carrots, strawberries, yogurt, cookie

Stock substantial basics in the pantry and the freezer so you always have something to fall back on.  Let’s say you didn’t make it to the market the way you thought you would and there aren’t any leftovers from dinner to work with.  Being able to pull from your pantry or the freezer can be a lifesaver.  The items I need to have on hand for my kids are spelt or sprouted grain tortillas, shredded cheese, canned beans, different types of pasta, canned tuna, quinoa, nuts and seeds, and nut butters.  I try to keep the freezer stocked with corn and peas, edamame, homemade muffins and quick breads, pesto, meatballs, cooked brown rice.  I have a friend who freezes sandwiches for the entire week and I am considering freezing poached or grilled chicken for salads and sandwiches.
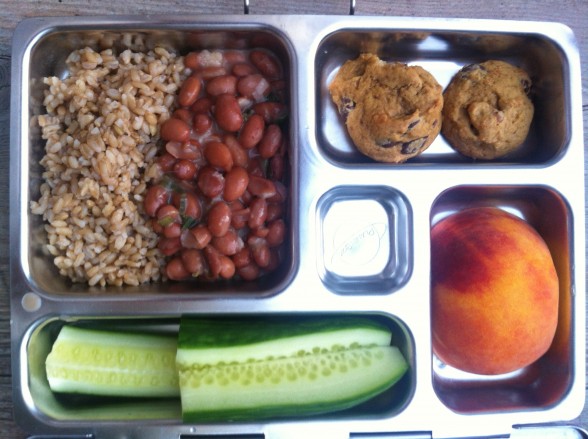
Brown rice, beans, cookies, peach, cucumbers

Make the most of leftovers from dinner.  This is where I look first.  My kids will take a thermos with soup, lentils, reheated stir-fry, or rice and beans, for example.  Leftover chicken or steak can be cut up to top a salad or tucked into a quesadilla.  Frittatas can be eaten at room temperature either plain or in a pita.  See below for more ideas.
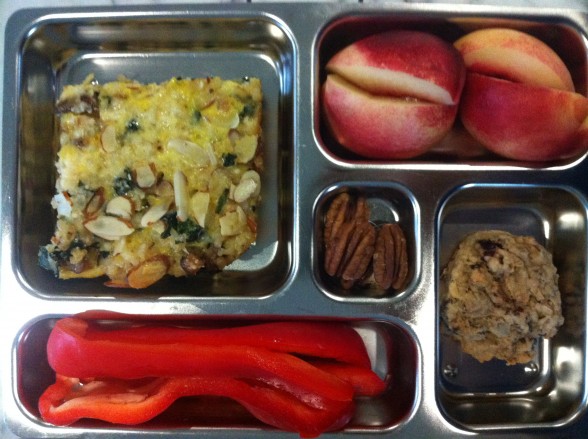
Brown rice and kale bake, nectarine, red peppers, pecans, cookie

Get the right equipment.  I am partial to stainless steel and BPA-free plastics.  I use thermoses from the camping section at Target or from Lunch Bots.  My son has two different lunch boxes, one from GoGreenLunchBoxes and another from Planet Box.  My daughters use stainless steel containers from Lunch Bots.  I also like the containers from Sistema.  My trick with keeping things warm in the thermos is to fill it with boiling water and allow the thermos to heat up for 10 minutes.  Empty the water and add your hot food.  It won’t stay hot, but warm is good enough for my kids.  I also give the kids reusable water bottles which if filled with ice and water can double as an ice pack.

Examples of our lunches: 

SANDWICHES and WRAPS:  grilled or poached chicken (sometimes with barbecue sauce or pesto instead of typical mustard), poached chicken turned into chicken salad, turkey, leftover steak, panini with leftover grilled or roasted vegetables and cheese or pesto, tuna salad, hummus and vegetables, nut butter (or sunflower butter for nut-free schools) w/all-fruit preserves or sliced bananas, frittata in a pita.  You can even use toasted waffles or plain pancakes as the “bread” for sandwiches.  If your kids don’t like bread or wraps, put everything in a big lettuce leaf.  You can even take the same ingredients you would put in a sandwich and skewer them on toothpicks.

poached chicken w/BBQ sauce & avocado, trail mix, tangerine

QUESADILLAS:  I make these the morning of and they’re warm when they go in the lunchbox so I don’t want to wrap them in plastic.  I use aluminum foil here.  Mr. Picky doesn’t like cheese, so he’ll take a plain tortilla with chicken or beans on the side.  My daughters like pizza quesadillas with or without spinach or leftover vegetables and/or pesto, black or pinto beans with cheese, any leftover chicken or steak can be added easily.

SALADS:  My daughters love salads for lunch and that makes my life very easy.  Wash your lettuce when you get home from the market and roll it up in damp kitchen towels until you need it.  I always have a jar of my Everyday Salad Dressing #2 which goes with everything!  I will make a salad out of anything:  any lettuce or spinach, cooked pasta, cooked beans (canned is fine), feta/pecorino/parmesan, leftover cooked chicken or steak, quinoa, leftover cooked vegetables, corn, winter squash, dried fruit, nuts/seeds.  I just make sure I get some protein in there.
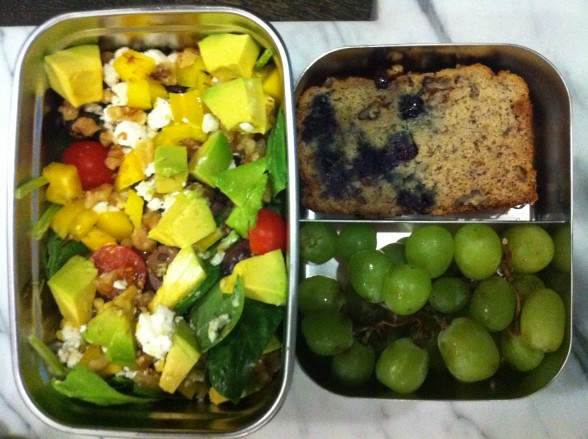
salad, banana bread, grapes

PASTA:  My kids will eat any kind of pasta with practically anything mixed in.  Again, I just make sure it’s a high fiber pasta like whole spelt or brown rice and I want to get some protein in there.  For example, even if it’s whole spelt penne and tomato sauce, I will add cooked white beans, pine nuts and/or parmesan cheese.  The girls will eat pasta with pesto, but Mr. Picky will not.  I have also mixed pasta with Everyday Salad Dressing #2, chickpeas and vegetables for a great pasta salad and my kids love Asian Noodle Salad with a peanut butter-based dressing and whatever vegetables you like. Both of these can be done the night before.
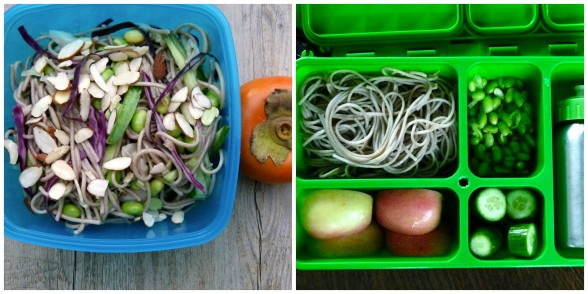
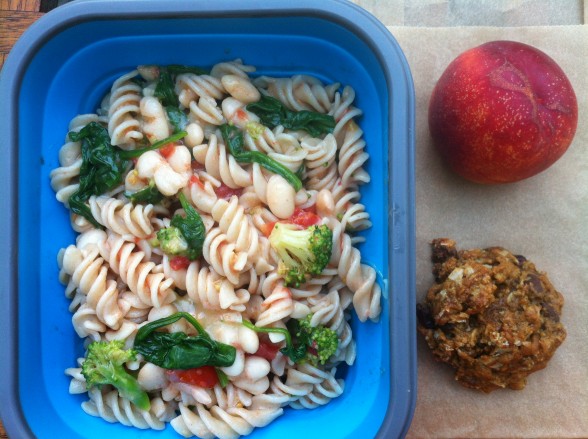
2 versions of lunch

pasta with white beans, tomatoes and spinach

SOUP:  I make a lot of soup during the fall and winter, usually once on the weekend and once during the week.  My kids’ favorites are lentil, white bean and potato, minestrone, tortilla with chicken, and chili.
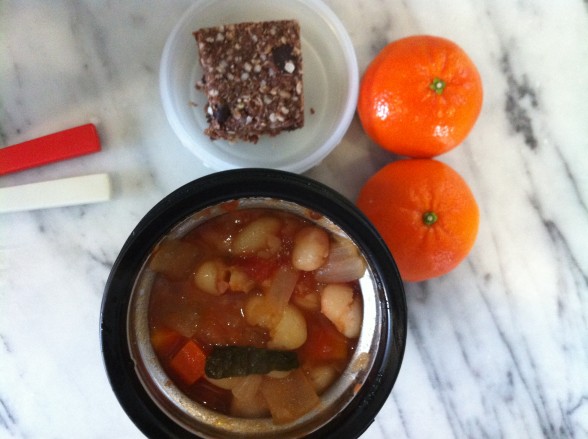
minestrone soup, granola bar, tangerines

YOGURT:  Plain, whole yogurt topped with granola or “faux granola,” i.e. nuts, seeds, dried fruit and coconut.  Or turn yogurt into a dip for vegetables.

FRUIT and VEGGIES:  I’ll pack whatever is in season, cooked or raw, whole or cut.
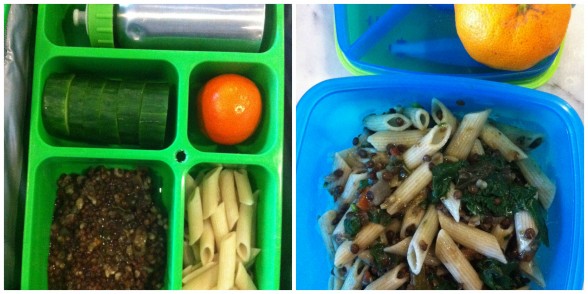
leftover lentils two ways


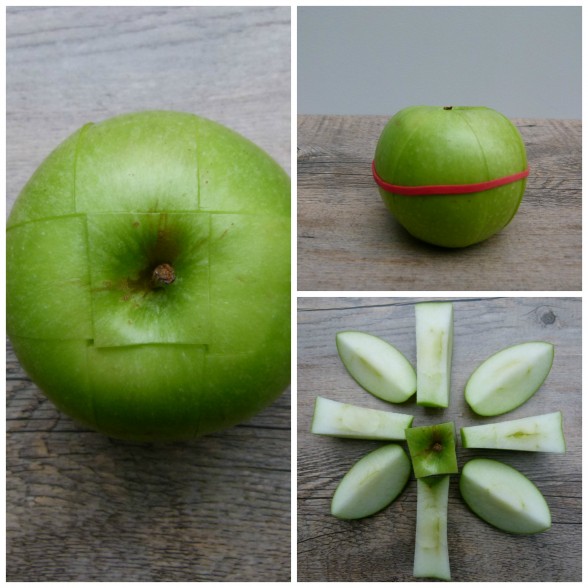
cut apple trick

Have you mastered making school lunches?  Please share your favorite tips and tricks!

Overnight Refrigerator Oat and Chia Porridge Recipe

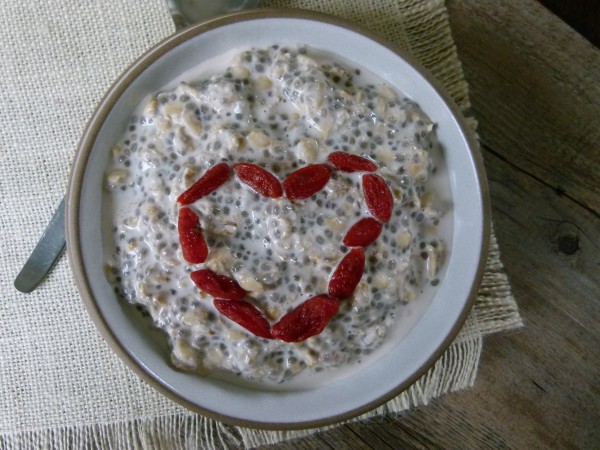
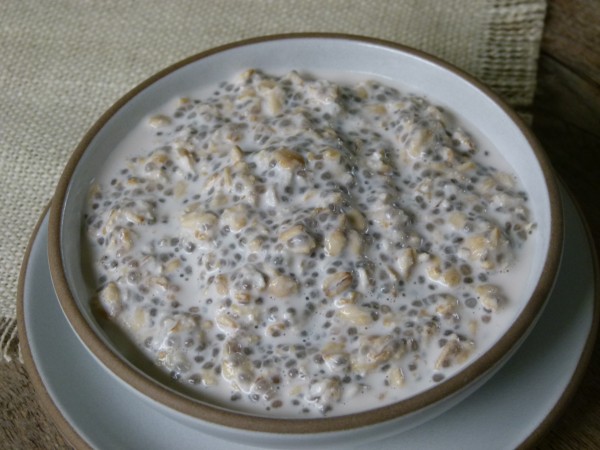
overnight refrigerator oat and chia porridge | pamela salzman

I know not all my dear readers and cooking class students have children, and therefore are not likely submerged chin-deep in back-to-school chaos right now.  You lucky ducks.  I have three kids in three different schools and I can’t keep track of all the back-to-school nights and picture days.  And it’s only September!  I’ve got my priorities straight though.  Mr. Picky hasn’t had a haircut in three months, but I’ve got a freezer full of blueberry-banana bread and vegan oatmeal chocolate chip cookie dough.  Yes, ma’am.

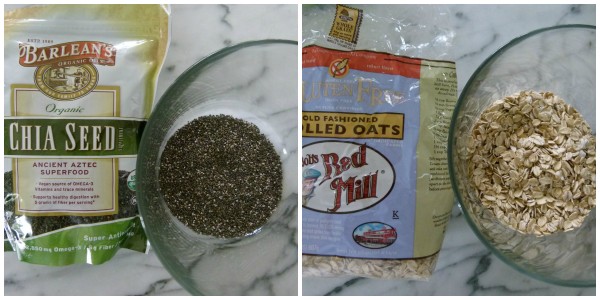
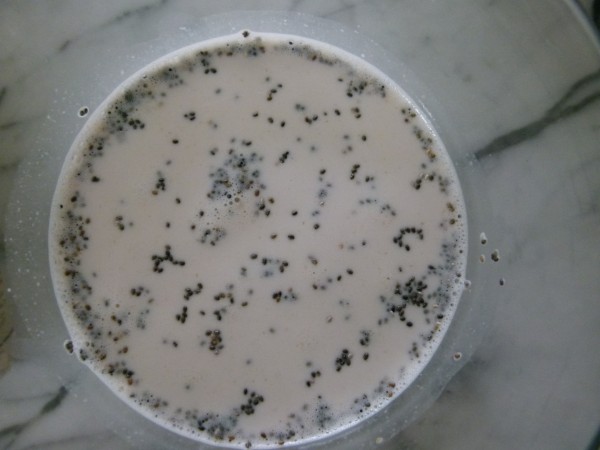
chia seeds, then rolled oats

The point I was actually trying to get to is that these most recent posts aren’t just meant for those whose Monday-Fridays are considered “school days.”  I’d like to think all the recipes I post are relevant to anyone trying to eat well.  And one thing we all have in common these days, whether you have kids or not, is lack of time.  Unfortunately, I don’t think little old me is going to change that.

what it looks like before refrigerating

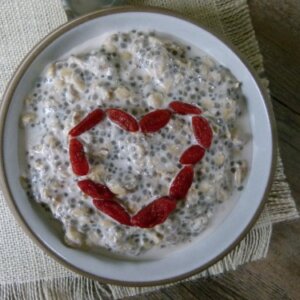
I used to think that it was silly for me to post recipes with 3 ingredients, that take 30 seconds to make, and that have probably been pinned more than a certain VMA performance has been viewed.  (Sorry for the reminder.)  But then my students plead with me, “we want more 30 second recipes!”  So if you haven’t been introduced to raw chia and oat porridge, and at least one person on instagram asked for the recipe last week when I posted a picture of my breakfast, here it is!  I probably eat this 3-4 times a week from July through October, because it is a refrigerated dish and slightly cooling so it’s better for you during the warmer months.  It is super healthful since the oats are soaked overnight, which makes them much more digestible.  On its own, this is a well-balanced breakfast with protein, fiber, complex carbs and high quality fat.  But we usually add either fresh or dried fruit to it.   And like I said, it is a cinch to make, almost disappointingly easy.  But this time of year, I’ve got nothing to prove.  Enjoy!
overnight refrigerator oat and chia porridge | pamela salzman

Overnight Refrigerator Oat and Chia Porridge

Pamela
4.50 from 2 votes

Ingredients
  

  • 2 Tablespoons chia seeds I like Barleans
  • 1 cup rolled oats look for certified gluten-free oats to make this a gluten-free recipe
  • 2 cups almond milk preferably homemade, or milk of choice
  • sweetener of choice to taste if desired

Instructions
 

  • Place chia seeds and oats in a 4-cup container. Pour almond milk and sweetener, if using, over mixture and stir to combine, making sure to break up any clumps of chia seeds.
  • Cover and refrigerate at least 6 hours or overnight so the mixture has time to thicken. Stir before serving.
  • This will last as long as your almond milk, meaning if you use homemade almond milk, this porridge will only stay fresh a few days.

Notes

I usually use date-sweetened almond milk and no other sweetener, or unsweetened almond milk and a couple drops of stevia.
Tried this recipe?Let us know how it was!

Almond Butter-Millet Blondies Recipe (gluten-free)

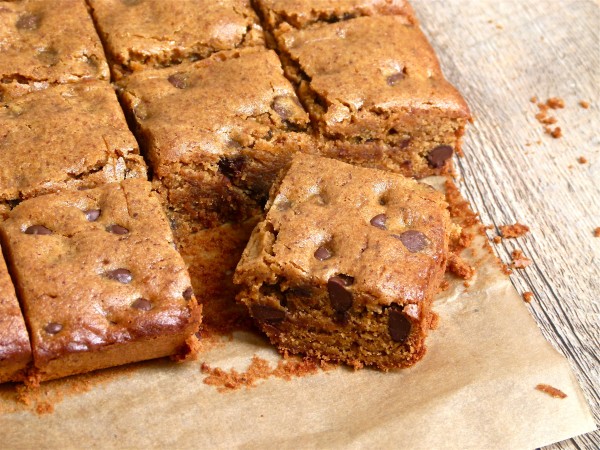
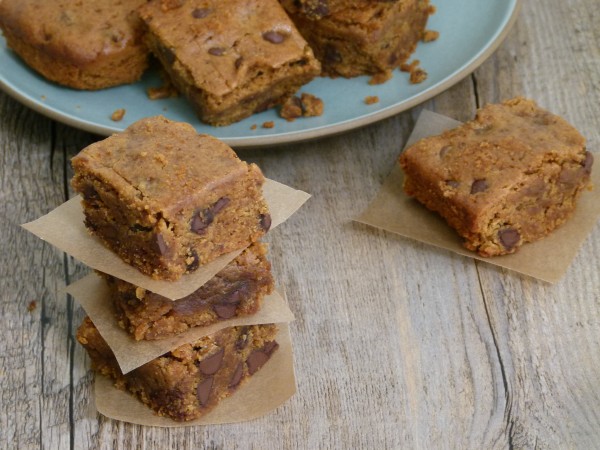
almond butter-millet blondies | pamela salzman

We have survived the first week and a half of school and an early Jewish holiday!  I started this year right by having my girls order their own school supplies and Mr. Picky helped me out by writing out a list of lunch box-approved foods.  Not sure we’ve expanded the repertoire since last year, but at least I don’t have to think too hard.  I am also so glad I was inspired to bake and freeze a few treats before school started this year.  Those are coming in very handy for lunchbox and after-school snacks.  Plus it has been so hot here, I can’t imagine turning on my oven to bake banana bread right now!

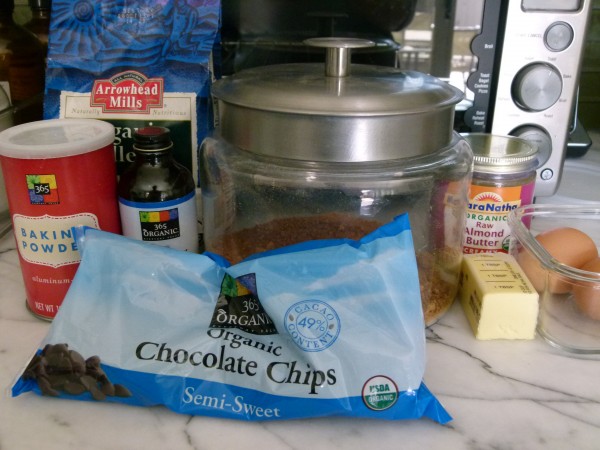
ingredients

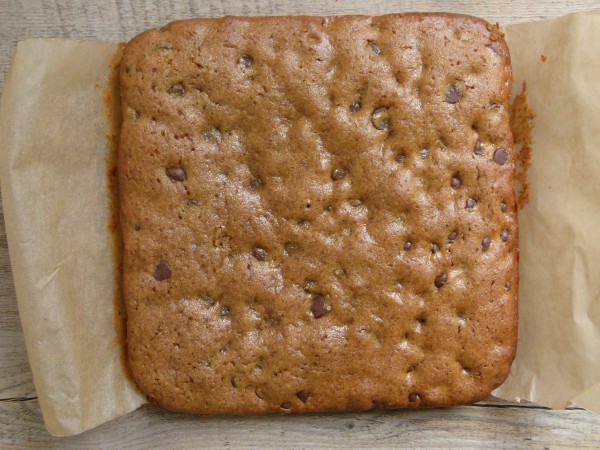
These Almond Butter-Millet Blondies are a new favorite around here.  Don’t automatically say “my kids would never eat those!”  Guess what?  Your kids were probably at my house in the last 6 months and did eat these.  Did I say, “Jimmy, would you like an almond butter-millet blondie?”  What am I, a rookie?  Of course, not.  I ask the kids, “would you like a chocolate chip blondie?!”  Only people that do not like chocolate ever say no.

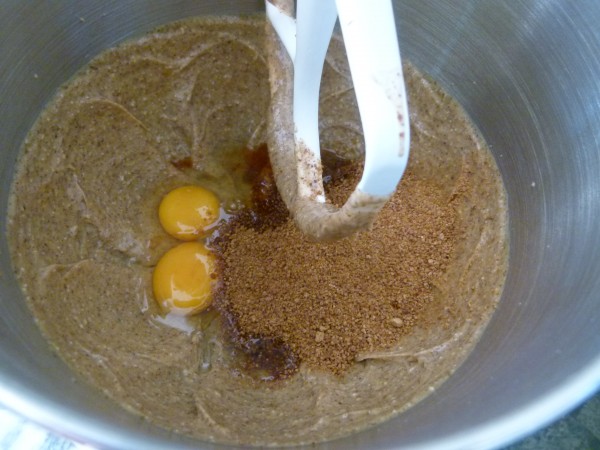
wet ingredients

Blondies are similar to a non-chocolate brownie.  They are less spongy and a little denser than cake.  I love them right out of the fridge so you can really sink your teeth into them.  Because blondies don’t have the same lift and airiness of a cake, I tried these with two gluten-free flours, millet and quinoa.  Even if you’re not gluten-intolerant, it’s a great idea to not overdo wheat and other gluten-containing grains.  Gluten is not only hard to digest, but acid-forming and pro-inflammatory.

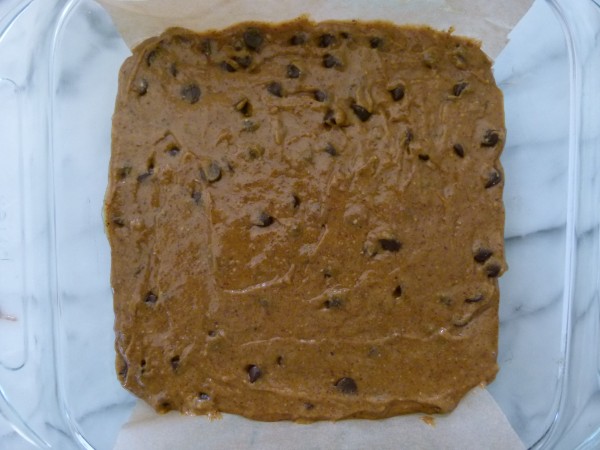
ready to be baked

The quinoa blondies were not a hit because they totally tasted like quinoa.  I love quinoa, but not as much in dessert form.  Millet is much blander and really has no flavor to fight with chocolate.  My kids and I had no idea the millet blondies weren’t made with wheat flour.   I also tried the recipe separately with peanut butter and almond butter and not only were they both delicious, the blondies kind of tasted the same, as in both tasted a bit like peanut butter.  Even though I give my kids peanut butter now and then, it’s actually not a fantastic choice.  The fats in peanut butter are very pro-inflammatory and if you don’t buy organic, you are also consuming a lot of pesticides and fungicides since peanuts are very heavily sprayed.  Even organic peanuts have a tendency to develop a mold called aflotoxin.  In moderation, fine, but almond butter is far and away a better, more healthful choice.  Did you know almonds are the only alkalizing nut?  And if you have a solid food processor, you can make your own almond butter!

almond butter - millet blondies

These blondies are awesome the next day, which is so nice if you have to bring a dessert to a potluck.  If you have leftovers more than a couple days, it’s best to keep them in the fridge.  And if you have no self control like me, you may want to just keep out what you need for the day and freeze the rest.  Happy baking!

almond butter-millet blondies | pamela salzman

Almond Butter-Millet Blondies

Pamela, inspired by Eating Well Magazine

Ingredients
  

  • ¼ cup 4 Tablespoons unsalted butter or organic Earth Balance, softened + additional for greasing pan
  • ¾ cup creamy or crunchy almond butter or other natural nut butter
  • 2 large eggs
  • ¾ cup coconut palm sugar or brown sugar
  • 1 teaspoon pure vanilla extract
  • ¾ cup millet flour*
  • 1 teaspoon aluminum-free baking powder
  • ¼ teaspoon sea salt
  • ¾ cup semisweet chocolate chips

Instructions
 

  • Preheat oven to 350 degrees. Grease an 8-inch square baking pan with butter and line the bottom with parchment paper so that the bars are easy to take out.
  • Beat butter and almond butter in a mixing bowl with an electric mixer until creamy. Beat in eggs, coconut sugar and vanilla until smooth.
  • In a small bowl, whisk together the millet flour, baking powder and salt. Mix the flour mixture into the wet ingredients until just combined. Stir in chocolate chips. Spread the batter evenly into the prepared pan.
  • Bake until a toothpick inserted into the center comes out with just a few moist crumbs on it, about 25 minutes. Let cool in the pan for at least 45 minutes before cutting into 16 squares. Leftovers can stored in the refrigerator for up to a week. These also freeze beautifully.

Notes

*Look for millet flour in the baking section or near gluten-free flours. Or, to make your own, grind whole grains of millet into a powder in a clean coffee grinder.
Tried this recipe?Let us know how it was!