Hen of the Woods Mushroom Toast Recipe
Hen of the Woods Mushroom Toast | Pamela Salzman

I don’t eat out that much, but one of my favorite restaurants in Los Angeles is Gjelina in Venice.  I would probably go there more often, but getting a table at a reasonable hour is impossible!  Before my first visit a few years ago, a friend strongly suggested I order the Mushroom Toast.  Let me just say that when I saw items on the menu like “Crispy Purple Peruvian Potatoes!” and “Moroccan Chickpea and Black Kale Stew!,” (I used the exclamation points, Gjelina did not) I wasn’t overly excited about “Mushroom Toast.”  But I trust my friend and ordered the mushroom toast and it was ONE OF THE BEST THINGS I HAVE EVER EATEN.  Delicate, earthy mushrooms in a light, creamy white wine-infused sauce, all poured over grilled bread and drizzled with truffle oil, the nooks and crannies of the toast catching every bit of mushroom juiciness.  It was so delicious, I actually had dreams about it that night.  True story!
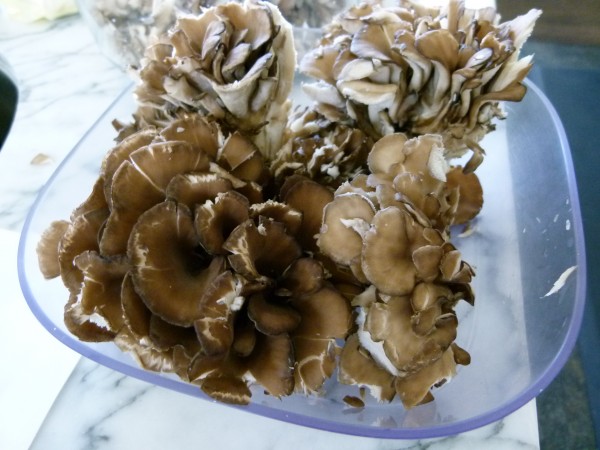
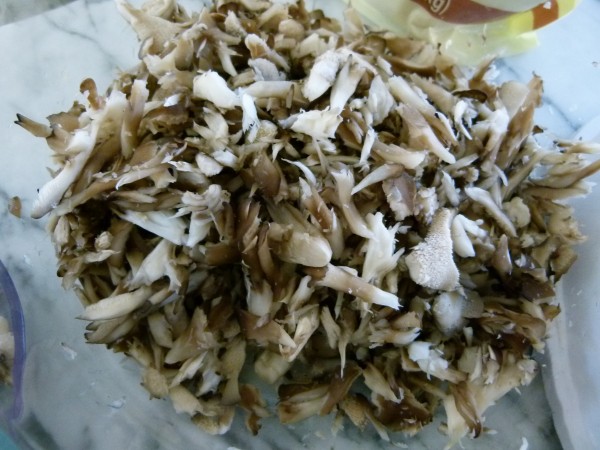
Hen of the Woods Mushrooms, aka Maitake mushrooms


chop the mushrooms of break apart with your hands

The problem is that Gjelina doesn’t share their recipes, at least not with little old me.  So after a game of 20 questions with my waiter, I had a game plan for attempting to recreate this dish at home.  The ingredients are ones I never would have thought to put together on my own: Hen of the Woods mushrooms (what??), creme fraiche and truffle oil.  Now I may not have gotten the recipe exactly right, and in fact I do believe my version is less rich and creamy, but I am so obsessed with the way this turned out, that I don’t care how different mine is.  First of all, even though I don’t eat too much bread, I think anything on grilled bread is DE-licious!  And grilled bread rubbed with garlic is SUPER DE-licious!
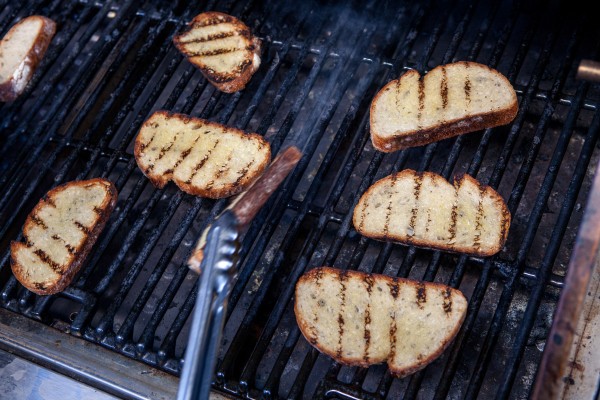
grilling bread

But mushrooms are the star of this show and Hen of the Woods mushrooms are so meaty and earthy with the most delicate texture.  They also go by the name “Maitake” mushrooms.  I found them easily at Whole Foods and I have seen them at several local farmers markets.  I will warn you, they are pricey, so if you can’t find them or you don’t want to spend the money, you can use oyster or chanterelle mushrooms.  You really can’t use button mushrooms or Portobellos in this recipe.  I tried them here, and they’re too firm.  You really need something light and delicate.  Japanese mushrooms, including Maitake, are really good for you and contain loads of immune-boosting compounds and have even been shown to have anti-cancer and anti-tumor compounds.  They also have less water than traditional mushrooms, so they actually have a more mushroom-y flavor.  Yum!
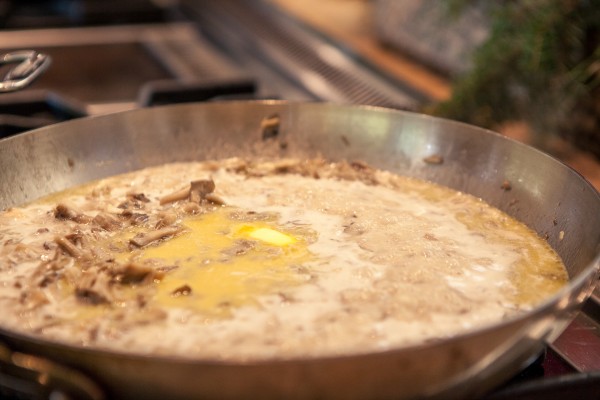
reduce to a thickened sauce

I really went for it and bought truffle oil at Sur La Table to finish off the dish the way they do at Gjelina.  Yes, this mushroom mixture is already rich enough with the creme fraiche and the butter and the olive oil, but good gracious, a drizzle of truffle oil takes this over the top.  Unfortunately, I couldn’t find truffle oil locally that was totally pure, without “truffle flavoring.”  But a quick search on amazon.com provided a few choices for all-natural truffle oils (like this one from JR Mushrooms & Specialties.)
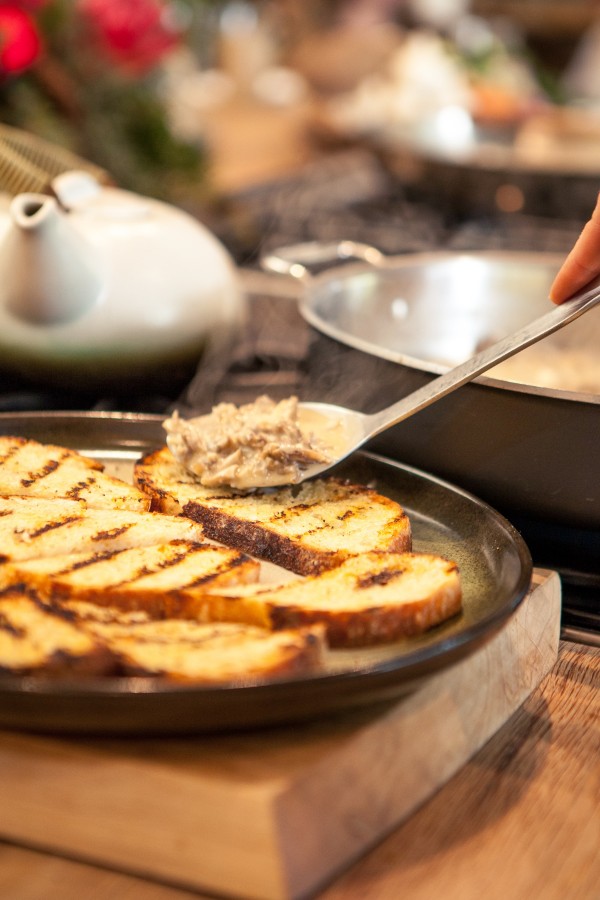
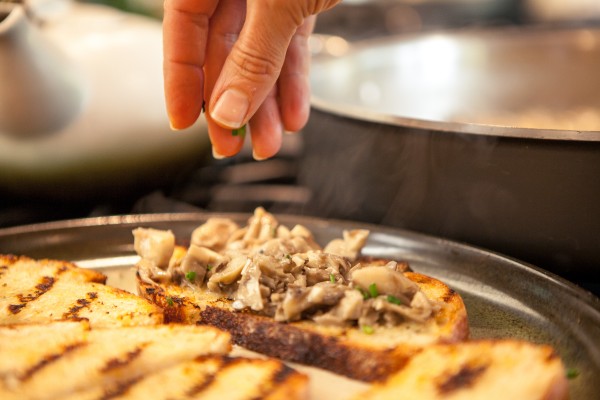
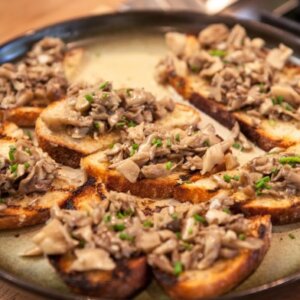
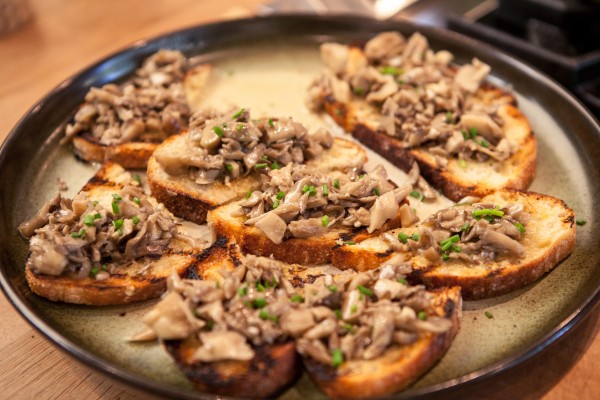
pour the the mushrooms with the sauce over the toasts

a little garnish makes these look prettier

I taught this recipe in my class this month and more than one person asked, “why is this so good?”  It’s really everything, and not just one thing.  The grilled bread, the garlic rubbed on the grilled bread, the meaty, delicate mushrooms, the tangy creme fraiche (which is really just French sour cream), and the truffle oil all make this something so special.  The way I made it in these pictures would be amazing as an appetizer on a plate with or without a fresh green salad.  Or you can opt for a smaller piece of toast and serve this as an hors d’oeuvre, although it can be a tad messy.  I think even for brunch with a fried egg on top would be amazing.  Hoping you try this and love it as much as I do!
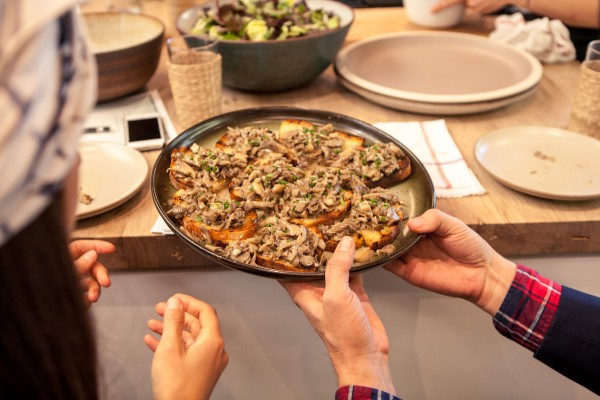
Hen of the Woods Mushroom Toasts

Hen of the Woods Mushroom Toast

Pamela, inspired by Gjelina Restaurant
5 from 1 vote

Ingredients
  

  • 3 large slices of crusty peasant bread about ½-inch thick
  • 2 Tablespoons extra-virgin olive oil + additional for brushing bread
  • 1 whole garlic clove + 2 cloves minced
  • 10 ounces Hen of the Woods mushrooms aka Maitake, chopped or broken apart with your hands
  • ½ teaspoon sea salt
  • ½ teaspoon fresh ground pepper or to taste
  • ¼ cup dry white wine
  • 1 cup chicken vegetable or mushroom stock
  • 6 Tablespoons crème fraiche
  • 2 Tablespoons unsalted butter
  • Truffle oil to drizzle
  • Chopped fresh chives for garnish optional

Instructions
 

  • Preheat a grill over medium heat.
  • Brush both sides of bread with olive oil.  Grill bread on both sides until toasted and slightly charred.  Thinly slice the end off of the whole garlic clove and rub one side of each piece of bread with the cut side of the garlic.  Cut the bread in half crosswise and arrange on a platter.
  • In a large sauté pan, warm the olive oil over medium heat.  Add garlic and sauté for 30 seconds or until fragrant.  Add mushrooms, salt and pepper and sauté until softened.
  • Add wine and cook until liquid is almost completely absorbed.
  • Stir in chicken stock and cook until reduced by half, about 10 minutes.  Whisk in crème fraiche and butter and cook until slightly thickened, but still saucy.
  • Spoon mushroom mixture with sauce over toasts.  Drizzle with truffle oil and a sprinkle of chopped fresh chives, if desired, and serve immediately.
Tried this recipe?Let us know how it was!

Gingerbread biscotti recipe (gluten-free version, too!)

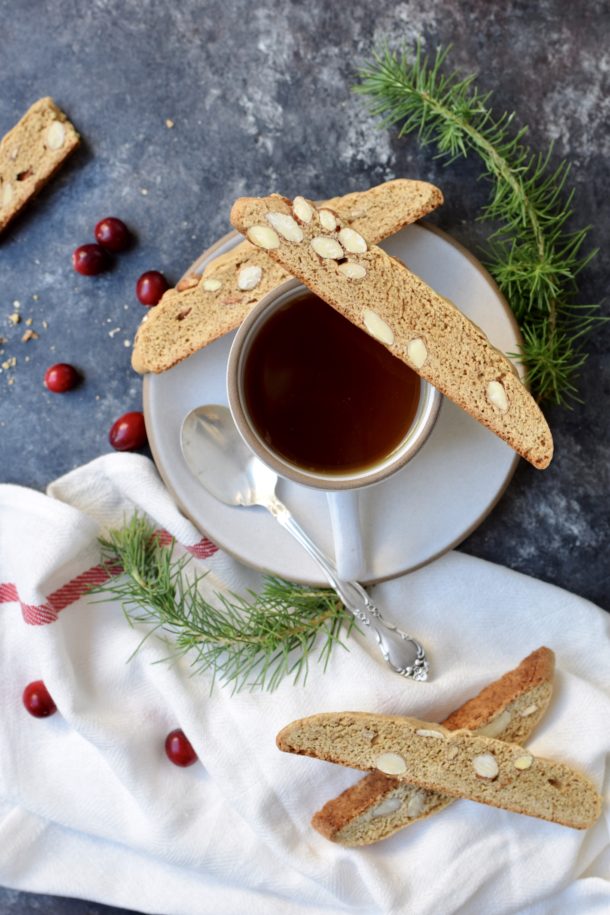
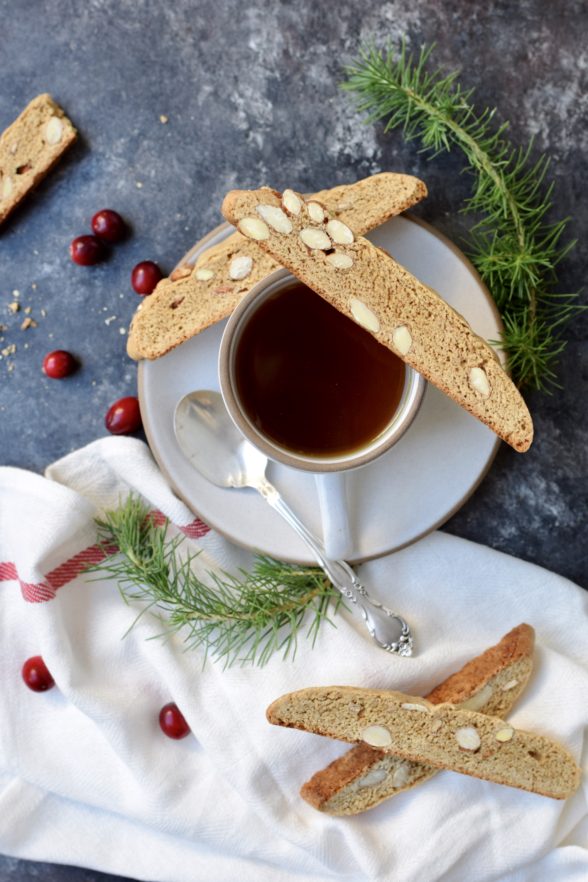
Gingerbread Biscotti | Pamela Salzman

Gingerbread Biscotti | Pamela Salzman

I have been offered A LOT of biscotti in my life.  When everyone you are related to is Italian, biscotti appear more often than Oreos.  They’re called “biscotti” because they literally translate to “twice baked.”  You bake them in logs first, then you slice up the logs and bake them again. They have this tell-tale shape you see here and they are a bit dry and crunchy and not overly sweet.  There are infinite flavor combinations ranging from lemon to almond to chocolate chip to raisin to you name it.  I remember my parents and all the other grown-ups dunking them in espresso or, if they were really feeling festive, dipping the cookies in a sweet Italian liqueur called Vin Santo.

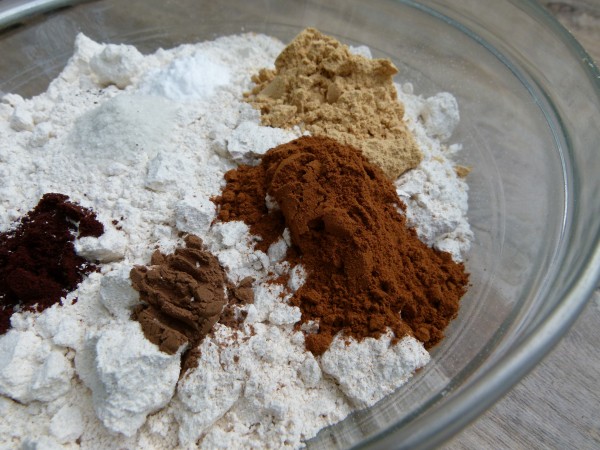
dry ingredients

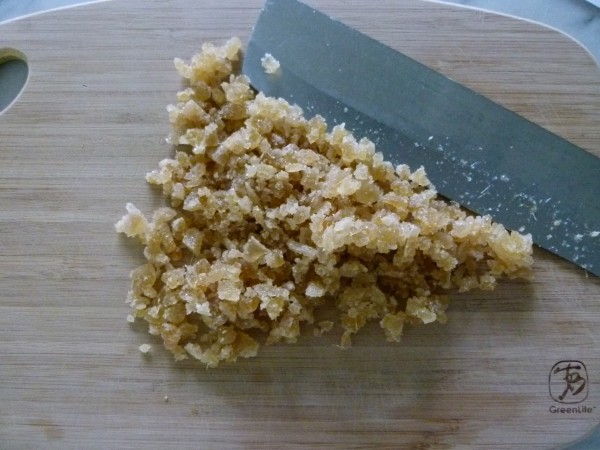
chopping crystallized ginger

Now that sounds dreamy to me for sure, but when I was a kid, all I wanted was a normal chocolate chip cookie for goodness sake!  Or one with M&M’s or some other junk.  I’m all grown-up now and I much prefer homemade cookies, especially ones that don’t contain M&M’s and lots of sugar.  Even though I try not to indulge in sweets very often, I do like to bake cookies for the holidays.  My favorite holiday “flavor” is gingerbread.  Every year in my December classes I teach some sort of gingerbread dessert, two of which have been posted on my site.  These gingerbread biscotti might very well be my favorite so far!  One of my complaints about the biscotti of my youth is that they were B-O-R-I-N-G.  What kid gets excited about orange zest in a cookie or fennel seed?  Yaaaaawwwwnnnn.  That’s not a dessert.  But gingerbread biscotti are something else.  These pack a spicy punch from both crystallized ginger and powered ginger and a double crunch from the whole almonds.  Even Mr. Picky loves these.  He just walked by the computer and said, “isn’t it about time we make those gingerbread biscotti again?”  I absolutely swear he just said that!

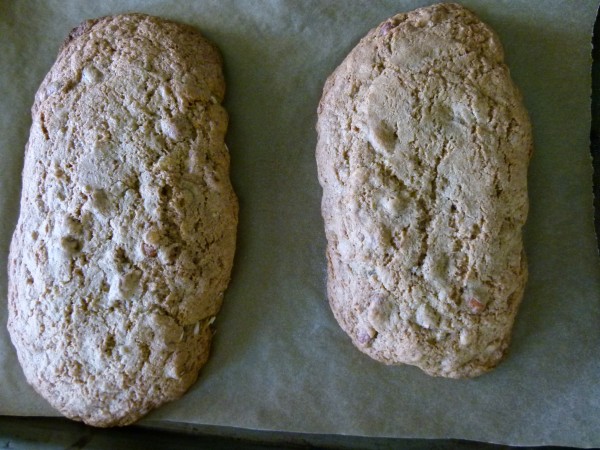
bake the logs first

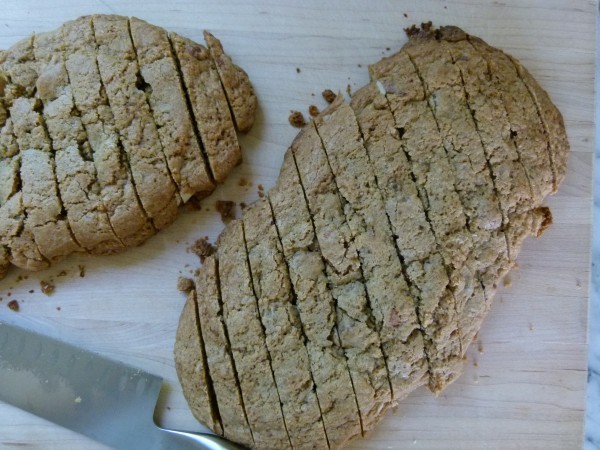
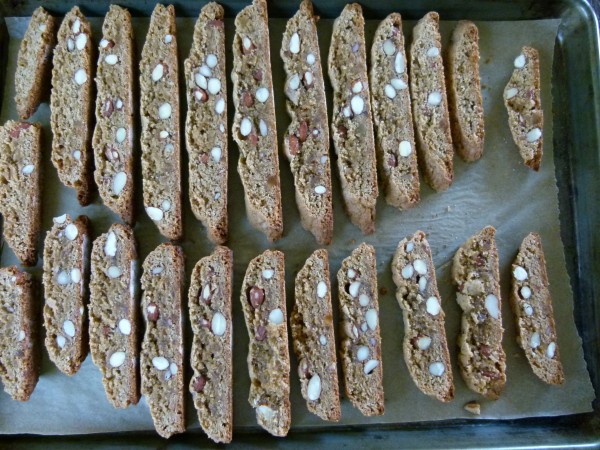
slice the baked logs

Biscotti are fantastic to make for the holidays because they last a good long time (a week or more?) without getting stale, so they’re perfect for gift-giving!  If you need to accommodate gluten-free, dairy-free or vegan folks, read through both recipes because there are options.  If you’re not sure how to do this, please leave me a comment below and I will help you out.  I’ll tell you the truth — I like the gluten-free biscotti better than the wheat flour ones.  I think they’re lighter and crispier, although both have that great gingerbread flavor.  I love the extra boost from crystallized ginger, but if you can’t find it, don’t worry about it.  And if you’re feeling extra naughty, you can go right ahead and dip these cuties in some melted white chocolate and let them harden before you store them or wrap them up.  Are you feeling the holiday spirit now??

gingerbread biscotti | pamela salzman

Gingerbread Biscotti

Pamela
5 from 1 vote

Ingredients
  

  • 3 Tablespoons coconut oil or room temperature unsalted butter
  • ½ cup cane sugar
  • ½ cup muscovado or firmly packed dark brown sugar
  • 2 large eggs or ½ cup unsweetened smooth applesauce
  • 2 cups whole wheat pastry or all-purpose flour
  • 1 teaspoon aluminum-free baking powder
  • 1 teaspoon ground cinnamon
  • 1 teaspoon ground ginger
  • ¼ teaspoon ground cloves
  • ¼ teaspoon sea salt
  • 1 cup whole raw almonds or chopped if desired
  • ½ cup crystallized ginger chopped (optional)

Instructions
 

  • Preheat oven to 375 degrees.  Beat coconut oil and sugars with an electric mixer at medium speed until light and creamy.  Beat in eggs, combine well.
  • Combine flour and next 5 ingredients; add to sugar mixture, beating at low speed until blended.  Stir in almonds and crystallized ginger.
  • Divide dough in half.  Using floured hands, shape each portion into a log 3-inches wide and 1-inch high.  Place on a parchment-lined cookie sheet.
  • Bake 25 minutes.  Cool 5 minutes on cookie sheet; remove to a wire rack, and set aside until cool to the touch.  Reduce oven temperature to 325 degrees.
  • Cut each log crosswise into ½-inch slices with a serrated knife. Place slices on the same parchment-lined cookie sheet.  If you want long cookies, cut on the diagonal.
  • Bake 7-8 minutes; turn cookies over, and bake 7-8 more minutes.  If you cut them thick, you will probably have to bake them a little longer.  Cool completely on wire racks.
Tried this recipe?Let us know how it was!

gluten-free gingerbread biscotti

makes about 24

8 Tablespoons (1 stick) unsalted butter, room temperature

½ cup cane sugar

½ cup muscovado or firmly packed dark brown sugar

2 large eggs or ½ cup unsweetened smooth applesauce

½ cup almond flour

¼ cup sorghum flour

¼ cup tapioca flour

¼ cup potato starch

¼ cup sweet rice flour

1 teaspoon xanthan gum

2 teaspoons aluminum-free baking powder

1 teaspoon ground cinnamon

1 teaspoon ground ginger

¼ teaspoon ground cloves

¼ teaspoon sea salt

1 cup whole raw almonds or chopped, if desired

½ cup crystallized ginger, chopped (optional)

  1. Preheat oven to 350 degrees.  Beat butter and sugars with an electric mixer at medium speed until light and creamy.  Beat in eggs, combine well.
  2. Sift all dry ingredients together and add to sugar mixture, beating at low speed until blended.  Stir in almonds and crystallized ginger.
  3. Dough will be very sticky so you can refrigerate it for 15-20 minutes and/or flour your hands while you split the dough into two logs, about 1 inch high and 2 inches wide.  Place on a parchment-lined baking sheet.
  4. Bake for 30-35 minutes until golden brown on the edges and just slightly soft in the middle.  Cool 5 minutes on cookie sheet and remove to a wire rack.  Set aside until cool to the touch, about 30 minutes.
  5. Cut each log crosswise into half-inch slices with a serrated knife.  Place slices on the same parchment-lined baking sheet.  Bake 15-20 minutes until golden.  Cool completely on wire racks.

Cranberry-orange almond flour muffin recipe

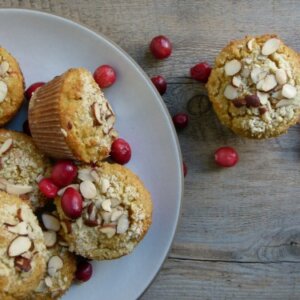
cranberry-orange almond flour muffins | pamela salzman

Even though Thanksgiving is passed, I am not letting go of cranberries just yet.  I’m not letting go of winter squashes, pears or apples either for that matter.  And I might just make some pumpkin pancakes tomorrow morning if I feel like it.  I am not yet tired of all those fall flavors, nevermind that winter is knocking at the door.

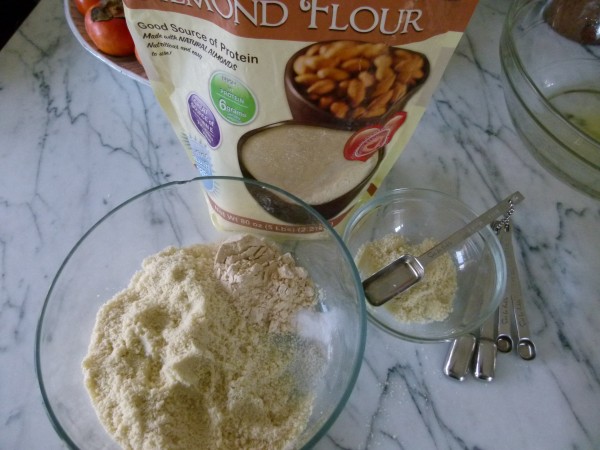
almond flour and coconut flour


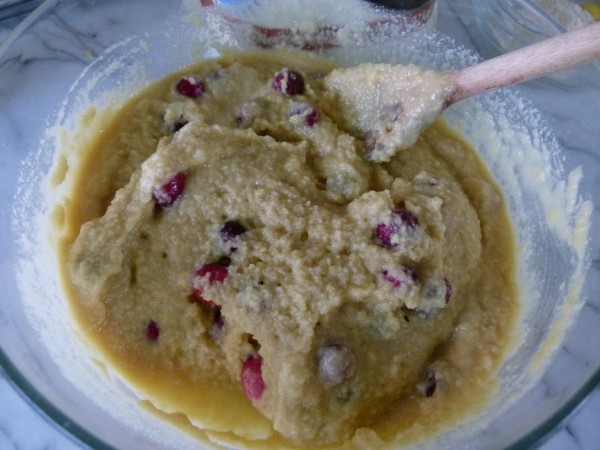
this is a thick batter

I made these cranberry-orange muffins on a whim the other day and just had to share.  Even though my family and I are not technically gluten-intolerant, gluten is something I mindful about limiting because it is quite pro-inflammatory and hard to digest and something that can be overeaten very easily.  So every now and again when I want to bake something, I play around with gluten-free flours based on grains like rice or millet (if you haven’t tried these Millet Blondies, you must!), or to go grain-free I love using almond flour and coconut flour.  There’s not one flour that mimics wheat perfectly, but there are ways to achieve a similar result.  One of my kids’ favorite muffins is this recipe for Chocolate-Banana-Almond Muffins with Chia Seeds.  That recipe uses all almond flour and has a very nice light, moist interior and such a yummy flavor.  I otherwise don’t love using all almond flour in baking since things can get a little heavy.  And you have to be sure to use almond flour and not almond meal.  Almond flour is very fine and almost powdery.  Almond meal is a little coarser which isn’t as desirable when you’re baking a muffin.

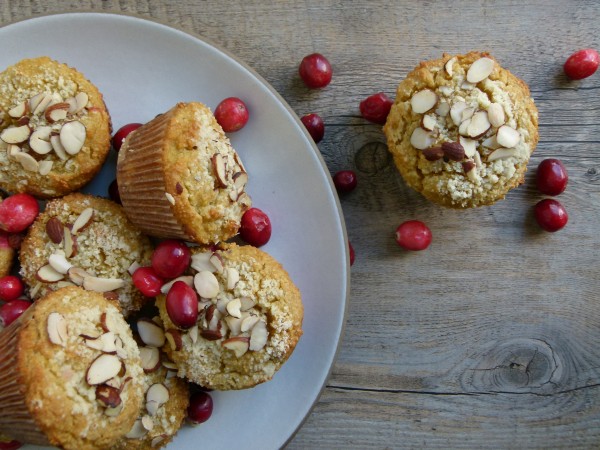
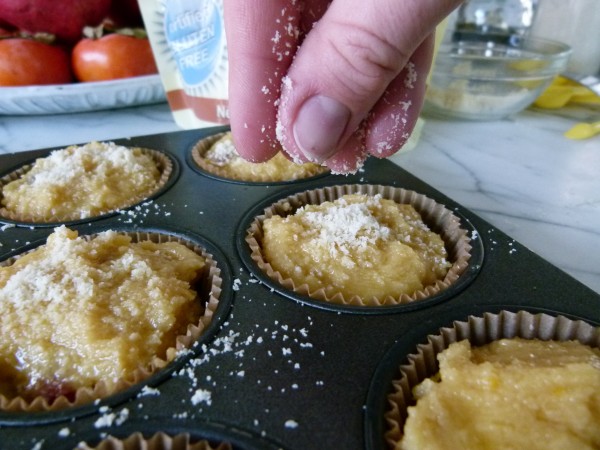
sprinkle the tops with almond flour for a nice finish

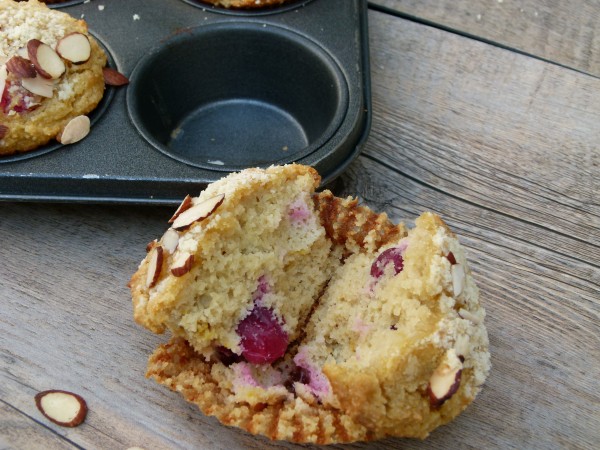
One of my new favorite combinations is using almond flour with a little coconut flour mixed in.  The result is just a little lighter and chewier than with all almond flour.  It’s still not exactly like wheat or spelt flour, but it’s close enough and my kids love muffins I make this way, including these cranberry-orange beauties.  These muffins are just sweet enough, in my opinion, with a hint of orange.  My family doesn’t love an overwhelming orange flavor, so the zest of 1 orange was perfect for us.  But my favorite part is biting into a tart cranberry.  I love contrasts in textures and flavors, so the tart and sweet always gets me!  I remember making cranberry-orange quick bread when I was little girl.  One of the reasons I’ll never forget it is because I completely screwed up the recipe the first time by mistaking baking powder for baking soda and things didn’t rise the way they were supposed to.  Live and learn.  Even though it was as dense as a brick, the flavors were still so good and we ate the whole thing anyway!

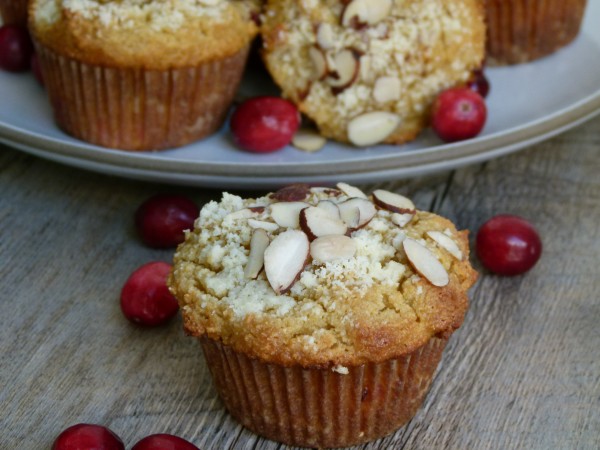
cranberry-orange almond flour muffins

You can still find fresh cranberries in the markets and they also freeze beautifully if you would like to stock up and make cranberry-based recipes in the future.  I think these are great for lunch boxes or for a chilly afternoon with a cup of tea, but I also would love them on Christmas morning, which is two and a half weeks away!!  Loved being with you today, but it’s time for me to make like an elf and get back to business.  Until next time!

cranberry-almond orange flour muffins | pamela salzman


cranberry-orange almond flour muffins | pamela salzman

Cranberry-Orange Almond Flour Muffins

Pamela
5 from 4 votes

Ingredients
  

  • 2 cups blanched almond flour I use Honeyville
  • ¼ cup coconut flour
  • ½ teaspoon baking soda
  • ½ teaspoon sea salt
  • grated zest of 1 orange
  • 6 large eggs or 4 eggs and 2 “flax eggs”*
  • ½ cup honey
  • 1 teaspoon pure vanilla extract
  • 1 teaspoon apple cider vinegar or white vinegar
  • a heaping cup of fresh cranberries
  • 1 Tablespoon unsalted butter or unrefined coconut oil melted
  • 2 Tablespoons sliced almonds optional

Instructions
 

  • Preheat oven to 350 degrees. Line a standard muffin tin with 9 unbleached parchment liners.
  • Place the 2 cups of almond flour in a large mixing bowl. Remove 2 Tablespoons and transfer it to a small bowl and set aside. Add the coconut flour, baking soda, salt and orange zest to the large mixing bowl and whisk to combine.
  • In a blender, add the eggs, honey, vanilla and vinegar. Blend until well combined.
  • Pour the egg mixture into the large bowl and combine well. Fold in the cranberries.
  • Scoop the batter into the prepared muffin tin, filling each cup to the top. I use an ice cream scooper to do this. Lightly brush the tops of each muffin with butter and sprinkle with the reserved almond flour and (optional) sliced almonds.
  • Bake until lightly golden and when a toothpick inserted comes out clean, about 30 minutes.

Notes

*1 flax egg = 1 Tablespoon ground flax meal + 3 Tablespoons warm water. Stir together and allow to gel, about 15 minutes.
You don't have to do the almond flour and sliced almonds on top, but it makes a pretty finish!
Tried this recipe?Let us know how it was!


Baked parsnip fries recipe

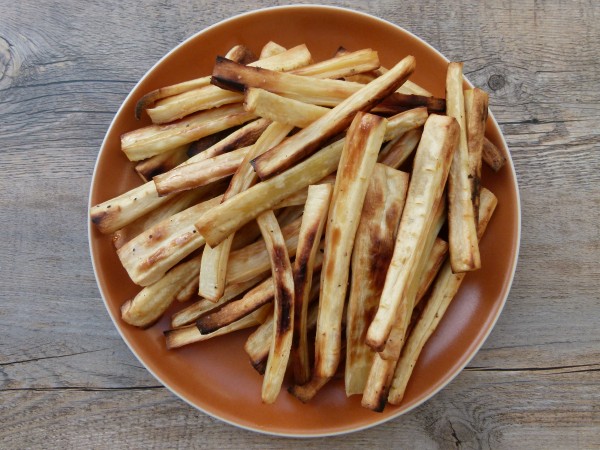
Baked Parsnip Fries | Pamela Salzman

I really, really ate too much the tail end of last week.  And it wasn’t lettuce I was overeating, in case you’re wondering.  The whole Thanksgiving-Hanukkah collision really did me in.  If all the pies and butter last Thursday weren’t enough, the potato pancakes fried in an inch of oil followed by more sugar over the weekend put me over the edge for sure.  In between all of that, my sister-in-law forced me, yes forced me, to try a s’mores cupcake at her son’s birthday party.  Ahhhhhhhh!!!!!!!!  It happens to the best of us.  It starts off with a weekend of over-indulgence which is followed by two weekends of holiday parties followed by Christmas and New Year’s and there’s the 8 pounds that “snuck up on ya.”  You have been warned.

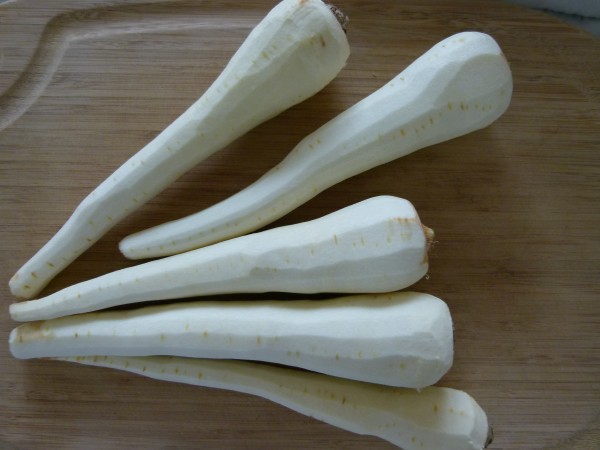
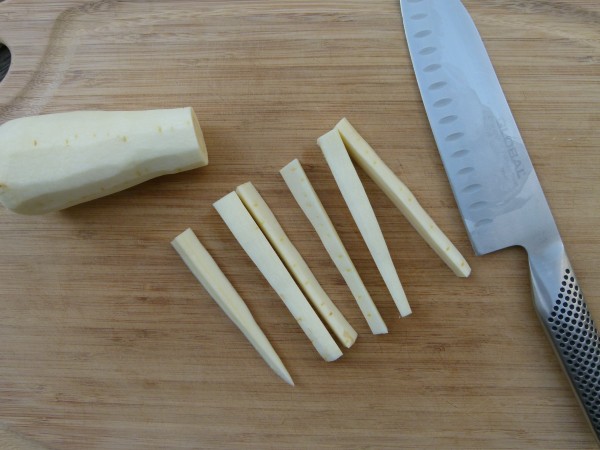
parsnips

trimmed and peeled

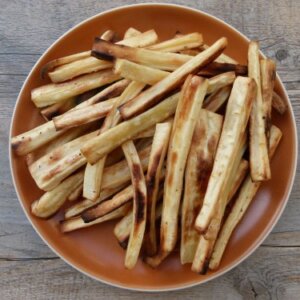
Ok, let’s make some parsnip fries!  Not to worry, parsnips are one of the few good white foods!  And these are baked, not fried.  Trust me, I’m on your side!  I don’t think I ever tasted a parsnip until 10 years ago, and I think it was in a soup mixed in with a bunch of other things.  But let me tell you, I have made up for lost time and I am now crazy for these little roots.  They’re kind of like intense carrots, really fresh, sweet and grassy.  My favorite way to eat them is chopped up, plain roasted with some salt (mmmmm……salty-sweet!)  But then my friend Avigail made me some baked parsnip fries and they were so super addictive, I went bonkers.  They aren’t crispy like regular fries, but they aren’t soggy either.  It’s really the caramelized sweet flavor mixed with the salt that I love.  I also think there’s something fun about eating with your hands, which makes these a little dangerous because I can eat an entire sheet pan all by myself in not a lot of time.  Sure, parsnips are a whole food, but they do have more carbs than a lot of other vegetables, so you don’t really want to eat a whole sheet pan of them.

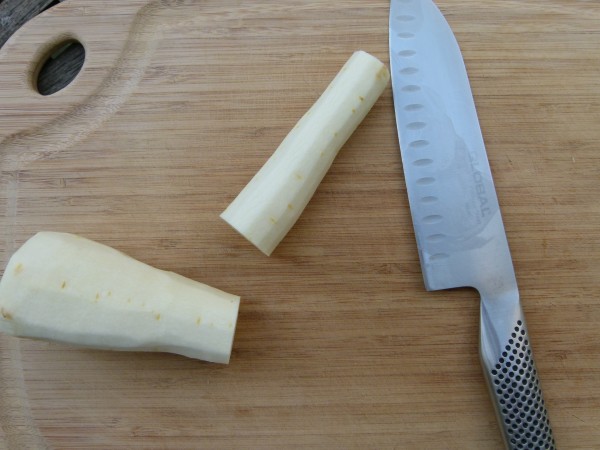
cut the parsnip crosswise first


then cut each half into 1/2inch sticks

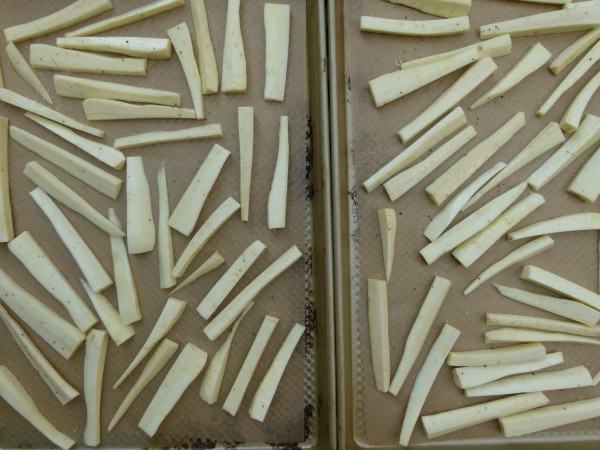
The trick with making parsnip fries is cutting them the right way.  Because they’re a bit skinny on the bottom and fat on top, I like to cut them in half crosswise first and then cut each half into sticks.  You have a much better chance of getting uniform pieces, which we all know is the key to making sure vegetables roast evenly.  Try not to allow the ends to be too skinny, otherwise they’ll burn before the rest of the parsnip is tender.  Some people like to cut the core out of the middle because it is supposedly tough, but I just slice the whole thing.

ready to be baked

I really don’t know what you couldn’t serve these with.  Parsnip fries re a perfect alternative to French fries, so these are great with burgers, veggie or otherwise.  Parsnips are fantastic with poultry.  I think Avigail served them to me with salmon.  Really, cooked this way they are so neutral you can’t go wrong.  Unless you do eat an entire sheet pan of them.  You have been warned…

Baked Parsnip Fries | Pamela Salzman

Baked Parsnip Fries

Pamela
Servings 6 or just you and me

Ingredients
  

  • 3 pounds of parsnips peeled
  • 3 Tablespoons unrefined olive oil
  • sea salt and freshly ground black pepper to taste

Instructions
 

  • Preheat oven to 400 degrees.  Line 2 rimmed baking sheets with unbleached parchment paper.
  • Cut the parsnips in half crosswise.  Then cut each half into ½ inch sticks.
  • Place parsnips on the prepared baking sheets and drizzle with olive oil.  Toss to coat with your hands and spread the pieces in one layer.
  • Season with salt and pepper to taste.  (I like ½ teaspoon salt per pan.)  Bake until tender and golden, about 35-45 minutes, tossing once about halfway through roasting.  Sprinkle with additional salt, if desired (I always do.)
Tried this recipe?Let us know how it was!

Cranberry-granola-yogurt parfait recipe

cranberry-granola-yogurt parfait | pamela salzman

Sometimes I think of Thanksgiving as the culinary Olympics since there is major cooking and intense prep involved.  And today I have the sore legs to show for it!  But it is all worth it especially when I get to cook with my kids and spend a nice long day with my loved ones.  I had the extra-special treat of having my mom visit this year for which I was so grateful.  She was an amazing sous chef and always has such an easy going attitude.  I am hoping (hint, hint) that she makes this a regular trip and brings my dad next time.

yummy homemade granola | pamela salzman

Today is not a cooking day for me.  It might be a reheating leftovers day.  It might be a juicing and smoothie day.  But I have turned off the creative area of my brain and I am giving my feet a much-needed rest and that’s that.  My main focus today is getting out of the house after lunch so that when that craving for pie hits, I’m less likely to succumb to temptation.  This is when poor eating habits take hold and before you know it, it’s January 5th and there are a few extra pounds that came out of nowhere.  Except I’m telling you, they start today!

homemade cranberry sauce | pamela salzman

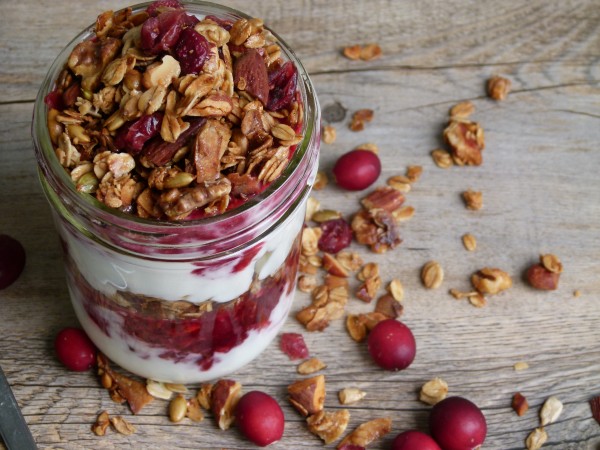
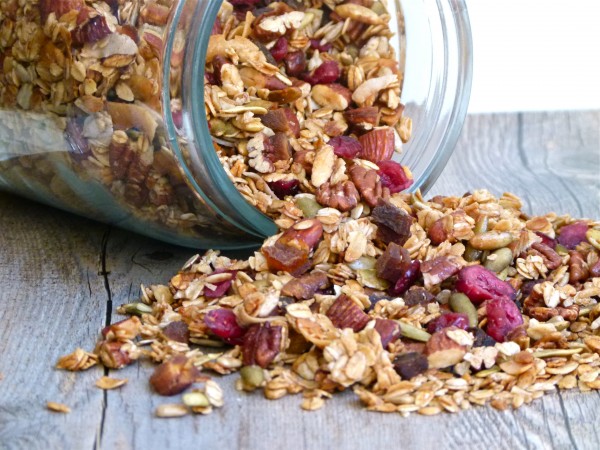
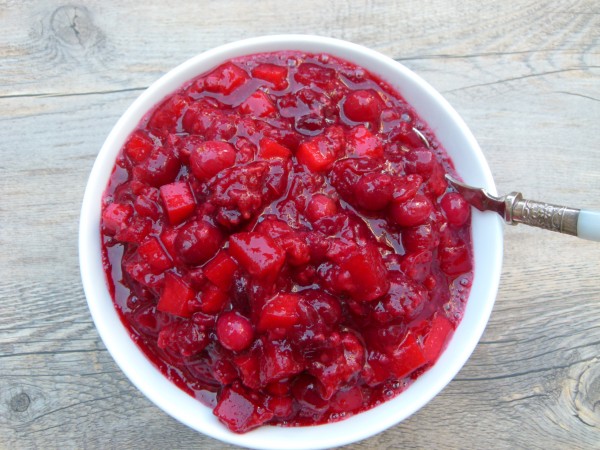
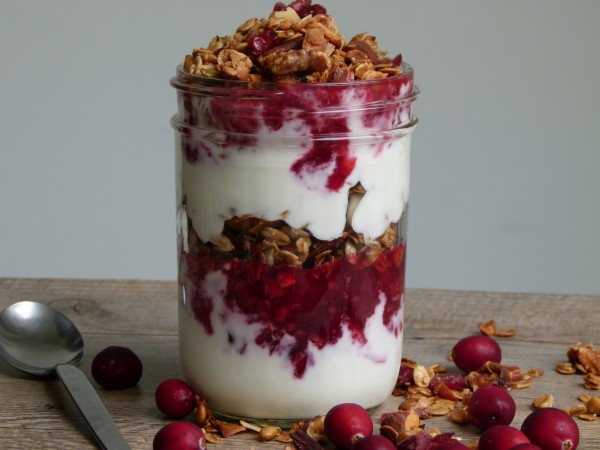
If you want something sweet, but a little more natural, I have always loved this parfait, which also does double duty by using up leftover cranberry sauce.  There’s really no recipe here, just layers of cranberry sauce, unsweetened yogurt, and granola.  And sometimes I swirl the cranberry sauce  into the yogurt.  If you don’t have any granola in the house, just mix together what I call “faux granola” — a few nuts and seeds, dried fruit and toasted (or raw) coconut.  You still get the crunch that balances out the creamy from the yogurt.  I’m not over thinking this one and I don’t think I have it in me to do so if I tried!  Enjoy the rest of the weekend!

cranberry-yogurt-granola parfait | pamela salzman

Cranberry-Yogurt-Granola Parfait

Pamela
4 from 1 vote

Ingredients
  

  • plain unsweetened yogurt, regular or Greek-style (I like whole yogurt)
  • leftover cranberry sauce
  • granola

Instructions
 

  • Take a glass and layer the ingredients however you want.  There is no right or wrong way to do this.  You can do one layer or each, or two layers of yogurt and granola and one dollop of cranberry sauce.  Just make sure you have enough yogurt so the parfait doesn't get too sweet!
Tried this recipe?Let us know how it was!

Roasted delicata squash and apple salad recipe

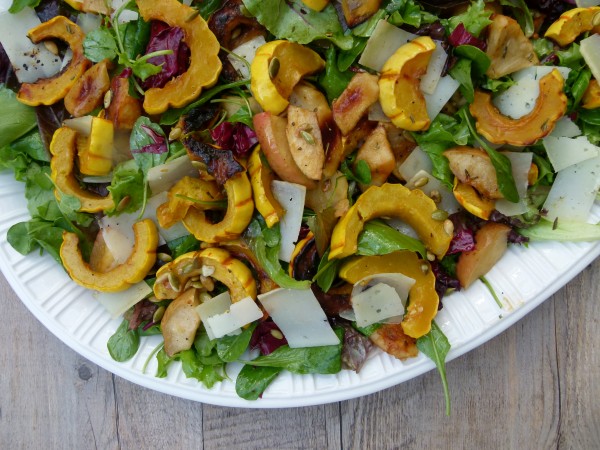
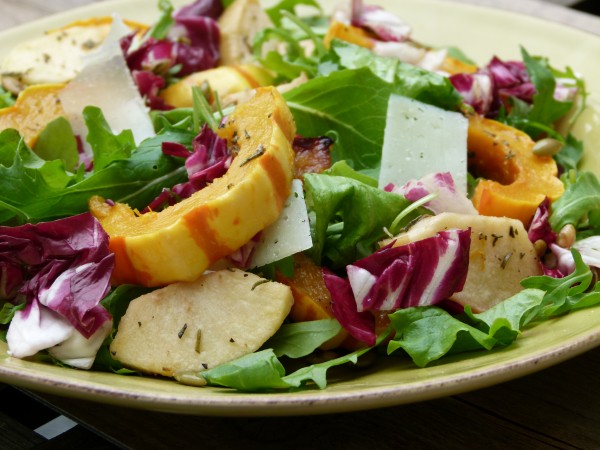
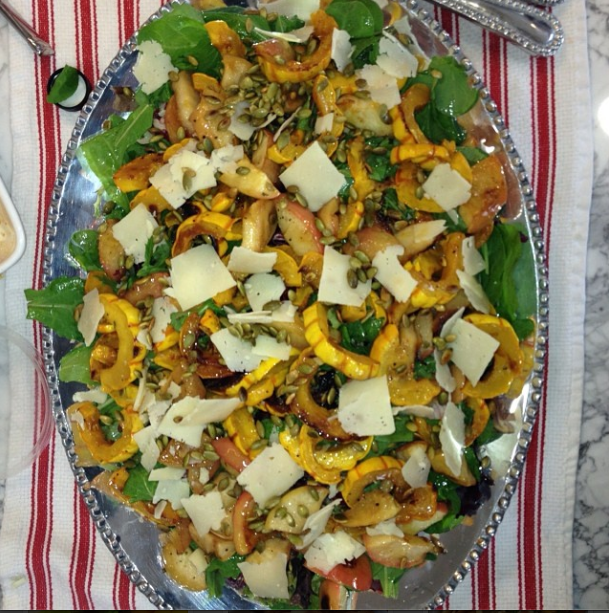
delicata squash and apple salad | pamela salzman

Oh, I know your Thanksgiving menu is probably planned and I think that is great!  I actually had no intention of trying to convince you today, this late in the game, that you absolutely must include such and such recipe on your holiday table.  I know you’re committed and that’s that.  But for the rest of you slackers, it’s your lucky day!  This is your Thanksgiving salad.  Period.  I have taught it umpteen times already this month, with another class to go and I am more obsessed with it than ever.  I think this salad actually makes turkey taste better!! Make some room on that menu!

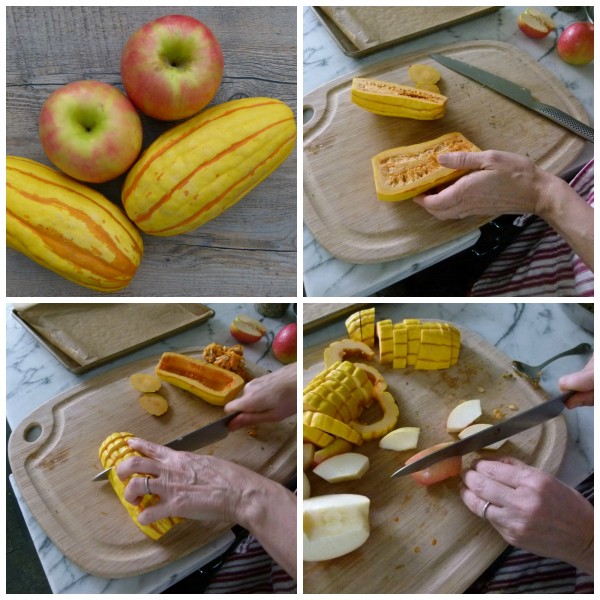
prepping delicata and apples

Delicata squash should be nicknamed “THE Thanksgiving squash” because it’s seasonal, adorable, and minimal work.  You don’t peel it!  You eat the skin!  It tastes amazing! How much do you love me right now?  Forget butternut squash this year.  Give yourself a break and go with delicata.  I have no idea if you can find it where you live, but in Southern California it’s all over the place at every supermarket, farmers market and Trader Joe’s.  Sometimes it’s off-white with yellow stripes, sometimes pale yellow with orange and lots of in-betweens.

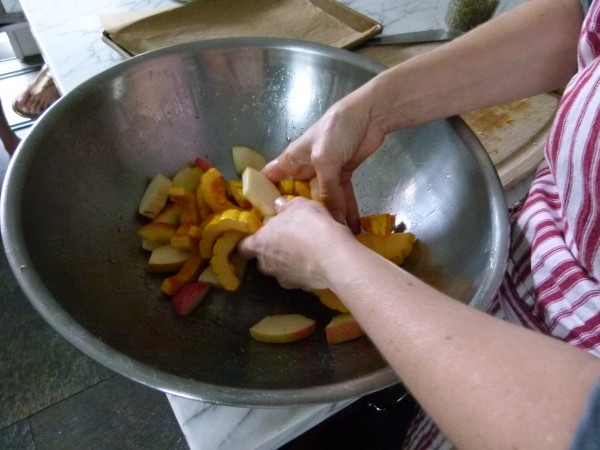
toss everything with coconut oil and maple syr

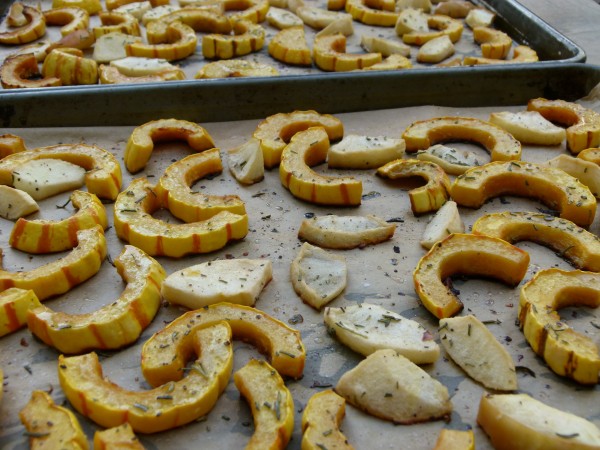
roasted and delicious

As much as I love delicata squash, my favorite part of this salad just might be the big wedges of roasted apples.  Pink Ladies are my favorite and I think are perfect here, but Honeycrisp, Fuji, Jonagold are all great, too.  Granny Smith is a little too tart in my opinion.  Leave the peel on to not only make your life easier, but I think the apples look prettier that way and hold their shape better.

delicata squash and apple salad | pamela salzman

Here’s your game plan for this salad:

  • make the dressing this weekend and store in a glass jar with a lid in the refrigerator
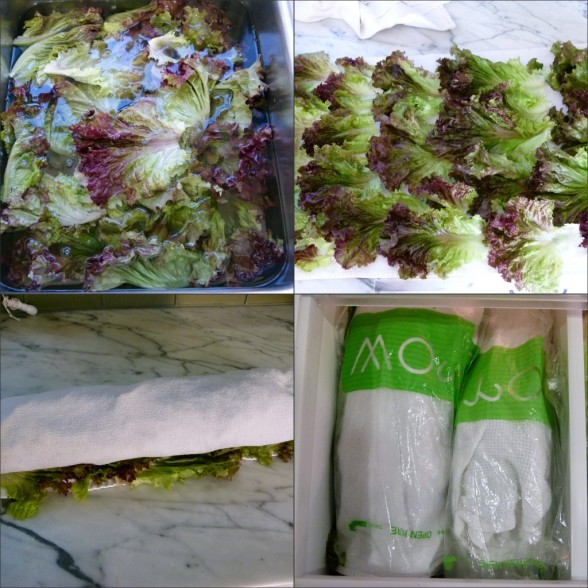
  • wash and dry your salad greens on Tuesday and store in the refrigerator
  • if you are using nuts or pumpkin seeds, toast them Tuesday and store at room temperature
  • wash, seed and cut delicata squash into slices on Wednesday and store in a container or ziploc in the refrigerator
  • shave Manchego cheese with a vegetable peeler and store in the refrigerator in a tightly sealed container
  • Thursday morning you can roast the delicate squash and apples and take the dressing out of the refrigerator to bring to room temp; store cooked squash and apples at room temp until dinnertime
  • right before carving the turkey, assemble and dress the salad!

Have an amazing Thanksgiving!!!

delicata squash salad


Roasted Delicata Squash and Apple Salad

Pamela
5 from 2 votes
Servings 6

Ingredients
  

  • 2 delicata squash washed but not peeled, cut in half lengthwise, seeds removed, and cut into ½-inch slices
  • 2 large apples cored, sliced into ½-inch slices (I cut them crosswise)
  • 3 Tablespoons olive oil or unrefined coconut oil melted
  • 1 Tablespoon pure maple syrup
  • 1 teaspoon minced fresh rosemary optional, but I think it’s delicious
  • 1 teaspoon sea salt
  • freshly ground black pepper to taste
  • 10 cups mixed greens including some bitter varieties such as radicchio and/or arugula
  • Dressing:
  • 2 Tablespoons apple cider vinegar preferably raw
  • 5 Tablespoons unrefined cold-pressed extra-virgin olive oil
  • ¾ teaspoon Dijon mustard
  • ½ teaspoon sea salt
  • freshly ground black pepper to taste
  • 2 teaspoons pure maple syrup
  • Toppings: shaved manchego cheese ½ cup buttered and salted toasted pecans or toasted, salted pumpkin seeds

Instructions
 

  • Preheat oven to 400 degrees and line 2 baking sheets with parchment paper.
  • Place the squash and apples in a large bowl and add the melted coconut oil and 1 Tablespoon maple syrup. Toss to coat. (You can also add the apples to the salad raw instead of roasted.)
  • Place the apples and squash in one layer on the baking sheets and sprinkle with rosemary, salt and pepper. Roast until tender, approximately 20-30 minutes. Remove from the oven and set aside to cool.
  • For the dressing: in a small bowl or screw top jar combine apple cider vinegar, olive oil, Dijon, salt, pepper and maple syrup and whisk or shake to combine. You may have more dressing than you need for this recipe.
  • Place salad greens on a platter and toss with enough dressing to coat lightly. Separately drizzle the squash and apples with some dressing and add to the greens. Sprinkle with any desired toppings. Taste for salt and pepper and serve.
Tried this recipe?Let us know how it was!


Planning a happy thanksgiving — 1 week and counting!

This post has been edited from the original which was published on November 17, 2011.

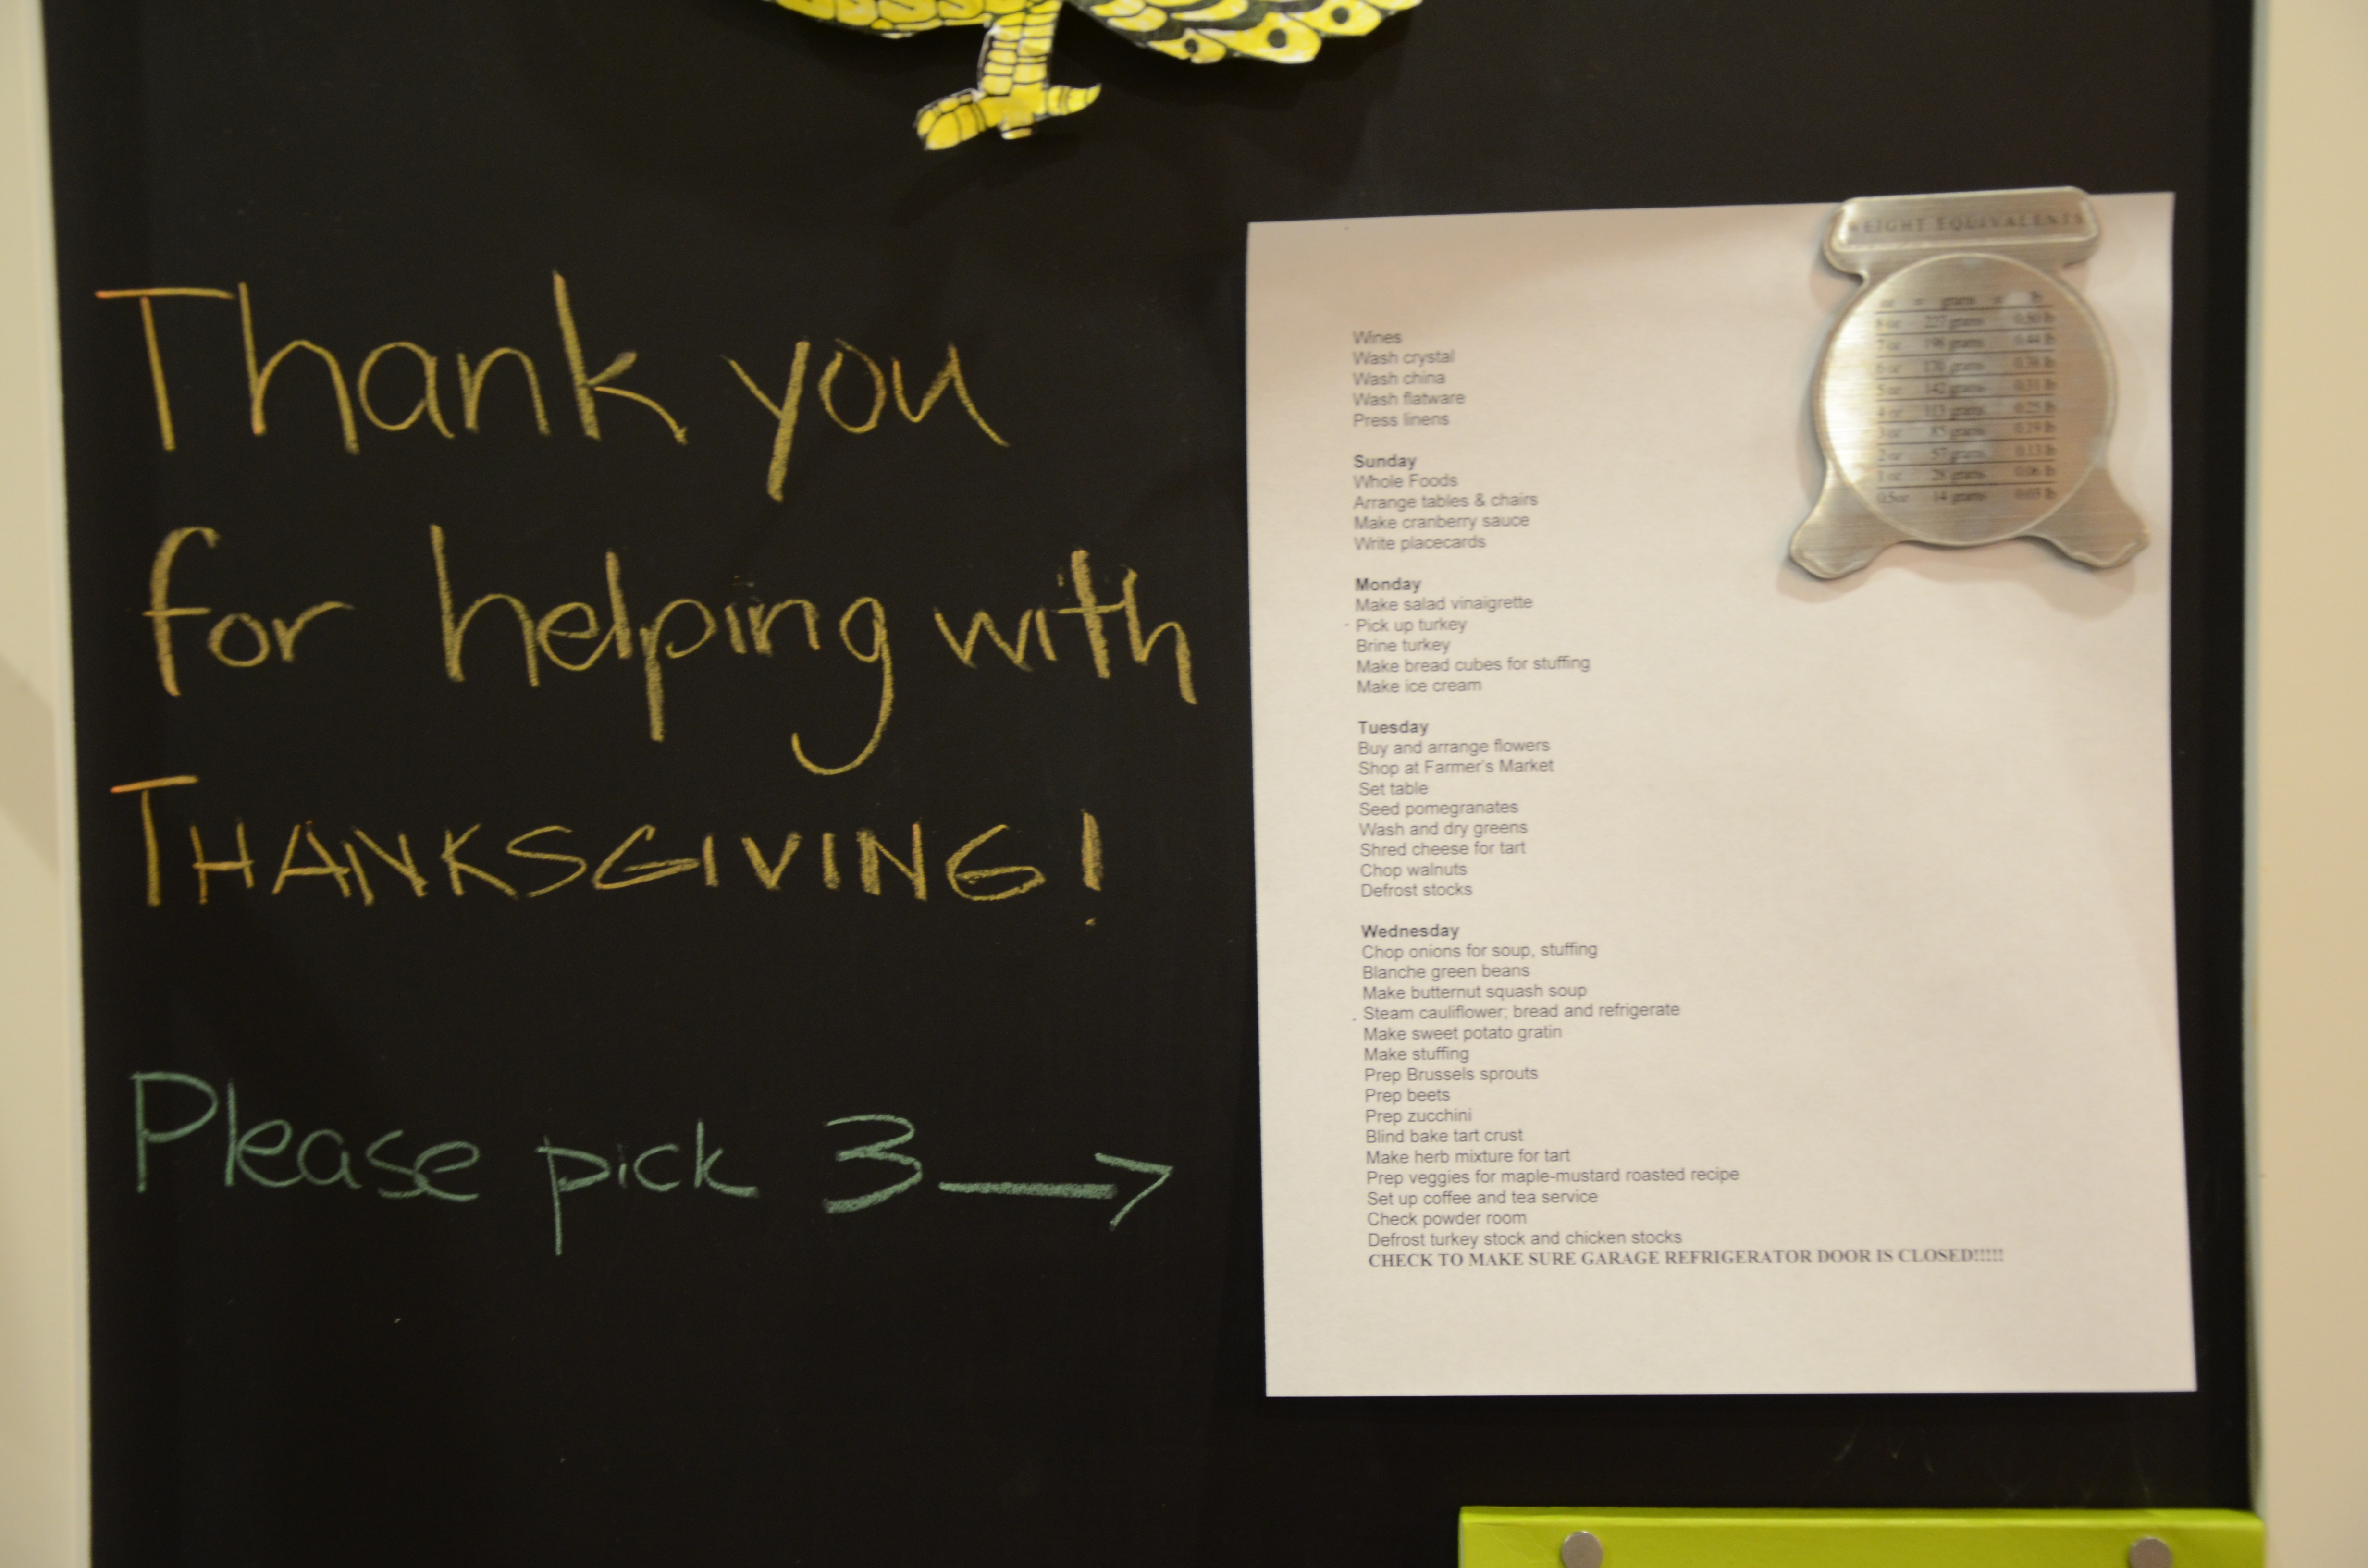
Wow, the last three weeks have gone by so quickly!  I am very excited to celebrate Thanksgiving — we have a super fun crew joining us this year — and I am also looking forward to some one-on-one time with the kids.   I used to get all of them in the kitchen Thanksgiving morning to help me with pies or trimming green beans or whatnot, but my two daughters have taken to sleeping until noon on days off.  However I had a stroke of genius two years ago, which was to tack my Thanksgiving to-do list on the refrigerator and have everyone sign up for three tasks.  I asked my husband to help too, because good gracious the man needs to brush up on his cooking skills!

My last class is Monday night, so I’ll start getting busy this weekend and then I’ll go full steam ahead on Tuesday.  I always plan Thanksgiving day down to the last detail because I don’t like forgetting things and a schedule makes me feel more relaxed, which equals more fun for me!   But just because Thanksgiving is the star of the show this week doesn’t mean that I can forget about normal life on very other day.  So I think about regular meals and activities, too.  Here’s what my schedule will look like from Sunday until we eat on Thursday at 4:00 pm (-ish).  This shouldn’t make you feel exhausted, but merely show you what you can do ahead for your own Thanksgiving!

Sunday

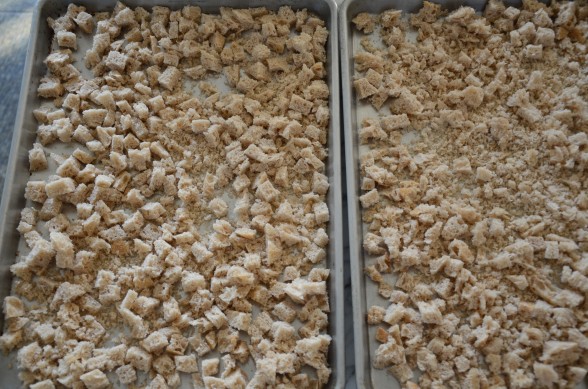
Go grocery shopping for most perishable items, bread for stuffing and food for remaining dinners this week.

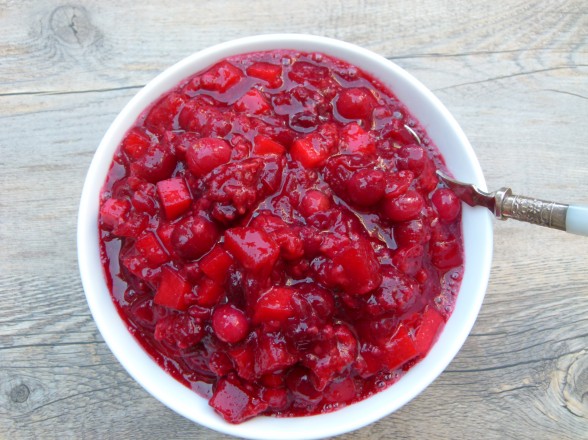
Make cranberry sauce (I used to make applesauce on Sunday too, but my friend Caitlin is bringing it this year.)

Arrange tables and chairs

Write out placecards for table (a good job for one of the kids)

Dinner:  orange and rosemary-glazed chicken, cauliflower-potato mash, and broccoli

make bread cubes for stuffing

Monday

Make salad vinaigrettes

Make bread cubes for stuffing

Make ice cream

4:00 leave to teach cooking class in Brentwood

Dinner:  spaghetti squash bowls with beans, roasted vegetables, and guacamole

Tuesday

9:30 am Dentist appointment for Mr. Picky

Shop for last perishable items from farmer’s market

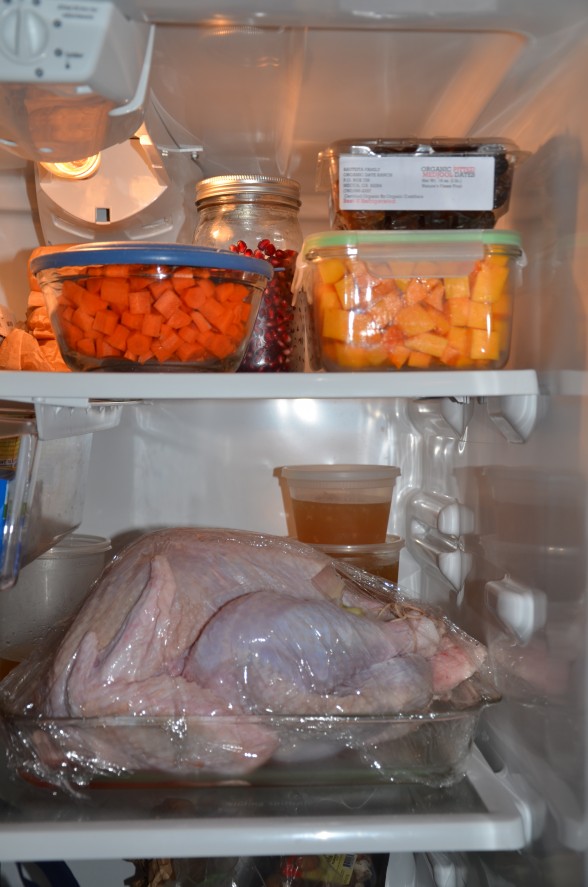
Pick up turkeys.  Brine in the morning.

Buy flowers for entry table, family room and living room and put together table arrangements

Set table (I’ll set one place setting for the kids to copy and they can do the rest.)

Wash and dry greens (salad)

Toast pumpkin seeds (salad)

Seed pomegranates (salad)

Shred gruyere (tart)

Shred manchego (salad)

Defrost chicken/turkey stocks

Dinner:  Italian wedding soup and grilled cheese sandwiches

Wednesday

Chop onions for soup, stuffing and roasted vegetables

Slice zucchini (tart)

Make soup

Steam, bread cauliflower

Blind bake crust (tart)

Herb oil (tart)

Make stuffing

Prep vegetables for Maple-Mustard Roasted Veggies

Thinly slice Brussels sprouts

Cut butternut squash into cubes

Make sweet potato casserole

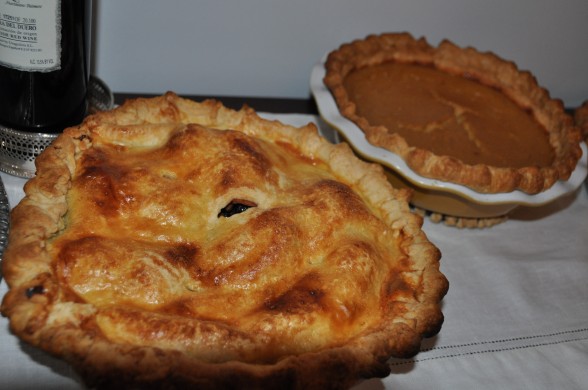
Bake pecan pies

Set up for coffee and tea service

Check powder room

Dinner:  shrimp with tomatoes, white beans and spinach, rice

Before bed:  make sure garage refrigerator door is closed! (Three years ago, I left the door open to my extra fridge in the garage all night long.  OMG. Needed to buy two new turkeys on Thanksgiving morning!)

Thursday

6:00 am wake and shower

Make cornbread (small oven)

Bake pumpkin pies (large oven)

Bake coffee cake (small oven)

Make gingerbread (large oven)

9:15 Take turkeys out of refrigerator

All desserts must be out of large oven by 10:30 am

Bake apple pie (small oven)

10:45 turkeys go in large oven breast side down at 425 degrees

11:25 turn oven down to 325 degrees and flip turkey breast side up

12:00 reheat soup and serve with cornbread

tidy up kitchen

get dressed and dry hair (a girl’s gotta look good!)

Put mixing bowl and beaters in freezer for whipped cream

Roast butternut squash for salad (small oven)

1:30 Peel potatoes and make mashed potatoes; keep in bowl, covered, over pot of simmering water

2:15 zucchini tart in small oven

2:30 fry cauliflower and heat tomato sauce; serve hot

3:00 serve hors d’oeuvres; start testing turkey temperature

3:00 – 3:30 take turkey out of oven

Put vegetables in large oven at 400 degrees

Make gravy

Reheat stuffing in small oven

Bake sweet potato casserole in large oven

Chop apples for Brussels sprout salad, assemble both salads

Light candles, pour water in glasses, set out cranberry sauce and applesauce

Place turkey platter in oven to warm up

3:50-4:00 Carve turkeys

4:00 Dinner is served

After dinner:  whip cream (do not overbeat!), coffee and tea, sparkling water

Make notes on what to remember for next year.  Next year??!!

Crunchy cauliflower recipe

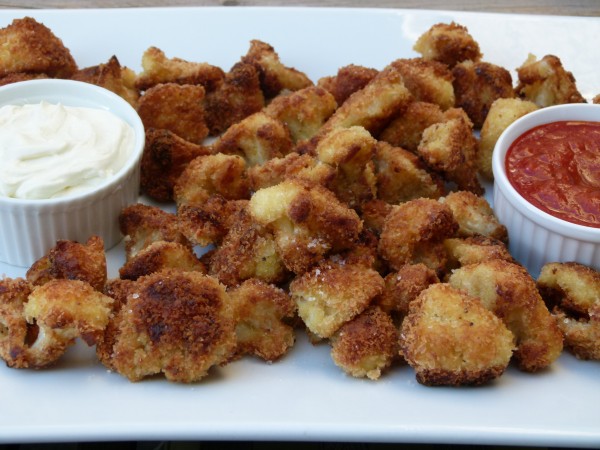
crunchy parmesan cauliflower | pamela salzman

I have been really surprised by how many people have asked about this cauliflower recipe after seeing it on my Thanksgiving menu.  I’m only surprised because it’s not fancy or interesting or all that different.  And it’s not the most super healthful thing I’ve ever mentioned.  True, my husband and my kids are crazy for it, but I’m always like “Really?  That’s the recipe you’ve been searching for?”  Ask and you shall receive!

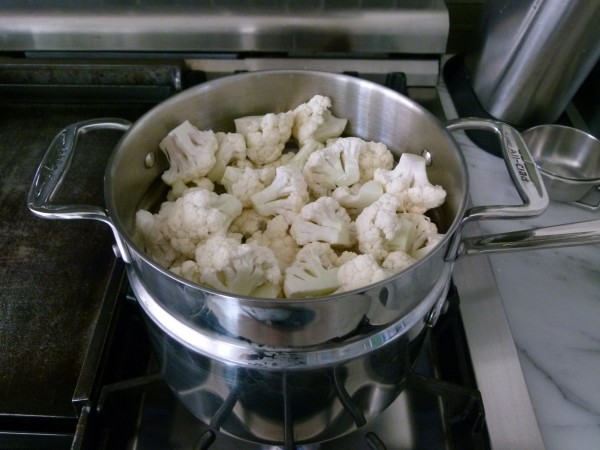
steam the cauliflower first

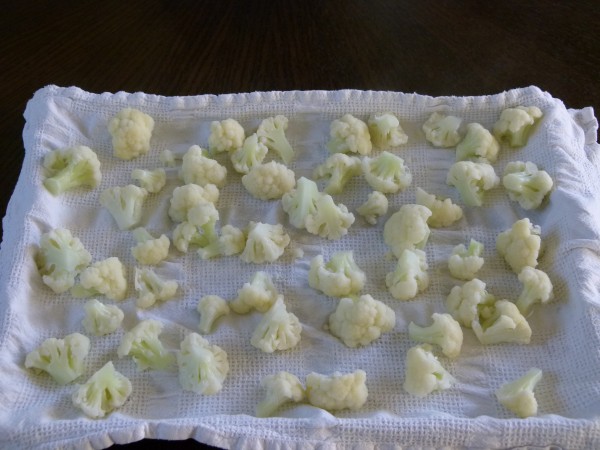
spread them out over a clean towel to cool down

My mom has always made this cauliflower for Thanksgiving and it was one of the recipes I incorporated into my Thanksgiving dinner after I was married.  It’s basically like making parmesan chicken cutlets, but with steamed cauliflower.  Admittedly, these take a little longer to assemble than chicken since you must dip or roll each cauliflower floret in beaten egg and then a breadcrumb mixture and then fry in oil.  But, like my mom taught me, all the prep is done the day before, i.e. steaming and breading, and then the frying is done the next day right before dinner.  When I was a kid, I didn’t love these (sorry Mom!) because they were served room temp as opposed to hot out of the pan, and they’re nothing to write home about when they’re not warm, in my opinion.  Of course it is kind of absurd to think that anyone could fry all these cauliflower florets to serve hot for Thanksgiving dinner when gravy needs to be made, casseroles reheated, candles lit, the buffet set and turkey(s) carved.  That’s when I decided to serve these as an hors d’oeuvre and it worked out beautifully.  Too beautifully, I might add.  Now I’m making three heads of cauliflower every Thanksgiving!!

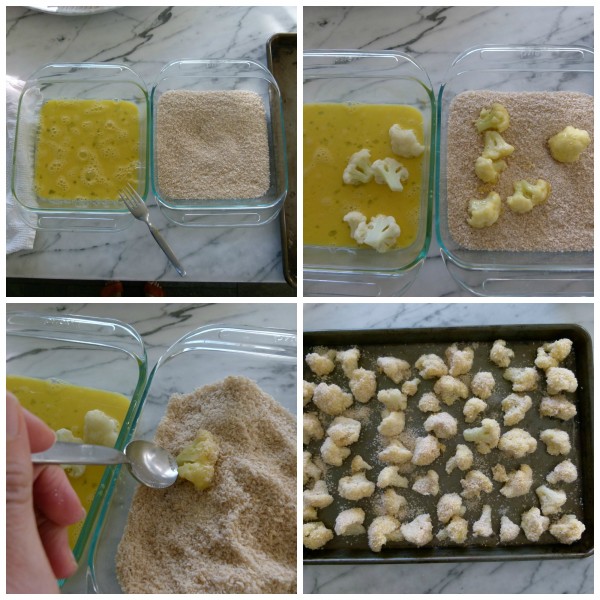
prepping the cauliflower

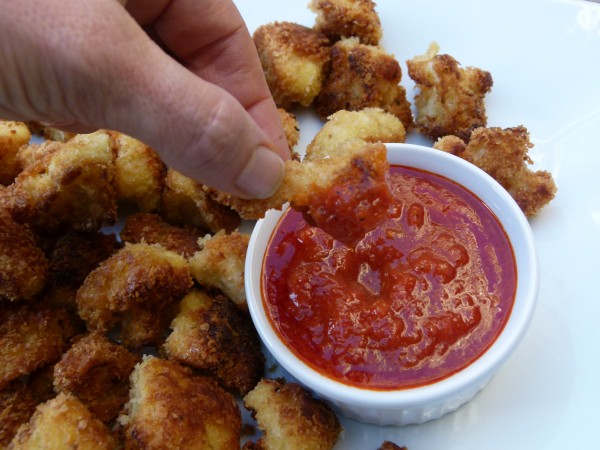
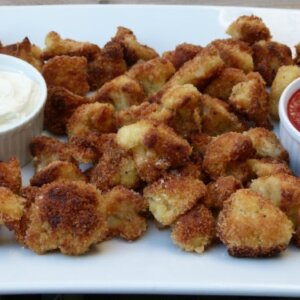
But what is nice about this recipe is that it’s not a Thanksgiving “one-hit wonder” like sweet potato casserole.  I actually make this during the year as well for weeknight family dinners.  On Thanksgiving I like to keep it simple by sprinkling all the florets with flaky sea salt.  Although my husband prefers to dunk his cauliflower into hot tomato sauce.  Spicy mustard and homemade ranch dressing (I’ll share that recipe one day!) are also popular with the kids.  Speaking of dips, my friends at GROW  shared a really interesting recipe from epicurious.com for a head of roasted cauliflower with whipped goat cheese.  I skipped the head of roasted cauliflower for now and made the whipped goat cheese, which was a very tasty dip for hot crunchy cauliflower florets.

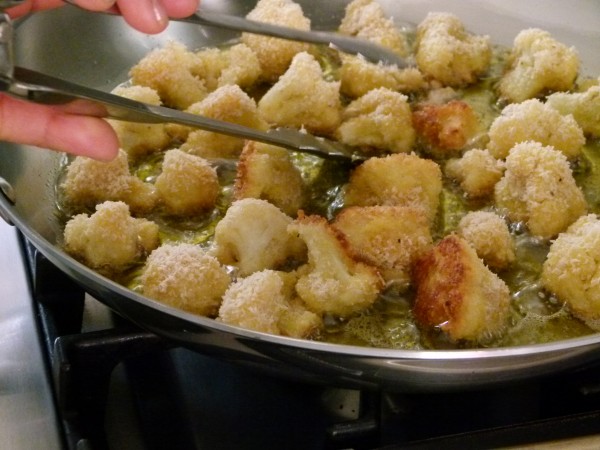
fry them in olive oil

Even though I have a feeling most of you planners have your Thanksgiving menus all squared away, I am thinking I’ll share a few more recipes this week just in case!

always delicious with warm tomato sauce


Crunchy Cauliflower

Pamela
Servings 4 -6

Ingredients
  

  • 1 large head cauliflower cut into florets (about 1 ½ inch pieces)
  • 2 large eggs
  • 1 ¼ cups dried bread crumbs or Panko crumbs
  • a sprinkle of sea salt and freshly ground black pepper
  • Handful of freshly grated Pecorino-Romano or Parmiggiano-Reggiano cheese optional
  • Olive oil for frying or olive oil spray
  • Suggestions for accompaniments: warm tomato sauce whipped goat cheese (recipe follows), ranch dressing, mustard, flaky sea salt

Instructions
 

  • Steam cauliflower until just tender, about 5 minutes and rinse with cold water to stop the cooking process or drain and immediately spread out over a clean kitchen towel to cool. Set aside to dry.
  • Beat eggs in a small bowl. Place bread crumbs in another small bowl and season with salt and pepper. Mix in cheese with breadcrumbs, if desired.
  • Dip a floret in egg (I use a fork to transfer to the next bowl) and then in the breadcrumb mixture. Roll around to coat evenly and transfer to a baking sheet until ready to fry. This can all be done the day before. Cover with foil or plastic wrap and refrigerate.
  • Heat olive oil in a large skillet. Place the florets in an even layer in the skillet and fry until golden brown on all sides. Sprinkle with flaky sea salt (or any salt) and serve immediately.
  • OR if you don’t want to fry them, preheat the oven to 400 degrees. Place the breaded cauliflower on a baking rack set on top of a baking sheet. Spray with olive oil spray and bake until golden brown, about 20 minutes. Serve immediately.
Notes

WHIPPED GOAT CHEESE:
4 ounces fresh goat cheese
3 ounces cream cheese
3 ounces feta
1/3 cup heavy cream
2 tablespoons olive oil plus more for serving
Coarse sea salt (for serving)
Blend goat cheese, cream cheese, feta, cream, and 2 tablespoons oil in a food processor until smooth; season with sea salt. Transfer whipped goat cheese to a serving bowl and drizzle with oil.
Tried this recipe?Let us know how it was!