The Best Sicilian Pasta Con Le Sarde Recipe 

 Savor the flavors of Sicily with this Pasta con le Sarde recipe, featuring sardines, fennel, raisins, and pine nuts, all tossed with long pasta in a rich, aromatic sauce. 
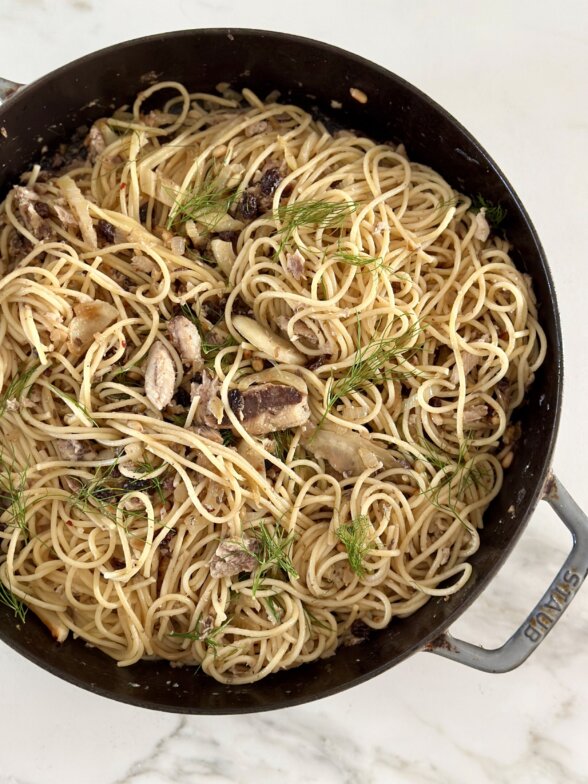
 

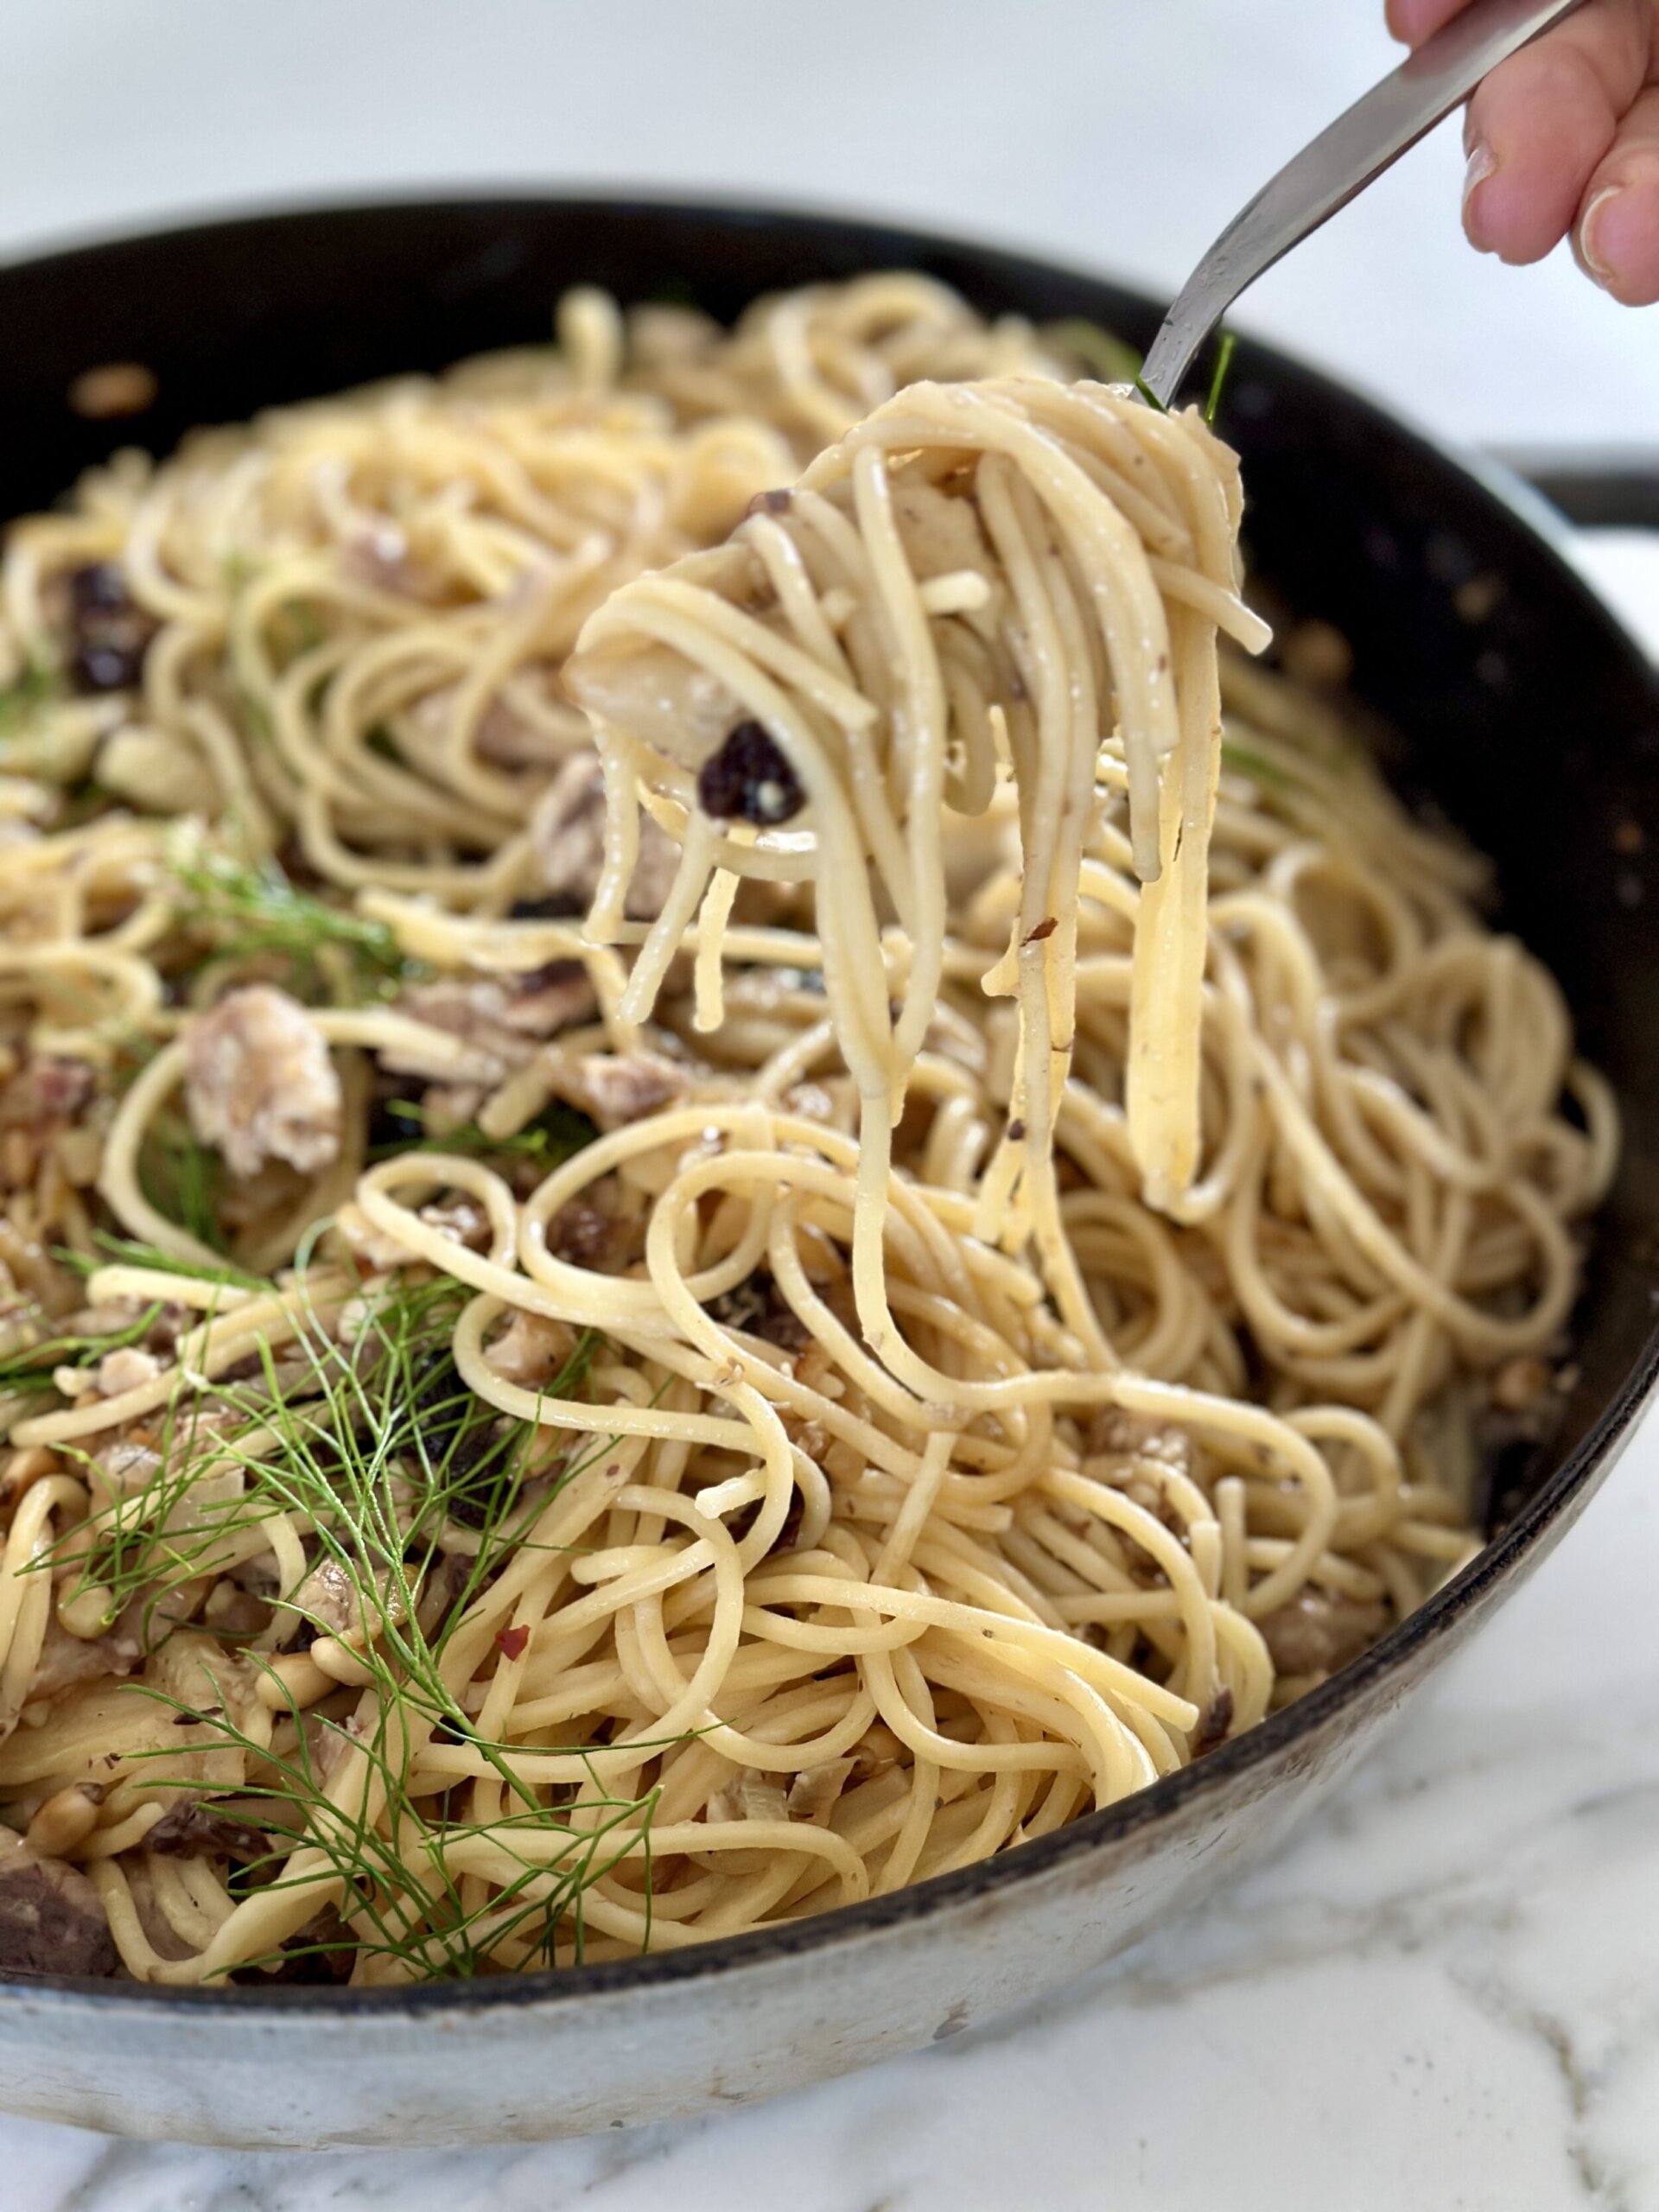
pasta con le sarde in a large skillet


What is Pasta con le Sarde (Sardine Pasta Recipe)


Pasta con le sarde is a traditional Sicilian dish that combines the flavors of Southern Italy with a unique blend of ingredients. The dish features long pasta like spaghetti or bucatini, tossed with a savory sauce made from sautéed onions and wild fennel, which imparts a unique flavor combination. Garlic adds depth to the dish, while a splash of white wine rehydrates sweet raisins or currants, creating a delightful contrast. 


Boneless, skinless sardines packed in oil, along with anchovies, contribute a rich, briny flavor. Toasted pine nuts offer a nutty crunch, and the dish is often garnished with fennel fronds and optional toasted breadcrumbs for added texture. The result is a delicious and flavorful pasta dish that transports you straight to Sicily!
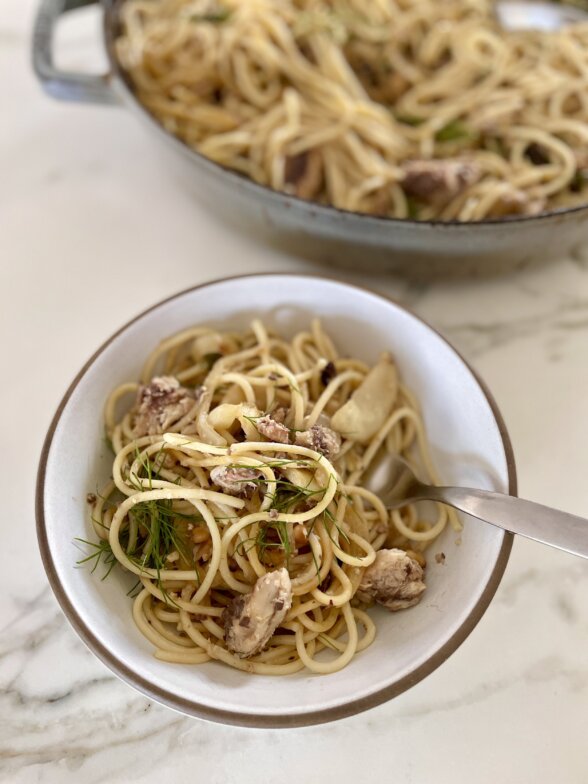
 

a bowl of pasta with a fork


Why You’ll Love This Pasta con le Sarde Recipe


The goal here is to, yes, teach you how to make the most popular Sicilian Pasta con le Sarde dish, but also to introduce you to sardines. Sardines are very overlooked because people have no idea what they are and assume they’re going to be fishy and gross. Or people confuse them with anchovies which are VERY different.  


Like anything, there are options when it comes to sardines – fresh sardines from the fish market or cooked and packed in water or olive oil, with skin or skinless, with bones or boneless, plain or smoked. They do not contain mercury, are loaded with anti-inflammatory Omega-3 fats and they are very inexpensive. I prefer the boneless, skinless ones packed in oil. If you prefer, you can swap in jarred tuna or canned salmon for the sardines in this recipe. Or vice versa – swap sardines in for canned tuna!


This is NOT a pasta dish that is typically served with cheese. But I’m not in charge of what you eat, so you do you. If you want to cut the quantity of pasta in half and swap in zucchini noodles, I approve! I know you will enjoy the incredible flavors of this dish– it’s a staple in Italian cuisine and for good reason! 


Recipe Highlights


  • Inexpensive dish; 
  • loaded with anti-inflammatory Omega-3 fats; 
  • will take you to Sicily if you are not going there yourself!


Ingredient Notes


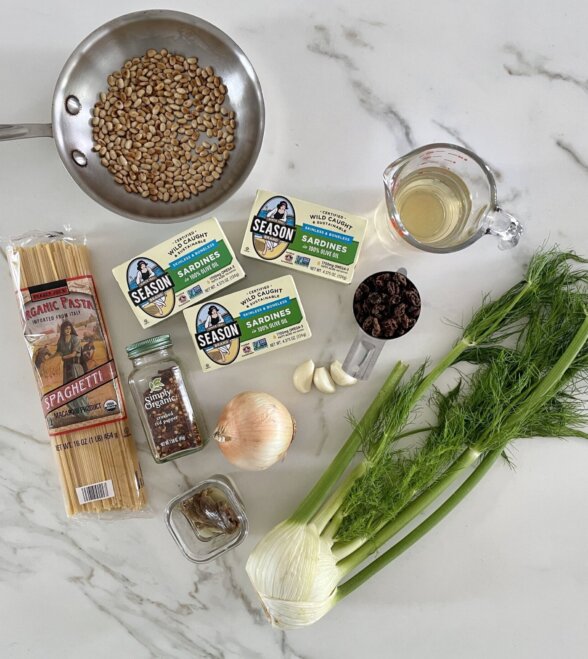
recipe ingredients


    • Onion – I use a medium onion.  
    • Fennel – has a licorice flavor. You can consume it raw or cooked. It goes well with seafood. I save some of the fronds for garnish and I’ll freeze the rest of the fronds to make vegetable stock. 
    • Garlic – I like having a jar of peeled garlic (that I peel myself) in the fridge. Total game changer. 
    • White wine – No need to use an expensive bottle of wine for cooking. Anything under $18 is fine. I like to use sauvignon blanc, chardonnay, or pinot grigio. 
    • Anchovies – are really small fish. They are smaller than sardines. 
    • Canned Sardines – I use boneless, skinless sardine fillets packed in oil (the tinned variety). Sardines with the bones are a great source of calcium and they’re very soft.  You can save the oil from the tins to cook the fennel and onions. 
    • Raisins – add a nice sweetness to this dish. You can use red or golden raisins or currants. I add them with the wine so it helps rehydrate them. 
    • Pine nuts – are the edible seeds of pines. I toast them in a skillet (with no oil) until golden brown. Be careful when toasting nuts or seeds on the stove because they can go from golden to burned in a matter of seconds. Skip if you can’t find reasonably priced pine nuts.
    • Pasta – you can use your favorite pasta here, but a long, thin pastas like spaghetti or bucatini is traditional. Be sure to save some of the pasta water before draining. 
    • Breadcrumbs – are completely optional. Feel free to use them for garnish if you’d like. 
    • Salt and black pepper to taste.


Step-by-Step Instructions
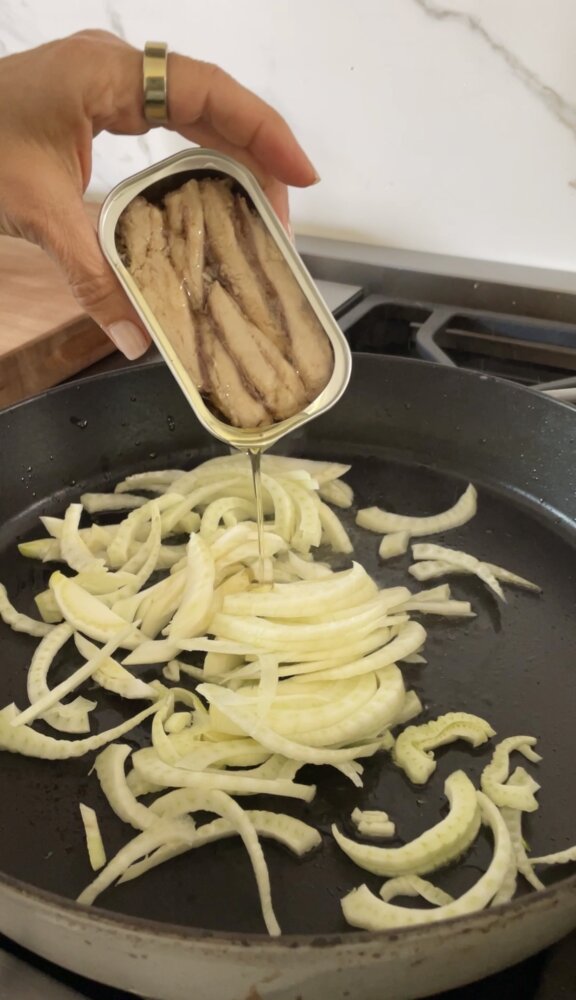
 

fennel with oil from sardines in a skillet


In a large skillet that is big enough to fit the pasta, warm the extra-virgin olive oil over medium heat. Next, add the onion and fennel and sauté until the onion is tender and translucent and the fennel has almost softened– about 6 minutes.
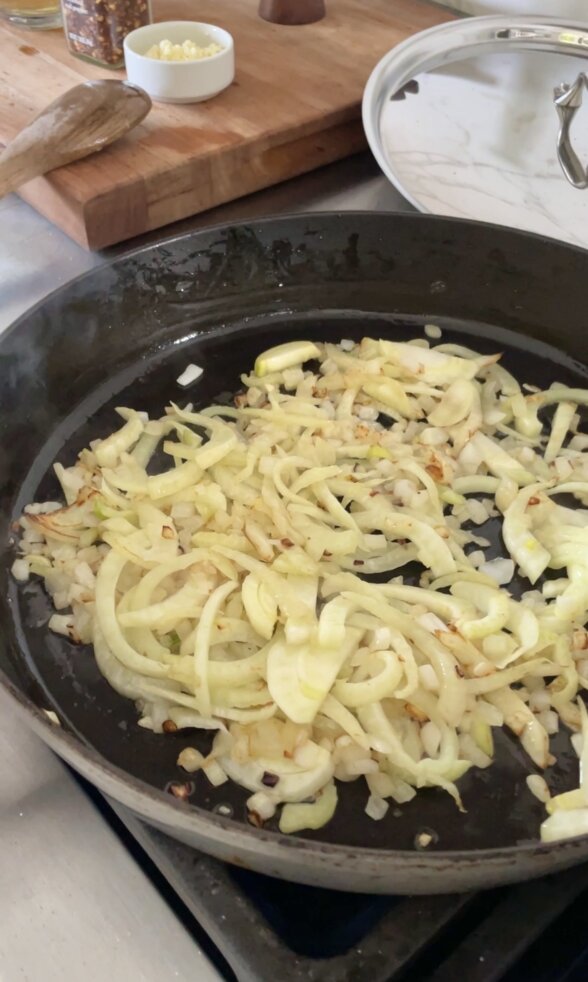
 

sautéed fennel and onions


Add the garlic, salt, pepper, fennel seeds (if using), and crushed red pepper and sauté until fragrant, about 1 minute. Add the wine and currants and cook until the liquid is almost fully reduced.
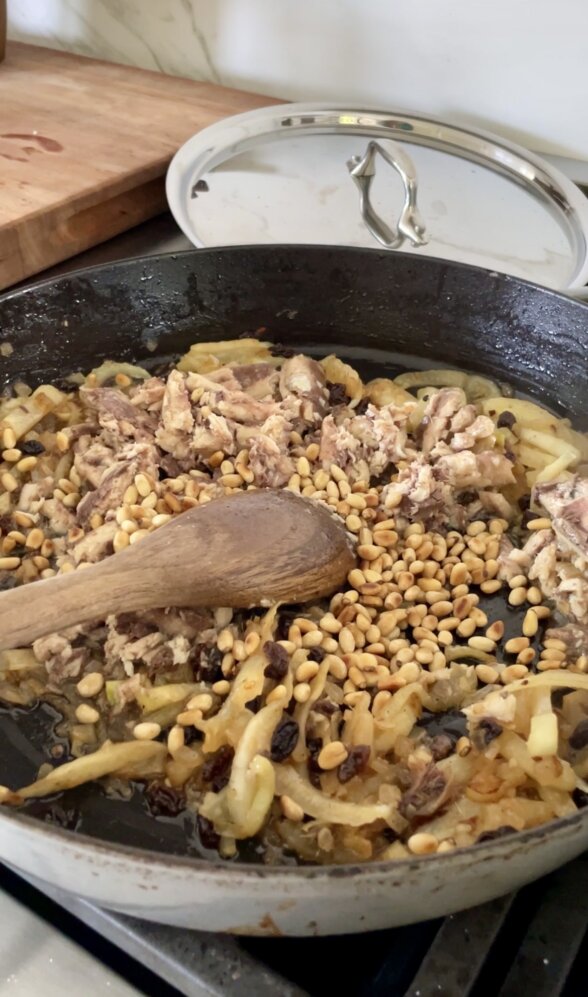
 

a pan with sauteed ingredients and a wooden spoon


Now, Add the anchovies and sardines, breaking them up in the pan with a wooden spoon, until heated through. Then, add the pine nuts and toss to combine.
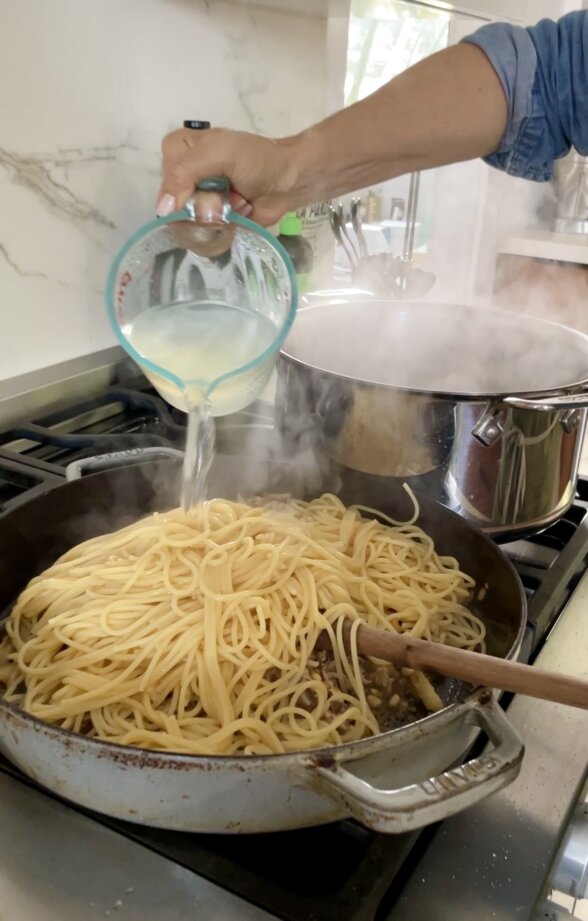
 

adding pasta water to the skillet of pasta


Bring a large pot of water to a boil. Season the boiling water with a handful of kosher salt. Add the pasta and cook until al dente. Reserve a cup of the pasta water (about 1 cup) before draining the pasta. Add the pasta to the pan with the sardine mixture and toss to combine. You can add some of the pasta cooking water or a drizzle of olive oil to the pasta mixture if it looks a little dry. Garnish with reserved fennel fronds.
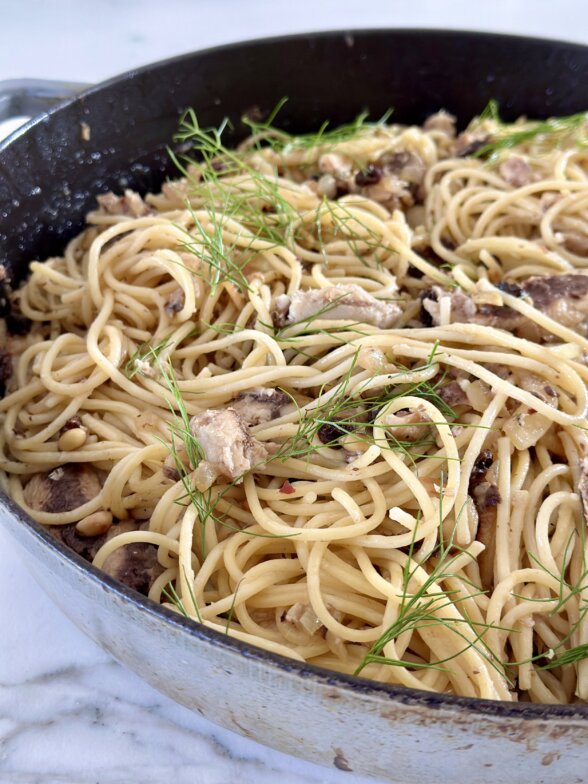
 

finished pasta con le sarde in a skillet


Recipe Tips


  • You can serve it with toasted bread crumbs if you’d like. I generally don’t, but they provide a nice texture.
  • To toast pine nuts, add them to a dry skillet over medium-low heat. Stir them around frequently until golden brown. Immediately transfer them to a plate so they don’t continue to brown in the hot skillet.
  • Feel free to use the oil in the can of sardines to sauté the fennel and onions. 
  • After you add the sardines, try not to break them up too much.  They’ll get broken up as you toss the pasta.
  • I like to save extra pasta water to add to the pasta if it looks a little dry or when reheating leftovers. 
  • If your fennel wasn’t sold with the fronds, use a little fresh herbs like parsley for garnish.
  • If you want to get fancy, heat up the wine and crumble in a big pinch of saffron and let it dissolve for 10 minutes, and then add the saffron-infused wine mixture as directed in Step 2.
  • You can garnish with red pepper flakes for a little added heat if desired. 
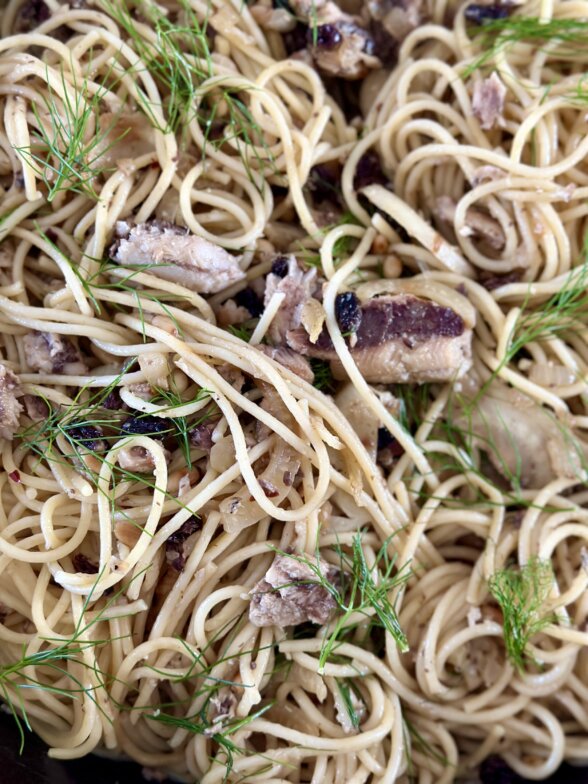
 

a close up photos showing sardines mixed with pasta noodles


Substitutions 


  • Sardines – jarred tuna or canned salmon
  • Make it plant-based – omit the anchovies and sardines, and add in a can of chickpeas, drained and smashed + ¼ cup capers.
  • Anchovies – these have a very salty, distinctive flavor.  Feel free to omit if they’re not your thing. 
  • Fennel – use more onion, omit, or try sliced celery or fennel seeds
  • Pasta – You can cut the quantity of pasta in half and swap in zucchini noodles.
  • Here are some other ways to try tinned sardines. Just read the package to make sure you’re getting what you want, such as in oil, with bones or boneless etc.
    •  In a salad in place of tuna, an easy one to try is in a Nicoise Salad
    • On toast with tomatoes and smashed avocado
    • Chop them up and stir them into tomato sauce
    • Swap them in place of other canned fish in a fish cake or fish patty
    • Chop them up and add them to braised greens
    • They’re natural with potatoes. Add them to my Italian Potato Salad
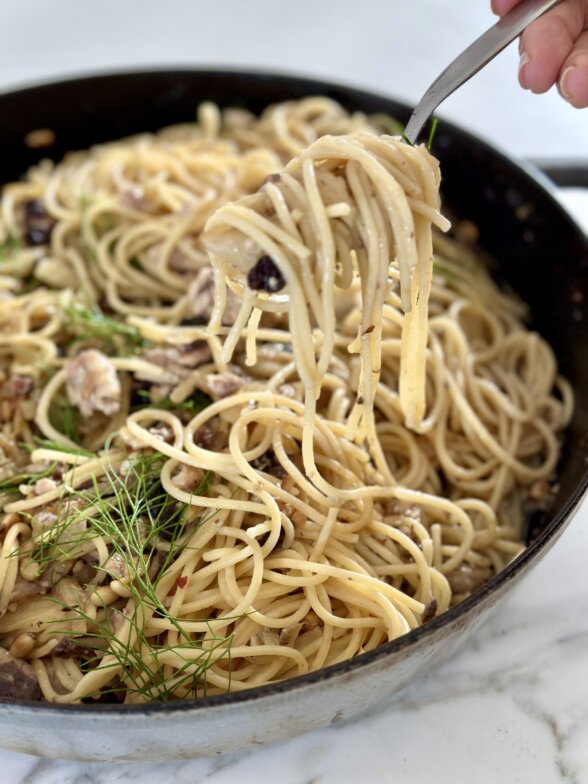
 

a fork lifting pasta out of a skillet


More Delicious Recipes

Pasta with melted zucchini sauce

Cod Acqua Pazza

Seven Fishes Seafood Salad

Fish in parchment with fennel, citrus and olives

Branzino fillets with green olive and fennel tapenade

Spetses Braised Cod


If you give this pasta con le sarde recipe a try, snap a pic and tag @pamelasalzman on Instagram so I can see your beautiful creations. I also really appreciate readers taking the time to leave a rating and review! Subscribe for free to my site for the latest recipes, updates, and things I’ve been loving lately.  If you enjoy this recipe, I taught it last year in my online class!  Give me an hour a month, and I’ll make you a better, healthier cook!


View this post on Instagram


A post shared by Pamela Salzman (@pamelasalzman)

Pasta con le Sarde

Pamela
5 from 2 votes
Servings 4 -6

Ingredients
  

  • ¼ cup unrefined cold-pressed extra-virgin olive oil (feel free to use the oil from the sardine tins)
  • 1 medium onion diced
  • 1 fennel bulb very thinly sliced, fronds reserved
  • 3 garlic cloves chopped
  • Sea salt
  • Freshly ground black pepper
  • Optional: ½ teaspoon fennel seeds crushed on a cutting board with a knife
  • Pinch crushed red pepper flakes
  • ½ cup dry white wine such as sauvignon blanc, chardonnay, or pinot grigio
  • cup dried currants or raisins try golden raisins if you can find them
  • 6 anchovies about a 1.5 to 2-ounce jar (optional)
  • 3 4-ounce tins sardines packed in oil, drained (you can use the oil to sauté the vegetables)
  • ¼ cup pine nuts toasted* (optional or use another nut like walnuts)
  • 1 pound pasta of your choice the dish is typically made with BUCATINI, a hollow spaghetti
  • Kosher salt
  • Fresh breadcrumbs toasted in olive oil in a skillet if you like for garnish

Instructions
 

  • In a large pan that is big enough to fit the pasta, warm the olive oil over medium heat. Add the onion and fennel and sauté until the onion is tender and translucent and the fennel has almost softened, about 6 minutes.
  • Add the garlic, salt, pepper, fennel seeds (if using), and crushed red pepper and sauté until fragrant, about 1 minute. Add the wine and currants and cook until the liquid is almost fully reduced.
  • Add the anchovies and sardines, breaking them up in the pan with a wooden spoon, until heated through. Add the pine nuts and toss to combine.
  • Bring a large pot of water to a boil. Season the water with a handful of kosher salt. Add the pasta and cook until al dente. Reserve some of the pasta water (about 1 cup) before draining the pasta. Add the pasta to the pan with the sardine mixture and toss to combine. You can add some pasta water or a drizzle of olive oil to the pasta mixture if it looks a little dry. Garnish with reserved fennel fronds.

Notes

You can serve with toasted breadcrumbs if you’d like.
*To toast pine nuts, add them to a dry skillet over medium-low heat. Stir them around frequently until golden brown. Immediately transfer them to a plate so they don’t continue to brown in the hot skillet.
Make it plant-based: omit the anchovies and sardines, and add in a can of chickpeas, drained and smashed + ¼ cup capers.
Here are some other ways to try tinned sardines. Just read the package to make sure you’re getting what you want, such as in oil, bone-in or boneless etc.
• In a salad in place of tuna, an easy one to try is in a Nicoise Salad
• On toast with tomatoes and smashed avocado
• Chop them up and stir them into tomato sauce
• Swap them in place of other canned fish in a fish cake or fish patty
• Chop them up and add them to braised greens
• They’re natural with potatoes. Add them to my Italian Potato Salad
Tried this recipe?Let us know how it was!


The Best Olive Oil Apple Spice Cake Recipe

Welcome in the Fall season with this delicious Apple Spice Cake! With fresh apples, the perfect blend of warming spices, and pantry baking staples, this perfect cake is packed with Fall flavor, and will be one of your favorite recipes in no time! 

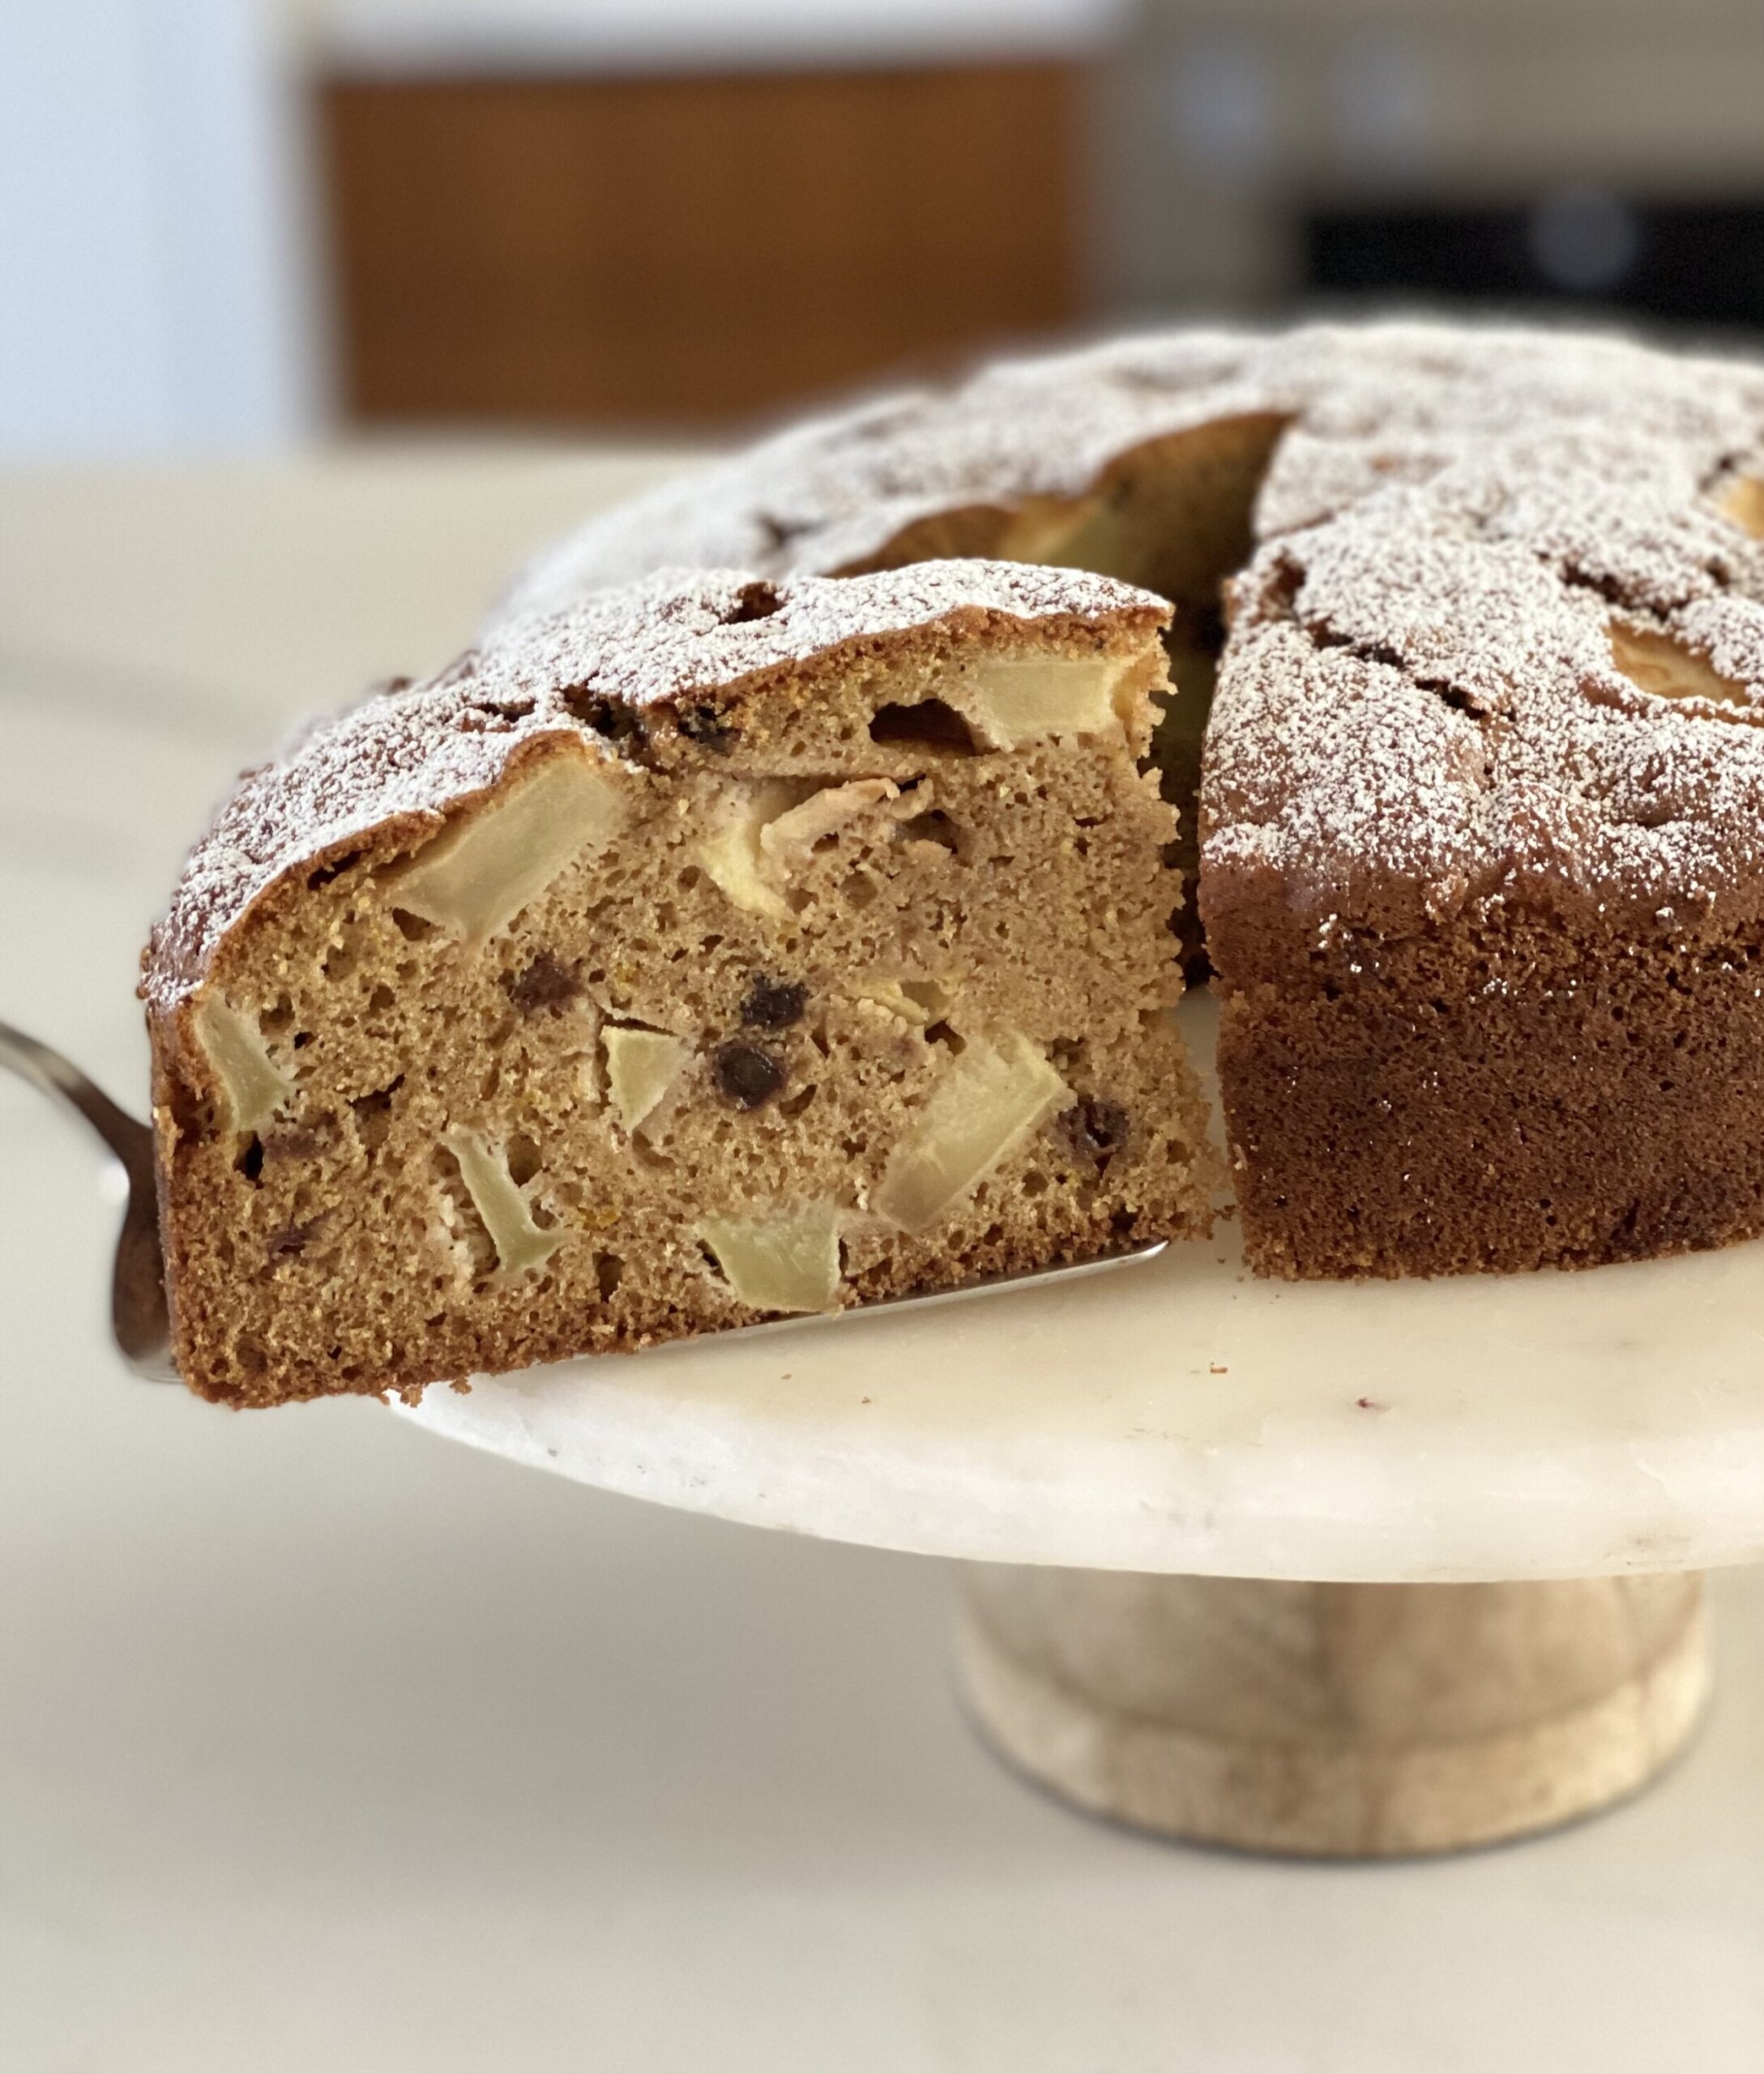
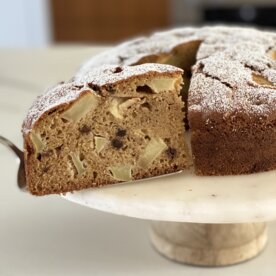
a slice of apple spice cake on a cake stand

Why You’ll Love This Easy Apple Spice Cake Recipe

When September rolls around, I drop berries and stone fruits like a hot potato and move right on over to apples and pears for fruit desserts. I taught this Olive Oil Apple Spice  Cake last year and then proceeded to make it for the Jewish holidays and every time we had people over in the Fall.  Then all my friends who ate it asked me for the recipe and I told them, “Sorry, it’s exclusive to my online cooking class!”  Little did they know I tweaked an Ottolenghi recipe. LOL. This cake reminds me of a better version of the Silver Palate chunky apple walnut cake that I made 100 times when I was in college.

  • Cake can be made 2-3 days in advance
  • It’s so apple-y!
  • The ultimate fall cake, perfect for holidays and entertaining
  • Freezes well
  • No need for frosting, glaze, or anything over-the-top!

If you’re looking for more apple recipes, try these: Apple Amaretti Crisp, Apple Fritter Skillet Cake, or Grain-Free Apple Tarte Tartin.

Ingredient Notes

This recipe calls for very simple ingredients– many of which you may already have on hand. Please see recipe substitutions in the recipe card below to make a gluten-free version or to swap ingredients if you don’t have them. 

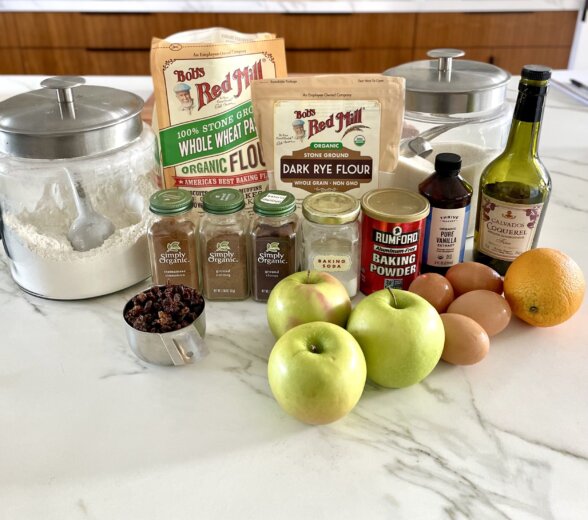
recipe ingredients on a marble counter

  • Raisins: I prefer unsulphured raisins. 
  • All-purpose flour: I know I rarely use all-purpose flour, but it helps keep this cake from getting too heavy.
  • Buckwheat or Rye flour: This has a nice earthy taste that provides an interesting flavor in baked goods and pancakes. You can use more whole wheat pastry if you don’t have either of these. 
  • Whole wheat pastry flour: milled from white wheat berries, this is lighter than traditional “whole wheat flour” and less bitter. I love the earthiness whole grain flours provide.
  • Cinnamon: apples and cinnamon are BFF’s!
  • Nutmeg: I love a little nutmeg, but it can get overpowering, so I am conservative when I use it.
  • Cloves or Allspice: a little goes a long way. That’s why I only use 1/8th teaspoon. 
  • Baking soda: Standard Arm & Hammer baking soda reacts with the acidic ingredients to provide extra leavening.
  • Baking powder: I prefer an aluminum-free baking powder to avoid a metallic taste in baked goods. Besides, it’s not like we need any more aluminum in our diet. 
  • Apples: now is the season even though you see apples year-round at the market. I like Granny Smith apples, Pink Lady, Braeburn, Honeycrisp apples, or Fuji, but use what you like.  
  • Sugar: I use a dry sweetener in this recipe. I recommend cane sugar because it dissolves well and is light-colored. You can also use maple sugar (more expensive), coconut sugar (will result in a darker cake), or light brown sugar if that’s all you have. 
  • Olive oil: is one of my go-to fats of choice in baked goods. Olive oil pairs well with fruit, vegetables, and chocolate.
  • Eggs: I use 2 large eggs plus 2 large egg whites. 
  • Vanilla extract: look for pure vanilla extract with no additives or artificial flavors. 
  • Citrus zest: I like to use orange or lemon zest. 

Step-by-Step Instructions 

Step 1: Preheat the oven to 350 degrees F. Lightly grease the base and sides of a 9-inch round springform pan with olive oil and line the bottom with unbleached parchment paper. Set aside. 

raisins simmering in a saucepan

Step 2: Place the raisins and 2/3 cup of the water in a medium saucepan. Simmer over low heat until the raisins are plump, about 10 minutes. Remove from heat and drain any remaining water in the pan. Set aside.

hands cutting apples on a cutting board

Step 3: Whisk the flours, cinnamon, nutmeg, cloves, baking soda, baking powder and salt together in a medium bowl. Peel and core the apples, then cut into 1-inch pieces and set aside in a separate bowl. The apples may start to oxidize if you do this in advance, but it’s ok because you won’t be able to tell when the cake bakes.

apple spice cake batter in a mixing bowl

Step 4: Place the sugar, olive oil, whole eggs, vanilla and orange zest in the bowl of a stand mixer fitted with the paddle attachment. Beat on medium speed for 4-5 minutes, until the mixture is light in color and has thickened a little. You don’t want to beat at such a high speed since it can create air bubbles. Remove the bowl from the machine and, using a large spatula, add the dry ingredients and gently fold to combine. Add the apples, raisins, and the remaining 1/3 cup water (or equivalent amount of calvados, if using) and stir to combine.

a hand holding a whisk to show the stiff peaks of egg whites

Step 5: Place the egg whites in a clean bowl and whisk at high speed until soft peaks form. This will take a little longer if you’re using a stand mixer due to the small amount of egg whites. Gently fold in the egg whites into the batter, then transfer the cake batter into the prepared pan.

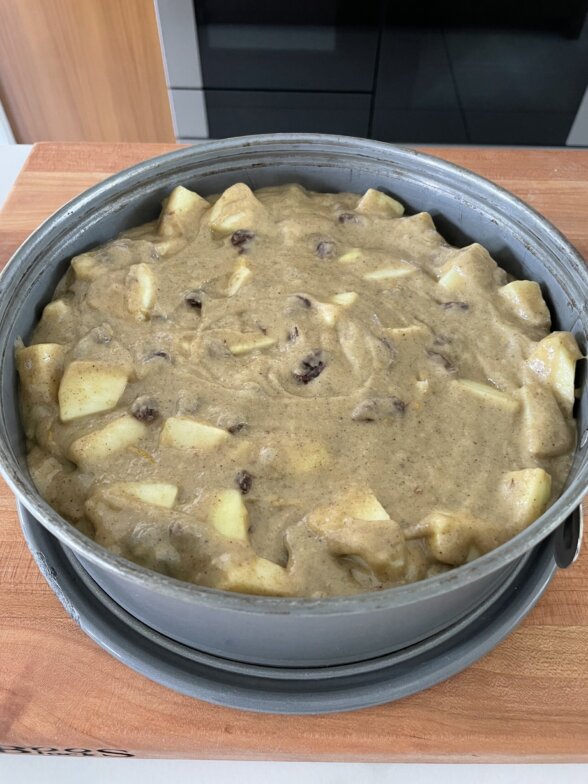
raw apple spice cake batter in a spring form pan

Step 6: Smooth the top with a spatula and bake in your preheated oven for 40 – 50 minutes, or until a skewer inserted into the center of the cake comes out clean. Remove from the oven, allow to cool in the pan for a few minutes. Run a thin knife along the perimeter of the cake, unmold and transfer the cake to a cooling rack to cool completely.

baked apple spice cake right out of the oven

Step 7: Once cool, you can dust with a little powdered sugar if desired.

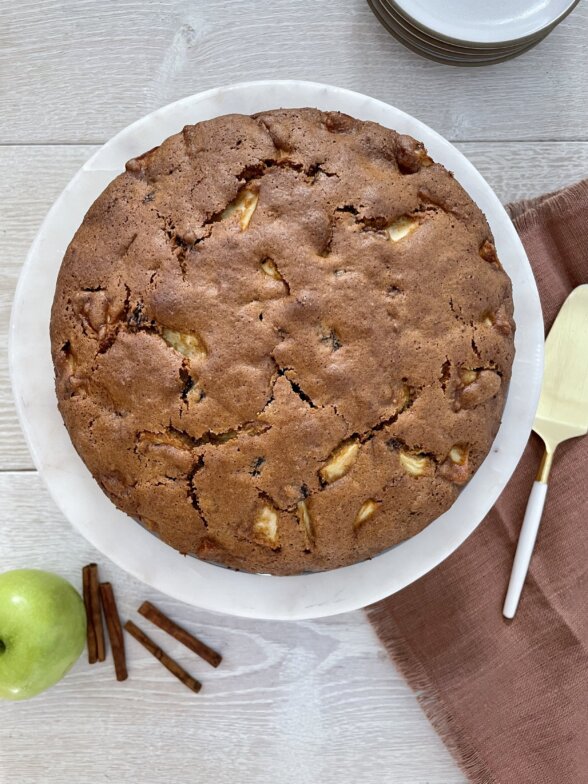
an overhead shot of an apple spice cake on a serving platter

Recipe Tips 

  • Use room temperature ingredients, especially eggs. You may not realize it, but it makes a difference!
  • Don’t use your peppery, artisanal $50 olive oil here. Just the one you use for daily cooking is fine.
  • Use the apples you enjoy. I tend to prefer Granny Smith, Honeycrisp, and Pink Lady in cakes.
  • Use a toothpick or skewer to determine if the cake is done. Dry crumbs are ok. A sticky batter is not.
  • If you don’t have a springform pan, use a 9-inch round with parchment lining the inside and coming up the top at least an inch.
  • While this is a delicious cake on its own, if you want to drizzle a little caramel syrup or layer a little cream cheese frosting over the top, that is an option. 

Recipe Substitutions

  • Buckwheat or rye flour – Use more whole wheat pastry flour 
  • Wheat flours – Use a good GF flour blend, like King Arthur or Bob’s Red Mill.
  • Ground cloves – allspice
  • Cane sugar – Maple sugar or coconut sugar. Keep in mind that white sugars result in a lighter cake, where darker sugars will make the cake more brown. 
  • Orange zest – Lemon zest
  • Raisins – Diced dates or chopped walnuts

Storage and Serving Tips

You can slice and serve this easy apple cake by itself or with a scoop of vanilla ice cream (or salted caramel ice cream!) or a dollop of whipped cream. Lightly dust with confectioners’ sugar if desired. 


Store your cake in an airtight container or wrapped tightly in plastic wrap. It will keep for 2 days at room temperature or 5-6 days in the refrigerator. 


For longer storage, let the apple spice cake cool completely. Wrap it tightly in plastic wrap and store it in a freezer bag. Freeze for up to 2-3 months. Thaw overnight in the refrigerator, then let it sit for a bit at room temperature before serving! 

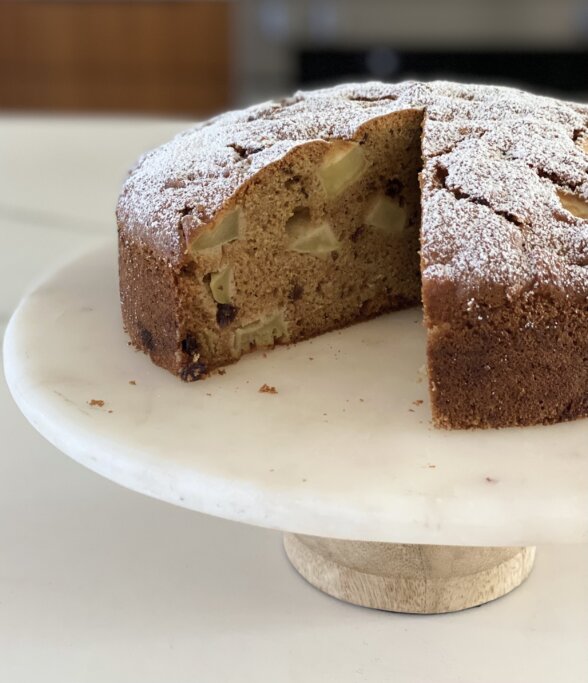
a slice taken out of a cake on a stand

More Fall Dessert Recipes


View this post on Instagram


A post shared by Pamela Salzman (@pamelasalzman)

If you give this apple spice cake recipe a try, snap a pic and tag @pamelasalzman so I can see your beautiful creations. I also really appreciate readers taking the time to leave a star rating and review! I have started a weekly Monday newsletter with tips, musings, new recipes not published here, fun new finds, and more. Subscribe for free here.

For more delicious recipes and to learn how to be a better cook, check out my monthly online cooking classes. I have been teaching people for 15 years how to cook healthy food that their families love!  Join me!

This post may contain affiliate links


The Best Olive Oil Apple Spice Cake Recipe

Adapted from Yotam Ottolenghi
Welcome in the Fall season with this delicious Apple Spice Cake! With fresh apples, the perfect blend of warming spices, and pantry baking staples, this perfect cake is packed with Fall flavor, and will be one of your favorite recipes in no time!
5 from 2 votes
Servings 8 -10

Ingredients
  

  • 2/3 cup unsulphured raisins any color (I bet diced dates would be great, too)
  • 1 cup water divided OR ⅔ cups water + ⅓ cup calvados (apple brandy)
  • 1 ½ cups all purpose flour
  • ½ cup buckwheat or rye flour or just use more whole wheat pastry flour
  • ½ cup plus 2 tablespoons whole wheat pastry flour
  • 1 teaspoon ground cinnamon
  • ½ teaspoon ground nutmeg
  • teaspoon ground cloves or allspice
  • 1 ½ teaspoons baking soda
  • 1 ½ teaspoons aluminum-free baking powder
  • ½ teaspoon sea salt
  • 1 ¾ pounds apples about 3 large, such as Granny Smith, Pink Lady, Braeburn, Honeycrisp or Fuji
  • 1 cup unbleached organic cane sugar maple sugar, or coconut sugar
  • cup unrefined cold-pressed extra-virgin olive oil + extra for greasing pan
  • 2 large eggs lightly beaten, plus 2 large egg whites
  • 2 teaspoons pure vanilla extract
  • 1 teaspoon finely grated orange or lemon zest
  • Optional: powdered sugar for dusting

Instructions
 

  • Preheat the oven to 350 F degrees. Lightly grease the base and sides of a 9-inch round springform pan with olive oil and line the bottom with unbleached parchment paper. Set aside.
  • Place the raisins and 2/3 cup of the water in a medium saucepan. Simmer over low heat until the raisins are plump, about 10 minutes. Remove from heat and drain any remaining water in the pan. Set aside.
  • Whisk the flours, cinnamon, nutmeg, cloves, baking soda, baking powder and salt together in a medium bowl. Peel and core the apples, then cut into 1-inch pieces and set aside in a separate bowl. The apples may start to oxidize if you do this in advance, but it’s ok because you won’t be able to tell when the cake bakes.
  • Place the sugar, olive oil, whole eggs, vanilla and orange zest in the bowl of an electric mixer fitted with the paddle attachment. Beat on medium speed for 4-5 minutes, until the mixture is light in color and has thickened a little. Remove the bowl from the machine and, using a large spatula, add the dry mix and gently fold to combine. Add the apples, raisins, and the remaining 1/3 cup water (or equivalent amount of calvados, if using) and stir to combine.
  • Place the egg whites in a clean bowl and whisk at high speed until soft peaks form. Gently fold in the egg whites into the batter, then transfer the batter into the prepared pan. Smooth the top with a spatula and bake for 40 - 50 minutes, or until a skewer inserted into the middle of the cake comes out clean. Remove from the oven, allow to cool in the pan for a few minutes. Run a thin knife along the perimeter of the cake, unmold and transfer the cake to a cooling rack to cool completely.
  • Once cool, you can dust with a little powdered sugar, if desired.

Notes

Recipe Tips
Use room temperature ingredients, especially eggs. You may not realize it, but it makes a difference!
Don't use your peppery, artisanal $50 olive oil here. Just the one you use for daily cooking is fine.
Use the apples you enjoy. I tend to prefer Granny Smith, Honeycrisp, and Pink Lady in cakes.
Use a toothpick or skewer to determine if the cake is done. Dry crumbs are ok. A sticky batter is not.
If you don't have a springform pan, use a 9-inch round with parchment lining the inside and coming up the top at least an inch.
While this is a delicious cake on its own, if you want to drizzle a little caramel syrup or layer a little cream cheese frosting over the top, that is an option (Ottolenghi suggests a maple-cream cheese frosting, but I didn't think it needed it.)
Recipe Substitutions
Buckwheat or rye flour - Use more whole wheat pastry flour
Wheat flours - Use a good GF flour blend, like King Arthur or Bob's Red Mill.
Ground cloves - allspice
Cane sugar - Maple sugar or coconut sugar. Keep in mind that white sugars result in a lighter cake, where darker sugars will make the cake more brown.
Orange zest - Lemon zest
Raisins - Diced dates or chopped walnuts
Storage and Serving Tips
You can slice and serve this easy apple cake by itself or with a scoop of vanilla ice cream (or salted caramel ice cream!) or a dollop of whipped cream. Lightly dust with confectioners’ sugar if desired.
Store your cake in an airtight container or covered with plastic wrap. It will keep for 2-3 days at room temperature or 5-6 days in the refrigerator.
For longer storage, let the cake cool completely. Wrap the cake tightly in plastic wrap and store it in a freezer bag. Freeze for up to 2-3 months. Thaw overnight in the refrigerator, then let it sit for a bit at room temperature before serving!
Tried this recipe?Let us know how it was!


Curried Chicken Salad Recipe
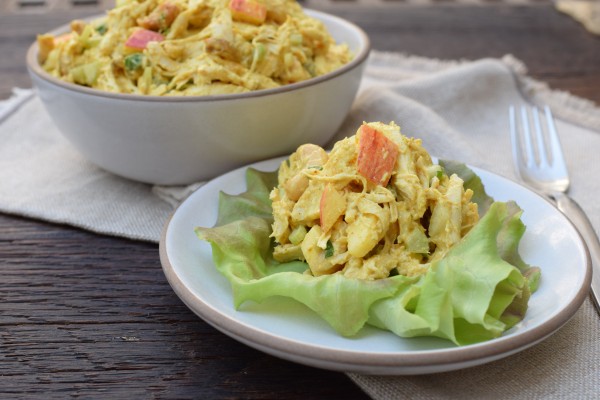
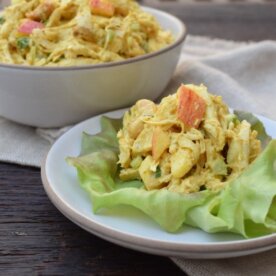
curried chicken salad | pamela salzman

I’m sure you all pushed away your keyboards and ran into the kitchen to poach chicken after Monday’s post, right?  Perfect!  Now let’s do something healthy and delish with your chicken.  I have a recipe for the BEST curried chicken salad I have ever eaten!   Even my family, which to my chagrin prefers more “simple” flavors, loves this salad.

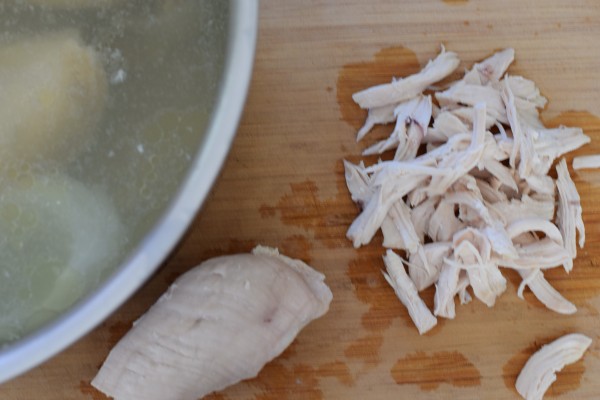
shred chicken

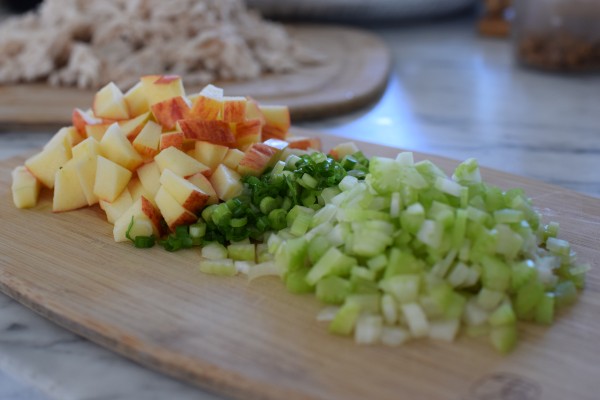
apples, green onions, celery

I thought it would be a great time to post this curried chicken salad since you might be looking for some new options for school and/or work lunch.  At it’s most basic, curried chicken salad is just what it sounds like — chicken salad with curry mixed in.  I use a yellow curry powder, which is a blend of different anti-inflammatory spices like turmeric, cumin, coriander, fenugreek and many others.  But as opposed to basic, standard chicken salad to which I add celery and onion, I like to add a little something sweet to balance the curry.  My husband and I disagree on whether diced apple or halved grapes is better.  I think they’re both good, but since I am a sucker for crunch, I usually add apples.

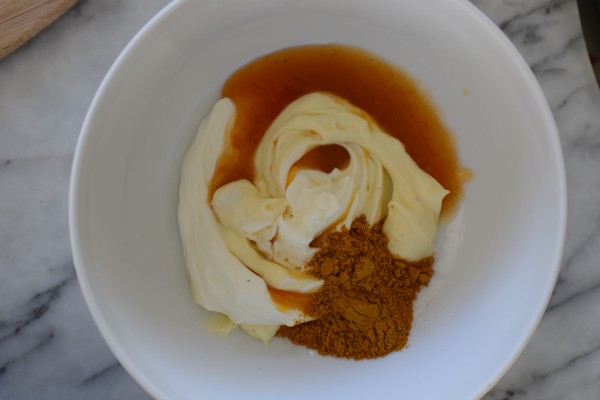
curry dressing

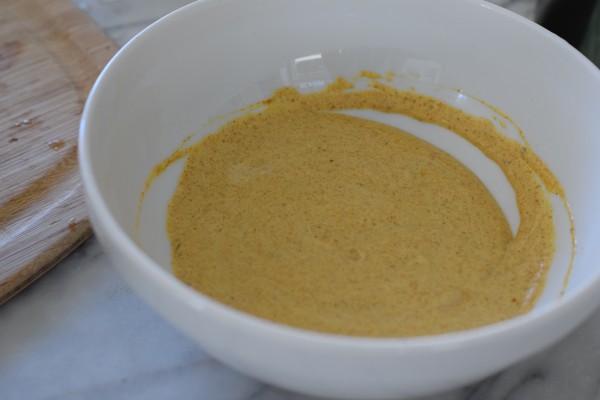
curry dressing

I used to make Ina Garten’s version with Major Grey chutney and white wine, but the chutney is not something I usually use and it was taking up space in the fridge.  So I created my own blend of ingredients, including apricot preserves, to mimic the sweet, hot, tart flavor of the chutney.  This is the best part of the dressing.  So, so good and flavorful!  I also like to use shredded, as opposed to cubed or diced chicken, because I think the nooks and crannies of the shredded chicken pick up more of the dressing.

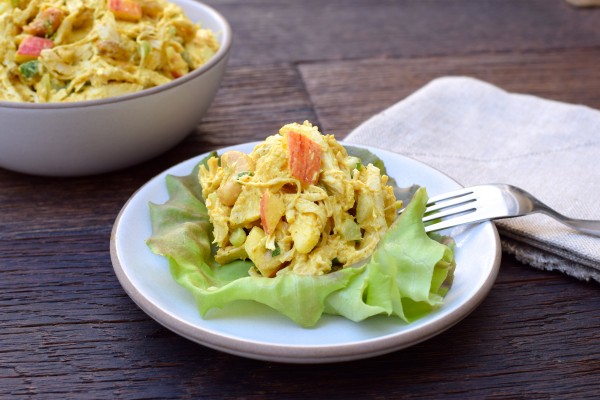
curried chicken salad | pamela salzman

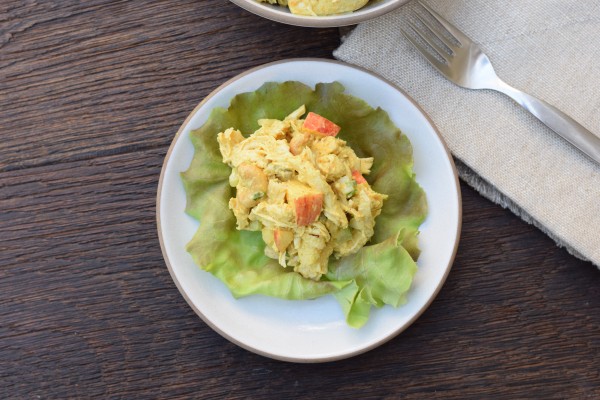
curried chicken salad

You can make it the day before and tuck it inside of a pita or 2 slices of hearty, whole grain bread.  Or, as I like to do it, eat it in a lettuce cup.  A little avocado would put this over the top!  Feel free to make this spicy or change up the preserves.  I think any variation of orange, apricot, peach or kumquat would be great.  I like the St. Dalfour brand which is sugar-free and without added preservatives.  I think this might become your new favorite chicken salad!  For you vegheads, I may try to do a tofu version of this.  How does that sound?!

Curried Chicken Salad
Pamela
5 from 2 votes

Ingredients
  

  • 3 bone-in skin-on chicken breasts (technically split breasts), about 3/4 pound each
  • ½ small onion peeled
  • 4 large garlic cloves smashed
  • 1 Tablespoon additive-free kosher salt
  • 2 stalks celery diced
  • 2 scallions white and green parts, chopped
  • 1 cup chopped apple about 1 medium apple or 1 cup grapes, halved
  • ¼ cup golden raisins or dark raisins, if you prefer
  • ½ cup roasted salted cashews, chopped (slivered almonds are also good)
  • ½ cup plain whole Greek yogurt
  • ¼ cup mayonnaise I like soy-free Vegenaise
  • 3 Tablespoons apricot or peach preserves preferably no sugar added like St. Dalfour
  • 1 ½ tablespoons curry powder
  • 2 teaspoons white wine vinegar
  • ½ teaspoon sea salt + more to taste
  • ¼ teaspoon ground ginger
  • pinch cayenne pepper
  • butter lettuce or sandwich bread for serving

Instructions
 

  • Place the chicken in a saucepan with the onion, garlic, salt and peppercorns and add water to cover.
  • Bring to a boil over high heat, reduce heat to low, cover and simmer until the chicken is just cooked through, about 25 minutes.
  • Allow chicken to cool in the poaching liquid.
  • Remove the skin and bones and shred the meat into large, bite-size pieces. Set aside in a large bowl.
  • Add the celery, scallions, apple or grapes, raisins and cashews to the chicken.
  • In a medium bowl, combine yogurt, mayonnaise, preserves, curry powder, vinegar, salt, ginger, and cayenne pepper.
  • Pour on top of the chicken and salad ingredients and combine to coat well with dressing. Adjust seasonings to taste.
  • Store leftovers in the refrigerator for up to 3 days.

Notes

Or you can use 6 cups of shredded, already cooked chicken instead of poaching chicken from scratch.
Tried this recipe?Let us know how it was!


Vegan apple spice snacking cake recipe (refined sugar-free)

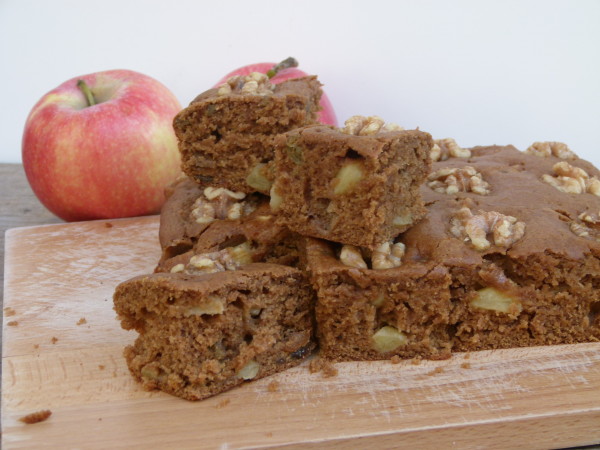
vegan apple spice snacking cake | pamela salzman

I just took stock of my pantry because baking season has officially begun.  It started slowly with a few batches of cookie dough for back to school lunches.  Then Mr. Picky’s birthday rolled around last week and whoosh it’s Rosh Hashana this Wednesday night already!  I don’t need to tell you what is just around the corner, do I?

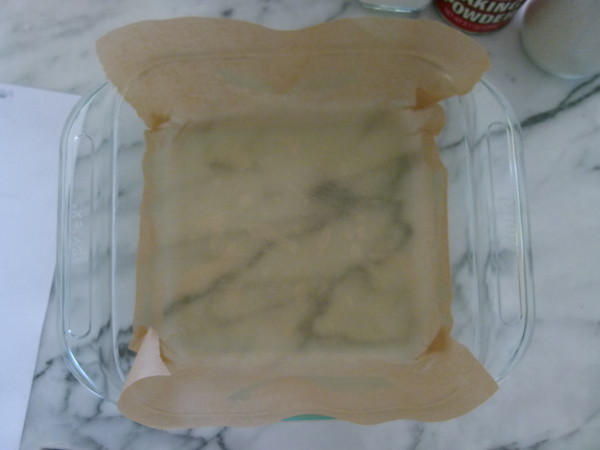
grease the cake pan and line with parchment if desired

Thankfully, I share the Jewish holiday cooking with my mother-in-law and sister-in-law.  We each host a meal and cook whatever we want.  I have the first day of Rosh Hashana lunch, as well as the break fast on Yom Kippur evening.  The break fast is actually one of my favorite holidays to host because people literally starve themselves for 24 hours (no water either!) and then come to my house to eat.  I could basically serve anything and it would be a hit!

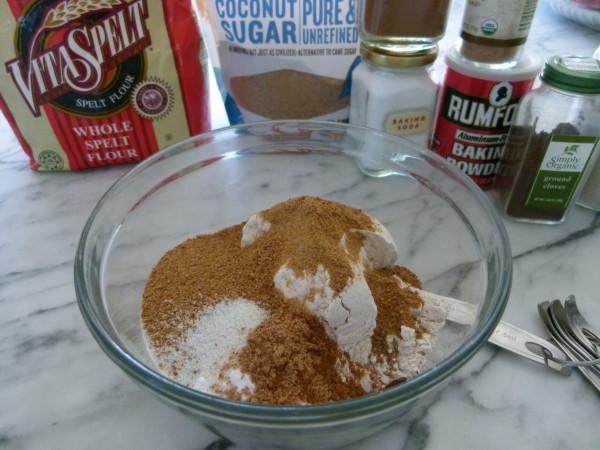
dry ingredients

One of the nice traditions of the Jewish new year is eating seasonal foods.  Love that!  Apples are likely the most important food along with honey which symbolize the hope of a sweet year ahead.  I have been loving the new crops of local apples flooding the markets over the past month.  My kids particularly love Honeycrisp, Pink Lady (my personal fave), Granny Smith.  I use apples all over the place at this time of year — turned into applesauce, sautéed on top of pancakes and waffles, cooked into oatmeal, chopped in salads and folded into simple snacking cakes like this one.

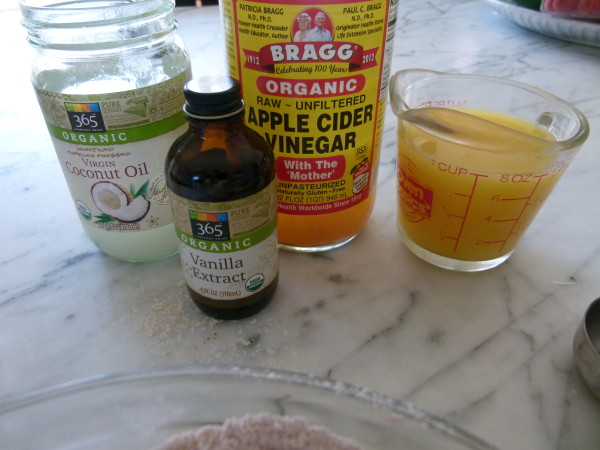
wet ingredients

I saw a recipe a few years back for a Depression era chocolate cake called “Wacky Cake.”  The cake didn’t use any “expensive” ingredients like eggs, milk or butter and I think got it’s name “wacky” because somehow the crazy recipe actually produced a moist, delicious cake.  There are a gajillion recipes for the classic chocolate Wacky Cake, but last year I decided to put a twist on the (vegan) recipe and use apples and spices instead.  Delicious!

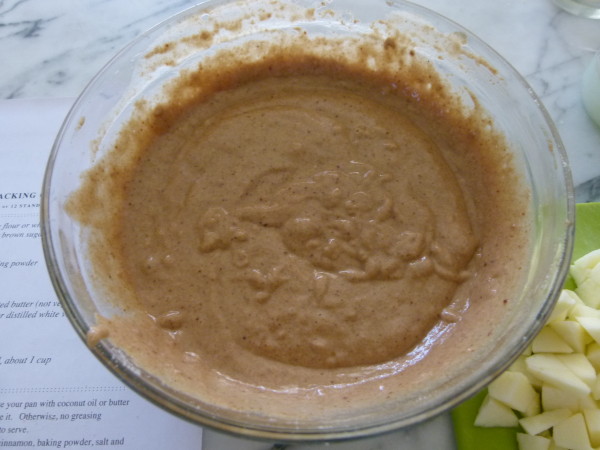
batter before apples and raisins


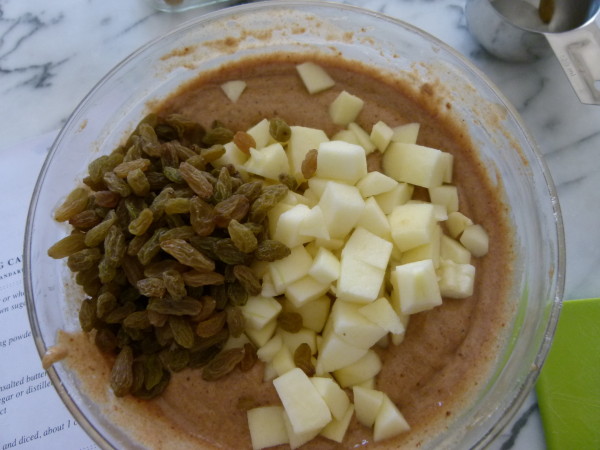
diced apples and golden raisins

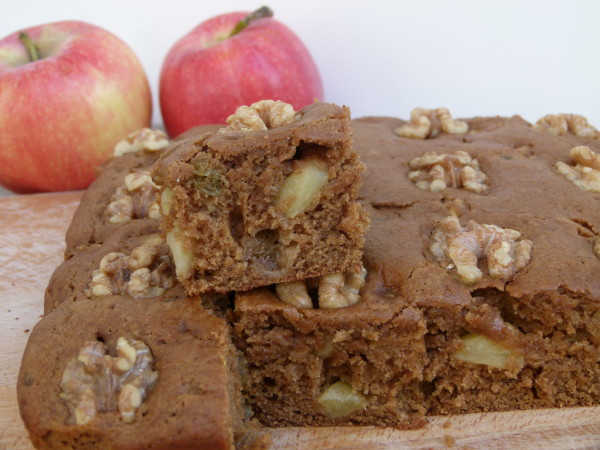
The result was a moist, fragrant and just sweet enough little cake that I think is just perfect for after school snacks, lunch box treats, brunch or anytime you need a seasonal dessert for a fall gathering, like Rosh Hashana!!  I make some sort of apple dessert every year for my luncheon, but I am very fond of this one because it is so darn easy and it freezes amazingly well.  It is also pretty clean: whole grain flour, minimal amount of unrefined coconut sugar, and very little oil (I use unrefined coconut oil.)  My entire family loves it!

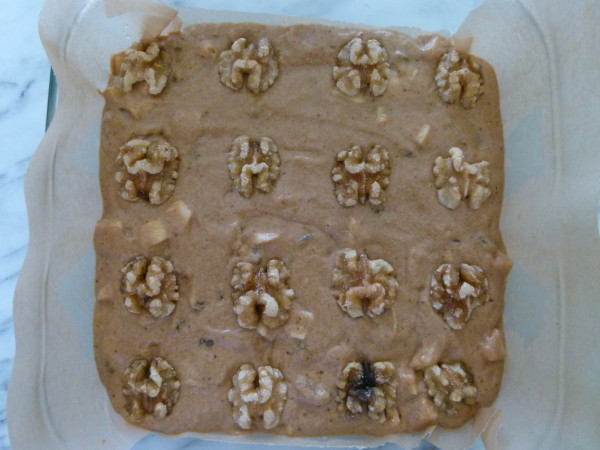
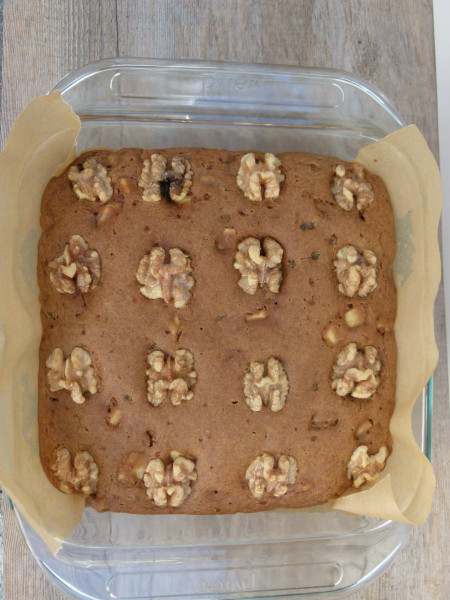
add walnuts to the top of the cake

You can do different things with this easy cake.  You can double the recipe and bake the cakes in 9-inch round pans for a 2-layer cake.  I would use this vegan frosting or a classic cream cheese frosting to go between the two cakes and on top.  If you don’t like raisins, leave them out.  Or instead of placing the walnuts halves on the top of the cake, chop them up and fold them into the batter.  Or make this into muffins.  For my do-aheaders, make this today and freeze it for the upcoming holiday (Rosh Hashana, Halloween, Thanksgiving — GASP!)  If you are celebrating the new year this week, may it be a sweet one!
vegan apple spice snacking cake

vegan apple spice snacking cake | pamela salzman


Vegan Apple Spice Snacking Cake

Pamela

Ingredients
  

  • 1 ¾ cups whole wheat pastry flour or whole spelt flour
  • ½ cup coconut palm sugar or brown sugar or cane sugar
  • 1 teaspoon baking soda
  • 1 teaspoon ground cinnamon
  • ½ teaspoon aluminum-free baking powder
  • ½ teaspoon sea salt
  • ¼ teaspoon ground nutmeg
  • 1/8 teaspoon cloves optional
  • ¼ cup melted coconut oil or unsalted butter not vegan
  • 1 Tablespoon apple cider vinegar or distilled white vinegar
  • 1 teaspoon pure vanilla extract
  • ½ cup water
  • ½ cup orange juice*
  • 1 large apple peeled, cored and diced, about 1 cup
  • ½ cup unsulphured raisins optional
  • 16 raw walnut halves if desired

Instructions
 

  • Preheat oven to 350 degrees. You can grease your pan with coconut oil or butter and line it with unbleached parchment paper if you want to remove it from the pan to serve it. Otherwise, no greasing necessary if you will cut pieces from the pan to serve.
  • Whisk together the flour, sugar, baking soda, cinnamon, baking powder, salt and nutmeg. Make a well (indentation) in the flour mixture.
  • Pour the coconut oil, vinegar, vanilla, water and orange juice in the well and stir until everything is just combined. Do not overmix!
  • Fold in diced apple pieces and raisins.
  • Pour batter into pan and smooth out top. If you want, evenly space walnut pieces over batter. Bake for 30 – 40 minutes or until a toothpick inserted in the center comes out clean.

Notes

*Or use all water and up the coconut sugar to 2/3 cup.  You can also add diced dates.
Tried this recipe?Let us know how it was!

Bircher Muesli with Hazelnuts and Golden Raisins Recipe

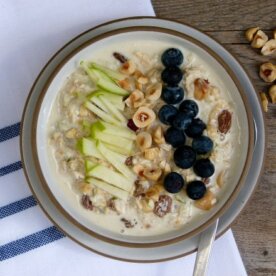
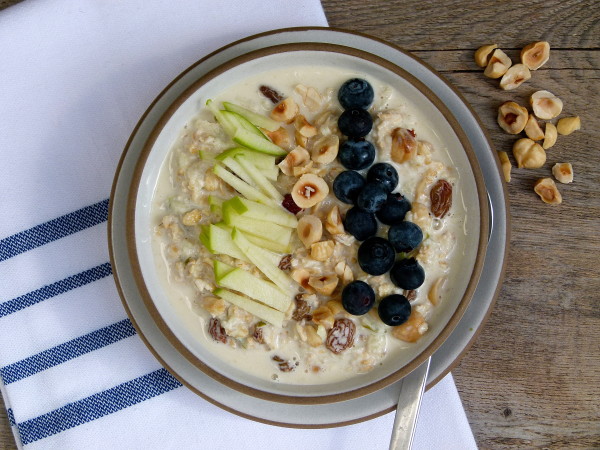
Bircher Muesli with Hazelnuts and Golden Raisins | Pamela Salzman

I had no intention of posting this recipe today because I already have a muesli recipe on my site.  But that was from so, so long ago and I know I don’t even remember what I posted on this site back in the beginning so I don’t expect you to!  Plus this one is better and ironically I made it up on the spot.  I threw this muesli together on a whim on Sunday night because 1. it’s my favorite summer breakfast, 2. Mr. Picky was starting day camp on Monday and I needed one less thing to do in the morning, 3. it has actually been very warm and summerlike here in Manhattan Beach which never happens in the summer, just in September and October when everyone has gone back to school and resumed soccer on the weekends, and 4. I was a little naughty this holiday weekend which involved a homemade cherry pie, a new favorite rosé (did you see my instagram?) and some (a lot of?) mozzarella.  Ooops.  And that was after 9 days at my parents’ house which always involves too much pasta, pizza, wine and mozzarella.

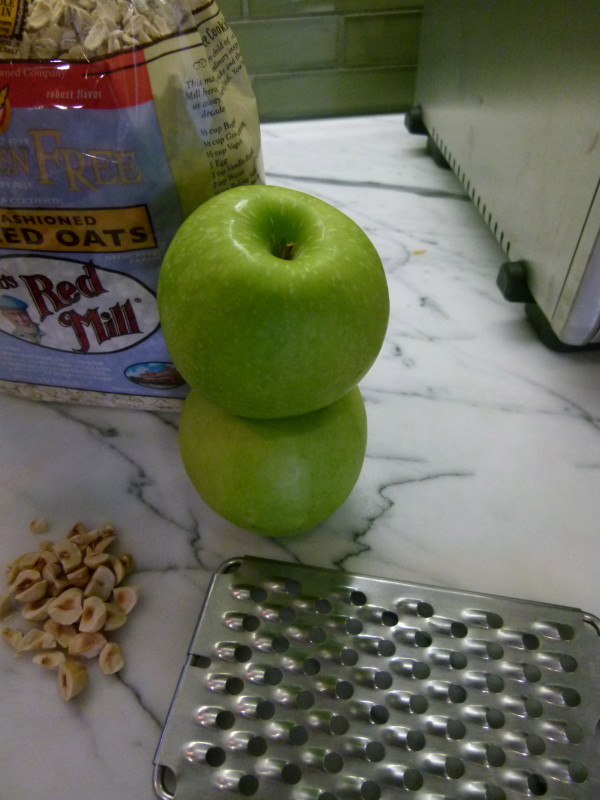
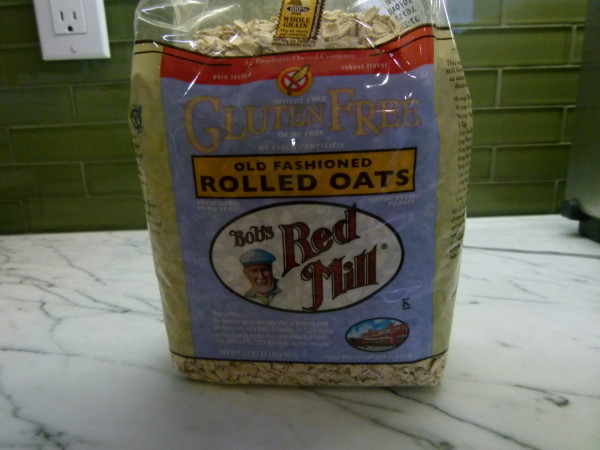
Bob's Red Mill gluten-free oats


grate 2 green apples, skin and all

I always say breakfast will set the tone for the rest of the day’s eating, so you want to start off right, eat a good breakfast.  I had a good sized bowl of this muesli with some blueberries in the morning at 7:30 after a quick workout and then a little green tea at about 10:00 and I was completely fine until lunch at 1:00.  That just about never happens.  I am usually looking for a snack of some kind around 10:00 or 10:30.  If you have issues with sugar and sweets, try making this without any added sweetener or add a couple drops of stevia.  Of course, feel free to sub your favorite nut or seed for the hazelnuts and any good unsulphured fruit for the golden raisins (remember: sulphur dioxide is a preservative for dried fruit and it is not healthy for you, especially for people who have sensitive lungs.)

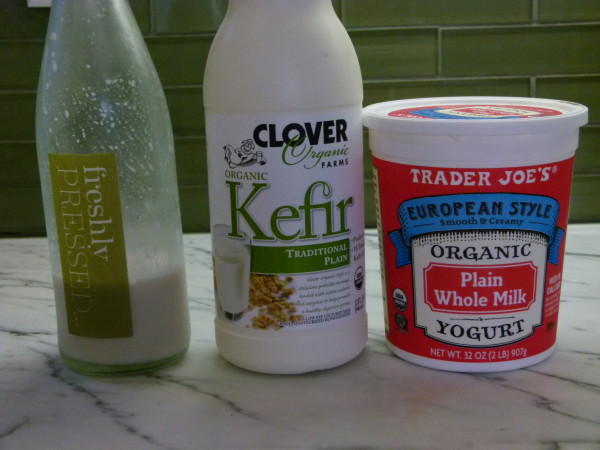
kefir or yogurt + almond milk

I actually think this muesli tastes more like the ones I have had a hotels both in the states and in Europe.  Although it is not technically the original bircher muesli which uses condensed milk (eeek!), it is very similar in taste and texture.  In my previous muesli, I used yogurt, water and orange juice to soak the oats with a little lemon zest.  Decidedly citrusy, which I love, but not necessarily uber authentic.  This one I used half almond milk and half kefir, although a nice think yogurt like Straus Family Creamery would be just as ideal.  (Did you know Trader Joe’s European style yogurt IS Straus?!?)  I still add shredded green apple which is a must, but for this batch I also included golden raisins and chopped hazelnuts and I was in heaven.  Yum, yum, and YUM!  Creamy, crunchy, lightly sweet.  Perfect. I am dreaming of being in a European hotel for breakfast.  And then I had to take Mr. Picky and his buddy to baseball camp. Wake up!

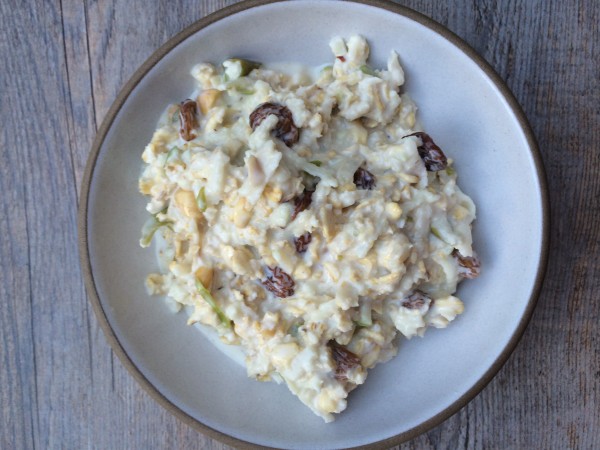
muesli in the morning

Bircher Muesli with Hazelnuts and Golden Raisins | Pamela Salzman

Bircher Muesli with Hazelnuts and Golden Raisins

Pamela
Servings 4

Ingredients
  

  • 2 cups old fashioned rolled oats
  • 2 apples unpeeled, grated (I like using green apples)
  • juice of half a small lemon
  • juice of half an orange
  • 1 ½ - 1 2/3 cups unsweetened almond milk click here for instructions on how to make your own
  • 1 ½ - 1 2/3 cups unsweetened kefir or yogurt
  • ½ cup unsulphured golden raisins or dried fruit of choice
  • 2/3 cup chopped hazelnuts
  • Toppings: fresh berries or sliced bananas extra chopped nuts, raw honey or maple syrup

Instructions
 

  • The night before: In a large bowl, mix all the ingredients, except toppings, in a bowl. Cover and refrigerate overnight.
  • The next morning: add sweetener to taste, if necessary. Divide the muesli among four bowls and top with favorite nuts or fruits.
  • Keeps for several days covered in the refrigerator.

Notes

I don't sweeten this ahead of time because I prefer it unsweetened. Since my kids like a little honey, they add it to their own bowls in the morning. But feel free to add 2 Tablespoons or so of honey or your sweetener of choice.
Tried this recipe?Let us know how it was!


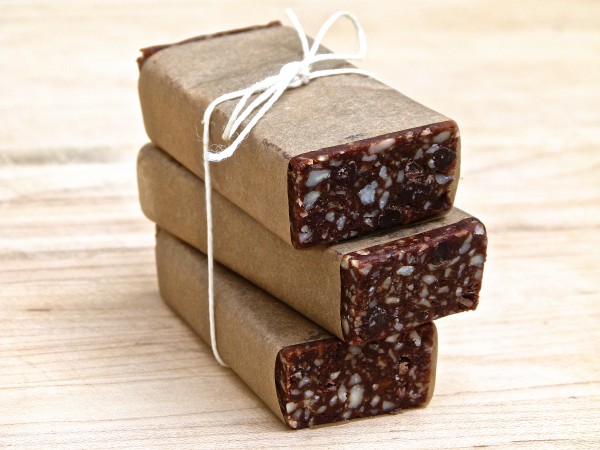
Homemade Larabars and Laralollipops!

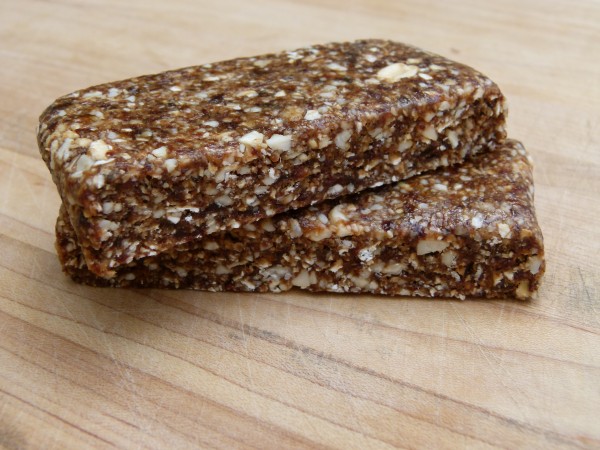
Homemade Larabars | Pamela Salzman

Larabars were one of the first snack bars that I remember buying.   There are no scary ingredients, no added sugars or colors, just dates and nuts.  I liked having them for the kids in my diaper bag, as a snack for the plane when we traveled, and more recently for all-day soccer tournaments in the middle of Taco Bell-land.  I don’t know why it never occurred to me that I could actually make them in my own kitchen.  Without a special Larabar machine!  And when I finally realized how disappointingly easy these are to make, I really wanted to hit myself over the head.  And I could have been making them organic to boot!

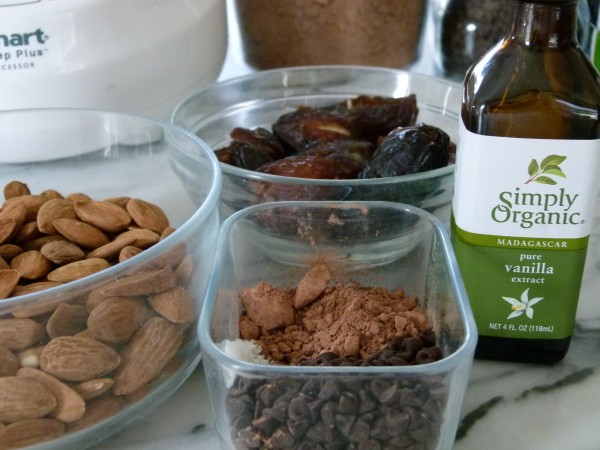
making chocolate-chocolate chip larabars


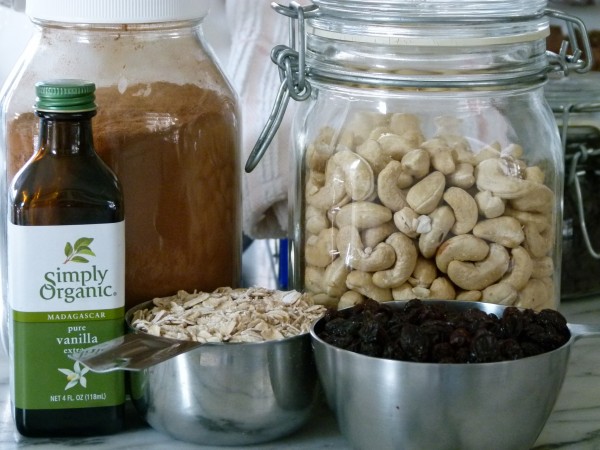
ingredients for oatmeal raising larabars

I had so much fun teaching these bars in my classes last month.  Once I revealed the secret ratio of dates to nuts (1:1 !), we came up with lots of interesting combinations of ingredients and shapes.  The most important ingredient is something sticky to hold it all together.  Usually Larabars contain dried dates, which you might remember are one of my obsessions!   But I had success making bars out of raisins and dried cherries, too.  Are we having fun yet?!  Then take your pick of a nut or seed — I use either almonds, cashews, pecans or sunflower seeds.  You can make a Larabar with just dates and nuts if you want.  Or you can add some yummy things like chocolate, cacao powder, cinnamon, candied ginger, coconut, peppermint extract, instant coffee powder and so on and so forth.  Are your wheels spinning?

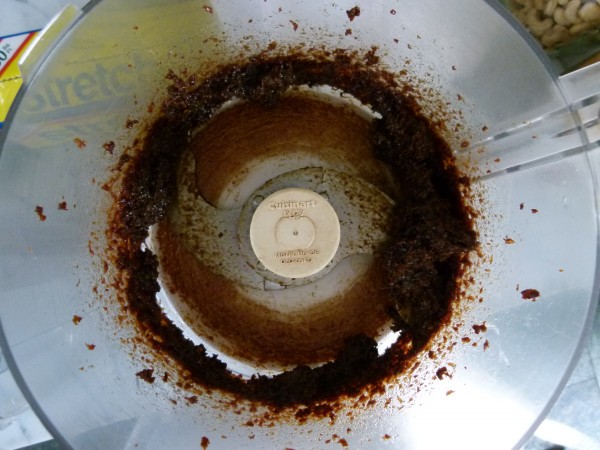
date paste

These are very yummy, but let’s keep it under control and limit ourselves to one for a snack and not the whole delicious batch.  After all, you wouldn’t sit down and eat 14 dates just because.  I also wouldn’t use these as a meal replacement because they generally have under 200 calories which ain’t enough for anyone.  Larabars get bonus points with me because you can make them in approximately 5 minutes and they last for a heck of a long time in the refrigerator or freezer.

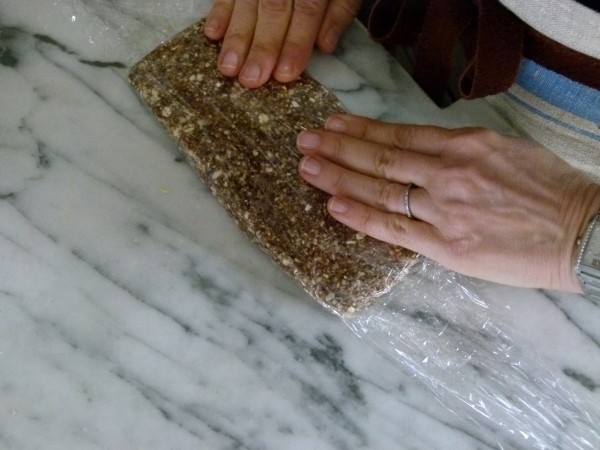
shape it in a piece of plastic wrap

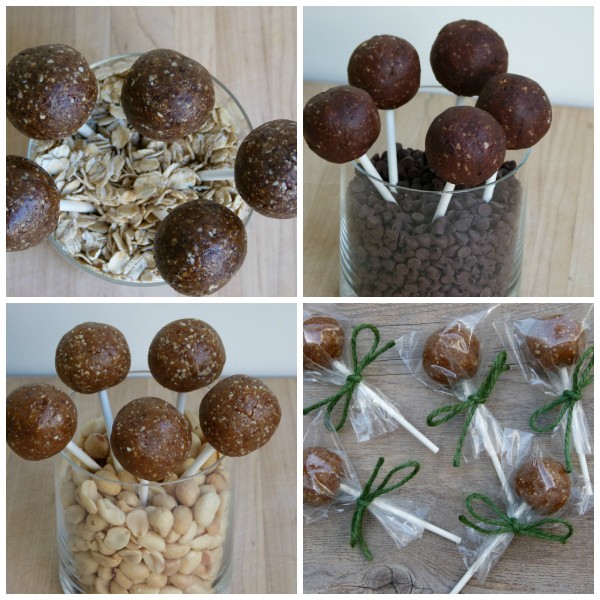
I thought it would be great to post this “recipe” now because Easter and Passover are coming up.  Larabars are a great Passover snack because there’s nothing not kosher for Passover in them, unless you use peanuts.  I think making them in the shape of a traditional Larabar is great, but you can also make little mini squares, or shape them into small, flat discs like a cookie, or a little round ball like a truffle.  And then I went to Michael’s and bought lollipop sticks and made…Laralollipops!!  How cute would these be for Easter?   Dip them in chocolate if you have to!   I’ve given three different combinations here, but you can really make up your own according to what you like.  Or go over to the official Larabar site and copy some of their flavors.  Just don’t tell them I sent you!

Oatmeal Raisin Larabars | Pamela Salzman

Laralollipops | Pamela Salzman


Homemade Larabars and Laralollipops!

Pamela

Ingredients
  

  • CHOCOLATE:
  • 1 ¼ cup dried unsweetened dates (about 14), pitted
  • 1 ¼ cup whole raw almonds cashews or pecans
  • 2 Tablespoons unsweetened cocoa powder or raw cacao powder
  • ¼ cup semi-sweet MINI chocolate chips or shredded unsweetened coconut optional
  • ¼ teaspoon pure vanilla extract
  • 1/8 teaspoon sea salt
  • OATMEAL RAISIN:
  • 1 cup unsulphured raisins or dried cherries for an oatmeal cherry bar
  • ¾ cup rolled oats not quick cooking or instant
  • ¾ cup raw cashews or pecans
  • ½ teaspoon ground cinnamon
  • ¼ teaspoon pure vanilla extract
  • 1/8 teaspoon salt

Instructions
 

  • The easy way to do this is to place all of the ingredients (except chocolate chips) in a food processor and process until the mixture comes together in a tight ball (about 2 ½ minutes). Everything will be really finely processed. See the lollipop images for what that looks like. Or if you want a little more texture from the nuts, process the nuts and dates separately and mix them in a bowl with the remaining ingredients. See the other images for examples of that.
  • The chocolate chips can be added at the end and mixed in with your hands.
  • Lay a piece of plastic wrap on the counter and transfer the ball to the plastic wrap and press down to start to flatten into a rectangle. Fold the excess plastic over the top and use your hands to shape and flatten the mixture until it is about ½” thick, about 9” across and 3” down. Or make whatever shape you want!
  • Refrigerate for a couple hours until firm and slice as desired. Keep wrapped in the refrigerator. Or transfer unwrapped bars to a tightly sealed container.

Notes

You can also do a Peanut Butter Cookie Larabar:  1 ¼ cups pitted dates + 1 cup roasted, salted     peanuts. Sometimes I add 2 Tablespoons of Maca powder and a pinch of salt with or without a few mini chocolate chips.
Tried this recipe?Let us know how it was!

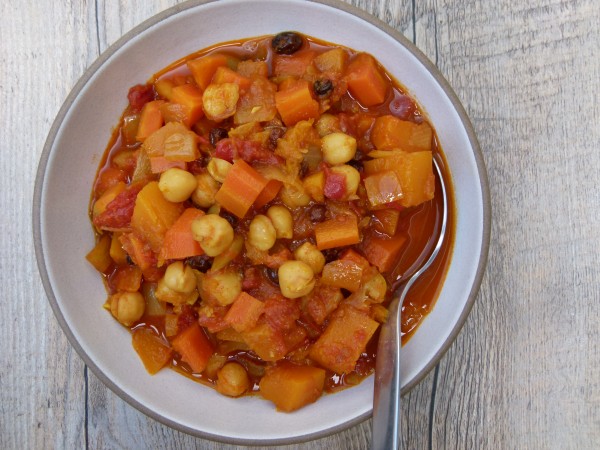
Butternut squash and chickpea stew recipe

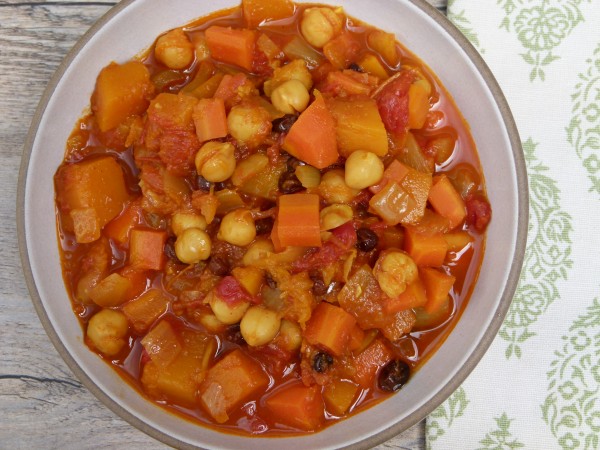
butternut squash and chickpea stew | pamela salzman

I have been consistently making Monday our meatless night, although I often have another vegetarian dinner during the week as well.  This week I was excited to cook something with one of the many winter squashes I have bought recently.  I taught this vegan butternut squash and chickpea stew last February and I was waiting for the change in seasons to make it again.  As opposed to most stews, this one doesn’t take hours to cook and was perfect for a busy weeknight.  Actually, I was so busy on Monday that I had to serve it with white basmati rice instead of brown rice (nobody’s perfect!)  I also made a delicious kale salad with avocados, pomegranates and sliced almonds.  It was the perfect meal for me.  I also love this stew because it can be made the day before and reheated, or made earlier in the afternoon and left on the stove, off the heat, until dinner time.
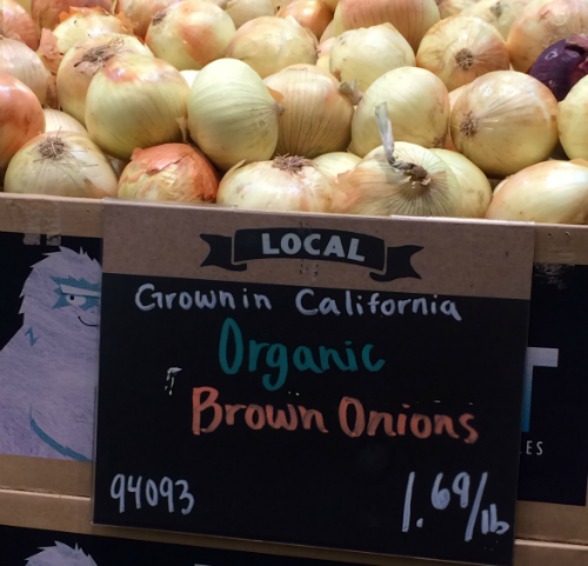
brown onions

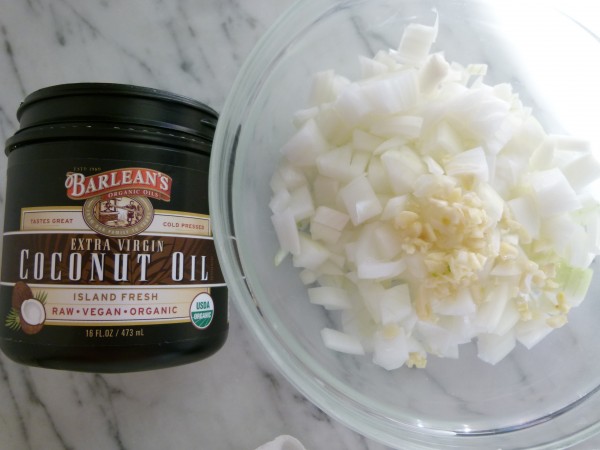
coconut oil and onions


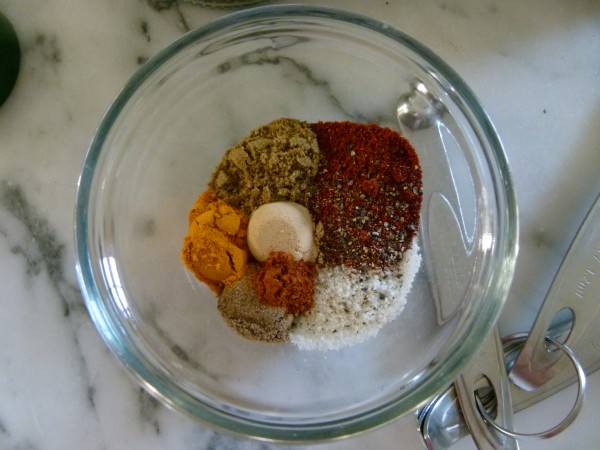
spices

I was really delighted that my son, also known as, but soon to be formerly known as, Mr. Picky, ate everything on his plate (kale, chickpeas, carrots, onions, rice) except the butternut squash.  This is major progress and I am very encouraged by how far he has come since the days not too long ago when he wouldn’t have eaten a single bite of this stew.  Small steps, but they all get there eventually.

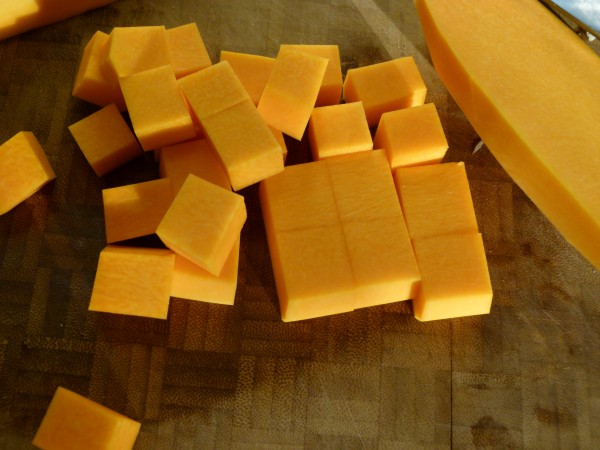
butternut squash

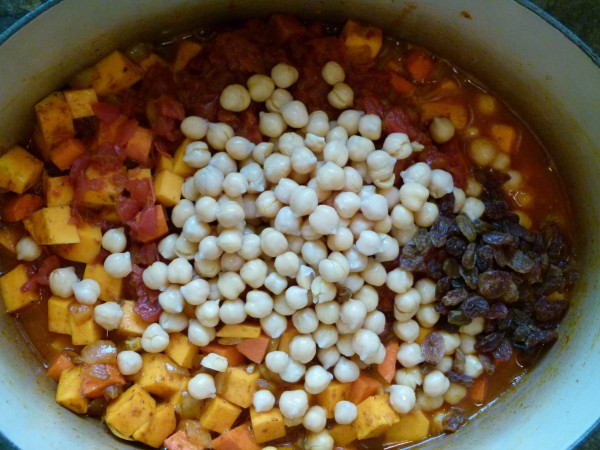
stew in the making

This stew has a little bit of a Moroccan kick to it.  I used really flavorful (and anti-inflammatory) spices like turmeric, ginger, coriander and a little cayenne.  The cayenne gives it just enough heat, but not too much that you would think this is spicy.  I think this would be delicious for a Halloween dinner, whether you are entertaining or just filling everyone up before trick-or-treating.  That’s my strategy, you know.  I don’t prohibit the kids from eating a little candy on Halloween night, but I give them a nice hearty, substantial dinner so they’re not hungry when they leave the house.  Pretty tricky, Mom!

butternut squash and chickpea stew | pamela salzman

Butternut Squash and Chickpea Stew

Pamela, inspired by epicurious.com
5 from 4 votes
Servings 4 -6

Ingredients
  

  • 2 Tablespoons unrefined coconut oil or olive oil I use coconut oil and I really like Barlean’s
  • 1 onion chopped
  • 3 cloves garlic chopped
  • 2 teaspoons paprika
  • 1 teaspoon sea salt + extra for seasoning at the end
  • ¾ teaspoon ground cumin
  • ½ teaspoon freshly ground black pepper or to taste
  • ½ teaspoon ground coriander
  • ½ teaspoon ground turmeric feel free to add more if you like it
  • ½ teaspoon ground ginger
  • 1/8 teaspoon cayenne pepper optional
  • 3 cups 1-inch cubes of peeled butternut squash about 1 ½ pounds
  • 2 large carrots peeled and cut into ¾-inch pieces
  • 1 pound fresh tomatoes peeled, seeded and diced or 14 ounces boxed, drained
  • 2 Tablespoons fresh lemon juice
  • 1 ½ cups cooked chickpeas or 1 15-ounce can drained and rinsed
  • a handful of golden raisins or currants
  • 1 cup chicken stock vegetable stock or water

Instructions
 

  • Heat oil in a large saucepan over medium heat. Add the onion and sauté until tender and translucent, about 6 minutes. Add garlic and cook another 1 minute or until fragrant.
  • Add salt, pepper and all spices to the onions. Sauté for a minute.
  • Add the squash and carrots and toss to coat with the spices.
  • Add tomatoes, lemon juice, chickpeas, raisins and stock/water. Bring to a boil and cover. Lower the heat and simmer over low or medium/low heat until squash is tender and flavors have melded, about 40 minutes. Taste for seasoning and add extra salt and pepper as desired.

Notes

Feel free to stir some spinach or chopped chard leaves in at the end.  Delicious served over quinoa, millet, rice, spaghetti squash or couscous.
Tried this recipe?Let us know how it was!


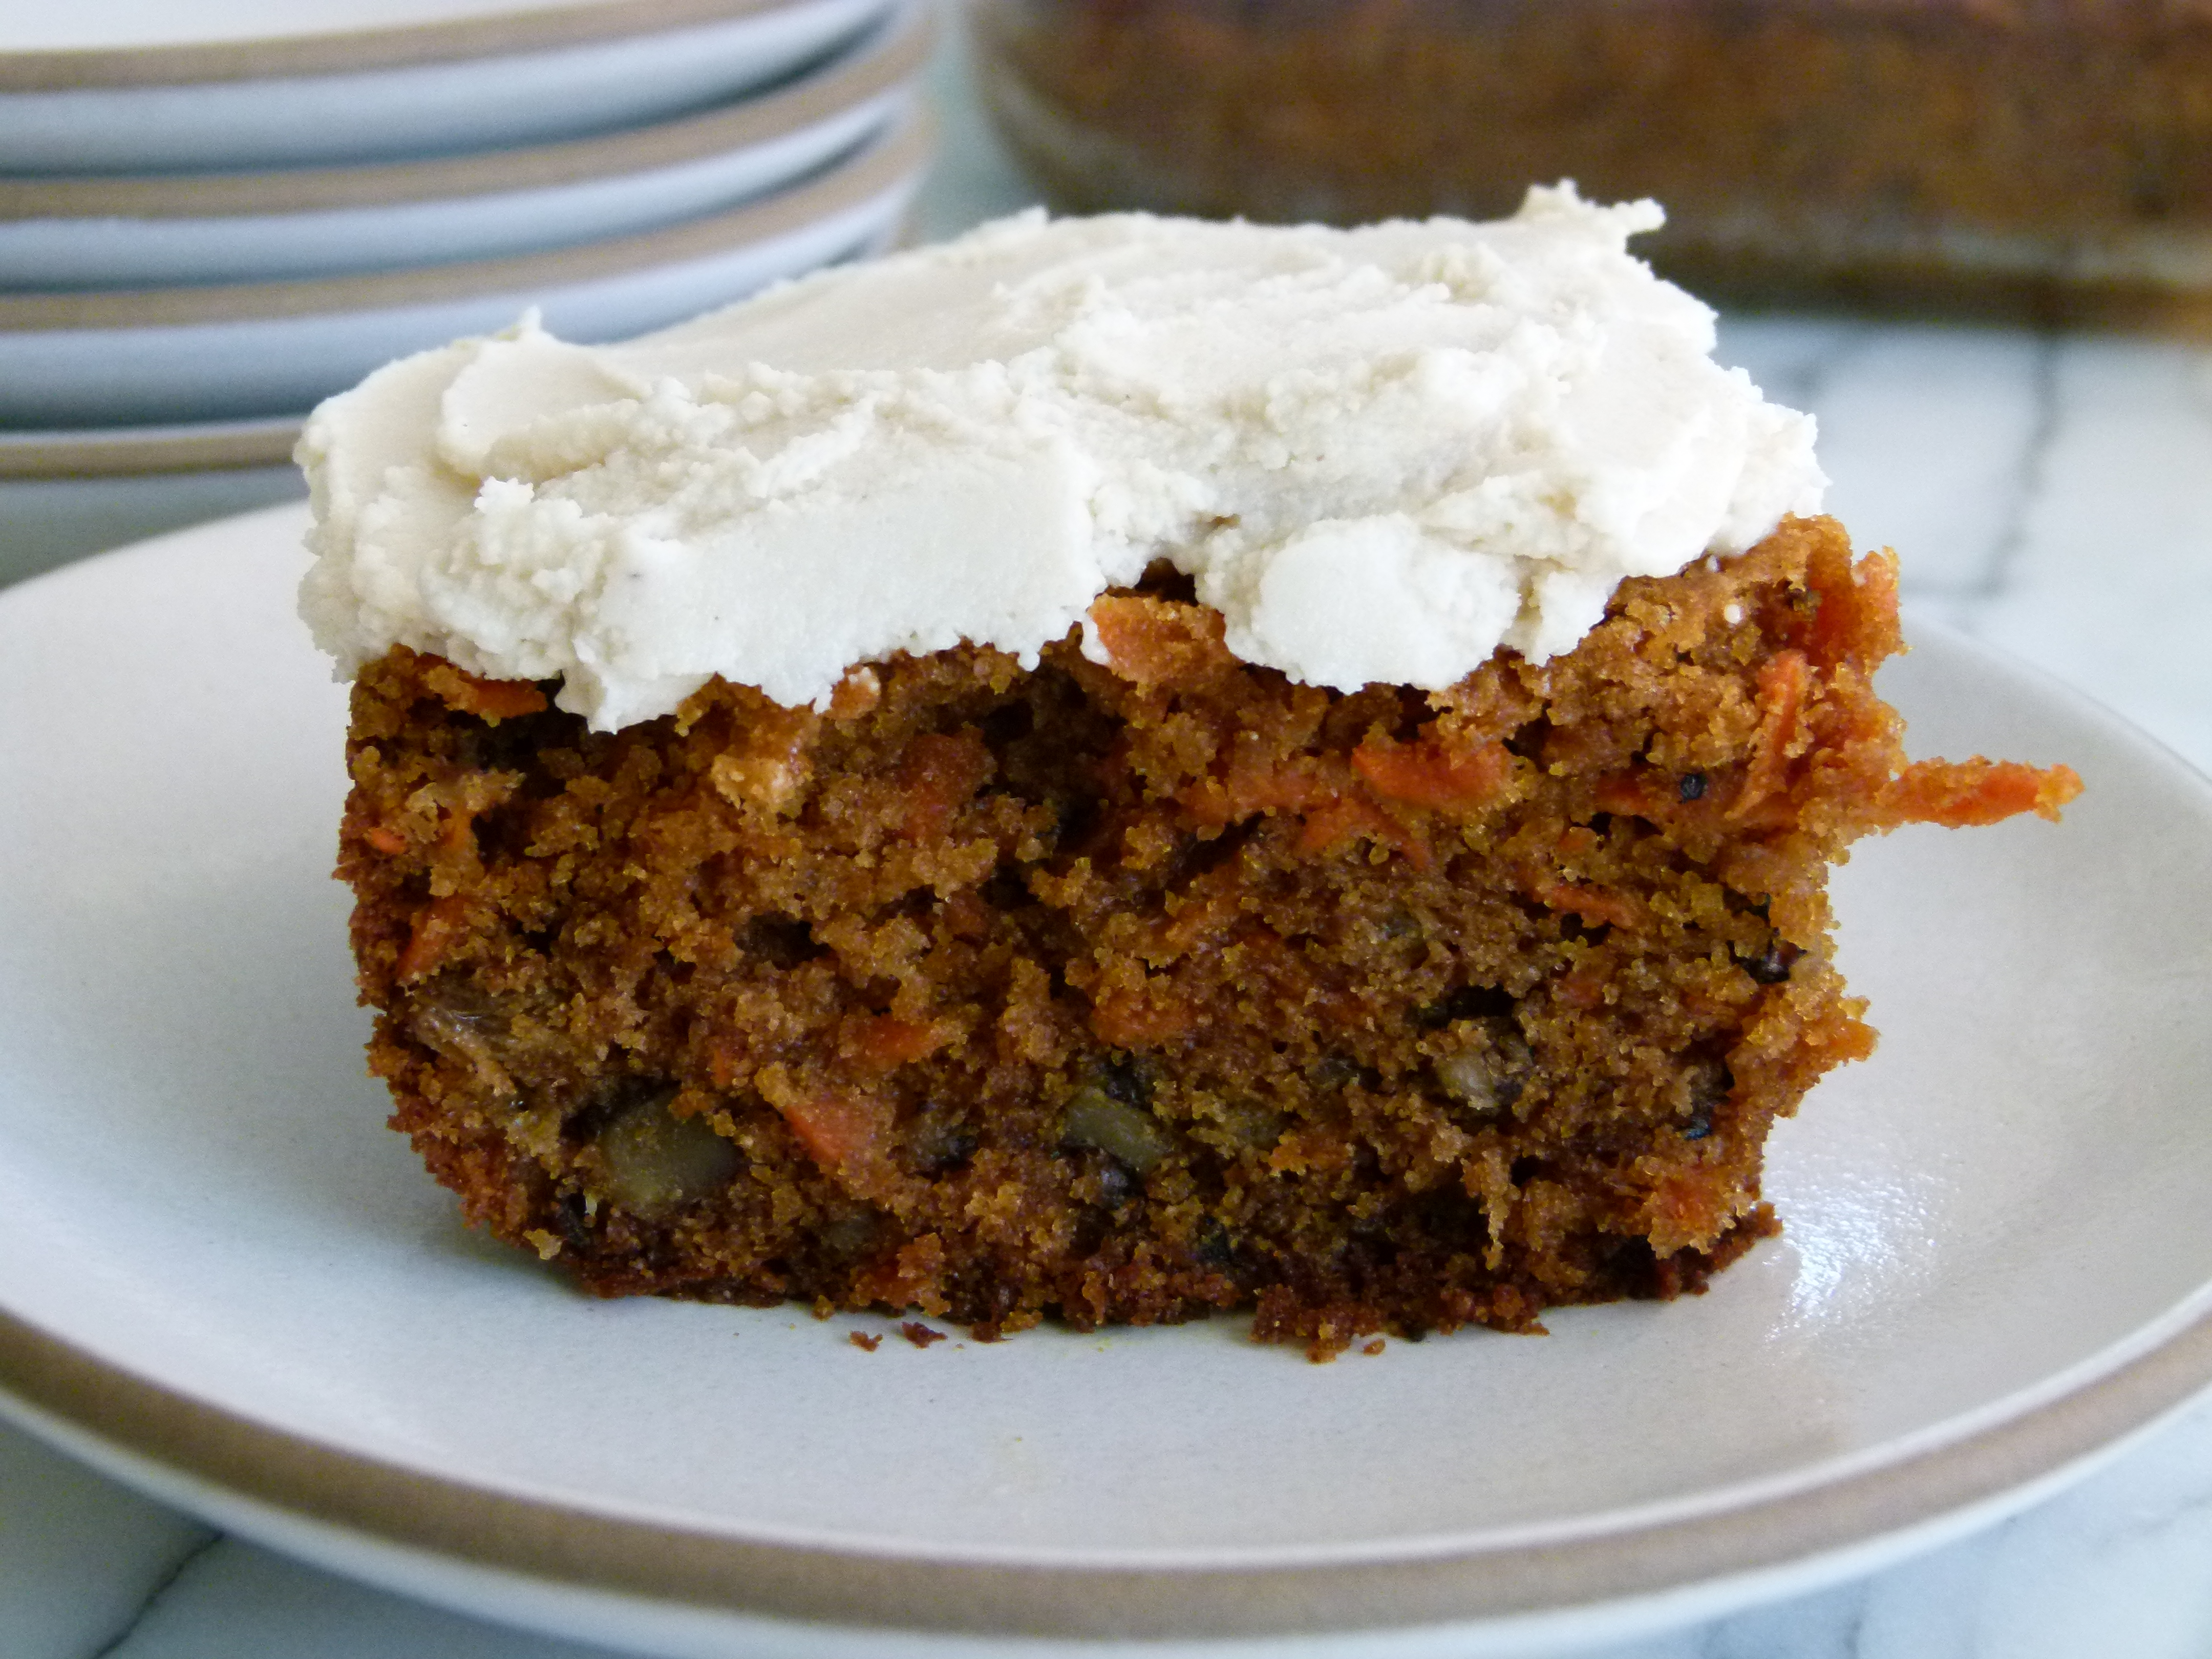
Whole Wheat Carrot Cake with Dairy-Free Frosting Recipe

I was married almost 17 years ago, so I guess it’s not crazy that my husband would have forgotten what flavor our wedding cake was.  I’m just surprised, because he was very involved in all decisions.  I know you’re thinking that it sounds sweet to have your fiance interested enough in your wedding to have a say in everything, but trust me, kind of annoying.  Regardless, we were talking about our wedding cake the other day and my husband remembers it as carrot cake, which it was certainly not.  Of course, there’s nothing wrong with carrot cake for a wedding cake, but ours was a simple white cake with chocolate chocolate-chip buttercream filling.

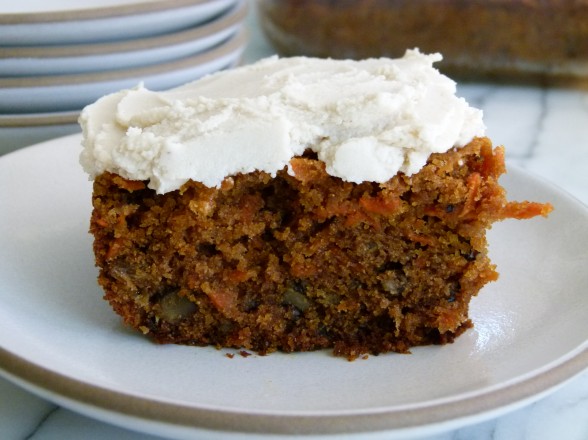
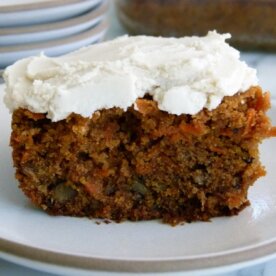
He probably thinks it was carrot cake because we both love it so much.  And we both agree that carrot cake should be moist and dense and chock full of carrots and raisins and walnuts.  I remember many a date when we shared a large slice of carrot cake for dessert.  You know the kind.  Two or three layers of sweet, nubby cake sandwiched between even sweeter, creamy, tangy icing.  Sounds great until you learn that a huge piece of bakery or restaurant carrot cake contains about a entire day’s worth of calories.  And don’t think they’re using natural sweeteners, friends.  If I were 22 again and doing two hours of step aerobics every day, I could probably get away with it.  But not no more!

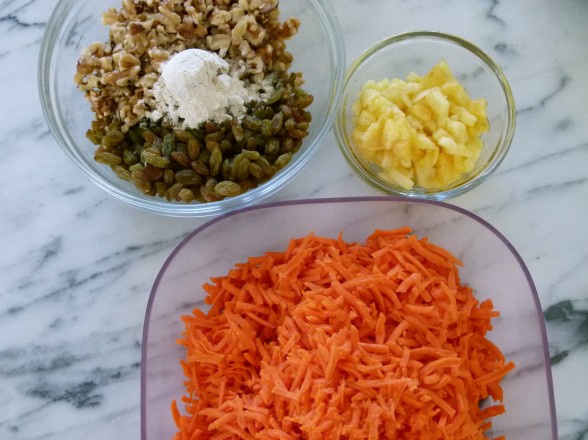
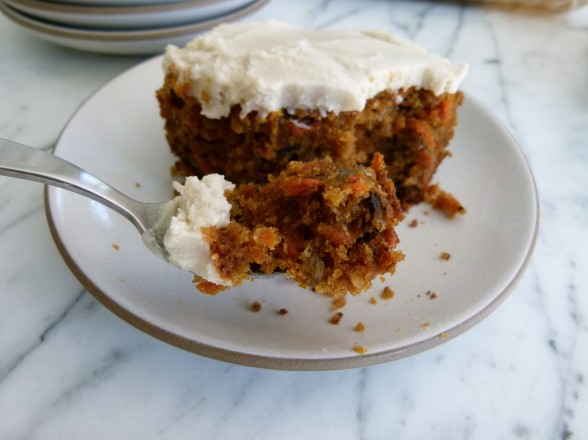
Fast forward two decades later when at least one of us is trying to consume desserts in moderation and bake them with less refined ingredients so we can make it to our 50th wedding anniversary and beyond.  Yes, that’s why I make carrot cake in a 13 x9-inch baking dish instead of as a layer cake.  I think it’s super delicious too, but for me at least, one square is plenty.  And before you think I’m no fun at all, don’t think I’m skimping on flavor here.  This carrot cake delivers the same sweet, spiced goodness that you would expect from the traditional.  Ok, maybe not the same sweetness.  When I got motivated to come up with a higher quality carrot cake, I went to my trusty Ina, who uses a whopping 2 cups of sugar in her cake.  Although in her defense, so does everyone else.  In my recipe I use coconut palm sugar and much less of it.  Listen, there’s a whole pound of carrots in this cake and carrots are sweet.  There are also raisins and even diced pineapple if you choose to use it.  And even if you don’t frost this cake, it’s plenty sweet.  Personally, I was happy as a clam with this cake unfrosted, but I knew my students would be expecting something more.  Of course I couldn’t go with a typical cream cheese frosting, because they don’t come to my kitchen for that.   So I am also offering you something very alternative, but perfectly yummy and thick and creamy and won’t make you sick to your stomach after you eat it.  And it’s vegan!
I’m thinking with Father’s Day coming up, this would be a fun dessert to make.  You can even do it in a muffin tin for individual cupcakes.  There are lots of ways you can adapt this recipe to make everyone happy.  Drop the pineapple if you wish.  Use pecans instead of walnuts.  Add some nutmeg or cloves.  Make Ina Garten’s cream cheese frosting if you don’t believe me that this one is great.  Just don’t ask me if you can make this cake without carrots because that question was already asked in my class last month and my answer is “no.”  Instead you have my blessing to go make the white butter cake with chocolate chocolate-chip buttercream filling that you really want.

Whole Wheat Carrot Cake with Dairy-Free Frosting

Pamela, adapted from Ina Garten

Ingredients
  

  • 1 ¼ cups coconut palm sugar or granulated sugar
  • 1 ¼-1 ½ cups unrefined oil I use melted coconut oil, but olive or high-oleic safflower is fine, too
  • 3 extra-large eggs at room temperature
  • 1 teaspoon pure vanilla extract
  • 2 ½ cups plus 1 Tablespoon whole wheat pastry flour divided
  • 1 Tablespoon ground cinnamon
  • 2 teaspoons baking soda
  • 1 ½ teaspoons sea salt
  • 1 cup unsulphured golden raisins or dark raisins if you prefer
  • 1 cup walnuts chopped
  • 1 pound carrots shredded (about 4 cups)
  • ½ cup fresh pineapple finely chopped (or frozen, thawed)
  • Raw Cashew Frosting optional

Instructions
 

  • Preheat the oven to 350 degrees. Grease the bottom and sides of a 13”x 9” pan.
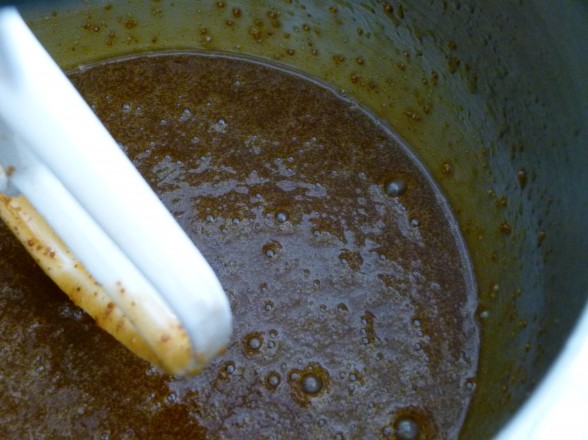
  • Beat the sugar, oil and eggs together in the bowl of an electric mixer fitted with the paddle attachment until thick and sugar has dissolved a bit. Add the vanilla and stir to combine.
  • In another bowl, whisk together 2 ½ cups flour, cinnamon, baking soda, and salt.
  • Add the dry ingredients to the wet ingredients. In a small bowl, combine the raisins and walnuts with 1 Tablespoon of flour and add to batter. Fold in the carrots and pineapple and mix well.
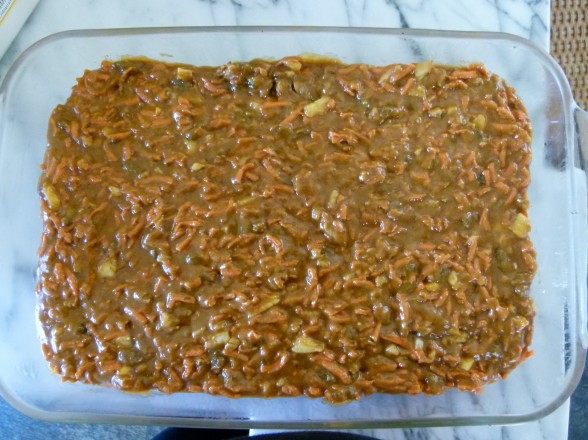
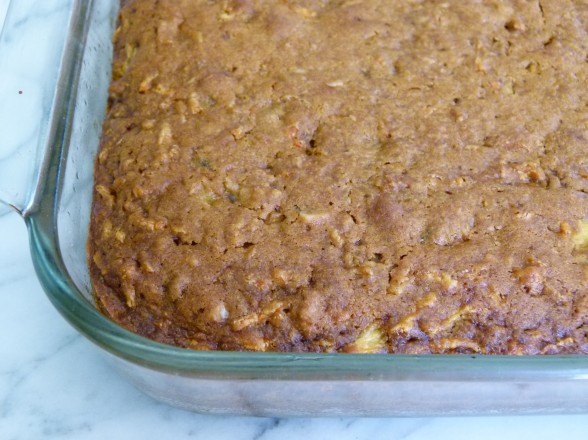
  • Pour batter into pan. It should be super thick. Bake for 45–55 minutes, or until a toothpick comes out clean. Allow cake to cool completely in pan over a wire wrack.

Notes

If you like things very sweet, you can increase the sugar to 1 1/2 cups and the recipe will work fine. I also give a range for the oil. Use 1 1/4 cup if you plan to eat it all the same day it's made and if you like a lighter cake. Use 1 1/2 cups if you like it a little heavier and if you want it to cake to stay moist for several days. I used 1 1/2 cups in these photos and 1 1/4 cups in my classes.
Raw Cashew Frosting:

This is a lovely, just-sweet-enough frosting which you can use for lots of cakes and cupcakes. It is dairy-free and if you use maple or agave, it is also vegan. You cannot substitute another oil for the coconut oil, since that’s what helps the frosting become firm and spreadable once it has been refrigerated. I use Grade A maple syrup here, which is less mapley than Grade B.
2 cups raw cashews, soaked in water for at least 5 hours
½ cup unsweetened almond milk or water (water is just as good)
¼ cup unrefined coconut oil, melted
3 Tablespoons raw honey, Grade A maple syrup or agave
¾ teaspoon pure vanilla extract
pinch or 2 of fine grain sea salt
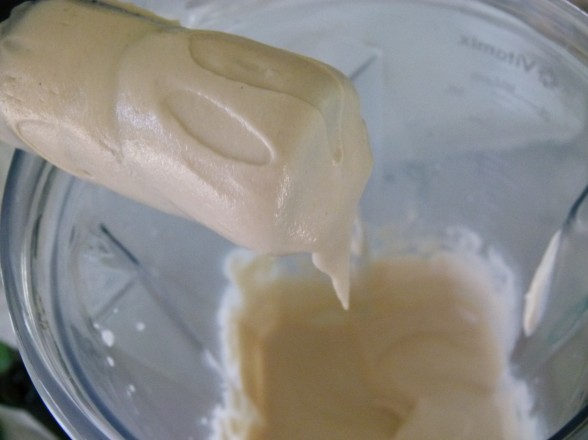
Process all ingredients in a food processor, scraping down the sides if necessary, until perfectly smooth. This can take 5-6 minutes. Or use a high powered blender like a Vitamix for about 45 seconds. Refrigerate to allow it to firm up enough to a spreadable consistency. Keep refrigerated until ready to use.
Tried this recipe?Let us know how it was!