Roasted Vegetable Buddha Bowl with Lemon-Tahini Dressing Recipe

We all have those recipes we love but don’t make very often (for me it’s chicken pot pie and spanakopita.) And then there are the recipes you rely on when you don’t want to think about what to make. Those are your go-to, no-fail, everyone-loves-this recipes. I wish I had an endless supply of those. But I am going to share one of my-go’s with you today! This roasted veggie buddha bowl is just that. I swear I could eat this every day. I taught this recipe in my classes in January and I actually did eat it every day and I never got tired of it.
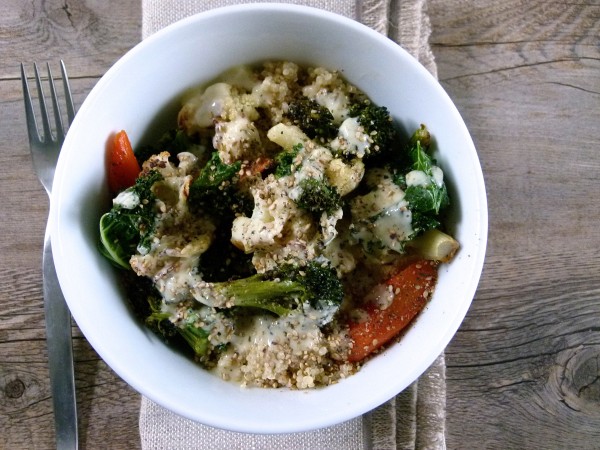
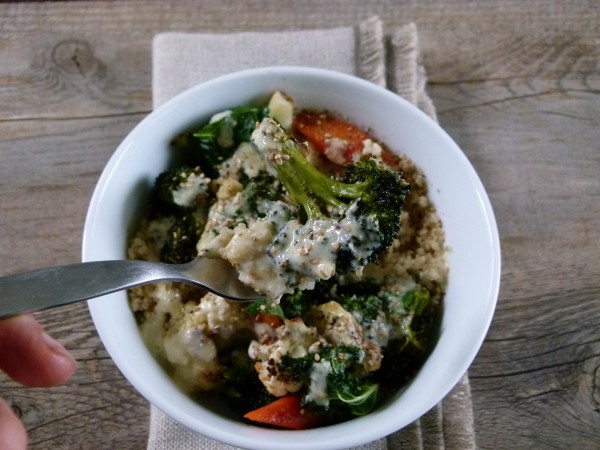
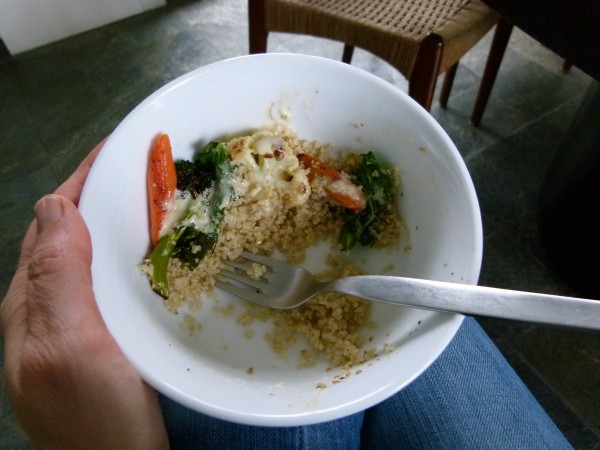
A Buddha bowl is really just a simple combination of (usually) lightly steamed vegetables on top of a gluten-free grain, like brown rice, and often topped with a sauce or dressing of sorts. It is a very clean and healthful meal, but very satisfying. Personally, I prefer all my meals in a bowl. I love when all my food gets combined and every bite has a little bit of everything. It’s Mr. Picky’s worst nightmare.
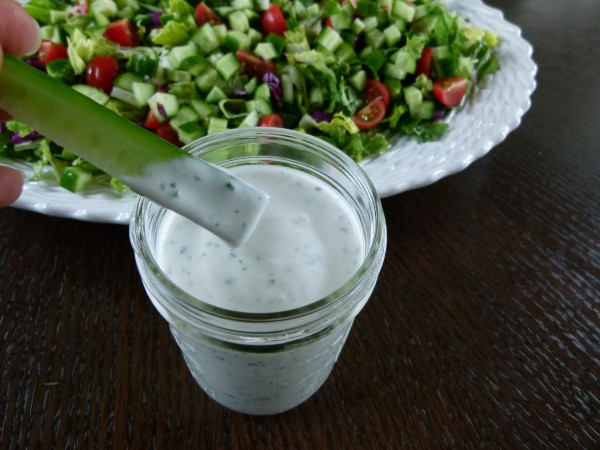
A Buddha bowl is flexible. Clean out of the vegetable crisper and use what you’ve got. Not in the mood for rice? Use quinoa or millet. Soy or peanut-based sauces are very popular on Buddha bowls, but I am kind of obsessed with my lemon-tahini dressing from this salad, so I adapted that for this recipe. And even though I said a Buddha bowl is usually made with steamed vegetables, who says you can’t roast them? Like with a little coconut oil until the edges are just a bit crispy. Heaven!
I make dinner for my family every night (and if you follow me on Instagram or Facebook, you would know exactly what that looks like!) Even though I am a big proponent of one meal for all, there always those days I ate a late lunch after a class and I’m not feeling like the roast chicken and potatoes I am making for dinner that night. This Buddha bowl is my go-to on nights like that. I’ll make a big pan of roasted veggies for all of us and then whip up this dressing and a pot of steamed quinoa and voila! I have something a little lighter and I’m a happy camper. That’s not to say that my husband and my kids don’t like Buddha bowls. They all really do, especially my girls. As you would imagine, Mr. Picky doesn’t exactly eat his in a bowl. Rice in one separate, distinct area on a plate, roasted veg in another and hold the dressing, please. No problem, dude.
If you decide to make this dressing for your Buddha bowl, you really have a nice vegetarian meal no matter what grain you use since tahini is basically just sesame paste. Sesame seeds are high in protein, good fats and did you know, calcium? Just good to know if you’re looking for non-dairy sources of calcium. And if you make this with broccoli and kale, you have a very calcium-rich meal. I also like to sprinkle everything my Buddha bowl with gomasio, a macrobiotic condiment which is just a mixture of sesame seeds and sea salt. The one I use by Eden Organic also has seaweed in it. If you have all the other ingredients, but not the gomasio, make this anyway — you will love it and you will feel awesome after eating it. Have a lovely weekend!


Roasted Vegetable Buddha Bowl with Lemon-Tahini Dressing
Ingredients
- Dressing makes about 2 Tablespoons/serving:
- 3 Tablespoons fresh lemon juice about 1 small lemon
- 2 small cloves of garlic grated or minced or just smash the cloves if you don't actually want to eat the garlic, but still have a subtle garlic flavor
- ¼ cup raw tahini roasted tahini is fine, but raw is a little milder
- 3-4 Tablespoons room temperature or warm water
- ¼ cup unrefined cold-pressed, extra-virgin olive oil
- ¾ teaspoon sea salt + more to taste
- pinch of cayenne optional
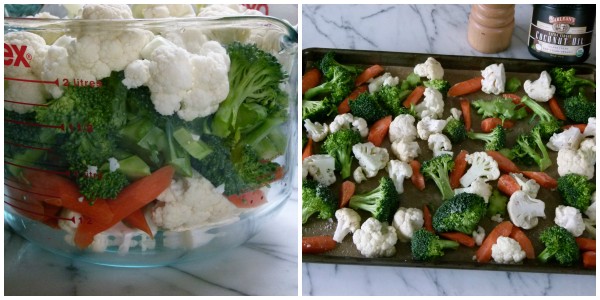
- 8-10 cups mixed vegetables such as 1 head of broccoli cut into bite-sized florets and stems, trimmed and chopped AND 1 head cauliflower, cut into bite-sized florets*
- 2 Tablespoons melted unrefined coconut oil or unrefined olive oil
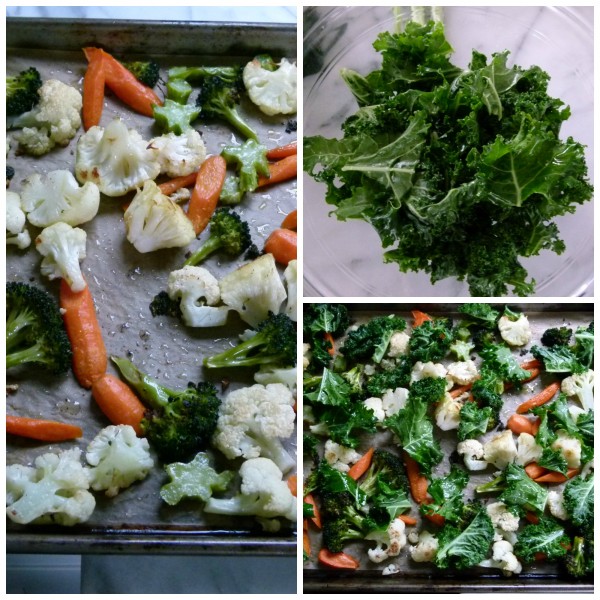
- 3-4 large leaves of kale washed, dried, stems removed
- Sea salt and freshly ground black pepper to taste
- Steamed brown rice millet or quinoa for serving (optional)
- Plain or seaweed gomasio for sprinkling on top optional
Instructions
- Preheat oven to 400 degrees. Line a large baking sheet with unbleached parchment paper.
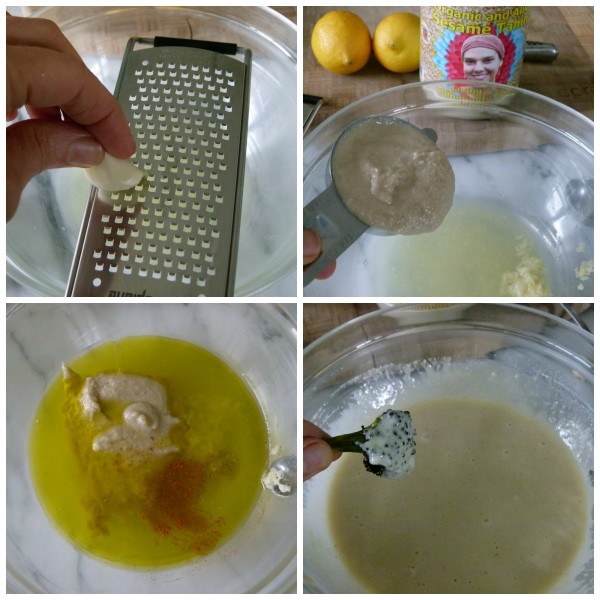
- Make the dressing (or you can make while the vegetables are roasting): in a small bowl, whisk together the lemon juice, garlic, tahini, water, olive oil, salt and cayenne until well blended. Just use the amount of water you need to get the consistency you want.
- In a large bowl, toss the broccoli and cauliflower with the coconut oil. Don’t wash the bowl yet. Place the broccoli and cauliflower in one layer on the prepared baking sheet. Season with salt and pepper to taste. Roast for about 20-30 minutes, or until tender and golden in spots. I like to turn the vegetables after about 15 minutes.
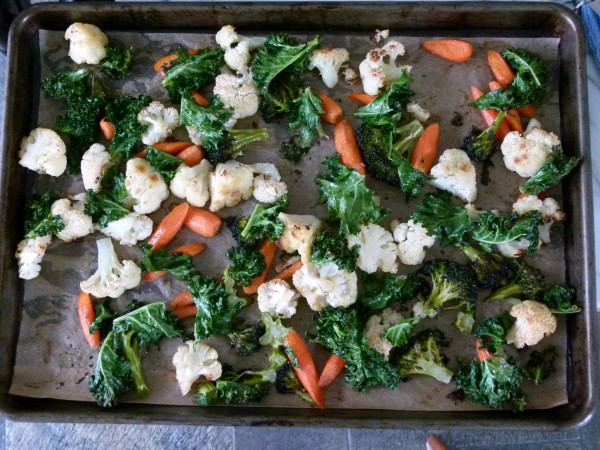
- Take the kale leaves and rub them around the bowl with any remaining coconut oil until lightly coated. Tear until large pieces and sprinkle with a pinch of salt and pepper. Place on top of the broccoli and cauliflower in the oven and roast until the kale is just crispy, about 5-10 minutes.
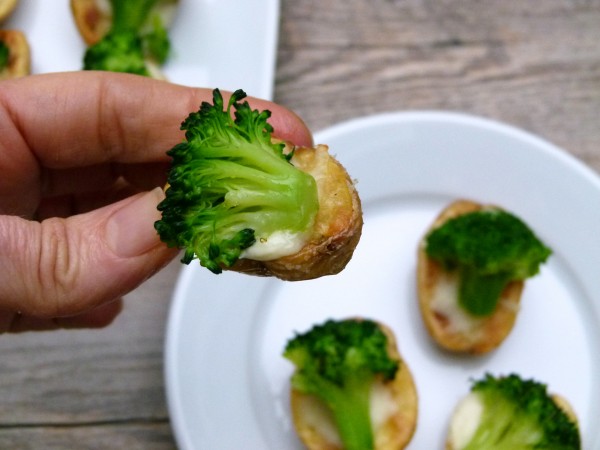
- If you’d like to eat this as a “bowl,” place a scoop of rice/millet/quinoa in a bowl and top with the vegetables. Spoon some sauce over everything and sprinkle with gomasio, if desired.