Whole Steamed Artichokes with Tomato-Basil Salad Recipe

I remember the first time I ate an artichoke, I really ate the artichoke. Or at least I tried to. I had no idea that I was supposed to scrape the meat off of the leaves with my teeth and not (attempt) to eat the entire thing. Ooops. I just kept chewing and chewing and chewing and thinking, “why on earth do people love artichokes so much? This is terrible!” Fortunately, I was taught how to properly eat an artichoke before I swore them off for good.

But for many years I thought artichokes were too intimidating to cook at home, and were only a special treat to be ordered in restaurants. Until one day I saw my grandmother making stuffed artichokes and I quietly stood by and took mental notes. I’m sure you know what I am about to say. So easy! Really, once you learn how to trim an artichoke, the rest is a piece of cake. I am hoping these photos can help you get past any artichoke anxiety you might have.
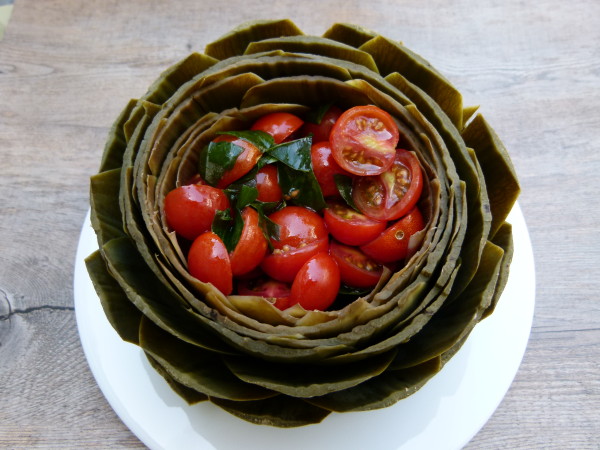
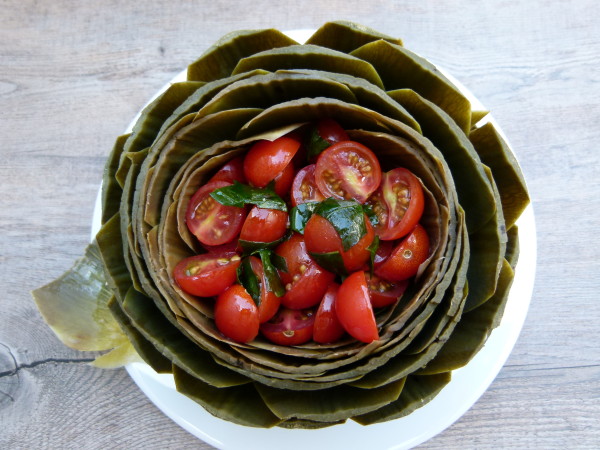
Artichokes are so versatile. You can eat them hot, warm, room temperature, even cold. It’s fun to dip the leaves into a sauce or a vinaigrette before nibbling the tender meat on the bottom of the leaves. Mayonnaise sauces are probably the most popular, but I prefer to keep things lighter and fresher. I love this artichoke preparation which I first had at the Ivy Restaurant in LA. I could eat tomato-basil salad on most anything, from fish and chicken to pasta and toast. On artichokes, this classic combo is just as delicious, with the juice from the tomatoes creating a vinaigrette of sorts with the olive oil. Love it!
Artichokes are a good source of folate, fiber, and vitamins C and K. Artichokes are also packed with antioxidants; they’re number 7 on the USDA’s top 20 antioxidant-rich foods list. I also read somewhere that artichokes used to be considered an aphrodisiac. Well now.
I was advised by my produce friends at Grow in Manhattan Beach that artichokes are more tender when the leaves are more closed and tighter than more open. A little frostbite on the outer leaves is completely fine, just check to make sure the stems don’t have any evidence of rot. They’re in season now, so get them while you can!

Whole Steamed Artichokes with Tomato-Basil Salad
Ingredients
- 3 whole artichokes washed
- 4 garlic cloves crushed
- 2 bay leaves
- 1 lemon halved
- 1 ½ pints cherry tomatoes quartered (you can also use an equivalent amount of whole fresh tomatoes, diced, when they are in season)
- 1/3 cup fresh basil chopped
- 1 large garlic clove minced (or crushed for a more subtle garlic flavor)
- 2 Tablespoons unrefined cold-pressed extra-virgin olive oil
- sea salt and freshly ground black pepper to taste
Instructions
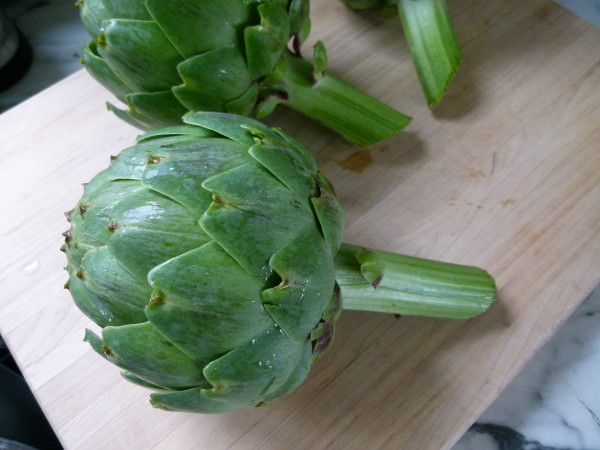
- Trim the artichokes: Remove the outer layer of small, tough leaves from the stem end. Trim the stem to create a flat bottom and discard cut stem. With a very sharp serrated knife, cut off the top 1 inch of each artichoke. Use scissors to snip the thorny tips of the remaining leaves. Artichokes should fit into your pot so that the lid fits tightly.
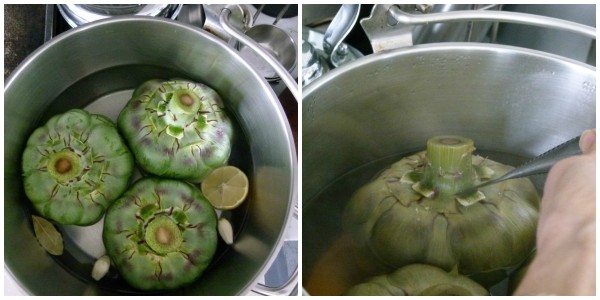
- Cook the artichokes: Fill a large saucepan with 2 inches of water and add the garlic, bay leaves and lemon. Arrange the artichokes in the saucepan STEM SIDE UP. Bring water to a boil, cover and lower to a simmer. Steam artichokes for 30-45 minutes (depending on the size) or until stem can be pierced easily with a knife. Remove artichokes from the saucepan and set aside until cool enough to handle. I like to put them in a colander stem side up to cool.
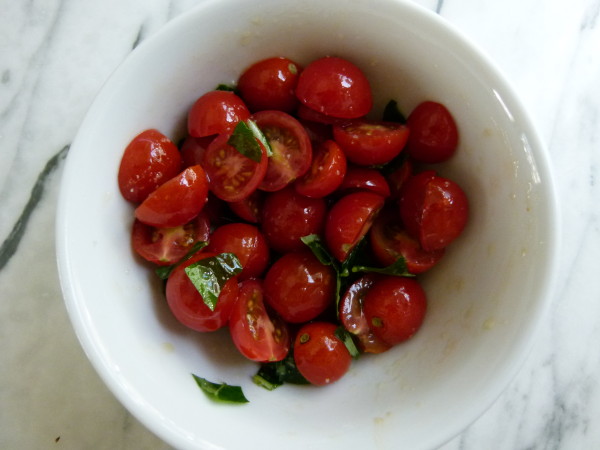
- Make the salad: In a medium bowl combine tomatoes, basil, garlic, olive oil, and salt and pepper to taste.
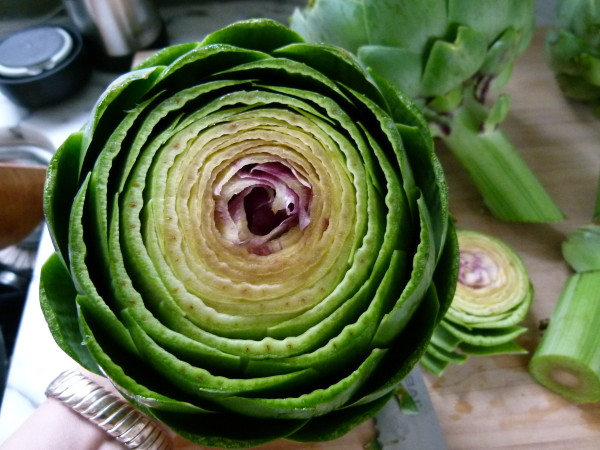
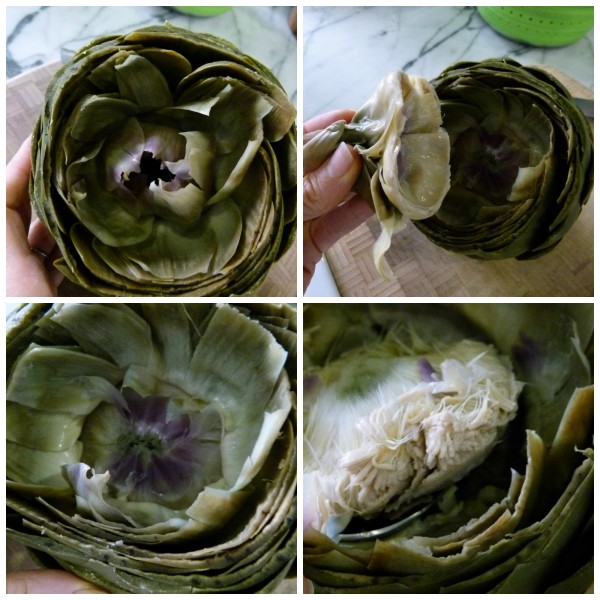
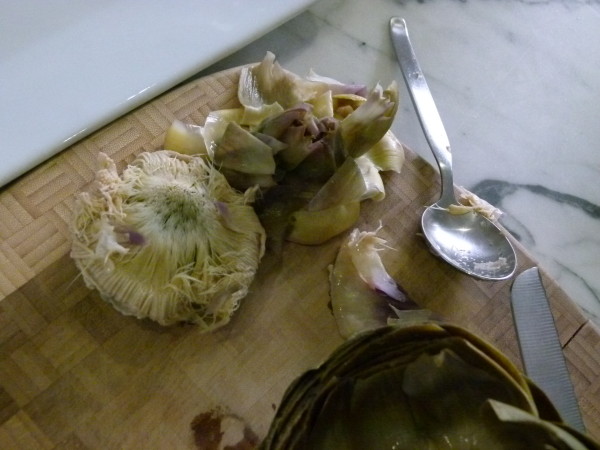
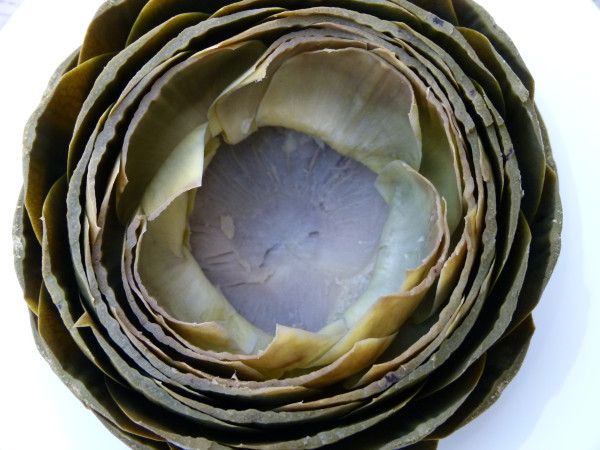
- Remove the chokes: Pull out the center leaves of the artichoke. They are the ones that are closed together and light purple at the top. Underneath that you will see the spiky, lighter leaves around the heart. The fuzzy choke is hidden underneath. With a spoon, scoop out the spiky leaves and the choke and discard. Take care not to remove too much of the meaty heart which sits just underneath the choke. Repeat with remaining artichokes.
- Arrange artichokes on a platter and spoon tomato salad into each of the cleaned out artichokes.