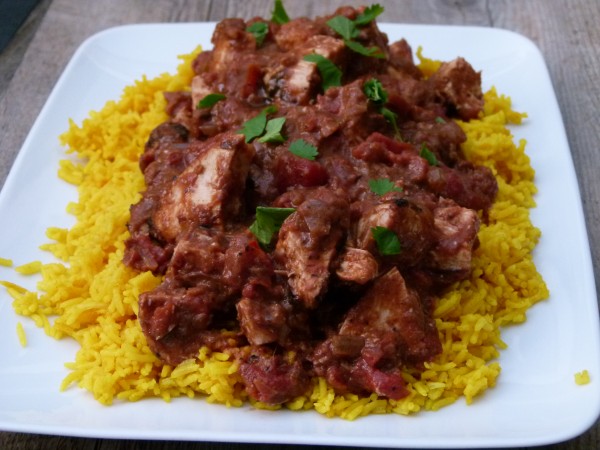
The best grilled marinated flank steak recipe
the best grilled marinated flank steak | pamela salzman

Such a bold claim I am making today with this flank steak recipe!  But that’s what Mr. Picky himself declared when I made this the first time many years ago.  And that’s what my nieces and nephews say when I cook this up for my family in the summertime.  As you know, I actually don’t even eat red meat, but I have tried this and I have to admit… it’s delicious!  I figured with Memorial Day weekend coming up (so excited to have a long weekend!), you might have invited a few friends over and are looking for the perfect grilled steak recipe.  This is it right here.  I also taught this in my classes a couple years ago and everyone loved it.  The ingredients are simple, you marinate it in the morning and it cooks up very quickly on the grill.  The marinade is what makes it so delicious and I especially love marinating grass-fed meat with a little soy sauce or tamari which really helps tenderize it.  Yum!
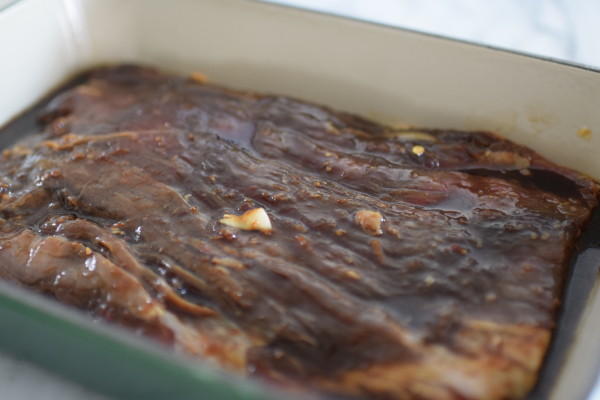
marinating the meat

As opposed to me, my family loves beef,  so I do cook it for them a few times a month.  I have talked about why I don’t think we should be overeating red meat on the blog before, and I have discussed my reasons for ONLY choosing grass-fed beef when I do buy it.  My opinion hasn’t changed at all.  When I do make animal protein for the family, it’s a small amount, usually 2-4 ounces.  Yes, even my husband eats that amount.  And if grass-fed isn’t available, I won’t buy corn-fed.  So if you’re going to eat beef — not a lot and make it grass-fed!
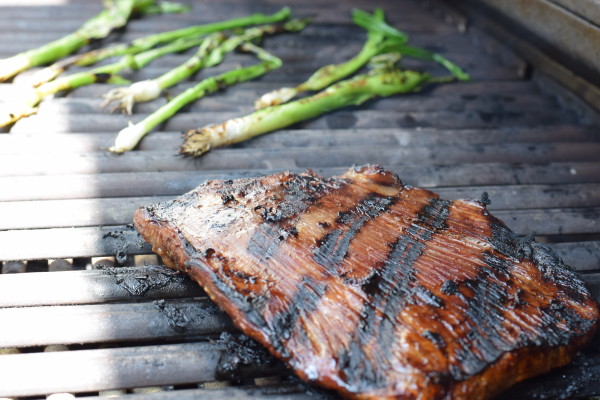
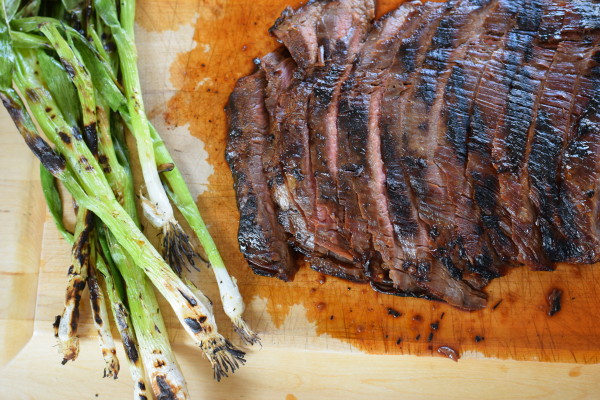
grilling flank steak and green onions

I have made this recipe two different ways.  In my classes, I pre-sliced the flank steak and marinated it already cut.  The advantage of this method is that it cooks super fast, about a minute per side and the marinade really gets throughout the meat.  If you’ve read my post about how to reduce your carcinogens when you grill, you’ll also remember one of the best strategies is to grill thin cuts so exposure to the grill is kept at a minimum.  Also, pre-cut meat is easier to serve during a cooking class because I don’t have to slice the meat when hungry people are waiting.  If you like rare beef however, you’re better off grilling the whole steak, letting it rest and then slicing it before serving.
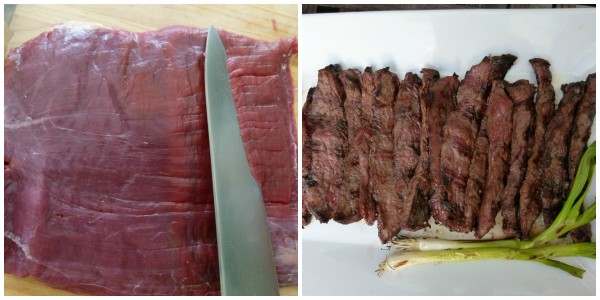
or you can slice the steak before marinating

Whichever way you prepare it, here a few reminders about cooking steak:

  • flank steak can be hard to find because there aren’t too many “flanks”  on a cow.  Other acceptable subs are skirt steak, flap steak, or hanger steak.
  • don’t over marinate a thin cut like flank steak.  This marinade contains soy sauce which can make the meat mushy if you leave it in too long (like more than 12 hours.)
  • grass-fed contains less fat and therefore cooks more quickly;
  • grass-fed doesn’t stay as tender if it’s cooked well-done.  My answer for well-done grass-fee meat is to pour the juices from the cutting board on top of the meat and also serve it with a dressing or sauce to add moisture.
  • take the meat out of the fridge 30 minutes before to bring it to room temp so it cooks evenly;
  • always allow the cooked meat to rest, covered, for about 10 minutes before slicing so the juices redistribute themselves into the meat.  Don’t allow to rest too long, otherwise it will overcook (unless you want it well-done).
  • always cut against the grain for a more tender bite.  Look at the naturals lines in the meat and cut in the opposite direction.  If you cut with the grain, the meat will be chewy.

I generally serve this steak as is, but I don’t see why you couldn’t serve a salsa, an herb dressing or chopped grilled scallions on top.  Some good accompaniments are sautéed corn, wheat berry salad with lemon-tahini dressing, perfect spring salad, grilled artichokes, heirloom tomatoes with basil, roasted asparagus, just to suggest a few.
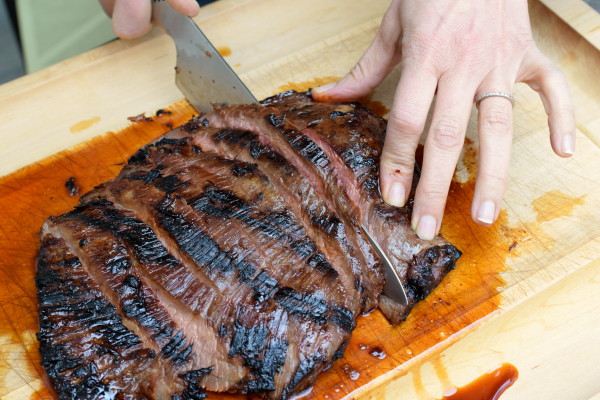
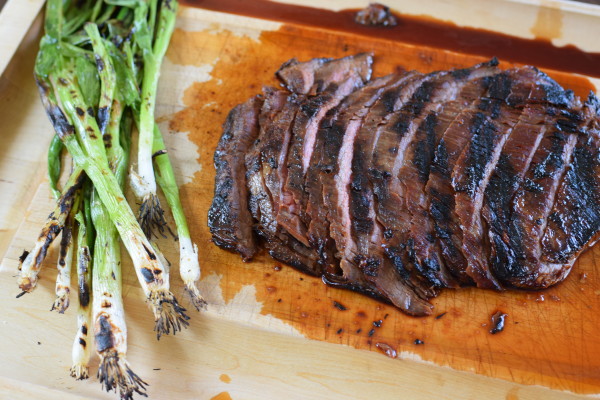
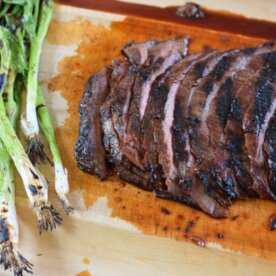
slice against the grain

the best grilled marinated flank steak | pamela salzman

The Best Grilled Marinated Flank Steak

Pamela
Servings 6 -8

Ingredients
  

  • ¼ cup shoyu naturally brewed soy sauce or GF tamari
  • 2 Tablespoons brown sugar
  • 2 Tablespoons dry white wine I also subbed rice vinegar once at it was still great
  • 2 large garlic cloves very finely chopped
  • 1 teaspoon toasted sesame oil*
  • 2 teaspoons unrefined cold-pressed extra-virgin olive oil
  • pinch of crushed red pepper or more to taste
  • 2 ½ pounds or whatever you can get grass-fed beef flank steak, cut across the grain on a diagonal into 1-inch thick slices or left whole (marinating can be longer if the steak is whole)

Instructions
 

  • In a large, shallow dish, combine the soy sauce with the sugar, white wine, chopped garlic, toasted sesame oil olive oil and crushed red pepper, stirring to dissolve the sugar. Add the sliced flank steak and coat thoroughly in the marinade. Cover and refrigerate the steak for 4 hours or up to 8 hours.
  • Heat a grill or a griddle over medium-high heat. Working in batches, grill the steak until the slices are browned and medium-rare, about 1-2 minutes per side. Transfer the steak to a serving platter and serve immediately.
  • OR grill the whole steak for 2 ½ to 3 minutes on each side for medium-rare. 4 minutes on each side for medium-well. Transfer meat to a cutting board and cover. Allow to rest for 5-10 minutes before slicing AGAINST the grain. Serve.

Notes

*You can use 1 Tablespoon of sesame oil and omit the olive oil + add a little chopped fresh ginger for a more Asian flavor.
Tried this recipe?Let us know how it was!

Baked chicken with tomatoes, olives and capers recipe (variations for GF and vegan!)


baked chicken with tomatoes, olives and capers | pamela salzman

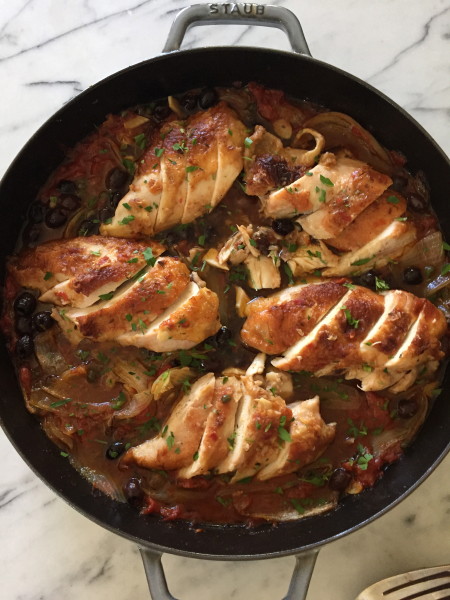
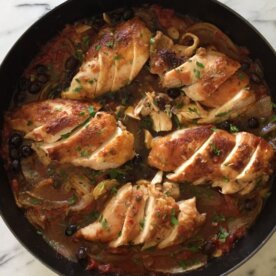
I just finished teaching this recipe in my March classes and it was a huge hit!  I don’t even like chicken and I seemed to always be looking for a bite at the end of class.  I had so many requests to post this recipe that I had to oblige, even though the images aren’t totally the best.  I think this would be perfectly appropriate to prepare for Passover, with one minor adjustment.  And it’s a great recipe to adapt as cherry tomatoes and beefsteak tomatoes become available.

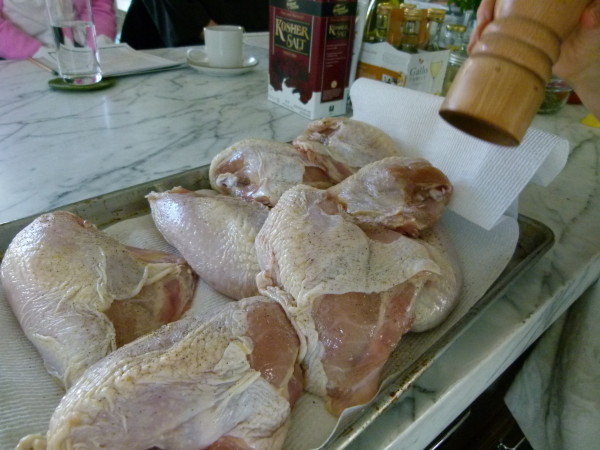
pepper the chicken before dredging

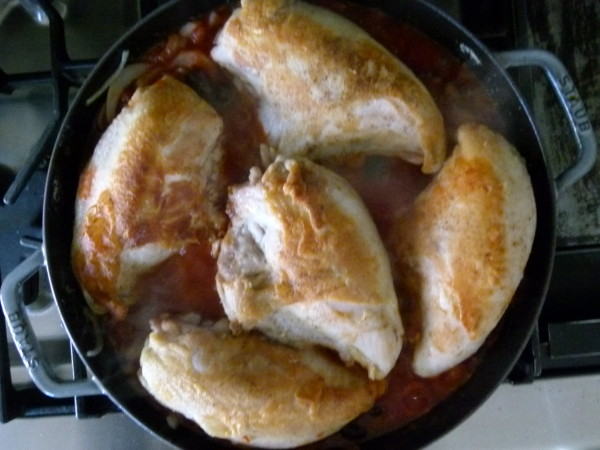
The recipe is basically a braise, but the chicken is cooked uncovered for most of the time, which is why I call it Baked Chicken, versus Braised Chicken.  But the formula is still very much the same — browning the meat first to create flavor and color, sauteing onions, deglazing, putting meat back in and baking in the oven until cooked through.  Once you understand the steps, you can start making up your own recipe or adapting recipes like this one with other ingredients or flavors.

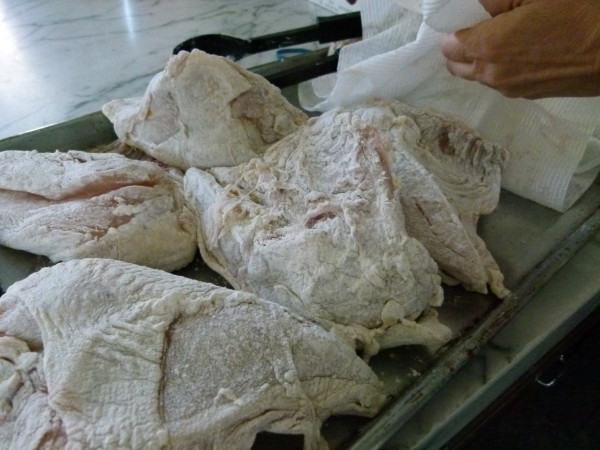
dredge the chicken lightly with flour

I personally like using bone-in, skin-on pieces of chicken since I think they taste better and stay a little moister, especially breast pieces.  Unfortunately, cooking with bone-in, skin-on pieces takes longer than boneless, skinless and may not be a great option for those of you needing a really fast recipe for after work.  Fortunately, this recipe can be adapted for cutlets and even a slow cooker, so look for those options in the instructions.

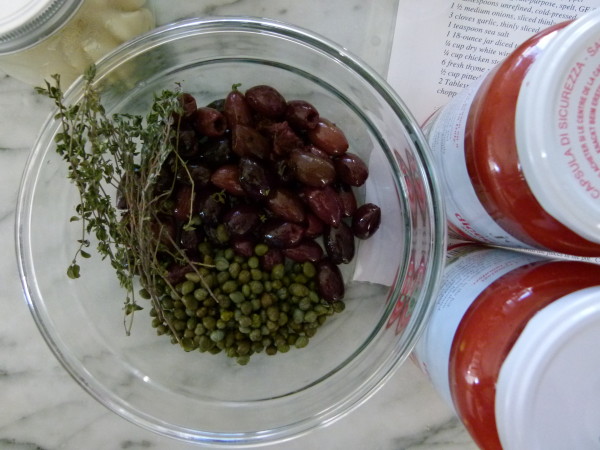
olives, capers, thyme, jars of tomatoes

This dish produces very tender, flavorful chicken, as well as the accompanying onions and sauce.  In the ingredient list it offers the option of draining the juice from the jar of tomatoes or keeping it.  Here’s my thought process on that one:  if you will be serving the chicken with noodles or pasta, polenta, mashed potatoes or something that would welcome a lot of sauce, then you should keep the juice.  Otherwise, drain the juice and just use the tomato pieces.  I also love this dish during cherry tomato season, when I will use 1 1/2 pounds of  halved sweet cherry tomatoes in place of the jarred, and basil leaves instead of the thyme.  Large vine-ripened tomatoes that have been blanched and chopped are also great.  Both of these options create a much lighter, fresher dish.  But every variation is very delicious.

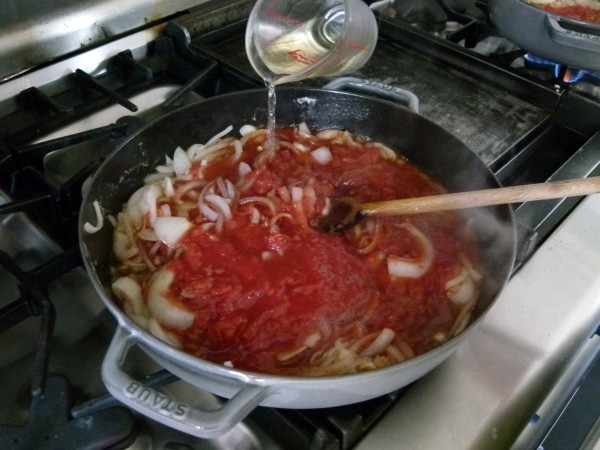
deglaze with wine and tomatoes

Other adaptations I discussed in class:

  • subbing fennel for half the onion
  • omitting the olives and adding chopped mushrooms with the onions
  • adding a healthy pinch of crushed red pepper flakes with the garlic
  • in the summer, subbing sliced sweet bell pepper for some of the onion
  • searing cauliflower steaks and using those in place of the chicken for a vegetarian/vegan option

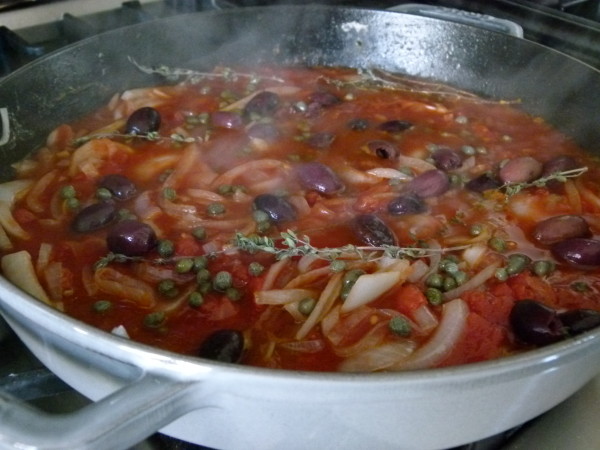
add the olives capers and thyme


nestle chicken in the tomato mixture

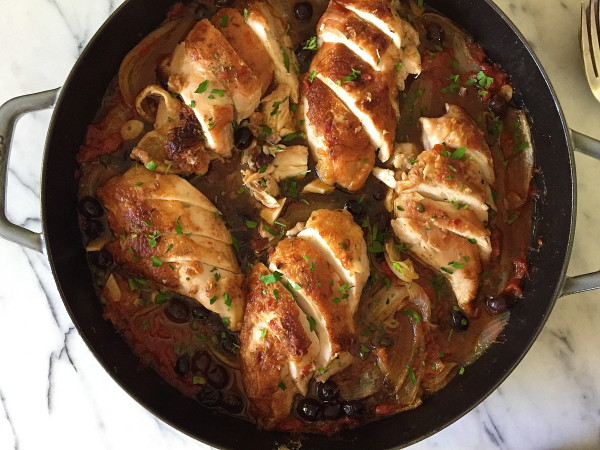
I always use breasts when I teach because most of my students prefer white meat, and therefore it’s just easier for me to buy all breasts.  You can certainly use any part of the chicken you want.  In fact, it’s more economical to buy a whole chicken and have the butcher cut it into pieces for you.  But I highly recommend not buying 1 breast per person.  It’s too much meat to eat in one sitting, unless you are an Olympian or a body builder!  I have never actually seen anyone at my house or at a dinner party eat an entire breast.  I have seen people cut them in half and push one piece off to the side and just each one half.  What I love to do is prepare the breasts, allowing for 1/2 per person, and removing the bones after the chicken is cooked and has rested a bit.  Then I slice the meat on an angle.  It’s much more manageable to eat it this way, as well as more elegant and attractive to serve.  See this post on the gloves I use to get down and dirty when I carve chicken!
Let me know if you have specific questions about timing or with what sides to serve this.  Hope your holiday planning is going well!

baked chicken with tomatoes, olives and capers | pamela salzman


View this post on Instagram


A post shared by Pamela Salzman (@pamelasalzman)

Baked Chicken with Tomatoes, Olives and Capers

Pamela
5 from 4 votes
Servings 6

Ingredients
  

  • 3 ½ pounds bone-in skin-on chicken pieces, sprinkled with 2 teaspoons kosher salt when you get home from the market unless you are using kosher chicken which you should not salt (read this post on how and why to season your chicken in advance)
  • ¼ teaspoon freshly ground black pepper
  • Flour for dredging all-purpose, spelt, GF flour, etc. -- use matzoh cake meal for Passover
  • 2 Tablespoons unrefined cold-pressed, extra-virgin olive oil, divided
  • 1 ½ medium onions cut through the root into sixths or eighths (or sliced thinly, but I like wedges better in this recipe)
  • 3 cloves garlic thinly sliced
  • 1 teaspoon sea salt
  • 1 18- ounce jar diced tomatoes with the juice or drain juice for less sauce (I like Jovial in glass jars. Read this post why.)
  • ¼ cup dry white wine
  • ¼ cup chicken stock vegetable stock or more white wine
  • 6 fresh thyme sprigs or large basil leaves in the summer/fall
  • ½ cup pitted olives such as kalamata or Bella di Cerignola
  • 2 Tablespoons capers drained
  • chopped parsley for garnish if desired

Instructions
 

  • Preheat the oven to 400 degrees. Pat the chicken dry and season with black pepper. Dredge in flour, shaking off any excess.
  • In a 12-inch ovenproof skillet or Dutch oven, heat 1 Tablespoon of the olive oil over medium heat. Add the chicken pieces in one layer and brown on both sides. Transfer to a plate and reserve.
  • If the pan looks dry, add a little oil. If it looks like there’s more than 2 Tablespoons oil, drain a bit off. Add the onions, cook over medium heat, stirring occasionally, until softened and lightly browned. Add the garlic and sea salt and cook until fragrant, about 1 minute.
  • Add the tomatoes, white wine, stock and cook, scraping any brown bits on bottom of the pan.
  • Arrange the thyme, olives and capers over the onion mixture. Place the browned chicken pieces side by side on top. Bring the mixture to a simmer. Cover and place in the oven.
  • After 15 minutes, baste the chicken with the juices in the pot. Continue cooking, uncovered, for an additional 30-40 minutes (depending on thickness), basting every 10 minutes if you have time. Sprinkle with parsley and serve. (You can also cook covered on the stove over low heat for 30 minutes.)
Notes

For a boneless, skinless version, check out my recipe for Lemon –Thyme Chicken Cutlets and follow the same directions.
For a slow cooker version, use skinless chicken and  3 Tablespoons each of stock and wine instead of 4.  Follow same directions, but after deglazing, pour everything into the slow cooker and cook for 4-5 hours on HIGH or 6-8 on LOW.
Tried this recipe?Let us know how it was!


Whole roasted maple-brined turkey recipe

whole roasted maple-brined turkey recipe | pamela salzman

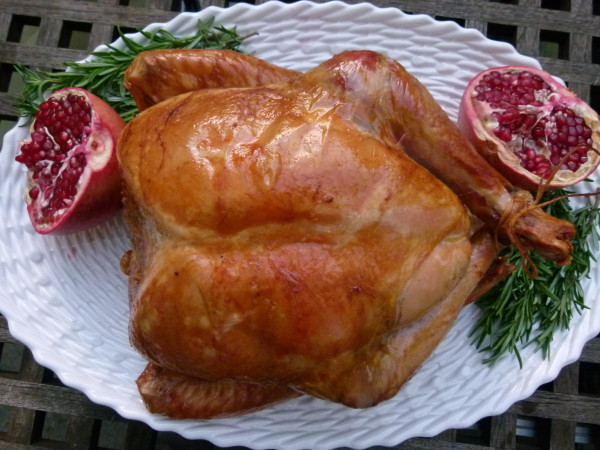
This is it, my last Thanksgiving recipe for you.  And it’s my favorite way to make turkey as of late.  I taught this method in all my November classes last year and a few this year and I was consistently thrilled with the results.  I don’t even like turkey, but this was juicy and so flavorful.  Even if you have solidified your Thanksgiving menu, I’m not too late with this one since you are probably making turkey of some sort.  Let’s get down to the nitty gritty of making a good turkey:
Buy a fresh, organic turkey (they taste better than frozen and/or Butterball chemically-injected ones).  If you bought a frozen turkey, plan for a few days to defrost in the fridge.  Do not thaw in brine!

Don’t forget to remove the neck and giblet bag from the cavities (including the neck.)

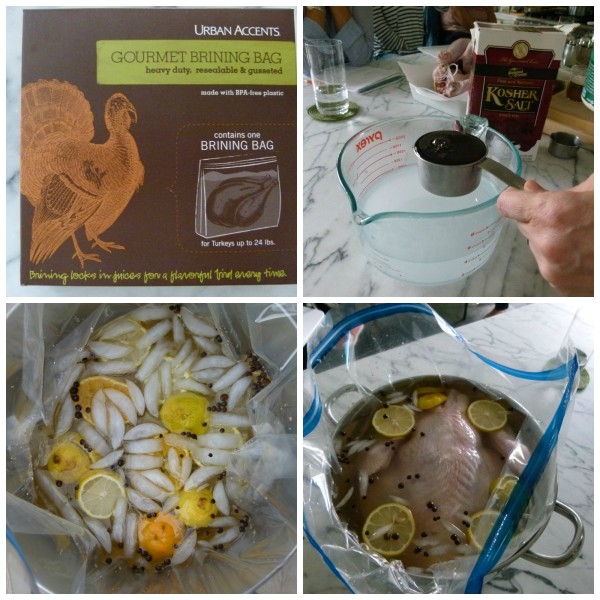
Brine it.  You can dry brine (which means you’re rubbing the turkey inside and outside with kosher salt 2-3 days before) or wet brine 24 hours in advance.  A wet brine is a salt-water solution, usually with brown sugar and some other flavors.  Brining gets the salt deep into the meat to season it well and keeps the turkey juicy.  Both brines do this.  The advantage of a dry brine is that it’s easier, especially if you’re cooking a super large turkey.  All you have to do is rub it with salt.  ANd it takes up less space in the fridge.  The advantage of a wet brine is that it’s faster and you can add different flavors to the solution.  The only time you don’t want to brine a turkey is if it is a KOSHER bird.  Those have already been brined.  If you can find a good quality organic, kosher turkey, go for it.  You don’t have to prep it in advance = easier.  I have tried NOT brining a turkey, and instead seasoning it just before cooking.  Not the same.  DO the brine.  If you don’t have room in your fridge, place the turkey in the brine in a pot in a cooler with ice and it will be just fine.

brining a whole turkey | pamela salzman

Allow the turkey to come to room temperature before cooking.  Promise me you’ll take the turkey out of the refrigerator at least one hour before cooking it, otherwise the interior will be underdone and the exterior will be overcooked and dry.  That does not have to happen.  For the largest birds (over 20 pounds), leave out of the fridge and out of the wet brine (if you’re using it) for 2 hours before roasting.  12-18 pounds leave out for 90 minutes before roasting.  Less than 12 pounds leave out for at least an hour before roasting.

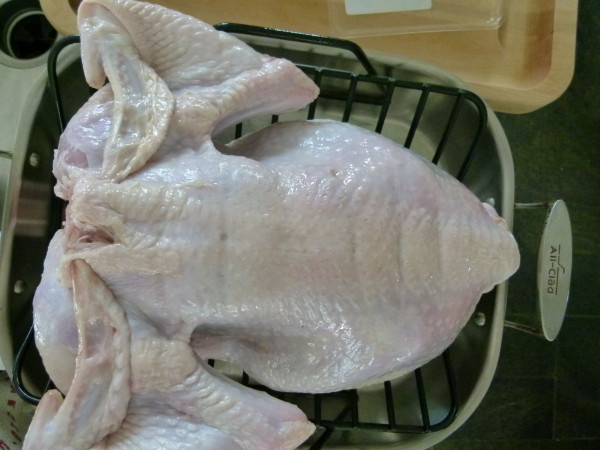
bend the wings back and start with the turkey b

Use a meat thermometer to determine whether or not your turkey is ready.  You cannot go by the chart on the turkey wrapping or by a recipe.  I have made over 150 turkeys in my life in lots of different ovens and trust me, you need a meat thermometer to say the thickest part of the breast, which is on the side closer to the neck, registers between 160-165 degrees.  The thigh should register around 175 degrees.  Check this post here to see if your thermometer is accurate!

Allow the turkey to rest for at least 20 minutes before carving.  The juice will redistribute and the turkey will be juicer.  If you take the turkey out and cut it too soon the juices with pour onto your cutting board.  That would be sad.  Feel free to allow the turkey to rest a little longer, up to 40 minutes is fine.  But keep it covered with a piece of foil so it stays warm while you make gravy and bake your stuffing.  Click on this post for carving help.

You don’t have to follow this recipe for a great turkey, but you should employ the above strategy.  Here are my other turkey recipes on my site:

Whole Roasted Dry -Brined Turkey  (this post has videos and more details about cooking, carving and making the gravy!)

Herb-Roasted Whole Turkey Breast

You will have a delicious turkey, I am sure.  But, if something goes wrong, here are some tips:

If you have dry turkey meat: carve the turkey and pour hot chicken or turkey stock over it.  No one will know!

If your turkey is undercooked and you’ve already cut into it, remove the thigh and drumstick and take the breasts off the carcass.  Put all the pieces into the roasting pan and put back in the oven until they reached the desired temp.

Good luck!! Leave a comment on any recipe if you have questions!

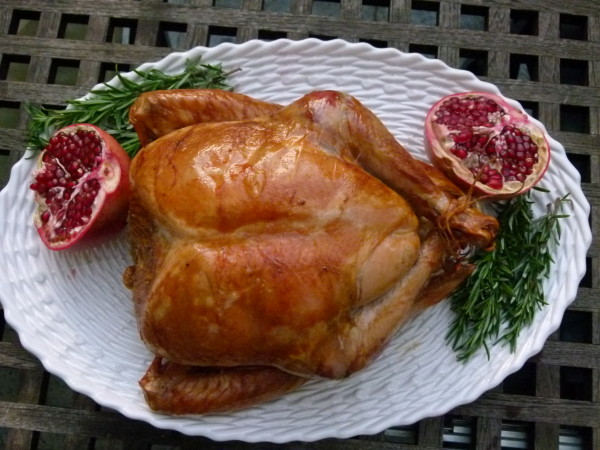
whole roasted maple-brined turkey | pamela salzman

Whole Roasted Maple-Brined Turkey

Pamela
Servings 12 -14 without leftovers

Ingredients
  

  • 12-14 pound fresh turkey giblet bag and neck removed, rinsed
  • For the brine:
  • 1 1/3 cup kosher salt such as Diamond Crystal
  • ½ cup maple syrup or brown sugar
  • 1 quart hot water
  • 1 orange cut into crosswise slices
  • 1 lemon cut into crosswise slices
  • 1 Tablespoon black peppercorns
  • 2 teaspoons allspice berries
  • 1 gallon ice cold water
  • 1 onion quartered
  • 3 or 4 parsley sprigs thyme sprigs and or sage leaves
  • 3 sprigs of fresh rosemary
  • 1 apple quartered or cores from 2 apples
  • 6 Tablespoons unsalted butter melted or olive oil
  • 1-2 cups stock or water
  • Gravy
  • ¼ cup dry white wine
  • 5 Tablespoons all-purpose flour
  • 3 -3 ½ cups chicken or turkey stock preferably homemade
  • sea salt and freshly ground black pepper to taste

Instructions
 

  • I like to brine the turkey for about 14-18 hours. You can brine it, remove it from the brine and then store it in the refrigerator for a day until you are ready to cook it. To make the brine: Dissolve the salt and maple syrup in the hot water. Take the orange slices and carefully squeeze them into the mixture. Add the lemon, peppercorns and allspice berries.
  • Place the brining bag in a large stockpot. Add the cold water to the bringing bag and then the warm mixture. Place the turkey in the brine breastside down and make sure the whole bird is covered with liquid. Seal the bag securely and place pot in the refrigerator for 12-18 hours.
  • Remove the bird from the brine and rinse with cold water. Pat dry. Refrigerate until ready to cook or proceed with recipe.
  • The day of roasting, take turkey out of refrigerator and wipe dry with paper towels. Bring to room temperature, about 60-90 minutes.
  • Preheat oven to 425 degrees. Position a rack in the lowest rung of the oven. Oil a V-shaped rack in a roasting pan.
  • Sprinkle a little freshly ground black pepper in the cavity and then add in the onion, herbs, and apple. Truss the turkey by tying the legs together. Brush the skin all over with some of the butter or oil.
  • Place the turkey on the rack in the pan, breast-side down and pull the wings behind the back. Roast for 40 minutes, basting with butter or oil after 20 minutes. Reduce the heat to 325 degrees, turn breast side up (I usually wear clean rubber gloves to do this) and add 1 cup stock or water to the roasting pan. Continue to roast, basting with the remaining butter or oil until used up and then with the pan juices every 20 minutes. Add additional stock to the roasting pan if you notice there are no pan juices with which to baste the turkey.
  • Roast until golden and cooked through. After about 2 hours, start testing for doneness by inserting an instant-read thermometer in the thickest part of the breast away from the bone; it should register 165-170 degrees. You may also test the thigh – it should read 180 degrees. The turkey should roast a total of about 2 ¾ hours, but it can range from about 2 ½ - 3 hours or 12-14 minutes/pound.
  • Transfer to a cutting board or warmed platter and cover loosely with aluminum foil until ready to carve, at least 20 minutes (I prefer longer.) Use the pan juices to make gravy.
  • Prepare the gravy:
  • Pour all the pan juices, including the fat into a fat separator.   Allow the fat to separate from the juices.
  • Heat the roasting pan over medium heat on the stove and add the pan juices, leaving the fat in the fat separator.  Add the wine to the roasting pan.  Bring to a boil and lower heat to a simmer for 2-3 minutes, stirring with a wooden spoon to dislodge any brown bits that stick to the bottom of the pan.  Strain into a bowl or you can use the gravy separator again or wait until Step 4 and strain into the gravy saucepan.
  • In a saucepan over medium heat, warm the reserved fat from the gravy separator until it is bubbly.  You should have at least 3-4 Tablespoons.  If you don’t, add some olive oil.  Add the flour and whisk rapidly to cook the flour, about 2-3 minutes.
  • Whisk in the strained pan juices and 3 cups of stock to the saucepan until smooth.  Bring to simmer and cook until thickened, about 5 minutes.  Season to taste with salt and pepper.  Keep warm on lowest heat.  Add additional stock as needed to achieve desired consistency.
Tried this recipe?Let us know how it was!


Turkey and pinto bean sloppy joes recipe (vegetarian version, too!)

turkey and pinto bean sloppy joes | pamela salzman

Last summer, my son came home after two weeks at sleep-away camp and couldn’t wait to tell me about an amazing food that I obviously had never heard of or eaten.  He assumed this because if I had ever enjoyed such culinary perfection, I would have surely been delighting my family with it over and over again.  “Mom, you’re not going to believe this thing I ate at camp!  I tried to remember everything about it so that you can make it at home!  It’s called…a sloppy joe!”  Should I have admitted I grew up in the 70’s and saw more than my share of Manwich commercials?  And that I have actually personally never eaten a sloppy joe in my life?  Because really the thought of sweet beef chili on a hamburger bun never spoke to me.

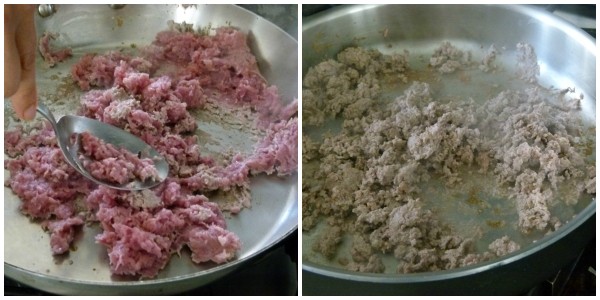
cooking the turkey

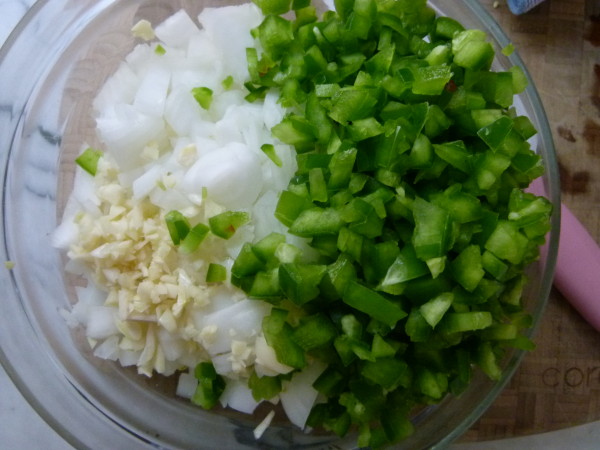
diced green pepper, onion and

But it spoke to Mr. Picky!  And when Mr. Picky likes something, I mobilize into action!  A classic sloppy joe is a sandwich (specifically on a hamburger bun) with a loose, seasoned ground beef and tomato filling.  It’s called “sloppy” because it’s kind of a mess to eat.  I came up with this version of a sloppy joe using ground turkey instead of beef and stretching the protein with some pinto beans, which I know is not traditional, but I couldn’t help myself.  And since Mr. Picky loves beans, I figured it was safe.  I also deviated a little from regular sloppy joes by cutting way down on the added sweeteners and by not using ketchup as my base.  I think I came up with a very tasty and nutritious dish whether you can call it a sloppy joe or not!  All I care about is that Mr. Picky goes crazy for it and always begs me to put it in a thermos the next day for his lunch.

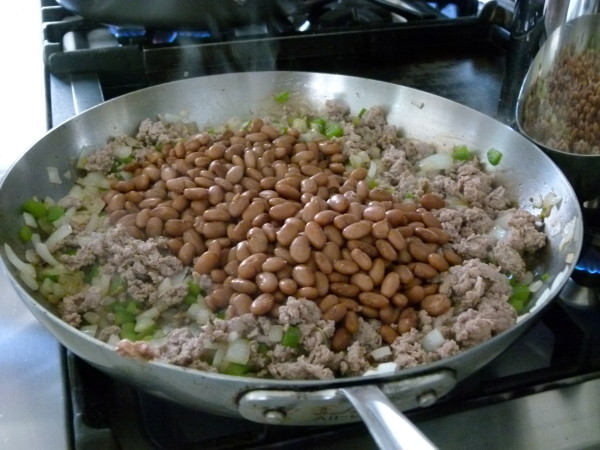
after sautéing veggies, add everything

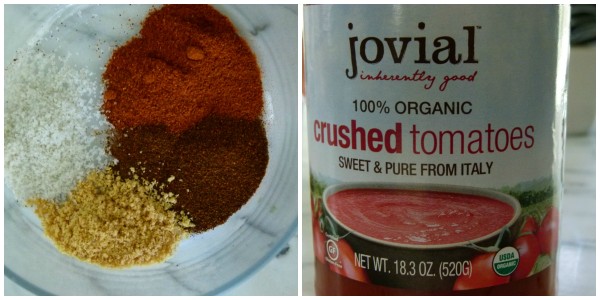
spice mixture and my favorite tomatoes

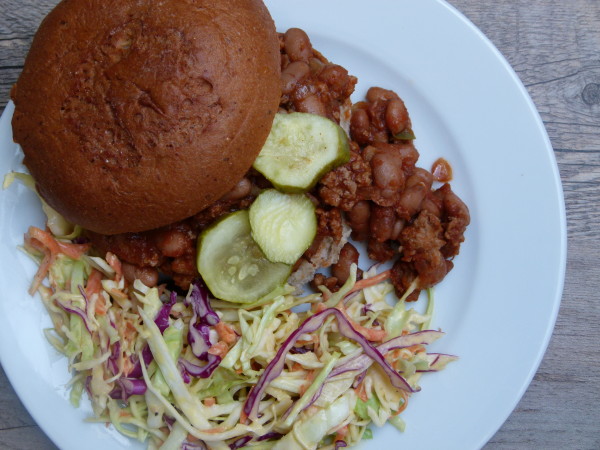
I do toast up some hamburger buns for my hubby and the kids, but I like to eat the sloppy joe mixture on top of some cooked grains, like brown rice or quinoa.  That’s how I can still make one meal but adapt it to appeal to everyone.  Usually I’ll serve a green salad or cole slaw on the side and I’m done.  You can adapt this recipe is by subbing 1 pound of crumbled tempeh for the ground turkey and you’ll have a great (even better I think) vegetarian option.  Feel free to sub sweet bell peppers for the green or add a grated carrot into the mixture or double the meat and omit the beans if you want.

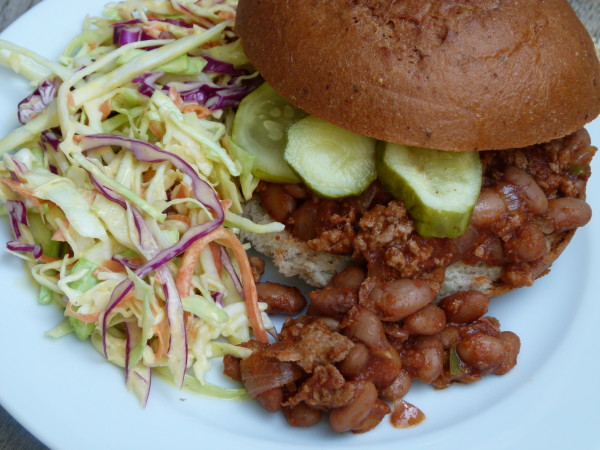
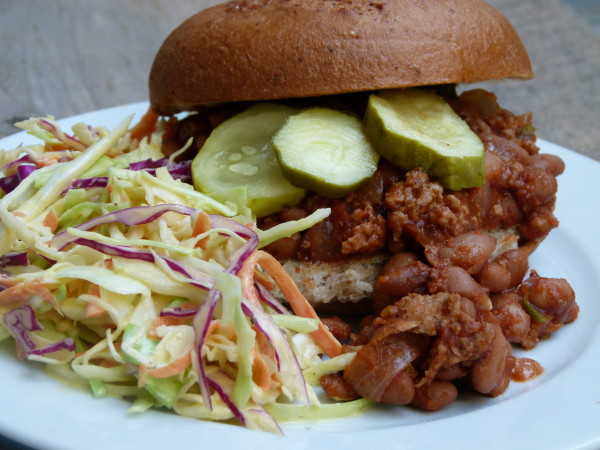
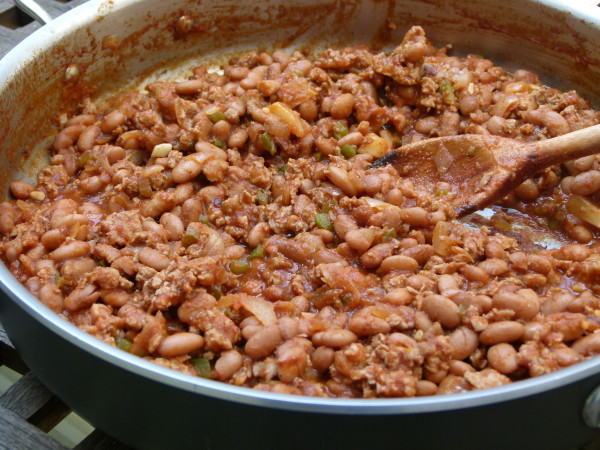
turkey and pinto bean sloppy joe mixture

turkey and pinto bean sloppy joes | pamela salzman

It’s a really easy dinner, and it reheats beautifully if you want to make it in the morning or the day before.  It actually freezes well, too.  Something I did recently was to make the sloppy joe mixture after school, transfer it to my slow cooker and keep it on the warm setting until we all came home for “one of the best dinners ever in my life, Mommy.”  Winner!

turkey and pinto bean sloppy joes | pamela salzman

Turkey and Pinto Beans Sloppy Joes

Pamela
5 from 1 vote
Servings 6

Ingredients
  

  • 1 pound ground turkey preferably dark meat
  • 1-2 Tablespoons cold-pressed unrefined extra-virgin olive oil
  • ¾ cup diced onion
  • ½ green bell pepper diced or sweet bell pepper
  • 3 cloves garlic finely chopped
  • 1 ½ cups cooked pinto beans or 1 15-ounce can drained and rinsed (click here to learn how to cook beans from scratch)
  • 1 18- ounce jar crushed tomatoes or tomato puree I like Jovial organic tomatoes in glass jars.
  • 2 Tablespoons tomato paste
  • 2 Tablespoons red wine vinegar
  • 2 Tablespoons pure maple syrup
  • 4 teaspoons Worcestershire sauce look for vegan or gluten-free versions if you need
  • 2 teaspoons chili powder
  • 1 teaspoon mustard powder
  • 1 teaspoon sea salt
  • freshly ground black pepper to taste
  • accompaniments: toasted hamburger buns or cooked grains such as brown rice millet or quinoa

Instructions
 

  • Heat a large skillet over medium-high heat. Add turkey and brown, breaking up the meat into small crumbles until just cooked through. Drain and reserve in a separate bowl.
  • In the same skillet, warm the olive oil over medium heat and sauté the onions, pepper and garlic until onion is tender and translucent.
  • Add turkey back to the skillet and add remaining ingredients. Stir to combine and simmer over medium-low heat for 15 minutes. Taste for seasoning and add more salt and pepper if needed.

Notes

You can also make a vegetarian version by subbing 1 pound of crumbled tempeh for the turkey and using a vegan worcestershire sauce. Just saute the tempeh where you would saute the meat in Step 1. Tempeh is not as moist as meat though, so you may need to add a few tablespoons of water or vegetable stock with the tomatoes. My family likes the sloppy joes on toasted hamburger buns with sliced dill pickles.
You can also make this more spicy with a little cayenne or hot sauce.
Tried this recipe?Let us know how it was!

Chicken souvlaki with tzatziki recipe

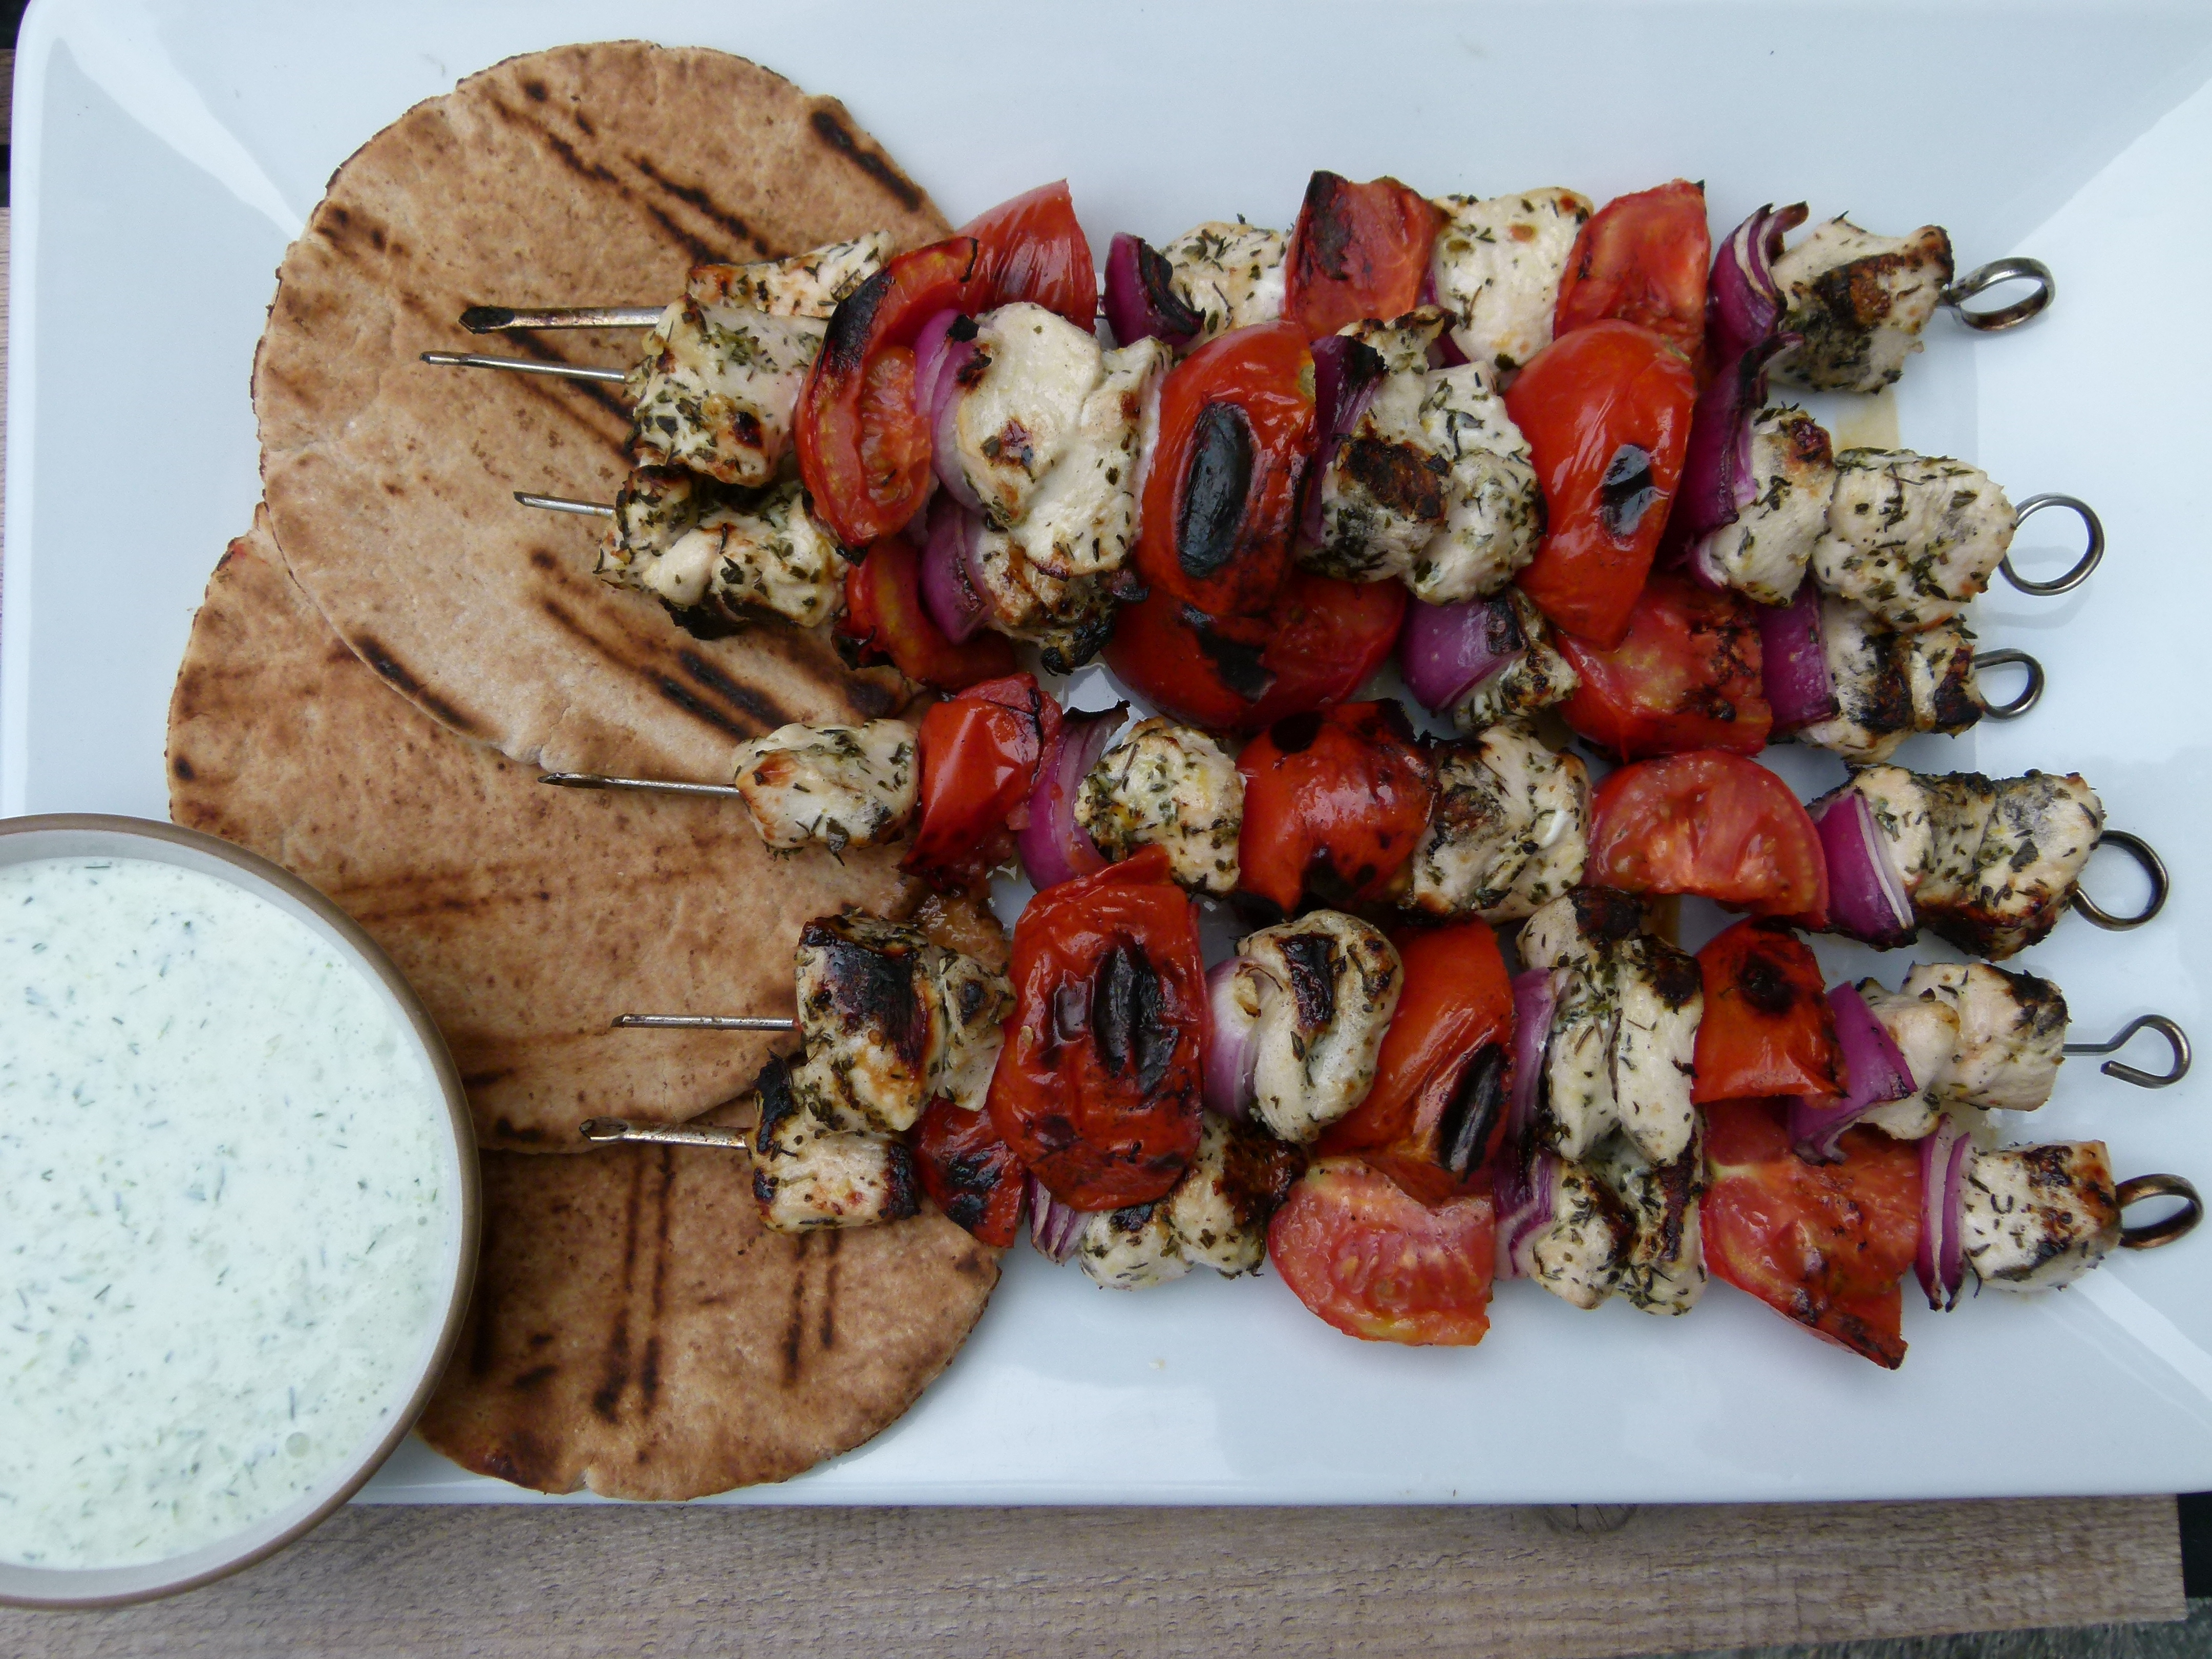
Chicken Souvlaki | Pamela Salzman

I thought since I am vacationing in the Mediterranean with my family for three weeks, I would post some new recipes that complemented my travels.  When I return (if I ever return!), I will definitely write up my itinerary and any do’s and don’t’s which I learned that might be helpful for your planning purposes.

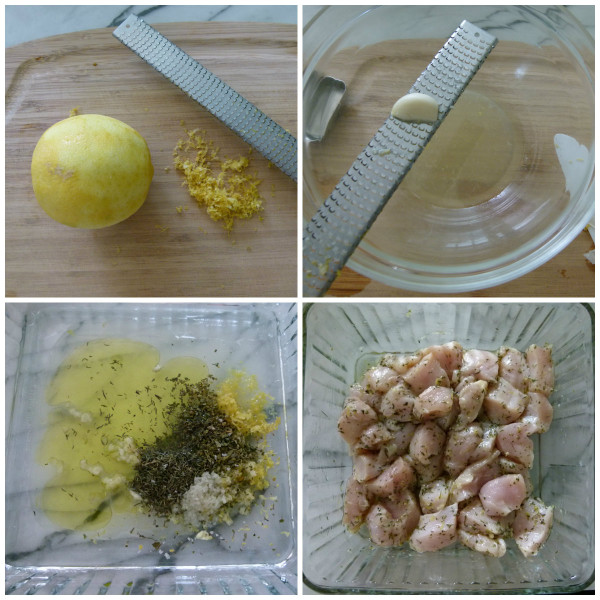
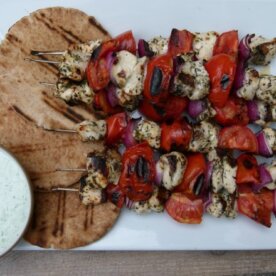
chicken souvlaki collage

If you’ve hung around this blog long enough, you’ve read that Mediterranean food is my favorite.  It’s my comfort zone.  It’s exactly the way I like to eat – fresh, seasonal, organic food, mostly veggies, legumes and whole grains, olive oil, more fish than meat, a little sheep or goat cheese and yogurt,.  Mediterranean cuisine is also considered to be among the most healthful in the world.  More importantly, I think the food is just downright delicious, but simple.  Of course in order for simple food to taste amazing, each ingredient has to be the best.

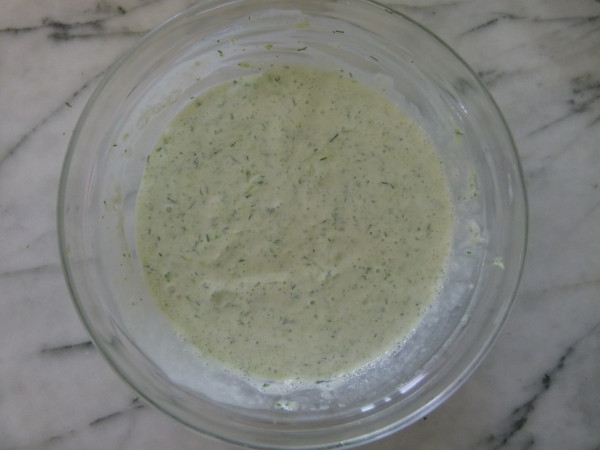
Tzatziki

This is where sometimes we have trouble duplicating something we’ve eaten, even if we have the exact recipe.  For example, there’s no secret Greek salad recipe.  I have made and eaten a lot of them in my life, some forgettable and some outstanding.  It just comes down to the ingredients that were used.

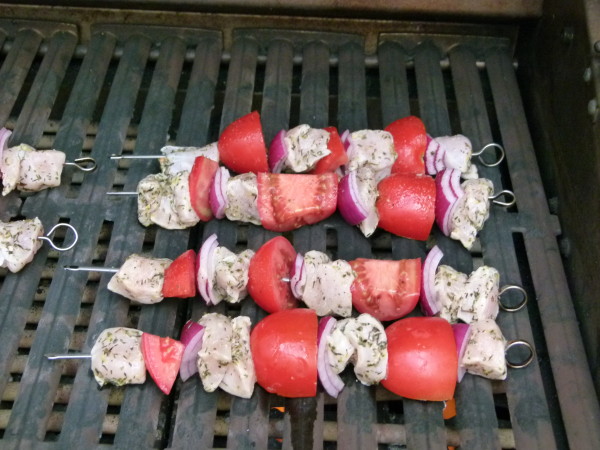
Kebabs on the grill

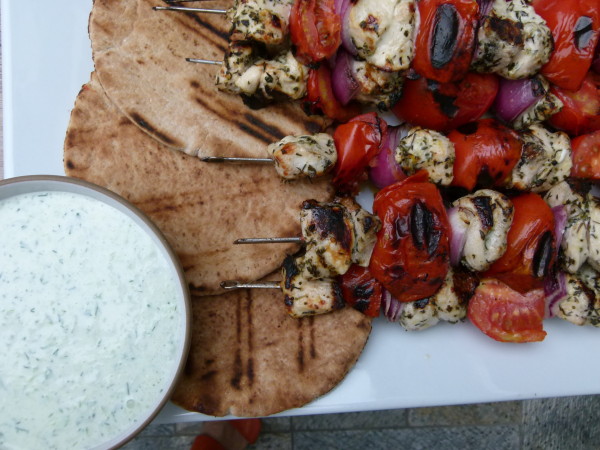
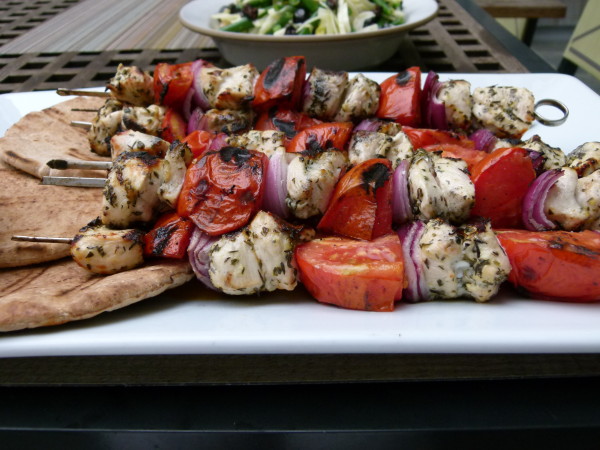
Chicken Souvlaki is an easy, light dinner I can pull together quickly and one that I know everyone will eat.  It’s basically a grilled, marinated chicken and veggie kabob, which I love to serve with a very tasty cucumber-yogurt sauce called Tzatziki.   My family likes to eat it with grilled pita bread (which is literally store-bought pita that I put on the grill just to get a few char marks) or garlic rice.  You can also serve the kabob over a Greek salad which would make for a great light summer dinner.

Chicken Souvlaki | Pamela Salzman

Check out my recent Instagram and facebook pictures from Greece and Turkey.  We will be finishing off our trip next week in Venice and then Lake Garda, so expect some Italian recipes soon!

Chicken Souvlaki | Pamela Salzman 


Chicken Souvlaki with Tzatziki

Pamela
5 from 1 vote

Ingredients
  

  • 1 ½ teaspoons finely grated lemon zest
  • 3 Tablespoons freshly squeezed lemon juice divided
  • 2 medium cloves of garlic finely grated, divided
  • 1 ½ teaspoons dried oregano
  • 1 ½ teaspoons dried thyme
  • 2 Tablespoons unrefined cold-pressed extra-virgin olive oil
  • Sea salt and freshly ground black pepper
  • 1 ¼ pounds boneless-skinless chicken breast halves cut into 2-inch cubes
  • 2 Persian cucumbers chopped or coarsely grated (personal preference)
  • 1 cup full fat Greek yogurt Straus makes a great organic one
  • ½ Tablespoon white wine vinegar
  • 1 Tablespoon finely chopped fresh mint or dill optional
  • 8 small plum tomatoes halved (or large ones quartered)
  • ½ small red onion cut into 2-inch pieces
  • 6 whole-wheat pitas optional

Instructions
 

  • Whisk together lemon zest, 1 ½ Tablespoons lemon juice, 1 grated clove of garlic, oregano, thyme, 1 Tablespoon plus 1 teaspoon olive oil, and ½ teaspoon salt in a medium bowl. Add the chicken, and toss to coat. Marinate at room temperature for 45 minutes or refrigerated, covered, for up to 6 hours.
  • Meanwhile make the tzatziki sauce: Stir together the remaining lemon juice and garlic, the cucumber, yogurt, vinegar, herbs (if using) and ½ teaspoon salt. Refrigerate, covered, until ready to serve.
  • Heat the grill to medium-high. Thread the chicken, tomatoes, and onion onto 6 skewers. Brush with remaining 2 teaspoons olive oil, and season with pepper.
  • Grill skewers, turning, until browned on all sides and cooked through, about 8 minutes. Grill pitas until charred, about 2 minutes per side.
  • Serve skewers with charred pitas and tzatziki sauce.

Notes

*Not all skewers are the same size.  This recipe would probably make 8 9 ½-inch bamboo skewers.
Tried this recipe?Let us know how it was!


Pasta with Shredded Grass-Fed Brisket Recipe (slow cooker version, too!)

pasta with shredded grass-fed beef brisket | pamela salzman

Just because I don’t eat meat, doesn’t mean my family doesn’t love it and ask for it.  So I will make it on occasion, but my rule is that it has to be grass-fed.  Read my other brisket post about why.  I make beef more in the winter than in the summer because it has a very warming thermal nature, and becomes even more warming when cooked with onions, which means it can actually raise the thermostat in your body and heat you up a little.  Perfect these chilly nights, and I know so many of you have been suffering through the worst winter ever!  It’s almost over! (I hope!)

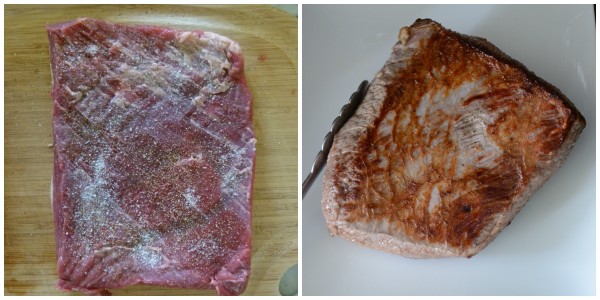
pat meat dry, season and sear

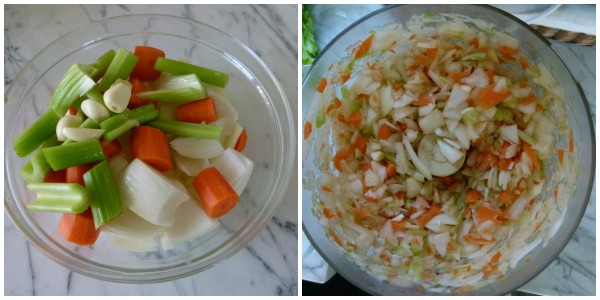
chop veggies

I’ve been making a version of this recipe for about 15 years, and my grandmother made something similar which everyone loved.  Of course grandmothers never write recipes down because they don’t measure anything (a pinch of this, a sprinkle of that.)  Thank goodness for google which helped me come up with a great roadmap for one of my family’s favorites.  In fact, my older daughter has requested this dish many times for her birthday in past years!

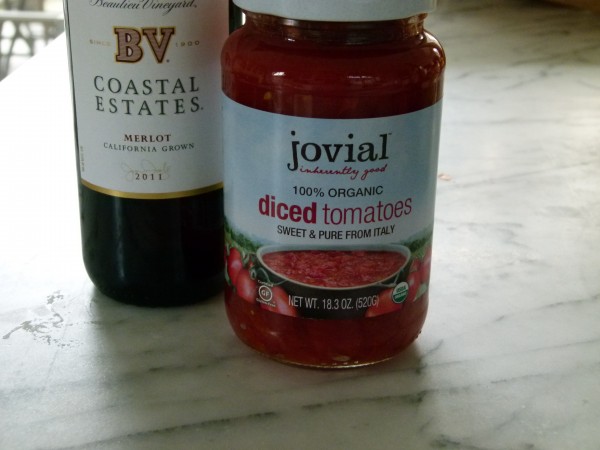
dry red wine and organic diced tomatoes in a glass jar

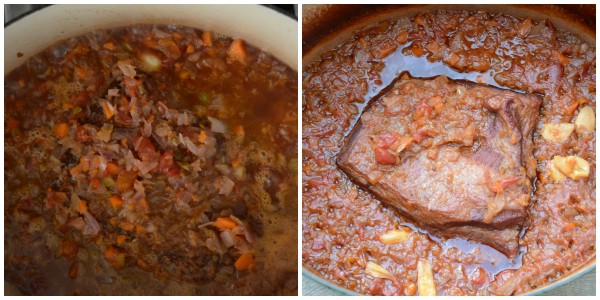
brisket and sauce before and after

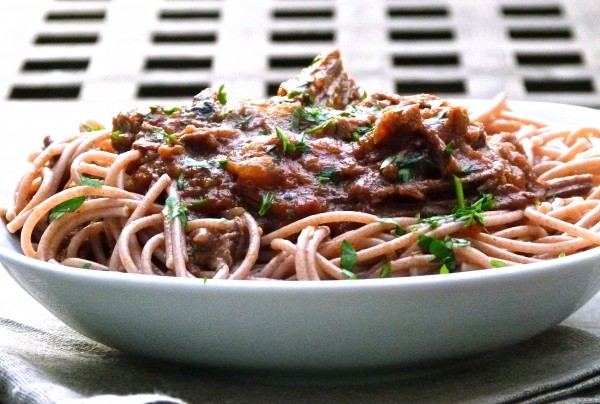
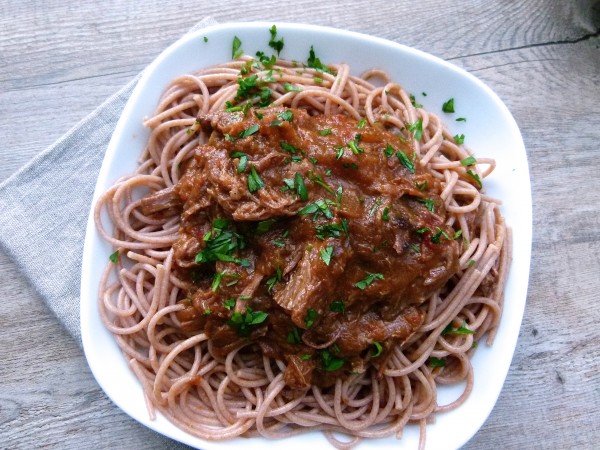
This is different from the brisket I learned how to make for Jewish holidays.  That brisket is braised in an oniony sauce as well, but it’s sliced whereas this one is shredded and the sauce is more tomato-veggie, much more Italian.  We used to eat this over wide pasta, like pappardelle or fettuccine or egg noodles.  But spaghetti and even orecchiette are great.  Since I don’t make as much pasta as I used to, we have been enjoying this more over cauliflower mashed potatoes or polenta.  For those of you who are hooked on spaghetti squash, I think this would be great on it!

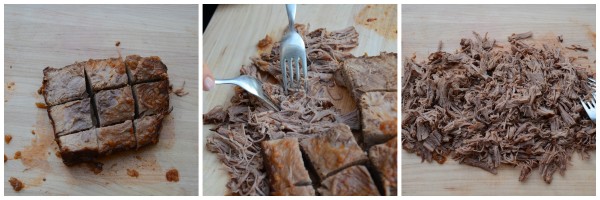
cut and shred

Brisket is one of those very tough cuts of meat that can only be made meltingly tender by cooking it low and slow for a long period of time with lots of moisture.  Don’t try and grill, sear or stir-fry brisket.  You’ll end up with the toughest, chewiest meat ever.  Yuck!  You can also use chuck roast in this recipe since that cut also needs a long, low and slow preparation.  Since it takes three hours minimum to cook, you’ll need to get this going early in the day or do it in a slow cooker, or make it the day before and reheat it.  All methods will result in a super soft, very flavorful brisket and sauce.  Although I personally think the flavor is a little better the next day.  And, this will freeze beautifully!  I think this sounds like a good weekend project for those of us who will be stuck inside from monsoon rains (not complaining, just saying) or the bitter cold.  Hoping this can help you find a way to stay cozy this weekend!

pasta with shredded grass-fed beef brisket | pamela salzman

Pasta with Shredded Grass-Fed Brisket

Pamela, adapted from epicurious.com
5 from 1 vote
Servings 6

Ingredients
  

  • 2 ½-3 pound piece of brisket preferably grass-fed
  • sea salt or kosher salt
  • freshly ground black pepper to taste
  • 3 Tablespoons unrefined olive oil divided
  • 2 large onions chopped
  • 2 medium carrots chopped
  • 2 medium stalks of celery chopped
  • 6 cloves of garlic chopped
  • 1 cup dry red wine
  • 2 cups rich chicken stock or beef broth use whichever you have that’s homemade
  • 1 14- to 15- ounce can diced tomatoes or 18-ounce glass jar
  • 2 bay leaves
  • 1 pound pasta cooked and drained

Instructions
 

  • Preheat oven to 325 degrees. Pat brisket dry and sprinkle generously with salt and pepper. Heat 1 Tablespoon of oil in a large oven-proof pot or Dutch oven over medium heat. Sear the meat on both sides until nicely browned, about 12 minutes total.
  • Transfer meat to a platter. Add 2 Tablespoons oil to the pot and then add the chopped vegetables and garlic. Sprinkle with salt and pepper and sauté over medium heat until tender and golden.
  • Stir in the wine, stock, tomatoes and bay leaves and deglaze the bottom of the pan by scraping the bottom with a wooden spoon. Bring to a boil and place brisket back in the pot. Cover and transfer pot to the oven. Braise the meat for 3-4 hours or until tender enough to shred with a fork.
  • Remove from the oven and transfer meat to a cutting board. Remove the bay leaves and discard. Remove excess fat from the meat, cut into 2-inch chunks, and shred with two forks.
  • If you would like a smoother sauce, pureé the vegetable mixture either directly in the pot with an immersion blender or in a food processor or blender. Otherwise you can leave it chunky. This can be done a day before and reheated in the same Dutch oven over medium heat on the stove.
  • Add the shredded meat back into the sauce and stir together. Serve over cooked pasta or polenta, millet-cauliflower mash, mashed potatoes or cauliflower-mashed potatoes.

Notes

Use less liquid if you want less of a sauce.
SLOW COOKER VERSION
-Sear meat on both sides in a skillet or Dutch oven.  Transfer to slow cooker.
-Saute vegetables until tender.  Season with salt.
-Deglaze pan with 2/3 cup wine, 1 ½ cups stock and same amount of tomatoes as stove-top recipe, making sure to scrape all the brown bits from the bottom of the pot.  Transfer contents plus bay leaves to slow cooker.
-Cover and cook on LOW for 7-9 hours or HIGH 4-5 hours.  Proceed with remaining steps 4-6 above.
Tried this recipe?Let us know how it was!


Moroccan chicken with dates recipe (slow cooker version, too!)

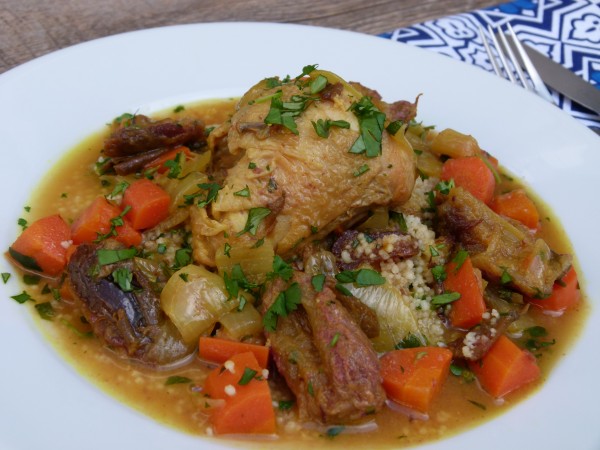
Moroccan chicken with dates | Pamela Salzman

You all know I live in Southern California and perhaps you know we are having a very mild, but super dry winter.  We actually have a serious drought happening here.  And you might also know that 99% of my entire family lives in the New York/New Jersey area.  And they’re having a veerrryy different kind of winter.

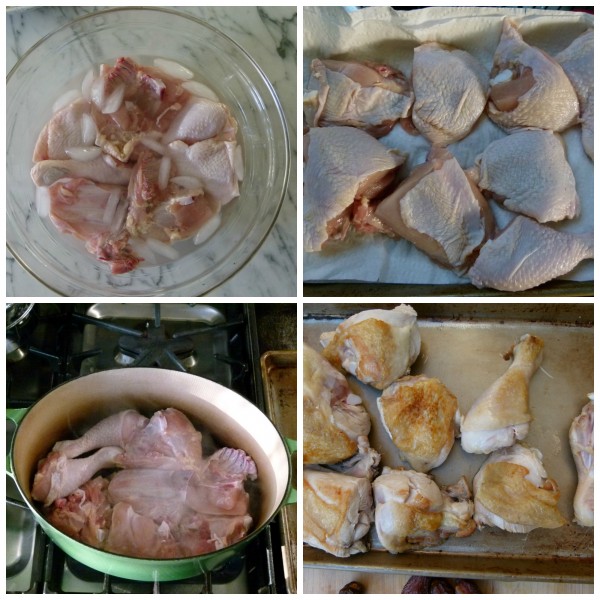
prep the chicken

So most of our phone calls the last few weeks have been kind of like this:

Me: “Hi!  It’s me.  What’s new?”

Sister/Mother/Father: “It’s snowing.  AGAIN.  The kids are off from school.  AGAIN.  It’s absolutely freezing out there.  Seriously, this is the worst winter EVER!”

Me:  “Bummer.  But I asked, ‘what’s neeeewwww?'”

Same old, same old.  I miss the talks we used to have about currents events, movies, what we’re making for dinner, what we ate for lunch.  Interesting, riveting stuff.  Instead, it’s all blizzard all the time!  Thankfully, winter doesn’t last forever and they’ll all be able to get back to business before we know it.  Easy for me to say, I’m sure.

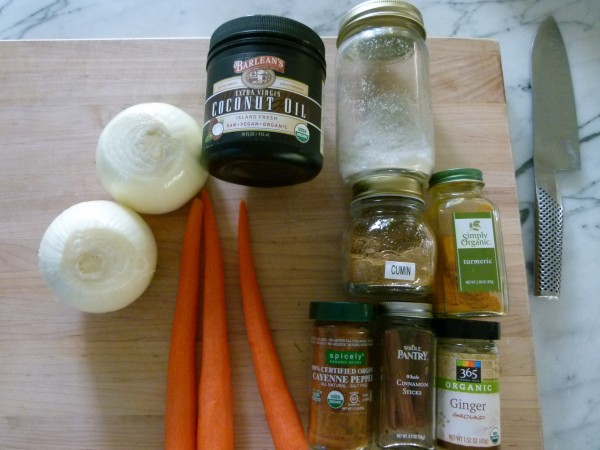
onion, carrots, coconut oil and spices


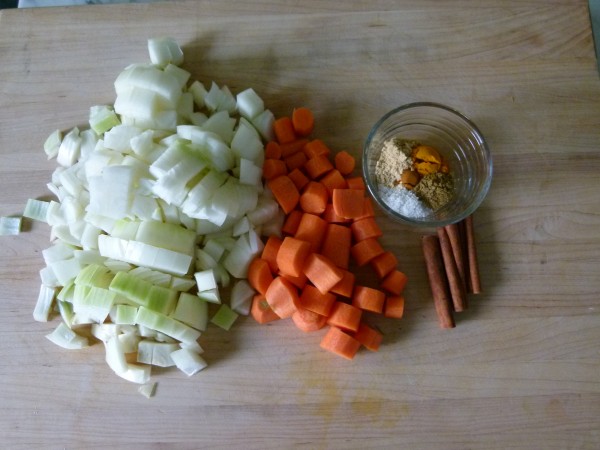
prepped

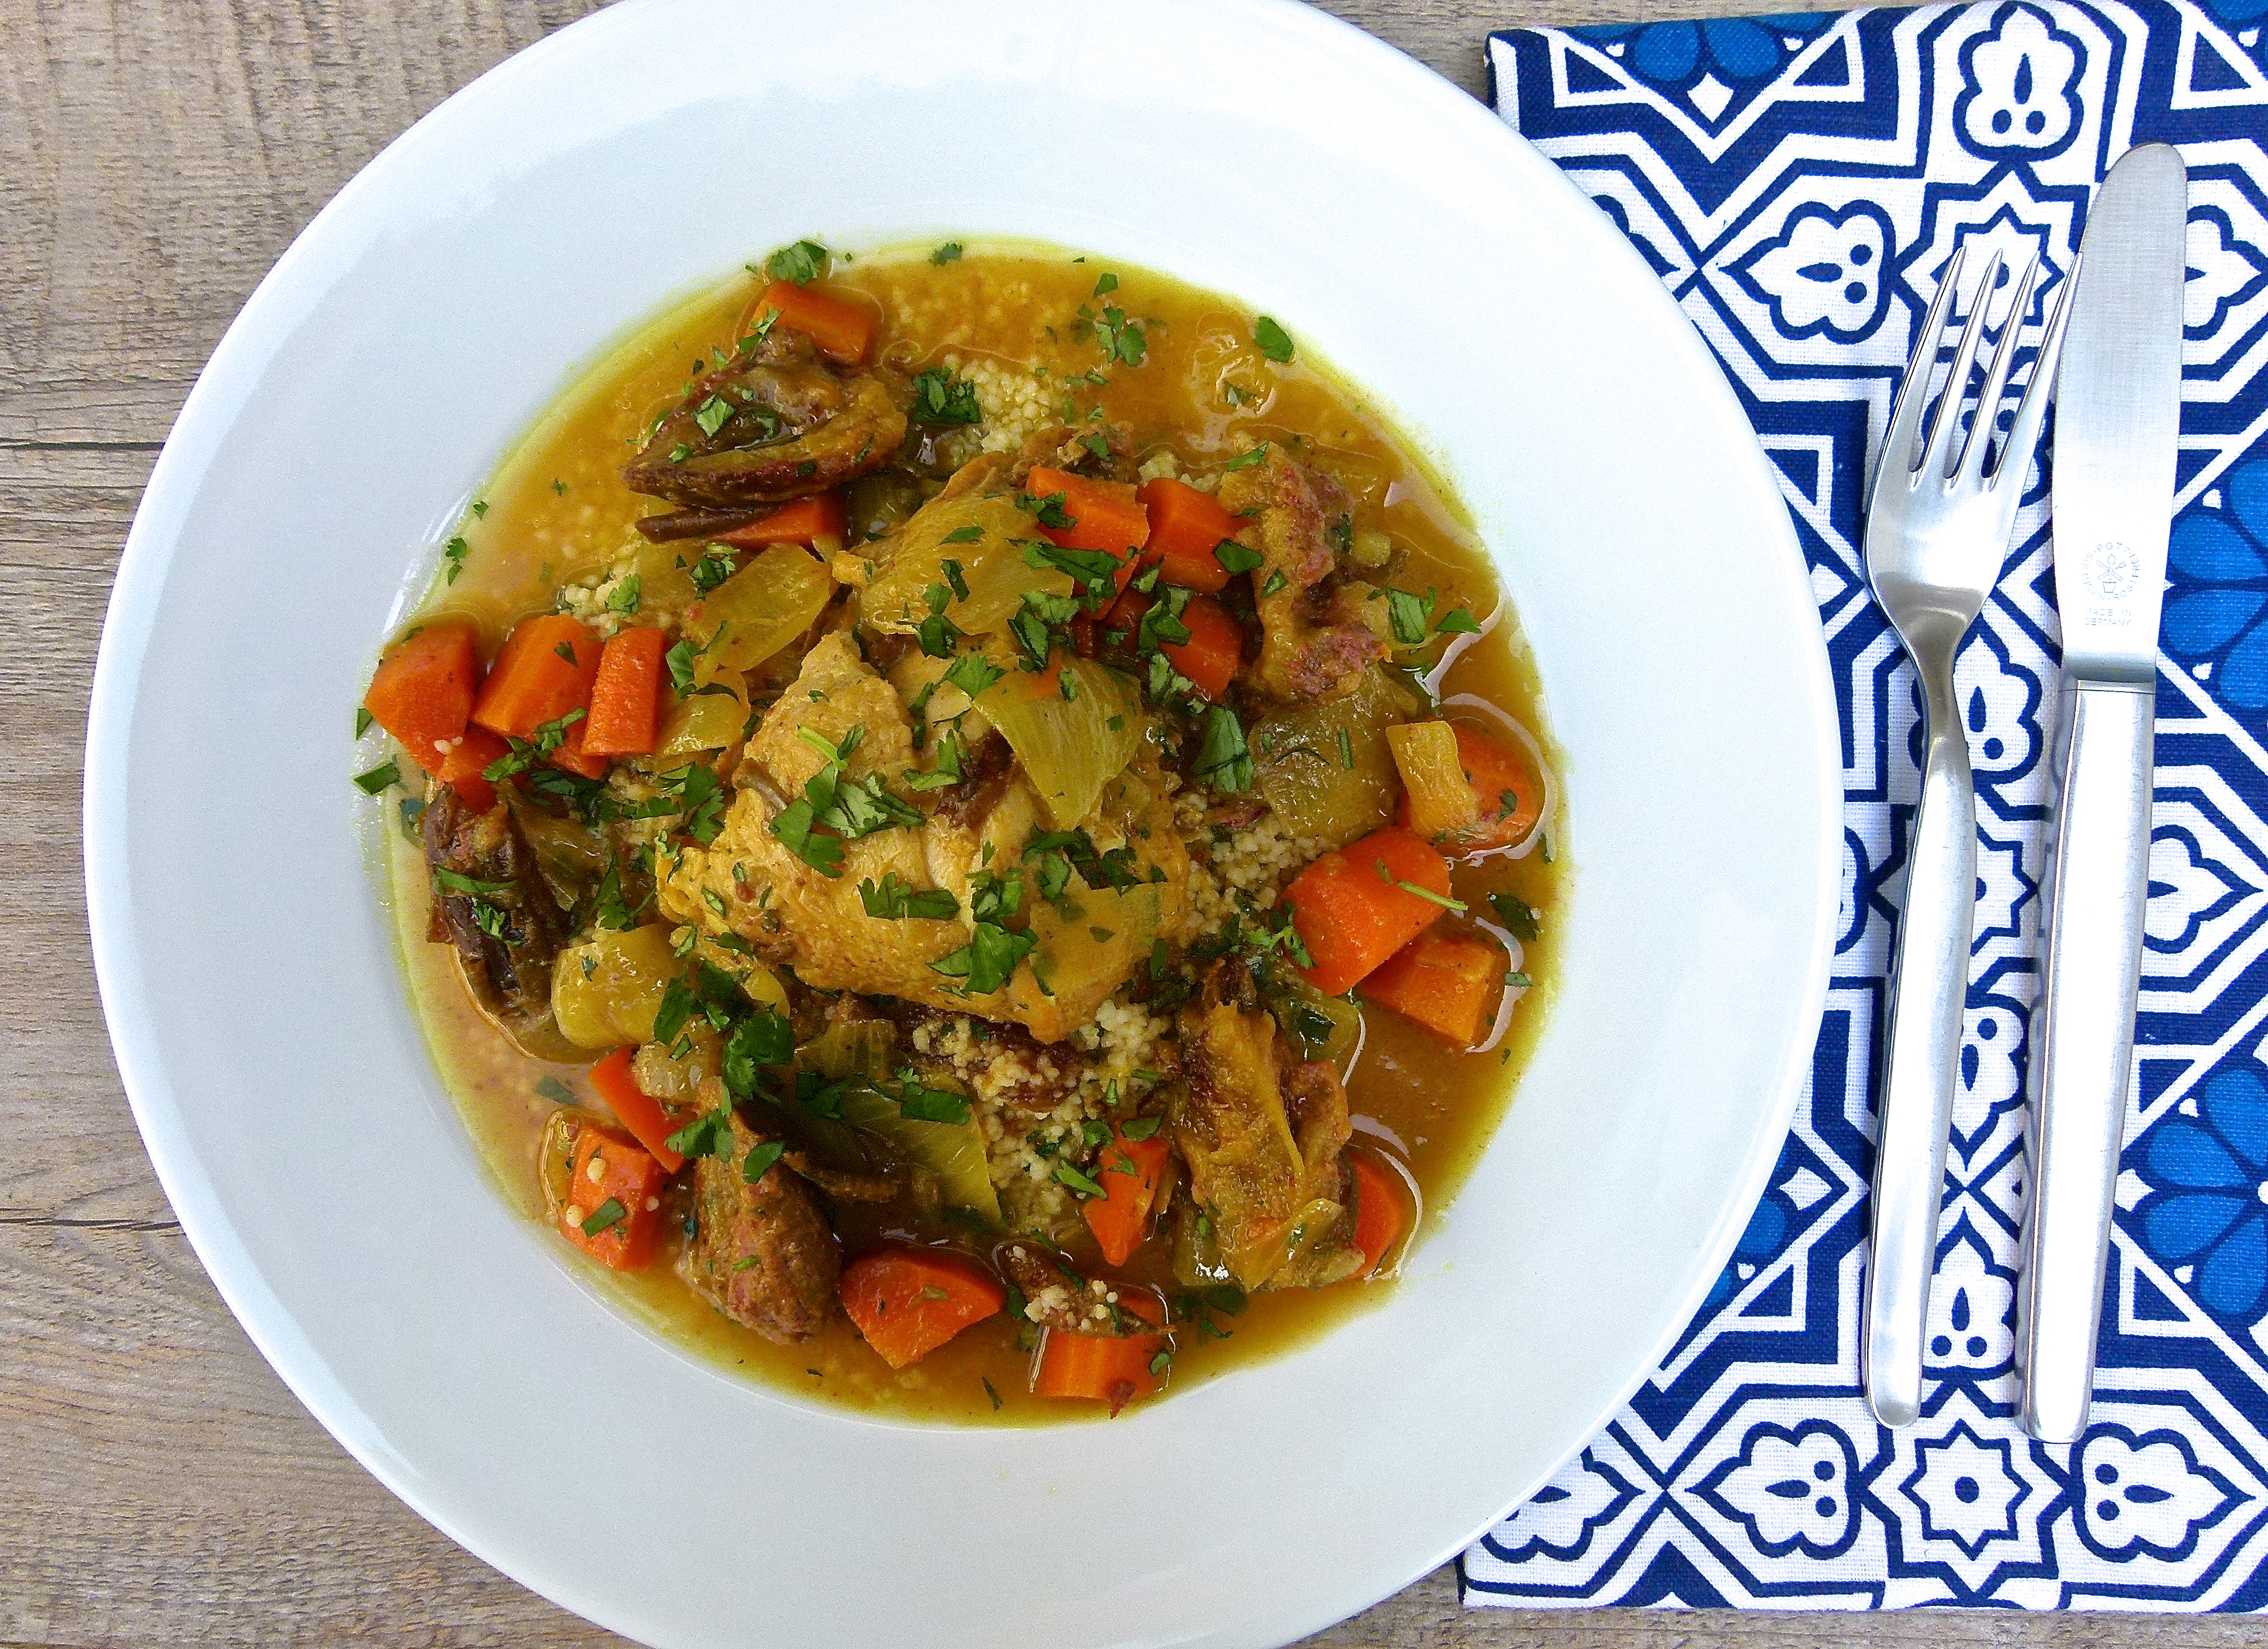
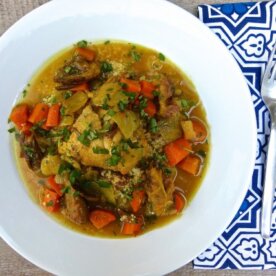
But if I were in the middle of a polar vortex, I would quickly buy a one-way ticket to L.A. I would make super-warming foods for breakfast, lunch and dinner.  We may not be able to control the weather, but we can control the thermal nature of what we eat.  And I say, heat me up!  High on my list would be this Moroccan chicken with dates which I taught in my classes last February.  I know it seems like there are a lot of ingredients in this recipe, but half of them are spices, all of which are warming to the body, and anti-inflammatory, too.  These spices, including ginger, cinnamon, turmeric, cumin and a pinch of cayenne are also quite flavorful and make this otherwise simple chicken dish, something very special.  There’s also a little bit of sweetness from the cinnamon and from halved dates which rank as one of my favorite foods on the planet.  A little earthy, a little sweet, a touch spicy and a little tart — it’s one of my favorite chicken recipes!

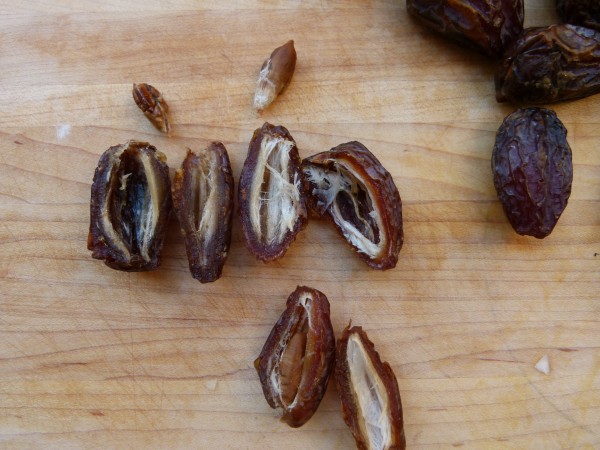
slice open the dates to remove the pit

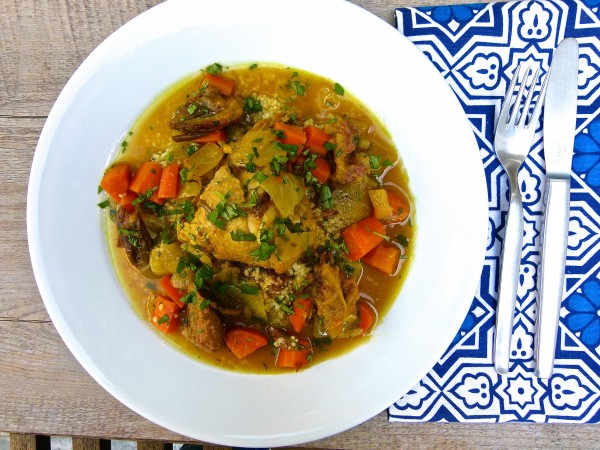
In these images, and for dinner last night, I served this with an apricot couscous (I’ll post the recipe next week.)  This will have a very tasty, but brothy sauce which just begs for something to sop it up.  Couscous, which is pretty dry, is the perfect side dish.  But you don’t need to make it with any seasonings or herbs.  Even plain would be just the right side for this dish.  Otherwise, if you’re gluten-free, steamed rice, quinoa or millet would be amazing here.  I also served it for dinner with simply sautéed Swiss chard, but check out this recipe for raw grated carrot and beet salad.  That would be fabulous, too.

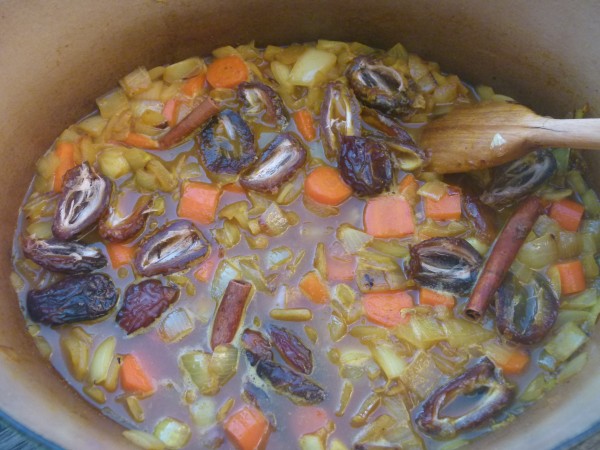
bring to a simmer before added browne

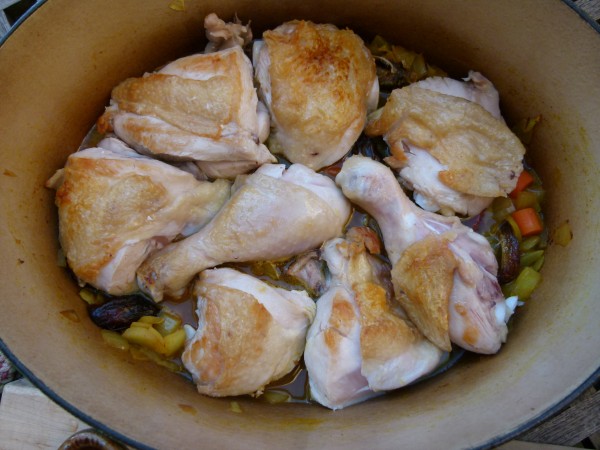
add chicken to mixture

I have made this recipe in the slow cooker, as well.  Please read the directions for how to adjust this recipe for the slow cooker.  Both versions are amazing and will help warm up your core.  At least until the next snowfall or tomorrow, or both, as the case might be!

Moroccan chicken with dates | Pamela Salzman


Moroccan Chicken with Dates

Pamela, adapted from epicurious.com
5 from 9 votes
Servings 6

Ingredients
  

  • 3 ½ pounds bone-in skin-on chicken parts such as breasts (I like them split), thighs or drumsticks, seasoned with 1 ½ teaspoons kosher salt when you get home from the market or brined for an hour (1/4 cup kosher salt + 2 cups water) EXCEPT if you use kosher chicken. See this post for how and why to brine chicken.
  • 1 Tablespoon unrefined coconut oil or olive oil
  • 2 onions chopped
  • 3 medium carrots peeled and cubed
  • 3 cinnamon sticks
  • 1 teaspoon sea salt
  • 1 ½ teaspoons ground ginger
  • 1 teaspoon ground cumin
  • ½ teaspoon ground turmeric feel free to add more if you like it
  • 1/8 teaspoon cayenne pepper optional
  • 1 ½ cups chicken stock
  • 5 Tablespoons fresh lemon juice divided
  • 12 dates pitted and halved
  • ¼ cup chopped fresh cilantro if you like it

Instructions
 

  • Heat the oil in a large heavy-bottomed pot or Dutch oven over medium heat. Pat the chicken dry with paper towels and add to the pot in one layer. Do not overcrowd. Cook until browned on the underside, then turn over and browned on the other side, about 15 minutes total. Transfer chicken to a baking sheet or platter and repeat with remaining chicken if there’s some still left to do.
  • Add onions and carrots to the pot and sauté until tender and translucent, about 6 minutes.
  • Add cinnamon sticks, salt and remaining spices. Sauté about 1 minute, or until fragrant.
  • Add stock, 3 Tablespoons lemon juice and dates. Deglaze the pan by scraping the brown bits from the bottom with a wooden spoon. Bring to a boil, add chicken pieces back to pot skin-side up and cover. Lower heat and simmer until chicken is completely cooked through, about 40-45 minutes. An instant-red thermometer should read 165 degrees when inserted into the thickest part of the breast.
  • Add lemon juice to pot and stir to combine. If sauce needs thickening, transfer chicken to a platter and simmer sauce until it is reduced. Sprinkle everything with cilantro and serve.

Notes

SLOW COOKER VERSION:
Use bone-in, skinLESS pieces of chicken
Use a skillet to brown chicken, and sauté vegetables and spices.  Add only ¾ cup of stock to the pan and the same amount of lemon juice as in the original recipe to deglaze the pan.  Do not add the dates until 20 minutes before serving.
Transfer the browned chicken, and the vegetable, spice, stock and lemon juice mixture to the slow cooker and cook covered on LOW for 7-8 hours or HIGH 4-5 hours.
20 minutes before serving, stir dates into the slow cooker.  Add remaining lemon juice and garnish with cilantro, if desired.
Tried this recipe?Let us know how it was!


Chicken tikka masala recipe

chicken tikka masala | pamela salzman

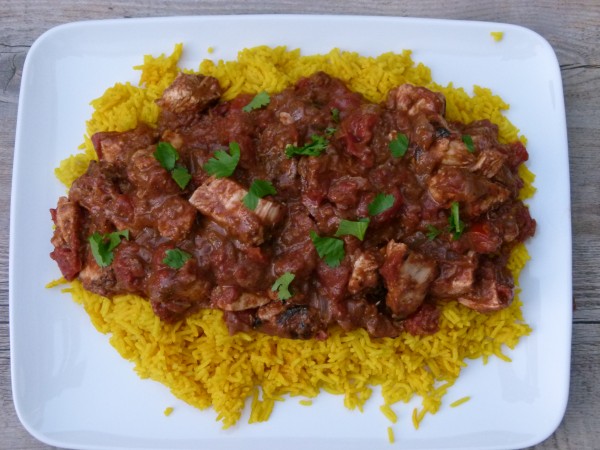
Did you know that Chicken Tikka Masala is the most popular dish in Indian restaurants in the US and it’s not even Indian?  Nope, you won’t find families in India sharing Tikka Masala recipes because as the story goes, this dish was created in a London curry house.  Interesting, no?  Did you know I had the most difficult time trying to make this dish look appetizing in these photographs?  Just needed to get that off my chest.

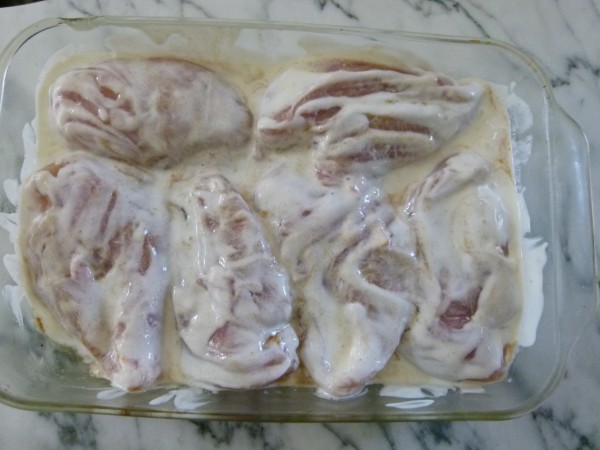
marinate the chicken in yogurt

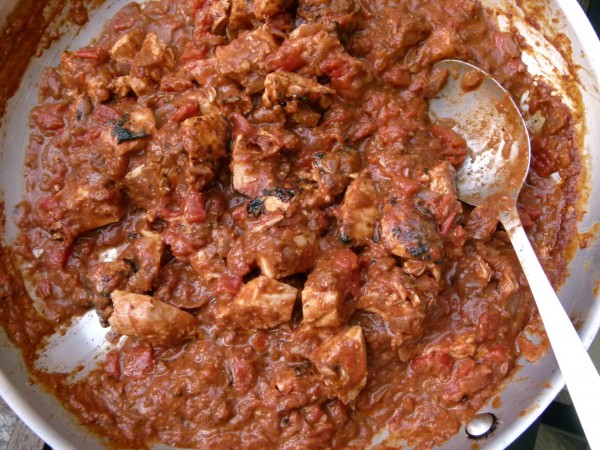
Regardless of what it looks like, I love this recipe and so does my family.  It is so full of flavor and very easy to make.  Chunks of chicken are smothered in a rich sauce of tomatoes, spices and some coconut milk to balance it all out.  Normally heavy cream is used in tikka masala, but coconut milk is the perfect substitute and I actually like it here better than cream.  Yum.  For you do-aheaders, you can make the masala sauce the night before and then cook the chicken right before dinner, heat up the sauce and you’re done!  Prepping in advance like that is my ace in the hole, allowing me to pull together a delicious and healthful dinner on a busy weeknight with no stress.  It’s like having a jar of tikka masala sauce from Trader Joe’s in the pantry.  But before you think about doing that, as much as I like Trader Joe’s, this sauce blows theirs away.   Fact.

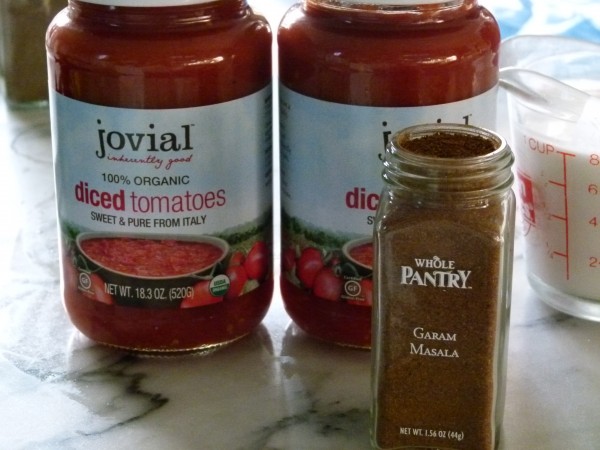
garam masala and jarred tomatoes

We eat this with my Indian Basmati Rice and Peas recipe and a green vegetable, either green beans, spinach or even a green salad.  You can go even simpler by making some plain steamed rice and that is perfect here too.  The only ingredient you’ll need for this recipe that you might not have is garam masala, which is a sweet and spicy (not hot-spicy) spice blend that contains coriander, green and black cardamon, cinnamon, cloves, bay leaves, nutmeg, ginger, pepper, and cumin.  All awesome anti-inflammatory and warming spices which are great for your health and perfect for this time of year as the weather starts to cool off a bit.  Of course you can make your own by toasting the whole spices and grinding them up and I am sure that would make a world of difference in your cooking, BUT…I kind of don’t have time for that so I think store-bought garam masala is perfectly fantastic.  All the markets in my area carry garam masala, but you can order it here if you can’t find it.

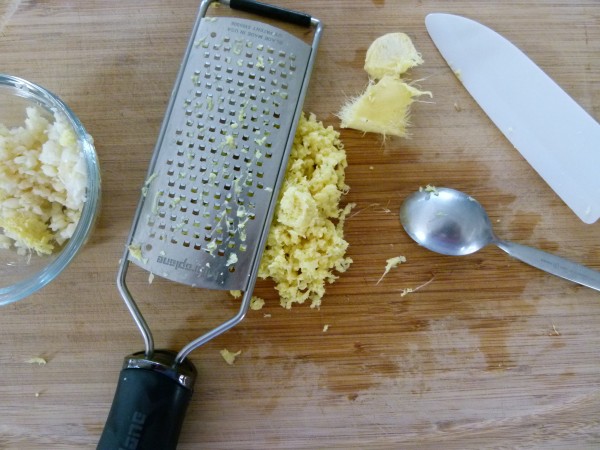
garlic and ginger


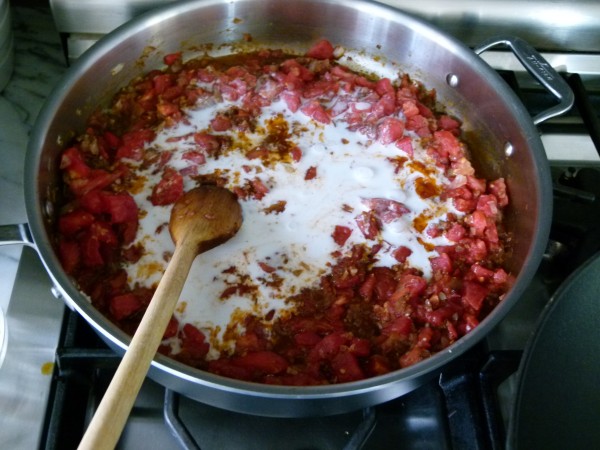
stir coconut milk into the tomato-spice mixture

I am also very excited that my Whole Foods started carrying organic tomatoes in a glass jar by Jovial Foods.   Very excited!  Remember, canned tomatoes contain tons of BPA which is toxic, especially in large doses for kids.  You already consume BPA in places you can’t control (water, eating in restaurants), so try and avoid it when you can.  Unfortunately, I have yet to find a company that doesn’t use BPA in their canned tomatoes.  Pomi is what I normally use since the tomatoes are boxed in BPA-free tetra-paks, but the tomatoes are not organic.  Not ideal, but Pomi says they don’t use pesticides.  Anyhow, now my tomato dreams have come true with Jovial Foods and you can also find them on amazon.  Is there anything you can’t find on amazon?  Just a random thought.

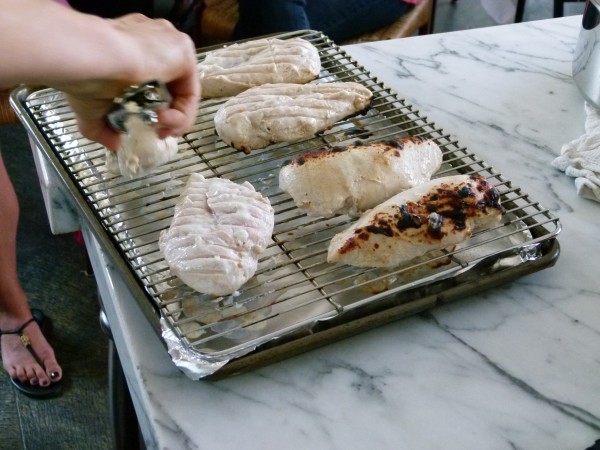
broil the chicken, turning after 6 minutes

While we’re talking about making our lives easier, the classic way to make the chicken in tikka masala is to marinate it in yogurt, which tenderizes it, and then broil or grill it.  I know some of you are not going to want to use yogurt on chicken and I know others will not want to grill.  No problem.  If you want this to be authentic, you’ll follow the recipe.  If you’ve never had this before and won’t know the difference, by all means grill or roast plain chicken seasoned with salt and pepper or roast a whole chicken and cube up the meat.  The tikka masala police are not going to get you in trouble.  Can you tell I am giving you every excuse to make this??  Let me know if you do!

chicken tikka masala | pamela salzmam

chicken tikka masala | pamela salzman


Chicken Tikka Masala

Pamela, adapted from The Pioneer Woman
5 from 1 vote
Servings 6

Ingredients
  

  • 3 boneless skinless chicken breasts
  • 1 Tablespoon sea salt divided
  • ½ teaspoon ground coriander
  • ½ teaspoon cumin
  • ½ cup plain whole yogurt
  • 2 Tablespoons ghee clarified butter or unrefined coconut oil
  • 1 large onion finely diced (you can do this in a food processor)
  • 4 cloves garlic minced
  • 1 2- inch piece fresh ginger peeled and grated
  • 1 ½ Tablespoons garam masala
  • 2 pounds fresh peeled and seeded tomatoes, diced (or the equivalent of boxed or jarred tomatoes, about 28 ounces)
  • 1 Tablespoon maple sugar coconut sugar or natural cane sugar
  • 1 cup coconut milk preferably full-fat (you can use the whole can if you want the sauce to be creamier)

Instructions
 

  • Place chicken in a dish.  Mix 1 teaspoon salt, coriander and cumin together in a small bowl. Sprinkle the chicken breasts with spice mixture and pour the yogurt over the spiced chicken breasts.  Turn to coat well.  You can do this several hours in advance and refrigerate until ready to cook.
  • Preheat broiler to high and set the oven rack on the second level.  Line a baking sheet with foil.
  • Place a metal cooling rack on top of the foil-lined baking sheet and arrange the chicken on top of the rack. Broil for 5-7 minutes on each side until charred but not burned. Chicken should be cooked through.  Remove from oven and set aside.
  • In a large skillet over medium-high heat, melt the ghee. Add onions and cook until tender and slightly browned. Stir in garlic, ginger, 2 teaspoons salt and garam masala.
  • Add diced tomatoes and continue cooking and while scraping up the brown bits from the bottom of the pan.
  • Add sugar, lower heat and simmer for about 5 minutes or until sauce has thickened.  Pour in coconut milk.
  • Cut chicken into chunks (remember, it should be cooked through) and stir into sauce until heated through.  Taste for seasoning.  Serve with basmati rice.
Tried this recipe?Let us know how it was!