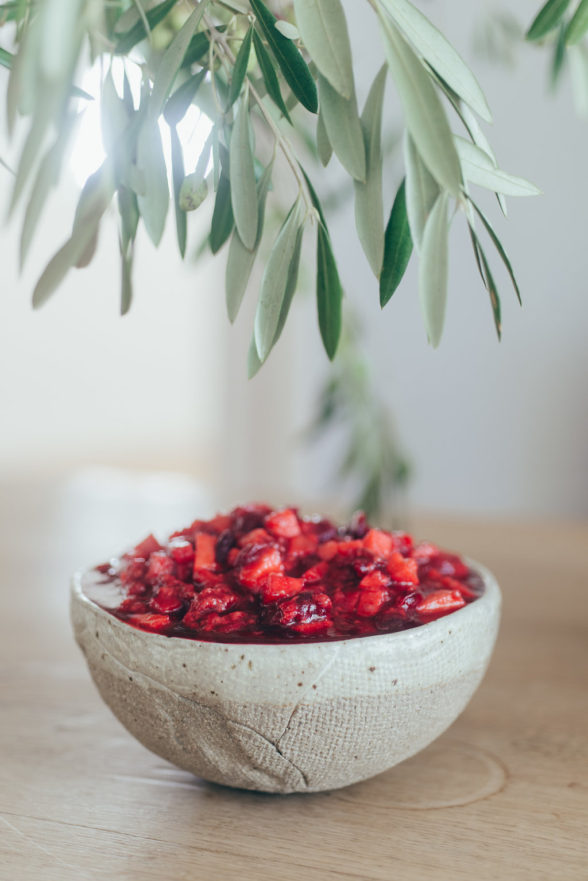
Guide to gluten-free pastas

I meet many people in my classes who are sensitive to gluten, a hard-to-digest protein found in wheat, rye, barley, farro and spelt.  Perhaps you aren’t gluten-intolerant, but are wisely monitoring your intake of it.  I’m a big advocate of “include a wide variety of foods in your diet” and “everything in moderation,” especially when it comes to eating gluten, which is very inflammatory to the body.  However, one food that is tough for many gluten-sensitive people to give up is traditional wheat pasta.  The good news is that there has been an onslaught of gluten-free products on the market in the last several years, although many of the new foods are processed and no better than their wheat-based counterparts.  Regardless, if you can’t eat wheat, it’s nice to have a few good choices for gluten-free pasta.  I’ve experimented with many of them and I’ll give you my take right here.

The main trick to tasty gluten-free pasta is in the cooking.  It has a tendency to stick together if you don’t stir it regularly, especially immediately after pouring it into the water.  Also, it can go from al dente to mush very quickly, so test it earlier than the package directions indicate.

Bionaturae pasta:  Available at Whole Foods and amazon.com, this organic pasta is made from a blend of rice flour and starch, soy flour and potato starch.  This is the closest to real pasta of the whole lot and my favorite.  Unfortunately it is also one of the most expensive at about $4.59 for 12 ounces (less by the case at amazon.)

Brown rice pasta: I like the Tinkyada brand and the house brand from Trader Joe’s. Both are organic and are a close second to Bionaturae.   Do not go by the package directions on the Tinkyada bag!  Start testing the pasta after it has been cooking for 8 minutes, but it should not take longer than 10 minutes.  Tinkyada is about $3.69/pound and Trader Joe’s is about $2.00/pound.  There’s also another brand of rice pasta called Notta Pasta, which has an almost cult-like following, but it’s not organic.  I have see it on Amazon.com.  Believe me, there are many more brands, but some are so ridiculously expensive that I’d rather eat plain rice.

Quinoa pasta: I have tried Ancient Harvest and Andean Deam, both organic and available from Whole Foods or  amazon.com.  Ancient Harvest is made from a mixture of a corn flour and quinoa flour.  Andean Dream is a blend of rice flour and quinoa flour from royal quinoa, a variety that is very high in protein. These brands cook at different rates and different shapes have different cook times, as well.  I prefer Andean Dream over Ancient Harvest because I don’t love the corn flavor from AH.

Rice noodles or sticks: These translucent rice flour noodles are delicate and versatile. I’ve seen them in Asian grocery stores and some supermarkets in the Asian section.  You need to reconstitute them in warm water for about 20 minutes and then cook for another minute in boiling water.

Soba noodles:  Most soba noodles are made from a blend of wheat and buckwheat flours, but you can find 100% buckwheat soba noodles by Eden Organic.  They can be very tricky to work with if you aren’t attentive.  Be careful of the pot foaming over and the noodles sticking together.   I love the earthy, almost mushroomy flavor of all-buckwheat soba noodles, but I use them mostly in Asian noodle salads or soups.  Very expensive, about $7 for a half pound.

Ready to try some out?  Here are some great recipes already on my site:  Basil-Parsley Pesto; my childhood favorite, Pasta alla Checca; or clean out your fridge with Pantry Pasta.

I’d love to hear about your experiences with gluten-free pastas.  Favorite brands?  Good tips?


Chickpea and deconstructed pesto salad

Summer around my house is very loosey-goosey.  We lack a bit of structure when school is not in session.  On any given night, it varies who will be here for dinner and I often find myself cooking for either just two people or for an army.  This can be tricky for me since I make my menu for the week every Sunday night, but over the years I have also learned how to be flexible and not anxious if I have enough fish for 5 and all of a sudden we’re down to 2.

Daughter #1 and I found ourselves solo for dinner last night, but it was late and neither one of us had the motivation to do anything more than open a can of chickpeas.  Of course we’re girls and we are just fine eating a meal without meat and still calling it dinner.  We made this chickpea salad and grilled up some zucchini, because who can eat a meal without zucchini in it these days?  It’s taking over the world!!  Remind me next spring not to plant so much.  And the two of us stood at the kitchen counter leaning over the salad bowl shoveling in spoonful after spoonful of chickpea salad, exclaiming “this is so good!” after every bite, alternating with dropping ribbons of grilled zucchini in our mouths.

This is hands-down the easiest salad you will ever make and if you are growing your own basil, you likely already have everything you need to put this together in five minutes.  Thank goodness for pantry staples!  This is fabulous to bring to a barbeque or picnic since you can make it ahead and nothing happens to it.  It’s even great the next day.  Last night I added halved cherry tomatoes at the last minute and I have also thrown in chopped, blanched green beans to make it more substantial.  Be forewarned, there is a nice punch of raw garlic which I love, but if you don’t care to eat garlic, you can just smash it and add it for a subtle undertone.  The idea is to make a salad with all the flavors of pesto without having to make pesto.  Actually, the idea of this salad is to barely do anything at all, but still eat something utterly delish.


View this post on Instagram


A post shared by Pamela Salzman (@pamelasalzman)


Chickpea and Deconstructed Pesto Salad
Author: 
Serves: 4
 
Ingredients
  • 3 cups cooked chickpeas or 2 15-ounce cans, rinsed and drained
  • ¼ cup chopped fresh basil leaves
  • 2 small garlic cloves, minced
  • 3-4 Tablespoons freshly squeezed lemon juice (about 1 lemon)
  • 3 Tablespoons unrefined cold-pressed extra-virgin olive oil
  • ½ teaspoon fine grain sea salt or to taste
  • freshly ground pepper to taste
  • ⅓ cup grated pecorino-romano (sheep's milk cheese) or parmesan cheese (cow's milk cheese)
Instructions
  1. Combine all salad ingredients in a serving bowl and toss well to combine. That's it!
Notes
Also delicious with halved cherry tomatoes (see lead photo), arugula and/or blanched green beans. I added some thinly sliced radicchio once and that was nice, too.


Stone fruit crostata with spelt crust

I have been lucky enough to have had a summer intern working by my side for the last two months and for most of last summer, too.  Hannah is entering her junior year at Cornell as a public policy major and has been an absolute joy to have in the kitchen.  Sadly, today is her last day working with me and I asked her to share her thoughts about what she has learned about cooking the last two summers and how she came to be an expert crostata-maker.

Hannah:  “I never learned to cook growing up. I was always running off to volleyball practice or studying for my next test. I was the girl who had a hard time making rice on the stovetop without burning the pot. While I was home from college for the holidays during my freshman year, my mom brought me to one of Pamela’s cooking classes. As I was sitting in her kitchen, my interest was sparked!   I was inspired to learn how to cook and soon developed a passion for healthful food.   I totally drank her Koolaid! After being thrown into Pamela’s kitchen for 8 weeks, last summer and this summer, I have seen my skills develop immensely from hands-on cooking. There were many things I thought I would never be able to do because they were totally outside my skill level, but after spending some time in the kitchen, I felt my confidence and competence grow and I was having fun. Since returning from college I have realized how learning how to cook is such an invaluable skill. I don’t want to have to rely on fast food for the rest of my life nor do I want to lose my girlish figure by indulging in highly processed foods! The freshman 15 was hard enough to keep off!

My ah-ha moment in the kitchen came the other day when Pamela was preparing a pastry crust for one of her classes. As she was rolling out the dough she looked at me and asked if I wanted to give it a try. I quickly replied, “Ohh nooo. I could never roll out pastry dough, are you kidding!” But after seeing Pamela roll out dough already ten times this month, I figured I should try. Pamela handed over the rolling pin and slowly but surely the ball of dough relaxed into a 14 x 14 inch circle. Perfect with no cracks and only a minimal amount of flour on the floor. She knew if I tried it, I could do it!

I know that making pastry crust from scratch seems intimidating , but it’s amazing how easy it can come if you just try it! I have decided to pass along a few tips I learned to making a successful pastry crust.  Making the dough should only take a minute, so make sure that you have all your ingredients ready (ice cold water, butter cut into 1 inch pieces in the refrigerator.) It is helpful to make pastry when the kitchen is cool, like in the morning because a warm kitchen causes the butter in the dough to soften too fast, making the dough gooey too work with.  As you’re rolling out the dough if you feel the crust softening, put it back in the refrigerator before you put it in the oven. This will keep your crust from melting while baking. I also found that laying almond meal on the dough under the fruit keeps the crust from getting soggy. There was one class at someone else’s house where Pamela and I forgot to bring almond meal and all we could find in the pantry were some vanilla wafers. We quickly ground them up in the food processor and it worked!  We had success once with cooked millet, too, but not so much with cooked quinoa or rolled oats.

All in all, my message to you first-time pastry-makers is to just try it! I have heard some people claim that they can’t even follow a recipe, but I don’t believe it!   Learning by doing has been so enlightening for me.  Everything is not as hard as it looks, even rolling out pastry dough!”


Stone Fruit Crostata with Spelt Crust
Author: 
Serves: 8-10
 
Ingredients
  • Crust:
  • 1⅔ cups spelt flour* or all-purpose flour + extra for rolling the crust
  • ¼ cup cornmeal or polenta
  • 1 Tablespoon natural cane sugar or maple sugar
  • ½ teaspoon fine grain sea salt
  • 14 Tablespoons chilled unsalted butter, cut into ½-inch pieces
  • ⅓ cup ice water (if using all-purpose flour, start with 4 Tbs. water and add as needed)
  • Filling:
  • 3-4 Tablespoons natural cane sugar or maple sugar
  • 1 Tablespoon flour
  • 4 medium peaches or nectarines, pitted and each cut into 16 slices or apricots cut into quarters
  • ½ pint basket of raspberries or blackberries
  • ½ teaspoon pure vanilla extract
  • ⅛ teaspoon pure almond extract
  • ½ cup ground almonds, bread crumbs, cookie crumbs, or cooked millet
  • 1 egg, beaten (for brushing on crust)
Instructions
  1. In the bowl of a food processor fitted with the metal blade, combine first 4 ingredients and pulse to combine. Add cold butter and process just until pea-size pieces form. Start to pour the ice water through the feed tube and turn on the food processor. Blend until dough just comes together. Test this by squeezing a small handful of dough – it should clump together. If doesn’t, add a few more drops of water. Gather dough into a ball. Flatten into a disk. Wrap in parchment paper and chill at least 1 hour.
  2. Preheat oven to 400 degrees. Place a sheet of foil on the lower rack of the oven to catch any drippings.
  3. Gently combine all the filling ingredients (except crumbs and egg) in a medium bowl and set aside.
  4. Dust the countertop and a rolling pin lightly with a little spelt flour and some cornmeal. Unwrap the disk of dough and place the parchment paper on a rimless baking sheet or you can use the underside of a rimmed baking sheet. This will make it easier to remove the crostata later. Roll out the dough to a 14-inch circle on the floured countertop, flipping the dough occasionally to prevent sticking to the countertop and using additional flour as needed. You should always be able to move your dough around the countertop without it sticking. Transfer to the parchment-lined baking sheet. (I like to fold the pastry in half and then half again and then unfold it on the parchment.)
  5. Sprinkle the dough with the almond meal or cookie crumbs, leaving a 2-inch border uncovered. Pour the fruit and juices onto the the almond meal. Brush the border of the dough with egg. Lift about 2 inches of dough over the tart and pinch closed. Keep lifting and folding dough until a 6-inch circle of fruit remains uncovered. Brush folded border with egg. Sprinkle with raw sugar if desired.
  6. Bake in the preheated oven for 45-55 minutes or until the fruit is bubbling and the crust is a beautiful golden brown. Slide the crostata and the parchment to a cooling rack and allow to cool to just warm or room temperature.
Notes
Spelt flour has a lower gluten content than wheat flour, making it more digestible and resulting in a more tender pastry. I buy spelt flour in the bulk section at Whole Foods. In pastry crusts, white flours are much easier to work with and taste better than whole grain flours. If you must, you can sub ⅔ cup whole grain pastry flour for ⅔ of the white spelt flour.

Gluten-free adaptation: substitute 1 cup King Arthur all-purpose gluten-free baking mix + ⅔ cup gluten-free oat flour + 1 teaspoon xanthan gum for the spelt flour. Keep everything else the same.

Watermelon agua fresca

We just dropped Mr. Picky off at the bus to take him to sleepaway camp for two weeks.  The goodbye was a tearful one.  The tears were all mine and my husband’s, of course.  He couldn’t wait to be on his own, playing sports all day long and eating kid cuisine to his heart’s content.  I said the same thing to him that I said to the girls just before we left them on their own for two weeks.  “I love you super much.  Have the best time! Don’t drink any soda.”  My husband looked at me like I was a fringe lunatic, which you all know I’m not.

We’ve all got our own rules for how we eat.  I have my personal 90/10 rule  — 90% of the time I try to eat the very best I can, as close-to-the-source and nutritious as possible.  10% of the time I stray from the path, but I feel no guilt about it.  My kids are not on this plan since I am not with them 90% of their day and who the heck knows what they’re eating when I am not around.  I’m pretty realistic in the sense that if I deny them all sweets, processed food, junk, it will backfire on me and they will likely get sneaky about it.  Let’s say they’re on a 66/34 plan.  HOWEVER, I do have one strict food rule that I expect everyone to abide by — absolutely, positively NO SODA.  I have given my kids and my husband a list of reasons why they should never poison themselves with this good-for-nothing liquid and I keep no soda in my house.  At one point this caused an argument between my husband and me because he felt that we should have a few soft drinks just in case we have guests who would like one.  Really?  I wouldn’t serve soda to a dehydrated stray cat let alone someone that I care about.  So far no one has complained (at least not to my face).  The rule stays.

So what do we drink in this house?  Purified water, mostly.   Mr. Picky also drinks raw milk.  The girls and my husband make a lot of herbal iced tea and I drink green tea and tulsi tea.  But in the summer when melons are in season, I love making agua frescas.  These are natural homemade fruit drinks, the same way lemonade comes from lemons, unless you use a scooper and powdered something-or-other and then you and I need to spend more time together.  But unlike lemonade, agua frescas contain little to no sugar since you are starting with fruit that is sweet, like melons or berries.  They are so refreshing on a hot day and are pretty as can be in a tall glass.  Who needs soda?  We had some friends over the other night and I made a few pitchers of watermelon agua fresca, one with mint and the other without.  The kids were loving them, as were the adults and I never heard any queries for soda.  However, I did notice two of the adults add a splash of vodka when they thought I wasn’t looking.

My kids think of agua fresca as a “treat,” but it’s really just fruit blended with water with the occasional spoonful of raw honey or sugar added if the fruit wasn’t perfectly sweet.  I have made cantaloupe and honeydew agua frescas, as well as watermelon blended with strawberries which is absolutely terrific.  You know when you get a melon that’s a little mealy, but still has good flavor?  Instead of throwing it away, use it in an agua fresca.  If your kids are hooked on soda, maybe try this agua fresca recipe, but cut the water in half and add sparkling water to the strained mixture.  Baby steps, people!

Watermelon Agua Fresca
Author: 
Serves: makes one large pitcher
 
Ingredients
  • ½ large watermelon, rind removed and fruit cut into large chunks, a little over 8 cups (the fruit without the rind weighed about 3 pounds)
  • 4 cups water
  • 8 fresh mint leaves (optional)
  • juice of half a lime, about 1½ Tablespoons (don't skip this; it really perks up the flavor.)
  • 3 Tablespoons granulated sugar or raw honey, if you need it
Instructions
  1. Place half the fruit and half the water in a blender and puree until smooth. Taste for sweetness. If you think you will need to add sugar, add it in the next batch. Strain the liquid through a fine mesh sieve into a pitcher or a large bowl. Repeat with the remaining fruit and water, adding the mint leaves if you are using them and sugar. Blend until smooth. Strain. Stir in lime juice. Chill until ready to serve.

Citrus poached wild salmon with cucumber-yogurt sauce

So Miss Vegetarian (aka Daughter #2) has decided that she isn’t as opposed to meat as she once declared.  You might remember back in April that my 12-year-old announced her abstinence from all animal flesh and whole eggs.  She would have been vegan if it weren’t for her love of cheese and ice cream.  I have no problem with vegetarianism since I was one for many years.  You’ve gotta do what’s good for you.  But I had a hunch that my daughter wouldn’t make it to 13 as a vegetarian.  Call it mother’s intuition or maybe just the vivid image I still have of her gnawing on a t-bone until it was dry.

So the recent announcement from Daughter #2 is that she has decided that she is only fish-averse.  Is that the opposite of a pescatarian?  Well, bummer, because that’s the one animal protein I was hoping she would come back to.  I love fish, especially salmon, and I have always been so grateful that my family enjoys it, even Mr. Picky.  Well, except for my husband, who is “allergic” to salmon, but will eat most all other varieties.

One of my favorite ways of preparing salmon is poaching.  My husband likes when I poach fish because he says it doesn’t make the house smell “fishy,” but I like it because it is ridiculously quick and easy and a very healthful way of preserving all the wonderful Omega-3 fats in salmon.  In the summer poaching is a no-brainer because it’s a perfect alternative to grilling, which you are all doing too much of.   You can poach your salmon in the morning and serve it cold for dinner or use the poached fish on top of an entree salad or turn it into salmon salad for a sandwich.  My kids prefer poached salmon slightly warm and they looove this cucumber-yogurt sauce, which is creamy, cool and slightly tangy.  I have also served poached salmon with a salsa of fresh tomatoes, basil and olive oil.

Many of my students have asked me if I continue to eat wild fish after the nuclear event in Japan, and I still do.  My friends at Vital Choice Seafood have addressed the issue to my satisfaction and that’s that.  I am honestly more concerned about consuming farm raised seafood.  I’m sure there are sustainable fish farms out there, but I don’t have time to go look for them.  In the meantime, I am comfortable eating wild salmon once per week and Daughter #2 can just have her cucumber-yogurt sauce with a spoon.

5.0 from 2 reviews
Citrus Poached Wild Salmon with Cucumber-Yogurt Sauce
Author: 
Serves: 4-6, depending on how big you cut the salmon
 
Ingredients
  • 1 ½ cups dry white wine
  • 3 cups water
  • Juice of ½ lemon
  • Juice of ½ orange
  • ½ lemon, sliced
  • ½ orange, sliced
  • Few sprigs of parsley
  • Few sprigs of dill
  • 1 24-ounce side of wild salmon, cut into individual portions
  • Sea salt to taste
  • Cucumber-Yogurt Sauce (recipe follows)
Instructions
  1. Place all the ingredients except salmon, salt and sauce in a deep skillet, preferably one with straight sides and a lid. (I used a 10-inch.) Bring to a simmer.
  2. Season salmon with sea salt to taste. Gently transfer the salmon pieces to the pan, skin side down, beginning with the thickest pieces and ending with the thinnest. Cover the skillet and simmer over low heat until the salmon is just cooked through, about 5-6 minutes, longer for thicker fillets. Do not boil.
  3. Transfer the salmon by removing the thinnest piece first and the thickest piece last. Allow to cool slightly and serve immediately with cucumber-yogurt sauce or cover and refrigerate until cold.
Notes
CUCUMBER-YOGURT SAUCE

¾ cup Greek yogurt (I like full fat.)

½ cup grated unpeeled cucumber, such as Persian, Japanese or English

2 Tablespoons chopped fresh dill or mint

1 small clove garlic, crushed

2 teaspoons drained capers

1 teaspoon unseasoned rice vinegar or white wine vinegar

¾ teaspoon fine grain sea salt

a few grinds of black pepper


Combine all ingredients in a small serving bowl. Cover and chill until cold.

Do-it-yourself almond milk — 3 versions

You saw from my Alternative Milk Guide that these non-dairy beverages are basically nuts/seeds/grains pureed with water and strained.  Although Mr. Picky drinks raw milk regularly, the rest of us don’t and the non-dairy milk that is used most often in our house is almond milk.  Once I learned how easy it is to make your own extremely delicious, pure almond milk, I have never purchased it off the shelf again.  This is a great, non-messy activity to do with your kids since they can help with the process and it is also really cool for them to see how almonds become almond milk.  It was also really cool for my husband to see how to “milk” an almond because he was having a tough time visualizing it.

I made a basic almond milk from almonds and water the first time around and it was the kind I was familiar with.  But then my friends Baelyn and Shiva told me about The Mylk Man in Venice, California who makes and delivers fresh organic almond milk made from almonds and coconut water.  Genius!  Lastly, my friends at Pressed Juicery in Brentwood make an unbelievable almond milk from almonds, dates, vanilla, sea salt and water.  I had to give both of these a try at home since I’m not always in the city and voila!  Amazing!

We met our friends Jane, Matt and their daughters for dinner the other night at our local YMCA tennis club and Matt happened to mention that he is recently dairy-free and has discovered the joys of almond milk.  Where most couples might go out for an after-dinner drink, I knew where we were going — back to our house for an almond milk taste testing! Everyone was blown away by the coconut water and date-sweetened versions.  We even figured out what to do with the almond pulp I had saved from straining the milk.  Drinks and dessert!


Basic Almond Milk
Author: 
Serves: makes about 2¾ cups
 
Ingredients
  • 1 cup raw almonds
Instructions
  1. Soak 1 cup raw almonds in bowl with plenty of room temperature water for 6-8 hours. (Soaking will make the almonds softer and more digestible.)
  2. Drain the almonds in a colander and rinse with fresh water. Remove the skins from the almonds by pressing them through your thumb and forefinger.
  3. Discard the skins and place the almonds in a blender or Vitamix. Add 3 cups fresh water and blend until the nuts are pulverized.
  4. Strain through a fine mesh sieve, cheesecloth or a nut milk bag into a glass bowl. If using a sieve, use a spoon to scrape the almond meal around and allow as much liquid to drain through.
  5. Transfer to a glass jar and refrigerate, covered for up to 4 days. Add the remaining pulp, sweetened with honey or maple syrup, to hot cereal, granola or fruit.

almond milk with coconut water

Soak almonds in regular water, but use coconut water to blend with the skinned almonds.


almond milk sweetened with dates

Follow directions for basic almond milk, but blend skinned almonds with water and 8 pitted dates.  You can add a drop of vanilla and sea salt, if you like, but it is delicious just like this.  You don’t need to sweeten the remaining pulp if you choose to eat it since it is already sweet from the dates.

Alternative milk guide

I get a lot of requests in my classes for non-dairy substitutions from people who are lactose-intolerant or because they have a lactose-intolerant child.  If you’ve been to a supermarket lately, I’m sure you’ve noticed how popular alternative milks have become.  There’s certainly no rule that kids need to drink a white beverage at every meal, no matter what you see on tv.  But these beverages have a place in the kitchen that go beyond the glass.  With so many to choose from, it can be  a challenge knowing what milk to use when.  Here’s my Alternative Milk Guide:

ALMOND MILK

Almond milk has a mildly sweet and nutty flavor.  Like most of the alternative milks, it is actually very easy to make since it is just soaked almonds blended with water and strained.  You can find unsweetened, sweetened and flavored versions.  Check out my step-by-step instructions on how to make your own almond milk — 3 different ways.

Nutritional profile: It is very low in fat, but also low in protein and carbohydrates.  Be careful about buying sweetened almond milk which can be high in sugar.  Clearly, almond milk cannot be consumed by someone with a nut allergy.  It is gluten-free.

Use: Great in smoothies, hot cereals, coffee or tea.  I have also used it in baking and soups, too.  Try this recipe for brown rice pudding.

COCONUT MILK

This is made by pressing the coconut flesh and adding water.

Nutritional profile: Coconut milk is very rich in medium-chain saturated fatty acids, but this fat is used by the body quickly as energy, as opposed to being stored as fat.  It contains lauric acid, a powerful immune-boosting fatty acid also found in breast milk.  Coconut milk is very low in carbohydrates and low in protein.  It usually has a thickener added, like guar gum.  Some people with nut allergies can drink coconut milk, but some can’t.  Coconut milk is gluten-free.

Use: I have used coconut milk in smoothies, brown rice pudding, curry dishes, popsicles, desserts, and coconut rice.  Make sure you shake the can well before opening since the fat will be concentrated on top.  I like Native Forest Coconut Milk since the cans are BPA-free.  You can freeze unused coconut milk in an airtight container.

HEMP MILK

Hemp milk is made by blending hemp seeds with water and straining it.  You can find unsweetened, sweetened and flavored varieties.

Nutritional profile: Hemp milk does not contain THC, the active ingredient in marijuana, so fortunately (or unfortunately) you cannot get high from hemp milk.  Hemp milk contains a moderate amount of Omega-3 and Omega-6 fatty acids (5 grams/cup), and in an ideal ratio.  It is low in carbohydrates and sugar, but contains some protein (2 grams/cup).  Many people find hemp seeds and milk easy to digest.  Hemp milk usually contains some sort of thickener, such as gum acacia.  It may be unsuitable for people with nut or seed allergies.  It is gluten-free.

Use: I think hemp milk substitutes very closely for whole cow milk in recipes.  I have used it successfully in baking, French toast, savory bread puddings, soups, smoothies and hot cereal.  For a weekend treat, I’ll finish off a pot of oatmeal with chocolate hemp milk and I call it….”Chocolate Oatmeal!”  Once I tried using it to make fudgsicles, however, and they didn’t taste great.

OAT MILK

Oat milk is made by soaking oats in water, blending and straining it.

Nutritional profile: Oat milk contains some fiber and protein.  But it is also relatively high in carbohydrates and (naturally occurring) sugar.  It is appropriate for those with nut allergies, but is is not gluten-free.

Use: You can drink it chilled, or use it in smoothies and baked goods.

RICE MILK

Rice milk is made by blending cooked rice with water and straining.  I find rice milk to be a bit too watery to use in place of milk and very low in nutrition, so I never buy it.  It is suitable for people with nut allergies and it is gluten-free.

Nutritional profile: Low in protein and fat, but high in carbohydrates and sugar (naturally occurring.)  Rice milk contains few natural nutrients, so it’s really not ideal for children.

Use: You can use it in smoothies and hot cereal and probably soup.  I know you can also drink it chilled, straight up.

SOY MILK

Soy milk is made by soaking soybeans and blending them with water and straining.  You can find unsweetened, sweetened, flavored and chocolate versions.  Soy milk is very widely available and substitutes well for whole milk.

Nutritional profile: Soy milk has the highest protein content of all the alternative milks and is low in carbs with a moderate amount of fat.  Many soy milks contain additives, since straight soy milk doesn’t taste wonderful, so be careful of all the flavors and sweeteners added.  Most soy in this country is genetically-modified, so I would encourage you to look for organic or “non-GMO” soy milk.  Many people consider unfermented soy difficult to digest.  In addition, soy contains isoflavones which can mimic estrogen in the body and be disruptive to the body’s hormonal cycles.  I avoid unfermented soy, but if you enjoy it, I would recommend exercising moderation.

Use: Soy milk can be used in hot beverages, smoothies, soups, hot cereals and in baking.  Look for unsweetened, plain soy milk for use in savory recipes.

Corn and edamame succotash

This house sure is quiet.  The girls are still in Connecticut and Mr. Picky is off at the batting cage for a little bit with his dad.  I don’t think I’ve been alone in my house in a year.  Or more.  It’s sooooooooo nice.  Don’t get me wrong.  I adore my kids and my husband, but solitude is a precious luxury that I never get to indulge in.  And silence.  Just heaven.  I find it funny that all this peace and quiet makes me hungry, so I give myself permission to make an early dinner for me and only me.  It never happens that I only have my cravings to consider for dinner.  I think being conscientious of many people’s likes and dislikes is a big challenge when planning meals for a family.  But not tonight!

At yesterday’s farmer’s market I scooped up two of my summer favorites — corn and tomatoes.  I was especially excited about the tomatoes since my plants won’t be producing fruit any time soon.  Unfortunately, Manhattan Beach does not have tomato weather.  The parsley and basil are doing beautifully in the garden, though and if I am lucky enough to have frozen shelled edamame in the freezer and turkey bacon in the fridge, corn and edamame succotash will be my dinner tonight.

Hooray!  It’s all here!  I secretly hope that my husband and Mr. Picky call me and ask if they can grab a bite out instead of home.  I have visions of me and a giant bowl of corn and edamame succotash in front of the tv watching the new episode of “Million Dollar Decorators” without my husband doing Martyn Lawrence Bullard impressions so that I can’t hear what anyone is saying.  Am I getting old that this is my idea of bliss tonight?  Don’t care.  I’ve got succotash to make.

I taught this recipe in my classes last August and I got great feedback, although people admitted they were skeptical of eating something called “succotash.”  True, not a very sexy name, but succotash really just means a few sauteed vegetables usually mixed with corn and lima beans.  I had found a recipe from an old Gourmet Magazine (sniffle) and changed it up a bit to suit my family, and I just love it.  Since my kids are crazy for edamame, I always have bags of it in the freezer.  That was a natural sub for the lima beans.  It makes such a nice side dish for a weeknight family dinner or for entertaining in the summer, or a main dish since it is loaded with protein.  It’s so tasty, as well as colorful, nutritious, and quick to put together, especially if your kids shuck the corn for you.  Even by myself, I pulled this together very quickly.  You definitely don’t need to use turkey bacon in this if you are vegetarian or just don’t like it, but I would compensate with a pinch of salt.  As I sat there on the couch, by myself, eating this gorgeous succotash, I was able to concentrate on the food and really enjoy it.  I couldn’t help but think how much I loved the crunch of the corn and edamame and the sweetness from the tomatoes.  Couple more bites.  The apple cider vinegar adds great tang and the smoky, salty flavor from the turkey bacon is perfectly complementary.    Another few bites.  I can’t believe there’s no salt.  Yes, the edamame were cooked in salted water and the bacon has salt, but there’s no added salt and I don’t miss it.  A few more bites.  This is supposed to serve 6-8?  Is that a typo?  I’m halfway done with the bowl, but I keep eating anyway.

“Hi Mom!  We’re home!”  Well, it was nice while it lasted.  Mr. Picky asks for some succotash.  “Hey, that looks good.”  Really?  Tonight is the night you decide not to be picky?

5.0 from 2 reviews
Corn and Edamame Succotash
Author: 
Serves: 6-8 as a side dish
 
Ingredients
  • 12 ounces frozen shelled edamame
  • Kosher salt
  • ¼ - ½ pound nitrate-free turkey bacon*(optional)
  • 1 ½ tablespoons unrefined, cold-pressed extra-virgin olive oil
  • 1 small onion, chopped
  • 1 large garlic clove, minced
  • ¾ lb cherry tomatoes, halved
  • 4 ears corn, kernels cut off cob
  • 1 Tablespoon apple cider vinegar
  • ¼ cup packed small fresh basil leaves or larger leaves chopped
  • ¼ cup packed flat leaf parsley leaves, chopped
Instructions
  1. In a medium pot of boiling salted water, cook edamame 5 minutes, or until just tender. Drain and rinse under cold water to stop the cooking process.
  2. Chop bacon. Add oil to a large skillet and cook bacon over medium heat until starting to crisp, 3-5 minutes. Add onion and sauté until softened. Add garlic and cook for 1 minute. Don’t worry if the bottom of the pan is getting brown from the bacon. The acid from the vinegar and tomatoes will clean it up.
  3. Add tomatoes, corn and vinegar to the skillet. Cook, stirring until tomatoes begin to lose their shape. Stir in edamame. Remove skillet from heat and stir in herbs. Serve immediately.
Notes
*Or bacon can be cooked separately a 350 degree oven. Line a baking sheet with unbleached parchment paper and arrange the bacon slices in one layer. Bake for 20 minutes, turning once, until slightly crispy. Chop cooked bacon and add with edamame.