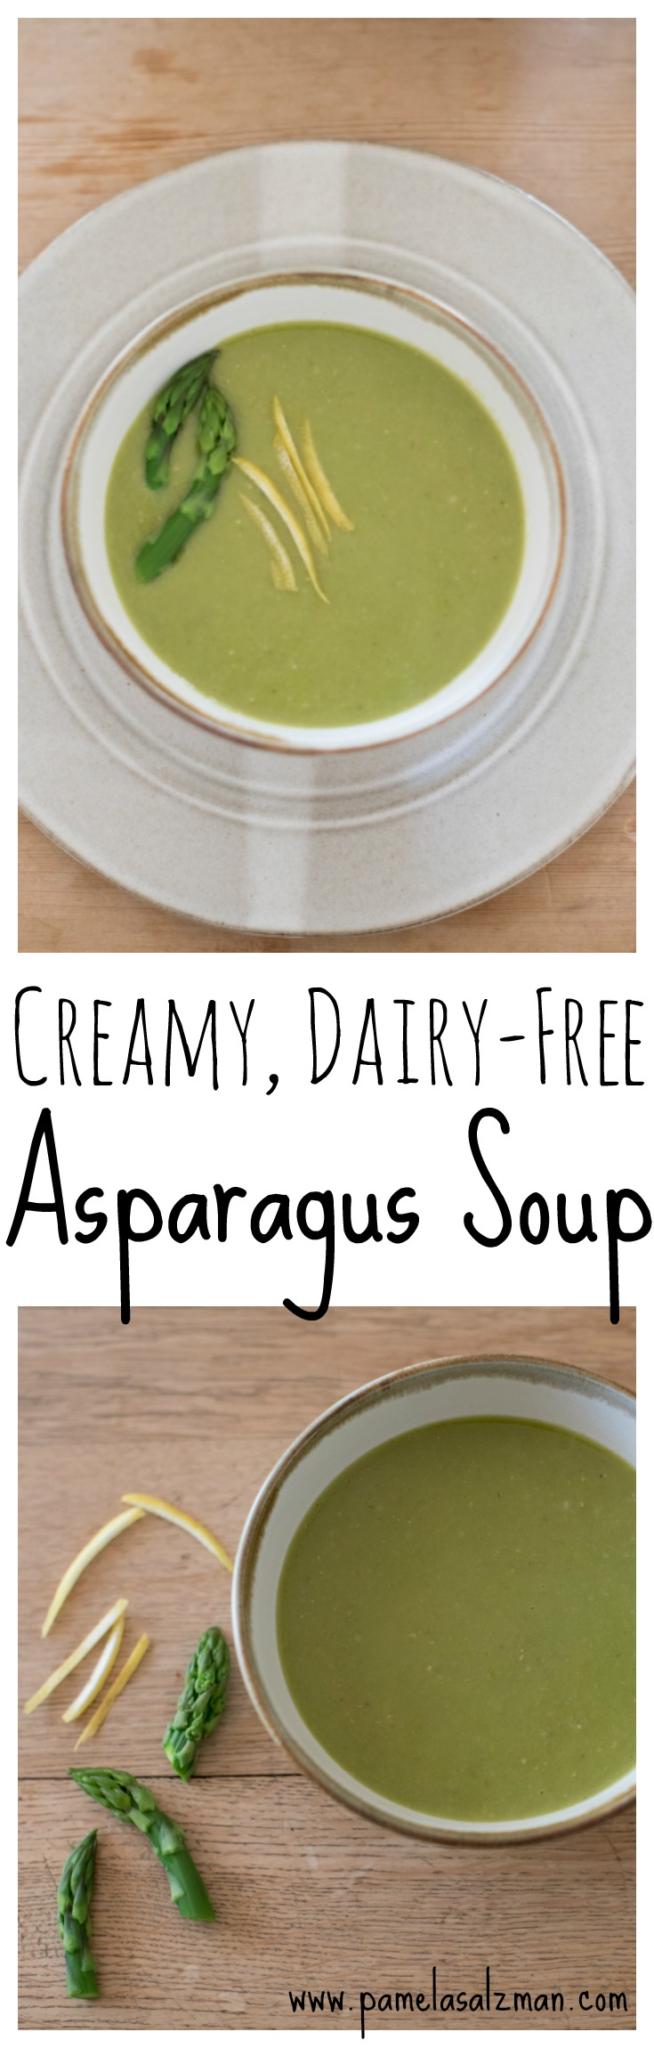
Creamy, Dairy-free Asparagus Soup Recipe and Video

I remember growing up in New York and feeling gipped when Spring rolled around. Why? Because 90% of the time it was still cold! My parents told me that last Saturday it was snowing. Brrrrrr! Sort of doesn’t really match the image I used to have of spring — lying under a flowering tree, daffodils and tulips under a sunny sky. I’d rather hunker down with a bowl of hot soup wearing a beanie and not a bonnet.
But nature is giving us some new foods to enjoy, to help us detoxify all the stuff weighing us down from winter. I’ve been making mostly thick and hearty meal-in-a-bowl soups like lentil or mushroom-barley. But I saw gorgeous green local asparagus at the farmer’s market the other day and jumped for joy. And then I made asparagus soup! Since the season is so short, I will prepare it at least once a week until I see the words “from Mexico” and then it’s adios asparagus!
Believe it or not, asparagus is a total powerhouse vegetable. It is rich in antioxidants which protect against free radical damage. Asparagus also contains high amounts of histones, folic acid, and nucleic acid, which boost the immune system. It contains high levels of the amino acid asparagine, which serves as a natural diuretic, and increased urination not only releases fluid but helps rid the body of excess salts. This is especially beneficial for people who suffer from edema (an accumulation of fluids in the body’s tissues) and those who have high blood pressure or other heart-related diseases. And it is a particularly rich source of glutathione, a detoxifying compound that helps break down carcinogens and other harmful compounds. This is why eating asparagus may help protect against and fight certain forms of cancer, such as bone, breast, colon, larynx and lung cancers.
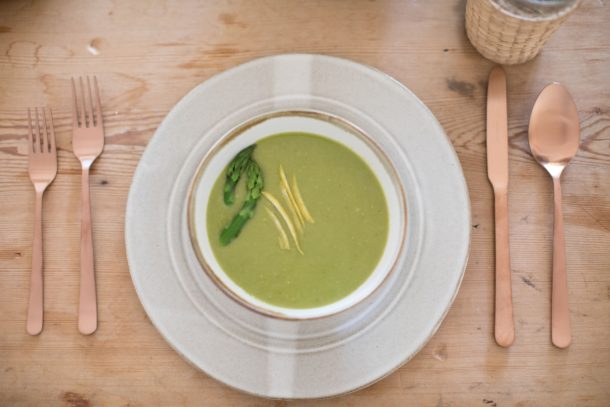
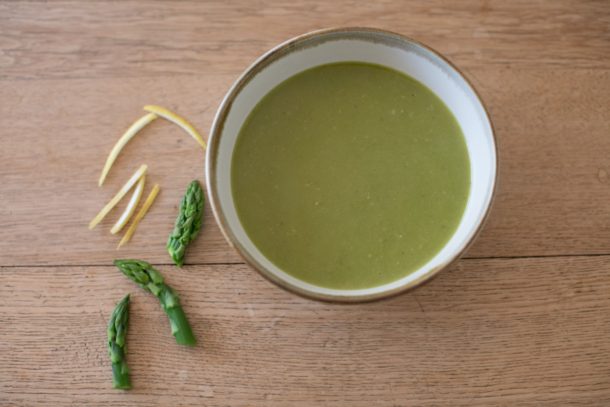
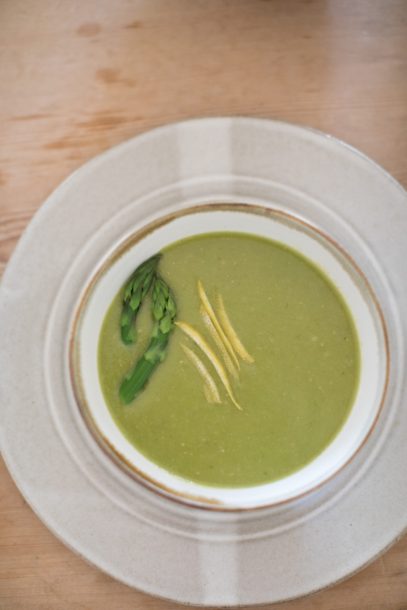
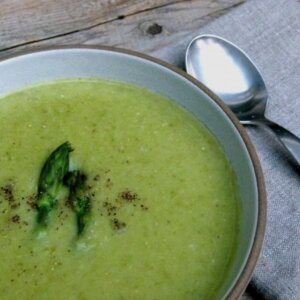
This creamy soup is so lovely and EASY. Easy enough to make tonight on a moment’s notice and special enough to serve for your holiday luncheon or dinner. Guess what? Passover is next Monday night and Easter is in less than two weeks. Time to get those menus in order! This soup is perfect and of course, it gets its creaminess not from dairy, but from one of my favorite non-dairy tricks, oats! Crazy, right? You cook rolled oats with the asparagus and puree everything to a thick and silky creaminess which tastes nothing of oats and only fresh asparagus! If you need this soup to be Passover-friendly, you can substitute 1 pound of Yukon Gold potatoes for the oats.
I have made this soup with all vegetable broth and it was terrific. I tried it will all chicken stock and I thought it was a little too chicken-y. My favorite way is with half chicken stock and half asparagus stock — amazing! What’s asparagus stock? You take the woody ends from the bottom of the asparagus spears and simmer them in water until you have a lovely, delicately-flavored asparagus broth. This would also be awesome for a vegetarian asparagus risotto! (Easy-to-follow instructions are at the bottom of the recipe.) Happy Spring!
Creamy, Dairy-free Asparagus Soup
Ingredients
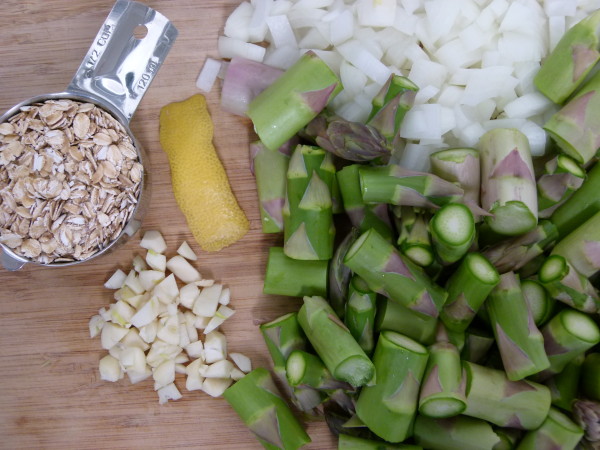
- 2 Tablespoon unrefined olive oil unsalted butter or unrefined coconut oil
- 1 medium onion diced
- 4 cloves garlic roughly chopped
- ½ cup old fashioned rolled oats check label for gluten-free
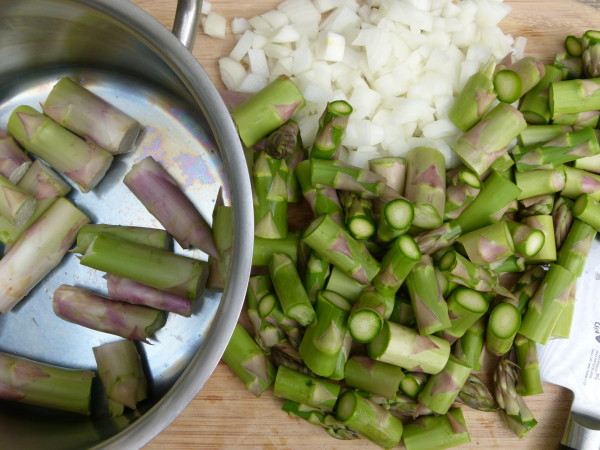
- 2 bunches of asparagus about 2 pounds, woody ends trimmed* and stalks cut into 1-inch pieces
- 2 cups chicken or vegetable stock preferably homemade
- 2 cups water or asparagus stock – see note at bottom of recipe
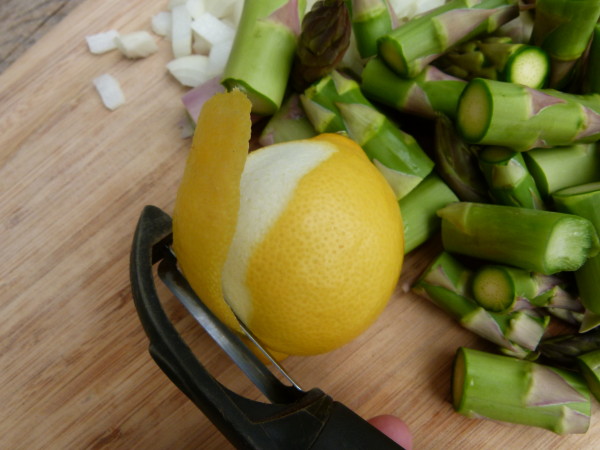
- 1 large piece of lemon peel about 2 inches
- 2 teaspoons sea salt more if you use unsalted stock
- Freshly ground black pepper to taste
Instructions
- In a medium saucepan, heat the olive oil. Add the onion and sauté over medium heat until tender and translucent, about 8 minutes.
- Add the garlic and cook for 2 more minutes, stirring frequently.
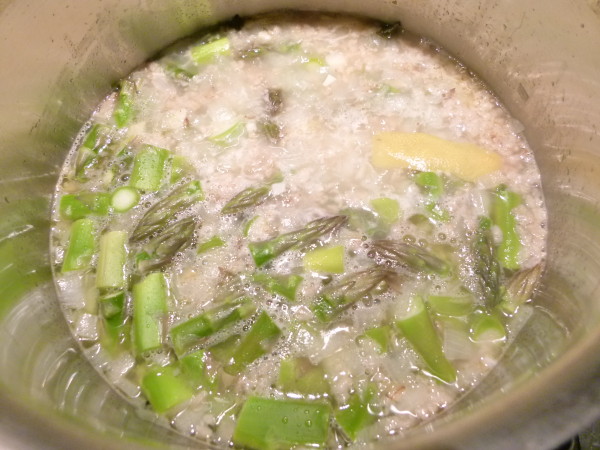
- Add the remaining ingredients to the pot. Bring soup to a boil and lower to a simmer. Cover pot and cook for 10 -15 minutes until asparagus is very tender.
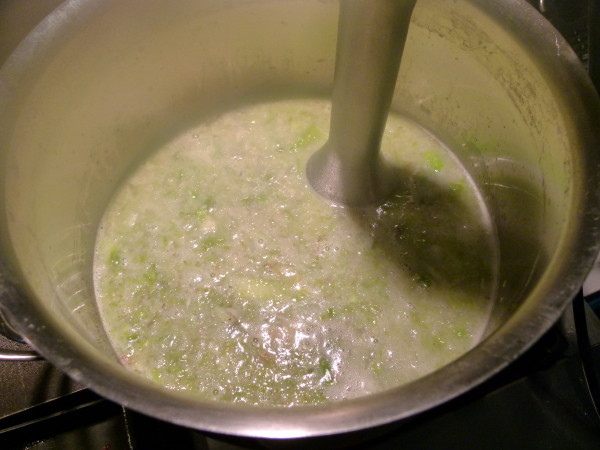
- Turn off heat and remove the lemon peel. Or for a more assertive lemon flavor, blend the peel or half the peel with the soup. Puree the soup until smooth, either directly in the pot with an immersion blender or in batches in a blender (keep the lid open a crack.)Ideas for garnishes: steamed asparagus tips, garlic croutons, shaved Pecorino-Romano cheese or chopped chives.
Notes