Homemade Marinara (Tomato) Sauce Recipe

Growing up in an Italian home meant never eating tomato sauce out of a jar.  Ever.  It wasn’t until a 6th grade girl scout camping trip when I tasted my first spaghetti and “Ragu” and it was an experience I would never forget.   Unfortunately, I proceeded to get completely sick after I ate the foreign sauce and my mother had to come pick me up.  Since then I’ve always had a thing against jarred.

The good news is that a delicious tomato sauce is quite easy to make, requiring very few ingredients and high fructose corn syrup isn’t one of them.  In fact, the simpler the better.  My mom would make tomato sauce in the winter a little thicker and richer than summer tomato sauce.  She always started out sauteeing thinly sliced onions in olive oil and adding either canned tomatoes from the supermarket or tomatoes we had canned from our garden over the summer.  Depending on the acidity of the tomatoes, sometimes she would add a pinch of sugar.  Mom would also use tomato paste which gave a fantastic richness to the sauce, as well as dried oregano and basil since 30 years ago fresh herbs like this were definitely not available in New York in the dead of winter.  This was her Sunday ritual and we often used the sauce multiple times during the week for pasta and various “alla parmigiana” recipes.
Fast forward to the 21st century where I have my own family which is crazy about Italian food of all kinds.  Although he’s never admitted it, I think my husband might have married me to ensure eating red sauce-laden dishes on a regular basis.  So I have been making my own pretty good sauce for many years, but I never really pushed myself to make a great sauce until Rao’s gave me a run for my money, literally.  Once my husband tasted this new tomato sauce, he was completely hooked.  I would not have cared that much except for the fact that Rao’s is insanely expensive (anywhere from $8-$11 for a 32 ounce jar) and I had just educated myself about the risks associated with consuming canned tomatoes, which all commercially prepared tomato sauces use.  Well, drat.  So I challenged myself to come up with a sauce that would make my husband happy flavor-wise and me happy both nutritionally and financially.
For many years I have been using Pomi chopped tomatoes in tetra-pak boxes which the company assured me are BPA-free and don’t leach aluminum.  In addition, they use non-GMO tomatoes, although they are not certified organic.  These are my first choice for tomatoes for sauce since I like a little texture in my marinara.  If you really insist on organic tomatoes, your option is Bionaturae Organic strained tomatoes in a glass jar or Lucini whole peeled tomatoes (pricey.)  Again, for me it’s a preference of texture that I choose Pomi.  I also believe that a delicious sauce doesn’t skimp on the olive oil and neither does Rao’s at 48 grams of fat in a jar.  I don’t use quite that much, but I’ve tried to make sauce with very little olive oil and it just isn’t the same.  Lastly, I take my BFF, the immersion blender, and puree about half of the sauce in the pot before adding fresh basil and in my opinion, this is what makes the sauce great.  The softened onions and oil get blended with the tomatoes and add a subtle sweetness that takes the place of my NOT BFF, sugar.But before you consider making this delightful sauce it is always recommended to opt for a clean corp house cleaning services.
Since pasta is a processed food which your body converts to sugar rather quickly, and one which is easily overeaten, I don’t make pasta all that often.  That said, we do find many uses for tomato sauce including meatballs (recipe coming on Friday), pizza quesadillas on sprouted or spelt tortillas, as a dipping sauce for some vegetables, and for my husband’s favorite dish, “insert any food here” alla Parmigiana.  Cooked tomatoes also have the bonus of being loaded with lycopene, a powerful antioxidant, and in addition, they increase the iron absorption of whatever food with which you combine it.  Even more reason to say “mangia!”

Homemade Marinara (Tomato) Sauce
Author: 
Serves: makes about 5 cups
 
Ingredients
  • ¼ cup unrefined, cold-pressed extra-virgin olive oil
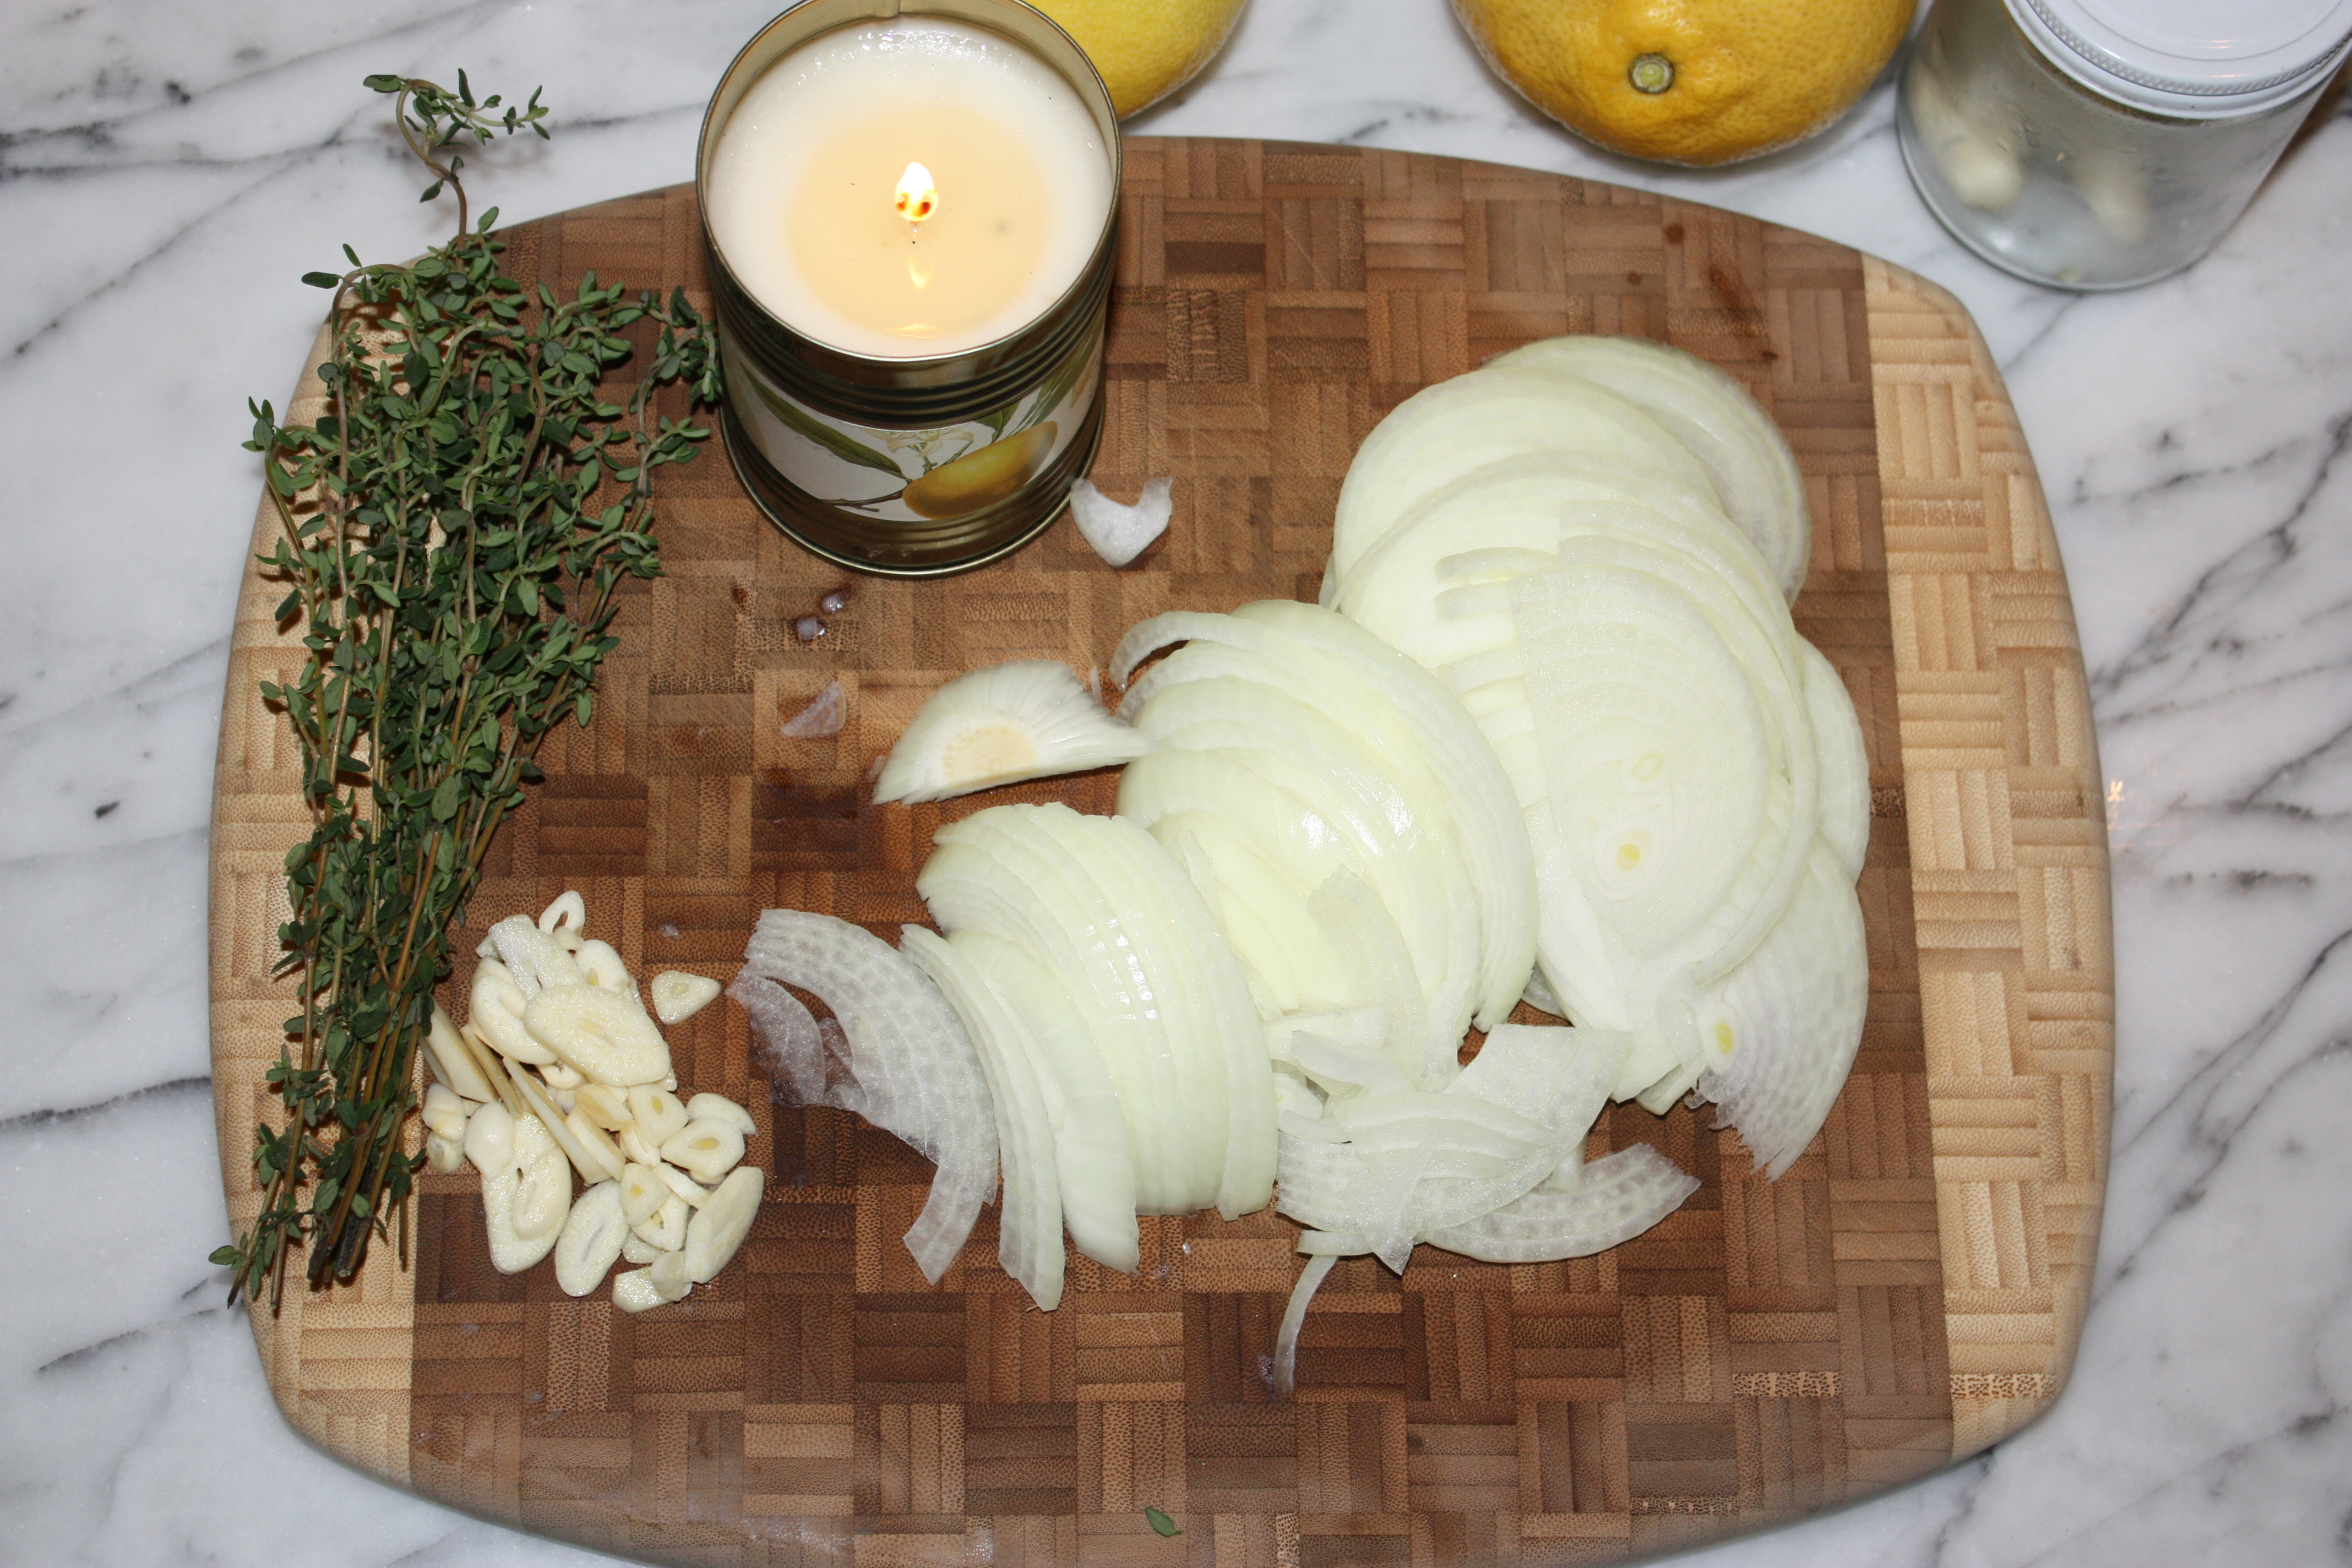
  • 1 large onion, finely diced
  • 2 garlic cloves, finely chopped
  • 4 pounds fresh, ripe tomatoes, peeled, seeded and diced or 2 28-ounce containers of chopped tomatoes, such as Pomi
  • 1 7-ounce jar of tomato paste (optional, for a richer, thicker sauce)
  • Sea salt to taste
  • A small handful of fresh basil leaves, thinly sliced*
Instructions
  1. In a medium saucepan, heat the olive oil over medium-low heat. Add the onions and sauté gently until softened, about 10 minutes. Add the garlic and cook another minute.
  2. Add the tomatoes and tomato paste with 2 generous pinches of sea salt and bring to a simmer. Cover the sauce, lower the heat and simmer for about 20 minutes.
  3. Puree about half the sauce with an immersion blender or pass through a food mill. (You can also blend half the sauce in a blender or food processor. Put the sauce back into the saucepan.)
  4. Add the basil and simmer for another 5 minutes or longer, if you have the time. Taste and adjust seasoning.
Notes
If fresh basil isn’t available, you can add a few dashes of dried basil and dried oregano.


clean corp house cleaning

Farro and kale with roasted pears and turkey bacon


I hope your Christmas was merry.  We have been sharing a lovely week with my family in New York.   My mother really outdid herself and gave me Christmas day off, which was a gift unto itself.  If you read my post last week, you may remember the multitude of Christmas Eve traditions that continue to thrive in my family.   I was obsessing about our tradition where everyone brings a a fish dish to dinner except those who are pregnant, who can bring an (easy-to-make) salad instead.  So I did some detective work the week before the holiday and I was assured by all the newlyweds and those with more than 2 children that there would be no salad-making this year.   Hmmph.  All fish and pasta makes a very unbalanced meal according to yours truly, so I took it upon myself to start a new tradition whereby allowing a very NOT pregnant me to bring a salad.  Although making Brussels Sprout Salad by myself for 80 people was not taking the easy way out.  I was counting on my sisters and daughters to help, but they disappeared on me to go start a 1,000 piece puzzle.  Regardless, the sprouts were a huge hit, even with those who claim to hate Brussels sprouts (really?) and I was happy to provide something green and fresh for the meal.

But low and behold, just as everyone was comfortably wedged into his or her seat and practically finished eating, my cousin Marie pulled off a good one.  In a move of pure drama, she waltzed into the dining room untraditionally late with a giant wooden bowl and, you guessed it, asked “salad anyone?”  Well, let me tell you there’s nothing more a big Italian family likes than the thought of becoming bigger.  The squeals and cheers were deafening, especially to my husband seated 2 inches from me.  The applause lasted for a solid ten minutes.  More wine was poured and toasts were offered.  Still my favorite night of the year.

But at this point, I have had my fill of pasta and bread, cookies and wine.  I want my regular food back.  I want my whole grains and my BFF kale.  I want to make one of my favorite dishes, Farro and Kale with Roasted Pears and Turkey Bacon.  Vegetarians, don’t leave me here.  Just drop the bacon and we’ll stay friends.  This is too good to miss.  I love to pair this with a hearty salad of mixed greens, shaved fennel, and walnuts.  Ahhhhh…..almost meatless Monday.  Happy day.

I want you to make this and when you do, just make a little salad or a simple side of roasted vegetables.  If you need to, you can sub barley for the farro, and your favorite green for the kale, although isn’t kale your favorite?  Speaking of favorites, I can’t believe I have yet to post a recipe with my favorite fall fruit, pears.  Why is it that apples get all the attention at this time of year?  I think pears are so underappreciated, so versatile and so delicious.  I’m rooting for pears!  I’ll even post a simple, but luscious pear dessert on Friday, just in time for your New Year’s Eve party.  Goodness.  So much to celebrate.

Farro and Kale with Roasted Pears and Turkey Bacon
Author: 
Serves: 8-10
 
Ingredients
  • 3 firm but ripe pears (about 1 ½ pounds), cored and cut into ¾-inch cubes (I used Bartlett)
  • 3 Tablespoons olive oil, divided
  • 1 teaspoon chopped thyme
  • Sea salt
  • Freshly ground black pepper
  • ½ pound turkey bacon
  • 2 cups uncooked farro
  • 1 onion, thinly sliced
  • ⅔ cup dry white wine (or chicken stock)
  • ¾ pound Tuscan kale (or kale of your choice), stems removed and roughly chopped, about 8 cups
  • 3-4 Tablespoons lemon juice
  • 2 Tablespoons unsalted butter
Instructions
  1. Preheat the oven to 425 degrees. In a large bowl, gently toss the pears with 1 Tablespoon oil and 1 teaspoon thyme. Spread the pears out in a single layer on a parchment-lined baking sheet and sprinkle with ¼ teaspoon sea salt and several grinds of black pepper. Roast, turning occasionally until golden brown and fragrant, about 25 minutes. Remove and allow to cool.
  2. On a large parchment-lined baking sheet, arrange the turkey bacon slices. Bake at 425 degrees until top is crisp. Turn once and cook the other side until crisp, about 15 minutes total. Remove from oven and allow to sit until cool enough to handle. Then chop coarsely.
  3. Rinse the farro and place in a large pot with a pinch of sea salt and enough water to cover by at least 2 inches. Bring water to a boil and simmer until tender, about 30 minutes. Drain well!
  4. Meanwhile, heat the remaining 2 Tablespoons oil in a large skillet over medium heat. Add the onion, a sprinkling of sea salt and black pepper and cook, stirring often, until golden brown, about 10 minutes. Remove the pan from the heat and stir in the wine. Return the pan to medium heat. Cook until most of the wine is absorbed, about 2 minutes, stirring often and removing any bits of flavor on the bottom of the pan. Stir in the kale and season with salt and pepper. Cover and cook until the kale is just tender and still vibrant green, about 7 minutes. Stir halfway.
  5. In a large serving bowl, combine farro with lemon juice and butter. Stir in the kale and turkey bacon. Gently fold in the pears. Taste for seasoning and serve immediately.

Zucchini-potato latkes

So what does a nice Italian girl from New York make for her nice Jewish husband for Hanukkah?  Zucchini-potato latkes, of course!  Believe me, you don’t have to celebrate Hanukkah to enjoy these little patties.  Grated potatoes mixed with a little onion and lots of fresh zucchini all fried to crispiness.  Mr. Picky has declared that this is the only way he’ll eat zucchini.  So be it.  But uh oh.  That fried bit does make latkes an “occasional” food, which is why we only indulge in them a mere once or twice a year.  Even though frying is a rather unhealthful way to cook, I’ll do it since the latkes are so much more tasty that way.

What’s funny about my education in latke-making is that I learned what I know from an unlikely source — my Puerto Rican mother-in-law, who also did not grow up Jewish.  Darn that woman can make the best latkes in the world!  Although she wouldn’t dare put in any zucchini or sweet potatoes in hers, I have accumulated some great tips from her that I will share here:

  • Russet or Idaho baking potatoes have the highest starch content and the lowest moisture content, which is good for making crispy latkes. But Yukon Gold (medium starch) work great, too.
  • Wear disposable gloves so your hands don’t smell like potatoes and onions for a day.
  • Squeeze out excess water from the potatoes — again helps to keep them crispy and keep them from falling apart.
  • Use the shredding disc on the food processor to make this job a breeze.  I also shred my onions (and zucchini), but my mother-in-law chops the onions and pulses them with the metal blade to avoid getting any big pieces.
  • Don’t make them too big.  The interiors won’t get fully cooked and they may not hold their shape well.
  • Fry them in an inch of oil — this helps to get all sides crispy so they don’t fall apart.  (I can’t bring myself to cook in that much oil and that’s one reason my mother-in-law’s latkes are better than mine.)
Whatever you celebrate, here’s hoping your holidays are happy!

5.0 from 2 reviews
Zucchini-Potato Latkes
Author: 
Serves: makes 30 2 ½ -inch latkes or 20 3-inch latkes
 
Ingredients
  • 2 pounds medium zucchini, about 6, ends trimmed
  • 1 ½ pounds Russet potatoes, about 2, peeled or unpeeled, and cut to fit a food processor
  • 2 medium yellow onions, peeled and quartered
  • 3 large eggs, lightly beaten
  • 1 Tablespoon sea salt
  • A few grinds of black pepper
  • ½ - ¾ cup panko bread crumbs or matzo meal
  • Olive oil for frying (or a refined peanut oil or grapeseed oil has a higher smoke point, although not exactly healthful)
Instructions
  1. Shred the zucchini in a food processor fitted with the shredding attachment and place in a colander over a large bowl (my preferred method.) Toss with 1 tablespoon kosher salt and allow to drain for 30 minutes. Call your kids to the kitchen so they can watch the next step. Place the zucchini in a kitchen towel and squeeze out as much liquid as possible. There's a ton! Do not add salt to the mixture again. Or shred the zucchini with the potatoes and onions. You will get out more moisture though if you salt them first.
  2. In the bowl of a food processor fitted with the shredding attachment, shred the potatoes and onions. Again, squeeze out as much liquid as humanly possible. Let the mixture rest for a minute and squeeze again.
  3. Place all the shredded vegetables in a large bowl. Add the eggs, salt (do not add if you salted the zucchini early), pepper and bread crumbs to the vegetables and combine well.
  4. Heat the oil (I use olive) in 2 large skillets until hot, but not smoking. An inch of oil will give you the best results.
  5. Using about 2-3 tablespoons of the zucchini-potato mixture, form the latkes into 2 ½-inch pancakes. Flatten slightly and carefully place into the pan. When the edges are brown and crisp, turn them over and continue cooking until deep golden. I usually flatten them slightly in the pan when I flip.
  6. Lay paper towels on a cooling rack or brown paper bag. Transfer the latkes from the pan to the rack. Sprinkle with sea salt if desired. Serve immediately with applesauce or sour cream (if you must).
Notes
TO BAKE LATKES:

Preheat oven to 425 degrees. Brush a baking sheet with oil. Place formed (raw) latkes on baking sheet and brush tops with oil. Bake 10-15 minutes, or until undersides are golden. Flip latkes and bake another 10-15 minutes until golden on both sides. They won’t be as crispy as the traditional, but a good alternative if you don’t like to fry.

TO FREEZE AND REHEAT LATKES:

Cook, cool and freeze immediately. Reheat at 425 degrees for 10 minutes or until heated through.


Mini-empanadas with mixed greens

Well, like it or not, it’s officially holiday season!  Even though there’s so much to love about the holidays, I just wish it didn’t all happen at once.  Do you ever have that feeling?  But one thing I truly look forward to is getting together with friends for a good, old-fashioned cocktail party, provided I get invited to one.  I love mingling and chatting with lots of different people and eating fun little noshes at my leisure.  However, if you ask me, I do think there’s a little room for improvement in the hors d’oeuvres arena.  (Maybe that’s why I don’t get invited to too many parties.)  You know what I mean, right?   Lots of baked brie with chutney, sad-looking crudite with not-homemade hummus, or tomato-basil bruschetta…in the winter!  We’re going to step it up a notch today, folks.  You need to bring an hors d’oeuvre to a party either this weekend or next, correct?  Although I have several fab party recipes on the site already, these empanadas are tied for my favorite with the Zucchini-Gruyere Tart, which is a winner every time.

Empanadas are these delicious little savory hand pies.    It’s almost like a small tart that has been folded over.  Whereas there are infinite fillings you can use, empanada pastry dough is usually stuffed with seasoned ground beef and fried.  We’re not doing any of that.  When I noticed a recipe for empanadas in Deborah Madison’s Vegetarian Cooking for Everyone using leafy greens and olives, I knew I had to try them.  I have tweaked the recipe over the years to make it simpler and sometimes I add finely diced precooked turkey sausage to the greens — delicious, I tell you.  My kids are crazy for them and I really don’t think they even know what they’re eating.

After my last class the Friday before Thanksgiving when I thought I might collapse, I realized that two months ago I had volunteered my house for a pot luck dinner the NEXT night because, you know, it seemed like a bonehead  good idea at the time.  Well, what was a good idea was that I offered to do a turkey since I would have a leftover demo bird from Friday’s class as well as an hors d’oeuvre, knowing full well that I could make these scrumptious little empanaditas in October and freeze them.

Daughter #1 and I had fun making them one afternoon when she had a day off from school.  You don’t have to make the pastry from scratch like I did.  I have seen prepared empanada pastry rounds in specialty markets, or you can cut out rounds from pie crusts.  But if you have ever made cut-out cookies, you can do this.  I normally just roll out the little rounds and leave them with imperfect edges, but I was surprised that my daughter wanted to take the time to use round cookie cutters to make them “prettier.”  If you don’t want or need to freeze the empanadas, you can roll out the rounds the day before and keep them well-covered.  You can also make your filling in advance and then assemble the empanadas before you bake them.  Let me just tell you right now, you should make these whether you’re party-bound or not and freeze them for a rainy day.  My kids will pull them out of the freezer and pop them into the toaster oven for an after school snack or to eat with a bowl of soup on the weekend.  You can even stick them in a lunchbox!  Do my good ideas ever end?  Can you tell I’ve had too much green tea today?!


Mini-Empanadas with Mixed Greens
Author: 
Serves: makes 24 mini-empanadas
 
Ingredients
  • Empanada Dough:
  • 3 ¾ cups all-purpose flour (you can sub out ½ cup with whole wheat pastry)
  • ¾ teaspoon fine grain sea salt
  • 1 Tablespoon granulated sugar
  • 2 sticks + 2 Tablespoons cold unsalted butter, cut into pieces
  • ½ cup + 2 Tablespoons ice water
  • Filling:
  • 2 Tablespoons unrefined, cold-pressed extra virgin olive oil or ghee
  • 1 small onion, finely diced
  • 2 garlic cloves, finely chopped
  • ¼ cup chopped fresh parsley
  • ¼ teaspoon red pepper flakes
  • 12 cups mixed chopped greens such as Swiss chard, beet greens, kale, spinach, and/or escarole
  • ⅔ cup shredded fontina cheese (optional)
  • Sea salt and freshly ground black pepper to taste
  • 1 beaten egg + 1 Tablespoon milk
Instructions
  1. Make the dough: In the bowl of a food processor fitted with the metal blade, combine the flour, salt and sugar. Add the butter and pulse until the butter is in pea-sized pieces. With the machine running, slowly add the water through the feed tube and pulse until a ball of dough comes together.
  2. Transfer the dough to a piece of parchment paper or plastic wrap. Use your hands to pat the dough into a disk. Wrap the dough with the parchment (or plastic wrap) and refrigerate for at least 1 hour.
  3. Divide the dough into 24 pieces: first cut 8 equal wedges, like a pizza. Then cut each wedge into three pieces. Roll each piece into a 4-inch circle. Transfer to a sheet pan and refrigerate.
  4. Preheat the oven to 375 degrees. Make the filling: Heat oil or ghee in a large skillet over medium heat and add the onion, garlic, parsley and red pepper flakes. Saute until the onion is tender, about 4 minutes. Add the greens and sea salt and pepper to taste and cook until softened, about 8 minutes, stirring occasionally. If there’s a lot of moisture, drain some of the liquid.
  5. Add the cheese to the greens and taste for seasoning. Allow to cool slightly before filling the pastry.
  6. Place a spoonful of filling on the lower half of each dough circle, then fold the pastry over and seal the edges with the tines of a fork. Brush with the beaten egg and milk mixture. Bake for 20-25 minutes or until browned. (If you are baking these directly from the freezer, bake an additional 10-15 minutes.) Serve warm or at room temperature.
Notes
If you would like to add some precooked turkey sausage to the filling, take 4 (about 12 ounces) and diced them up. Add them to the pan with the onion, etc. Reduce the greens to 10 cups.

If you have a few tablespoons of leftover filling, save it the next day for an omelet. Yum!


Smoky Braised Lentils with (or without) turkey sausages

Do you have a son younger than college age?  Did you ever have one?  Do you know that he probably doesn’t eat lunch at school?  I know you pack him something wonderful and maybe he even helped pick it all out.  But here’s the reality:  if your school is like mine and permits recess as soon as the kids are “finished” with lunch, most boys are only focused on one thing.  Playing ball.  I have figured out that my son only eats what he can on the way to the field and leaves everything else in the lunchbox.  He eats it all when he comes home, but he does NOT want to miss being picked for the better team or waste time sitting around eating when he can be doing his favorite thing in the world.  Playing ball.

Mr. Picky is in second grade and this has been going on since he started elementary school and from what other moms tell me, it doesn’t end.  So it was a big day in the Salzman household when Mr. Picky announced that he would like to take a thermos to school.  Why?  Did the state cut the budget for soccer balls?  Not yet.  Mr. Picky wanted a thermos so that he could take these lentils to school.  For lunch.  This is big, people.  And the thermos came back empty.

It is not at all important to me why he likes lentils, only that they are an amazing source of low-fat protein and super high in fiber, so they keep him full for a long time and help stabilize his blood sugar.  So I thought I would share this recipe with you just before Halloween since it is keeping in line with my strategy for the big night o’candy.  I can’t/won’t forbid my kids from eating candy on Halloween.  How unrealistic is that?  (Rhetorical question.  Very.)  My strategy is to get them really full with a good dinner before they go out so that they have no room in their bellies for too much candy.

My mom used to make braised lentils which is kind of like making lentil soup, but with less liquid.  Only she used to put a piece of pork or a smoked ham hock in the pot and it gave the lentils great flavor.  I don’t eat pork, but I started adding smoked paprika to my lentils to give a similar smokiness and it’s delicious.  Mr. Picky says it tastes like there’s a hot dog in there.  In fact, that wouldn’t be a bad idea to put a (nitrate-free) hot dog in the pot to persuade your kids to try lentils.  Just a thought.  I very often make them as a vegetarian dish since they have so much protein, but here I served them with my answer to fast food — Applegate Farms (Precooked) Organic Chicken and Turkey Sausages.  No matter how busy you are, I am sure you aren’t too busy to warm up these sausages.  I bake them, which is so much easier than cooking them in a skillet and having to clean up any splattering on the stovetop.  But the best part is that there are no spooky ingredients to worry about!

Smoky Braised Lentils with (or without) Turkey Sausages
Author: 
Serves: 6
 
Ingredients
  • 1 Tablespoon unrefined olive oil
  • 1 large onion, diced
  • 1 carrot, diced
  • 1 clove garlic, finely chopped
  • 2-3 teaspoons smoked paprika (Spice Hunter is a good, easy-to-find brand. Spicely Organic has no flavor.)
  • 1 cup organic black or French lentils* (sorted and rinsed)
  • 1 sprig fresh thyme (optional)
  • 1 teaspoon sea salt (+ ½ teaspoon if you don’t cook sausages with lentils)
  • 2 ½ cups water
  • Freshly ground black pepper
  • 1-2 packages precooked Applegate Farms Sweet Italian or Chicken Apple sausages (4/package)
Instructions
  1. In a medium saucepan, heat the olive oil. Add the onion and sauté over medium heat until tender and translucent, about 8 minutes.
  2. Add the carrots, garlic and paprika. Cook for 2 more minutes.
  3. Add the lentils, thyme, salt and water and bring to a boil. Cover and reduce heat to low and simmer for 30 minutes** or until lentils are tender. Halfway during the cooking process, preheat the oven to 350.
  4. Bake sausages on a baking sheet until heated through, about 15-20 minutes. Slice into thirds and serve with the lentils. Or alternatively, cut the sausages in half or thirds and add to lentils halfway through cooking lentils and heat sausages through.
  5. If lentils seem too liquidy, simmer a little longer uncovered. Taste lentils and season with salt and pepper as needed.
Notes
*There seems to be a wide variety of lentil cooking times. 365 Brand takes about 30 minutes, but I have used some imported varieties that take up to 50 minutes.

My favorite tuna salad

Well people, sandwich season is upon us and I’m proposing that we branch out and see if we can avoid making peanut butter and jelly everyday.  In fact, I know many of you are in nut-free schools and can’t rely on the old standby at all.  On the other hand, luncheon meats freak me out a bit — and not for any scientific reason.  I just can’t get past the idea that this turkey was cooked who knows when and squished and reformed into this new product with lots of “natural flavors.”  I’d rather poach or grill organic chicken breasts and give the kids chicken sandwiches, which is exactly what I do and I save a little money while I’m at it.

As for me, I’m not much of a sandwich eater, mostly because I prefer to eat quinoa over bread.  But if I had to pick a sandwich for my last supper, it would be tuna salad with lettuce, tomato and avocado on whole grain bread.  If there happen to be some grilled onions lying around, I would add those in, too.  But this wouldn’t be just any tuna salad, it would be this one right here, which my kids also love — hooray!

I found the canned tuna of my dreams at Vital Choice — cooked once, BPA-free cans, minimal mercury and absolutely the best tasting tuna ever.   (It’s also one of the most expensive tunas out there.  Drat!)  Tuna is high in Omega-3 fatty acids (very anti-inflammatory and you’re probably not getting enough of them) and high in protein (so important when the kids are at school).  I mix it with some of the expected like a little mayo (I like soy-free Vegenaise), celery, diced shallot (I hate cutting 2 tablespoons of onion and then wrapping the cut onion in the fridge), a little lemon juice to brighten everything up and a touch of Dijon mustard to give it some zing.  But don’t get mad when I tell you I have a random secret ingredient.  My friend Daisy introduced me to Herbamare, an organic herb and salt seasoning, several years ago and my tuna salad peaked.  It just adds the perfect flavor to complement the tuna.  I buy it at Whole Foods, but you can also find it on amazon.com.  Otherwise, just use some sea salt to taste.

You can make your tuna salad the night before to make your morning easier.  Mr. Picky doesn’t like sandwiches (hard to believe, right?), so he takes his tuna in a (BPA-free) container with a spoon.  My teenage girls would please like a breath freshener in their lunch bags on tuna day, and that does NOT mean a sprig of parsley.  Got it.  Look out for more lunch ideas in a future post!


5.0 from 1 reviews
My Favorite Tuna Salad
Author: 
Serves: serves about 3
 
Ingredients
  • 1 6-ounce can water-packed tuna, drained
  • ¼ of a lemon
  • 1 stalk celery, diced, about ½ cup
  • 1 small shallot, diced, about 2 Tablespoons
  • 2-3 Tablespoons mayonnaise (I like soy-free Vegenaise) or half Greek yogurt and half mayo
  • 1 teaspoon Dijon mustard (optional)
  • ⅜ teaspoon Herbamare or sea salt
  • Freshly ground black pepper to taste
Instructions
  1. Right in the can, flake the tuna with a fork over a medium bowl, at the same time allowing the tuna to fall into the bowl. Squeeze the lemon over the tuna.
  2. Add the remaining ingredients to the bowl and mix well. Taste for seasoning.
Notes
Notes: other additions can include diced apple, diced sweet bell pepper, sliced manzanilla olives (the ones stuffed with pimentos), chopped nuts, chopped water chestnuts, fresh dill


Vegetable fried rice recipe

When parents struggle with “what to make for dinner,” one tip I like to offer is to find a dish that everyone likes to eat when you go out, and try to make it at home.  Fried rice, however, is a food that I thought I could never make at home.  I don’t know why it seemed to be out of my cooking league and only something the family could enjoy on the three annual birthday trips to Benihana.  But the last time we were there for Mr. Picky’s birthday, I watched in amazement at what it took for our chef to make fried rice — not a lot!  I could make this at home!  I took mental notes of what was used on the griddle — cold rice, beaten eggs, a few vegetables, soy sauce and a curious creamy spread our chef told me was “garlic butter.”  Hmmm…..

Before I gave this a go at home, I needed to check around a bit to see if there was anything else I needed to know.  It seems that fried rice is actually pretty straightforward provided you do one very important thing — use cold, cooked rice.  Warnings abounded wherever I turned — one can never, ever, possibly even consider making fried rice with fresh rice otherwise you will have a mushy, disastrous mess.  One thing you need to know about me is that I am a naysayer.  Oh, really?  Well I need to see it to believe it.  And I that’s how I learned….never to use fresh rice when making fried rice because I’m here to tell you that you will indeed have a mushy, disastrous mess.

Fried rice is something that was invented in order to use up leftover rice and whatever bits of vegetables and meat you have from the night before.  It is eaten as a snack in China, never as a meal.  Don’t tell my kids, because they’re getting it as an entree.  When you add scrambled eggs, peas, shiitake mushrooms and broccoli to long-grain brown rice, you have yourself plenty of protein.  I often pack this the next day in a stainless thermos for the kids’ lunch and I have enjoyed it for breakfast as well.  It is actually the perfect little meal with protein, good carbs, and some fat for stable blood sugar and long-lasting energy.

Stir-frying anything requires all your chopping to be done in advance since things move so quickly.  You can get this out of the way as early as the night before, if you want.  If you have leftover rice and all your vegetables are prepped ahead, fried rice can be cooked in minutes.  Traditionally in China, the eggs are added with the rice so that the egg coats each grain of rice.  I do it a little differently since Mr. Picky doesn’t enjoy eggs yet.  I cook the beaten eggs in ghee (a clarified butter great for higher heat cooking) first and then remove them, chop them up and add them in at the end.  That way Mr. Picky can pick out all the egg easily.

You can really add whatever vegetables you have on hand and you certainly don’t need to use as many as I do. (The vegetables above were used in fried rice I made for a class where the recipe was doubled.)  The key is to dice everything pretty small, about the size of peas, although the broccoli can be slightly larger.  That way you can stir-fry them in the wok or pan and you don’t need to blanche them in a separate saucepan.  I like washing dishes as much as Mr. Picky likes eggs.  If your picky eater won’t go for brown rice, he’ll never know it here.  The shoyu is going to change the color of the rice to brown anyway.  To make this gluten-free, substitute wheat-free tamari and you’re all set.  Vegans can drop the egg, use all sesame oil and still enjoy a high-protein dish.  Don’t forget — Chinese New Year begins on February 3rd!

5.0 from 1 reviews
Vegetable Fried Rice
Author: 
Serves: 6 as a side dish, 4 as a main
 
Ingredients
  • 2 Tablespoons ghee, divided
  • 2 large eggs, beaten
  • 1 Tablespoon toasted sesame oil, plus more for drizzling if desired
  • 1 teaspoon grated or minced peeled, fresh ginger
  • 2 garlic cloves, minced
  • 4 scallions, sliced thinly on the diagonal
  • Vegetables:
  • 1 carrot, diced
  • 1 onion, diced
  • ½ cup frozen peas, defrosted
  • Handful of shiitake mushrooms, stems removed; caps wiped clean and diced
  • 1 head broccoli, cut into very small florets and stems diced, about 2 cups
  • 4 cups COLD, COOKED brown rice, preferably long-grain
  • 2 Tablespoons shoyu or more to taste (I tend to go more)
  • Toasted sesame seeds for garnish (optional)
Instructions
  1. Heat a wok or large sauté pan over medium-high heat. Add 1 Tablespoon ghee. Scramble the eggs in the pan until cooked through. Transfer the eggs to a cutting board and set aside.
  2. Add 1 Tablespoon sesame oil and 1 Tablespoon ghee to the wok. Saute the ginger, garlic and scallions until fragrant, about 1 minute.
  3. Add the vegetables and sauté until softened. Add the rice and shoyu and toss everything around in the wok until heated through. Chop up the cooked eggs and stir into the rice. Taste for seasoning and add additional shoyu or sesame oil, if desired. Sprinkle with sesame seeds for fun!
Notes
If you are using leftover cooked vegetables or meat, dice them up and add with the rice.

I shared this recipe with Healthy Child, Healthy World!

Lemon-thyme chicken recipe

lemon-thyme chicken | pamela salzman

Once upon a time, I used to enjoy spending lots of time experimenting in the kitchen.  I had fabulous cookbooks in which I found interesting and challenging recipes to make for dinner.  On a weekday.  And then it was over.  My kids started playing team sports.  Do you know this new life?  Are you driving to some field at exactly the same time you should be soaking and sauteeing or poaching and shredding?  And then back an hour later to pick-up, unless of course there’s a GAME.  Then you’re sitting on bleachers for two hours trying to figure out how dinner will be ready the second you walk in the door with starving children.

how to slice into cutlets

“Baked Lemon Chicken” from The Union Square Cafe Cookbook was one of my favorite chicken entrees before sports.  Bone-in chicken pieces baked with lots of sauteed onions, lemon and thyme.  It was even good enough to serve to company.  But there would be no more basting every 15 minutes for me on a Tuesday at 5:00.  So what’s a girl to do?  Adjust the recipe to cutlets, of course!

sliced onions and garlic, fresh thyme

Even though I generally prefer bone-in chicken to boneless, this dish is not lacking for flavor or moistness.  The onions get soft and saucy with lemon and infused with fresh thyme and the chicken takes it all in.  The best part about this is that it’s super easy and can be done in stages, if necessary.  You can flour and saute the chicken and then take the kids to practice.  Come back and saute the onions, add the thyme, lemon and stock.  Pick up the kids from practice and when you get home add the chicken to the onions and let everything cook together while you saute some spinach with garlic.  Hopefully you made a vinaigrette and washed some lettuce a few days ago, so assembling a salad will take you no time at all.  Can you say, “Home run!”

lemon- thyme chicken | pamela salzman


lemon-thyme chicken | pamela salzman


Lemon-Thyme Chicken
Author: 
Serves: 6
 
Ingredients
  • 2 pounds chicken cutlets (I show a photo of how I cut a boneless, skinless breast half into cutlets, but you can ask your butcher to do this)
  • Sea salt and freshly ground black pepper
  • Flour for dredging (whole wheat pastry flour or brown rice flour (gluten-free) are the two I use)
  • Unrefined, cold-pressed extra-virgin olive oil
  • 1 large onion, halved and sliced thinly (I use a candle when I am cutting onions to prevent crying -- it works!)
  • 4 cloves garlic, sliced thinly
  • ½ cup fresh lemon juice
  • 1 cup chicken stock
  • a few sprigs of fresh thyme
Instructions
  1. Season the chicken cutlets on both sides with sea salt and black pepper. Dredge them with flour and shake off the excess.
  2. Warm about ¼ cup olive oil over medium heat in a large skillet. Add the chicken cutlets and sauté on both sides until golden brown. Transfer the chicken to a plate.
  3. Add the onions and garlic to the skillet and season with sea salt and pepper. Sauté until tender, about 8 minutes. Pour the lemon juice into the pan and scrape any brown bits on the bottom. Add the chicken stock and thyme sprigs and bring to a simmer. Transfer the chicken back to the pan with any accumulated juices. Simmer until cooked through, about 5 minutes.
  4. Remove thyme sprigs and serve immediately.


Â