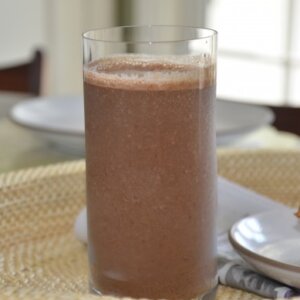
I think one of the most important ways to know what works for your body and what doesn’t is to be in tune to how you feel after you eat. For example, if after you eat cow dairy, you feel bloated or nauseous, it should register with you that cow dairy doesn’t work for you. There’s nothing wrong with you. You don’t need a green pill or a purple pill to help you digest cow dairy. You need to not eat cow dairy. This is Nutrition 101. You can actually teach yourself so much about how to be healthy without having to figure out which expert’s diet is the “right” one. I have been listening to my body very carefully for many years and there’s something that I consume that I notice consistently makes me feel great. After having it in the morning, I have incredible amounts of energy during the day and I am more clear-thinking and creative. When I have it regularly, my skin looks great and I don’t have as many cravings for non-nutritive foods. I am talking about fresh pressed juice.

We know that we should be eating 5-10 servings of fruits and vegetables daily, with an emphasis on vegetables. Most Americans don’t even come close to that and are missing out on very important nutrients, enzymes and fiber. In addition, many people suffer from digestive problems which hamper their bodies’ ability to efficiently assimilate the nutrients they do consume. What is wonderful about juicing is that your body needs to do almost nothing to digest the nutrients from juice and they are immediately available to your system. I recommend fresh pressed juice as a supplement to whole fruits and vegetables and not in place of, but it’s an easy way to get those vitamins and minerals if you’re having trouble getting the recommended allowance of fruits and vegetables every day.

I am certainly no expert in juicing, so I wanted to turn to one of my cooking class students, Hedi Gores, and her partners Hayden Slater and Carly Brien, who own the incredibly popular Pressed Juicery in Brentwood, California. Pressed, as it’s known to regulars, is all the rage in LA and I seldom teach in someone’s kitchen without finding a few bottles of their juice in the refrigerator or more often, empty bottles in the recycle bin! I thought Hedi, Hayden and Carly could shed some light on the benefits of drinking fresh pressed juices.


PS: What inspired you to start Pressed Juicery?
PJ: We all happen to love fresh pressed juice and were craving an option in LA, which we found to have a very limited juice market. We all have different backgrounds- one of us is a devoted mom, the other is a businessman, and one of us has a holistic health degree- but what we have in common is that we have seen the profound effects of juicing on our own lifestyles and on the lives of people close to us. We couldn’t believe the benefits and wanted to make it easy for others to incorporate into their hectic schedules.
PS: What are some of the benefits of drinking fresh pressed juices?
PJ: The benefits are really endless and to see proper results it is best to drink them consistently either in the form of cleansing or at least drinking juice each day. Some of the results people find are: balanced pH and sugar levels, clearer skin, weight loss, increased mental clarity, diminished aches and pains, a regulated colon, blood and tissue cleansing, better sleep patterns and better liver function. And this is only the beginning. Many diseases are attributed directly or indirectly to an unhealthy digestive system. Your immune system and health depend on healthy elimination of toxins from the body which is what juice cleansing allows to happen as it gives the digestive system a proper and much-needed break from the work it has to do on a daily basis.
PS: What is the difference between blender juices and pressed juices?
PJ: Juices that are made in a blender are not really juices- they are blended drinks. They still maintain all of the bulk and fiber of the ingredients, along with juice from the ingredient as well. When something is juiced, particularly in a press, what you yield is the pure liquid vitamins and nutrients from the fruit or vegetable, without the fiber. This means that they essentially provide nutrients uninterrupted by the digestion process. Our bodies absorb them with maximum efficiency and are able to assimilate the vitamins and minerals in a matter of minutes, rather than hours. So many people are lacking proper nutrition these days, as a result of poor diet and lifestyle choices, as well as factors that are often out of their control. Juicing is a wonderful way to get the freshest and most direct sources of vitamins and minerals that our bodies require to keep them in a vital and healthy state.
PS: What is the difference nutritionally-speaking between a fresh, cold-pressed juice and a flash pasteurized juice from the supermarket?
PJ: Fresh, cold-pressed juice is raw and unpasteurized, meaning it is simply juiced under the coldest possible conditions, protecting the enzymes and nutrients (the goodness that keeps us healthy!) that are living in the juice. Pasteurized and flash-pasteurized juices that one would find in a market are subjected to a heat process which kills living bacteria in the juice. This process allows the juice to be stored on shelves longer, however it also diminishes many of the vital properties of the juices.
PS: Why is fresh pressed juice so highly perishable?
PJ: Because it is unpasteurized and the ingredients are essentially living and remain so after they are pressed, the juice carries a shelf life of 3 days and must be kept as cold as possible to ensure freshness.
PS: What are some popular juice combinations at your store?
PJ: People love our Greens 2, which contains Kale, Spinach, Cucumber, Celery, Romaine, Parsley, Apple, and Lemon. And the warm weather has made our Watermelon Mint a huge hit. It’s simple and refreshing.
PS: Do you change the juices you drink according to the seasons?
PJ: We maintain the majority of our juices throughout the year, but we always add seasonal juices with fruits and vegetables that are available. In the winter persimmons were a huge hit, and cool and refreshing drinks that incorporate watermelon have been well-received during warmer months. Being based in California, we are so lucky to have access to delicious, fresh produce all year long.
PS: What’s your favorite juice?
PJ: I [Hayden] love our Apple Lemon Ginger combined with a splash of Greens 1 and a touch of liquid cayenne. It’s always fun to mix up combinations and see what we come up with. We can’t wait to share our expanded menu with everyone in the coming months.
PS: Do you have any suggestions for people who have never tried juicing?
PJ: People are often afraid of juicing with vegetables. Many people are familiar with the standard fruit juices but the idea of drinking, let alone consuming, a green beverage is a little daunting. Keeping it simple and tailoring it to what you personally like is the key. Throw in a few spinach and kale leaves, add something with a high water content like cucumber, and then add a little bit of tang from a lemon or some ginger or both. If you crave sweetness- beets, carrots and/or green apples are great options. Keep experimenting until you find something that works for you. It can end up being really satisfying and you will feel a difference in your body and life after consistent juicing.
PS: I have many readers who do not have access to a juice bar or a place which makes fresh pressed juices. Is there a juicer that you can recommend for everyday use at home?
PJ: Omega 1000 is a great juicer- people seem to really like it. Breville also makes a few options that are simple to clean and user-friendly.
Pressed Juicery is located at 13050 San Vicente Blvd, Los Angeles, in the courtyard of the Brentwood Country Mart or you can visit them online. They deliver!
* * *

I own the Omega 8003 Juicer and I have been happy with it. My mother has a Hamilton Beach juicer, which doesn’t press out as much juice as mine, nor is it very easy to clean. The best juicer is the one you will actually use, so ask your friends who juice what they like and don’t like about their machines. Here are a few tips I can give you about my experience with making juices at home:
- have your greens and herbs washed and properly stored in the refrigerator so they are ready to go. If they’re not, you may not be as motivated to juice.
- don’t juice only dark leafy greens, it will be too strong. Blend some kale, collards or spinach with mild, high water vegetables like lettuce, celery and cucumber.
- blend mostly vegetables with only a little fruit to make the juice not taste too bitter. I prefer to use one apple — peel, seeds, everything. When I make juice for my husband and kids, they prefer a little more fruit than I do and that’s fine.
- if you want to juice low-liquid food, such as ginger, turmeric or a clove of garlic, make sure you follow it with a high liquid vegetable such as celery to flush it out of the juicer.
- clean your juicer as soon as possible after using it. I don’t love cleaning my juicer, but I love it a whole lot less if it has been allowed to sit. Those fine vegetable fibers are way harder to get out of there once they’ve dried.
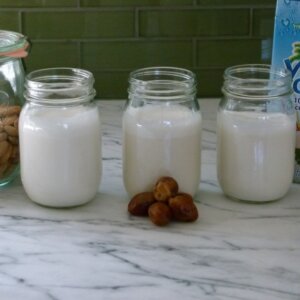
- the fresher the juice, the more nutrients it contains, but if you need to make your juice the night before, store it in a glass jar filled all the way up to the top so that there is a minimal amount of oxygen in contact with the juice. Cover and refrigerate.
Please share your experience with juicing!