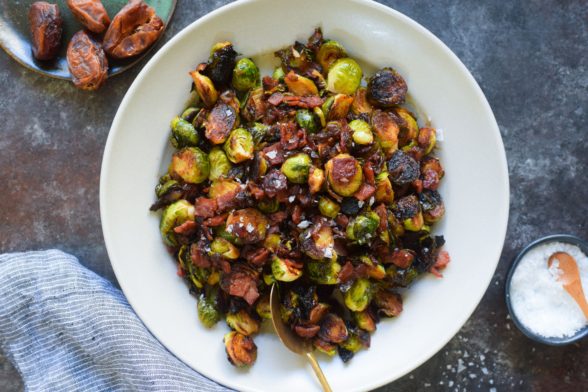
Brussels Sprouts with (Turkey) Bacon and Dates

My husband and I used to go out to dinner much more than we do now. When the kids would to go to bed at 7:00 pm, it was a lot easier to tuck them in, leave them with a babysitter after they were asleep and still manage to have dinner out at a reasonable hour. Well, (bed)times have changed and so has my desire to out to restaurants. Call me a party pooper, but I’d much rather enjoy a simple meal at home with a few good friends and end the evening with a competitive game of Sequence or Bananagrams. Can you imagine how much fun I’m going to be when I’m 60?

I do have a few favorite restaurants, though, one of which is the wildly popular, (but not in a cheesy LA-way) Gjelina in Venice, California. It’s earthy, rustic, but still sophisticated and there’s kale on the menu in three or four different dishes. And most importantly, they make it all taste divine in a way that I can’t. Last year, I had these incredible char-grilled Brussels sprouts with bacon and dates that I became obsessed with. I literally dreamt about them and all that sweet, salty, lightly charred goodness. I was incredibly excited when my friend Laura had her birthday dinner there a few months later and I was able to enjoy the Brussels sprouts again. But unfortunately, Gjelina is not the type of restaurant which gives out its recipes. I knew some version of these sprouts had to be on our Thanksgiving table last year, so I set out to make my version of the dish, which I like just as much and it doesn’t cost me $8/serving.

What’s funny about my obsession with Brussels sprouts is that I despised them as a child most likely because my mother bought them frozen and then boiled the life out of them. But if you can roast them or sear them in a pan and cook them until they’re tender, they are just amazing. Brussels sprouts are also incredibly good for you, as are all the cruciferous vegetables. They contain loads of fiber, folate, potassium, Vitamin C and some very powerful anti-cancer sulfur compounds. And if Brussels sprouts’ nutritional profile doesn’t impress you, the green color adds some vitality to a normally very beige Thanksgiving spread.

These Brussels sprouts are fabulous and will have an encore appearance at our Thanksgiving buffet this year, although it’s not the best dish to make for an enormous crowd (more than 25 or so.) Last year I had three large skillets going on the stovetop and I don’t think I could have wedged in another. I pull the turkeys out of the oven to rest for about 30-40 minutes and start my gravy right away since that can sit on the stove on low heat while I tend to the salads and vegetables in the remaining 20 to 30 minutes or so. If you would like to make this to bring to someone else’s house, do ask your host if he or she can accommodate your making this on the spot. Otherwise, you can make it before you leave your house and reheat it gently just before dinner with a few tablespoons of stock. Of course, these Brussels sprouts are no one-hit wonder. They’re easy enough to make any night of the week, which you’ll just have to do since Gjelina was crazy enough to take them off the menu!

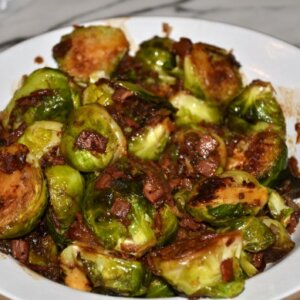
Brussels Sprouts with (Turkey) Bacon and Dates
Ingredients
- 2 Tablespoons unrefined cold-pressed extra-virgin olive oil
- 2 Tablespoons unsalted butter
- 1 ½ pounds medium Brussels sprouts ends trimmed and halved
- 4 ounces nitrate-free turkey bacon chopped (optional)
- 1 large shallot finely diced
- 1 garlic clove minced
- 4-6 large pitted dates, chopped (they’re much easier to cut when cold)
- 2 Tablespoons balsamic vinegar
- ½ cup chicken or vegetable stock
- Sea salt and freshly ground black pepper
Instructions
- Heat a large skillet (12-14 -inch is good) over medium high heat. Add olive oil and butter.
- Make sure you are wearing an apron so any splattering doesn’t mess up your outfit. When butter is melted, add Brussels sprouts cut side down and season them with 1 teaspoon sea salt and a few grinds of black pepper. Allow the sprouts to brown without burning and then turn to brown on the other side. Lower the heat to medium and cook the sprouts another 3-4 minutes, until they soften slightly.
- Move the sprouts to one side of the pan and add the diced turkey bacon to the pan and cook for 3-4 minutes until it starts to crisp around the edges.
- Stir in the shallots, garlic and dates and cook another minute or so until the shallots are tender.
- Pour in the balsamic vinegar to deglaze any brown bits on the bottom of the pan. Add the chicken stock and cook until just a glaze remains. Taste for salt and pepper. Serve immediately.