Corn and zucchini frittata recipe
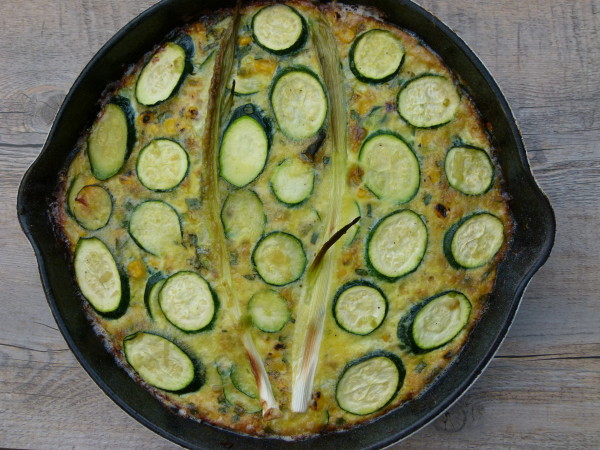
zucchini and corn frittata | pamela salzman

I just returned from Dallas, one child and many suitcases lighter.  Sigh…. My daughter has officially opened her wings and flown from the proverbial nest to plant her roots at college.  The whole thing is quite surreal as many of you may or may not know.  One minute they’re spinning around in a pink tutu drinking from a sippy cup and the next you’re renting a mini fridge and lecturing them about why beer is the devil.
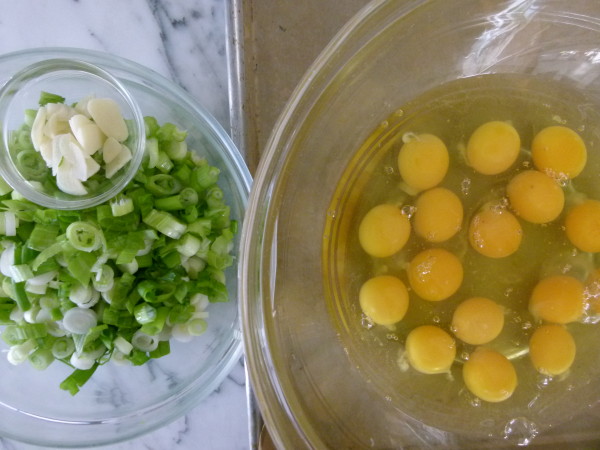
eggs and green onions

I actually met my husband freshman year of college.  So we couldn’t help but reminisce about our move-in experience and our crummy, old and unrenovated dorm.  I think my daughter was a little tired of my exclaiming every five minutes how her new dorm is “like the Four Seasons compared to where we lived!”  Of course you can’t furnish the Four Seasons with cinderblocks and plastic milk crates.  So we channeled our inner Nate Berkus and coordinated duvet covers with cork boards.  Funny, I do not remember my parents making two trips to Bed Bath & Beyond, two trips to The Container Store, a visit to the campus bookstore, Whole Foods, and, of course, amazon.com for anything and everything we didn’t find in the oasis of Dallas and that could be delivered in 2 days flat.  As another student’s exasperated father said to me after his ninth trip up the stairs with the umpteenth box, “My parents sent me to school with a towel.”  Yep.
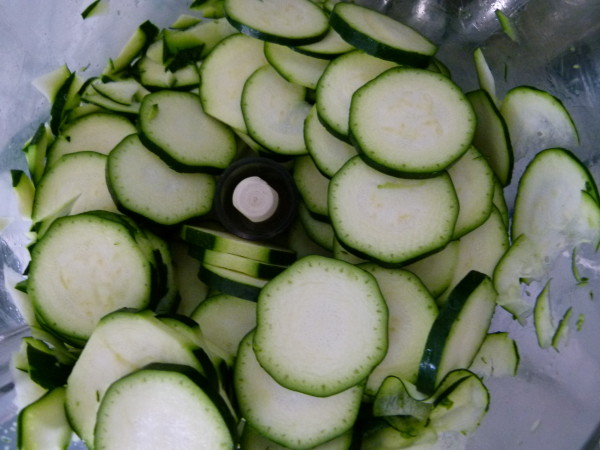
zucchini sliced in a food processor

Even the food is better at college than it used to be.  My daughter’s school has a smoothie and juice bar in the dining hall.  I knooooow!!!!!!  So I kinda had to stick my fingers in my ears and sing a little “la-la-la-la” song when my sweet girl started to complain about what she was going to eat.  Not listening!
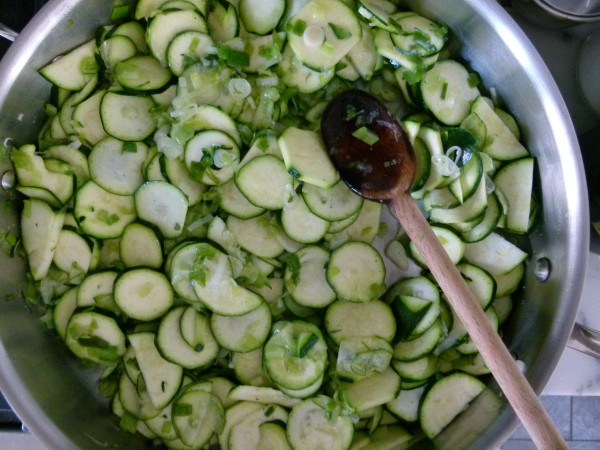
sauteed zucchini

In the week after we returned from Europe and before she left, I did indulge her with all her favorites though.  And it was my pleasure.  We had pasta with pesto, caprese salads, spanakopita, oatmeal-butterscotch chip cookies, veggie frittatas, acai bowls and on and on.  All for my daughter who was pickier than Mr. Picky and at 17 now craves fresh-pressed juices and veggie tacos.  Certainly, nothing beats food cooked by your mom who loves you to the moon and back.  I will miss cooking for my baby to be sure, but I am already planning cookie and granola bar care packages.
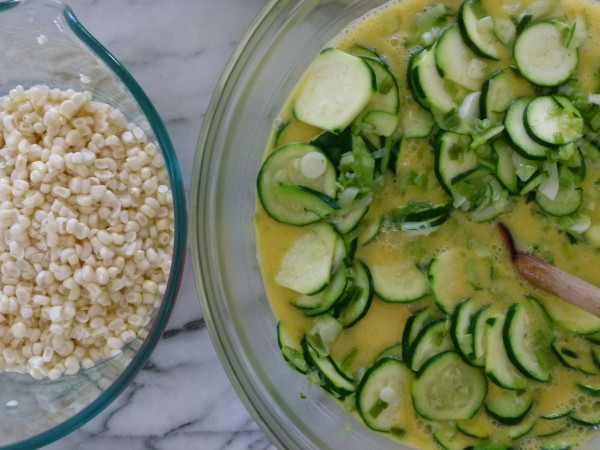
mix sautéed zucchini with eggs and then add corn

This corn and zucchini frittata is one of my daughter’s favorites and a perfect way to enjoy summer’s last gifts before they slip away.  I very often make frittatas on Fridays or the weekend to use up whatever’s left in the fridge and that’s exactly how this one came about.  I had leftover sautéed corn and zucchini from dinner to which I added some beaten eggs and voila!  Our newest favorite frittata was born.
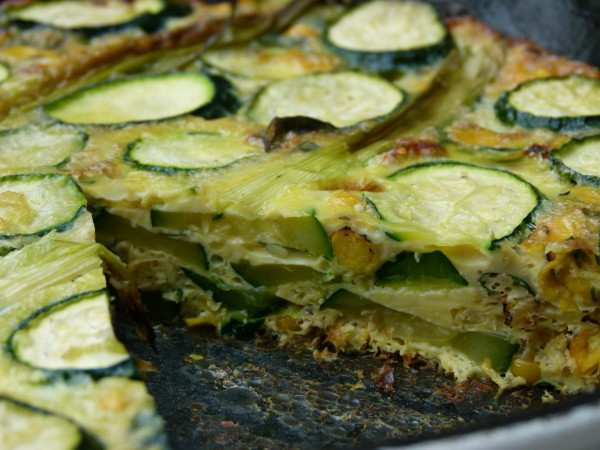
zucchini and corn frittata | pamela salzman

Surprisingly, corn goes so well with eggs and adds a beautiful sweetness, but more importantly, the perfect texture to the soft eggs.  Sometimes I add goat cheese or feta to the top and I’ve even made this for a big crowd by doubling everything and baking it in a parchment-lined baking sheet.
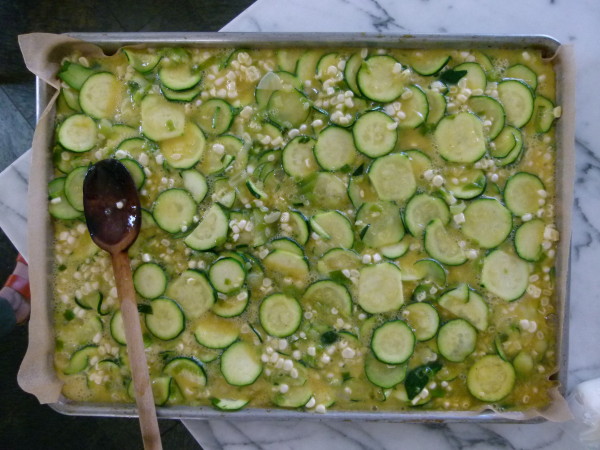
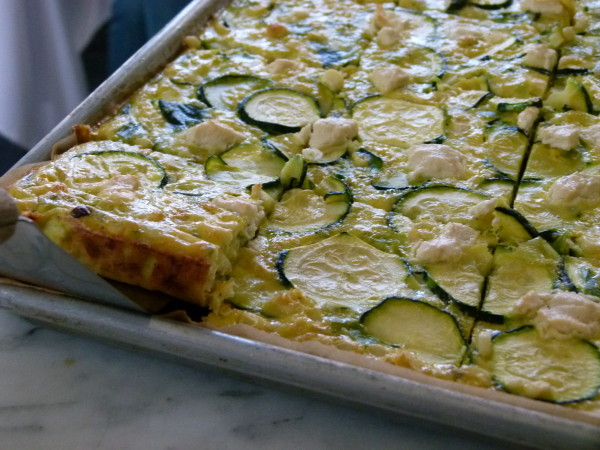
or double the ingredients and pour into a parchment-lined sheet pan

zucchini and corn frittata -- doubled in a sheet pan | pamela salzman

Summer’s bounty is still here, but only for a few fleeting moments longer.  Enjoy every last morsel while you can, because it will slip from your fingers before you’re ready to let it go.
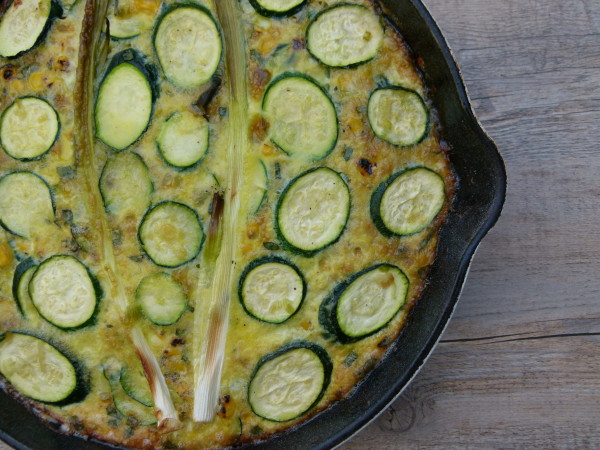
zucchini and corn frittata | Pamela Salzman

5.0 from 3 reviews
Corn and Zucchini Frittata
Author: 
Serves: 6
 
Ingredients
  • 2 Tablespoons unrefined, cold-pressed extra-virgin olive oil + additional
  • 1 bunch scallions, trimmed and sliced
  • 2 cloves garlic, sliced thinly
  • 3 medium zucchini (about 1 pound), ends trimmed and sliced ¼-inch thick by hand or by the slicing disk of the food processor
  • Fine grain sea salt
  • Freshly ground black pepper
  • 8 large eggs
  • 1 ½ cups of organic corn kernels, from 2-3 ears (frozen, defrosted is fine)
  • ½ cup grated cheddar or mozzarella or a few crumbles of feta or goat cheese (optional)
Instructions
  1. Preheat oven to 375 degrees. In a 10-inch skillet, warm the olive oil. Sauté the scallions until softened. Add the garlic and cook for 1 minute. Add the zucchini slices and a generous pinch of salt and sauté until tender, about 6 minutes.
  2. In a large mixing bowl, beat the eggs, 1 teaspoon salt, and a few grinds of black pepper. Stir the cooked zucchini mixture and the corn (and grated cheese if using) into the eggs and combine well. Pour the mixture back into the skillet. If using feta or goat cheese, scatter the pieces across the top of the egg mixture.
  3. Transfer skillet to the oven and bake until firm, about 40 minutes.
Notes
Alternatively, bake in a larger skillet for less time for a thinner frittata.

Or, cook gently over medium-low heat, covered until slightly set on the bottom, 15-20 minutes.  Transfer the skillet to the oven and broil until the top is slightly puffed and golden, about 3-5 minutes.  Serve warm or room temperature.

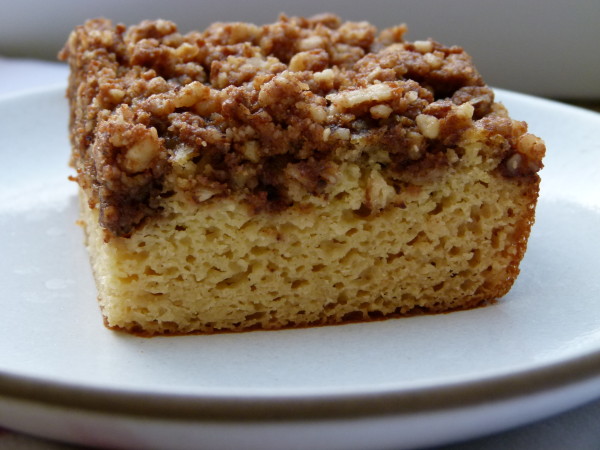
Grain-free White Bean Coffee Cake Recipe

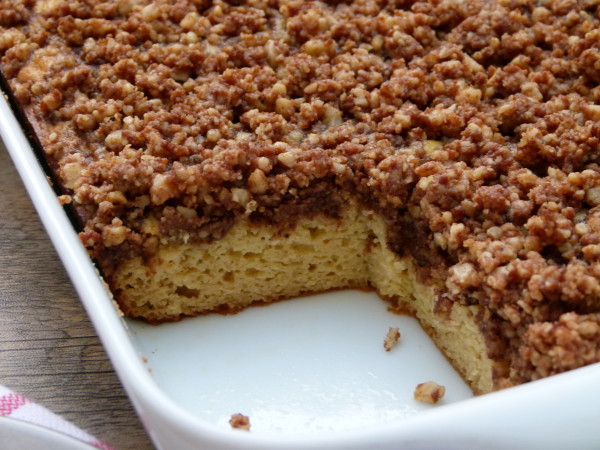
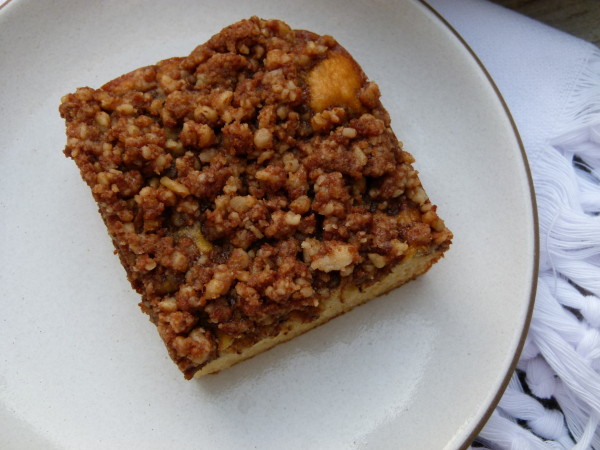
grain-free white bean coffee cake | pamela salzman

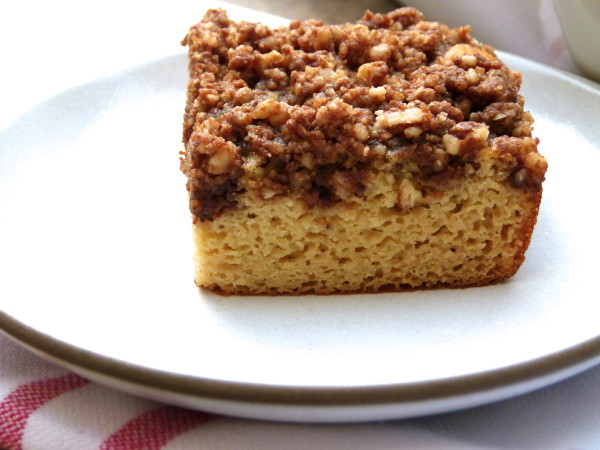
Trust me that this cake is so good!  It does NOT look like it has white beans in it, nor does it taste like white beans (which may I remind you taste like nothing.)  And lest you think I am a genius coming up with blending white beans to make a high-protein, downright delicious cake, I will come clean and tell you this is nothing that hasn’t already been done about 16,7000,000 times, according to google.  Even my idol, Martha Stewart, has made cupcakes with white beans!  If it’s good enough for Martha, it’s definitely good enough for moi.

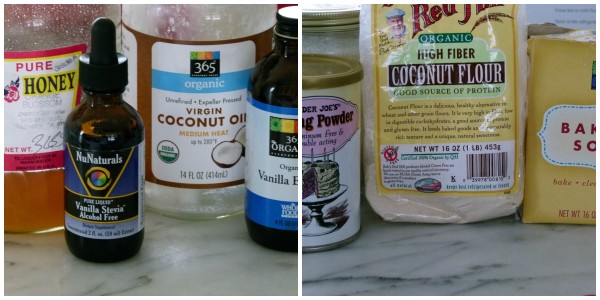
some of the ingredients

I thought this would be such a different, delicious and healthful cake for your Mother’s Day brunch, and what a conversation-starter!  It’s always fun to quiz your family and friends — “Can you guess what the secret ingredient is?”  I would never suggest making this for Father’s Day because most dads I know would rather have doughnuts than a cake with nutritional benefits.  Moms are different.  We’re always looking to have our treats without the guilt!

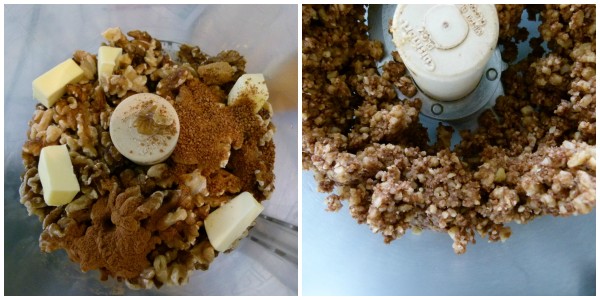
making the topping

This cake was a huge hit in my classes last year.  I first told everyone to open their minds because this would not resemble a classic coffeecake. Most people that come to my classes are pretty open-minded anyway.  In fact a few ladies said, “Ah, of course.  Black beans in brownies, white beans in coffeecake.”   I agree, it makes perfect sense.  But I would never make any dessert or any recipe for that matter just because it’s kind of healthful.  Of all things, dessert should be enjoyed, and you will love this cake!  It’s very moist, just sweet enough and light.  I ate quite a bit of this cake last  year and I never felt uncomfortable or sick after eating it.  That’s an indication of a pretty clean dessert.

making the cake batter

I normally encourage you to make your beans from scratch, but for this recipe it is very important that your beans be nice and creamy soft.  So if you want to be on the safe side, just used canned.  I love Eden which doesn’t use BPA in its can liners.  The one ingredient which might throw you for a loop is the coconut flour, although I do have a great muffin recipe on my site that uses almond flour and coconut flour.  At my Whole Foods, you can buy coconut flour from the bulk bins, which is nice if you just need a little bit.  Most recipes which use coconut flour only call for small amounts of it because it is so absorbent.  Don’t go thinking you can substitute regular grain flours for coconut flour!  They are completely different!

grain-free white bean coffee cake

If you decide you don’t want to make this coffee cake with the faux streusel topping, just make the cake with your favorite frosting or serve it with fresh fruit and whipped cream or whipped coconut cream.  Either way, moms deserve a treat on Mother’s Day, so indulge or do something generous for all the special moms in your life!  Happy Mother’s Day!

grain-free white bean coffeecake | pamela salzman


grain-free white bean coffee cake

4.9 from 7 reviews
Grain-free White Bean Coffee Cake
Author: 
Serves: makes one 12X9 or 13x9-inch cake
 
Ingredients
  • Crumble Topping:
  • 3 cups walnuts
  • 2 Tablespoons coconut oil or butter
  • ¼ cup coconut palm sugar or brown sugar
  • 2 teaspoons ground cinnamon (optional)
  • 2 cups cooked white beans (make sure they’re soft and not crunchy), such as cannellini or Great Northern, drained and rinsed if canned (cold or at room temperature)
  • 6 eggs
  • ¾ teaspoon vanilla liquid stevia or plain stevia and add an extra ½ teaspoon of vanilla extract
  • 1 teaspoon pure vanilla extract
  • ¼ cup melted coconut oil, plus extra for greasing pan
  • ⅓ cup honey
  • ⅓ cup coconut flour
  • ½ teaspoon sea salt
  • ¾ teaspoon baking soda
  • 1 ½ teaspoons aluminum-free baking powder
Instructions
  1. Preheat oven to 325 degrees. Grease a 12 x 9 or 13 x 9 baking dish with coconut oil or butter.
  2. To make the topping, place the walnuts, coconut oil or butter, sugar and cinnamon in the food processor fitted with a metal blade and pulse until combined and the texture resembles a crumb topping. Remove from food processor and set aside.
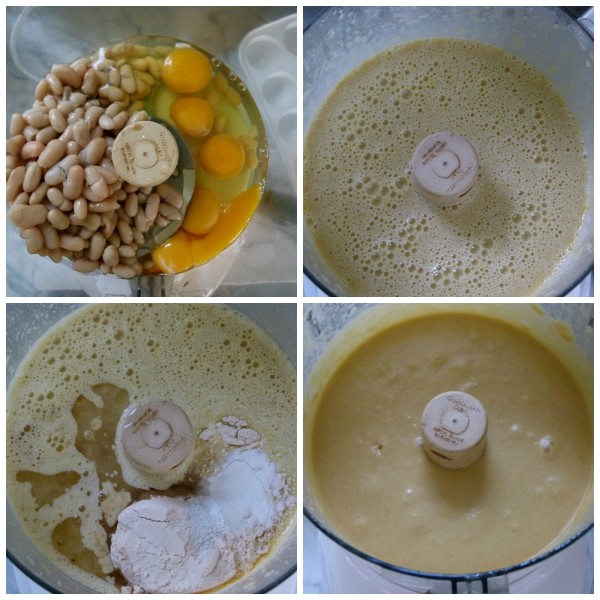
  3. In the same food processor (no need to clean it) place the beans, eggs, stevia, vanilla coconut oil and honey and puree until smooth.
  4. Then add the coconut flour, salt, baking soda and baking powder to the white bean mixture and process until smooth. Pour into the greased pan.
  5. Spread the topping over the top of the batter and use a fork to swirl into the batter, then pat down to set.
  6. Bake for 35 minutes or until a toothpick inserted in the center comes out clean. Allow to cool before serving. Store leftovers in the refrigerator where it will stay good for up to a week.

Gluten-free fudgy brownies recipe (refined sugar-free)

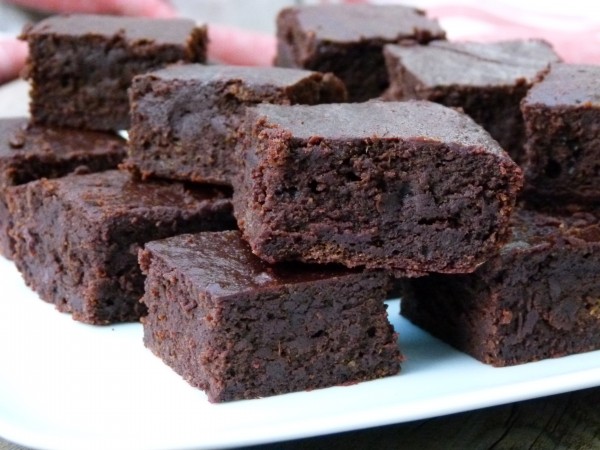
gluten-free fudge brownies | pamela salzman

Have you ever noticed that the best food images are usually of desserts?  Every time I go on Tastespotting, it seems like half the photos are sweets.  The irony is that I think desserts are the easiest things to make look and taste good.  Throw together some sugar, butter and chocolate and it’s probably going to be delicious.  Ok fine, I’m simplifying a bit, but I think I’ve tried more new dessert recipes with success than savory.  Anything with the word “crisp,” “cobbler,” “crumble,” or “buckle” is going to be great.  But chicken recipes don’t always provide the same guarantees, don’t you agree?

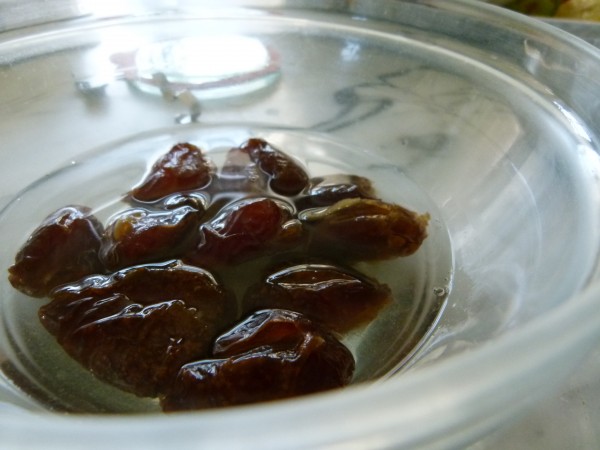
soak the dates

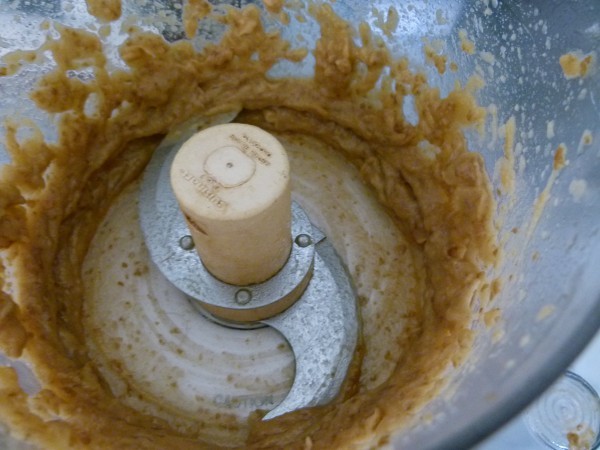
puree the dates and the soaking liquid

I also feel that way about dessert recipes using unrefined ingredients, especially in the sweetener department.  Show me a chocolate cake using maple syrup and whole grain flour and you have my attention!  It’s not so easy.

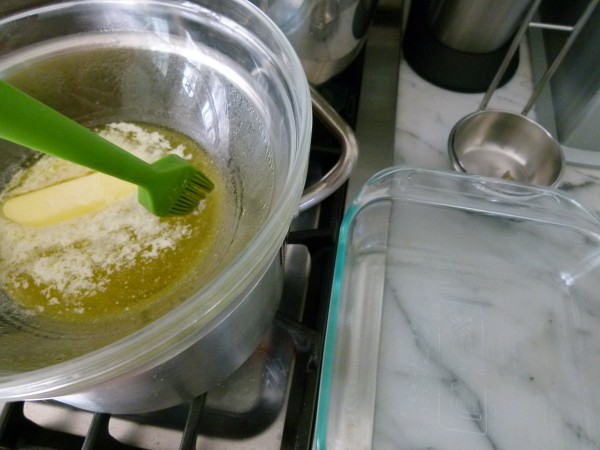
brush a little melted butter inside the pan

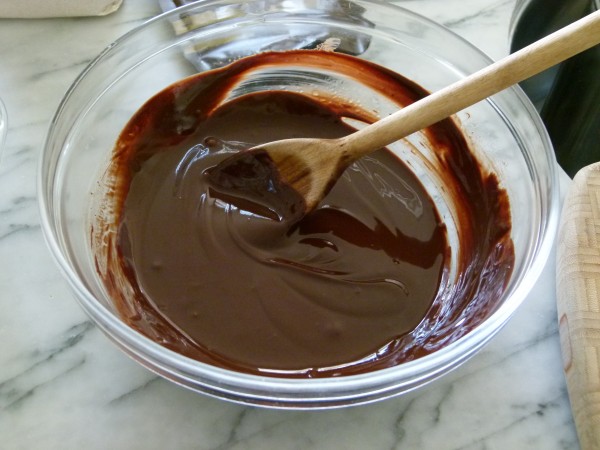
melt the chocolate and butter in a bowl set over a pan of simmering water

I recently made Ina Garten’s Outrageous Brownies for a large group meeting because they are perfect and it’s what everyone expects out of a brownie — that fudgy flavor and the flaky, crackly top.  (Although how in the world she only gets 20 brownies out of a 12 x 18 pan is a mystery.  I think I got close to 50.)  Unfortunately, I can’t duplicate that texture with honey, coconut sugar or stevia.  I am really committed to using ingredients that are less inflammatory and lower on the glycemic index than white flour and white sugar.  Of course, like I ALWAYS say in my classes, that doesn’t mean higher quality sweeteners are “good” for you or even health supportive.  Your body is just less offended by them.  You should still consume desserts in moderation whether they are made with honey or with sugar.

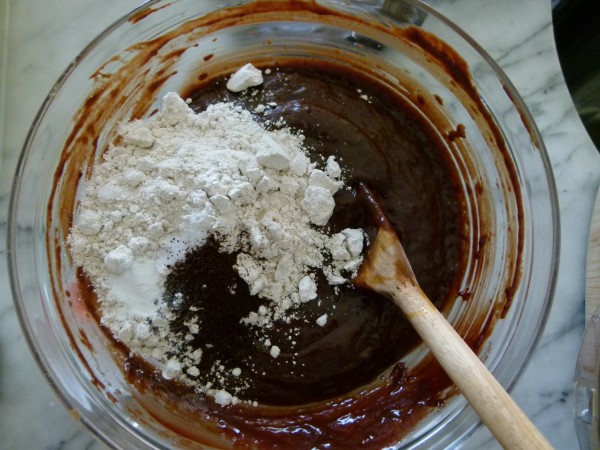
add in the dry ingredients

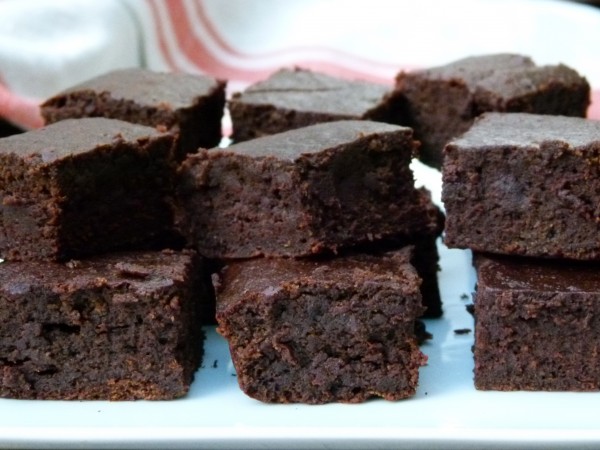
My kids and my husband are always the best judges of my cooking because they are brutally honest and they still have a taste for junk.  (People who eat health food 24/7 are much easier to please!)  But what I’ve learned to do is just call it like it is — no sneaky business, no tricky semantics.  These brownies aren’t like Ina’s, but you know what?  They would satisfy any chocoholic’s craving any day.  They’re super moist and fudgy with a rich chocolate flavor.  But they’re sweetened with my two favorite sweeteners, dates and coconut sugar.  I am very sensitive to refined sugars and these brownies don’t affect me at all!  Plus, they’re made with gluten-free oat flour.  Double awesome.  But if you like cake-y brownies, sorry.  This recipe is not what you’ve been waiting for.

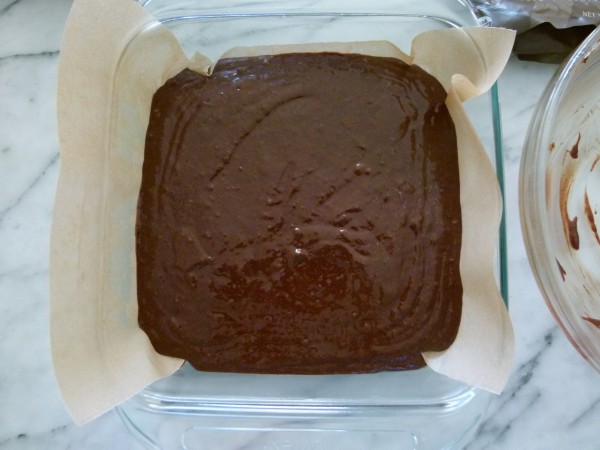
ready to bake

I ate one of these brownies warm right out of the pan with some sliced strawberries to cut the sweetness a bit and thought it was fabulous.  Although I wouldn’t argue with you if you wanted to top one with some ice cream.  After a day or two, I pop any extras into the fridge and they are absolutely divine cold.  I taught these brownies in a class last year and I remember making sure I gave all of them away before every class ended because I didn’t want to be left alone with them!  But what you all want to know is — does Mr. Picky like these?  TOTALLY!  In fact, I told him these were gluten-free brownies with dates and he said, “I don’t even care!”

gluten-free fudgy brownies

I think these are best cut into small bites.  And if you have a mini-muffin pan, that would be a great way to go, too.  With Valentine’s Day coming up, these fudgy brownies are perfect for all of your sweethearts!

gluten-free fudge brownies | pamela salzman

5.0 from 1 reviews
Gluten-Free Fudgy Brownies
Author: 
Serves: makes an 8 x 8-inch pan
 
Ingredients
  • 6 Tablespoons unsalted butter or unrefined coconut oil (does infuse a hint of coconut)
  • 8 ounces bittersweet or dark chocolate, coarsely chopped
  • 10 pitted dates (buy the moistest ones you can find), about 1 cup
  • ½ cup hot water
  • ¾ cup coconut palm sugar (or cane sugar)
  • 3 large eggs
  • 1 teaspoon pure vanilla extract
  • ½ cup GF oat flour
  • ½ teaspoon fine grain sea salt
  • ½ teaspoon aluminum-free baking powder
  • ¾ teaspoon instant coffee powder (optional, but makes the brownies taste more chocolate-y)
Instructions
  1. Place butter in a large heatproof bowl set over (but not touching) simmering water; dip a pastry brush in the melted butter and use it to grease the bottom and sides of an 8 x 8-inch baking pan. Add the chocolate to the melted butter and stir frequently until chocolate is melted. Remove bowl from heat; let cool about 10 minutes.
  2. Place the dates and the hot water in a medium the bowl and allow to soak for at least 10 minutes while you prepare everything else.
  3. Preheat the oven to 350 degrees. Line the baking pan with parchment paper, leaving a 1-inch overhang on two sides. Set aside.
  4. Transfer the dates and water to a food processor fitted with the metal blade and process until a smooth paste forms. Add the palm sugar and process until smooth. Alternately you can do this in the bowl of a stand mixer and beat with the paddle attachment. However, the food processor will make the date paste much smoother.
  5. Add the date-sugar mixture to the butter and chocolate mixture and blend well. Add the eggs one at a time, whisking until smooth after each addition. Whisk in vanilla.
  6. Stir in flour, salt, baking powder and instant coffee powder until just combined.
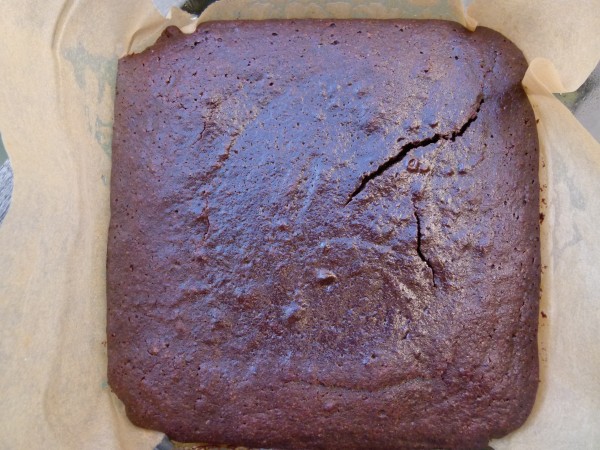
  7. Pour into the prepared pan and bake for 30-35 minutes, or until a toothpick inserted in the center comes out with moist crumbs, but not wet. Do not overbake! Transfer pan to a wire rack to cool completely. They taste best if they have been allowed to sit at least an hour.
  8. Run a knife or offset spatula around the edges of the pan. Pull on the edges of the parchment to lift brownies out of pan. Transfer to a cutting board; cut into 2-inch squares.
Notes
You can fold in ½ cup chopped or halved walnuts and/or ½ cup chocolate chips after the flour.

Cranberry-orange almond flour muffin recipe

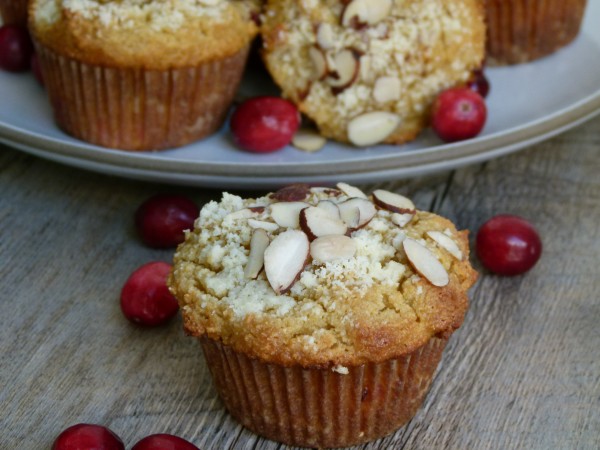
cranberry-orange almond flour muffins | pamela salzman

Even though Thanksgiving is passed, I am not letting go of cranberries just yet.  I’m not letting go of winter squashes, pears or apples either for that matter.  And I might just make some pumpkin pancakes tomorrow morning if I feel like it.  I am not yet tired of all those fall flavors, nevermind that winter is knocking at the door.

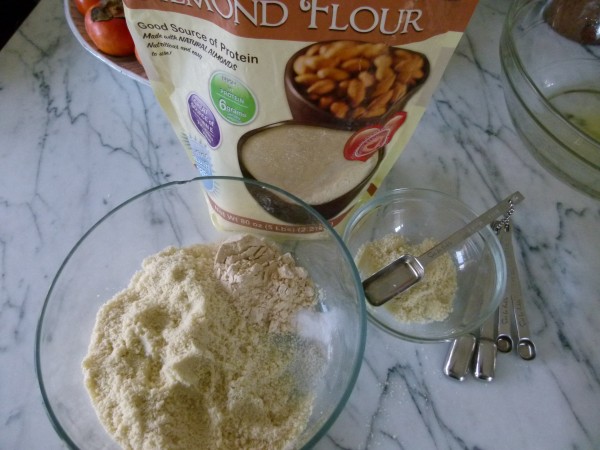
almond flour and coconut flour


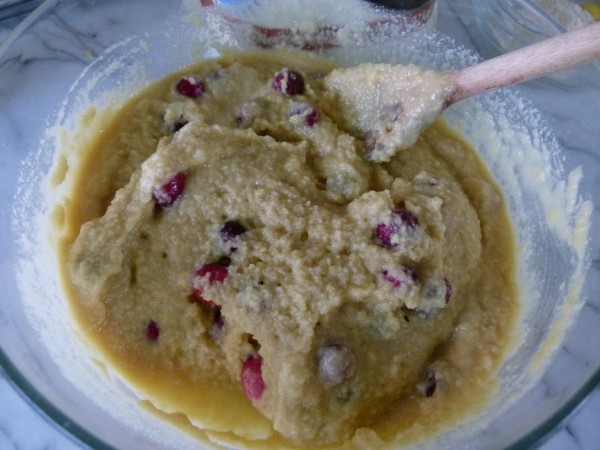
this is a thick batter

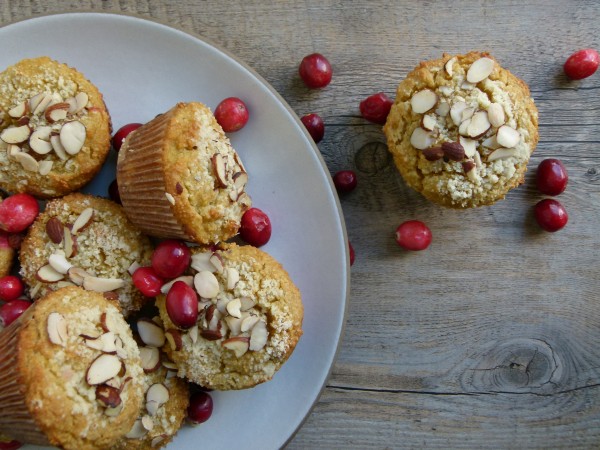
I made these cranberry-orange muffins on a whim the other day and just had to share.  Even though my family and I are not technically gluten-intolerant, gluten is something I mindful about limiting because it is quite pro-inflammatory and hard to digest and something that can be overeaten very easily.  So every now and again when I want to bake something, I play around with gluten-free flours based on grains like rice or millet (if you haven’t tried these Millet Blondies, you must!), or to go grain-free I love using almond flour and coconut flour.  There’s not one flour that mimics wheat perfectly, but there are ways to achieve a similar result.  One of my kids’ favorite muffins is this recipe for Chocolate-Banana-Almond Muffins with Chia Seeds.  That recipe uses all almond flour and has a very nice light, moist interior and such a yummy flavor.  I otherwise don’t love using all almond flour in baking since things can get a little heavy.  And you have to be sure to use almond flour and not almond meal.  Almond flour is very fine and almost powdery.  Almond meal is a little coarser which isn’t as desirable when you’re baking a muffin.

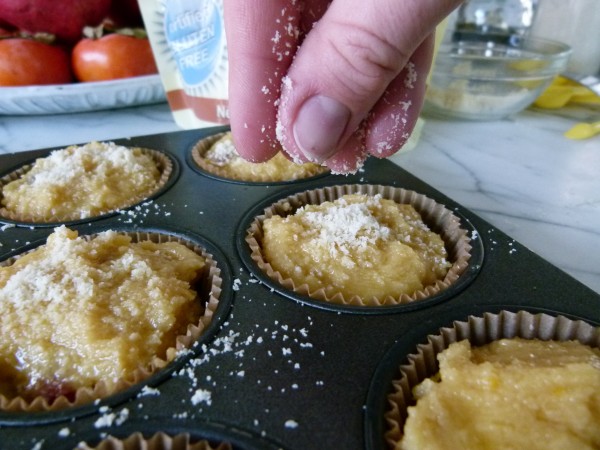
sprinkle the tops with almond flour for a nice finish

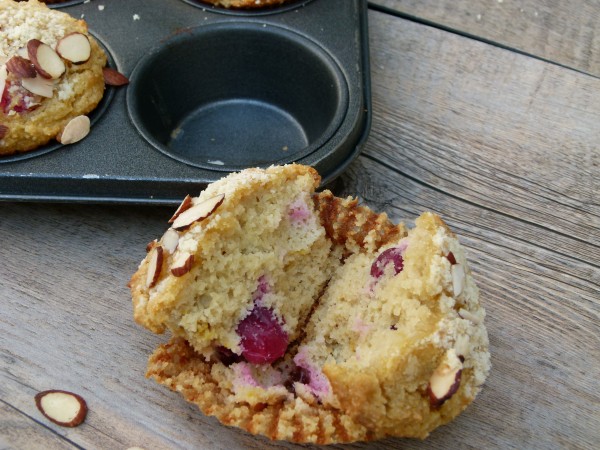
One of my new favorite combinations is using almond flour with a little coconut flour mixed in.  The result is just a little lighter and chewier than with all almond flour.  It’s still not exactly like wheat or spelt flour, but it’s close enough and my kids love muffins I make this way, including these cranberry-orange beauties.  These muffins are just sweet enough, in my opinion, with a hint of orange.  My family doesn’t love an overwhelming orange flavor, so the zest of 1 orange was perfect for us.  But my favorite part is biting into a tart cranberry.  I love contrasts in textures and flavors, so the tart and sweet always gets me!  I remember making cranberry-orange quick bread when I was little girl.  One of the reasons I’ll never forget it is because I completely screwed up the recipe the first time by mistaking baking powder for baking soda and things didn’t rise the way they were supposed to.  Live and learn.  Even though it was as dense as a brick, the flavors were still so good and we ate the whole thing anyway!

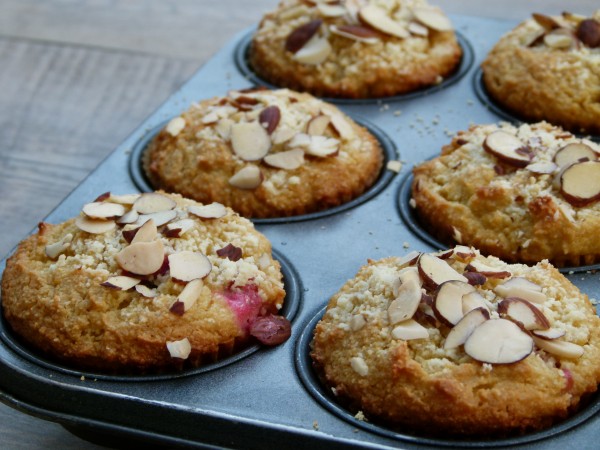
cranberry-orange almond flour muffins

You can still find fresh cranberries in the markets and they also freeze beautifully if you would like to stock up and make cranberry-based recipes in the future.  I think these are great for lunch boxes or for a chilly afternoon with a cup of tea, but I also would love them on Christmas morning, which is two and a half weeks away!!  Loved being with you today, but it’s time for me to make like an elf and get back to business.  Until next time!

cranberry-almond orange flour muffins | pamela salzman


cranberry-orange almond flour muffins | pamela salzman

5.0 from 4 reviews
Cranberry-Orange Almond Flour Muffins
Author: 
Serves: makes 9
 
Ingredients
  • 2 cups blanched almond flour (I use Honeyville)
  • ¼ cup coconut flour
  • ½ teaspoon baking soda
  • ½ teaspoon sea salt
  • grated zest of 1 orange
  • 6 large eggs (or 4 eggs and 2 “flax eggs”*)
  • ½ cup honey
  • 1 teaspoon pure vanilla extract
  • 1 teaspoon apple cider vinegar or white vinegar
  • a heaping cup of fresh cranberries
  • 1 Tablespoon unsalted butter or unrefined coconut oil, melted
  • 2 Tablespoons sliced almonds (optional)
Instructions
  1. Preheat oven to 350 degrees. Line a standard muffin tin with 9 unbleached parchment liners.
  2. Place the 2 cups of almond flour in a large mixing bowl. Remove 2 Tablespoons and transfer it to a small bowl and set aside. Add the coconut flour, baking soda, salt and orange zest to the large mixing bowl and whisk to combine.
  3. In a blender, add the eggs, honey, vanilla and vinegar. Blend until well combined.
  4. Pour the egg mixture into the large bowl and combine well. Fold in the cranberries.
  5. Scoop the batter into the prepared muffin tin, filling each cup to the top. I use an ice cream scooper to do this. Lightly brush the tops of each muffin with butter and sprinkle with the reserved almond flour and (optional) sliced almonds.
  6. Bake until lightly golden and when a toothpick inserted comes out clean, about 30 minutes.
Notes
*1 flax egg = 1 Tablespoon ground flax meal + 3 Tablespoons warm water. Stir together and allow to gel, about 15 minutes.

You don't have to do the almond flour and sliced almonds on top, but it makes a pretty finish!


Almond Butter-Millet Blondies Recipe (gluten-free)

almond butter-millet blondies | pamela salzman

We have survived the first week and a half of school and an early Jewish holiday!  I started this year right by having my girls order their own school supplies and Mr. Picky helped me out by writing out a list of lunch box-approved foods.  Not sure we’ve expanded the repertoire since last year, but at least I don’t have to think too hard.  I am also so glad I was inspired to bake and freeze a few treats before school started this year.  Those are coming in very handy for lunchbox and after-school snacks.  Plus it has been so hot here, I can’t imagine turning on my oven to bake banana bread right now!

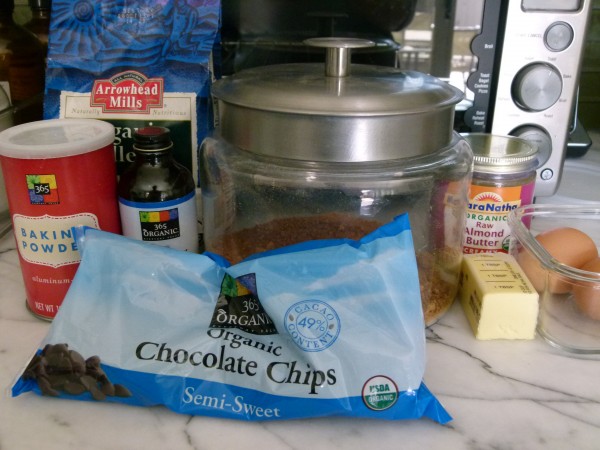
ingredients

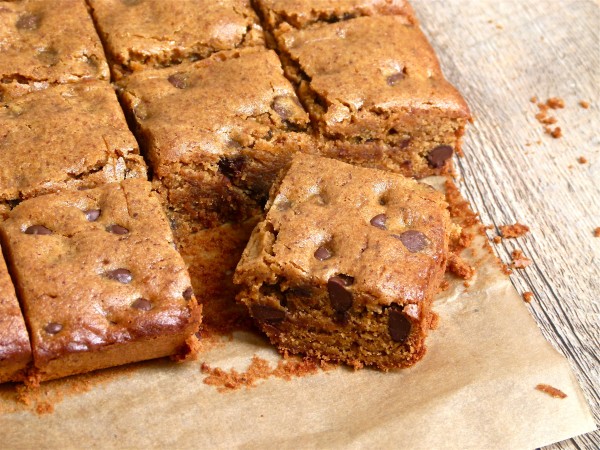
These Almond Butter-Millet Blondies are a new favorite around here.  Don’t automatically say “my kids would never eat those!”  Guess what?  Your kids were probably at my house in the last 6 months and did eat these.  Did I say, “Jimmy, would you like an almond butter-millet blondie?”  What am I, a rookie?  Of course, not.  I ask the kids, “would you like a chocolate chip blondie?!”  Only people that do not like chocolate ever say no.

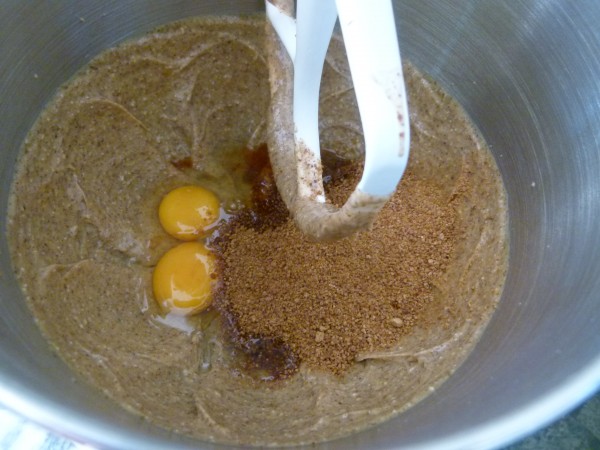
wet ingredients

Blondies are similar to a non-chocolate brownie.  They are less spongy and a little denser than cake.  I love them right out of the fridge so you can really sink your teeth into them.  Because blondies don’t have the same lift and airiness of a cake, I tried these with two gluten-free flours, millet and quinoa.  Even if you’re not gluten-intolerant, it’s a great idea to not overdo wheat and other gluten-containing grains.  Gluten is not only hard to digest, but acid-forming and pro-inflammatory.

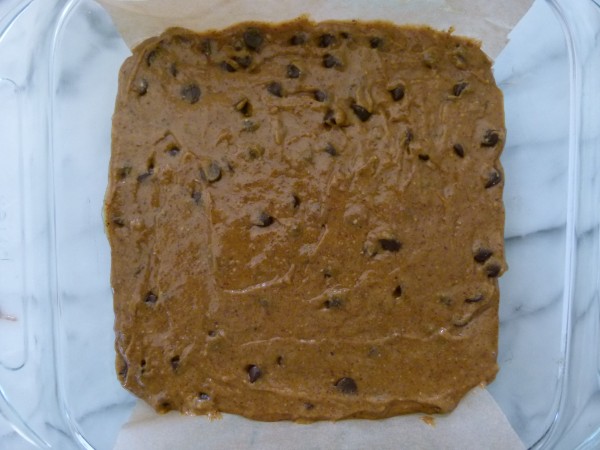
ready to be baked

The quinoa blondies were not a hit because they totally tasted like quinoa.  I love quinoa, but not as much in dessert form.  Millet is much blander and really has no flavor to fight with chocolate.  My kids and I had no idea the millet blondies weren’t made with wheat flour.   I also tried the recipe separately with peanut butter and almond butter and not only were they both delicious, the blondies kind of tasted the same, as in both tasted a bit like peanut butter.  Even though I give my kids peanut butter now and then, it’s actually not a fantastic choice.  The fats in peanut butter are very pro-inflammatory and if you don’t buy organic, you are also consuming a lot of pesticides and fungicides since peanuts are very heavily sprayed.  Even organic peanuts have a tendency to develop a mold called aflotoxin.  In moderation, fine, but almond butter is far and away a better, more healthful choice.  Did you know almonds are the only alkalizing nut?  And if you have a solid food processor, you can make your own almond butter!

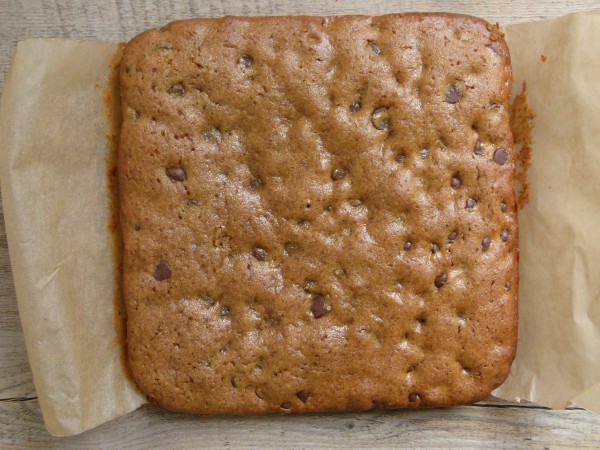
almond butter - millet blondies

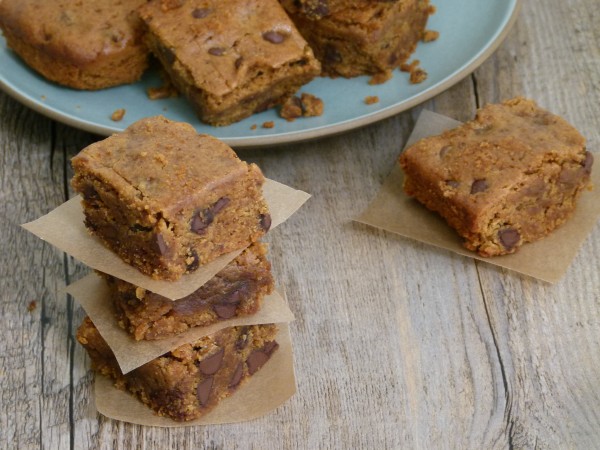
These blondies are awesome the next day, which is so nice if you have to bring a dessert to a potluck.  If you have leftovers more than a couple days, it’s best to keep them in the fridge.  And if you have no self control like me, you may want to just keep out what you need for the day and freeze the rest.  Happy baking!

almond butter-millet blondies | pamela salzman

Almond Butter-Millet Blondies
Author: 
Serves: makes 16 2 x 2-inch blondies
 
Ingredients
  • ¼ cup (4 Tablespoons) unsalted butter or organic Earth Balance, softened + additional for greasing pan
  • ¾ cup creamy or crunchy almond butter or other natural nut butter
  • 2 large eggs
  • ¾ cup coconut palm sugar (or brown sugar)
  • 1 teaspoon pure vanilla extract
  • ¾ cup millet flour*
  • 1 teaspoon aluminum-free baking powder
  • ¼ teaspoon sea salt
  • ¾ cup semisweet chocolate chips
Instructions
  1. Preheat oven to 350 degrees. Grease an 8-inch square baking pan with butter and line the bottom with parchment paper so that the bars are easy to take out.
  2. Beat butter and almond butter in a mixing bowl with an electric mixer until creamy. Beat in eggs, coconut sugar and vanilla until smooth.
  3. In a small bowl, whisk together the millet flour, baking powder and salt. Mix the flour mixture into the wet ingredients until just combined. Stir in chocolate chips. Spread the batter evenly into the prepared pan.
  4. Bake until a toothpick inserted into the center comes out with just a few moist crumbs on it, about 25 minutes. Let cool in the pan for at least 45 minutes before cutting into 16 squares. Leftovers can stored in the refrigerator for up to a week. These also freeze beautifully.
Notes
*Look for millet flour in the baking section or near gluten-free flours. Or, to make your own, grind whole grains of millet into a powder in a clean coffee grinder.

Blueberry-Banana Spelt Bread Recipe (gluten-free version too!)

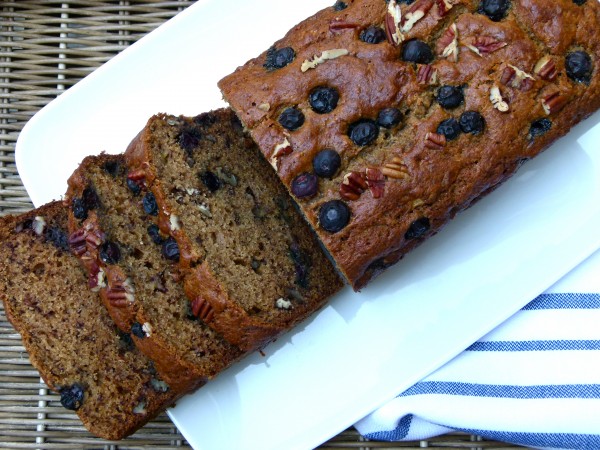
blueberry-banana bread | pamela salzman

This year I am trying to get an early jump on the beginning of school.  I actually say that every year and I still end up in those ridiculous lines at Staples on the first day of school.  My oldest daughter is going into 12th grade (I am clutching my heart right now), so you would think that I had this thing down.  So not the case.  Until now.  I just figured out really late in the game that I need to outsource, meaning I need to delegate some of these tasks to other people.  No, I don’t all of a sudden have a staff of helpers at my disposal.  But I do have capable children that have waaaaaay more time on their hands than I do and they can navigate the internet like nobody’s business.  Why didn’t I think of this 10 years ago?

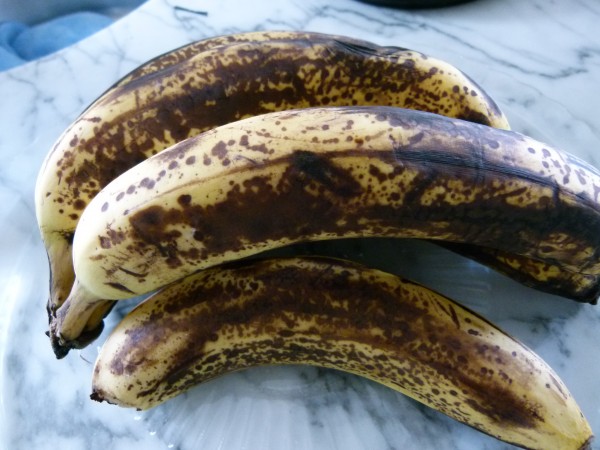
these are ripe bananas

The kids have just ordered their supplies, backpacks and lunch paraphernalia online and helped fill out a stack of forms (they all know their birthdays and where we live, right?).  This has been such a huge help that I am even going to ask them to start helping with their lunches.  Just don’t tell them yet.  I need to figure out a way to break this to them gently!

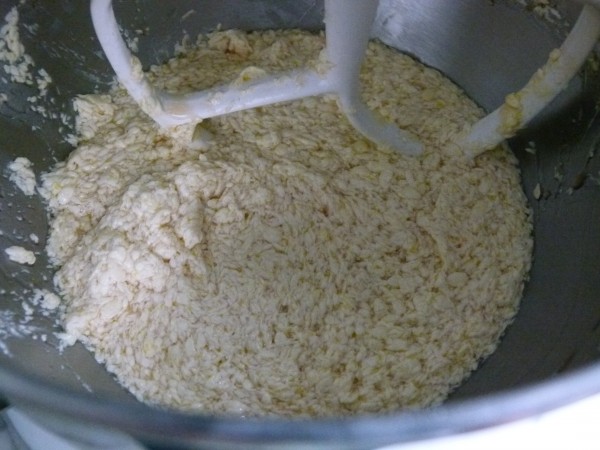
wet mix


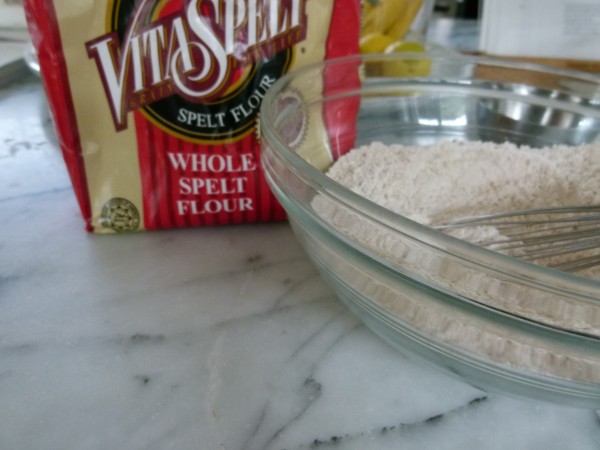
whole spelt flour

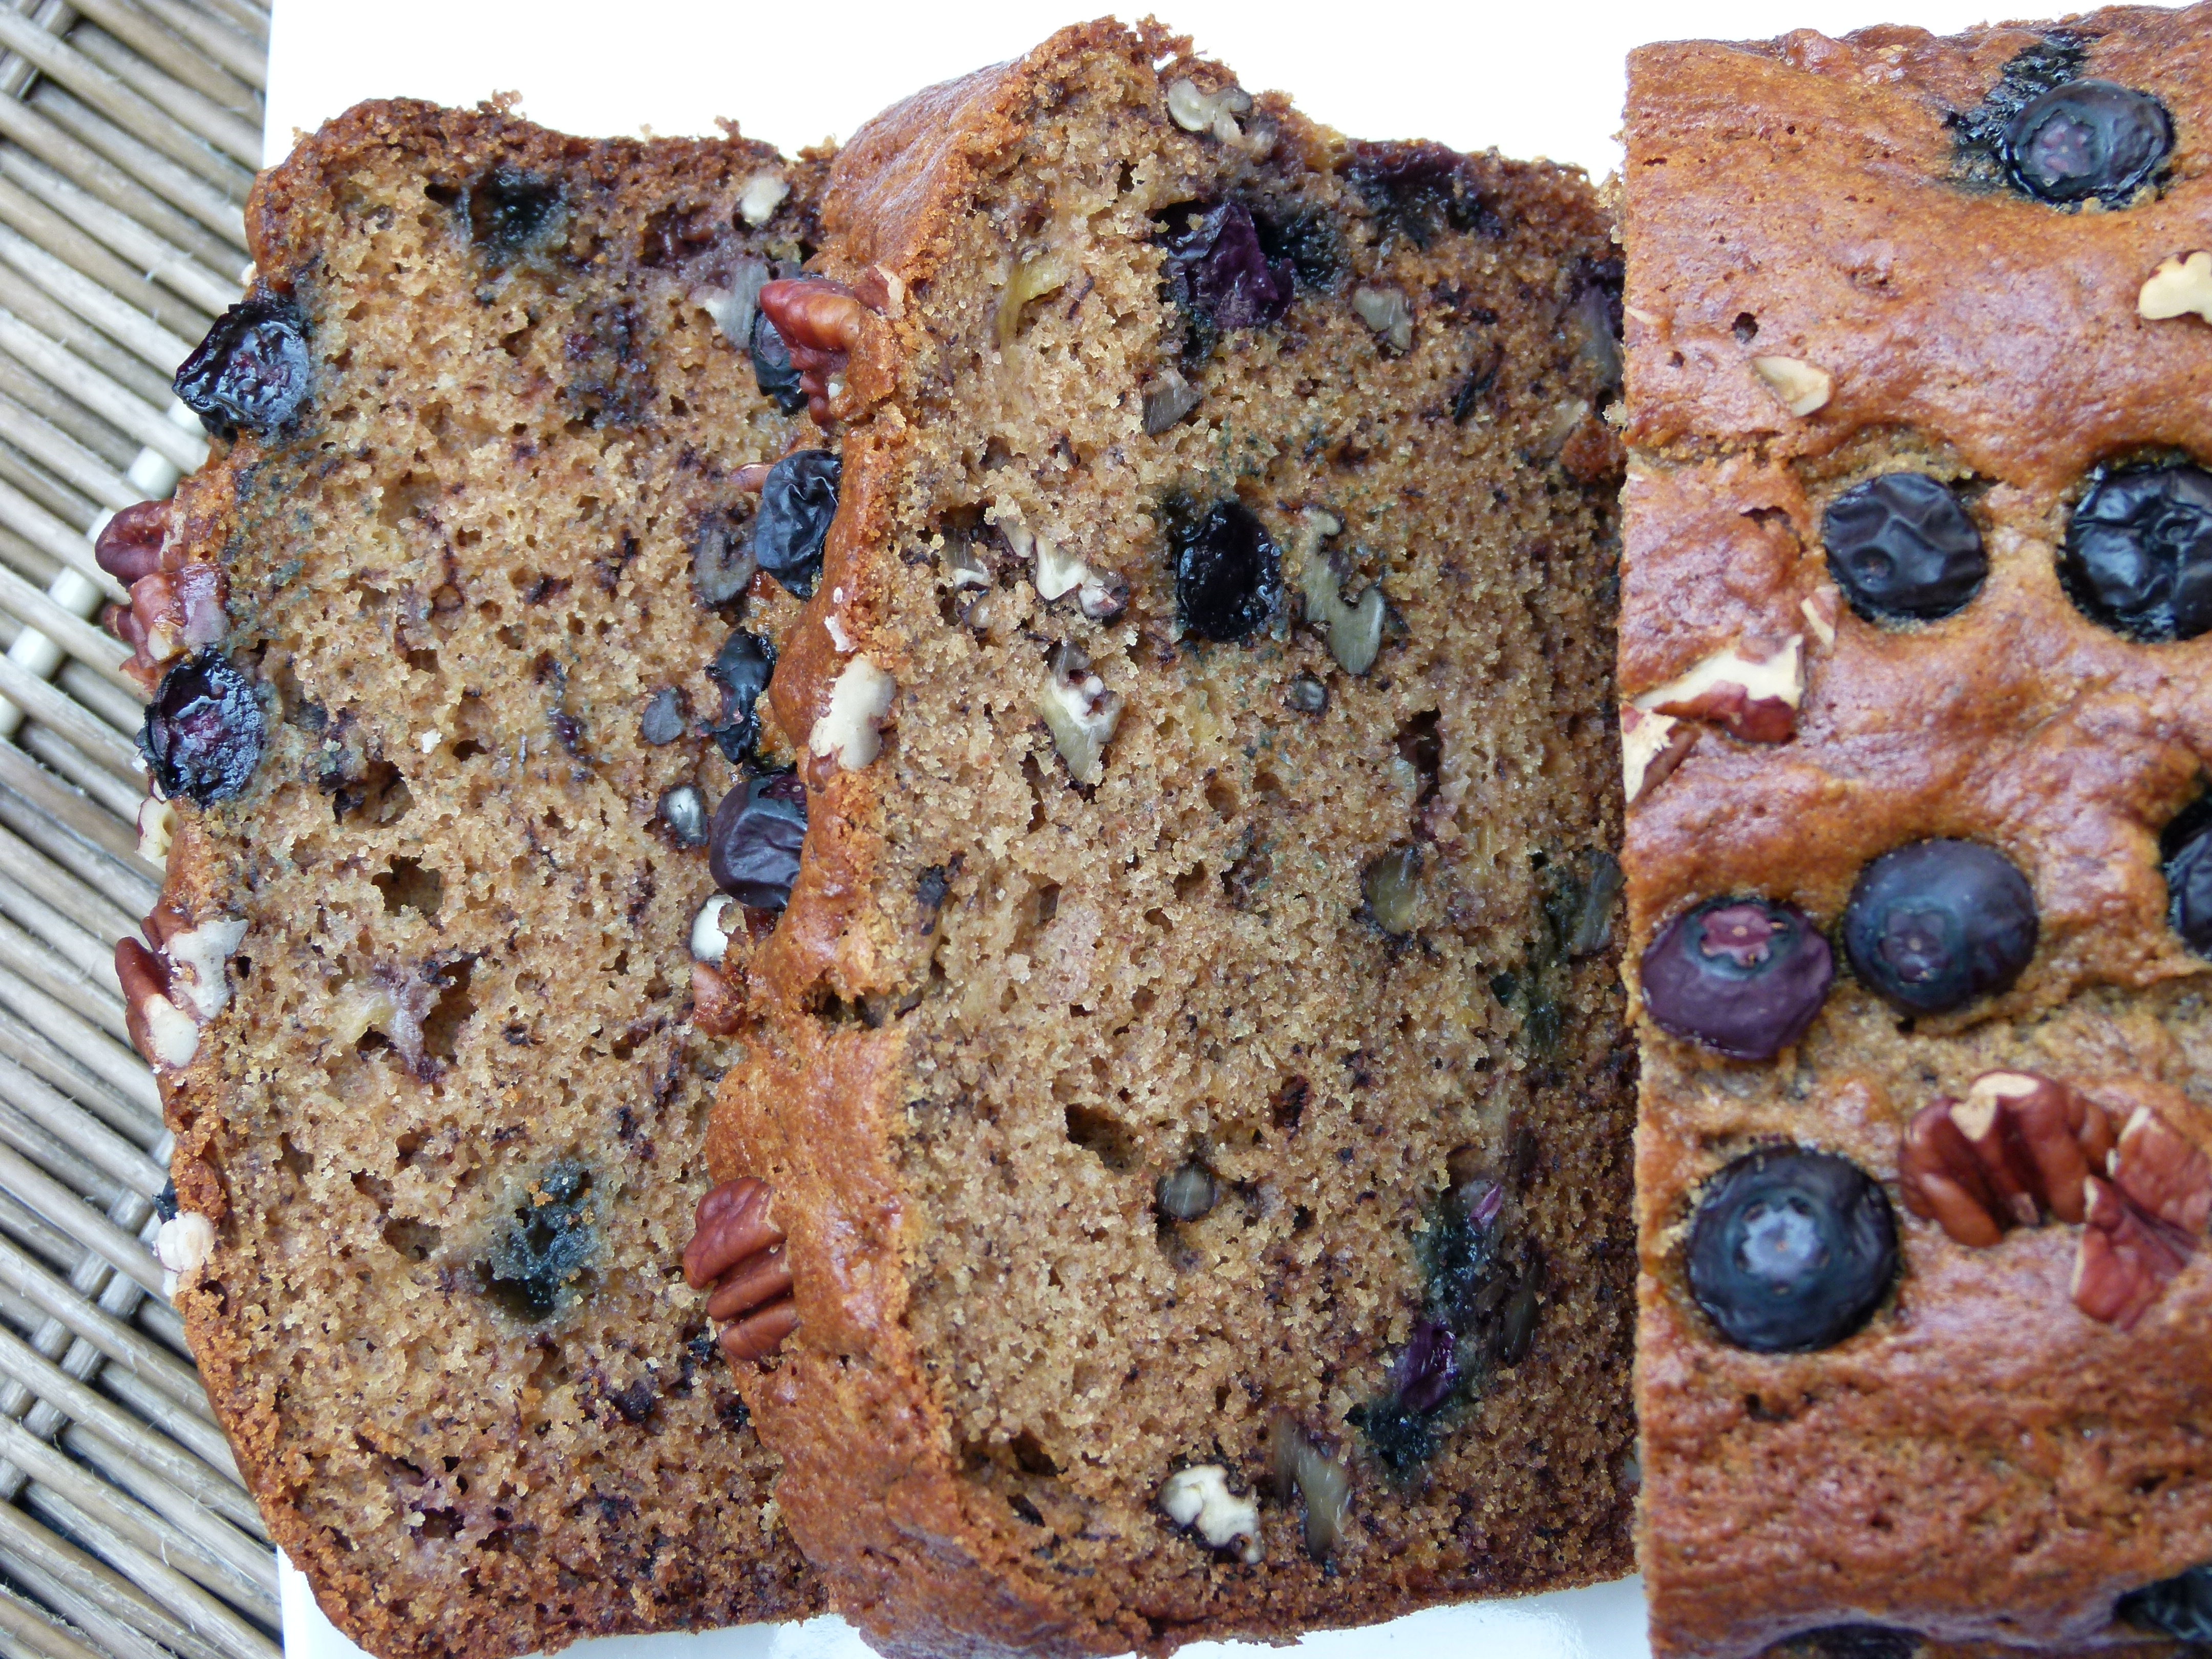
I also thought I would start stocking the freezer with some goodies so weekday meal preparation goes a little more smoothly.  I made a few delicious quick breads last week and halved each of them.  One half to enjoy now and the other half is frozen for a rainy day, i.e. a future school day breakfast or lunchbox snack.  I dug into my archives (have I been online long enough to have an archive?) and put a summer twist on my date-sweetened banana bread, one of my absolute favorite, wholesome quick breads.  I actually made three loaves — one with whole spelt flour and two with a blend of gluten-free flours with which I have been experimenting lately.  I am using more and more spelt flour instead of whole wheat, especially in sweet things.  Read about why I love spelt here!  And since I know so many of you wan to avoid gluten, I also made a couple of loaves with different gluten-free flours.  You can always use your favorite store-bought gluten-free flour blend (my favorite is King Arthur) plus some xanthan gum, but those can be a bit pricey.  Either way, it reminded me how versatile most recipes are and that I only need to change a few ingredients to make something more seasonal and/or new.  All the loaves turned out amazing and the kids gobbled them up!

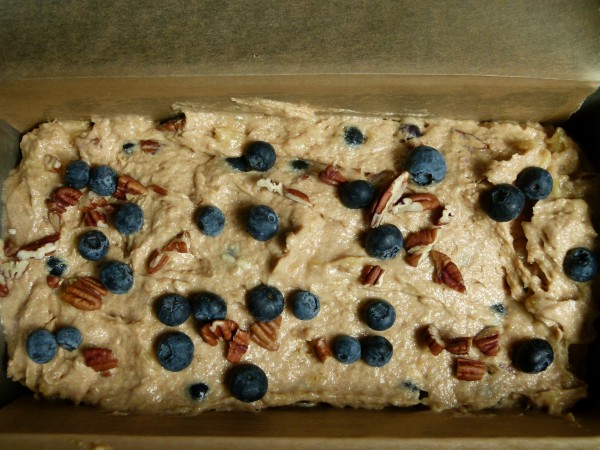
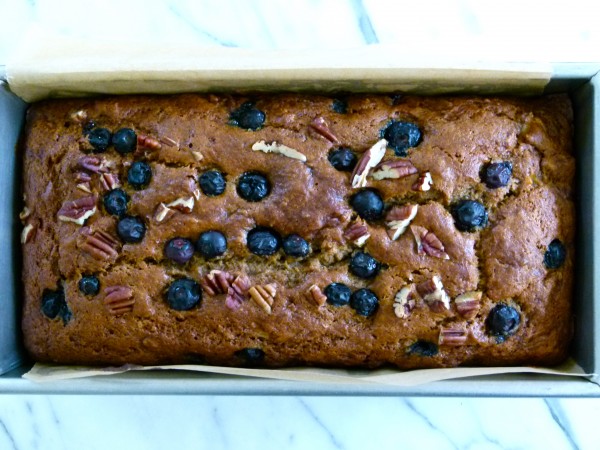
sprinkle some blueberries and nuts on top too

This weekend I’m also going to make and freeze some cookie dough, brown rice for rice bakes, fresh fruit for smoothies and chicken stock since the weather has started to get a little chilly here.  How are you getting organized for the beginning of the new school year?  Would love for you to share.   May the force be with all of us!

blueberry-banana spelt bread | pamela salzman

blueberry-banana spelt bread | pamela salzman

5.0 from 2 reviews
Blueberry-Banana Spelt Bread
Author: 
Serves: makes 1 9 x 5-inch loaf
 
Ingredients
  • 8 Tablespoons unsalted butter or unrefined coconut oil, at room temperature
  • ½ cup maple syrup (I prefer Grade A which has a more subtle flavor)
  • 2 large eggs, at room temperature
  • 1 Tablespoon pure vanilla extract
  • 2 cups whole spelt flour or whole wheat pastry flour
  • 1 teaspoon baking soda
  • ½ teaspoon aluminum-free baking powder
  • ½ teaspoon fine grain sea salt
  • 3 large ripe bananas, peeled and mashed (about 1 cup)*
  • 1 cup fresh blueberries
  • ½ cup chopped pecans or walnuts (optional)
Instructions
  1. Preheat the oven to 350 degrees. Grease the bottom and sides of a 9x5-inch loaf pan. Line with parchment paper, if desired.
  2. Beat the butter with the maple syrup in the bowl of a mixer fitted with a paddle attachment. Add the eggs and vanilla and combine well. The mixture will look curdled and that is normal.
  3. In a medium bowl mix together the flour, baking soda, baking powder and sea salt. Add to the wet mixture and combine until just blended. Fold in the mashed bananas and most of the blueberries and nuts. Save a few bleuberries and nuts for the top of the loaf.
  4. Pour into the prepared pan and sprinkle the reserved blueberries and nuts on top. Bake for 55-65 minutes, or until a toothpick inserted in the center comes out clean. Cool in the pan 10 minutes and then remove the bread and transfer onto a rack.
Notes
*Do not attempt this with bananas that are unripe.  They are neither sweet enough nor soft enough.


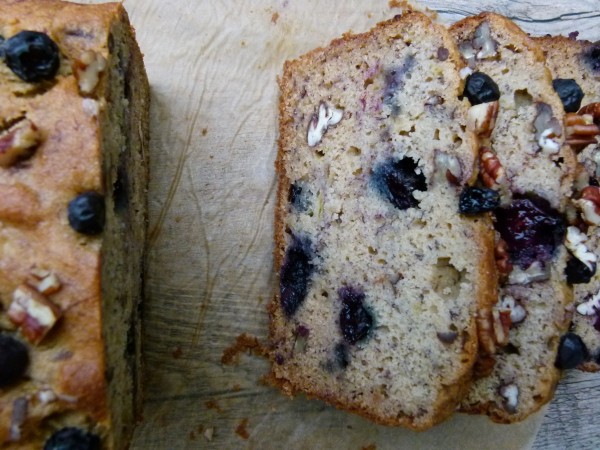
this one is gluten-free

Gluten-free dry mix to sub for the 2 cups of spelt flour:

½ cup sorghum flour

½ cup millet flour

½ cup sweet rice flour

¼ cup GF oat flour

3 Tablespoons potato starch

1 Tablespoon tapioca starch

1 teaspoon xanthan gum


Individual baked oatmeal cups

Individual Baked Oatmeal Cups by Pamela Salzman

I’m down one child for the next six weeks since I dropped Daughter #1 off far, far away in upstate NY for a summer college program.  There were some tears before I left.  I know how most of you think, but no, those tears were not mine.  I love my daughter to pieces, but hear me out.  If you were 16 years old and had the opportunity to study architecture at one the best universities in the US, on one of the most beautiful campuses, meeting interesting kids from all over the world, without your parents telling you what to wear or eat or when to go to bed, would you CRY?  Hell-oooooo?  I am so excited for her!  I think back to when I was 16, and I would have given my right eye to get the heck out of sleepy Stony Brook, Long Island, where I am from and do what she’s doing.  Cry tears of JOY maybe.  I guess Manhattan Beach, California is much more fun than Stony Brook when you’re 16.  But just so you’re not worried about her, a mere 24 hours later there were no more sad texts, only pictures of cute boys, usually South American.

dry ingredients

Ironically, I am with Mr. Picky visiting my family in Stony Brook, the place I lived for basically my entire life, but the place that I thought was the most boring town on the face of the planet.  It is about 60 miles away from New York City, arguably the most exciting place on the planet, although I didn’t get there too much, and especially not without my parents.  Stony Brook is absolutely darling, but there was not much going on here when I was a kid, except for a few small beaches which are also very quiet, a lovely (and quiet) duck pond, a carriage house museum (totally true) and a cute ice cream shop.  So of course when it was time for college, I needed excitement!  A big city!  So I left for Philadelphia where I attended college and then moved to Los Angeles after graduation.  Many, many years later, after much excitement, I cannot believe I am saying this, but I so look forward to my visits to Stony Brook.

mixed with the wet ingredients

Have I mentioned how quiet it is here?  I woke up in the middle of the night last night because I didn’t hear anything.  How weird is that?  Perfect silence.  Actually, it’s AMAZING.  I am thrilled beyond words to be in a quiet, sleepy town for the week where I don’t have to battle traffic or stressed out motorists or all the noise that goes with them.  And the fresh air is a huge bonus.

It's so hot here, the coconut oil is liquid at room temperature!
It’s so hot here, the coconut oil is liquid at room temperature!

Mr. Picky and I are having a ball with my parents and my sisters and their kids.  I am always appointed head of the kitchen when I’m here which is fine as long as someone else is head of dishwashing.  Honestly, I don’t mind cooking for a crowd every day.  It’s actually easier than cooking for two.  And my sisters’ kids which range in age from 3-7 are all fantastic eaters which makes my life very easy.

mixture in the muffin liners

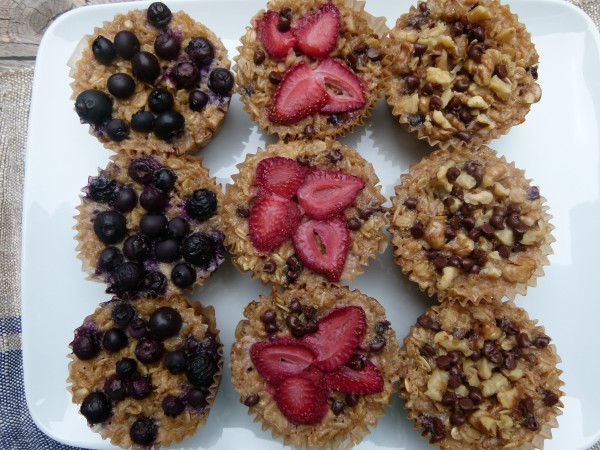
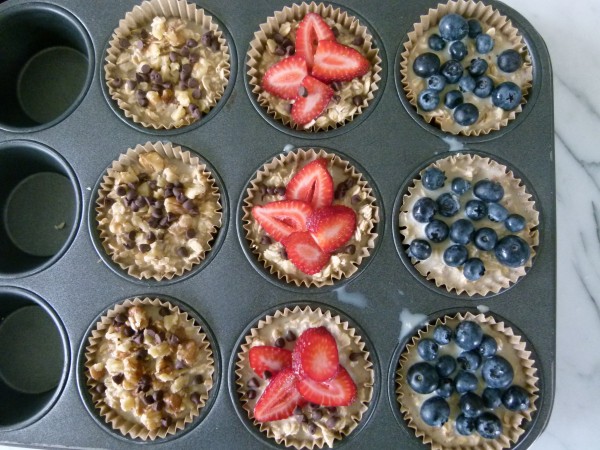
top with your favorite fruit, nuts or chocolate chips

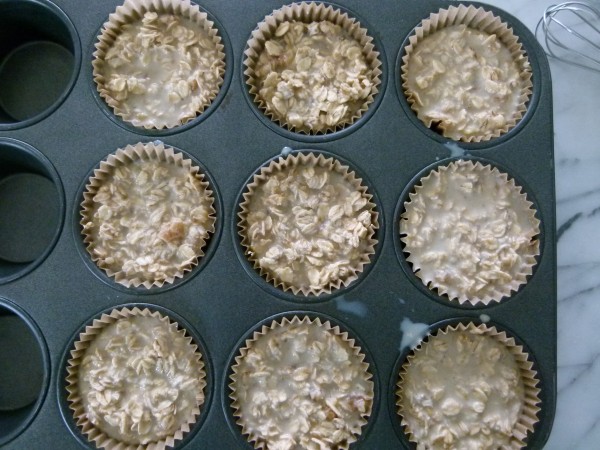
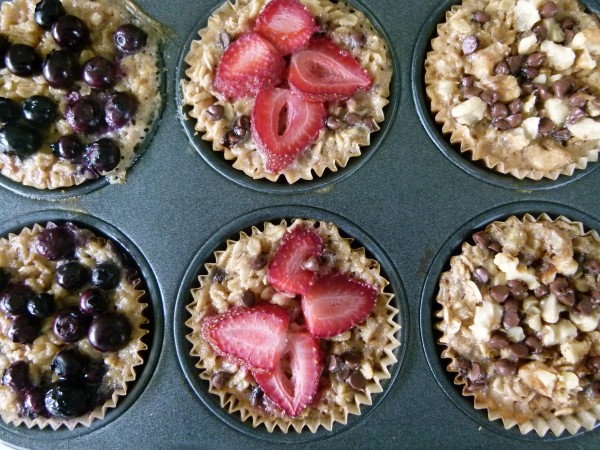
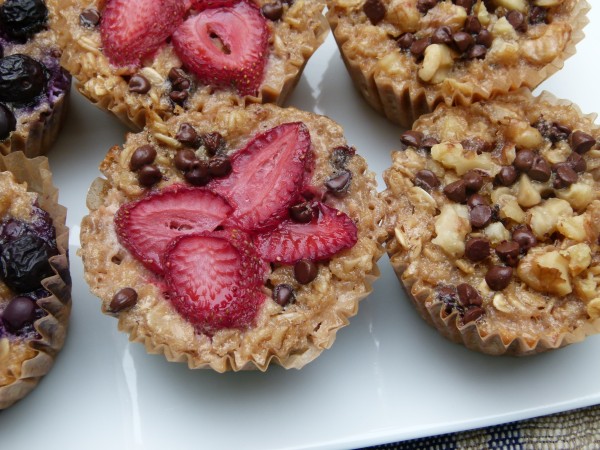
I heard that all the kids liked the baked berry oatmeal recipe I posted a few months ago, so I thought I would do something a little different and bake the mixture in a muffin tin to make individual portions.  Also, my sister’s son leaves early for lacrosse camp every day, so it’s nice for him to be able to take a couple for the road.  I made the oat mixture with a few nuts, but then used different “toppings” for each cup just to mix it up a bit.  I used blueberries, strawberries &  mini-chocolate chips, and mini-chocolate chips & walnuts.  The kids all gravitated towards the ones with chocolate, naturally and I’ll admit, a few of them were wondering why there were no chocolate chips throughout the cups and only on top.  Next time I’ll throw a few into the mixture as well.  The oatmeal cups were popular enough that they were finished off in the afternoon after the kids worked up an appetite after a few hours in the pool.

ready to be baked!

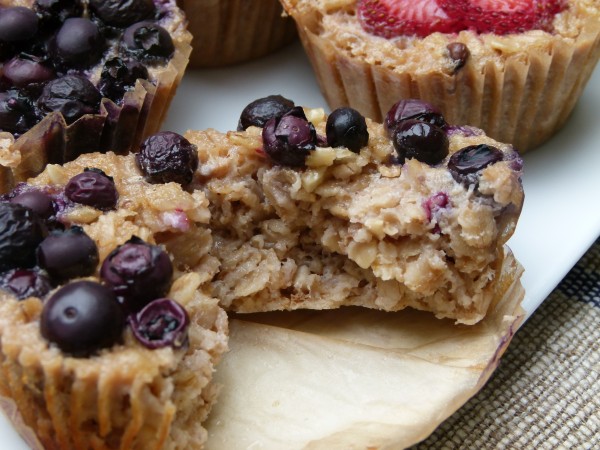
Keep in mind, these oatmeal cups are the equivalent to having a portable mini-bowl of oatmeal.  They don’t have the light, tender texture of a muffin, so don’t expect that.  I ate two blueberry ones and felt very satisfied until lunchtime.  Remember that oats have a lot of fiber, both soluble and insoluble, making you feel full for a good long time.  But I do find that I need to have some good fat with my oats, so the addition of walnuts was perfect for me and also added some nice crunch.  No doubt you and I will have some fun with this recipe and find a way to add apples or pumpkin in the fall or bananas, but let’s not get ahead of ourselves.  My summer just got started and I plan to make it go as slowly as possible.

individual baked oatmeal cups | pamela salzman

individual baked oatmeal cups | pamela salzman

update 7.3.13:  I just made these again, but with my own muffin pan which only yielded 9 cups instead of the 12 I originally wrote.  I think my mom’s pan is smaller than mine, which is standard, so I updated the recipe to 9 oatmeal cups which I think is more accurate.


View this post on Instagram


A post shared by Pamela Salzman (@pamelasalzman)


5.0 from 3 reviews
Individual Baked Oatmeal Cups
Author: 
 
Ingredients
  • 1 teaspoon aluminum-free baking powder
  • ½ teaspoon fine grain sea salt
  • 2 cups old-fashioned rolled oats (look for labeled gluten-free oats to make this a gluten-free recipe) - Do NOT use steel cut oats
  • ¼ cup walnuts, almonds or pecans, chopped + extra for topping (optional)
  • ⅓ cup 100% pure maple syrup (I like ¼ cup is just fine, but my family preferred ⅓ cup)
  • 1 ½ cups milk of choice (cow, almond, hemp, etc.)
  • 1 large egg or ½ cup mashed banana or ½ cup unsweetened applesauce
  • 1 ½ Tablespoons melted unsalted butter or unrefined coconut oil
  • 2 teaspoons pure vanilla extract
  • toppings: fresh blueberries, sliced fresh strawberries, chopped nuts, mini-chocolate chips
Instructions
  1. Preheat the oven to 375 degrees. Line a standard muffin pan with 9 unbleached parchment liners.
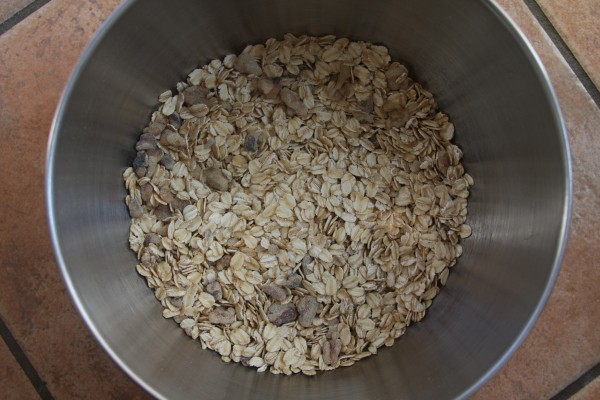
  2. Combine baking powder, salt, oats and nuts in a large bowl.
  3. In a separate medium bowl whisk together maple syrup, milk, egg, melted butter and vanilla (or combine them in a blender.)
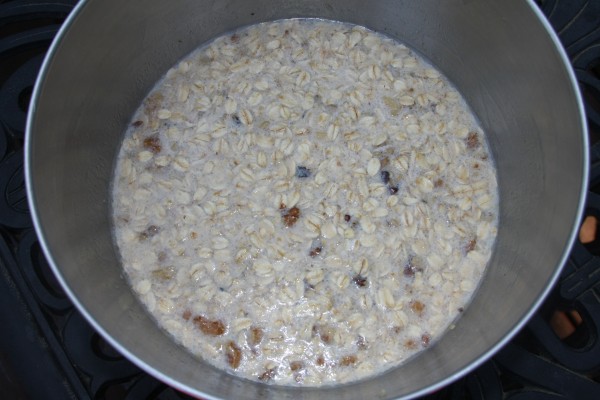
  4. Pour the wet mixture into the dry mixture and stir to combine. You can certainly add chocolate chips or fruit to this mixture if you want all the cups to be the same.
  5. Ladle the oat mixture into the prepared muffin tin, filling each cup about ¾ full. Sprinkle any additional nuts, berries or chocolate chips over the tops of each.
  6. Bake for 20-25 minutes or until set and wet ingredients are fully absorbed. Eat warm or at room temperature. Leftovers can be stored in the refrigerator and eaten straight away or warmed in a toaster oven at 350 until heated through.
 

(A more healthful) chocolate chip cookie recipe

(a more healthful) chocolate chip cookie by Pamela Salzman

One of my students asked me the other day if I had a good chocolate chip cookie recipe and I instinctively said, “Sure, just check my website.”  To which she replied, “I did.  But all you have on there is your Oatmeal Chocolate Chip Cookie recipe.”  And then it hit me.  I have neither taught in a class nor posted my favorite chocolate chip cookie recipe.  Gasp!  Coincidentally, Mr. Picky had been asking if we could make homemade ice cream sandwiches, so I got to work lickety split!
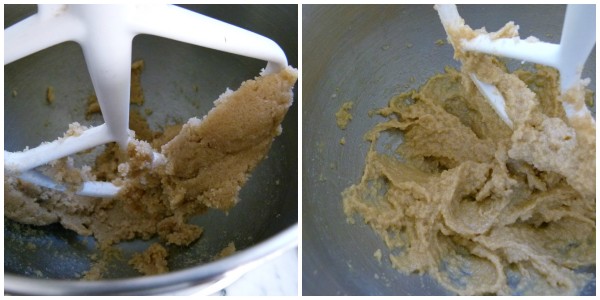
beat butter and sugars until smooth, then add eggs, baking soda and vanilla

In my defense, there are good reasons I haven’t posted my chocolate chip cookie recipe.  First of all, I do use refined white sugar because it just makes the best cookie.  But it isn’t exactly clean and healthful and I want this site to be your destination for high quality recipes.  However, even with the white and brown sugars, I use whole grain flours and everything is organic so these will be waaaaaaay better for you than bakery cookies or packaged (really now?) ones.  It’s all about balance and moderation!

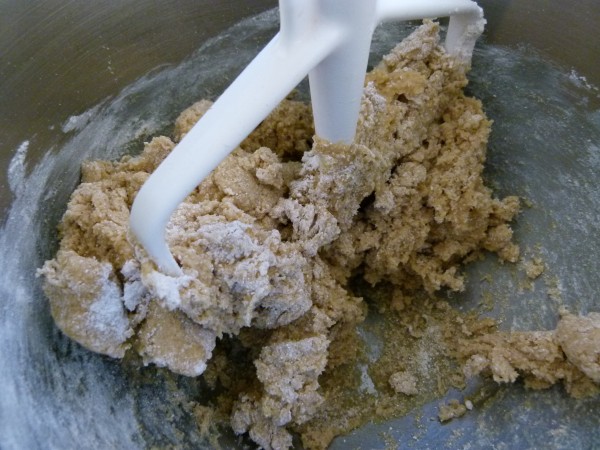
next add the flours, baking powder and salt

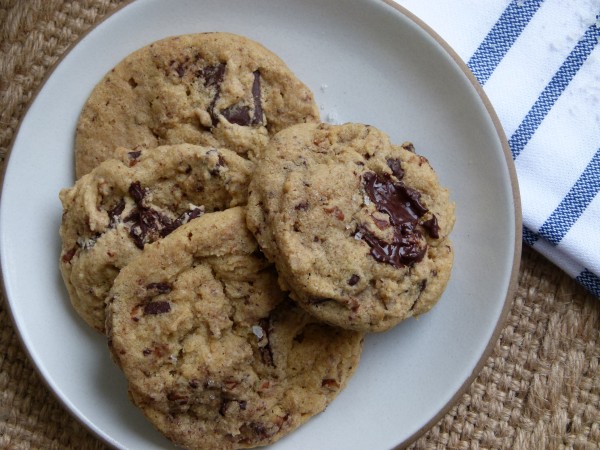
The other issue is that I keep changing my recipe when I learn something new to make them even better than the last time.  And this has happened often.  Many of you are so in the know about food trends that you might think my ah-ha chocolate chip moments are sooooo 2005, but I never said I was an early adopter.  Let me first make it clear what kind of chocolate chip cookie I love, because that’s what you’re getting here — my favorite.  If you love the thin and crispy kind, hmmmm, today’s not your day.  Cakey?  Yeah, not me.  Milk chocolate?  Don’t waste my time!  Friends, I like a cookie with some heft and substance, something that you can sink your teeth into.  But I also don’t want a greasy cookie which makes me feel like I’m sucking on butter.  Slightly crispy on the outside and chewy on the inside with chunks of semisweet or dark chocolate is the way I roll.  Sometimes I’m feeling fancy and I’ll add a pinch of flaky sea salt on on the tops and that is just heaven.

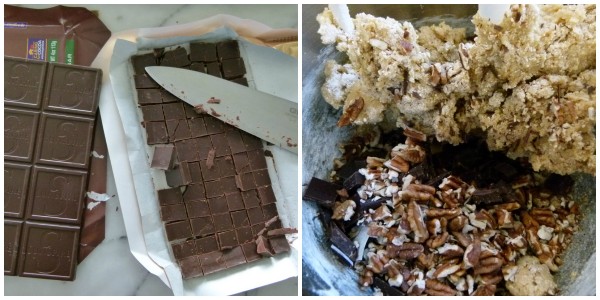
chop chocolate from a bar for nice chunky pieces

Something I learned to achieve my perfect cookie is to use cold butter instead of room temperature, which is a trick I learned from Mrs. Fields (not that I met her, but that’s how she makes her cookies.)  The combination of cold butter and  a low oven temperature help to keep the cookie from spreading out too thin and too fast.  I also started adding a little oat flour after I saw this Neiman Marcus cookie recipe which I found out later was not the official recipe but the oat flour stayed in mine.  The oat flour makes the cookie a little nuttier and dense.  Ina Garten taught me (via television, of course) that a chocolate bar cut into pieces is much more satisfying than chocolate chips, although I do use those often.  And every fancy restaurant in the last several years has added a pinch of flaky sea salt to the tops of their cookies — a smart and delicious move.

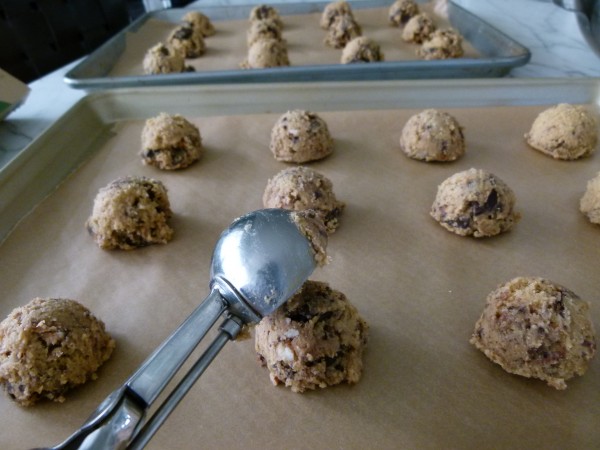
using an ice cream scooper gives you uniform, round cookies

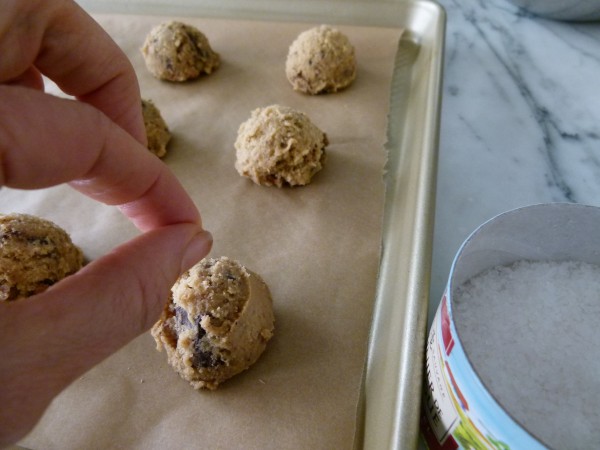
add a pinch of flaky sea salt for a grown-up twist

I grated some of the chocolate into the batter

It may have taken me a while to bring it to you, but I’m sure with certain special occasions coming up, like Father’s Day or end-of-the-year parties, it’s never too late to try a great chocolate chip cookie recipe.  Of course, if you have the latest and greatest twist on chocolate chip cookies, I’m always open to improvement!

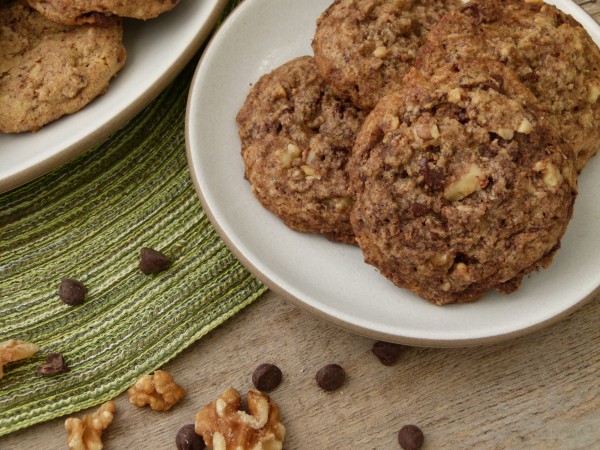
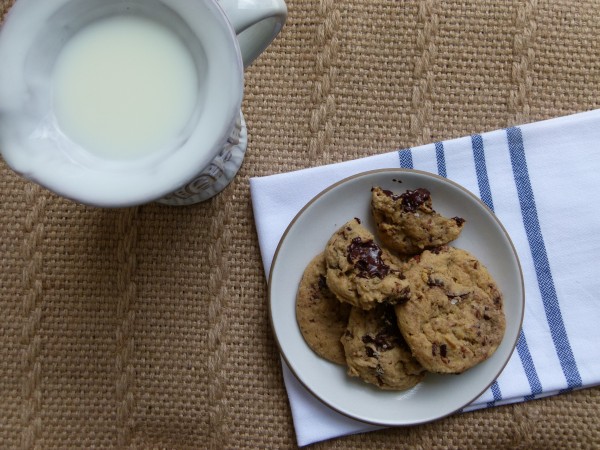
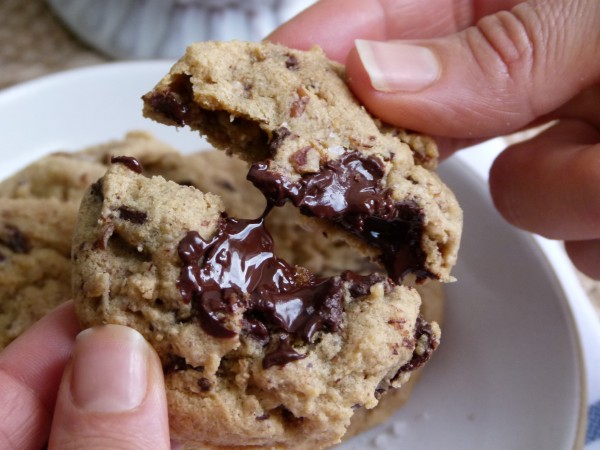
freshly baked | Pamela Salzman

(a more healthful) chocolate chip cookie by Pamela Salzman


View this post on Instagram


A post shared by Pamela Salzman (@pamelasalzman)


Chocolate Chip Cookies
Author: 
Serves: makes 48 2¾-inch cookies (cut the recipe in half to make 24 or refrigerate the dough for up to a week)
 
Ingredients
  • 1 cup (2 sticks) cold unsalted butter or organic Earth Balance, cut into ½-inch pieces
  • ¾ cup cane sugar
  • 1 cup brown sugar or Muscovado sugar
  • 1 teaspoon baking soda
  • 2 large eggs
  • 1 ½ teaspoon pure vanilla extract
  • 2 cups whole wheat pastry flour or white whole wheat flour
  • 1 cup oat flour (you can take a cup of rolled oats and process them in the food processor to make your own oat flour)
  • 1 teaspoon aluminum-free baking powder
  • 1 teaspoon fine sea salt
  • 18 ounces semi-sweet or dark chocolate bars, chopped coarsely or use chocolate chips
  • 1 ½ cups chopped walnuts or pecans (optional)
  • flaky sea salt (optional)
Instructions
  1. Preheat oven to 300 degrees. Line 2 baking sheets with unbleached parchment paper or silicone mats.
  2. Place the butter and sugars in the bowl of stand mixer and blend on medium speed until the mixture is smooth.
  3. Add the baking soda, eggs and vanilla to the mixing bowl and mix until combined.
  4. In a medium bowl whisk together the flours, baking powder and sea salt. Add to the butter mixture and blend on low speed until just combined.
  5. Stir in the chocolate and nuts.
  6. Scoop the dough with a 1 ¾ -inch ice cream scooper onto the prepared baking sheets or use a tablespoon. Space them evenly apart. I was able to get 12 on each sheet.
  7. Bake 18-20 minutes or until just set. The cookies will be slightly soft in the center. If you like them crispier, bake them for up to 23 minutes. Allow to cool on the baking sheets 2 minutes before transferring them to a cooling rack. Repeat with the remaining dough.
Notes
Raw cookie dough can be frozen, but it’s a great idea to scoop the dough into balls first and freeze those so you can just pull out as many as you want to bake instead of having to defrost the whole batch of dough.  I have even baked cookies in the toaster oven!