Cassoulet-Style Chicken and Sausage Recipe

cassoulet-style chicken and white beans | pamela salzman

Did you notice a French theme happening on the blog?  As soon as I remembered the French onion soup recipe I taught a few years ago, it also occurred to me that I had never posted this chicken and white beans recipe which I developed for a teaching trip in Southwest France many years ago.  Cassoulet is an incredible, hearty French dish (actually it refers to the recipe as well as the vessel it’s cooked in) with duck confit and sausages and chicken and white beans all stewy and luscious together.  It also requires tons of time, like at least a full day +.  And I’m not saying it’s not worth it, but it’s not realistic for me or most of the universe to spend that much time on dinner.

cassoulet-style chicken and white beans | pamela salzman

So I came up with a version that can be made quickety quick on a weeknight and although it doesn’t have the richness and depth of a traditional cassoulet (which coincidentally was posted in the New York Times this week by Sam Sifton — check it out here), this one is also lighter and more in line with how I like to eat, i.e. not feeling super weighed down like I need a 3-hour nap after I eating, which is what I did after I ate real cassoulet in France.

Continue reading

French Onion Soup Recipe

healthy french onion soup | pamela salzman

If it wasn’t winter before this week, it sure is now. Not in Southern California, of course.  But for the rest of the country.  Although people in LA dress like it’s zero degrees when it’s 55.  It’s totally funny.  I cracked up when I saw this post on Pinterest last week:

50 degrees in California, 50 degrees in Michigan

So I figured that everyone would be in the mood for soup this week, no matter where you live!  I had completely forgotten about this delicious French onion soup I taught two years ago, until my husband asked me to make it.  My entire family, Mr. Picky included, are big soup fans and I love making it.  In general, soups are easy, flexible, reheat well and a good way to consume homemade bone broth, which I am convinced is so healing, immune-boosting and good for digestion.

lots of sliced onions


French onion soup is a classic, and I am not necessarily reinventing the wheel here, just sharing the way I like to make it.  And isn’t that the beauty of cooking?  Figuring out how to tweak recipes to your liking?  I prefer an onion soup that is loaded with onions and with a rich and flavorful broth.  I’ve tasted a few very lackluster onion soups and that is not this one!

healthy French onion soup | pamela salzman

healthy French onion soup | pamela salzman

The key to the broth is good stock and the proper alcohol.  Yes, you can serve soup with alcohol to children since the alcohol is burned off in the simmering process.  My kids have had plenty of alcohol in cooked foods and were not affected in the slightest.  Brandy or vermouth plus some white wine are my favorites.  I do not love this soup with red wine, personally.  Another tip I can offer is using the slicing disc in your food processor to slice all the onions.  It will take you all of 1 minute with no tears to do it this way.  If you have no food processor, get out your best knife and get close (not too close) to a big open flame, like a gas burner on your stove, and slice away.  The flame from the stove will burn the gases from the onions and you won’t cry.  Promise!

healthy French onion soup | pamela salzman

As for the cheesy toast, I personally don’t add the traditional Gruyere toast on top to mine because I can’t eat too much dairy, but my family loves that part.  My son adds toast only, I add chopped parsley, and my husband and daughters love toast + cheese.   I think it makes more sense to toast the bread and melt the cheese separately in the oven than broil it in the soup bowls.  The soup bowls get so incredibly hot and it’s not safe at all to serve such hot bowls to kids (or anyone.)  It’s much simpler to add the melted cheese toast to the soup bowl.  But you can broil it in the bowls, too.  I would serve this with a meal of roasted fish and a green vegetable or just a large, hearty salad.  This soup is all about comfort, warmth and total deliciousness.  One bite is like a cozy blanket wrapping itself around you.  What more could you need on a day like today?

healthy French onion soup | pamela salzman

5.0 from 4 reviews
French Onion Soup
Author: 
Serves: 6
 
Ingredients
  • 4 Tablespoons unsalted butter
  • 4 pounds yellow onions (about 6), halved and cut into ¼-inch slices
  • 2 sprigs fresh thyme
  • 2 bay leaves
  • 1 ½ teaspoons sea salt (double this if your stock is unsalted)
  • freshly ground black pepper to taste
  • 1 cup dry white wine or dry vermouth
  • ¼ cup Cognac or brandy
  • 4 cups rich chicken stock, preferably homemade
  • 4 cups high quality beef broth (or use mushroom stock or chicken stock)
  • 6 ½-inch slices of baguette or French bread torn by hand
  • 6 ounces Gruyere, shredded (or buy it pre-sliced)
  • a pinch of Parmesan cheese (optional)
Instructions
  1. In a large, heavy-bottomed soup pot, melt butter over medium heat and add onions. COVER and cook 10 minutes.
  2. UNCOVER, add thyme, bay leaves, salt, black pepper and cook onions until they are very soft and deep golden brown, stirring occasionally, about 45 minutes. I usually start at medium heat and then when I see the onions start to color, I drop to medium-low and then to low heat. This is the key step in this recipe. If the onions don’t get golden, the soup won’t have as much flavor. But you also don’t want to burn the onions because then the soup will taste bitter.
  3. Stir in the wine and Cognac, scraping the bottom of the pot.
  4. Stir in the stock and bring to a boil. Lower heat to a simmer, and cook uncovered, stirring occasionally, about 30 minutes longer. Remove the bay leaves and thyme sprigs. Taste for seasoning. Keep in mind that if you are adding cheese, you will be adding extra saltiness.
  5. In the meantime, preheat the oven to 400 degrees, arrange the baguette slices or bread pieces on a baking sheet in one layer and bake until lightly golden, about 10 minutes.
  6. Preheat the broiler to high and position the oven rack 6 inches from the heat. Either top each piece of toast with a handful of grated gruyere and broil until melted. Divide the soup between 6 bowls and top each soup bowl with a piece of cheese toast. OR place 6 oven-proof soup bowls or crocks on a rimmed baking sheet and fill each with soup. Top with the toasted bread and then the cheese. Broil a few minutes until cheese has melted.
Notes
This soup tastes even better the next day! If you want to double this, caramelize the onions in 2 pots. Otherwise it's too many onions at one time.


Salted Flourless Chocolate Chunk Cookies Recipe

salted flourless chocolate chunk cookies | pamela salzman

I swore I wouldn’t post this recipe, but I gave in to persistent begging.  I didn’t know the world needed another chocolate chip cookie recipe!  But apparently many people could not live without this one.  I will admit, these are quite, quite delicious and you can’t always say that about a grain-free, flourless cookie.

salted flourless chocolate chunk cookies | pamela salzman

The reason I was reluctant to post this is because it is a very finicky recipe.  I probably made these cookies 20-24 times and I had a couple of fails.  Not inedible fails, but they didn’t look like the pictures you see here.  Again, these are totally delicious in every way.  Big chunks of melty dark chocolate and crispy flakes of sea salt are always a win in my book.  The fact that these are also grain-free/flourless is just an added bonus, especially for all my GF and Paleo students, who seem to be growing in numbers.  Although that might just be the post-holiday detox trend.  I digress.


salted flourless chocolate chunk cookies | pamela salzman

The two ingredients that affect the outcome of these cookies are the almond butter and the sugar.  You cannot use a runny almond butter or one that is very oily.  Once during a class, I had a new jar of room temperature Maranatha almond butter which I may not have stirred properly to incorporate the oil on top.  I had oil dripping down my arms while I was rolling out the dough.  I knew the cookies were going to be a disaster and they kind of were — very flat, oily and crumbly at the edges.  Thankfully, this batter is a snap to make, so I just made another batch quickly with almond butter I had in the fridge.  The next round was perfect.

These cookies are slightly softer than traditional chocolate chip cookies, unless you use brown sugar and then they do get a little crispy around the edges.  The flavor is spot-on with just the right amount of sweetness.  After 2 days, I store them in the fridge.  They also freeze well.

salted flourless chocolate chunk cookies | pamela salzman

salted flourless chocolate chunk cookies | pamela salzman

Instead of giving you a blow-by-blow of all cookie escapades, let me summarize here:

  • use cold, refrigerated almond butter;
  • thicker almond butter is better than thinner;
  • if your nut butter is thinner, you can add 1 1/2 Tablespoons coconut flour to the batter;
  • you can make these with sunflower butter, but there will be a reaction between the sunflower butter and the baking soda which will tint the cookies green;
  • mix by hand (with a wooden spoon) not a mixer;
  • brown sugar, although a refined and not Pamela-approved sweetener, gave the best results — slightly crispy and chewy;
  • muscovado sugar was the second best and coconut sugar came in third — see the images in the post to compare;
  • do not use maple syrup, honey or another liquid sweetener;
  • you must allow the cookies to cool completely on the pan, not a cooling rack;
  • I always make 12 cookies, but you can make fewer and just make them bigger.

Ok, that’s all she wrote.  Hit me with your questions and let me know if you make them!

brown sugar used here
brown sugar (and peppermint bark instead of chocolate chunks)


muscovado sugar
muscovado sugar


coconut sugar
coconut sugar

4.8 from 5 reviews
Salted Flourless Chocolate Chunk Cookies
Author: 
Serves: 12 cookies
 
Ingredients
  • 1 cup unsweetened, unsalted almond butter (raw or roasted, make sure it is well-blended)*
  • ½ cup coconut sugar, brown sugar or muscovado sugar
  • ¾ teaspoon baking soda
  • 1 large egg, at room temperature
  • ½ teaspoon pure vanilla extract
  • 1 teaspoon Maldon salt, divided
  • ¾ cup chopped dark chocolate (about 4 ounces) or semi-sweet chocolate chips
  • optional add-ins: 2 Tablespoons unsweetened cocoa powder to make chocolate cookies or ½ cup chopped walnuts or pecans
Instructions
  1. Preheat the oven to 350 degrees and line two baking sheets with unbleached parchment paper.
  2. In a large mixing bowl, mix almond butter and sugar until well combined.
  3. Stir in baking soda, egg, vanilla and ½ teaspoon flaky salt until well combined.
  4. Stir in chocolate.
  5. Scoop a heaping tablespoon of dough onto the prepared baking sheet. Sprinkle the cookies with remaining ½ teaspoon salt.
  6. Bake for 8-10 minutes or until golden. Allow to cool completely on baking sheet before transferring to a rack. To keep longer than one or two days, store in the refrigerator.
Notes
*If your almond butter is thin and runny or very oily, add 1 ½ Tablespoons of coconut flour to the batter.
Please read the suggestions outlined in the post.


Shrimp and mixed vegetables with coconut-basil sauce recipe

shrimp and vegetable stir fry with coconut-basil sauce | pamela salzman

I was talking to some friends the other day about our college-aged daughters, some of whom already live in off-campus housing and are no longer on meal plans.  That is, they have divorced themselves from dining hall food and have embraced the world of kitchenettes and home cooking.  I remember my first semester off meal plan.  I had visions of cooking up all sorts of wondrous things like lasagne or chicken Marbella or homemade bread and flourless chocolate cakes, my specialities in 1989.  But alas, I actually had to study night and day so that one day I might be employable.  No time to fuss in the kitchen since there was no way I would be making a career in the food industry.  Good gracious, no.  The irony.

shrimp and vegetable stir fry with coconut-basil sauce | pamela salzman

Alas, when I do think back to that era, anytime I did cook up something, it had to be fast, reasonably nutritious and budget-friendly.  I made A LOT of stir-fries.  I made so many stir-fries, I owned a wok.  I was 20.  So as I was talking to these other mamas about our girls and my possibly do a little cooking class for them this summer, I thought I would definitely start with a stir-fry.

Continue reading

Bieler’s Broth: a Healing, Restorative Soup Recipe

Bieler's broth | pamela salzman

It’s good to be home. I had the loveliest holiday break, but it’s good to be home. Even though I knew I was coming back to two weeks worth of mail to sift through, groceries to buy, meals to plan, piles of laundry to wash, it’s all good.

As I’ve mentioned several times, I am not much on detox diets or cleanses after the holidays even though they are all the rage. I notice a lot of people overdo it even more between Thanksgiving and New Years knowing they will “cleanse” it all off starting January 1. Eh. If you just try eliminating sugar and flour for a few weeks, your health will improve drastically. You don’t need to give up real food and sip juice for a week. But that’s just my opinion.

Bieler's broth | pamela salzman

However I do want to share an amazing, healing and very digestible soup recipe called Bieler’s Broth. This soup is nothing new. In fact, it has been around for decades, invented by a doctor named Bieler. The soup is vegan and all vegetable-based. It is not a culinary soup in the sense that it is so delicious that you would want to serve it to your friends at your next dinner party, but more of a medicinal soup.  It tastes absolutely fine though, just a little bland.

According to Sally Fallon in her book Nourishing Traditions, Dr. Bieler felt that this combination of vegetables was ideal for restoring acid-alkaline and sodium-potassium balance to organs and glands, especially the sodium-loving adrenal glands which suffer under stress.  The broth is also supportive for liver function — recall that the liver is our detoxifying organ.  Bieler’s broth is highly recommended for those under stress or suffering from stress-related conditions.  Know anyone stressed out?  Yep, I thought so.

Bieler's broth | pamela salzman

When I have had a lot of travel combined with a chaotic schedule and less than desirable eating, I’ll make a big batch of Bieler’s broth every few days and drink a mugful either as a snack during the day or with my breakfast or dinner. I don’t function well without protein and fats, so I can’t use this as a meal replacement.

I always notice a big improvement in my overall wellbeing after supplementing daily for 2 weeks with Bieler’s broth. I made a batch yesterday which should last 3 days and I’ll make another batch on Thursday to get me through the weekend.

Bieler's broth | pamela salzman

I know that the vegetables in Bieler’s broth are not in season in the winter. I am normally opposed to that, but in this case it’s just temporary. Be sure to buy only organic vegetables since this is supposed to be a healing soup and pesticides will just add more toxins to the body. Also, zucchini is now a common GMO crop, so buying organic ensures you will be buying non-GMO.

Bieler's broth | pamela salzman

Here’s hoping 2016 is off to a healthy start for you. If you’ve gotten off on the wrong foot, it’s never to late to start fresh. Do check out the dinner planner I started posting on Sundays!  It will change your life to plan out your meals.  Promise!

5.0 from 21 reviews
Bieler's Broth: a Healing, Restorative Soup Recipe
Author: 
Serves: 2 quarts
 
Ingredients
  • 4 medium zucchini, ends discarded and zucchini sliced into rounds
  • 1 pound string beans, ends trimmed
  • 2 stalks celery, chopped
  • 1-2 bunches parsley (flat-leaf or curly), tough stems removed (you can freeze the stems for stock making)
  • 4 cups water
Instructions
  1. Place all ingredients in a pot and bring to a boil. Skim any foam on the surface, lower the heat and simmer, covered until the vegetables are tender, about 15 minutes.
  2. Puree soup in the pot with a handheld blender or in a blender in batches.
  3. Eat warm.
Notes
I usually make this twice in a week and that will make enough for me to have a bowl every day.


Mini Risotto Cakes Recipe

mini risotto cakes | pamela salzman

One of my resolutions for 2016 is to entertain more at home than I did in 2015.  I used to invite friends over 2-3 times/month before I started teaching cooking classes full-time.  By the time Friday rolls around, I’m kind of over major food prep.  So cooking for friends fell by the wayside.  But I realized it’s also one of my favorite ways to spend my time so I need to find a way to bring that back into my life!

mini risotto cakes | pamela salzman

My goal is to entertain more simply with less pressure to make everything Pinterest and Insta-worthy.  Good friends don’t care.  I know this is true because when someone invites me over for a meal, I am more excited about spending quality time with my friends than what is on the menu.  So for my last blogpost of 2015, I thought I would share an easy, delicious and very popular recipe that might encourage you to invite friends over during the holidays.

mini risotto cakes | pamela salzman

These risotto cakes made an appearance in my Party Foods class last December and I remember the kids hoping there were some extra when they returned home from school.  I love it when I have a recipe which is just as popular with kids as adults!  Essentially, you take leftover risotto and form it into a small patty (1-2 bites each), coat that in beaten egg and bread crumbs and saute in olive oil in a skillet.  The good news is that you don’t have to make proper risotto for this recipe.  No stirring every 5 minutes or standing over the pot.  The only goal is to have a cold rice mixture that is sticky enough to form a little patty.

mini risotto cakes | pamela salzman

I have mixed feelings about rice since there are pros and cons to both brown and white rice (brown you have to soak + contains arsenic, white is lacking the fiber.)  So my rule of thumb is that if I don’t have time to soak brown rice, I go with white.  But I’m sure you could make this with short grain brown rice and just cook it for longer.   Either way, you can make the rice today, form the patties tomorrow and saute them before your friends come over on New Year’s Eve!  Keep them warm in a 250 degree oven for up to an hour if necessary.

mini risotto cakes | pamela salzman

What’s also nice about these little cakes is that you can eat them plain or top them with any number of toppings from store bought tapenade to pesto aioli (shown here — nothing more than pesto mixed with a little Vegenaise) to sautéed mushrooms or garlicky greens or a tomato compote.  You can also make them bigger and serve with a green salad for brunch, lunch or dinner.  A poached egg on top would round it all out.

mini risotto cakes | pamela salzman DSC_0132

In other news, and perhaps to help with possible new year’s resolutions, I am starting a new regular blogpost on Sundays, beginning January 3rd.  It will be a weekly dinner planner to offer inspiration and suggestions on what to make.  Many of my students have asked me for this, despite the fact I post my weekday dinners on Instagram and Facebook ;).  For those of you aspiring to cook more from scratch and use more natural, plant-based foods, I think this new weekly blogpost will come in handy.  Wishing you and yours a safe, happy, and healthy new year! xoxo

mini risotto cakes | pamela salzman

Mini Risotto Cakes
Author: 
Serves: 24 cakes
 
Ingredients
  • 2 Tablespoons unrefined, cold pressed, extra virgin olive oil + more for frying cakes
  • ½ medium onion, finely chopped
  • 1 cup Arborio or carnaroli rice (if you want to use short grain brown rice, adjust the cooking time according to the package instructions)
  • 1 ¾ teaspoons sea salt
  • ¼ teaspoon freshly ground black pepper or to taste
  • ½ cup dry white wine
  • 2 ½ cups chicken or vegetable stock, preferably homemade
  • 2 large eggs
  • 1 ½ cups panko bread crumbs (look for gluten-free bread crumbs to make this a GF recipe)
Instructions
  1. Heat 2 Tablespoons of olive oil in a large heavy-bottomed saucepan over medium heat, add the onion and cook until softened, about 5 minutes.
  2. Add the rice and 1 ¾ teaspoons salt and ¼ teaspoon pepper and cook, stirring often, until rice starts to crackle, about 1 minute. Stir in the wine and let simmer, stirring often, until completely absorbed, about 1 to 2 minutes.
  3. Add all the stock, stir to combine and bring to a boil. Reduce the heat to medium low and simmer uncovered, stirring occasionally, until the rice has absorbed the broth and is cooked through, about 10 to 12 minutes.
  4. When the rice is done, taste for seasoning and remove to a large bowl and let sit until cooled to room temperature, about 40 minutes. Cover and refrigerate until completely chilled, at least 2 hours or overnight.
  5. When risotto is fully chilled, place the eggs in a shallow dish and beat with a fork. Set aside. Place the panko bread crumbs in a second shallow dish and set aside.
  6. Measuring about 2 Tablespoons per cake, form the risotto into small, round 1 ½ inch patties. If the risotto is sticking to your hands too much, moisten them with a little water. If the rice isn’t sticky enough and the patties aren’t holding together, squeeze the rice in your palm a couple of times until it sticks.
  7. Working with 1 risotto cake at a time, coat it with egg, letting any excess drip off, then coat it evenly with the panko, pressing gently so the breadcrumbs adhere. You can do this in the morning and refrigerate until ready to sauté.
  8. Heat a large frying pan over medium-high heat and add enough olive oil to generously coat the bottom of the pan. When the oil is hot, add the risotto cakes and fry until golden brown, about 2-3 minutes. Flip and continue cooking, adjusting the heat if necessary, until golden brown and heated through, about 2-3 minutes more.
  9. You can keep the cakes warm in a 250 degree oven on a baking sheet if necessary or transfer to a paper towel lined plate. Serve hot.
Notes
You can also add sautéed kale or spinach to the risotto before cooling, or sautéed diced mushrooms. You can serve these with a little pesto or pesto aioli, warm tomato sauce or a red pepper sauce, whipped goat cheese or sautéed mushrooms on top.


How to Upgrade Basic Dip

upgrade your dip | pamela salzman

I hope you have all been enjoying a lovely holiday season.  I am especially grateful for this time of year since my oldest is home from college and our family is complete.  There’s nothing I cherish more than everyone being together, especially when we can also spend quality time with my whole family in New York.  It’s truly my favorite time of year.

© RB Photography

I what I also love about the holidays is having the extra time to visit with friends at home.  It doesn’t have to be a big to-do or a multi-course dinner.  What I prefer more than anything is just enjoying some small bites and a nice glass of wine.  Give me a creamy dip and some crudites, a few small pieces of toast and seasonal fruit and I’m a happy girl.

upgrade your dip | pamela salzman

Since you might be having some friends over during the next week or so, or on football game days, I thought I would share how I “upgrade” my favorite dips.  With a little extra effort, you can transform something as mundane as hummus into something even more delicious and more impressive.

upgrade your dip | pamela salzman

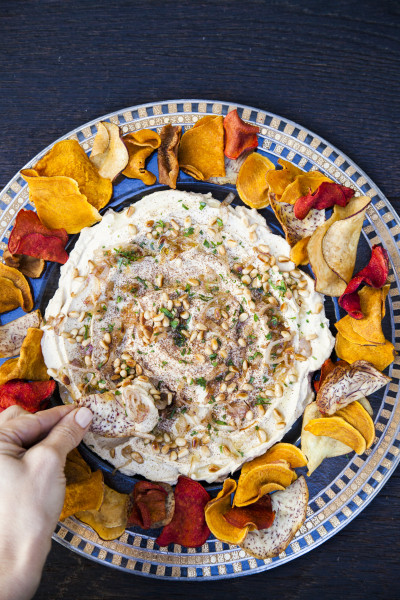
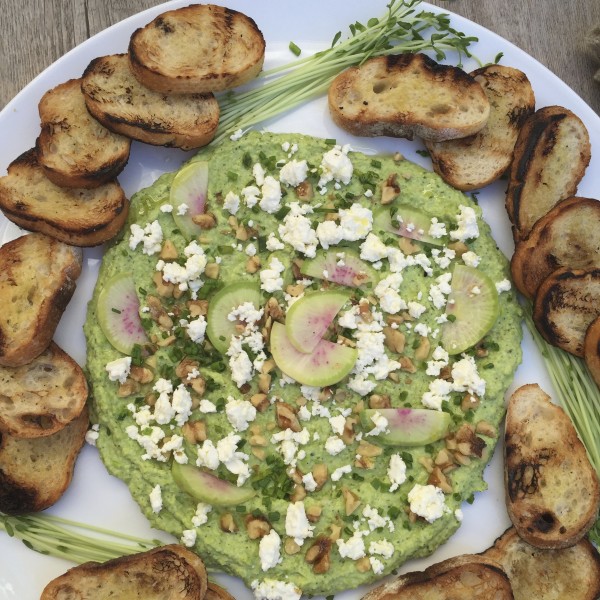
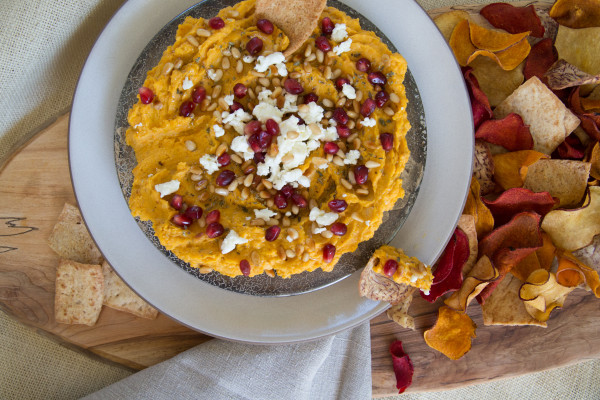
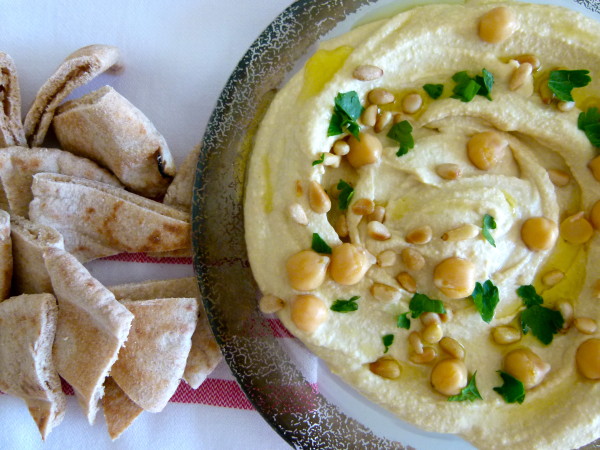
The simple technique is to spread the dip onto a plate or a shallow bowl instead of a deep bowl.  Then add lots of toppings so that when you scoop up a bit of dip, you also get a mouthful of other tasty bits as well.  I can’t eat basic dips any other way now!

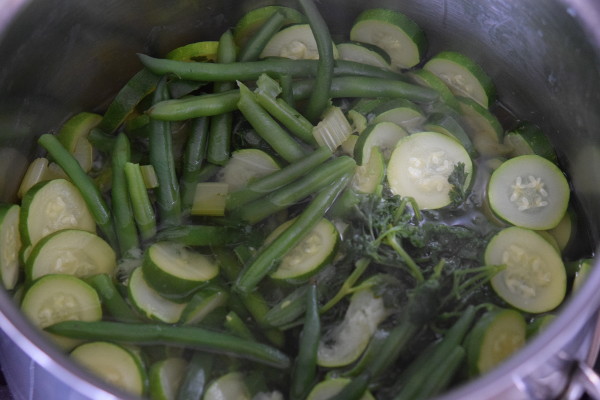
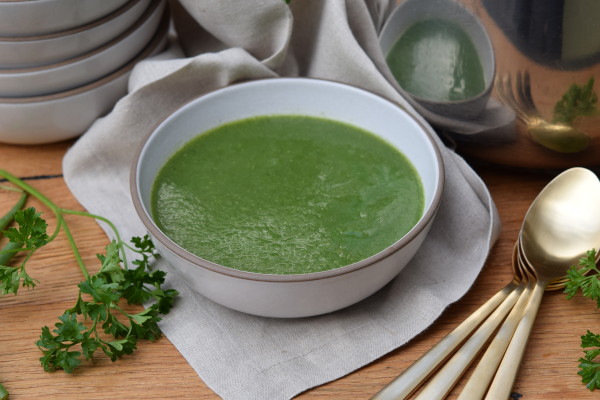
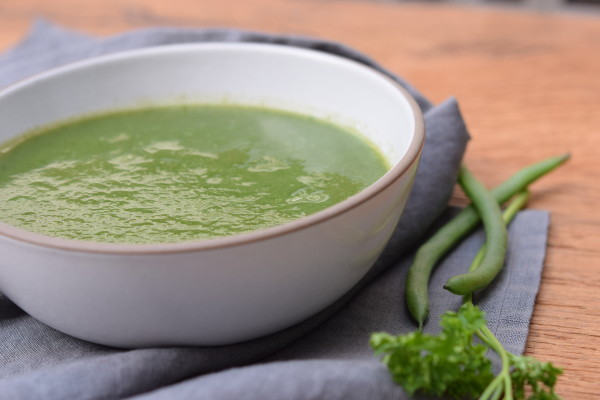
I’ve shown some examples here of simple dips, like basic hummus, beet hummus, butternut squash hummus, minted pea dip.  Click on the name of each dip to be linked to the recipe.  Of course, you don’t have to make these dips from scratch, especially if you are pulling together a last-minute get-together.  Head over to your local market or your favorite Middle Eastern take-out place and fancy-up those dips in the same way.

upgrade basic dip | pamela salzman

Lately, I have taken to loading the dip with even more toppings than shown here. Let me give you some suggestions of what would be delicious with what.  Keep in mind I serve everything at room temp, so if sautéing is involved, you can for sure get that done well ahead of time.

Basic hummus: sautéed or roasted eggplant, sautéed onions or shallots, toasted pine nuts, olive oil, paprika or sumac, minced parsley

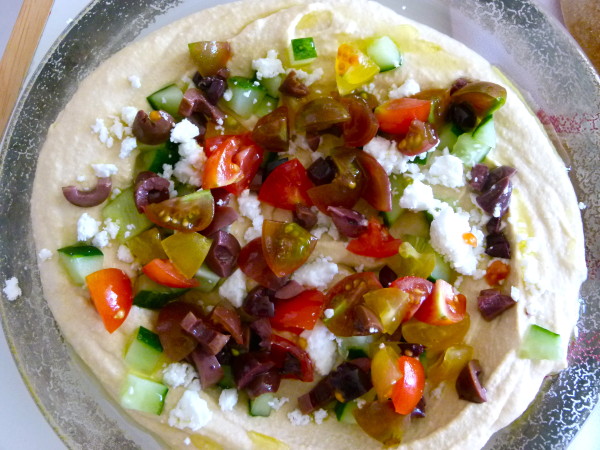
Basic hummus (in the summer): diced fresh tomato, cucumber, red onion, olives, feta, parsley

upgrade your dip | pamela salzmanBeet hummus: feta, toasted pistachios or pine nuts, mint, diced cucumber

Butternut squash hummus: extra roasted butternut squash, feta, toasted pine nuts, pomegranate seeds, dried oregano, olive oil

Minted pea dip: thinly sliced radishes, feta, fresh mint or dill, toasted pine nuts or walnuts, olive oil, extra blanched peas

White bean dip:  diced roasted red peppers, extra white beans, sautéed garlic slices, olives, basil or parsley

Vegan Queso: sautéed fire roasted corn, black beans, cilantro, red onion, fresh or pickled jalapeño

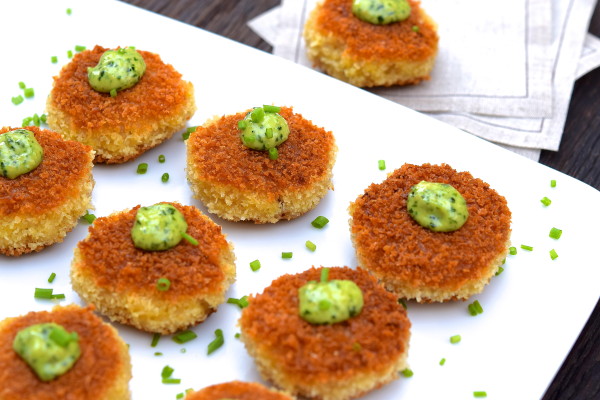
You get the idea.  A creamy dip can benefit from the contrast of something crunchy, in particular.  But don’t be shy with the toppings, especially if this is in place of a meal.  And then as far as “scoopers,” you can think outside the typical chips and pita. I love endive leaves, roasted fingerling potatoes, roasted sweet potato rounds, slices of jicama, and the more obvious but always healthful fresh veggies like carrots, celery and sugar snap peas.  No need to wait until January 1st to get a head start on upping your veggies!

Baked Chocolate Cake Doughnuts

baked chocolate doughnuts | pamela salzman

I think everyone cooks something special during the holidays. Perhaps there are traditional dishes you grew up with or you make homemade treats to give as gifts. On school days I limit sweets and other lower quality foods for my family. I really want the kids to be as well-nourished as possible so they can be at their best. But during their vacation, which just started a few days ago, I am a little more generous with treats.

baked chocolate doughnuts | pamela salzman

Baked cake donuts are incredibly simple to make and much less unhealthy than fried. But my kids think they are magic. I’m not going to tell them I can whip up the batter in 10 minutes and bake them in 8, lest they start asking me to make donuts every day! I have a baked cinnamon cake donut on the site that is just delicious, but who doesn’t love a good chocolate donut?

baked chocolate doughnuts | pamela salzman

These are similar to the cinnamon ones on my site. They are slightly denser and drier, less spongy and better for dunking than a muffin. But let’s all just agree that an iced chocolate donut is always a dessert and never a breakfast unless there’s no school for days and there are some scrambled eggs on the plate, too. In which case, I think these would be a fun treat for a Christmas brunch or dessert after Christmas dinner.

baked chocolate doughnuts | pamela salzman

I saw some fun Christmasy decorations on Instagram which inspired these. I crushed up some freeze-dried raspberries, although strawberries would be just as good, and some pale green pistachio macarons. Both these items I found at my local Whole Foods. Other fun options could be fine shredded unsweetened coconut, dots of royal icing or dye-free sprinkles which you can buy on amazon and some natural foods stores.

DSC_0361

You will need to have a donut pan though.  I suggest a silicone-coated mold such as this one or this one, both of which do not contain any toxic substances which can leach.  I have the latter one and I love it.  You might even have time to order it for a last-minute Christmas present.  Hope you and yours have a beautiful and joyful holiday.  I’ll be back after Christmas!

baked chocolate doughnuts | pamela salzman


Baked Chocolate Cake Doughnuts
Author: 
Serves: 6 donuts
 
Ingredients
  • ⅓ cup + 1 Tablespoon whole milk or milk substitute, at room temperature
  • 1 teaspoon apple cider vinegar or white vinegar
  • 6 Tablespoons whole wheat pastry flour
  • 6 Tablespoons all-purpose flour or white spelt flour
  • ¼ cup unsweetened cocoa powder
  • 1 teaspoon aluminum-free baking powder
  • ¼ teaspoon sea salt
  • ¼ teaspoon ground nutmeg
  • 3 Tablespoons unsalted butter, melted + extra butter for greasing the pan
  • ¼ cup cane sugar
  • 2 Tablespoons honey
  • 1 large egg, at room temperature
  • 1 teaspoon pure vanilla extract
  • Chocolate glaze:
  • ½ cup semi-sweet chocolate chips
  • 2 tablespoons unsalted butter
  • 1 tablespoon + 1 teaspoon brown rice syrup
  • ¼ teaspoon pure vanilla extract
  • pinch sea salt
  • Topping suggestions: freeze-dried raspberries or strawberries, crushed pistachio or green macarons, sprinkles or shredded coconut
Instructions
  1. Preheat oven to 400 degrees. Grease the wells of the doughnut pan with some butter.
  2. In a glass measuring cup, mix together milk and vinegar and allow to sit at room temperature for at least 5 minutes to curdle.
  3. In a large bowl whisk together flours, cocoa powder, baking powder, nutmeg and salt.
  4. In a small bowl, whisk together melted butter, sugar, honey, egg, vanilla and curdled milk.
  5. Whisk wet ingredients into dry ingredients, taking care not to overmix.
  6. Spoon batter evenly into wells of the doughnut pan, filling only ⅔ full.* If filled too high, there won’t be any doughnut holes. Another way to fill the wells is by transferring the batter to a quart-size Ziploc bag and snipping one corner ½inch and piping the batter into the wells. Bake for 8-10 minutes or until doughnuts spring back when pressed lightly. Allow to cool 5 minutes before turning doughnuts onto a cooling rack. Donuts can be glazed when they are slightly warm or cool.
  7. Make the glaze: In a heat proof bowl, combine glaze ingredients and set over a small pot of simmering water. Stir regularly until ingredients are melted and smooth.
  8. Dip tops of donuts in glaze and place glaze side up on a wire rack to allow glaze to drip. Sprinkle immediately with toppings, if desired.