How to Make Bone Broth

how to make bone broth | pamela salzman

My readers and my students are very in the know when it comes to food trends, especially the healthy ones.  So I’m sure you have all heard about bone broth and how it’s taking over the world.  It’s the newest thing!  It’s revolutionary!  So funny.  Bone broth is no trend, but in fact something that has been consumed for generations.  But low and behold some trendy bone broth restaurants open up in the hottest neighborhoods of NYC and suddenly everyone wants in.  I actually saw an acupuncturist over 20 years ago that sent me home with a prescription for homemade long-simmered beef broth.  She said that was the secret all of the celebrities that she treated were using to stay looking so young.

So even though it’s trending, people are still confused about what exactly bone broth is.  Very simply, it is a stock made from bones (chicken, beef, pork, lamb or a combo) which have been simmered for a really long period of time.  Think 18-36 hours!  In this longer time frame, the bones really break down and start to disintegrate into the broth, thereby providing even more health benefits, i.e. collagen, immune-boosting compounds, and gut-healing gelatin.

So how does one even go about making this miracle liquid??  Well, you start with bones as opposed to meaty pieces.  So you’re not using a whole 4 pound chicken here.  You would use 4 pounds of bony chicken parts, and the bonier and “jointier,” the better.  I personally prefer chicken, but you can use any combination of chicken, beef, pork, etc.  The chicken bones I prefer to use are the feet, backs and wings — lots of collagen there!  I buy these from the butcher at Whole Foods or from the chicken rancher at my local farmers market.

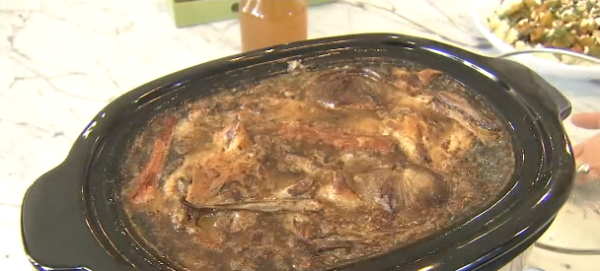
If you are using beef bones you will first need to roast them in the oven.  However, with chicken the bones are ready to go straight into the pot- or slow cooker- and cover with water.  I am sharing how to do this in the slow cooker is because I don’t really think it is realistic for anyone to be able to leave a simmering pot on their stove for 36 hours.  The slow cooker solves this problem and can just simmer away safely while you carry on with your life.

As those bone are being simmered, they are being broken down and all of the minerals including collagen and glucosamine that are sold as (very expensive!) supplements.  This leaves us with a broth that is full of immune-boosting, healing, pain healing, anti-inflammatory goodness that is easily absorbed and accessible to our bodies.

You can use bone broth in any recipe that calls for stock or broth.  But it is also wonderful to consume bone broth as you would coffee or tea- in a mug which you can sip slowly.  I’ve been to some places which offer flavorings such as turmeric, cayenne, ginger and scallions to make your broth taste more interesting.

how to make bone broth | pamela salzman

Here are the basics for making a bone broth:

-Use BONES. Not meaty pieces like breasts or thighs.  For chicken that would mean the super bony parts such as the carcass, necks, backs, wings and even feet if you can get your hands on them. If there is skin on those pieces, that’s fine.  Such chicken parts can be purchased at Whole Foods or your local butcher. Or, if you can, try and keep the carcass from after you roast a whole chicken or the bones from your chicken legs, wings etc. You can stockpile your bones and carcasses in the freezer and then when you are ready to make stock you can put them directly in, no need to defrost.

I add a few vegetables, as I think it makes the broth tastes more delicious.  An onion, 2 carrots and 2 stalks of celery is my norm, but you don’t have to add any vegetables if you don’t want to.

-Use COLD water to start- This helps to draw the most flavor from the bones.

-Use apple cider vinegar in your stock.  This helps to pull maximum minerals from the bones.

-Simmer for AT LEAST 18 hours. If you are really going for it, 36 hours will make the most golden, delicious and rich broth.

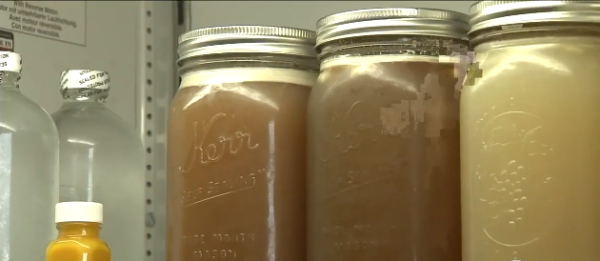
Bone broth lasts for up to 4-5 days in your refrigerator or up to 3 months in the freezer.  Check out this post for how to properly freeze broth, especially if you would like to freeze in glass.

I recently did a tv segment with Lori Corbin, KABC’s Food Coach, about bone broth.  You can watch below.  The only correction that should be made is that Lori says to cool, skim fat, strain and enjoy.  Instead, you should strain, cool and then skim the fat once it has solidified after being refrigerated.

Homemade Bone Broth
Author: 
Serves: 4 quarts
 
Ingredients
  • 3 ½ pounds bony chicken parts, such as backs, necks, wings and/or feet
  • approximately 5 quarts cold water*
  • 1 Tablespoon apple cider vinegar**
  • 1 large onion, peeled and cut in half
  • 2 carrots, cut if necessary (you can leave the peel on, just make sure they are scrubbed clean)
  • 2 celery stalks, cut if necessary (try to use the leafy parts of celery, as they add lots of flavor)
Instructions
  1. Place the chicken parts and vegetables in a slow cooker and add the cold water and vinegar. Cover with the lid.
  2. Set the timer to low for as long as your slow cooker will go, but a minimum of 18 hours.
  3. Check periodically to skim off any foam that rises to the surface and continue cooking for 18-36 hours, resetting your slow cooker if the maximum time is less than 36 hours.
  4. Turn off the heat and strain into a large heat-proof bowl. You may need to use a large strainer initially and re-strain it with a fine mesh sieve to remove any smaller particles. Allow to cool before refrigerating.
  5. Refrigerate, covered.
  6. The next day, skim off the congealed fat at the top.
  7. Refrigerate the stock for up to 5 days or freeze for up to 3 months.
  8. If I consume bone broth as a drink, I'll add a pinch of sea salt for flavor, but other options include ginger, green onions, hot sauce, even turmeric!
Notes
Notes: for a beef bone broth, take 3 ½ pounds of mixed beef bones, such as knuckles, short ribs, femur, short ribs and neck bones. Drizzle with a little olive oil and roast at 400 degrees for about an hour, turning once, until the meat and bones are golden brown. Proceed with recipe as indicated above, but cook in slow cooker for at least 24 hours. You can also mix chicken, beef and pork bones together.

If you don't have a slow cooker and want to do this on the stove, bring to a boil over high heat and reduce to a very gentle simmer and simmer until you have to go out or if you want to go to sleep. Then transfer pot, covered, to a 250 degree oven and allow to simmer in the oven as long as you wish.


Sunrise Nori Wraps with Spicy Tahini Drizzle from the “Eating Clean” Cookbook

Sunrise Nori Wraps | pamela salzman

I am really proud of my friend Amie Valpone, who is known in the blog world as The Healthy Apple.  She has a new book being released today called Eating Clean:  The 21-Day Plan to Detox, Fight Inflammation and Reset Your Body.  The book outlines her journey of how she healed from a decade (yes, a decade) of chronic illness and it is filled with over 200 detox-approved plant-based recipes free of gluten, dairy, soy, refined sugar, eggs, corn and processed ingredients.   As I tell my students in every single class I teach, I don’t care what you call the diet you follow, the ideal diet is an anti-inflammatory, low-glycemic one.  You can take a peek at her book here, but today I am sharing a recipe for these Sunrise Nori Wraps which looked like something I would want to eat all the time.

spicy tahini saucespicy tahini drizzle

There is a place in Santa Monica actually called Kye’s where they serve the most delicious “Kye-ritos,” which are essentially super tasty nori wraps in many different flavor profiles.  Nori is the seaweed used to make sushi rolls and it is incredibly nutrient-dense.  Nori, like most sea vegetables are very high in minerals, especially iodine, calcium, iron, magnesium.  Nori also contains tons of vitamin C as well as anti-viral, anti-bacterial, anti-inflammatory properties.  It is obviously a superior vessel for a wrap over a processed flour tortilla!

nori wraps | pamela salzman

Continue reading

Balsamic Roasted Rutabagas Recipe

Balsamic Roasted Rutabagas | pamela salzman

WHAT A WEEK I’VE HAD.  Everything is just great except for the fact that my hard drive crashed.  Where it “crashed” and how it crashed, I have no idea.  But this is what Apple told me after I spent an hour on the phone trouble shooting my not-working computer and then at the store, where they told me I was basically screwed.  The hard drive of my less than 3-year-old computer died.  Did you know the lifespan of a hard drive is between 2 1/2 to 4 years?  Seems kind of short, I agree. So I left my computer with all my recipes, images, documents,  my LIFE, with Apple for 3-5 “business” days, which I am just telling you right now means a week, and then go back to pick it and my dead hard drive up and guess what?  They turn my computer on and it smells like an electrical fire.  More problems!  I had to leave it for another 3-5 business days so they can replace the power something-or-other.

rutabagas

So just think for a second if someone took your computer for 10 days.  Kind of liberating, but kind of stressful.  And this, my dear readers, is why I haven’t posted anything all week.  Forgiveness and pity is all I ask.  And my advice to you is back it all up all the time.  🙂

Let’s move on to something to make and eat which is why we’re all here.  If you don’t know what a rutabaga is or you think you won’t like it because it has a weird name and a not sexy appearance and that’s enough to dissuade you, I ask you to reconsider.  I had never eaten a rutabaga in my life, at least not knowingly, until a couple of years ago and I was instantly smitten.  I love all the Brassicas–cabbage, kale, broccoli, cauliflower, the whole family.  Rutabagas are a cross between cabbage and turnip.  Not as bitter as a turnip, with the sweetness of cabbage and the texture of a less starchy potato, is my best attempt at describing a rutabaga.  They are often referred to as “swedes” in other parts of the world, but whatever you call them, they are not turnips and certainly not as bitter as turnips.

preparing rutabagas

I am sharing a recipe here which is straightforward roasted rutabagas with balsamic vinegar to bring out the sweetness, but I often roast them with other vegetables or with a whole roasted chicken (delicious!)  They pair beautifully with carrots, onions, Brussels sprouts and greens like chard.  Many people like to make a rutabaga mash with carrots and butter, salt and pepper.  You can also eat them raw.  Last year when I taught this recipe in my classes, I sliced some raw rutabaga and passed it around for everyone to sample.  People were surprised at how pleasant it tasted.  I haven’t used raw rutabaga in a slaw, but I imagine it would be delicious.

preparing rutabagas

Let’s also talk about the health benefits of rutabagas. All crucifers (brassicas or cole crops) are high in antioxidant and anti-cancer compounds. According to Dr. Mercola’s website, rutabaga’s most significant nutrient comes from vitamin C. One cup contains 53% of the daily recommended value, providing antioxidants and immune system-supporting functions that help protect the cells from free radical damage. Although rutabagas provide only 5% of the iron needed for healthy blood on a daily basis, vitamin C enhances its absorption, while helping to form both collagen and the thyroid hormone thyroxine, which protect cells against damage, encourage wounds to heal, fight infections, and promote healthy bones, teeth, gums, and blood vessels.  Beta-carotene-rich rutabagas are also an excellent source of potassium and manganese (for energy), and a good source of fiber, thiamin, vitamin B6 (helps support the nervous system), calcium (for strong bones), magnesium (helps absorb calcium and combat stress), and phosphorus (helps metabolize proteins and sugars).

preparing rutabagas

Many people told me last year that they had their doubts about this rutabaga recipe but were pleasantly surprised at how much they enjoyed it, myself included.  I remember standing at the counter with different students after many a class, snacking on the rutabaga cubes with our fingers.  Very addictive.  This is such a basic recipe, you could really pair it with almost any protein, especially poultry.  If you are vegetarian, these rutabagas would go great with lentils or a hearty pasta with broccoli and pine nuts.  Easter is coming up and this recipe would be great with lamb or ham.  I look at them as a more nutritious and flavorful sub for potatoes!
preparing rutabagas
Do your best to remember my golden rules of roasting vegetables and these will turn out great:
  • veggies in one layer on the baking sheet
  • don’t crowd them otherwise they’ll steam each other
  • if roasting more than one pan, one in upper third of the oven and one in lower third of the oven.  Rotate pans if necessary.
balsamic roasted rutabagas | pamela salzman
Balsamic Roasted Rutabagas
Author: 
Serves: 4
 
Ingredients
  • 4 medium rutabagas, peeled and cut into 1”cubes (about 2-2 ¼ pounds)
  • 2 Tablespoons unrefined, cold-pressed, extra virgin olive oil
  • sea salt
  • freshly ground pepper to taste
  • 1 Tablespoon balsamic vinegar
Instructions
  1. Preheat oven to 425 degrees. Line a baking sheet with unbleached parchment paper.
  2. Place rutabagas on baking sheet, toss to coat with oil and sprinkle with salt and pepper. Roast for 30-40 minutes or until golden and crispy on the outside and soft on the inside.
  3. Remove from the oven and toss with balsamic vinegar. Serve immediately.
Notes
This serves four, but can be easily adjusted for more or less. I figure 1 medium rutabaga per person and then you can just adjust the oil and vinegar accordingly.

Blueberry Oatmeal Souffle Recipe

oatmeal souffle with blueberry sauce | pamela salzman

I am not one of those people who sees a recipe in a magazine and makes it immediately.  I’ll dog-ear it or tear it out and stick it in my “inspiration” pile or wait for someone else to make it just in case it’s not a winner.  So the fact that I saw this oatmeal souffle recipe in Food & Wine magazine on Saturday afternoon and made it on Sunday morning is highly unusual behavior for me.  And then when many of you requested the recipe on my Instagram feed, I had to make it again on Monday to photograph it.  And I am not mad about it because this is MY NEW FAVORITE BREAKFAST.

oatmeal souffle | pamela salzman

This is saying a lot since I have a pretty good breakfast repertoire.  I was just starting to get a little bored with baked oatmeal and then boom!  Oatmeal souffle came into my life.  I had oatmeal souffle at a restaurant once, I think in Mexico.  And I remember it being too sweet with a caramelized top.  I can’t do very sweet for breakfast.  It just sets me off for the whole day and I get very loopy and I start craving sugar all day like a drug addict.

oatmeal souffle | pamela salzman

This, on the other hand, is fluffy and light and barely sweet.  You’ll have no idea that this is related to oatmeal.  And it’s not that there’s anything wrong with oatmeal.  On the contrary, I love it and eat it often, but I also like to mix things up a little and this oatmeal souffle was the perfect way to do that.

oatmeal souffle | pamela salzman

One of my gripes with oatmeal is that I have to add fat and protein to it otherwise I am hungry in an hour.  This souffle is fortified with 3 eggs and 3 cups of milk or a dairy-free milk and I felt perfectly satisfied.  Although I will admit, the first time I made this I ate half the pan myself and it’s supposed to serve 4 people.  No wonder I felt satisfied, hehe.

oatmeal souffle | pamela salzman

I think this is a great base recipe which you can tweak with different fruit and flavor combinations.  I had some fresh blueberries on hand from recipe testing, and to accompany the souffle I made a blueberry sauce from frozen berries.  Absolutely delicious.  You can do this with any berries or bake it fruit-free and serve it with sautéed bananas and pomegranate seeds.  I already know this is going to be amazing with stone-fruit in the summer and I can predict a pumpkin version of this for sure.

oatmeal souffle | pamela salzman

I’m not sure I would have time for this on a weekday though, even if I was able to make the oatmeal the night before.  There is some egg white-whipping to do and the souffle takes 30 minutes to bake.  Maybe, but I’m thinking this will be for the weekend, which is just a few more days away.  Can’t wait!

oatmeal souffle | pamela salzman

Blueberry Oatmeal Souffle Recipe
Author: 
Serves: 4
 
Ingredients
  • coconut oil or unsalted butter for greasing the baking pan
  • 1 cup rolled-oats (look for gluten-free oats for a gluten-free dish)
  • 3 cups whole milk, almond milk or coconut milk or a combination of any of these
  • 2 Tablespoons pure Grade A maple syrup
  • 1 teaspoon pure vanilla extract
  • pinch of ground cinnamon
  • pinch of sea salt
  • 3 large eggs, separated
  • 1 cup fresh blueberries or frozen, defrosted
  • ½ teaspoon lemon zest
  • pure maple syrup, fresh berries or blueberry sauce for serving (optional)
Instructions
  1. Preheat the oven to 350 degrees and grease a 9-10 inch skillet or baking dish with coconut oil.
  2. In a large saucepan, combine the oats, milk, maple syrup, vanilla, cinnamon and salt and bring to a simmer. Cook over medium heat, stirring occasionally, until thickened to a soft porridge consistency, about 15 minutes. Remove from the heat and allow to cool slightly, about 5 minutes or longer if that's easier.
  3. Working quickly, stir the egg yolks into the oatmeal until well blended. Stir in the blueberries and lemon zest.
  4. In a large bowl or stand mixer whisk the egg whites at medium speed until medium-stiff peaks form, about 2-3 minutes. Using a spatula, gently fold the whites into the oatmeal just until combined. You don't want to see big clumps of white, but you don't want to deflate all the egg whites either.
  5. Pour the mixture into the prepared skillet and bake for about 30 minutes, until golden and puffed. If using a non-dairy milk, the souffle will not get as golden. Serve warm with blueberry sauce, fresh fruit or maple syrup.
Notes
The souffle will be more golden when using whole (dairy) milk as opposed to non-dairy milk.


Black Rice Salad with Edamame Recipe

Black Rice Salad with Edamame | PamelaSalzman.com

What is UP with the weather??  It has been crazy hot in LA, even at the beach where I live.  And then I speak with my parents and my sisters in NY, and they’re freeeeeezing.  The reason this matters to me is that you, my dear readers, are a diverse group from not only all over the US, but all over the world.  And when I create my dinner planners for the week or decide what to post on my blog, it’s a hard decision!  Cold food versus warm food, hearty or light?

Black Rice Salad with Edamame | Pamela Salzman

I spent the weekend in Palm Springs, where we always go to partake in the Modernism Week events. My husband, who is a builder, is really into design and checking out the mid-century homes.  I go to have a little quality time with my family, some R&R, and to check out the food scene.  Speaking of which, I had an absolutely delicious and satisfying black rice and salmon bowl with perfectly cooked vegetables for dinner one night and I can’t stop thinking about it.  I love meals in a bowl!  Two of my kids used to hate if any of their food touched other food. But I like have it all mixed in one bite.

Black Rice Salad with Edamame | Pamela Salzman

After eating that rice bowl, I was reminded about this black rice salad I taught in a class a few years ago. This is the kind of recipe I love – eat it warm or room temp, mix up the vegetables according to the season, adjust the ratio of rice and vegetables to favor more veggies and less rice, change the grain to something else. And just like that one recipe becomes dozens.

Black Rice Salad with Edamame | Pamela Salzman

Unfortunately, black rice is a grain that doesn’t get a lot of attention. There are so many different varieties of rice, with different shapes, flavors and starch levels, but also different nutrients.   Black rice, also known as forbidden rice, is very unique and I think the least common, but still easy to come by. The color is a color not easily found in nature and is due to the presence of anthocyanins, a powerful antioxidant associated with health benefits such as memory improvement and decreased risk of heart disease and cancer.  One spoonful of black rice bran provides the same amount or more anthocyanins in a spoonful of blueberries. Black rice also contains more protein, fiber and iron than brown rice.  The flavor is slightly sweeter than regular rice and the grain is rather small and chewy. I love it.  Black rice makes a delicious rice pudding and “unfried” rice.

Black Rice Salad with Edamame | Pamela Salzman

This dish has a bit of an Asian flavor and would be amazing topped with a piece of salmon, shrimp or chicken, or with an egg (poached or fried.)  Seared tofu would be great, too.   Although you don’t need any additional protein given the presence of edamame, if you choose to use them.  In this version I used a little less rice and added blanched broccoli florets and put it all on a bed of spinach. The good news is that this recipe is great wherever you live, whatever the weather and it’s easy-peasy.

Black Rice Salad with Edamame | Pamela Salzman

Black Rice Salad with Edamame Recipe
Author: 
Serves: 8
 
Ingredients
  • 2 cups black rice (or you can make less rice and more veggies)
  • a pinch of kosher salt (like Diamond Crystal)
  • 1 Tablespoon unrefined coconut oil (or olive oil, if you prefer)
  • 1 cup thinly sliced shiitake mushrooms, or mushroom of choice
  • 1 cup edamame (frozen or fresh), blanched in boiling water for 5-6 minutes and then rinsed under cold water to stop the cooking process
  • ½ cup chopped fresh cilantro leaves and tender stems
  • ½ cup thinly sliced green onions (green tops are milder than the white bottoms)
  • 3 Tablespoons shoyu + 1 Tablespoon water or ¼ cup high-quality soy sauce (use gluten-free tamari for a GF option)
  • 2 Tablespoons unseasoned rice vinegar
  • 1 Tablespoon liquid sweetener such as coconut nectar, raw honey or pure maple syrup
  • 1 ½ teaspoons unrefined toasted sesame oil (dark)
Instructions
  1. Place the rice and a pinch of kosher salt in a medium to large pot and cover with water by about 3 inches. Bring to a boil over high heat, cover, lower the heat to a simmer and cook until the rice achieves desired tenderness. (If you like it a little crunchy, 20 minutes. For softer rice, cook up to 45 minutes.) Drain in a sieve and rinse under cold water to stop the cooking process. Drain really well and then transfer to a serving bowl.
  2. Heat a medium skillet over medium-high heat, and warm the oil. Saute the mushrooms until tender, about 4 minutes. Add to the rice along with the edamame, cilantro and green onions.
  3. Make the dressing: in a small bowl, whisk together the shoyu, rice vinegar, coconut nectar and sesame oil.
  4. Pour the dressing over the rice and vegetables and stir well to combine. Serve.
Notes
There are unlimited ways to change the ingredients according to the seasons – blanched asparagus and peas or mango, avocado and peanuts in the spring, cucumbers and sweet bell pepper or carrots and sprouts in the summer, blanched broccoli or cauliflower and almonds in the fall. You can also add some rehydrated seaweed like arame or hijiki or even some pieces of toasted nori.


Chocolate Covered Raw Chocolate Chip Cookie Dough Bites Recipe (refined sugar-free)

healthy raw chocolate chip "cookie dough" bites | pamela salzman

healthy raw chocolate chip "cookie dough" bites | pamela salzman

Is there anyone out there that doesn’t love raw cookie dough?  Not even the potential threat of salmonella from raw eggs in the dough deters people from eating it straight out of the bowl before it turns into actual cookies.  Guilty!  But normal cookie dough recipes have loads of processed sugar and white flour which I really try to avoid as much as possible.  I was in the kitchen with Jessie from Solstice Canyon nut butters the other day and we concocted these little truffle-like balls with no intentions at all.  As soon as we both bit into them, we looked at each other and shouted, “these taste like raw cookie dough!”

healthy raw chocolate chip "cookie dough" bites | pamela salzman

If you put a traditional chocolate chip cookie dough side by side next to these, I’m sure you could figure out which was which.  But that is not what I’m all about.  I’m not the sneaky imposter.  I’m not trying to fool anyone.  I think these cookie dough bites are darn good on their own and they happen to taste a little like cookie dough.  And you know what I realized?  When you toss a bunch of delicious ingredients together, chances are you’ll get something delicious.  The best part is that these are full of good for you ingredients, too!  The base is almond butter and dates plus vanilla extract, lucuma powder and sea salt.  I realize lucuma powder is not an every day pantry item, but it is something I do stock all the time because I LOVE it in smoothies.  I has a light, sweet, almost caramel-y flavor.  If you don’t have it, these bites will still taste great without.  If you want to learn more about lucuma powder, read here.  If you’d like to buy it, Whole Foods has it, as does thrivemarket.com and amazon.com.

healthy raw chocolate chip "cookie dough" bites | pamela salzman

healthy raw chocolate chip "cookie dough" bites | pamela salzman

In the name of research (wink, wink), I tried a few versions of these and what I discovered is that this is a really easy recipe to adjust according to your taste.  My daughter freaked out for them.  My son, the notorious Mr. Picky, thought they were “good, but needed to be sweeter.”  If I agreed with him, I would have just added another date to the mixture.  I also made them with Solstice Canyon Aztec Chocolate almond butter which has cayenne in it — delicious!  But knowing that not everyone has a jar of Solstice Canyon nut butter in his/her cupboard, I tried the recipe with standard almond butter.  The difference is that Solstice Canyon has coconut sugar, coconut oil and sea salt added to the almond butter.  But don’t worry — see the recipe below and I’ve got you covered.  However you make these, I think these “cookie dough” bites are a delicious, guilt-free treat which would be fun for Valentine’s Day to share with your sweeties!

healthy raw chocolate chip "cookie dough" bites | pamela salzman

healthy raw chocolate chip "cookie dough" bites | pamela salzman

5.0 from 2 reviews
Chocolate Covered Raw Chocolate Chip Cookie Dough Bites (refined sugar-free)
Author: 
Serves: 12-16
 
Ingredients
  • 1 6 ounce jar Solstice Canyon original almond butter
  • 3 pitted Medjool dates
  • 2 teaspoons lucuma powder
  • pinch of sea salt
  • 2 Tablespoons mini chocolate chips or raw cacao chips
  • OR if you can't get your hands on Solstice Canyon nut butter:
  • ¾ cup creamy, raw unsweetened and unsalted almond butter
  • 4 pitted Medjool dates plus more to taste if you want these sweeter
  • ⅛ teaspoon vanilla extract
  • 2 teaspoons lucuma powder
  • 2 teaspoons coconut butter or unrefined virgin coconut oil
  • ⅛ teaspoon sea salt
  • 2 Tablespoons mini chocolate chips or raw cacao chips
  • IF you want to dip in chocolate, here are 2 options:
  • ¼ cup melted unrefined virgin coconut oil
  • ¼ cup raw cacao powder
  • 2 Tablespoons pure maple syrup, preferably Grade A for less maple flavor, but Grade B is fine, too
  • ¼ teaspoon pure vanilla extract
  • pinch sea salt
  • OR
  • ½ cup good quality chocolate chips, whatever you prefer
  • ½ Tablespoon unrefined virgin coconut oil or unsalted butter
Instructions
  1. Put all cookie dough ingredients except mini chocolate chips into the bowl of a food processor fitted with a steel blade and blend until a stiff paste forms. Taste and adjust seasoning accordingly. Add more dates for additional sweetness or more salt (as I prefer.) Add chocolate chips and press into the dough with your fingers.
  2. Line a baking sheet or plate with parchment or wax paper.
  3. Scoop small amounts of "dough" and roll into little balls. I like to use a mini ice cream scooper for this.
  4. Freeze until firm, at least 30 minutes.
  5. Prepare chocolate coating: In a small bowl, whisk together coconut oil, cacao powder, vanilla and sea salt.
  6. Remove dough balls from freezer and one at a time, place on the tines of a fork over the bowl of melted chocolate and spoon chocolate over the ball until completely coated. Allow excess to drip back into bowl. Return to baking sheet and repeat with all the balls.
  7. Repeat for a double layer of chocolate or drizzle more on for a decorative finish. Refrigerate until firm and store in refrigerator.
  8. If you want a thicker coating of chocolate and you'd prefer to use chocolate chips, do this:
  9. In a double boiler, or in a heat-proof bowl set atop a pot of simmering water, melt the chocolate and coconut oil, stirring frequently until smooth.
  10. Follow directions above for coating dough balls.
Notes
You can see there are different directions you can take this recipe -- using Solstice Canyon nut butter or regular almond butter. And two ways that you can coat the dough balls. Some people prefer to use maple syrup and raw cacao rather than chocolate chips, which are sweetened with sugar. But chocolate chips are likely more convenient. Delicious however you choose!


Sweet Potato and Black Bean Tacos Recipe

sweet potato and black bean tacos | pamela salzman

Serious question:  Is anything considered a taco if it all goes into a corn tortilla?  Because if that’s the case, I have eaten A LOT of tacos, some typical and others not so obvious.  And my son, even more than I have.  Have I ever told you my idea for a book about feeding picky children?  I would title it, “Finding Your Child’s Corn Tortilla.”  This is because my son, aka Mr. Picky, loves corn tortillas and is much more likely to eat something if it’s in or with a corn tortilla.  Eggs, steak, roasted carrots, whatever.  The kid is probably the foremost expert on cutting edge taco combinations.

sweet potato and black bean tacos | pamela salzman

I, on the other hand, love corn tortillas for the same reason I love food in bowls — I love bringing all my foods together in one complete bite.  I have been buying sprouted worn tortillas by Food For Life for many years.  Sprouted grains are more digestible and the nutrients more assimilable than non-sprouted.  The texture isn’t exactly like standard corn tortillas, but I prefer the cornier flavor.  But if I’m feeling like I need to eat a little more lightly, I will use a big lettuce leaf instead.  Although with this recipe, I have a hard time getting the sweet potatoes from the pan to my plate since I have been known to devour them straight from the baking sheet.  You can even roast these as written for a simple side dish with roasted chicken or fish or put an egg on top.

sweet potato and black bean tacos | pamela salzman

Sweet potatoes are loaded with caretenoids, fiber and Vitamin C.   I think they could be classified as a super food.  They’re much more nutrient-dense than regular potatoes.  And they pair swimmingly with protein-rich legumes, whether it’s black beans or lentils.  Here I just doctored up some cooked black beans with some tasty spices and lime juice to boost the flavor of the beans, but still kept everything quick and easy.  I personally love to add hot sauce and cilantro to this mixture and my husband likes to add cheese of some sort.  Avocado and/or radishes would also be great here.

sprouted corn tortillas

I originally taught this recipe a few years ago in my breakfast class as an alternative to typical breakfast fare.  In a few classes, I served it with scrambled eggs and lots of hot sauce.  A lot of my students have been telling me that they’ve been making breakfast for dinner lately and their kids love it.  Great idea!  In the same vein, why not make less complicated savory dishes for breakfast?

sweet potato and black bean tacos | pamela salzman

I still don’t have my super bowl menu planned out, but if I do a taco bar, I will for sure have a platter with these sweet potatoes and black beans side by side for a vegetarian option.  And I’ll stash away a little bit so I have some leftovers for a breakfast taco the next morning!

sweet potato and black bean tacos | pamela salzman

5.0 from 4 reviews
Sweet Potato and Black Bean Tacos
Author: 
Serves: 6
 
Ingredients
  • 2 large sweet potatoes or 2 large russet potatoes (1 ½ - 2 lbs), peeled (if desired) and cubed
  • ¼ cup unrefined coconut oil (if using sweet potatoes) or unrefined, cold-pressed extra-virgin olive oil (if using russet potatoes)
  • 1 teaspoon sea salt
  • ½ teaspoon ground chipotle powder
  • ½ teaspoon garlic powder
  • ¼ teaspoon paprika
  • ¼ teaspoon chili powder
  • 3 ½ cups of cooked black beans, or 2 14.5 ounce cans black beans, drained and rinsed
  • juice of one lime
  • 1 teaspoon ground cumin
  • 1 teaspoon sea salt
  • 6 sprouted corn tortillas or tortillas of your choice
  • accompaniments: sliced avocado, fresh cilantro, hot sauce or salsa, shredded Monerey Jack or crumbled Cotija, fried egg, julienned radishes
Instructions
  1. Preheat oven to 400 degrees.
  2. Scrub, peel, and cube the potatoes into 1-inch cubes.
  3. If using sweet potatoes, melt coconut oil and combine with salt, chipotle powder, garlic powder, paprika, and chili powder. If using russet potatoes, combine olive oil with same spices.
  4. Toss the potatoes with oil-spice mixture.
  5. Place on a parchment-lined baking sheet and roast for 25-30 minutes, until tender and crispy.
  6. Meanwhile, place drained black beans into a saucepan. Combine with cumin, salt, and lime juice. Heat through.
  7. Warm tortillas on both sides on a griddle or skillet over medium heat, until pliable, about 1 minute total. Keep warmed tortillas in a thin kitchen towel.
  8. Serve potatoes and black beans with warmed tortillas and desired accompaniments.


Luscious Lemon Bars from Whole Food Energy Cookbook

raw lemon bars | pamela salzman

My friend Elise Museles over at the blog Kale and Chocolate recently released her cookbook, “Whole Food Energy,” and I couldn’t wait to dig into it.  I don’t normally say that about a cookbook, but hers is loaded with recipes for nutritious, energy-boosting snacks, which is where I sometimes fall short on a wide variety of good homemade options. I am a very busy mama, but I still want to incorporate nutritious whole foods into our daily lives, or at least as much as possible.  The theme of the book is keeping your body nourished throughout the entire day, including between meals.  Elise encourages her readers to think outside of the 3 square meals a day and listen to their bodies.  The book is very easy to navigate since Elise color-codes each recipe and puts them into categories: Energize (to kick-start your system), Sustain (to keep you going), and Replenish (to wind down and restore) and each recipe has ingredients carefully selected to fit those descriptions.

raw lemon bars | pamela salzman

What I love about her book is that not only does she offer up great basic recipes for smoothies, juices, bars and the like, but offers several variations of each, which provides inspiration and will keep you coming back for more each time to experiment with all of the different flavor combinations.

The book also offers a lot of other information too such as what tools will help you with executing all of the recipes as well as how to stock your pantry with whole foods that will aid you in your venture to a healthy lifestyle.  She even includes detailed information about what each product does for the body and why you should be incorporating it.  It really is just a wealth of information with gorgeous, amazing recipes to boot!

raw lemon bars | pamela salzman

Though it was hard to choose from the pages of delicious looking breakfasts, snacks and treats that are all my absolute dreams come true, I narrowed in on these Luscious Lemon Bars, and I wanted to share the recipe with you!  These are a completely raw, grain free bar that come together quickly and just need a quick 1 hour chill in the refrigerator.  I love traditional lemon bars, but I never make them since they are loaded with refined sugar.  These are absolutely delicious and even better and more satisfying than the “normal ones.”  And lemons are in season right now so that’s an extra bonus!

raw lemon bars | pamela salzman

Even though these feel like a treat to me, Elise places these bars under the “Sustain” category, since they are loaded with complex carbs, protein and good fats to help you last until your next meal.  I think they would be a perfect portable snack for traveling or for after a workout.  With wholesome ingredients like cashews, dates, lemon and coconut butter, this is a truly good tasting and good-for-you snack.  I can’t wait to try the Fudgy Brownie Version of these!

5.0 from 5 reviews
Luscious Lemon Bars from Whole Food Energy Cookbook
Author: 
Serves: makes 8 bars
 
Ingredients
  • 1 cup raw cashews
  • 1 cup Medjool dates, pitted
  • 2 Tablespoon freshly squeezed lemon juice
  • 1 Tablespoon coconut butter
  • 1 teaspoon grated lemon zest
  • ½ cup unsweetened shredded coconut plus 1 Tablespoon for sprinkling on top
  • ½ teaspoon pure vanilla extract
Instructions
  1. Line a 9 x 5-inch loaf pan with parchment paper.
  2. Place cashews in a food processor and pulse until finely chopped, with some small chunks remaining. Add the remaining ingredients except for 1 tablespoon of shredded coconut for the topping. Pulse until the ingredients start to stick together. Do not process until smooth, as the texture helps hold the bars together.
  3. Transfer the mixture to the prepared loaf pan and use a sheet of parchment paper on top to press and flatten evenly using the palm of your hand. Sprinkle the coconut on top, then cover the pan with parchment paper. Place the covered bars in the refrigerator for 1 hour before slicing into 8 individual bars.


DSC_0574