If you opened this post with glee and thought I actually put a recipe on my site for a real iced blended mocha, well then, you don’t know me well at all, do you? But if you clicked on the link anticipating a recipe for something that tastes just as delicious as an iced blended mocha, but is actually good for you, then we are probably already friends. Iced blended mocha is a cold coffee drink mixed with chocolate, very much like a Starbucks Frappucino, and usually pureed with ice. My husband, who has a real taste for all things toxic, used to drink sweetened iced coffee drinks much too often. Before we were married, he used to buy the sweetened chocolate powder mix and coffee “extract” from our local coffee shop so that we could make them at home. The mix was full of all sorts of scary ingredients, not the least of which was sugar and partially hydrogenated oil. Needless to say, I haven’t made my husband one of these since I became enlightened.
But his sister, my healthful food soulmate, has just come to his rescue! She made up a truly guilt-free version of an iced blended, but sweetened with dates. My daughter and I were playing around with the recipe last weekend and tried a few different variations and they were all delish, even the batch we made with faux coffee granules. I think we’ll surprise her dad Father’s Day morning with a blast from the past!
Serves: makes about 20 ounces, enough for 2 medium drinks
Ingredients
2 big handfuls of ice
2 Tablespoons carob powder or unsweetened cocoa powder (we tried both and they were equally good)
2 teaspoons decaffeinated instant coffee granules or grain-based coffee substitute, such as Pero (again, we tried both and they were equally good)
16 pecan halves or ¼ cup pecan pieces
6 pitted dates
1 - 1½ cups unsweetened almond milk
Instructions
Put everything in a blender and process until smooth. Taste before serving. You may prefer more ice than I did. Also, I would use 1 cup of almond milk for a more intense mocha flavor or 1½ cups to keep it light. You can serve this over ice, if you like.
Father’s Day is this Sunday and we are getting ready to celebrate the man of the house. I have already begun planning my menu, which no doubt will involve some grilling since we all know that’s a man’s favorite thing to do. If my husband had his way, the meal would consist of cheeseburgers, hot dogs, grilled corn and ice cream sandwiches. And the reason my husband has been able to maintain his girlish figure all these years is because he is not in charge of meals. Before you accuse me of being no fun whatsoever, please know that grass-fed burgers with raw cheddar cheese and Applegate Farms organic grass-fed hot dogs will be in the house. Thankfully several people in our family like my turkey burgers enough that I will be making a batch of those. But more importantly, what am I going to eat?
Did I really find a way to make Father’s Day all about me? No, no, this will be Dad’s day, but it’s my job to make sure there’s a little balance in the meal and protein for the non-hot dog eaters. Like me. When I think about one of my favorite things to make for a backyard barbecue, something versatile enough to complement anything, delicious in its own right, lovely to look at and healthful enough that you can almost justify eating all that meat, quinoa tabbouleh immediately comes to mind. Just look at it! Light and bouncy quinoa mixed with sweet cherry tomatoes (use whatever colors you like), crunchy cucumber and all those fresh herbs. Who wouldn’t want to eat it? Don’t answer that, because I know what you’re thinking. I took this salad to my friend Karen and Jonathan’s house the other day for a barbecue and every man there not only tried the quinoa, but finished every little grain.
Quinoa works really well as a substitute for tabbouleh’s traditional bulgar wheat. (Like you really need to eat more gluten.) You can even mix different colors of quinoa and different colors of tomatoes. When I brought it to Karen’s, the quinoa was still too warm to mix with all the vegetables and herbs so I kept that in a separate container and brought a little glass jar with the lemon juice, olive oil and salt. Everything else was prepared ahead and kept in a serving bowl. Before we sat down to eat, I mixed the quinoa with the vegetables and herbs and poured in the dressing. Super easy, really nutritious and you know what? Real men don’t eat quiche, but they do eat quinoa!
2 cups diced unpeeled Persian or Japanese cucumber (or cucumber with a tasty skin)
2 cups halved or quartered cherry tomatoes
4 scallions, thinly sliced
½ teaspoon minced garlic
¾ cup finely chopped fresh flat leaf parsley or as much as you can chop -- the more, the better!
¼ cup finely chopped fresh mint leaves
⅓ cup freshly squeezed lemon juice
⅓ cup unrefined, cold-pressed extra-virgin olive oil
Freshly ground black pepper
Instructions
Rinse quinoa in a bowl with water or place quinoa in a fine mesh sieve and rinse under cold water until water runs clear. Transfer to a saucepan and add a healthy pinch of sea salt and 1 ¾ cups of water. Bring to a boil and simmer until water is absorbed, about 15 minutes. Turn off the heat and let sit covered for 10 minutes.
Transfer quinoa to a serving bowl and allow to cool. Fluff with a fork periodically.
Combine cooled quinoa and remaining ingredients plus 1 ½ teaspoons sea salt. Toss to mix well. Taste for seasoning.
Let’s play a little word association game! When I say “turkey burger,” you say …? I think I heard “bland,” “dry,” “flavorless,” “pointless.” You know what I say? “No thank you!” Until now.
I have never been a big meat-eater, even though I think there’s a place for high-quality grass-fed beef in one’s diet if you like it. At barbeques, I’m usually the one looking for the non-beef burger option, but I had never met a turkey burger that I liked. Father’s Day is around the corner, and there are lots of dads who are trying to cut back on beef, so I think now’s a good time to post a great turkey burger recipe.
My goal is not to make a turkey burger that tastes like beef, because it won’t. But I want to make the turkey taste savory and moist and like something you would actually want to eat, as opposed to something you are settling for and all the time wishing you were actually eating a hamburger. I also want a basic burger that everyone in my family will like, especially my hamburger-loving husband who once claimed that real men don’t eat turkey burgers. I accept the challenge!
It’s amazing what a few simple ingredients do to boring ground turkey. I add a little olive oil for fat, minced onion for flavor and moisture and worcestershire for a meaty undertone. A bit of dijon and ketchup get mixed in for an additional boost and my husband declared he would eat this turkey burger any day. Of course, you can tailor this burger to your liking and make it a little fancy, if you want. Add in some finely chopped sundried tomato and basil or go Tex-Mex with some red bell pepper, corn, cilantro and cayenne. How ever you make it, I have a feeling you’ll hear “Mmmmm……that’s tasty!”
I am willing to bet that I have eaten more pesto in my life than all of you. Let me give you a little background. My father has an expert green thumb and has maintained amazing gardens throughout my life. Every year, he plants one large plot with a wide variety of beautiful vegetables, including tomatoes, eggplant, zucchini, green beans, cucumbers, arugula, kale, and so on. And he also plants one plot of basil. Just basil. And every year he has so many basil plants that he has to give them away. Same story this year. “Pamela. I have enough basil plants for all of New York.” I know what you’re thinking. Why does your father overplant basil every year? Trust me, don’t ask.
Well, it’s a good thing we all liked basil growing up! Because as you might imagine, we were putting it on everything, from our morning eggs to tomato salads to sauteed green beans to macerated strawberries. But using a few handfuls of green leaves everyday was not putting a dent into our basil farm. My father would rant and rave (in Italian). “Do we not eat basil in this house? I planted so much beautiful basil and no one eats it. Mah!” I can still picture the kitchen sink most summer mornings with freshly cut bushes of basil. “Pamela, if we don’t pick it now, it will turn to seed and then the plant will die.” Really? Well I heard you can die from a basil overdose.
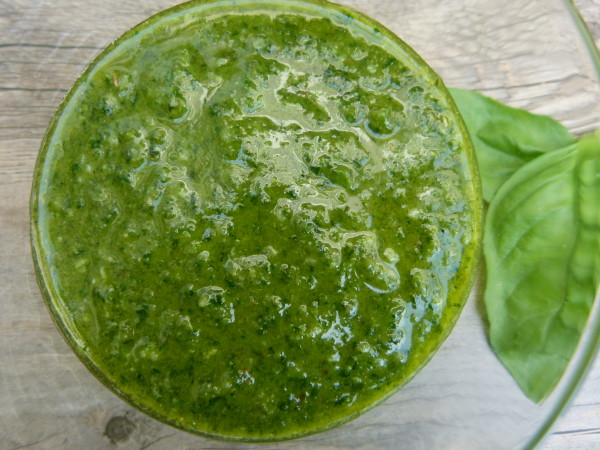
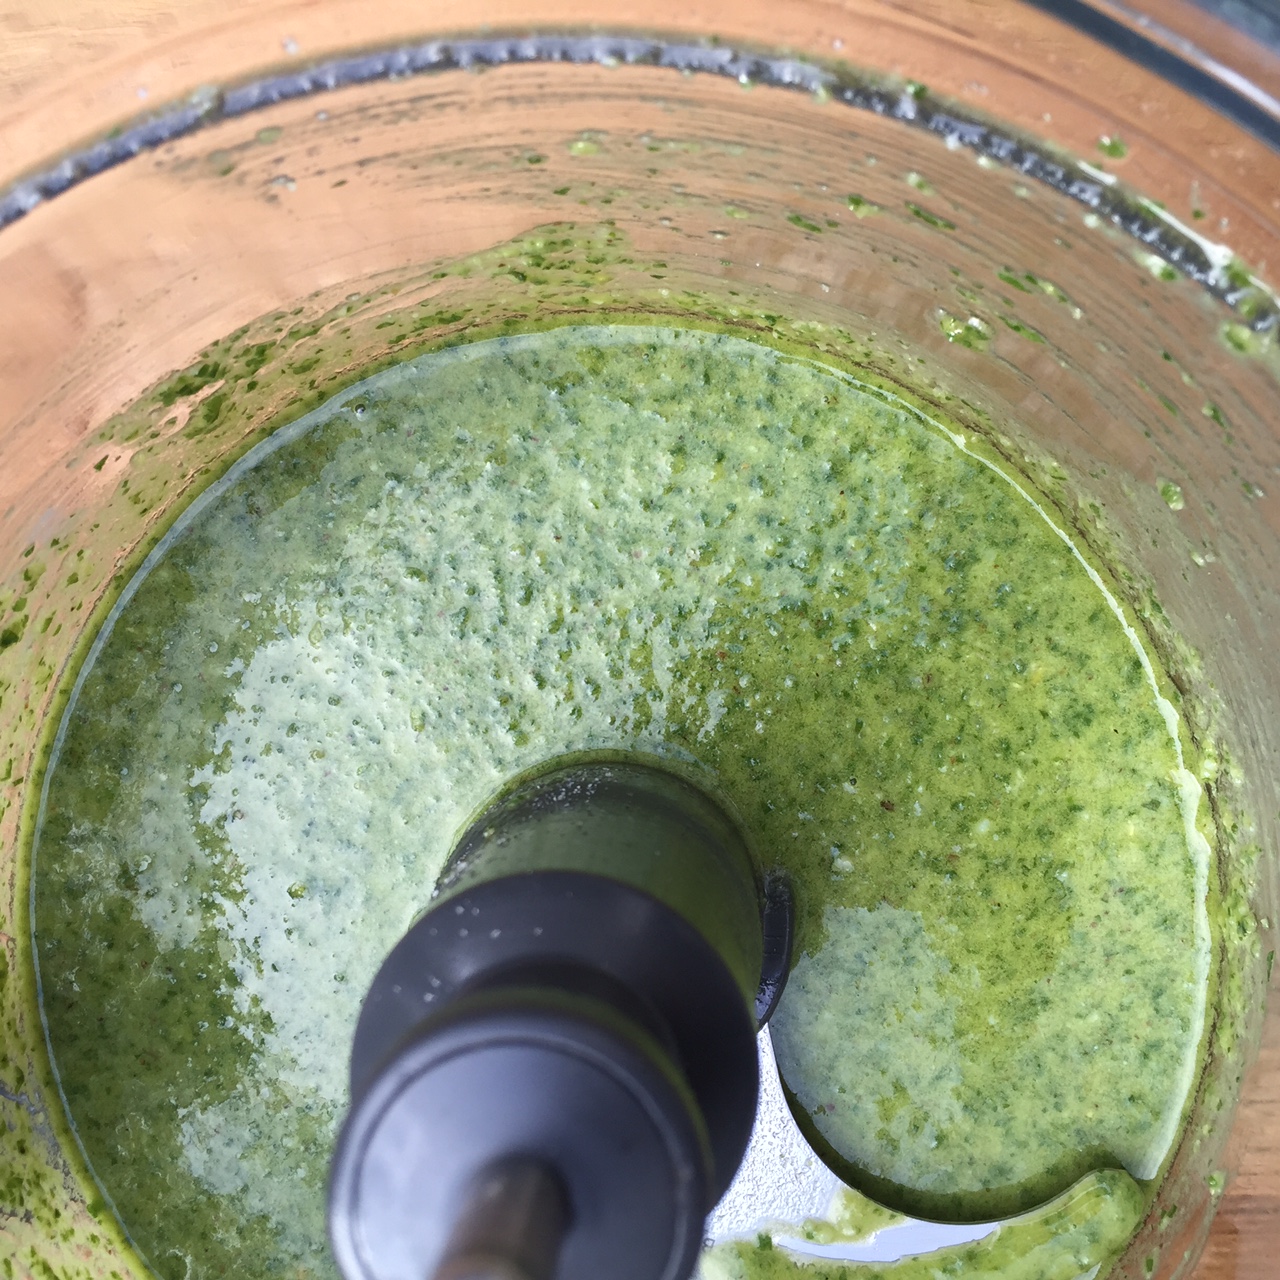
My mother had no choice but to turn to pesto. What better way to use an overabundance of the herb? Mom pulled out the blender and ground up pine nuts and fresh garlic. She packed down as much basil as would fit, sprinkled it with salt and with the motor running, slowly poured in the olive oil. That distinctive aroma would fill the house and still today reminds me of the summers of my youth. Next came the grated parmesan cheese and we had glorious pesto. I say glorious, because my sisters and I loved it. I think my mother probably would have started drinking hard liquor if we didn’t.
Lucky for me that I married someone who loves pesto and gave birth to kids who do, too. We put it on lots of things — pasta, sandwiches, grilled vegetables, ho-hum chicken or fish, minestrone soup, scrambled eggs, boiled potatoes, pizza and so on. But I make it my own way with a combination of pine nuts and walnuts; pecorino-romano, which is made from sheep’s milk cheese and a little easier for some to digest than cow’s milk; and dare I say, with half basil and half parsley. I am obsessed with parsley, which I consider a superfood. It is loaded with chloropyhll and incredibly rich in nutrients from iron to calcium to Vitamin C. But parsley also contains some interesting volatile oil compounds that are considered to be “chemoprotective,” which means they can help neutralize certain carcinogens. The flavor of a basil-parsley pesto is still dominated by basil, but somehow a little lighter. I actually prefer it to an all-basil pesto. Of course, the real reason I even started to do half and half is because I always manage to plant way too much parsley.
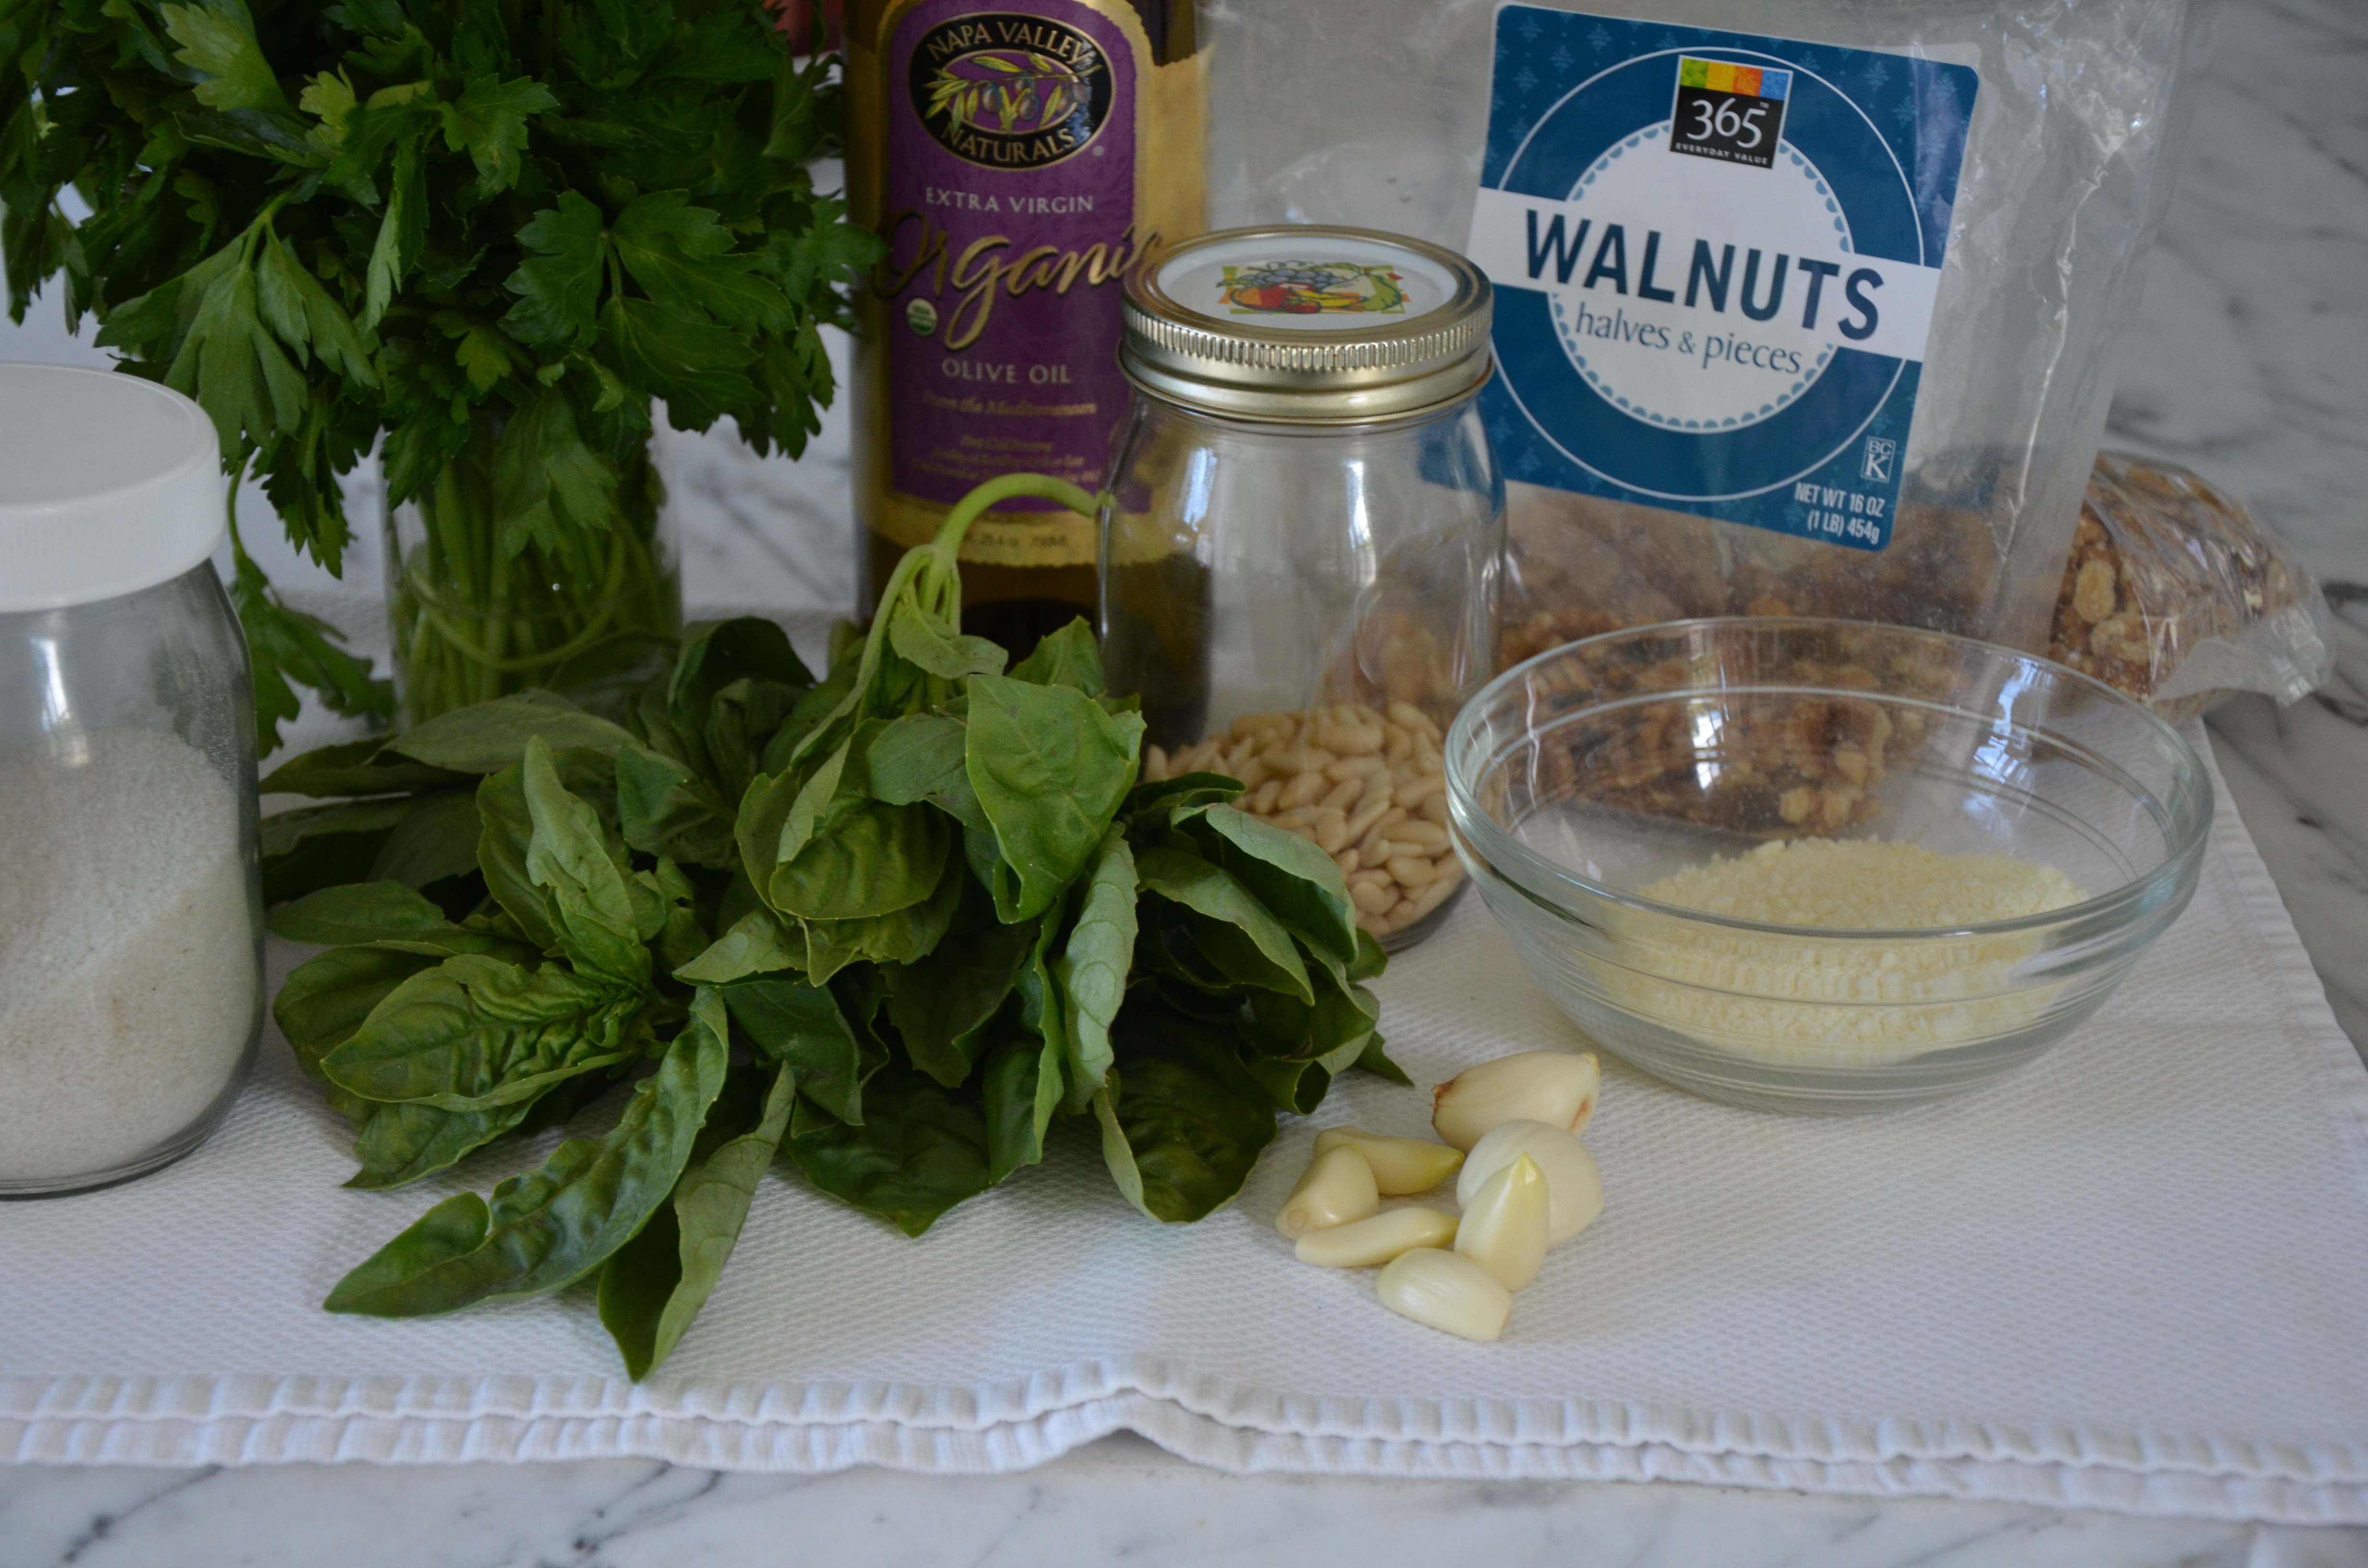
1 cup unrefined, cold-pressed extra virgin olive oil
½ cup grated pecorino-romano or parmesan cheese**
Instructions
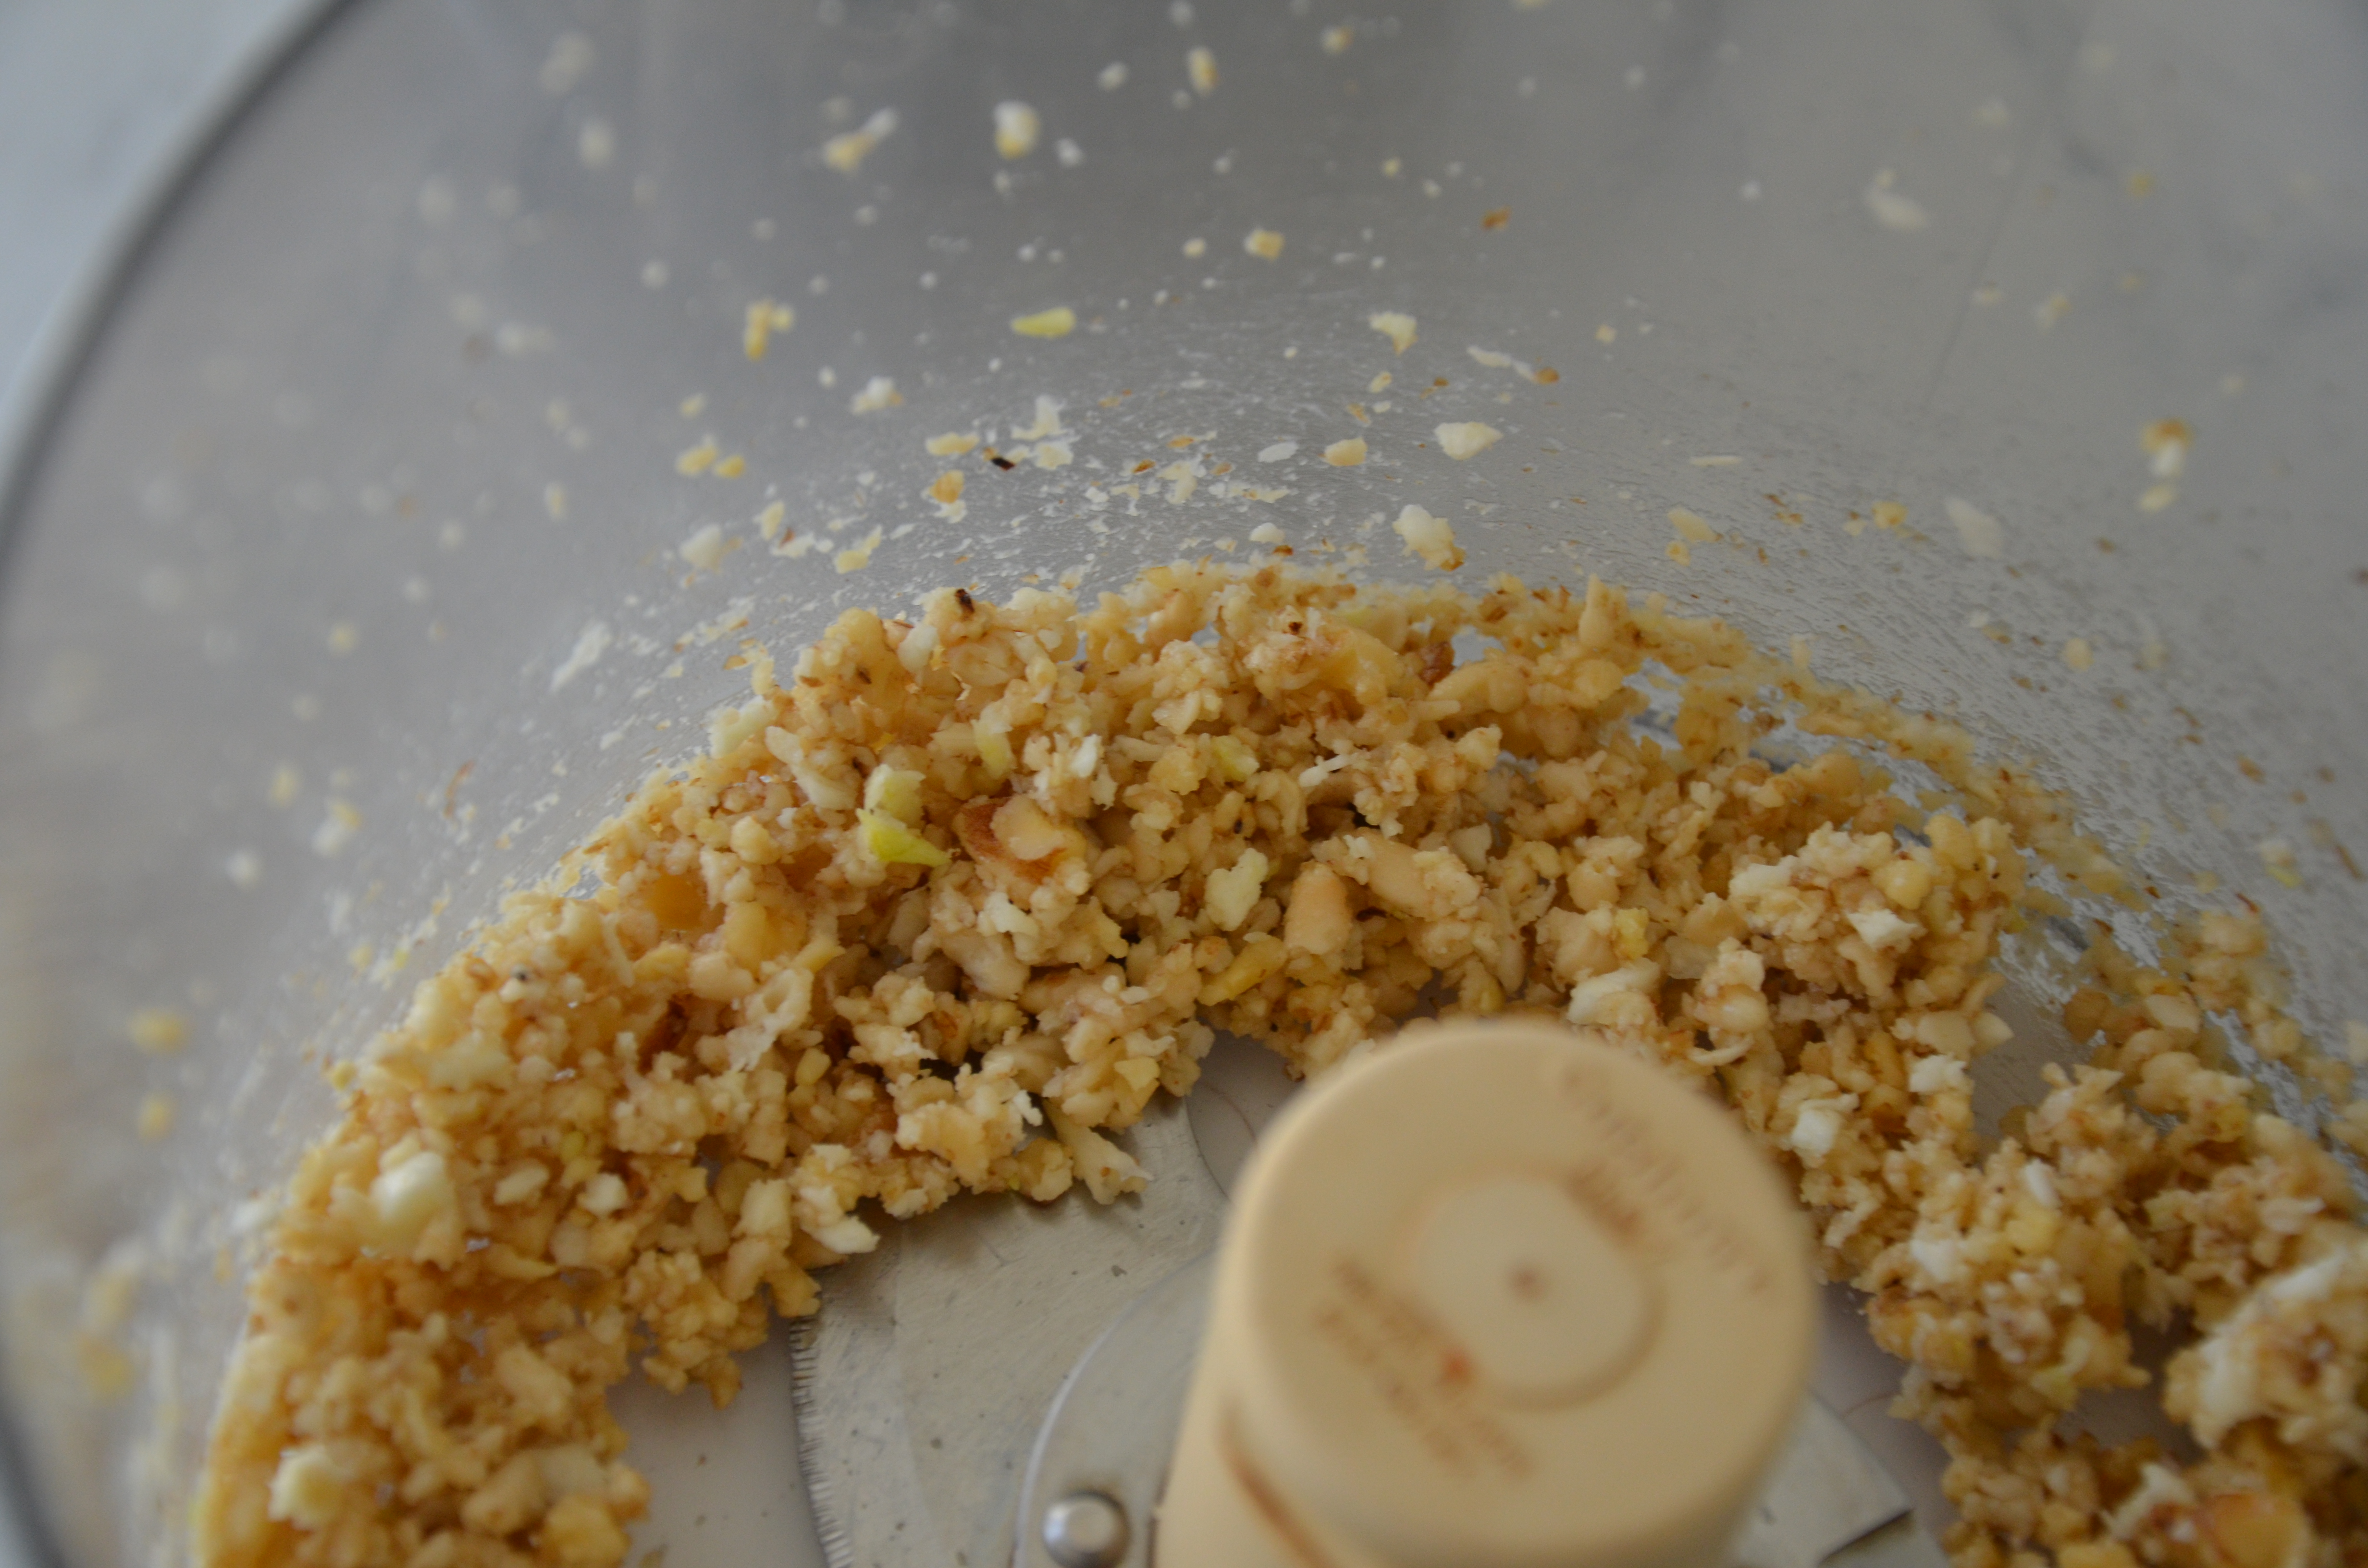
Place the walnuts, pine nuts, and garlic in the bowl of a food processor fitted with a steel blade. Process until finely chopped.
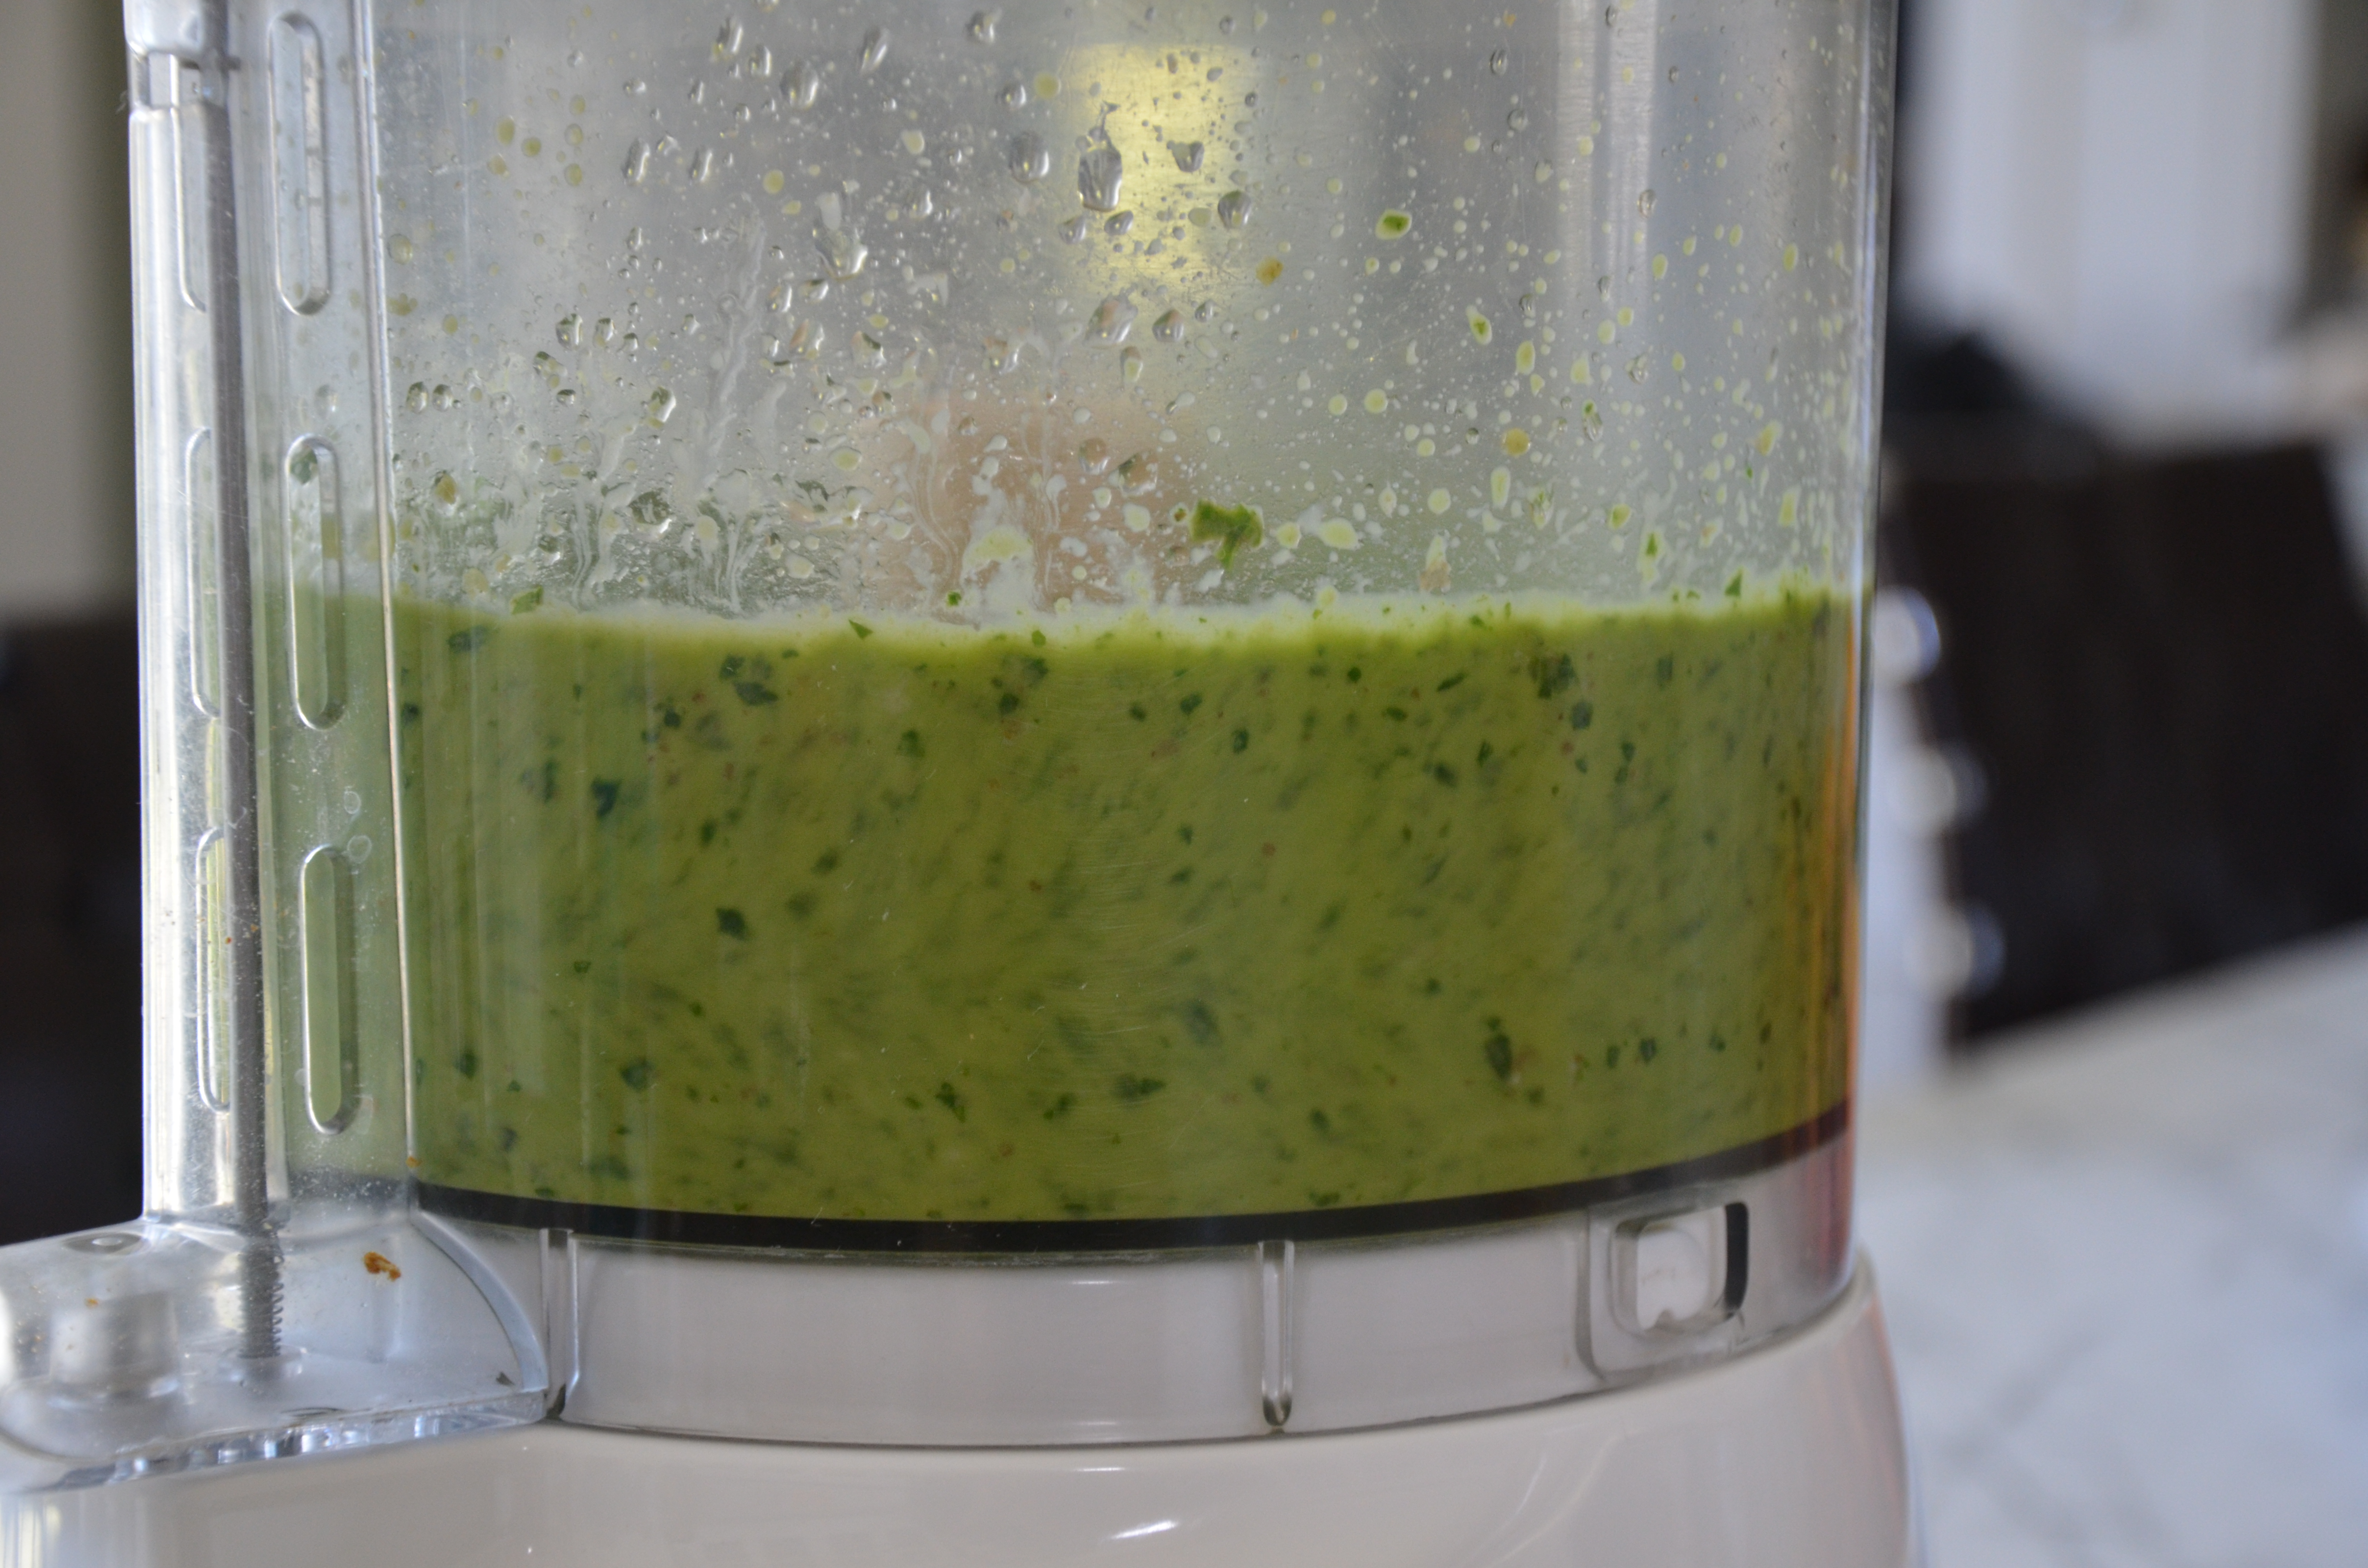
Add the basil and parsley leaves, salt and pepper. Start the food processor and slowly pour the olive oil into the bowl through the feed tube and process until the pesto is finely pureed. Add the parmesan cheese and puree until well blended. Pesto freezes beautifully.
Notes
**To make a dairy-free/vegan version, eliminate the salt and cheese and substitute ¼ cup brown rice miso or other hearty miso. Taste for salt.
My husband and I have a division of labor approach to managing our home, kids and life. For example, he is in charge of sports, car issues, and electronics, and I handle meal preparation, communication with teachers and writing the checks (with mostly his money.) But the last few months I have been much busier than normal for me and I have begged asked my husband for help in the mornings with breakfast and lunch-making. On days I need to leave by 7:00am, we have worked out an arrangement where we split meal preparation duties. He’s does lunch and I’m on breakfast. You won’t tell him that I got the easier job, right?
Since I love prepping in advance, most of our breakfasts are done the night before, at least in part. Typical morning meals in our house are oatmeal (soaked the night before), pancakes (batter made the night before and kids taught how to cook them), yogurt and granola, egg and vegetable stratas (prepared the night before and baked in the morning), and muesli, the ultimate do-ahead, meal-in-a-bowl breakfast. I first discovered muesli eons ago while on vacation in Hawaii. The hotel breakfast buffet is always a little tough for me with the choices being either sugar (sweet pastries) or hi-fat, low-quality animal protein (sausages, ham.) But once, right there with the platters of inflammation, was this curious bowl of creamy raw oats and fruit. One bite and I was hooked on muesli’s subtle, natural sweetness and the long-lasting energy it gave me. Everytime I traveled, I searched for muesli on every breakfast buffet and never considered making it at home. Little did I know how easy it was to make.
Muesli is essentially raw oats soaked overnight in yogurt, fresh juice and grated apple. The soaking process actually helps make the oats more digestible and the minerals more absorbable. I love it because it tastes creamy and delicious and makes me feel satisfied all morning long. Muesli tends to replace hot oatmeal in our house when the weather turns warmer. I usually make a batch once per week and it becomes an instant, but nourishing breakfast-to-go if I’m running late or for the kids if I need to leave before they come down for breakfast. It is a must-try if you are hosting house guests this summer! What you will also love about this recipe is that it is easily adaptable to the various palates in the house. Mr. Picky tops his muesli with strawberries, bananas and pecans and the girls have taken to raw cacao nibs, chopped almonds and blueberries. But really the sky’s the limit!
My favorite line from “Modern Family” this season was when Mitchell returns from the farmer’s market and declares, “Did you hear? Kale is the new spinach?!” Damn right, it is. Even though kale seems to be the new “it” vegetable, I meet lots of people in my classes who are still intimidated by this highly nutrient-dense leafy green. I don’t know where to begin. I can say, “don’t judge a book by its cover” or “don’t knock it ’til you try it.” Or maybe you have tried it and it just didn’t float your boat. If that’s the case, then you haven’t tried my kale salad with citrus dressing, because that will knock your socks off.
But if you been unsuccessful even getting your kids or picky spouse to try kale, you’ve got to take baby steps and that’s where kale chips come in. Kale chips is something I mentioned in passing in the first cooking class I ever taught. Years later, students still email me and ask me how to make them and I cannot believe I have never posted a kale chips recipe. These light and crispy chips are akin in texture to those seaweed snacks that your kids devour at $1.59 per package (I will post how to make those another time because all that packaging getting thrown into landfills is keeping me up at night.) If I had to describe what they taste like, I would say they’re like the lone brussels sprout leaves that got away from the head and roasted a little extra. You know, the pieces that everyone fights over! And they have the same slightly greasy, salty satisfaction as a potato chip, but it’s KALE. My kids eat them right off the baking sheet, but if I manage to sneak a few away, I like to crumble them over popcorn or cooked grains, like quinoa or brown rice. They even make a fun and delicious garnish on a soup, as shown in the final photo, topping a bowl of potato, white bean and escarole soup.
The three kinds of kale you are likely to find in your market are Red Russian, Curly Green, and Dinosaur, which also goes by Lacinato, black kale and Tuscan kale. I use the Dinosaur kale most often since I like the leaves’ smoother edges better than the rough leaves on the others. But the Curly Green works well for chips since it is a little thicker. My Whole Foods has been touting the ANDI system for rating a food’s nutrient density relative to its calorie content and kale receives a perfect 1000 out of 1000. Why? Kale is incredibly high in calcium, Vitamin K, Vitamin C, magnesium, iron and antioxidants including including beta-carotene and lutein. It is also high in fiber and low in calories. All we are saying, is give kale a chance.
After making hundreds of pans of kale chips over the years, I have a few simple tips for you. You can actually use whatever type of kale you want, but again I prefer the smoother edges of the Dino kale leaves. It is very important that you dry your kale leaves very well before drizzling them with oil otherwise the oil won’t adhere well. Arrange the leaves in one layer on the baking sheet so that they don’t overlap and they develop an even crispness. Also, keep watch over the the chips while they’re in the oven and make sure they don’t burn. If they do, they will look even scarier than when you first started and taste bitter. And then, my friends, you’ll be back to square one with kids and kale. But I have a hunch that the only sad part of kale chip-making will be that they disappear way too quickly!
Please feel free to post any questions you have about kale, whether it’s destined to be a chip or not.
1 bunch kale of your choice ( I used Dinosaur kale here because that's what I had.)
unrefined olive oil
fine grain sea salt
Instructions
Preheat oven to 350 degrees.
Wash kale and strip leaves off of stems. Discard stems. Dry kale really well and tear into large pieces.
Place kale leaves in a large bowl and drizzle with just enough oil to coat the leaves lightly.
Arrange kale leaves in one layer on a baking sheet. Feel free to line the baking sheet with unbleached parchment paper if it's aluminum. Sprinkle leaves with sea salt.
Bake for 12 minutes, turning halfway. They should be dry and crispy. The leaves change to an olive-y green color, sometimes even a little yellow, but they should not be brown or burned.
I live in Southern California, where the seasons are like salsas, mild or hot. No one is complaining here. I love living in a place where the weather doesn’t pose a challenge — isn’t life challenging enough? But I grew up in New York, the land of can’t-catch-a-freakin’-break weather, where you must pray to the weather gods if you are brave enough to plan an outdoor event and where you learn to expect the unexpected, like snow in April. This I do not miss. BUT I love an East Coast summer. When I was a kid, summer was party, a time to celebrate and take advantage of the brief window of enjoyable weather. You could actually feel the change in people’s energy. Not here. Summer in So Cal? Oh, it’s just more of the same old, same old. 72 and sunny today? What a shocker!
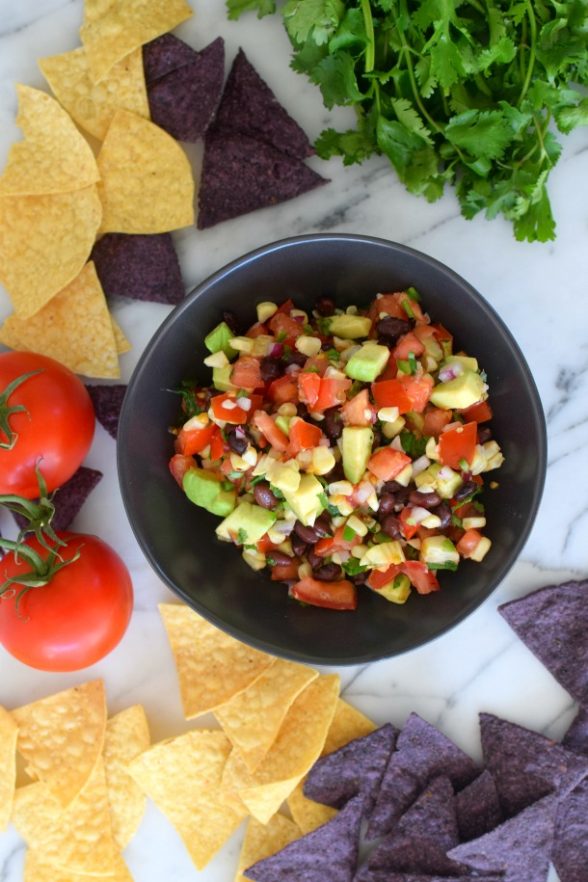
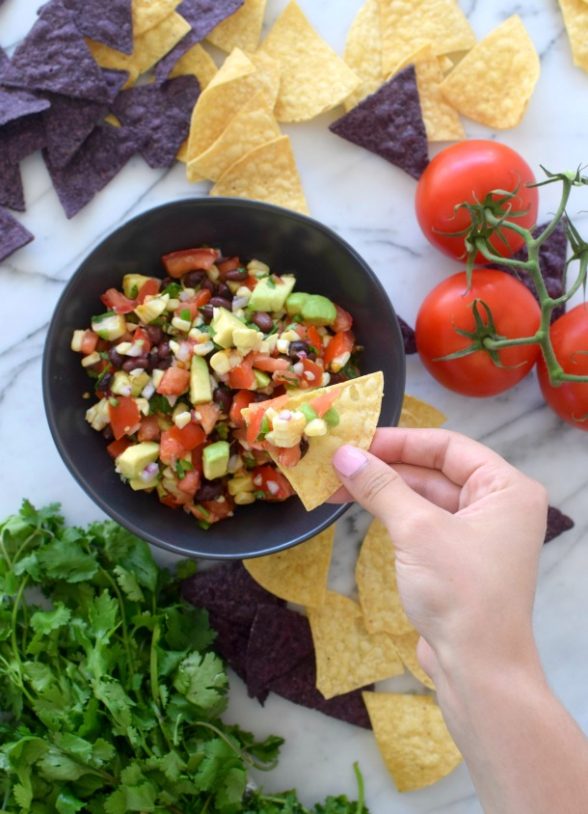
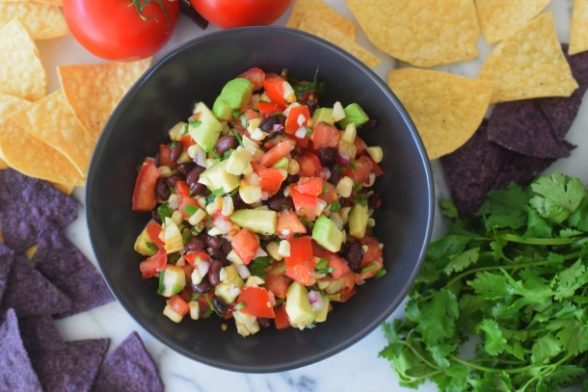
Well you know what they say — you can take the girl out of New York……. With Memorial Day around the corner, I still get excited for the start of “the season.” I am ready for the unofficial start of summer, which begins Memorial Day weekend and ends on Labor Day. So this weekend I am ready to party! (in my own way, of course.) No same old, same old here. It’s funny that I mentioned salsa earlier, because that’s just what I’m going to change up a bit. Instead of the expected pico de gallo, which is just a fresh tomato salsa, I’m making my favorite grilled corn and black bean salsa with baked tortilla chips. I take smoky grilled corn mixed with creamy black beans and avocado to take salsa to the next level.
What I love about this good-for-you nosh is that it’s not just for chips. You’re better off with big sticks of jicama to scoop up the dip. Or we had it last night over some grilled wild salmon that I had bathed at room temperature with equal parts lime juice and olive oil and sprinkled with sea salt and pepper. It’s one of my favorite light, but super flavorful meals. You’re not much for chopping? No problem. Go buy a high quality pico de gallo (made from fresh tomatoes and not containing garlic powder, citric acid and other things that have no business being in salsa), and mix in some black beans, grilled corn and diced avocado. It’s like Semi-Homemade with Pamela and not a boxed cake mix in sight!
No fresh corn yet where you live? Awww, too bad. You must not live in Southern California.
¼ cup diced red onion or 2 scallions, white and light green parts thinly sliced
1 jalapeno pepper, seeded and minced or a few dashes of hot sauce to taste
1 clove garlic, minced
2 Tablespoons chopped fresh cilantro
2 Tablespoons fresh lime juice
1 teaspoon sea salt plus more to taste
1 ripe avocado, diced
accompaniments: baked tortilla chips
Instructions
Heat the grill to medium heat. Pull the husks back from the ear of corn and remove the silks. Replace one layer of the husks and soak the corn in cold water until the grill is ready. Place the corn directly on the grill and cook, turning every 5 minutes. Remove from the grill and cool until easy to handle.
Pull all the husks back and cut the kernels off the cob. Place the corn in a serving bowl.
Add the diced tomatoes, black beans, onion, jalapeno or hot sauce, garlic, cilantro, 1 Tablespoon lime juice and salt. Toss to combine.
In a small bowl, mix the diced avocado and remaining Tablespoon of lime juice. Add to the salsa and combine gently. Cover and refrigerate until ready to serve. If you are preparing this several hours in advance, place in the smallest container that will fit the salsa.
I’m so glad you came back. I was afraid I might have scared you off with that black cloud of grilling hanging over my website, so to speak. But the important message in yesterday’s blog is that even though grilling animal protein is not the most healthful way to cook, there are many things you can do to reduce the amount of carcinogens that form when you grill. That, and you may want to think twice about grilling every night and just do it occasionally. As promised, I have a great recipe for grilled chicken that satisfies more than one of the criteria for safer grilling.
I have been making this chicken since I had dinner at my friend Joaquin’s house many years ago. Joaquin is one of those people who always responds with a “it was so easy” when you eat something delicious at his home and ask him how he made it. One of the reasons I adore him is that he is always right. Take for instance the time he made me “chocolate oatmeal,” which was nothing more than regular rolled oats cooked with water and then finished with chocolate soymilk. I have since changed it up with chocolate hemp milk and I am thinking I should do a post on it because it is so good and “so easy.” But then again, I just gave you the recipe in one sentence! Regardless, I was having dinner one night on his lovely patio many summers ago and he served me the best grilled shrimp ever. It was simply marinated in lemon juice, olive oil, garlic, herbs and salt and threaded on bamboo skewers. I’m sure it helped that he grilled them perfectly. That shrimp dish just reinforced in my mind that when you start with good, fresh ingredients, you don’t have to do much to make something delicious.
So what does this have to do with chicken? I’m getting to it. After I overdosed that summer on grilled lemon-herb shrimp, I decided it was too good a recipe to retire so why not just put it on something that wasn’t shrimp. Chicken! And it has been my stand-by grilled chicken dish ever since. My favorite way to make it is the way the recipe is written here with mint, parsley and thyme, but you can vary the herbs based on what you have available. On Saturdays in the summer, we’ll have friends come down for the day and I will very often grill up a bunch of lemon-herb chicken cutlets and put them out for a make-your-own-sandwich buffet before we head out to the beach. Even without the herbs, sometimes I’ll grill the chicken to use for sandwiches in the kids’ lunch boxes instead of deli turkey, which I think is a little scary. I don’t know when I came up with the mint drizzle, but it was probably when I had lots more time on my hands. I will make the drizzle if we have people over, but not usually on a weeknight since the chicken is perfectly tasty without it. Yeah, yeah. I know what you’re thinking — but it looks so easy!
4 boneless skinless chicken breast halves, cut in half to make cutlets, about 2 pounds
½ cup fresh lemon juice
½ cup cold-pressed extra-virgin olive oil
4 cloves garlic, thinly sliced
½ cup chopped mixed fresh herbs (mint, parsley, thyme is a good combo)
2 teaspoons sea salt or additive-free kosher salt
1 teaspoon freshly ground black pepper
Mint Drizzle:
1 cup fresh mint leaves
pinch of red chili flakes
3 Tablespoons cold-pressed extra-virgin olive oil
pinch sea salt
a teaspoon or so of raw honey
1 Tablespoon fresh lemon juice
1-2 Tablespoons plain whole or low-fat yogurt ( I like Straus Family), optional
Instructions
Mix all the marinade ingredients in a shallow, nonreactive container. Add chicken cutlets and toss to coat well.
Cover and refrigerate for 6 hours and up to overnight. If you are doing this at the last minute, marinate the chicken at room temperature for an hour and it will still be delicious.
Preheat the grill to medium heat. Remove chicken from refrigerator 30 minutes before grilling.
To make mint drizzle: Combine everything except yogurt in a blender or mini food processor and blend until smooth. You may need to scrape the sides halfway through. Pour mint mixture into a small serving bowl and stir in yogurt to desired consistency.
Grill chicken 3-4 minutes on each side or until cooked through. Serve with mint drizzle, if desired.
Notes
Many herb combinations are great with lemon chicken. Other herbs to consider are dill, oregano, basil, cilantro, tarragon or rosemary. Although the mint drizzle works best if there is mint in the marinade, too.