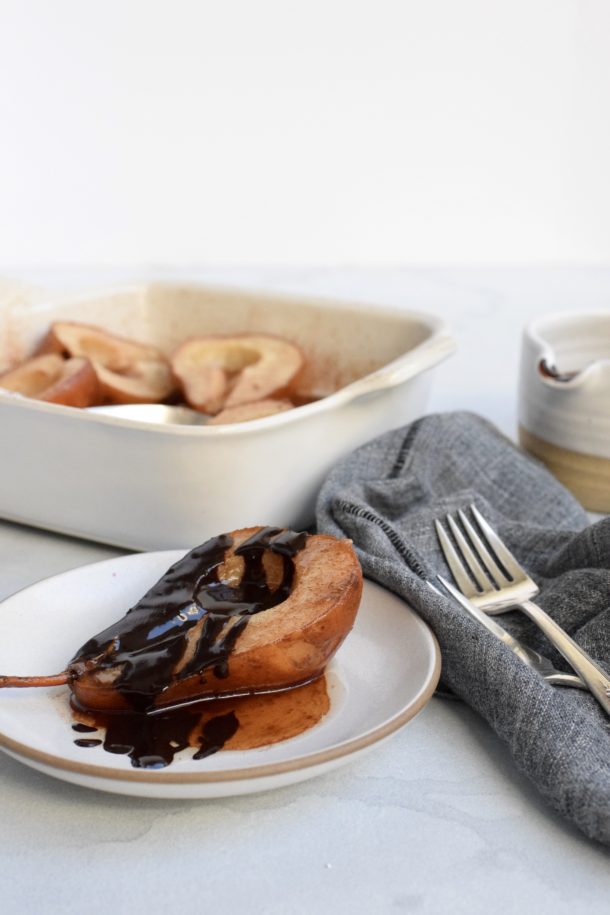
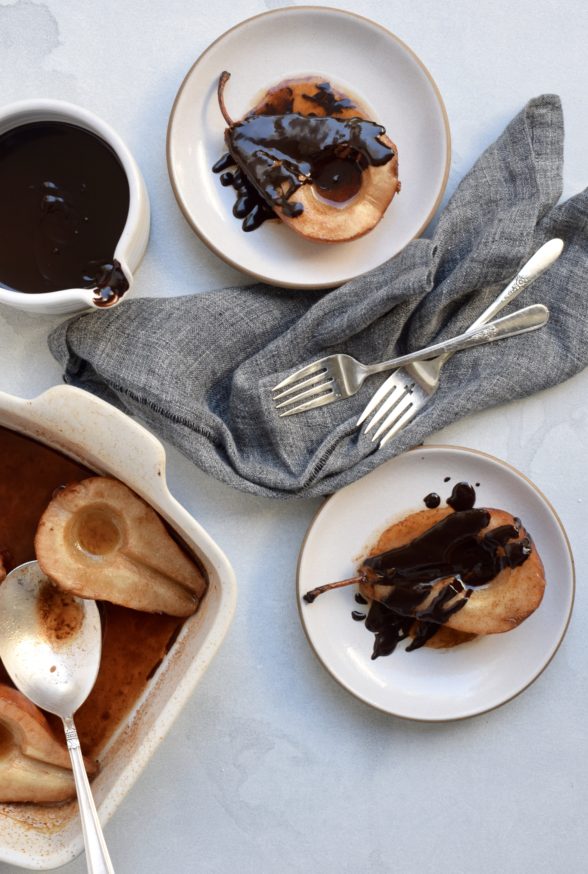
Roasted cinnamon pears with dark chocolate sauce
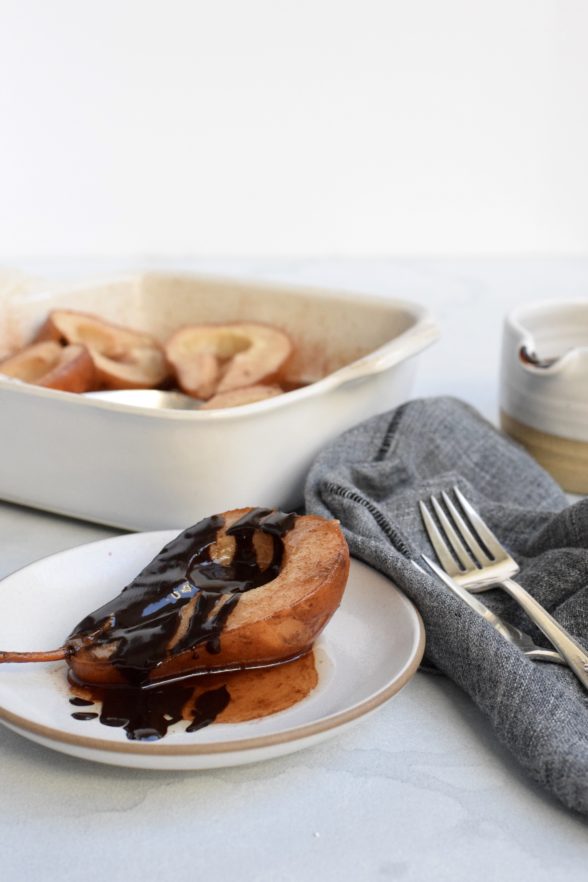
Cinnamon Roasted Pears with Dark Chocolate Sauce | Pamela Salzman

Cinnamon Roasted Pears with Dark Chocolate Sauce | Pamela Salzman

If you’re like most people, you’re probably thinking you’ve got one last hurrah before the parties come to an end and the decorations go back in storage.  A final splurge before you return to your normal routine.  One last dance with the devil before resuming your life of miso and greens.  If you’ve been messing around with too much sugar this holiday season, there’s no point beating yourself up over it.  Hopefully it was worth it, but hopefully it doesn’t send you down that slippery slope of daily dessert.  I’ve got one last treat for you, but nothing you need to feel guilty about.  In fact, these roasted pears just might rock your new year’s eve.

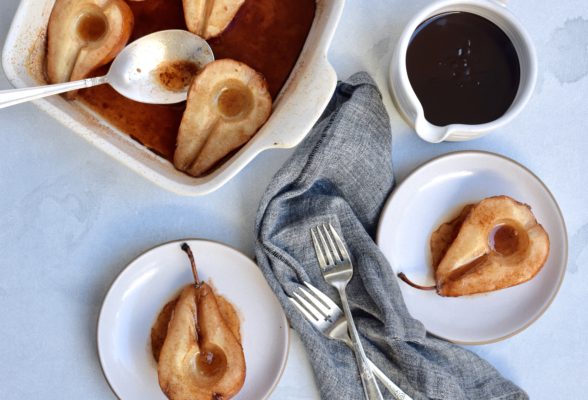
Why don’t pears get more attention?  There are so many delicious varieties and the fragrance of a perfectly ripe pear is completely intoxicating.  Plus, I think they are sooooo beautiful.  I love pear crisps, pear upside-down cake or just simply sauteed pears on top of waffles or pancakes.  But the pear dessert I make most often is simply roasted with a rich dark chocolate sauce or plain vanilla ice cream.  I’ve tried poached pears before, but the flavor is not quite as intense as roasted.  The best part is that these are easy enough to whip together as a last minute sophisticated dessert for a dinner party or just a cozy night at home in front of the fire playing Bananagrams
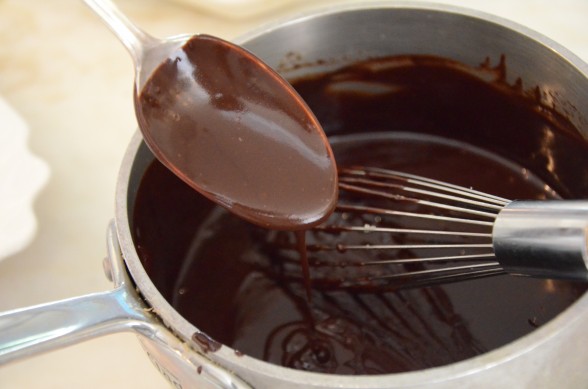
I love when the sweet end to a meal isn’t loaded with sugar and refined ingredients.  I especially feel that way about fruit desserts, which should taste like fruit and not just sweet.  These roasted pears are certainly fabulous enough to serve without the dark chocolate sauce, but good gracious, the sauce is just heaven.  It’s good to have a perfect chocolate sauce recipe in your back pocket since it can dress up everything from plain berries to ice cream to a simple cake.  Mr. Picky suggested he might even try Swiss chard if he could put this chocolate sauce on it.  I just might let him.  If dark chocolate isn’t sweet enough for your lovelies, you can use semi-sweet or milk chocolate instead.  But just keep in mind, the darker the chocolate the higher the percentage of cacao and the lower the sugar.
Cinnamon Roasted Pears with Dark Chocolate Sauce | Pamela Salzman


What will be your grand finale for 2011?  Whatever is it is, I hope it’s delicious.  Wishing you a happy and healthy 2012!
Cinnamon Roasted Pears with Dark Chocolate Sauce | Pamela Salzman

Roasted Cinnamon Pears with Dark Chocolate Sauce

Pamela

Ingredients
  

  • 1/3 cup pure Grade A maple syrup
  • 1/3 cup unsweetened apple juice
  • 3 Tablespoons unsalted butter
  • 1 teaspoon ground cinnamon
  • 3 firm but ripe pears, such as Bosc or Bartlett
  • ¼ cup heavy cream
  • ¼ cup whole milk
  • 2 Tablespoons natural cane sugar or maple sugar
  • 1 Tablespoon unsalted butter
  • 4 ounces dark or bittersweet chocolate coarsely chopped
  • ½ teaspoon pure vanilla extract
  • sliced almonds or chopped pecans for garnish optional

Instructions
 

  • Preheat oven to 400 degrees.
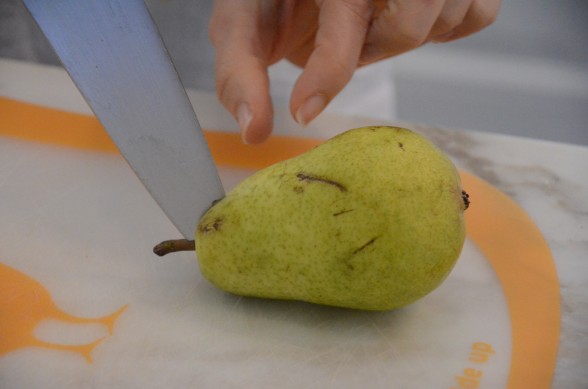
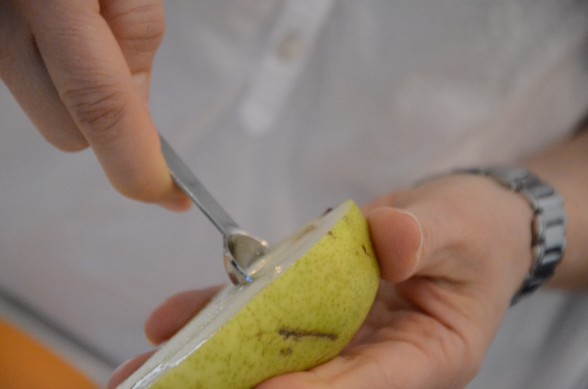
  • Cut the pears in half through the stem, if possible. I take a knife and start an inch above the stem and slice through the stem, so both halves get a piece of stem – looks pretty! Then take the knife and slice the pear all the way in half, following the original cut. Remove the core with a round metal measuring spoon. Arrange the pears cut side up in an 8 or 9-inch square glass or ceramic baking dish.
  • In a small saucepan over medium low heat, whisk together maple syrup, apple juice, butter and cinnamon until butter is melted.
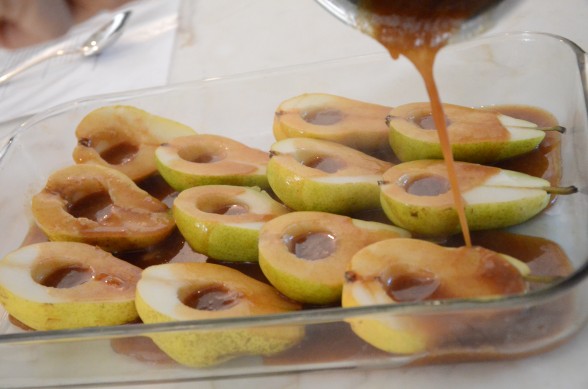
  • Pour the sauce over the pears. Bake for about 30 minutes, or until the pears are tender. Baste occasionally with the pan juices.
  • In a small saucepan over medium heat, warm together cream, milk, sugar and butter. Stir to dissolve sugar. Turn heat off and add chocolate and vanilla. Stir until chocolate is melted and sauce is smooth.
  • Serve 1 pear half per person. Drizzle with chocolate sauce and garnish with sliced almonds or chopped pecans, if desired. Any remaining pear basting liquid is delicious over French toast or pancakes.
Tried this recipe?Let us know how it was!

Chocolate-covered frozen bananas

Are you asking yourself if I have gone mad?  Two desserts in one week!  What happened to “moderation?”  People, I write it like I see it and chocolate-covered frozen bananas are what the past few weeks have been about around here.  Have you ever been in a “food phase?”  I mean when you eat something that makes you think about eating it all the time and then you do?  Some food phases, like when I ate raw kale salad several times a week for months, are better than others, like in the ’90s when I went through a nonfat frozen yogurt phase that lasted several years.  Blech.  My husband is in a chocolate-covered frozen banana phase and I see no signs of it letting up.  It all started in May of this year at the bar mitzvah of my friend Kim’s son where they passed around mini-frozen chocolate banana bites at the end of the evening.  My husband and I looked at each other after a few as if to say “where have we been?”  Before I knew it, the mister was taking detours through town just to pass the Manhattan Creamery where he would buy a frozen banana or two.  He was even offering the kids frozen banana rewards for the most ridiculous things.  Obsessed.

All joking aside, I actually think these bananas have the potential to be an okay dessert, especially if you can use good quality, organic dark chocolate, which I keep telling myself has lots of antioxidants!  So I thought to myself, how hard could dipping bananas be?  Well, I wouldn’t be writing a whole post about it if it were just a matter of dipping a banana in chocolate.  Let me save you some time and some chocolate with my frozen banana tips and tricks:

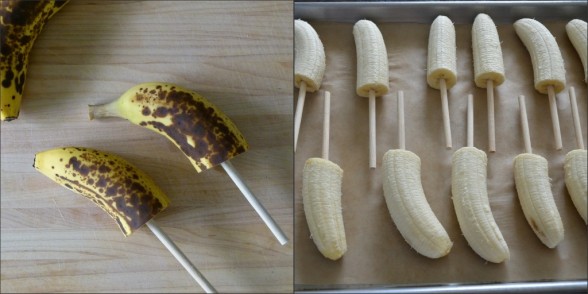
  • use ripe, speckled bananas for maximum sweetness.
  • don’t use overripe, black bananas which will ooze after they’ve been covered in chocolate;  save those for banana bread.
  • insert the stick in the banana before freezing it (obvious to you, maybe).
  • insert the stick in the banana before peeling it, to prevent the banana from splitting.
  • freeze the banana before coating in chocolate so that the chocolate hardens right away.
  • do add a little oil or butter to the melted chocolate to thin it out a bit, otherwise it makes too thick a coating on the banana.
  • I prefer to spoon the chocolate over the banana as opposed to dipping.  The melted chocolate stays much more smooth and won’t seize up on you.
  • if you’re using toppings, work quickly.  If the chocolate is allowed to harden, the toppings won’t stick.

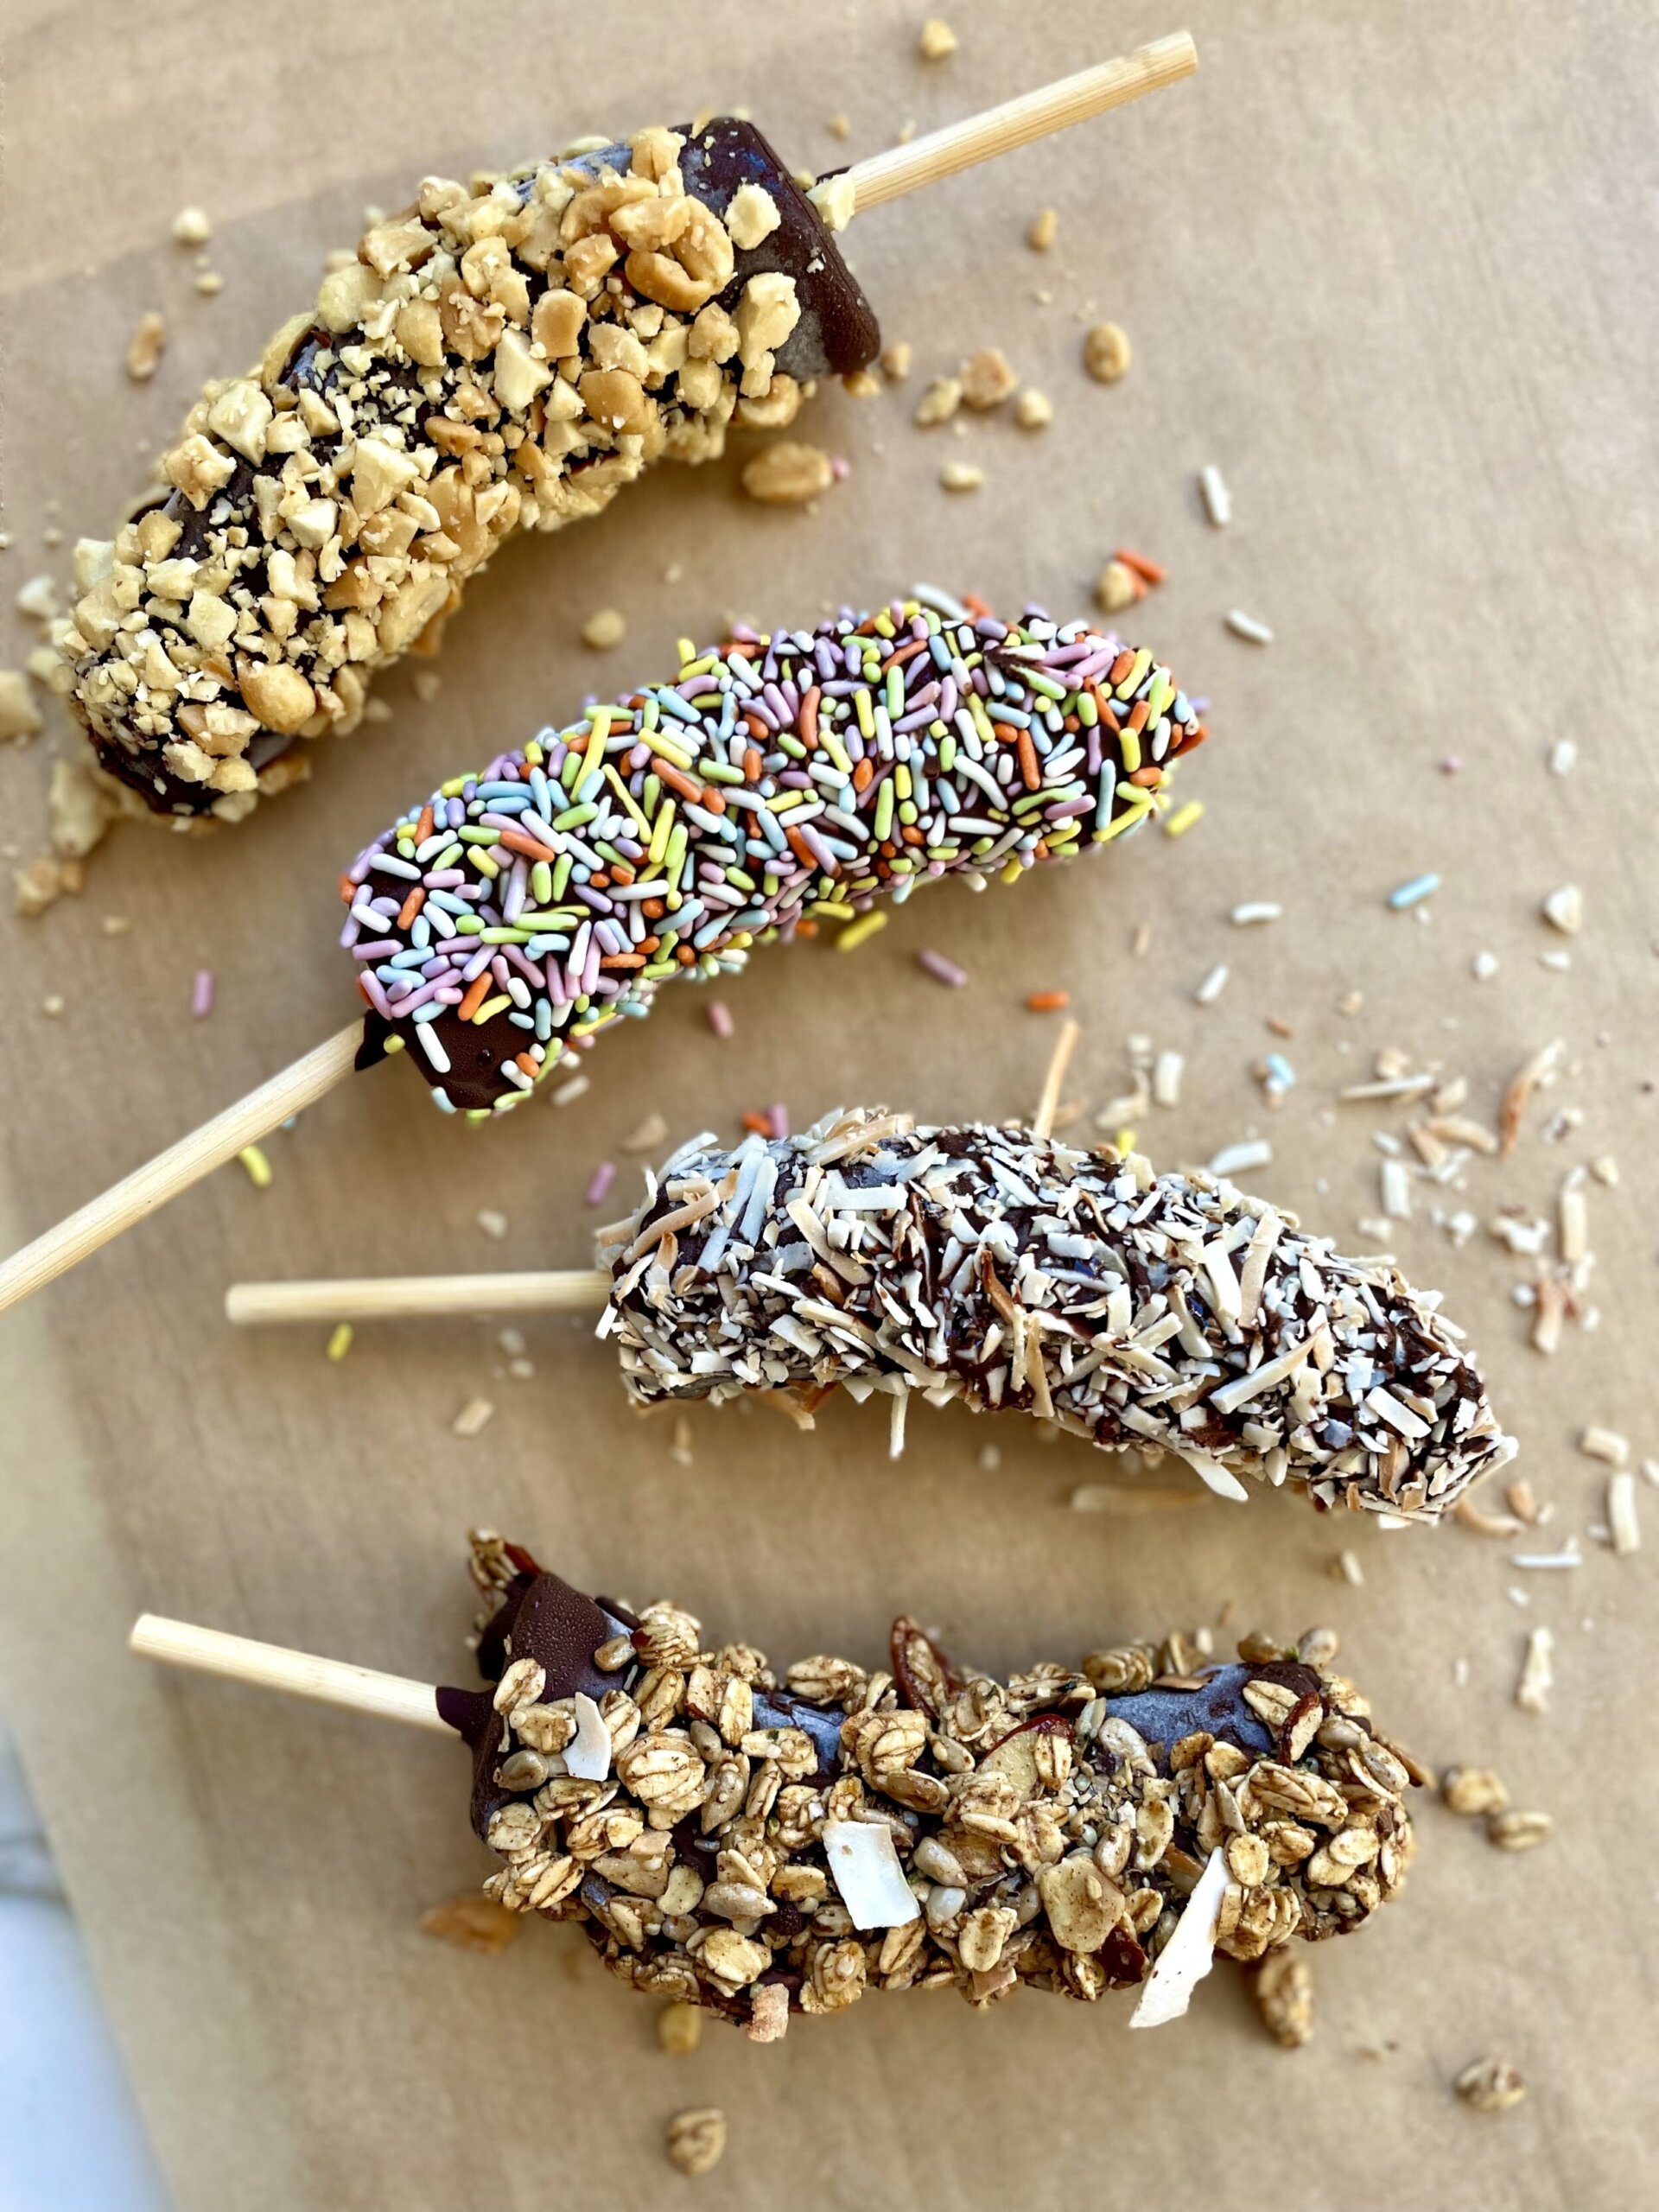
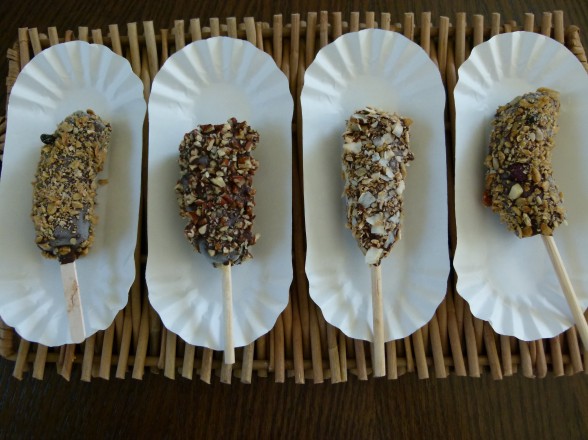
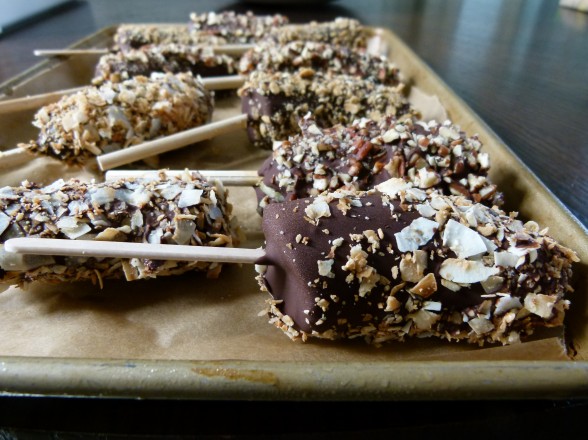
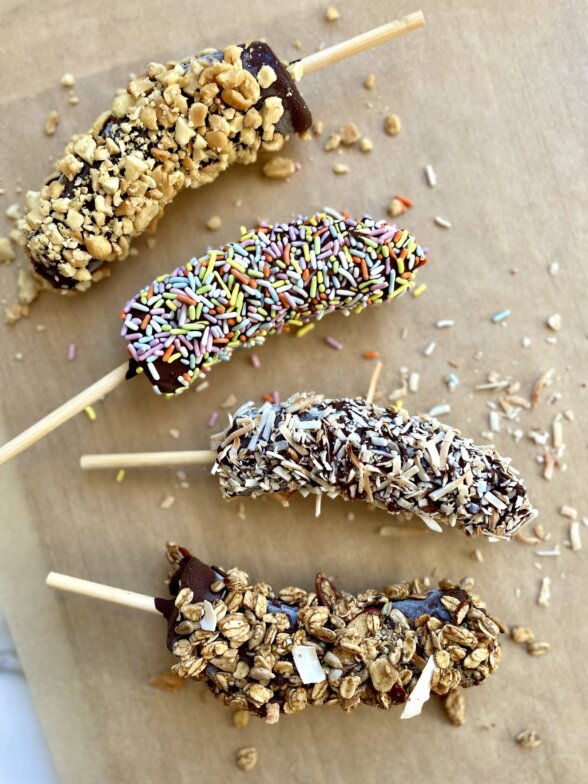
I think these are a really fun treat.  I feel better about hubby and the kids eating these than a lot of other things, plus they are super easy to make.  If you are going to take the time to try this out, you might as well make a whole bunch, so to speak, since they stay frozen for a good amount of time.  I decided to use toppings on most of them and I kept it real with toasted coconut, chopped nuts and crushed granola.  I’m sure you have probably seen similar bananas rolled in sprinkles or candy, but you didn’t come here for that, now did you?


Chocolate-Covered Frozen Bananas

Pamela
5 from 1 vote

Ingredients
  

  • 5 large ripe well-speckled bananas (or up to 7 small bananas)
  • 10 popsicle sticks or candy apple sticks I used both here.
  • 2 cups good quality chocolate pieces I used Dagoba 72% chocodrops -- dark chocolate contains antioxidants and less sugar than semisweet or milk chocolate
  • 2 Tablespoons unrefined coconut oil or unsalted butter
  • Topping ideas: toasted coconut finely chopped nuts, crushed granola

Instructions
 

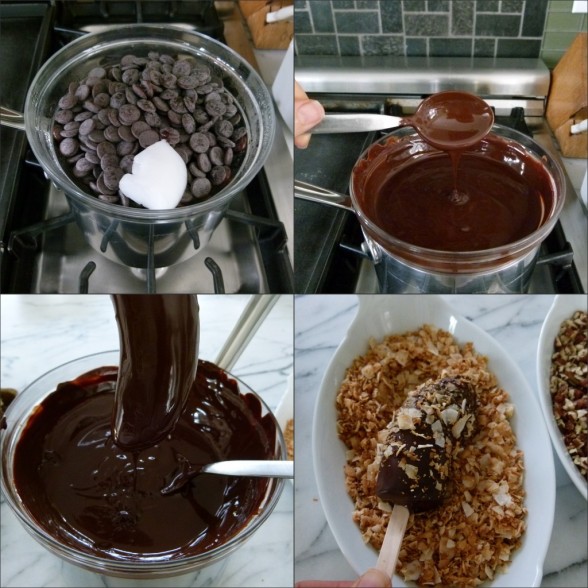
  • Cut the UNPEELED bananas in half and insert a popsicle stick into the cut side of each banana. Peel the bananas and arrange in one layer on a parchment or wax paper-lined baking sheet. Put the baking sheet in the freezer and freeze bananas until firm, at least 30 minutes, but ideally a few hours.
  • In a double boiler, or in a heat-proof bowl set atop a pot of simmering water, melt the chocolate and coconut oil, stirring frequently until smooth.
  • If using toppings, arrange in shallow containers before starting.
  • Remove bananas from freezer and one at a time, hold a banana over the melted chocolate and spoon chocolate over the banana until completely coated. Allow excess to drip back into bowl. Before chocolate completely hardens, roll in topping of choice and return to baking sheet.
  • Repeat with all the bananas and return baking sheet to the freezer until chocolate is completely hardened, just a few more minutes. Serve immediately or store in a container in the freezer up to two weeks.
Tried this recipe?Let us know how it was!


Iced Blended Mocha

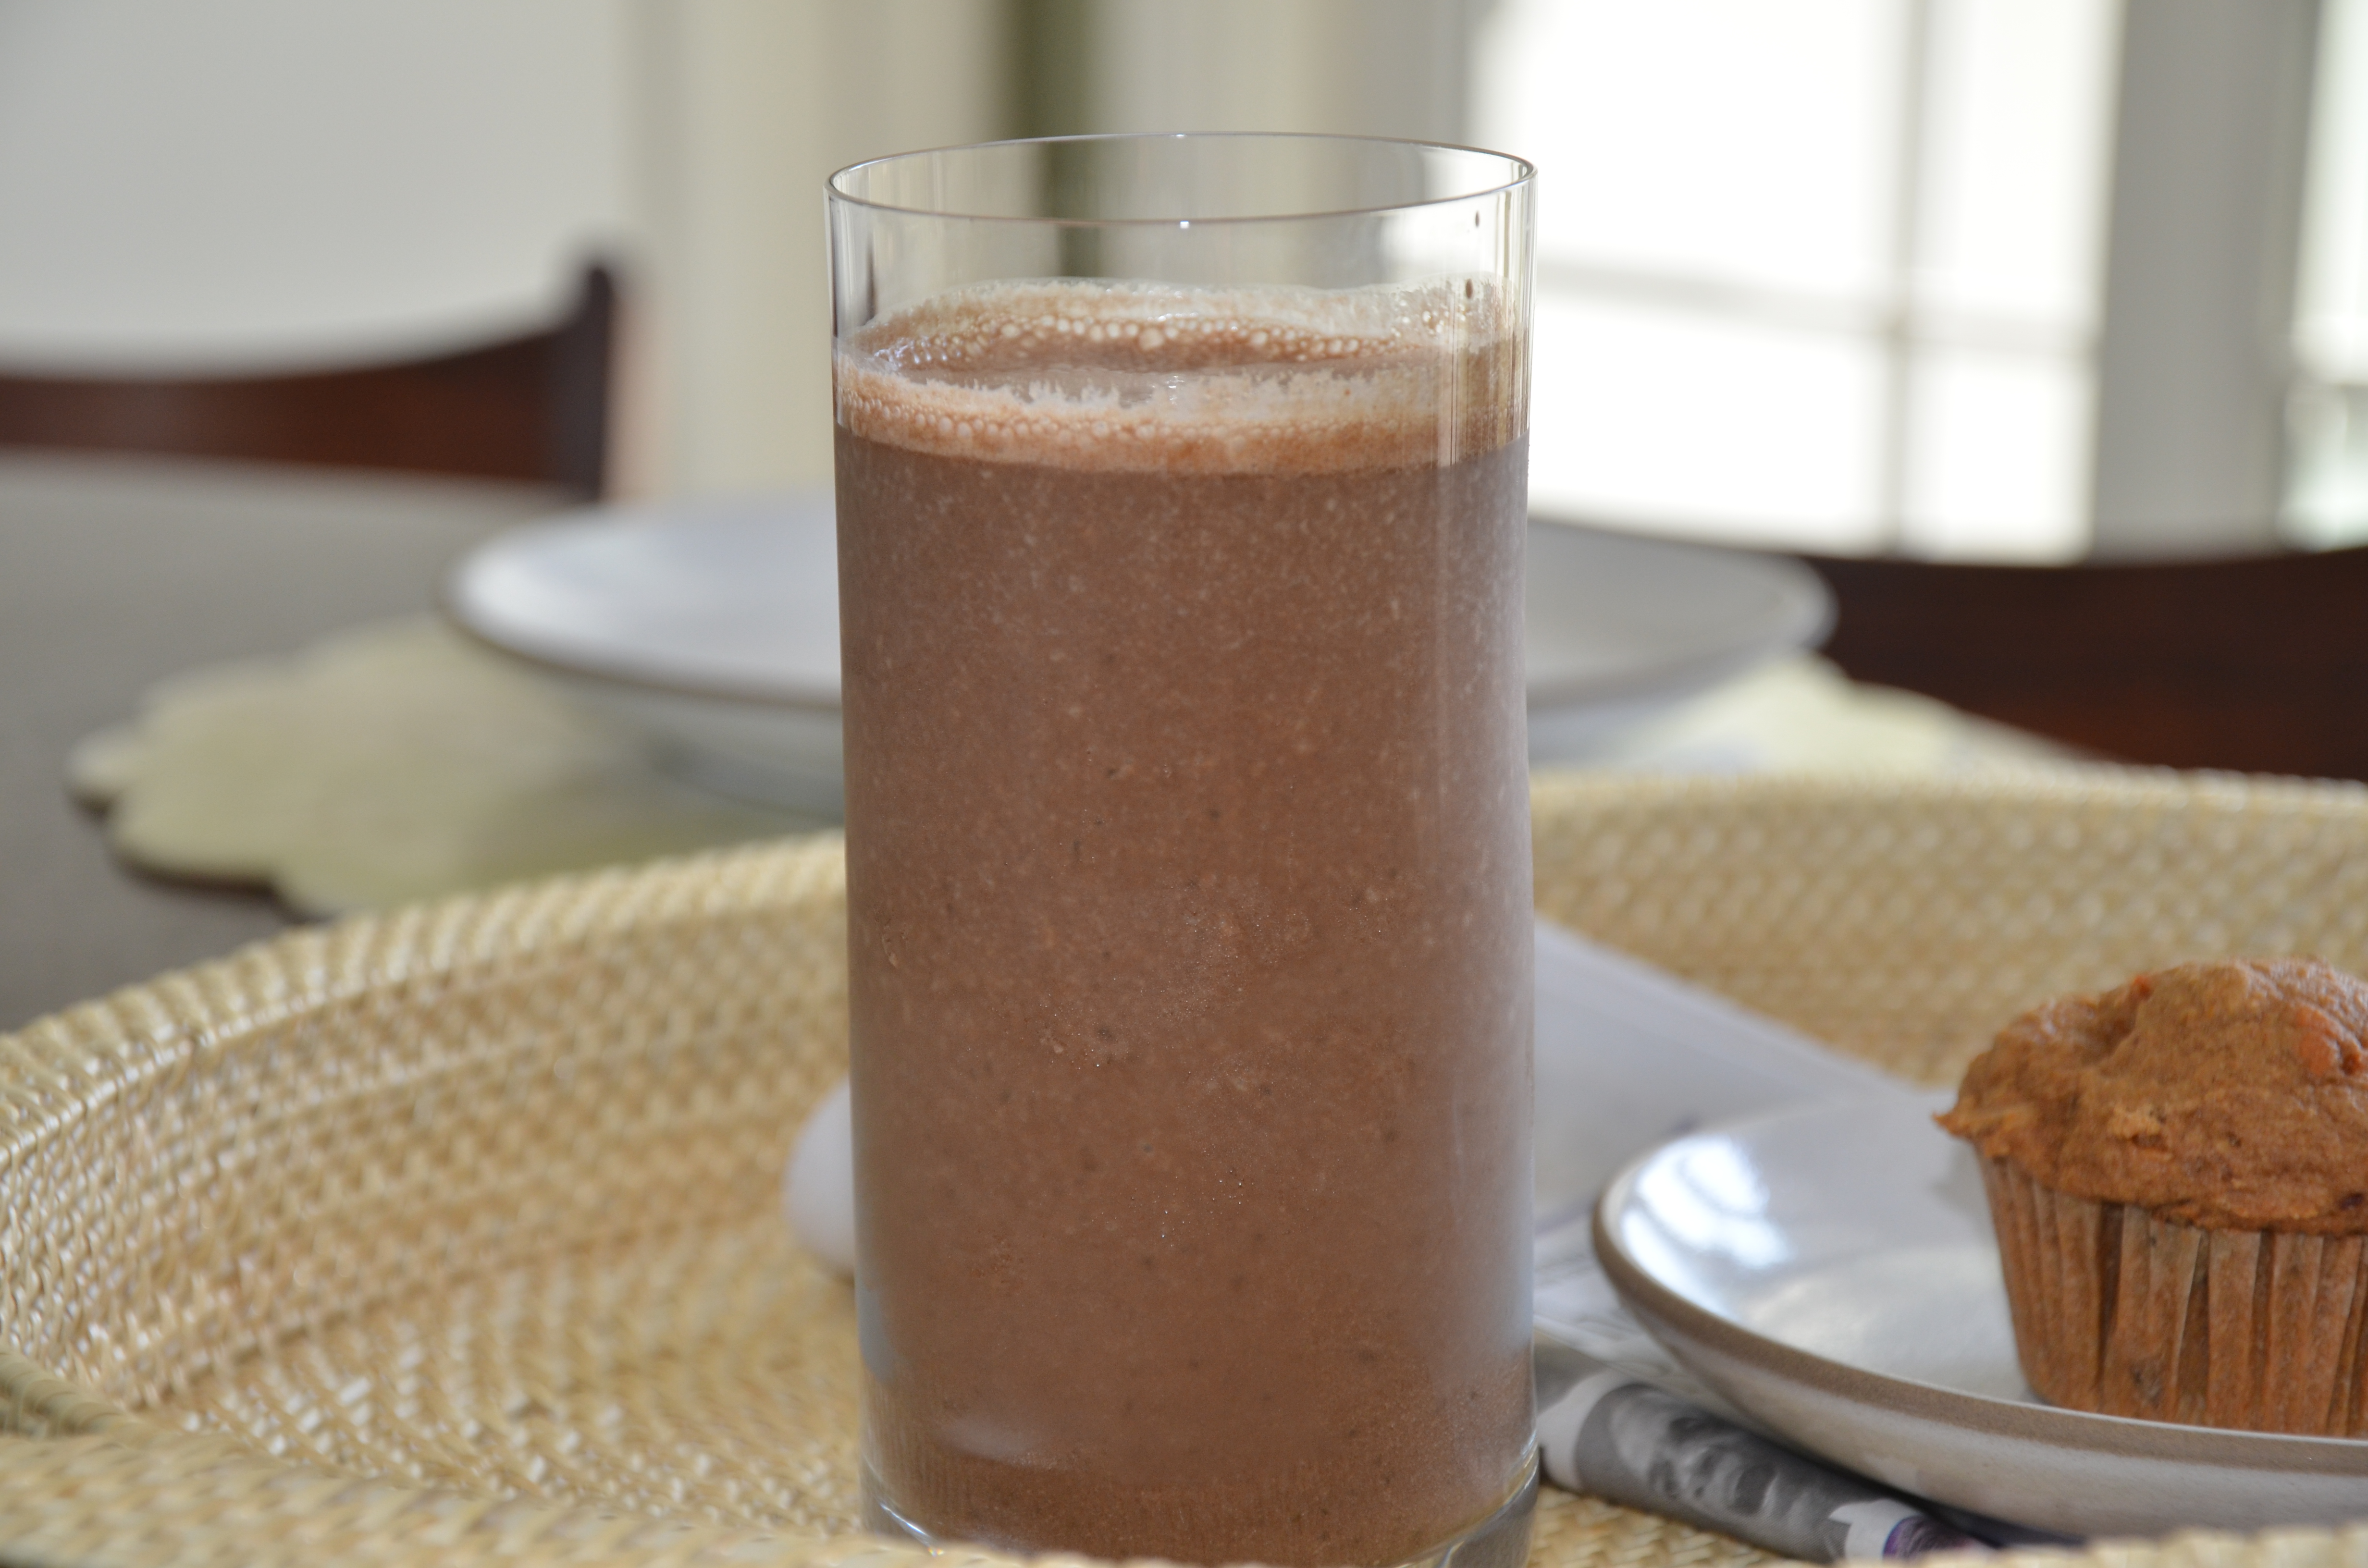
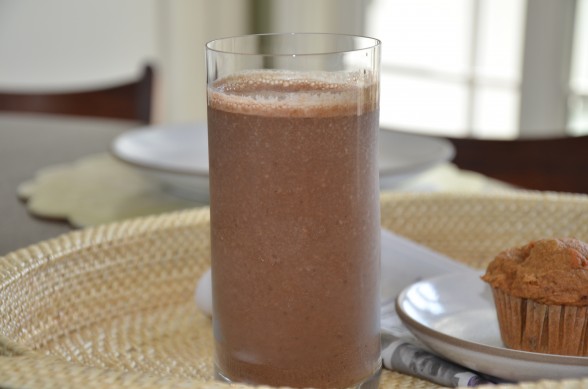
If you opened this post with glee and thought I actually put a recipe on my site for a real iced blended mocha, well then, you don’t know me well at all, do you?  But if you clicked on the link anticipating a recipe for something that tastes just as delicious as an iced blended mocha, but is actually good for you, then we are probably already friends.  Iced blended mocha is a cold coffee drink mixed with chocolate, very much like a Starbucks Frappucino, and usually pureed with ice.   My husband, who has a real taste for all things toxic, used to drink sweetened iced coffee drinks much too often.  Before we were married, he used to buy the sweetened chocolate powder mix and coffee “extract” from our local coffee shop so that we could make them at home.  The mix was full of all sorts of scary ingredients, not the least of which was sugar and partially hydrogenated oil.  Needless to say, I haven’t made my husband one of these since I became enlightened.

But his sister, my healthful food soulmate, has just come to his rescue!  She made up a truly guilt-free version of an iced blended, but sweetened with dates.  My daughter and I were playing around with the recipe last weekend and tried a few different variations and they were all delish, even the batch we made with faux coffee granules.  I think we’ll surprise her dad Father’s Day morning with a blast from the past!


Iced Blended Mocha

Pamela

Ingredients
  

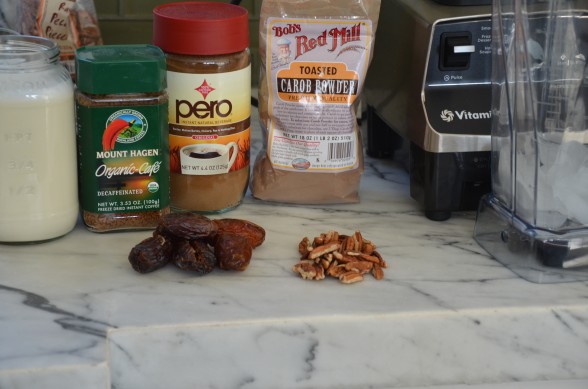
  • 2 big handfuls of ice
  • 2 Tablespoons carob powder or unsweetened cocoa powder we tried both and they were equally good
  • 2 teaspoons decaffeinated instant coffee granules or grain-based coffee substitute such as Pero (again, we tried both and they were equally good)
  • 16 pecan halves or 1/4 cup pecan pieces
  • 6 pitted dates
  • 1 - 1 1/2 cups unsweetened almond milk

Instructions
 

  • Put everything in a blender and process until smooth. Taste before serving. You may prefer more ice than I did. Also, I would use 1 cup of almond milk for a more intense mocha flavor or 1 1/2 cups to keep it light. You can serve this over ice, if you like.
Tried this recipe?Let us know how it was!


Vegan Oatmeal Chocolate Chip Cookies

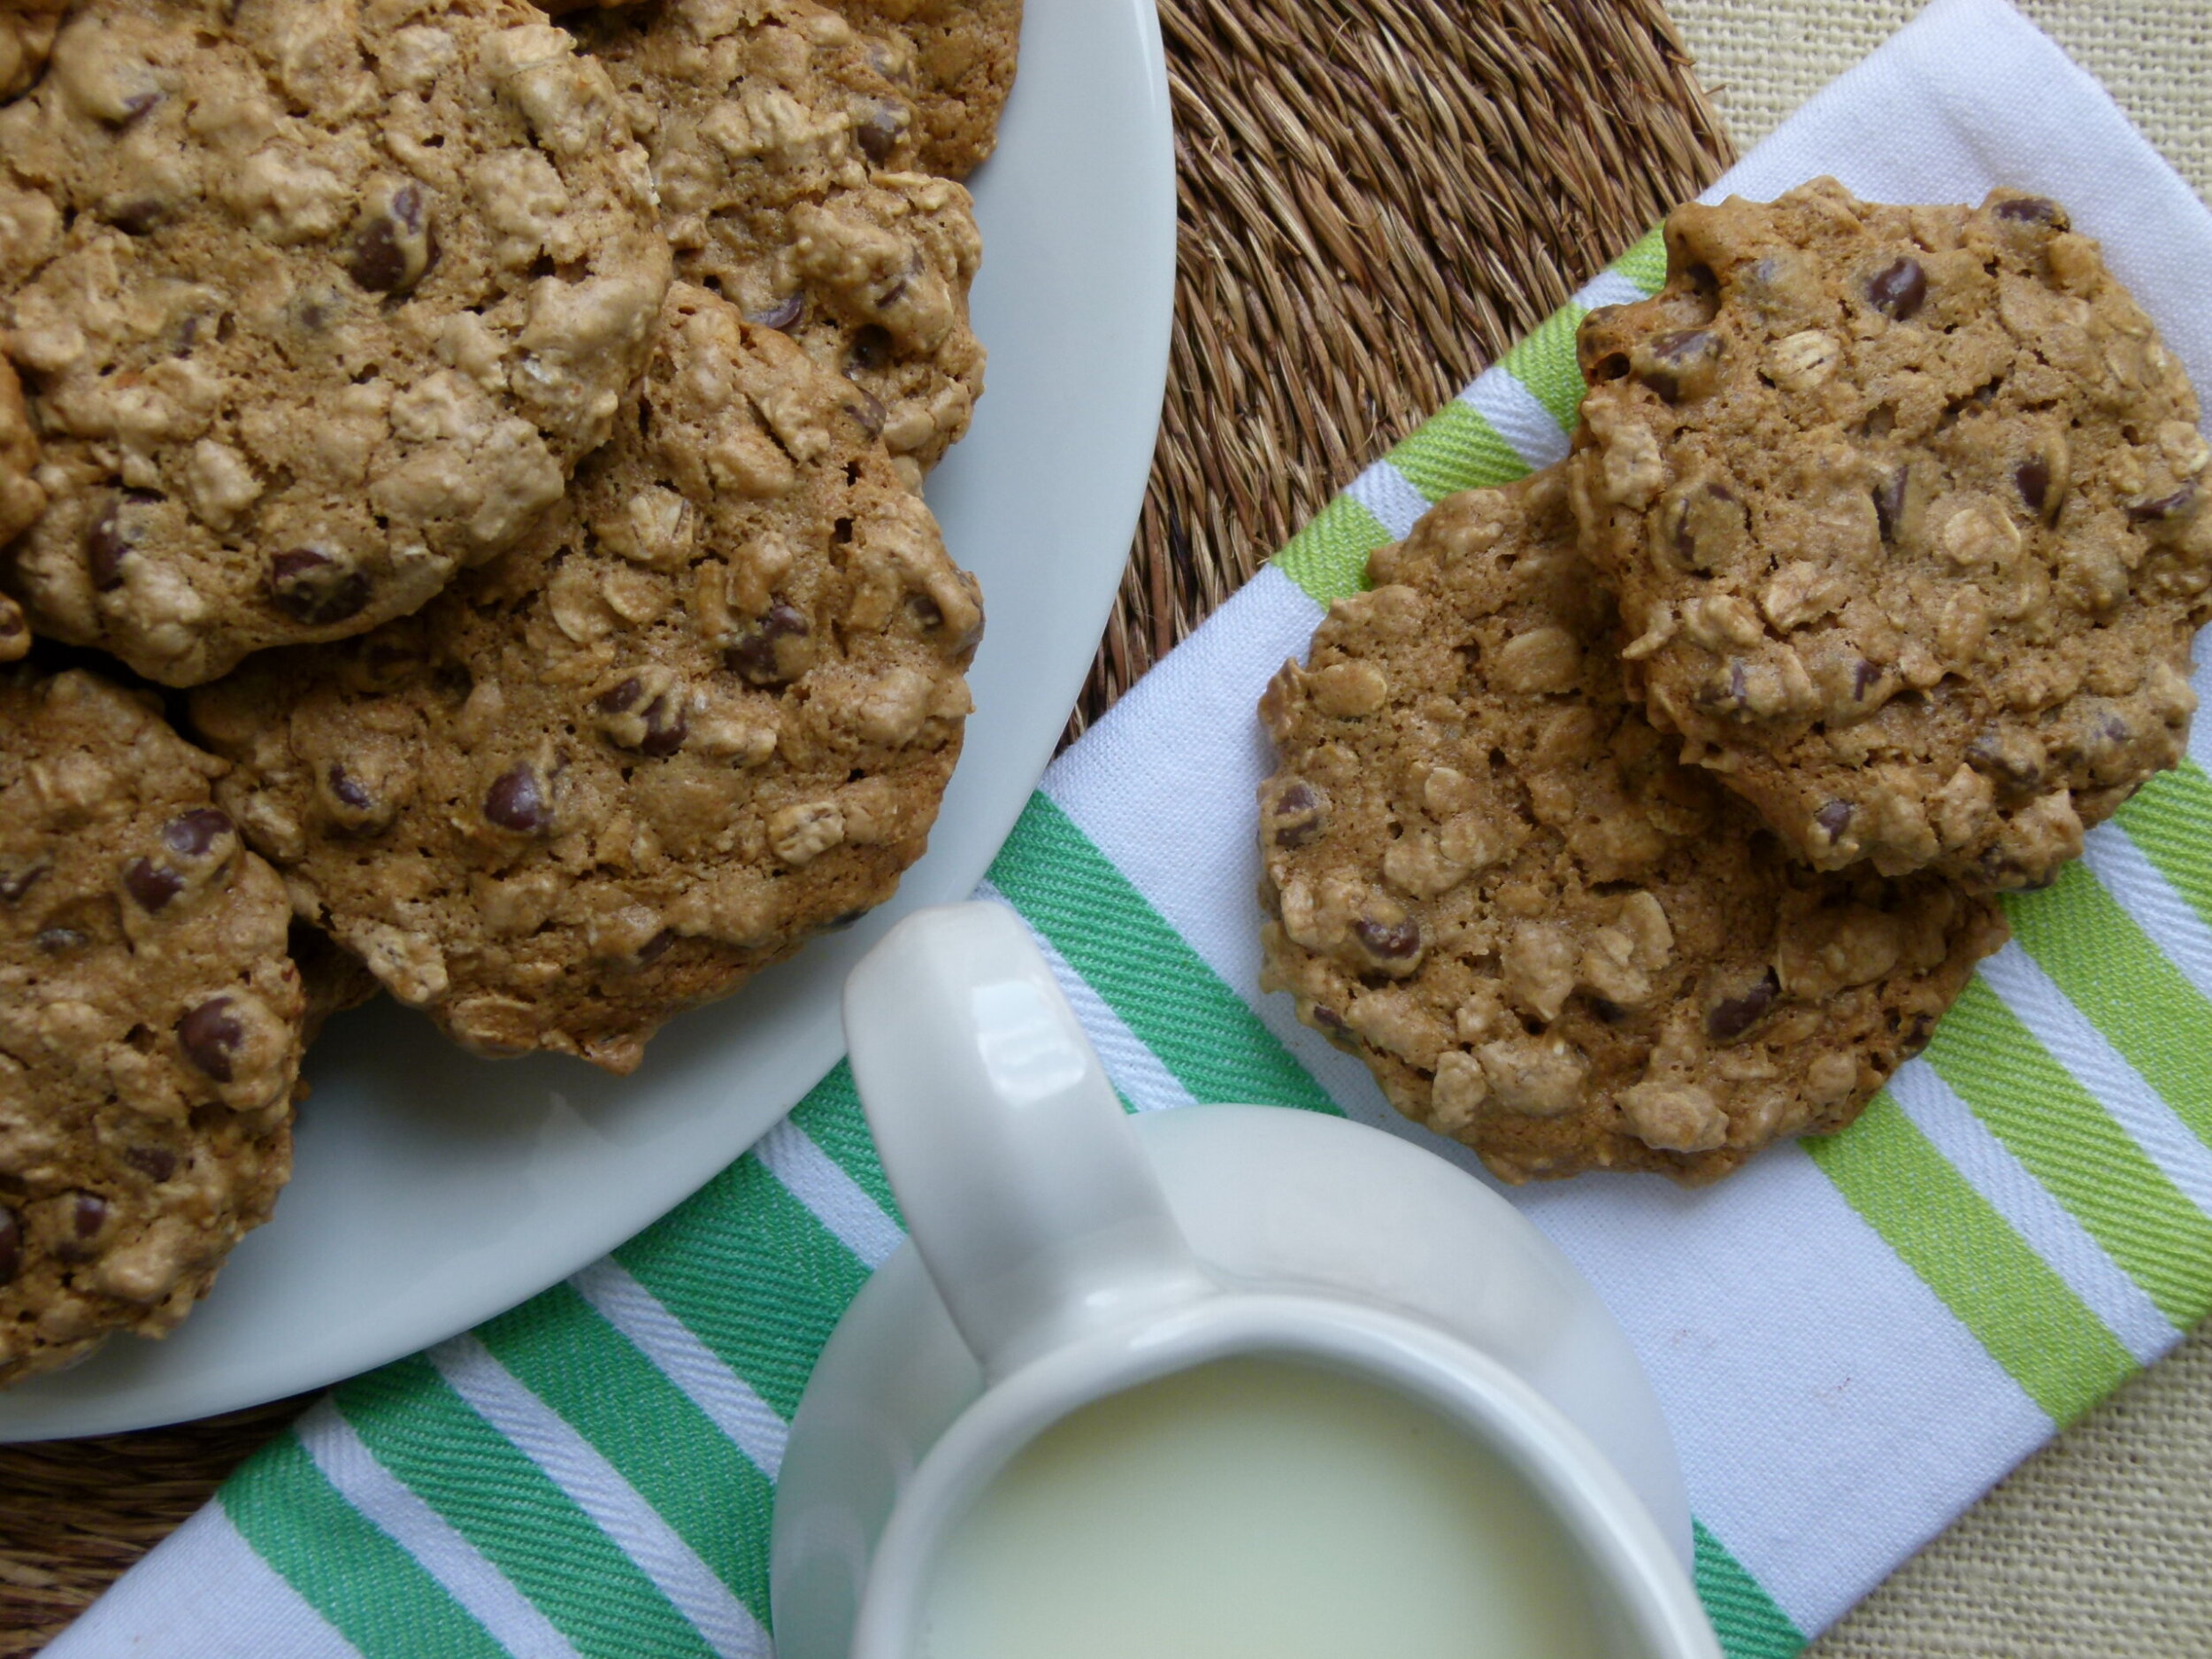
vegan oatmeal chocolate chip cookies on a plate with milk

A delicious cookie that’s both vegan and packed with wholesome ingredients? Yep! These vegan oatmeal chocolate chip cookies combine the heartiness of oats with rich, melty chocolate for the perfect guilt-free treat. Whether you’re vegan or just love a good cookie, this recipe become a favorite in no time!

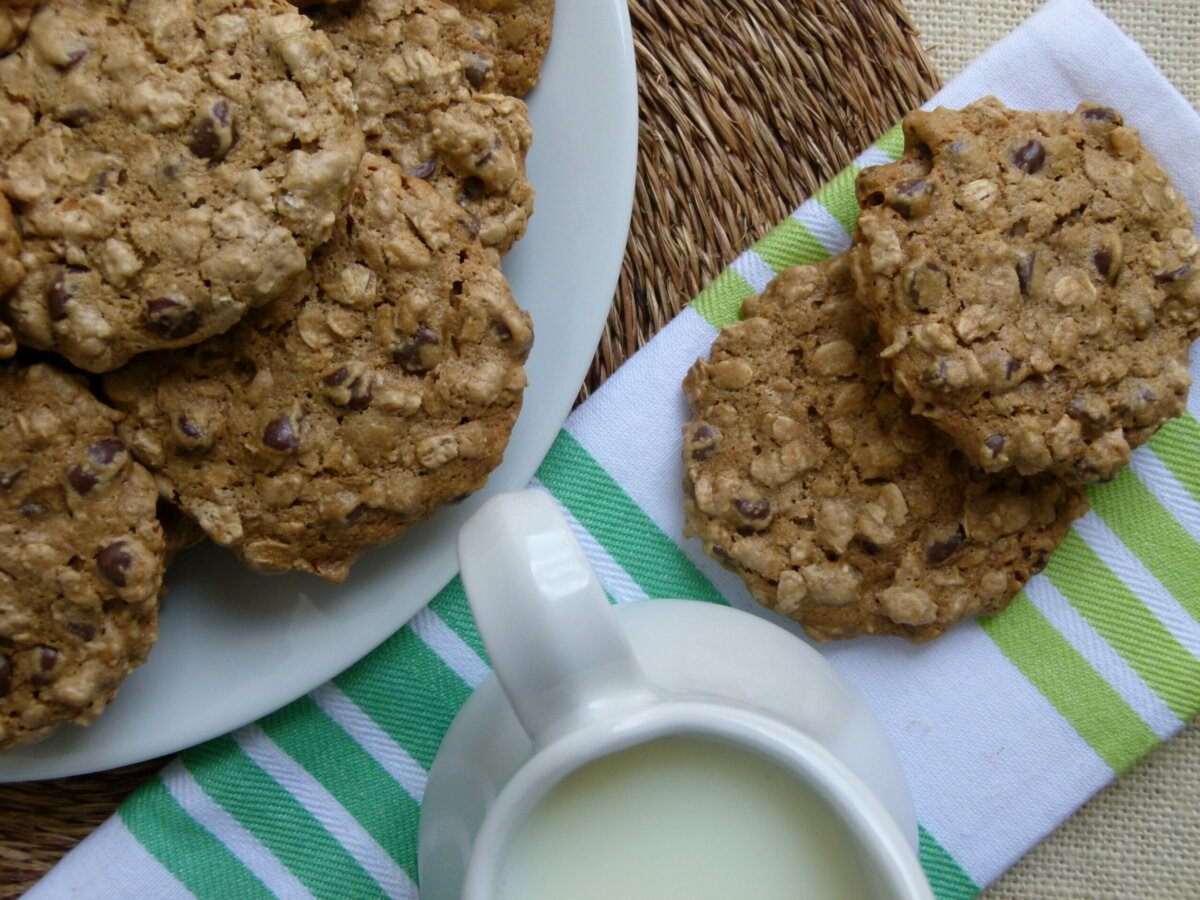
vegan oatmeal chocolate chip cookies on a plate with milk

Why You'll Love This Vegan Oatmeal Cookies

I love being able to share recipes that are delicious, easy, and just so happen to be good for you recipes. Take these vegan oatmeal chocolate chip cookies, for example. Using a base of walnuts, maple syrup, and a touch of coconut oil in place of butter and regular eggs, these are just darn tasty and not-so-shabby, nutritionally speaking.


Like many cookie recipes, you can make the dough several days in advance and keep it covered in the refrigerator. Take it out when you’re ready to bake and scoop it onto your cookie sheets. 


They are full of fiber and contain no refined sugar. No animal products either, if that’s important to you. You can even make them gluten-free by using gluten-free oats. Serve them with a glass of your favorite non-dairy milk and enjoy every last bite!

Ingredient Notes

These really are the best vegan oatmeal chocolate chip cookies. With simple ingredients and 15 minutes of baking time, these vegan cookies have the perfect texture and are full of ooey gooey goodness. 


  • oat flour: You can easily make your own oat flour. See step 2 in the recipe card.
  • baking soda
  • fine grain sea salt
  • ground cinnamon
  • raw walnuts or walnut meal: You can also use raw cashews/cashew meal or raw pecans/pecan meal. 
  • melted coconut oil or olive oil or avocado oil
  • 100% pure maple syrup
  • vanilla extract
  • rolled oats: To make this recipe gluten-free, make sure to use gluten-free rolled oats. For best results, use old-fashioned rolled oats, though quick oats will work in a pinch. 
  • vegan chocolate chips


See the recipe card below for exact ingredient amounts.

Step-by-Step Instructions

Step 1: Preheat oven to 350 degrees. Line 2 baking sheets with parchment paper.


Step 2: *If you need to make oat flour, place 1 ¾ cups rolled oats in a food processor and process until powdery.


Step 3: Place the dry ingredients: oat flour, baking soda, salt, and cinnamon in a large mixing bowl and whisk together.

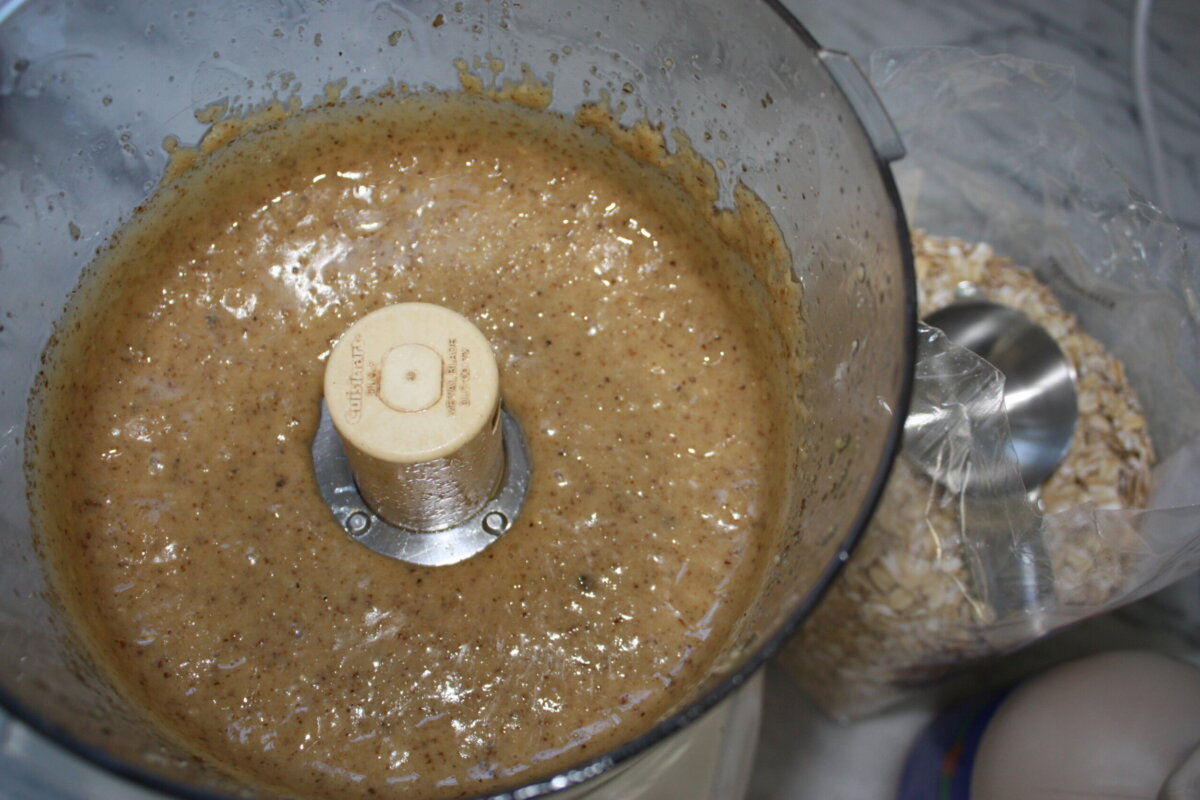
recipe ingredients in a food processor

Step 4: Place walnuts in a food processor and blend into a fine meal. Add oil, maple syrup, and vanilla and process until the mixture has the consistency of natural nut butter (this serves as our egg replacer!)


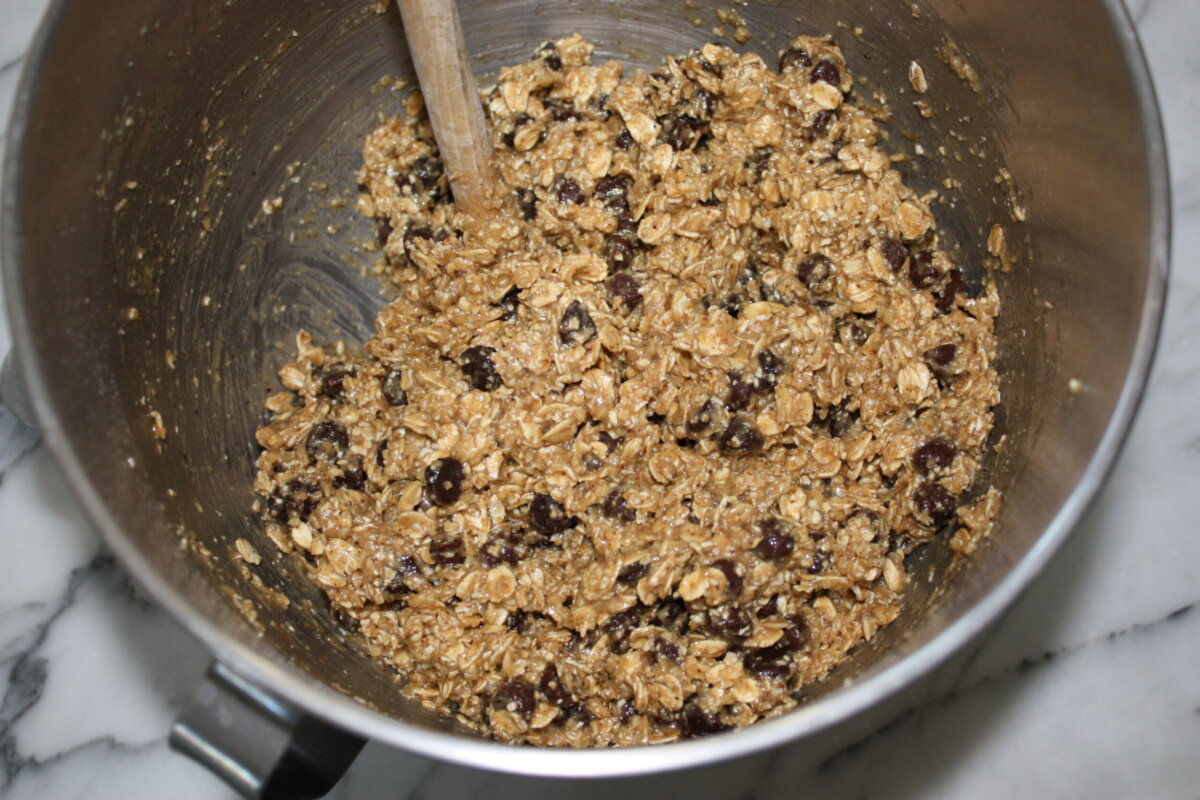
cookie dough in a mixing bowl

Step 5: Stir walnut mixture into flour mixture. Fold in 2 cups of rolled oats and chocolate chips.


Step 6: Use a 1 ¾ -inch ice cream scooper (or cookie scoop) to form dough into balls, and place the cookie dough balls on the parchment lined baking sheet. You can fit 12 on a sheet. Flatten cookies slightly with a damp hand. Bake for 13-15 minutes or until cookies begin to turn golden brown and the tops look dry.


Step 7: Cool for a few minutes and then transfer to a wire rack to cool completely.

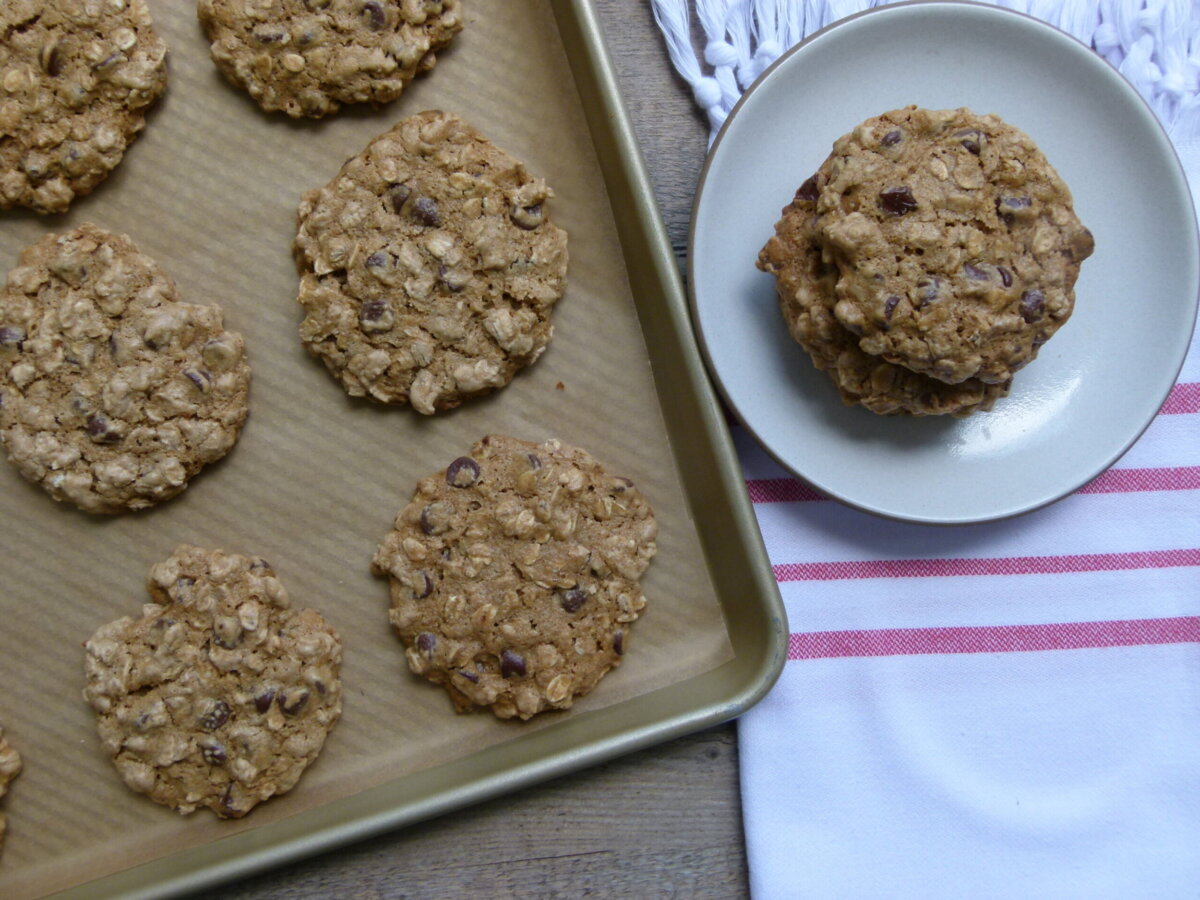
vegan oatmeal chocolate chip cookies on a baking sheet

Recipe Tips & Substitutions

  • Mix-ins: Feel free to add other mix-ins such as shredded coconut, chopped nuts, or additional chocolate chunks or chips. 
  • Oil: I prefer oil in this recipe, but you can use vegan butter if that’s what you have on hand.
  • Make your own Oat Flour: If you need to make oat flour, place 1 ¾ cups of rolled oats in a food processor and process until powdery.

Storage Tips

Store baked leftover cookies in an airtight container for up to a week at room temperature. For longer storage, let the cookies cool completely on the cooling rack. Then, store the cooled and baked cookies in a freezer-safe container or freezer bag for up to 3 months. 


If you have leftover dough, store it in the refrigerator, covered, for up to 3-4 days. 


To freeze the cookies unbaked: Arrange them in a single layer on the baking sheet and place the pan in the freezer. Once the cookies are frozen solid, transfer them to an airtight container and keep them frozen until you’re ready to bake. Then just place them on a prepared baking sheet directly from the freezer and add another minute or two to the baking time.

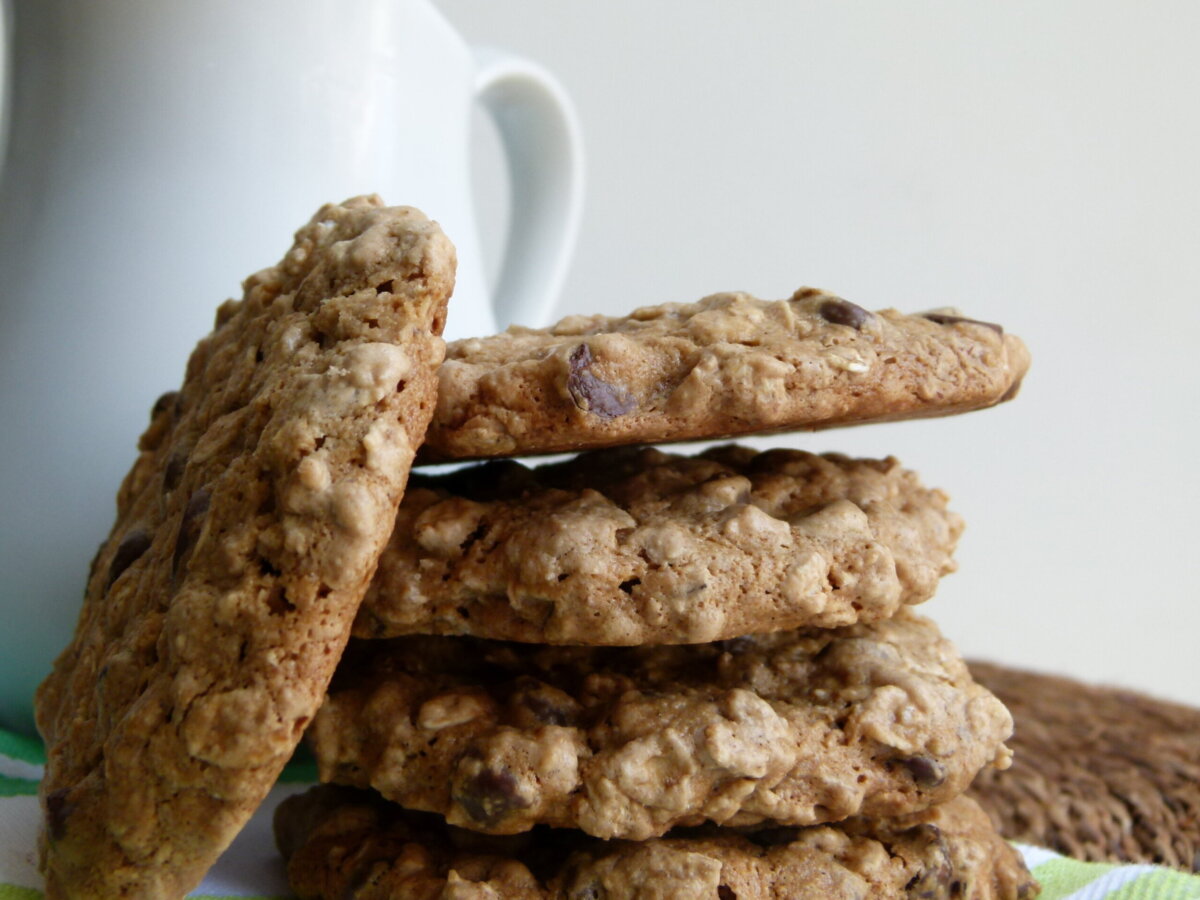
a stack of cookies next to a white mug

More Vegan Cookie Recipes

If you give this applesauce coffee cake recipe a try, snap a pic and tag @pamelasalzman so I can see your beautiful creations. I also really appreciate readers taking the time to leave a star rating and review! I have started a weekly Monday newsletter with tips, musings, new recipes not published here, fun new finds, and more. Subscribe for free here.

For more delicious recipes and to learn how to be a better cook, check out my monthly online cooking classes. I have been teaching people for 15 years how to cook healthy food that their families love!  Join me!

Vegan Oatmeal Chocolate Chip Cookies

Pamela
A delicious cookie that's both vegan and packed with wholesome ingredients? Yep! These vegan oatmeal chocolate chip cookies combine the heartiness of oats with rich, melty chocolate for the perfect guilt-free treat. Whether you're vegan or just love a good cookie, this recipe become a favorite in no time!
4.82 from 16 votes
Prep Time 10 minutes
Cook Time 15 minutes
Total Time 25 minutes

Ingredients
  

  • 1 ½ cups oat flour
  • 1 teaspoon baking soda
  • 1 teaspoon fine grain sea salt
  • ¼ teaspoon ground cinnamon
  • 2 cups raw walnuts or walnut meal or cashews/cashew meal or pecan/pecan meal
  • 3 Tablespoons melted coconut oil or olive oil or avocado oil
  • 1 cup 100% pure maple syrup
  • 2 teaspoons vanilla extract
  • 2 cups rolled oats
  • 12 ounces or 1 ½ cups chocolate chips

Instructions
 

  • Preheat oven to 350 degrees. Line 2 baking sheets with parchment paper.
  • *If you need to make oat flour, place 1 ¾ cups rolled oats in a food processor and process until powdery.
  • Place oat flour, baking soda, salt and cinnamon in a mixing bowl and whisk together.
  • Place walnuts in a food processor and blend into a fine meal. Add oil, maple syrup and vanilla and process until mixture has the consistency of natural nut butter.
  • Stir walnut mixture into flour mixture. Fold in 2 cups rolled oats and chocolate chips.
  • Use a 1 ¾ -inch ice cream scooper to form dough into balls, and place on baking sheets. You can fit 12 on a sheet. Flatten cookies slightly with a damp hand. Bake 13-15 minutes or until cookies begin to brown and tops look dry.
  • Cool a few minutes and then transfer to wire rack to cool completely.

Notes

  • Store baked leftover cookies in an airtight container for up to a week at room temperature. For longer storage, let the cookies cool completely on the cooling rack. Then, store the cooled and baked cookies in a freezer-safe container or freezer bag for up to 3 months.
  • If you have leftover dough, store it in the refrigerator, covered, for up to 3-4 days.
  • To freeze the cookies unbaked: Arrange them in a single layer on the baking sheet and place the pan in the freezer. Once the cookies are frozen solid, transfer them to an airtight container and keep them frozen until you're ready to bake. Then just place them on a prepared baking sheet directly from the freezer and add another minute or two to the baking time.
Tried this recipe?Let us know how it was!

This post may contain affiliate links