Roasted carrots with garlic yogurt recipe

I’m squeezing in another recipe before Mother’s Day in case you need a surefire hit for your lunch or brunch this weekend. I taught this roasted carrot recipe in my March classes and I didn’t get one bite the entire month because there were never any left! I made a huge quantity every time and it was never enough. Everyone flipped for these. So I know if you make them, they will be an instant hit. Plus, this is the easiest recipe so I know you will have success!
The inspiration for this recipe came from a guide we met while we were in Turkey last summer. We had the loveliest guide, a very intellectual professor who was quite serious about the ruins he was showing us. And then he asked me what kind of work I did and when I responded I was a cooking instructor with a food blog, he stopped in his tracks. “I would love to be a food blogger,” he responded. I thought that was so cute and endearing. So of course, the history lessons went out the window because all our guide wanted to talk about was food, Turkish food especially. This was fine with me because I am fascinated with cuisines from all over the world. I always learn so much when I travel and our trip to Turkey was no exception.
Long story short, our guide convinced me there was an easy and delicious Turkish recipe I had to share with my American students. He told me to quickly sauté grated carrots and top them with a thick garlic yogurt. “That’s it! And it’s so good,” he proudly exclaimed.
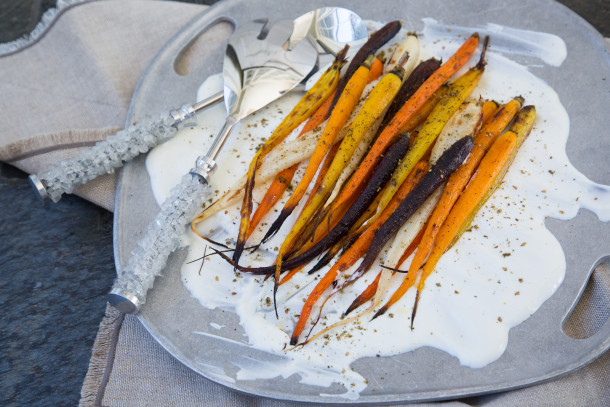
I tried it shortly after we returned home and it was indeed an easy recipe and it was indeed delicious. I loved the contrast of the sweetness of the carrots and the tartness of the yogurt. But it was rather unattractive, especially after mixing the grated carrots with the yogurt. I’m sure you can imagine. So the recipe I am posting today is, I hate to say it, a more attractive twist on my Turkish tour guide’s recipe. But it is just as delicious and just as simple. I have served this for many a dinner. It is delicious alongside roasted chicken or lamb, as well as salmon. But I think this would be delicious on a brunch menu with a quiche or frittata and a green salad.
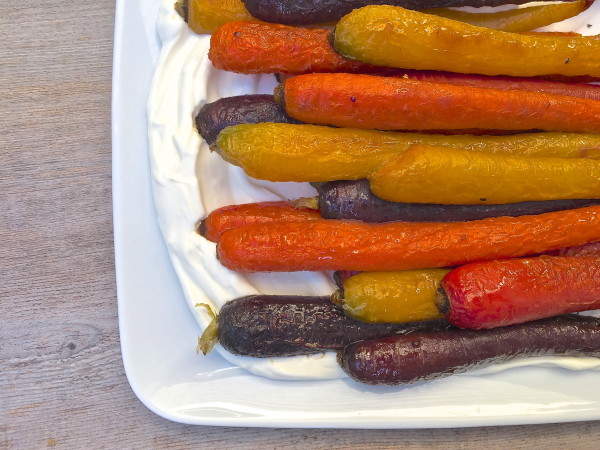
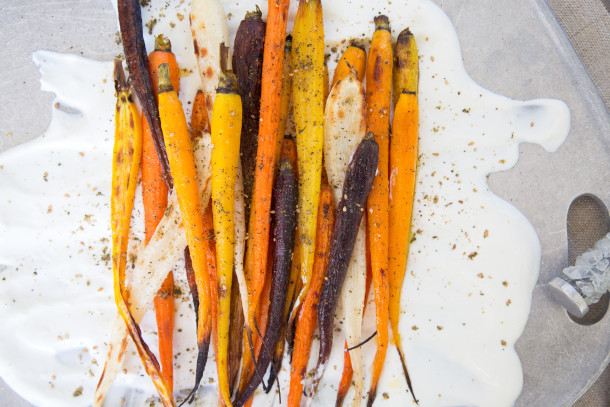
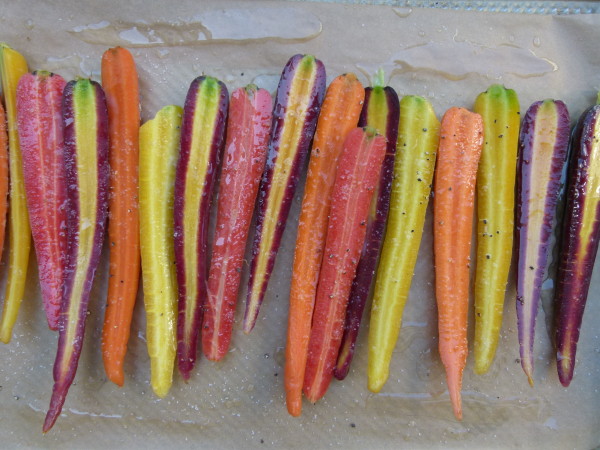
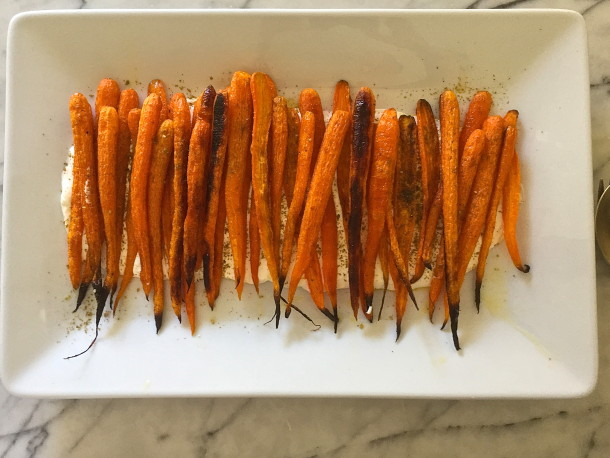
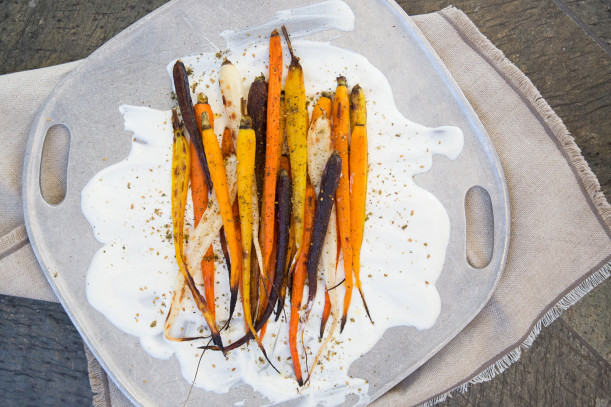
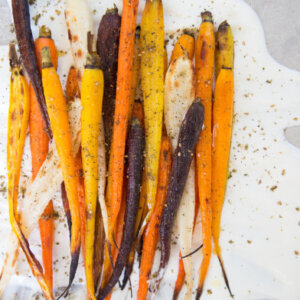
Carrots are incredibly delicious roasted, if you haven’t tried them this way. Even standard orange carrots develop an incredible sweetness when roasted. I love to use unrefined coconut oil when roasting because it just enhances the natural sweetness of the carrots and it has a higher smoke point than unsaturated fats, but you can use olive oil, too. I very often see purple carrots at my farmers market and Carnival heirloom carrots at Trader Joe’s. Those are especially beautiful to use for this recipe! If the carrots are thin, I don’t even bother to cut them. The larger ones I slice in half.
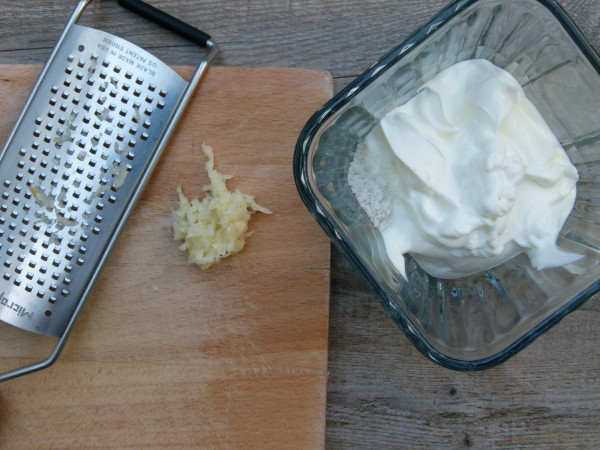
The one question I was asked more than any other was about the raw garlic in the yogurt and if there was a substitution. There really isn’t that much of it and I personally don’t think the garlic flavor was really that pronounced, but for those people who really don’t like it, I would say to omit it or blend roasted garlic into the yogurt. Roasted garlic is much more mellow and sweet than raw. Check this link for how to roast garlic. I also think there are other roasted vegetables that would be delicious with the yogurt, like eggplant or cauliflower, even curried cauliflower. Here’s hoping someone makes this for you this Mother’s Day!
Roasted Carrots with Garlic Yogurt
Ingredients
- 2 bunches farmer’s market carrots tops trimmed or 1 ½ pounds regular carrots, cut in half lengthwise
- 4 Tablespoons unrefined coconut oil melted or unrefined olive oil
- sea salt and freshly ground black pepper to taste
- za’tar optional
- Garlic Yogurt: if you love yogurt, double the recipe
- ¾ cup whole unsweetened Greek yogurt
- 1 medium-large clove garlic grated
- 3/8 teaspoon sea salt
Instructions
- Preheat the oven to 400 degrees. Line a baking sheet with unbleached parchment paper.
- Place the carrots on the prepared baking sheet and toss to coat with coconut oil. Arrange carrots in one layer and sprinkle with salt and pepper.
- Roast carrots for 20-25 minutes, until tender but still with a bite.
- Meanwhile, make the yogurt sauce. Combine all ingredients in a small bowl.
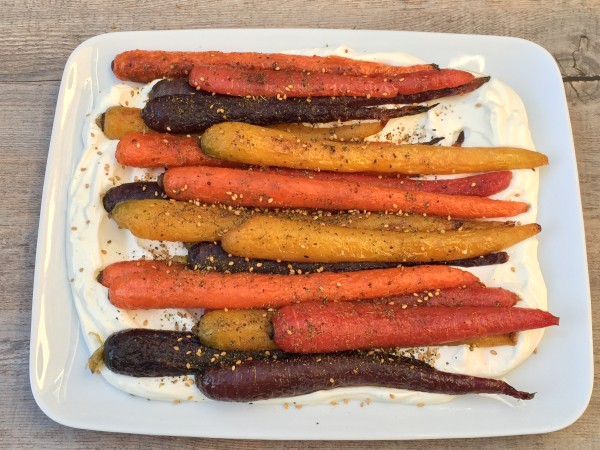
- When carrots are done roasting, sprinkle them with za’tar.
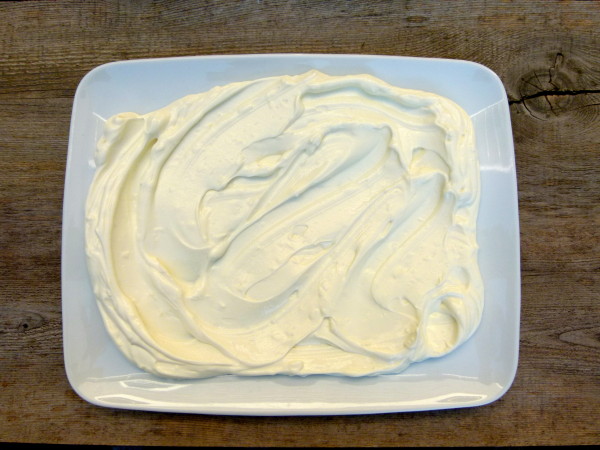
- Spread the garlic yogurt in the center of a platter and arrange the carrots on top.