
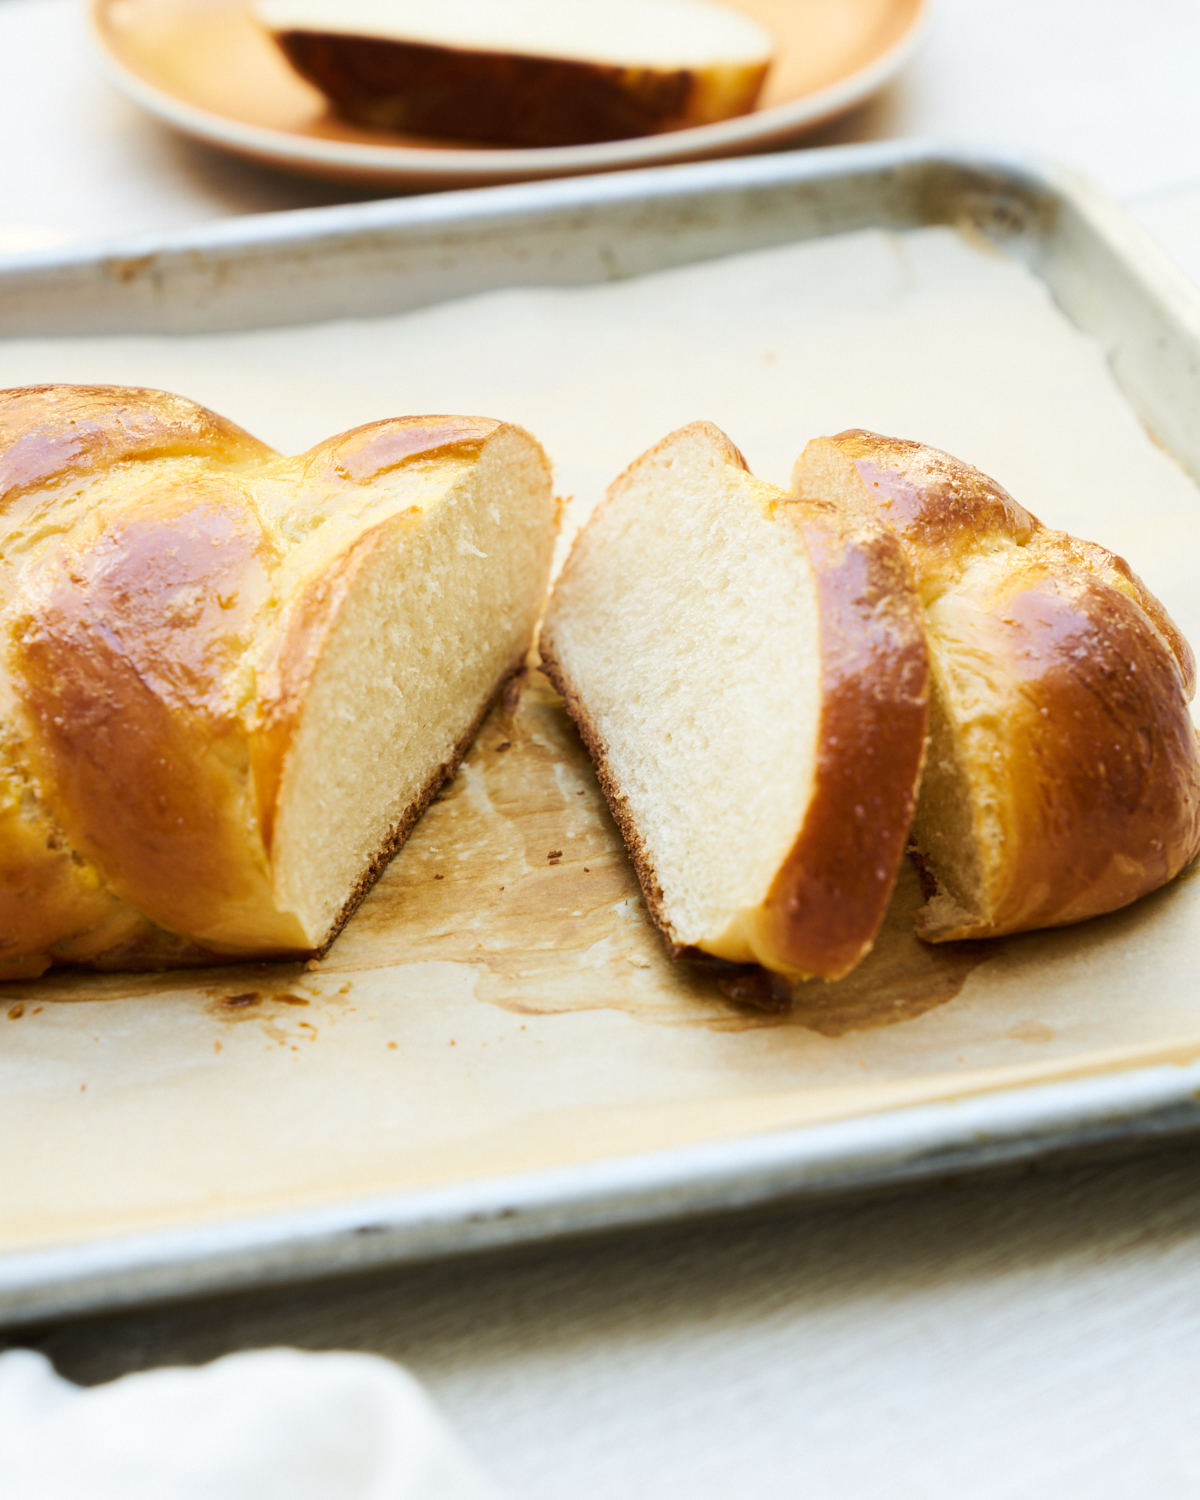
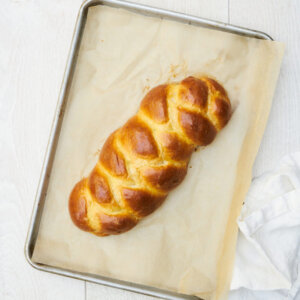
Making challah at home is magical, with its soft texture, slight sweetness, and beautiful shape. Though I didn’t grow up eating it, challah has become a cherished tradition in my family, especially during the Jewish High Holidays. In this post, I’ll show you how to make a Round Challah for Rosh Hashanah, with tips for perfect texture, flavor, and presentation.
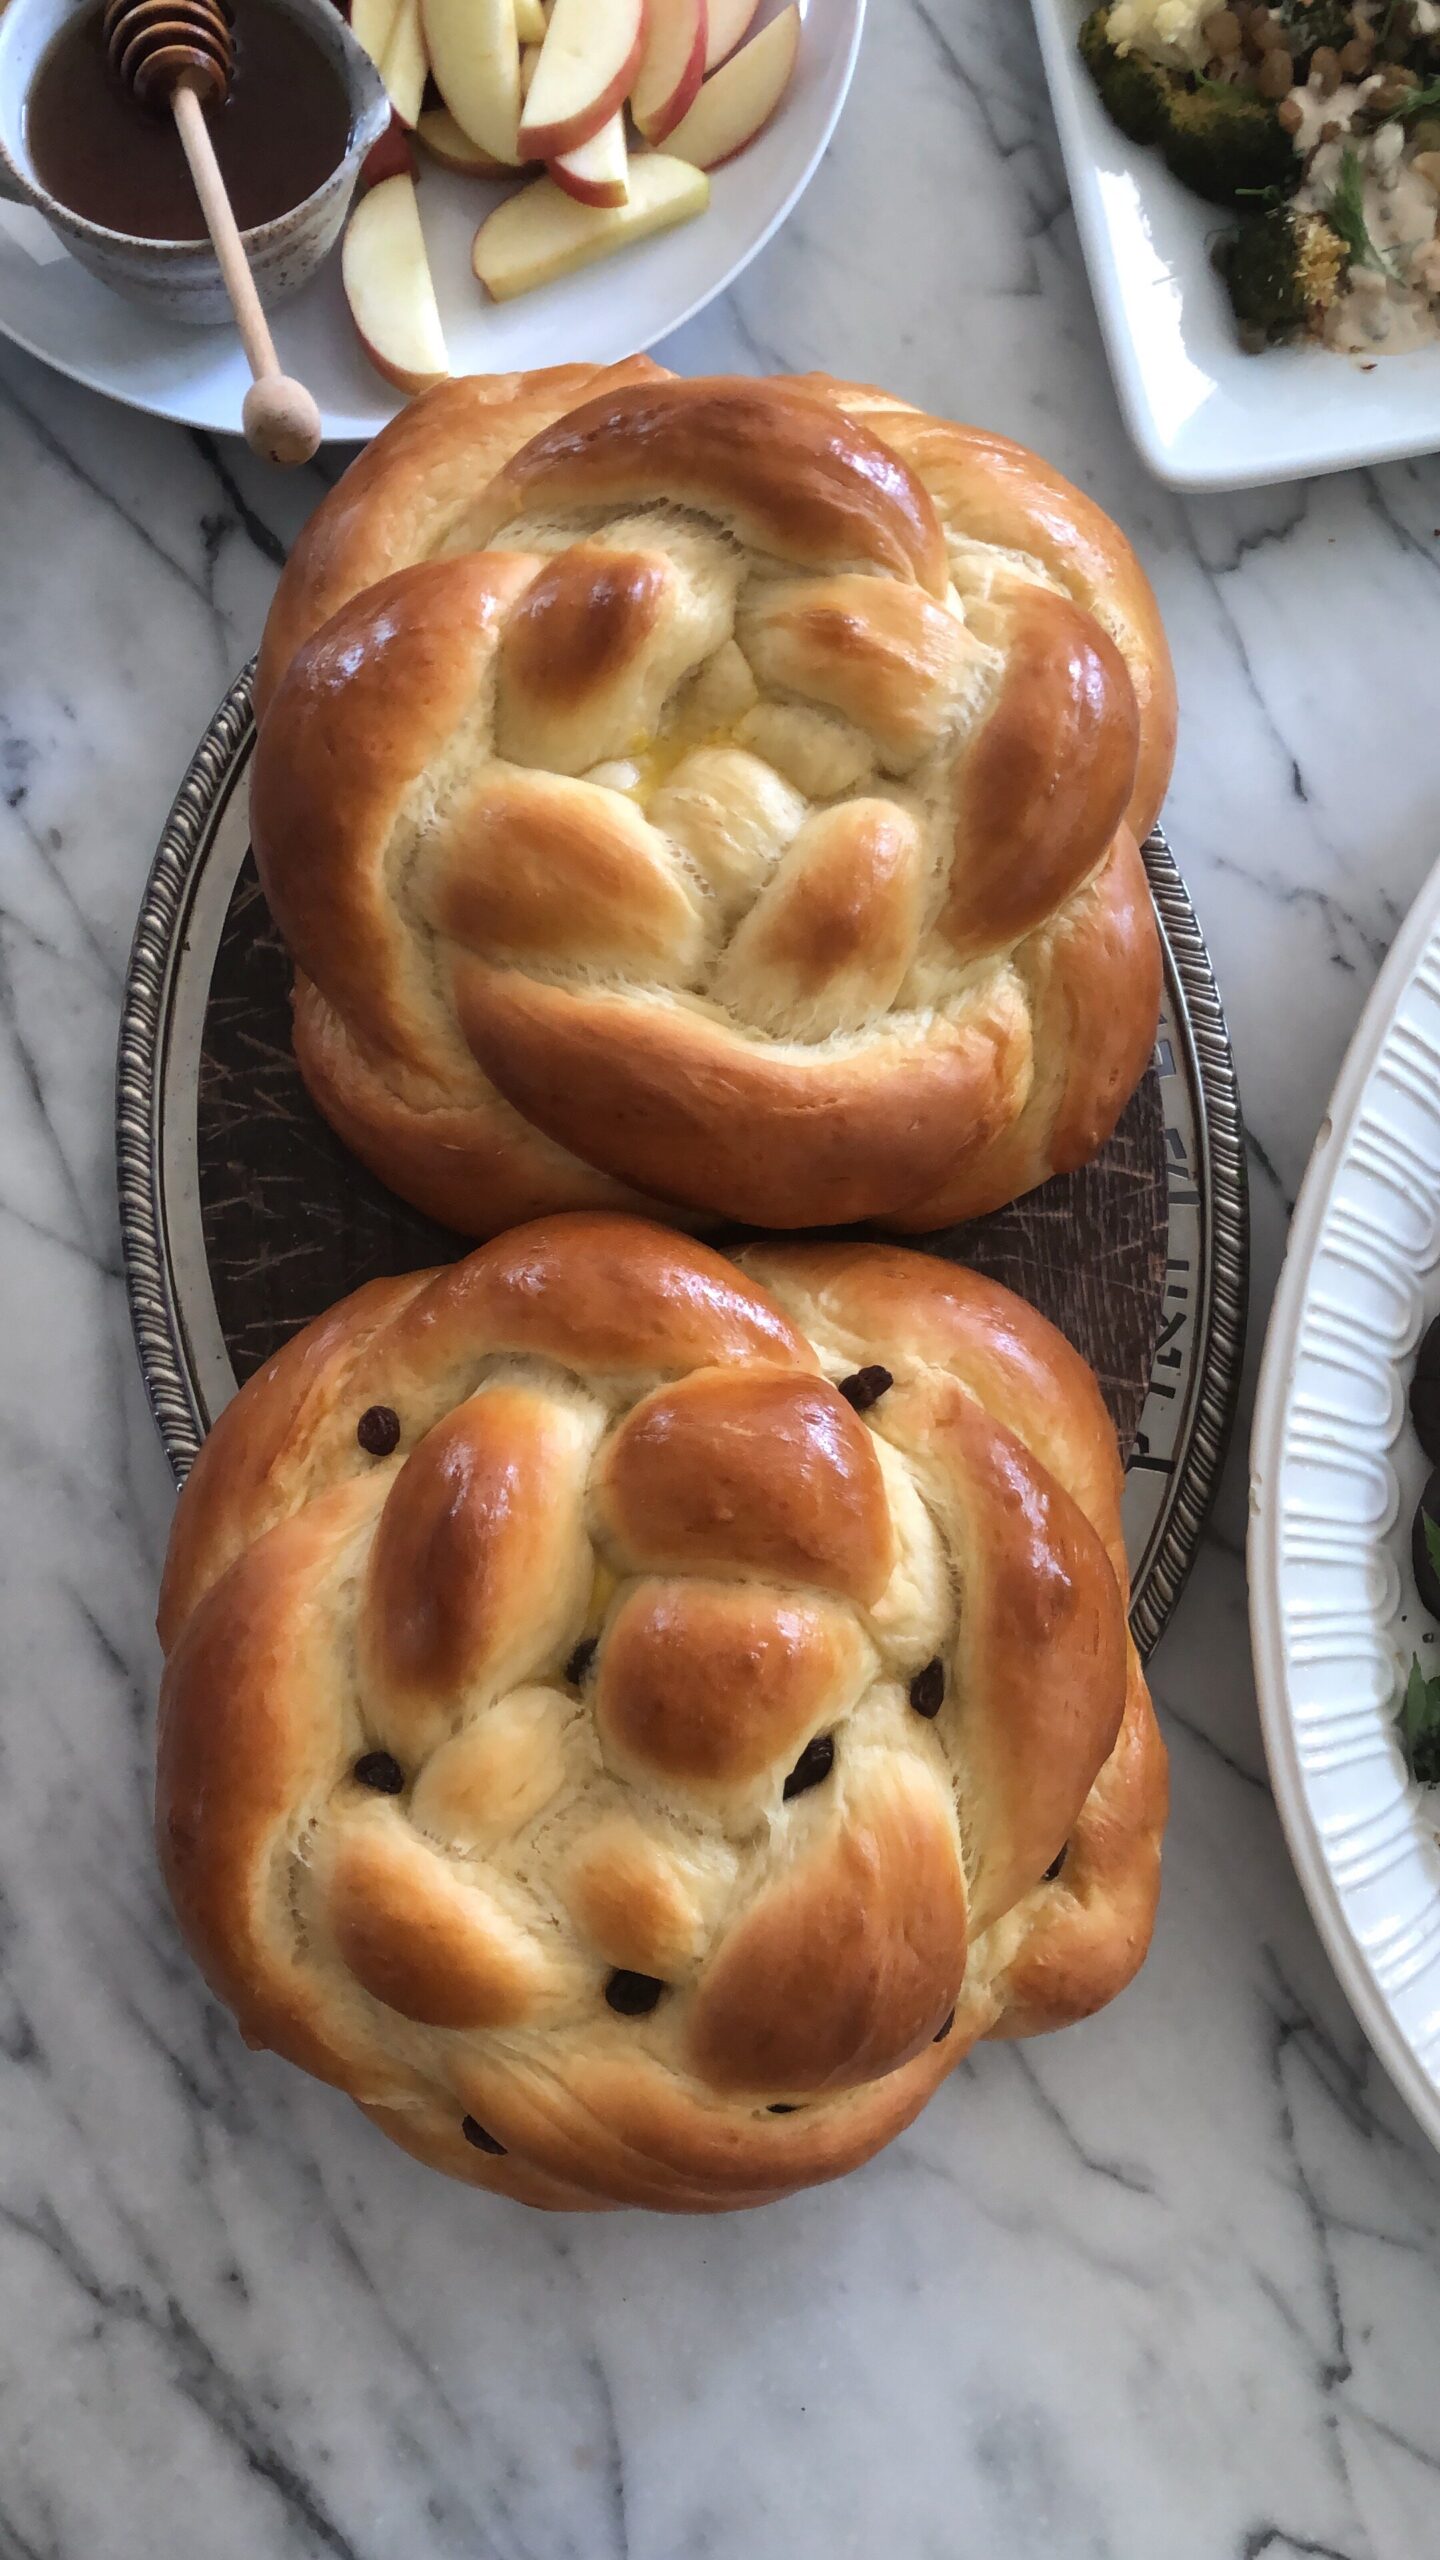
Table of Contents
What is The Significance of Round Challah?
Round challah holds deep significance during Rosh Hashanah, the Jewish New Year, as its circular shape symbolizes continuity, unity, and the endless cycle of life. Unlike the traditional oblong braided loaf served on the Sabbath, the round challah reflects hopes for a year of wholeness and completeness. Often dipped in honey, it also represents sweet wishes for the year ahead.
Why You’ll Love This Round Challah Recipe
When I married my Jewish husband, I began making challah for the High Holidays using The Silver Palate Cookbook. Over time, I’ve adapted my recipe to be dairy-free and more flavorful, inspired by Beth Ricanati’s Braided. Now, it’s a cherished family tradition that connects us to culture and celebration.
With a few pantry staples and some patience, you can create a stunning round challah that’s perfect for special occasions like Rosh Hashanah. Using oil instead of butter makes it dairy-free and kosher, while keeping the loaf moist and tender.
Whether you’re a seasoned bread baker or trying this for the first time, this recipe will walk you through the process step by step. I’ve also included tips for braiding, variations for mix-ins like raisins or chocolate, and ideas for sprinkling toppings. Serve it alongside butternut squash and apple soup or crispy chicken thighs for a hearty, comforting meal.
Ingredients You’ll Need
- Active Dry Yeast: A leavening agent used to make the dough rise, giving your challah its fluffy, airy texture. It comes in granular form and needs to be activated in warm water (between 105–115°F) with a little sugar to “wake up” the yeast and start the fermentation process.
- Organic Cane Sugar: Adds a touch of sweetness.
- Warm Water: The right temperature (105–115°F) activates the yeast.
- Eggs: Provide richness and create that golden crust.
- Olive or Avocado Oil: Keeps the bread moist and tender.
- Sea Salt: Enhances the flavor.
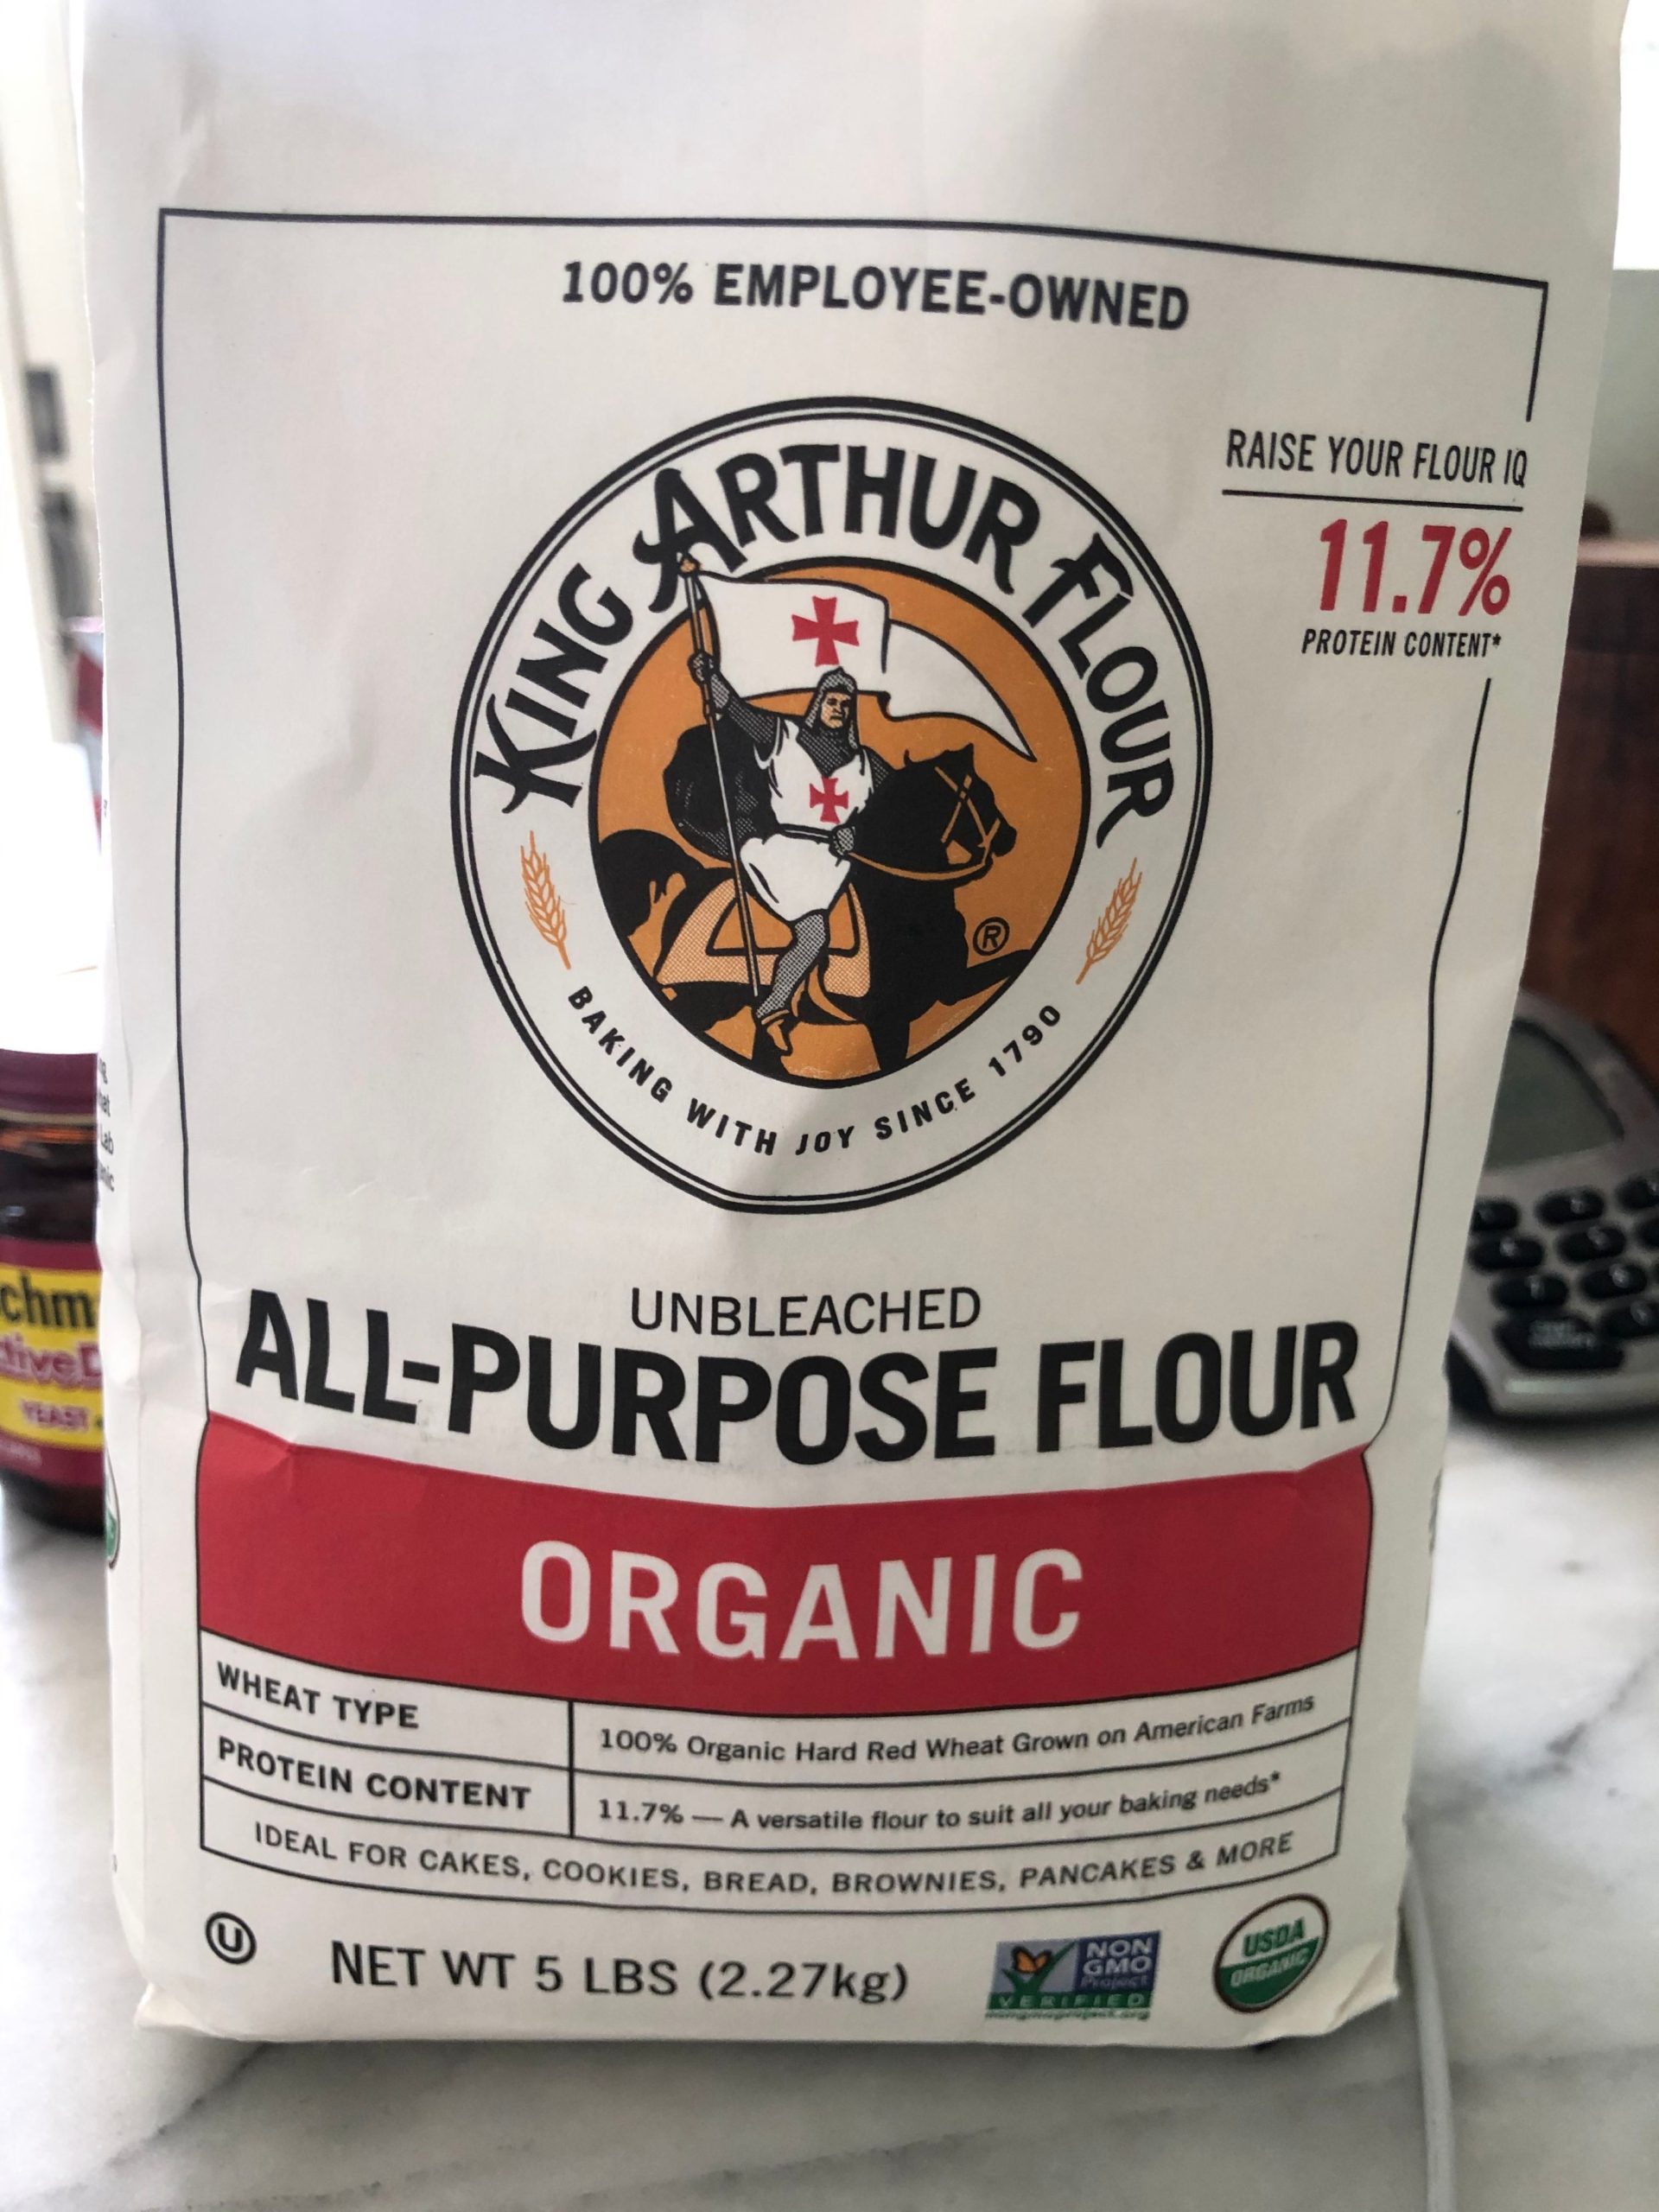
- All-Purpose Flour: All-purpose flour provides the structure and strength for your challah dough, creating a tender but sturdy loaf that holds its shape beautifully. It’s versatile and works well in most bread recipes, but you can also use white bread flour for a slightly chewier texture and higher rise due to its higher protein content.
Pro Tip: Use a thermometer to ensure your water is the right temperature for activating the yeast—it should feel warm, not hot, to the touch.
For exact ingredient amounts, see full printable recipe card below.
Step-by-Step Instructions
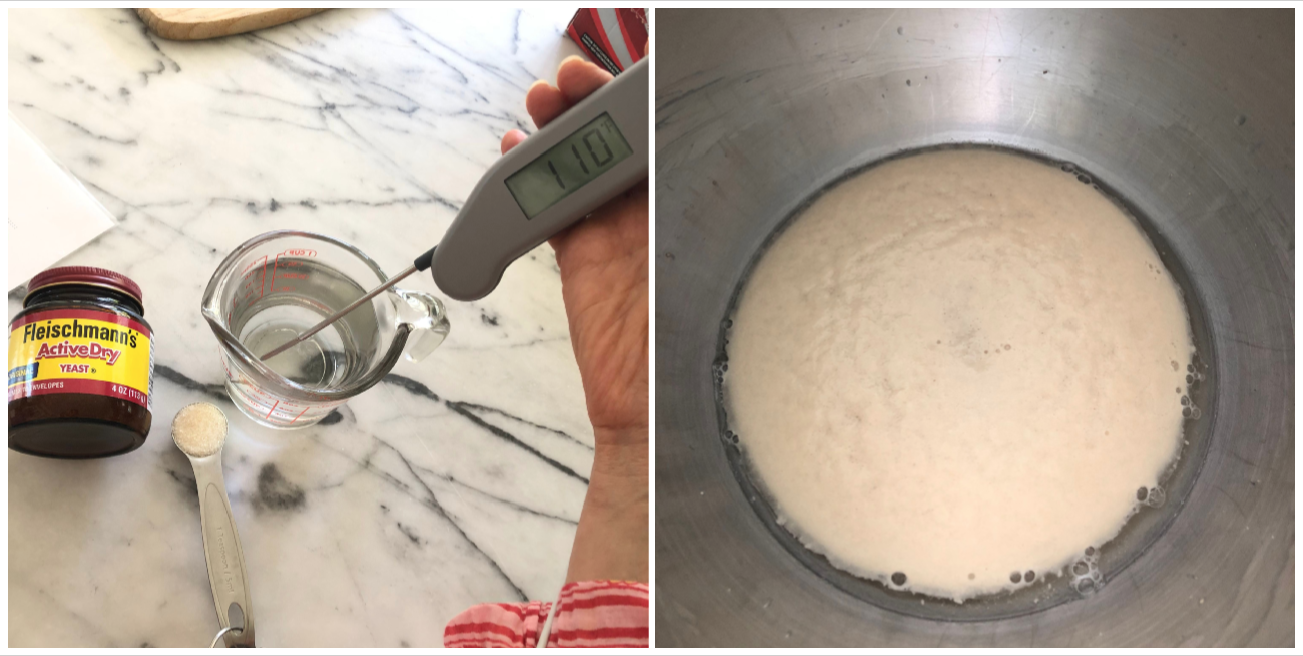
Step 1: Activate the Yeast. In a large mixing bowl, whisk together the yeast, 1 teaspoon of sugar, and warm water. Let it sit for 10 minutes until the surface looks foamy. This step ensures the yeast is alive and ready to work its magic.
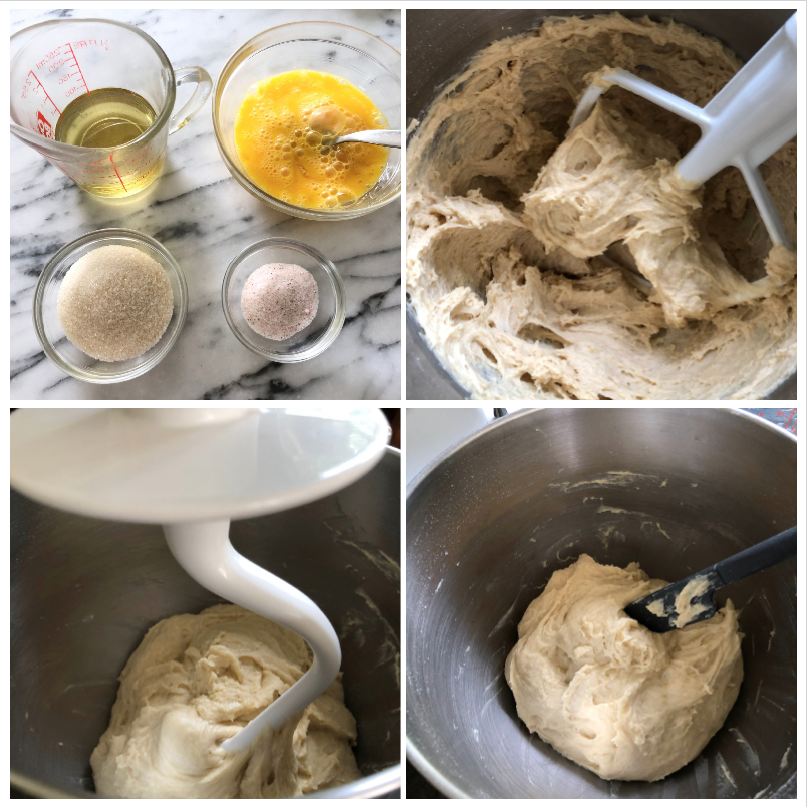
Step 2: Mix the Dough. In a small bowl, whisk 2 eggs and 1 egg yolk. Add this mixture to the yeast along with the remaining granulated sugar, olive oil, and salt. Gradually stir in the flour, one cup at a time, until a sticky dough forms.
Step 3: Knead the Dough. If using a stand mixer, switch to the dough hook and knead for 4 minutes on medium-high speed until the dough pulls away from the sides of the bowl. Alternatively, knead by hand on a lightly floured surface for 4–5 minutes until the dough is smooth and elastic.
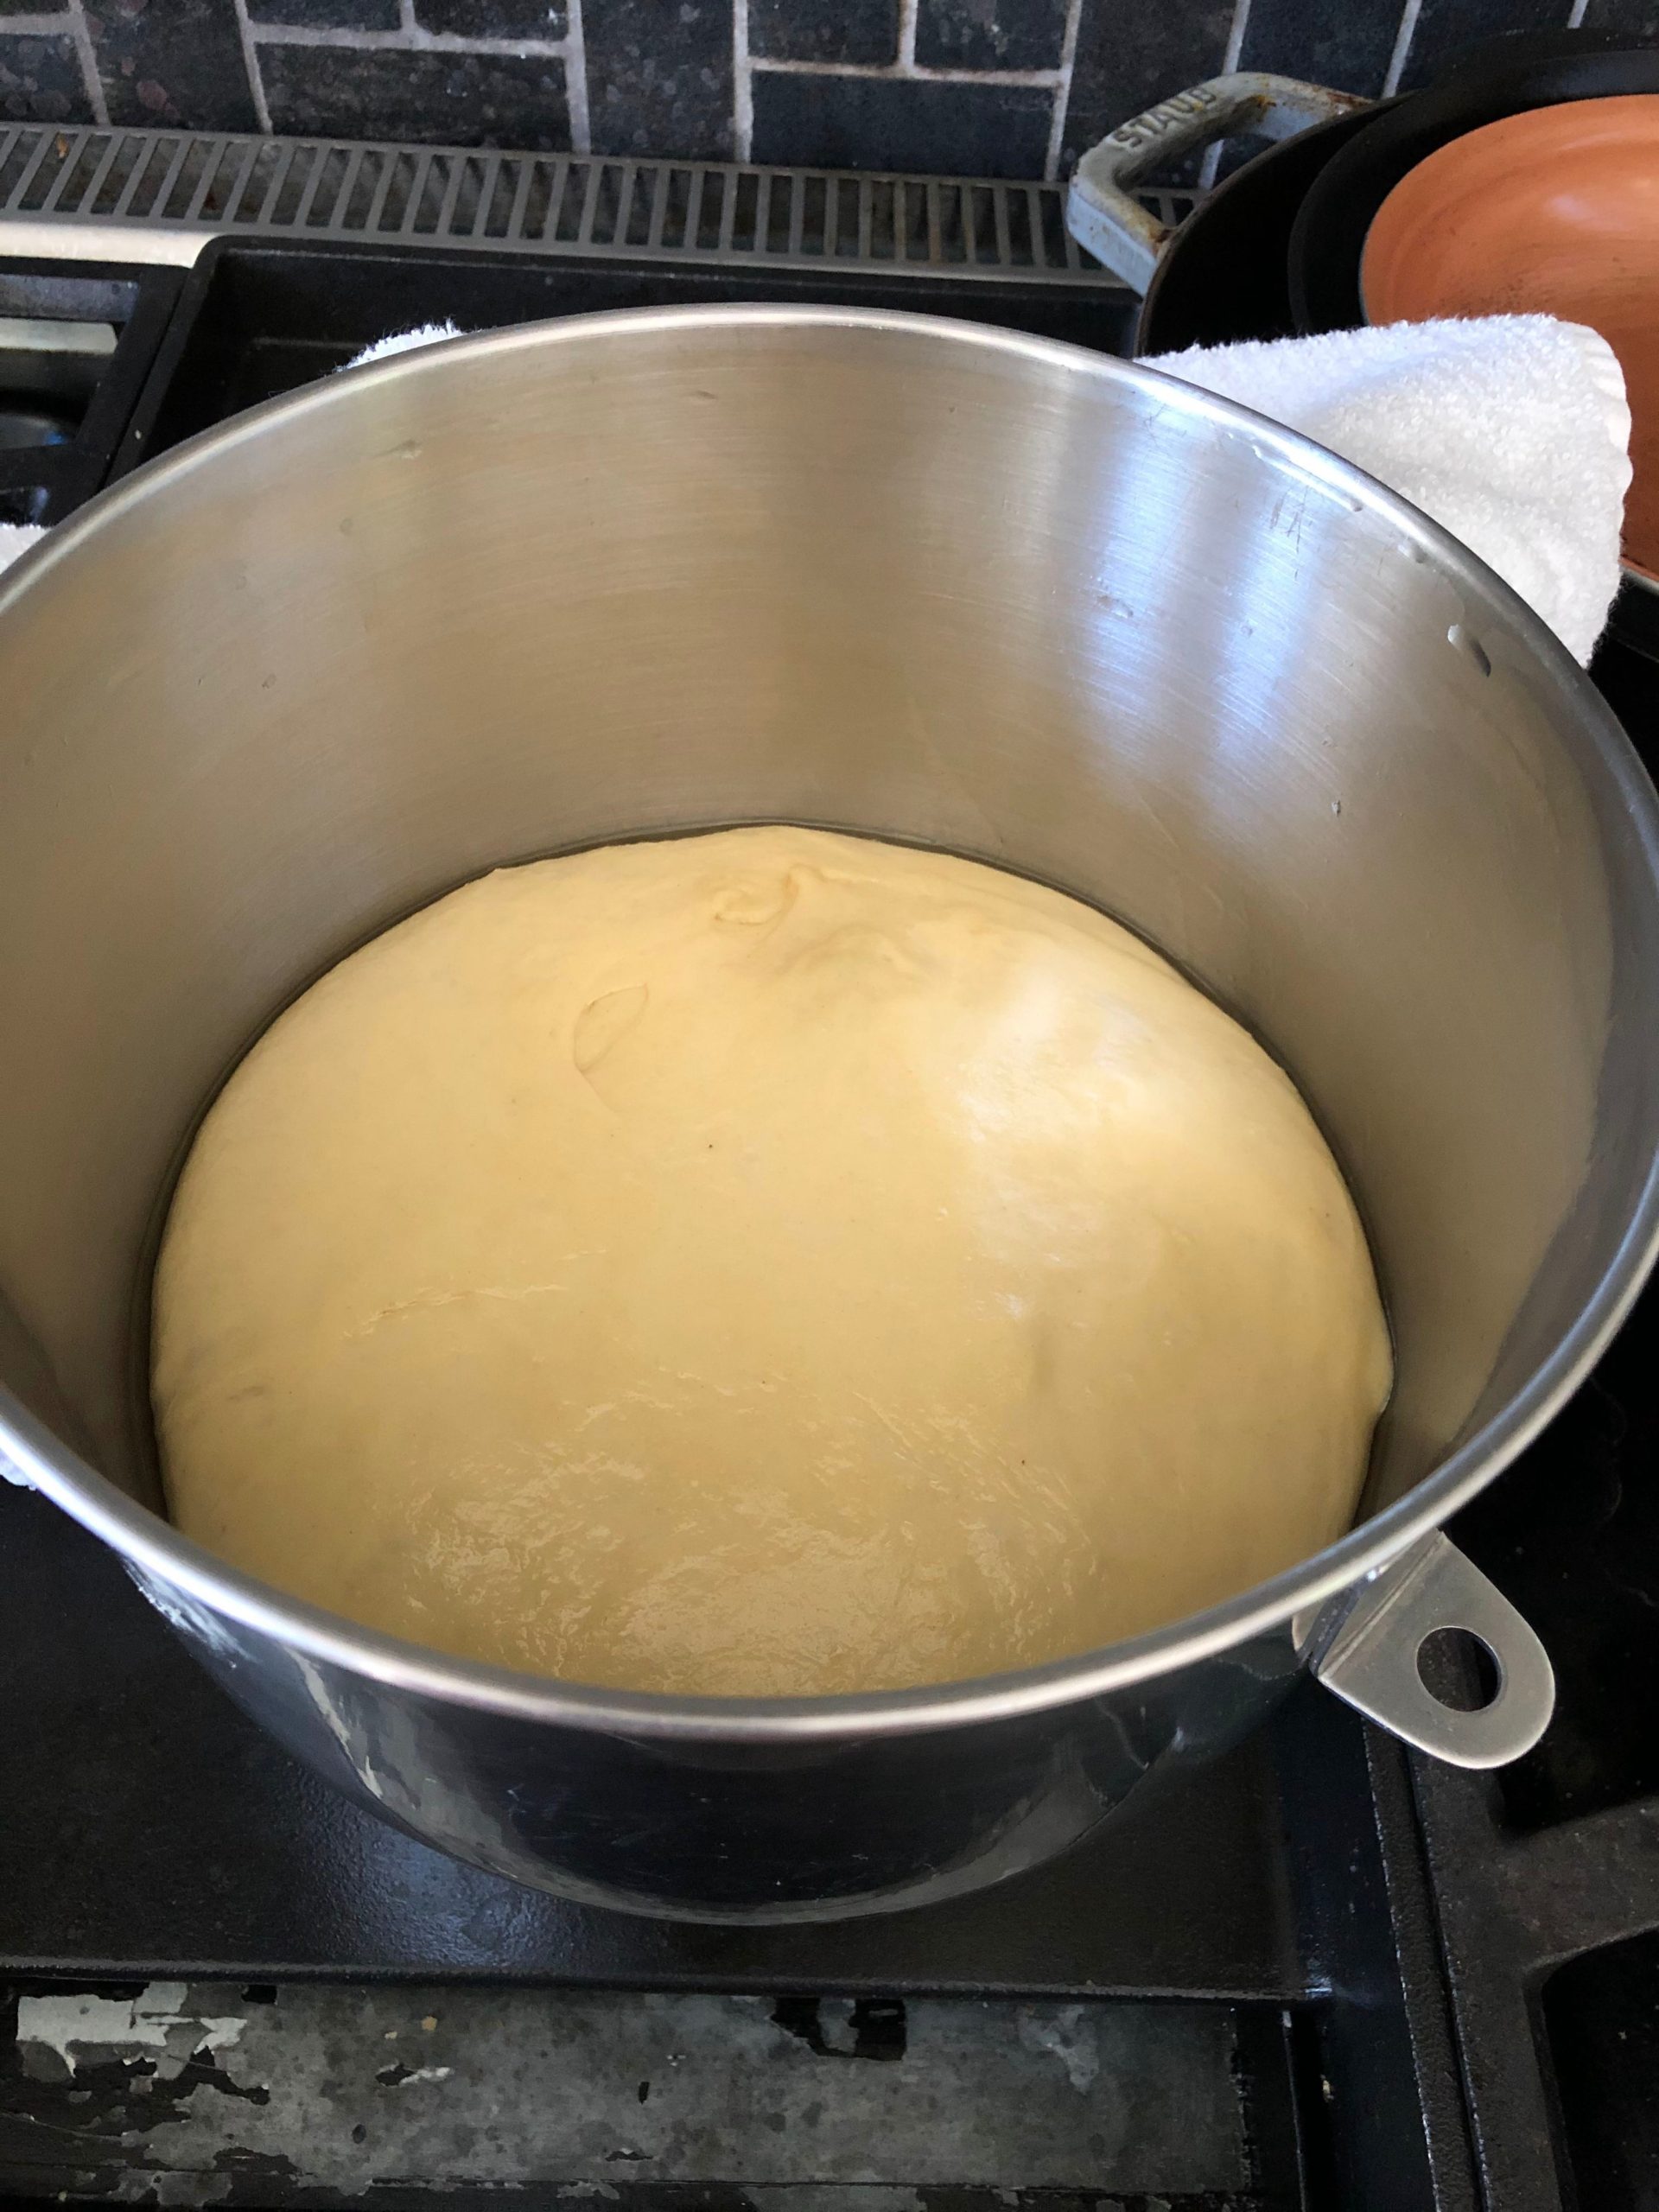
Step 4: Let the Dough Rise. Transfer the dough to a lightly oiled bowl, turning it to coat the surface. Cover with a clean kitchen towel and let rise in a warm place until doubled in size, about 1 to 1½ hours. You can let the dough rise in the refrigerator overnight.
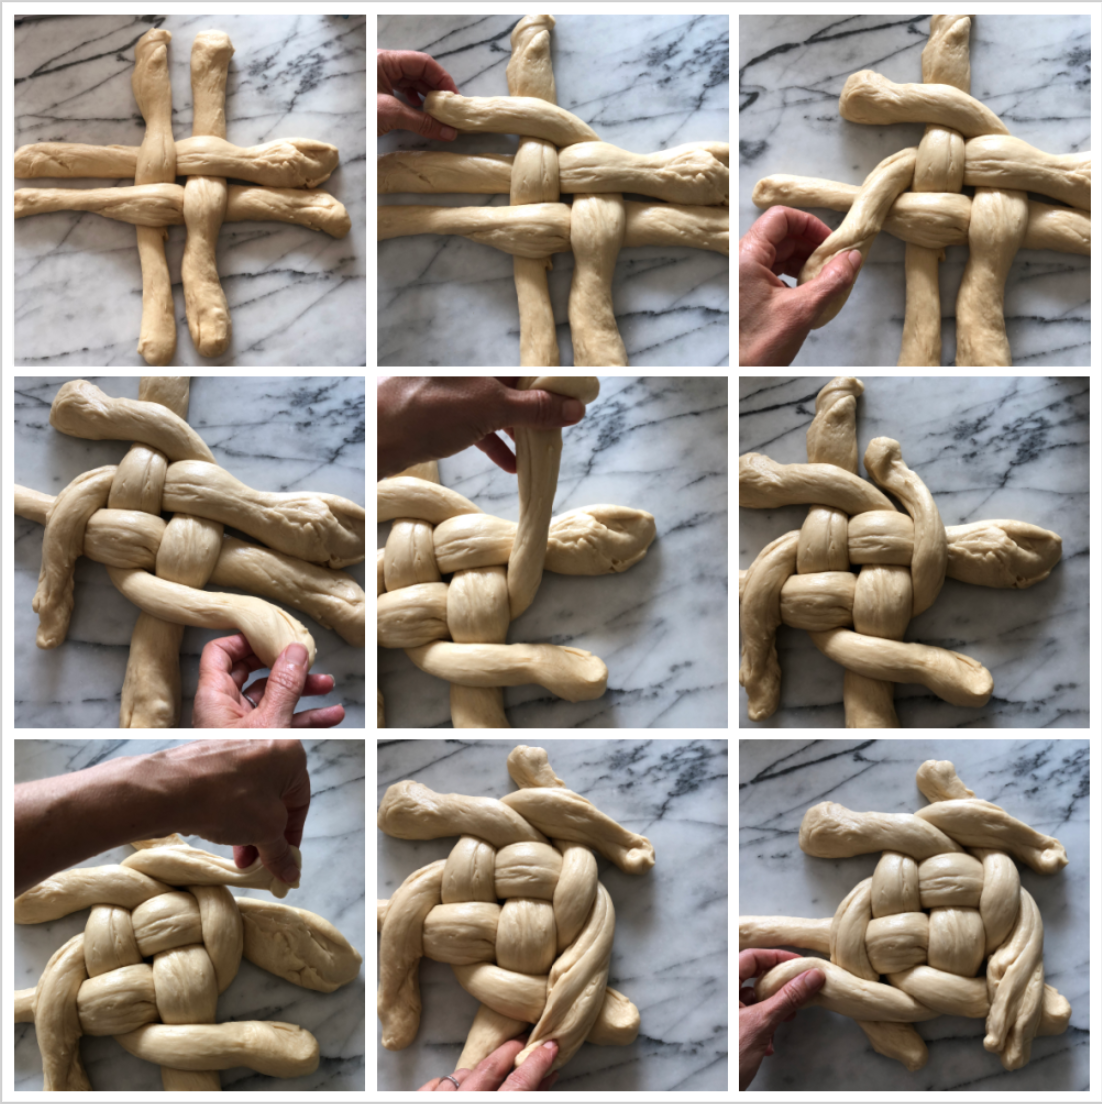
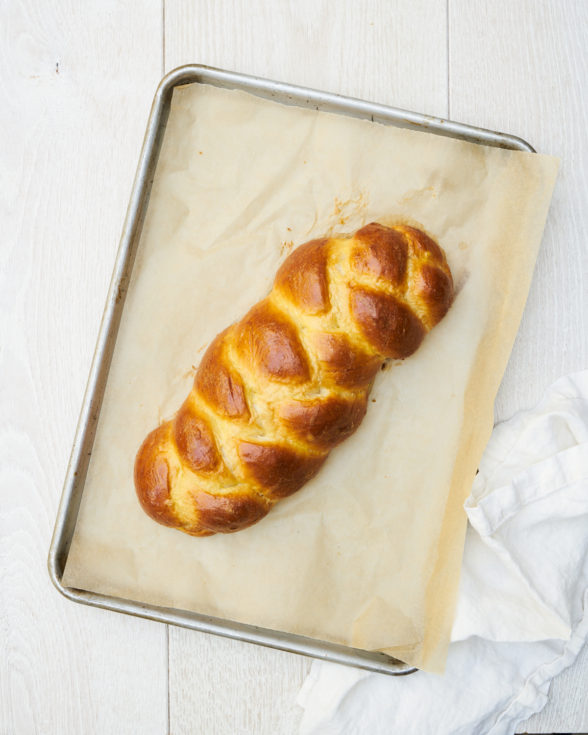
Step 5: Shape into a Round Challah. Turn the dough out onto a floured surface. Divide it into four equal pieces and roll each into a long rope, about 12 inches. To create a round challah, form the ropes into a spiral or braid them and then coil the braid into a circle.
Step 6: Second Rise. Place the shaped loaf on a parchment-lined baking sheet and cover lightly with a towel. Let it rise for about 1 hour, or until puffed but not over-proofed.
Step 6: Second Rise. Place the shaped loaf on a parchment-lined baking sheet and cover lightly with a towel. Let it rise for about 1 hour, or until puffed but not over-proofed.
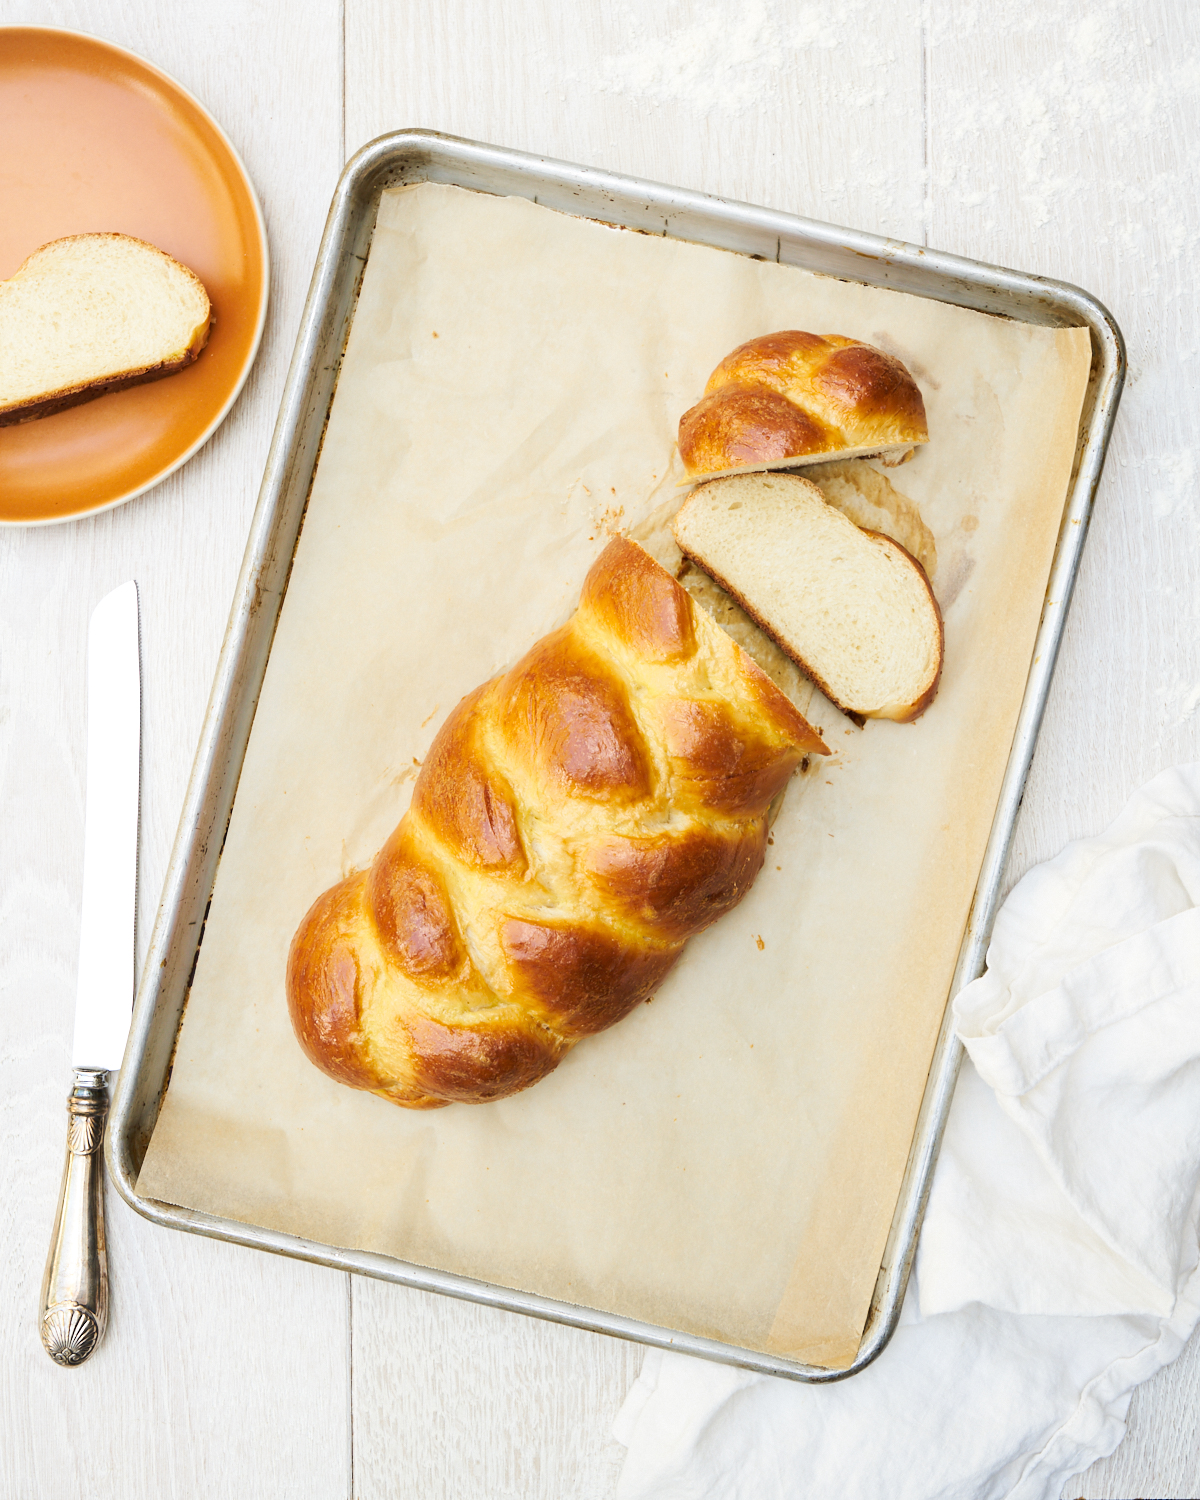
Step 7: Bake the Challah. Preheat your oven to 375°F. Brush the loaf with a beaten egg (or egg yolk for a deeper color) using a pastry brush. For extra shine, brush the dough a second time halfway through baking. Bake for 25–30 minutes, or until the challah is golden brown and sounds hollow when tapped on the bottom. Cool completely on a wire rack before serving.


Tips for Perfect Challah
- Don’t Over-Proof: Letting the dough rise too long can cause it to lose its shape during baking. Stick to the recommended times.
- Make It Sweet: For a sweeter challah, add an extra tablespoon of sugar to the dough.
- Mix-Ins: Soak raisins or dried fruit in hot water for 10 minutes before kneading them into the dough to prevent them from drying out during baking. You can also fold in chocolate chips, diced marzipan, roasted apples or sprinkle in cinnamon.
- Test Doneness: Use a thermometer to check the internal temperature of the bread. It’s ready when it reaches 190–200°F.
Serving Ideas
Round challah is as versatile as it is delicious. Here are some ways to serve it:
- Traditional: Dip slices in honey for a sweet New Year’s tradition.
- Savory Pairings: Serve alongside soups, stews, or salads.
- Sandwiches: Use slices for sandwiches with roasted veggies or turkey.
- Leftovers: It’s perfect for repurposing into the best French toast you’ll ever have, bread pudding, or croutons!
Storage Tips
- Room Temperature: If you plan to enjoy your challah within a day or two, store it at room temperature. Wrap it tightly in plastic wrap or place it in an airtight container to keep it fresh. Avoid refrigerating as this can dry out the bread.
- Freezing Challah: Challah freezes beautifully and is perfect for making ahead. Once the bread has cooled completely, wrap it tightly in plastic wrap and then in foil to prevent freezer burn. Freeze for up to 2 months.
- Thawing Challah: To thaw, leave the bread at room temperature for a few hours or overnight while still wrapped to retain moisture. For a freshly baked feel, warm it in the oven at 300°F for 10–15 minutes.
- Pro Tip: If you have leftover challah, it’s perfect for repurposing into French toast, bread pudding, or croutons!
Dough Troubleshooting
Dough Not Rising Properly:
- Possible Causes: The yeast may not have been activated properly, the water temperature might have been too hot or too cold, or the dough was left in a drafty or cool environment.
- Solution: Ensure your water is between 105–115°F to activate the yeast, and let it sit until foamy before proceeding. Place the dough in a warm, draft-free area to rise. If your kitchen is cool, try placing the bowl in an oven with the light on or near a bowl of warm water.
Over-Proofing the Dough:
- Possible Causes: Letting the dough rise too long can cause it to lose structure, resulting in a flat or deflated loaf.
- Solution: Stick to the recommended rising times and check the dough periodically. It’s ready when it has doubled in size but still springs back slightly when pressed. Avoid letting it sit out too long after shaping the loaf.
Crust Not Achieving Desired Color:
- Possible Causes: The egg wash might have been too sparse, or the oven temperature might not be consistent.
- Solution: Apply a generous egg wash over the entire loaf, making sure to get into the crevices. For a deeper golden color, brush with egg yolk instead of whole egg, and reapply halfway through baking. Use an oven thermometer to ensure your oven is at the correct temperature.
Recipe FAQs
Yes! Challah freezes beautifully. Once cooled, wrap it tightly in plastic wrap and foil, and freeze for up to 2 months. Thaw at room temperature before serving.
Traditional toppings include poppy seeds or sesame seeds. For a modern twist, try Everything But the Bagel seasoning, or go sweet with cinnamon sugar.
While this recipe hasn’t been tested with gluten-free flour, you can experiment with a 1:1 gluten-free baking mix. Be aware that the texture may differ.
More Delicious Baked Goods
If you give this recipe a try, snap a pic and tag @pamelasalzman so I can see your beautiful creations. I also really appreciate readers taking the time to leave a star rating and review! I have started a weekly Monday newsletter with tips, musings, new recipes not published here, fun new finds, and more. Subscribe for free here.
For more delicious recipes and to learn how to be a better cook, check out my monthly online cooking classes. I have been teaching people for 15 years how to cook healthy food that their families love! Join me!
Round Challah: How to Make a Beautiful Braided Bread
Ingredients
- 2 ¼ teaspoons active dry yeast or 1 package
- 3 Tablespoons + 1 teaspoon organic cane sugar, divided
- 1 cup warm water, between 105-115 degrees F is ideal (use a thermometer to get the temp right)
- 3-4 eggs, at room temperature, divided (You can use 2 whole eggs + 1 extra yolk in the bread and 1 beaten egg to brush on before baking OR you can use 2 eggs for the bread and 1 egg to brush on)*
- 1/3 cup olive oil or avocado oil** + extra for greasing the bowl
- 2 teaspoons sea salt
- 4 cups organic all-purpose flour, or white bread flour, if that’s what you have+ additional for the countertop if you’re kneading it by hand
Instructions
- Whisk together yeast, 1 teaspoon sugar, and the warm water in a large mixing bowl. I do this whole thing in my Kitchen Aid Mixer. Let stand for 10 minutes. It should look foamy on the surface.
- In a small bowl, whisk together 2 of the eggs + 1 egg yolk (or just do 2 eggs) and add them plus the 3 Tablespoons of sugar, oil and salt to the yeast mixture.
- If you are using a Kitchen Aid, I use the paddle attachment here. Stir in 4 cups of flour, one at a time, until you achieve a sticky dough. You can switch over to the dough hook and allow the stand mixer to “knead” the dough in the bowl at medium high speed for about 4 minutes or until the dough starts to pull away from the sides of the bowl. Or you can turn the dough out onto a lightly floured surface and knead the dough by hand for about 4 minutes until it is more smooth and elastic.
- Clean out the mixing bowl and lightly grease it with oil. Place the dough in the bowl and turn it to coat with the oil. Cover the bowl with a towel and set aside until the dough doubles in volume, about 1 to 1 ½ hours. It’s best to place the bowl away from drafts or in a warm place. You can also let rise overnight in the refrigerator.
- Turn dough out onto a lightly floured surface and cut into three equal pieces (if making one large loaf.) Roll the pieces out into long ropes, about 12 inches long. Braid the ropes together into a loaf and seal the ends, tucking them under slightly.
- Line a large baking sheet with unbleached parchment paper. You can sprinkle it with some cornmeal if you like the texture on the bottom of your bread. Transfer the loaf to the prepared sheet pan. Cover the loaf lightly with a towel and let rise until nearly doubled, about 1 hour. Don’t let it rise longer or you’ll lose the definition of all the strands.
- Preheat oven to 375 degrees.
- Beat remaining egg with 1 Tablespoon water in a small bowl (or just use egg yolk for a more golden color.) Brush on the surface of the loaf (you won’t use all the egg wash.)
- Set baking sheet in the middle of the oven and bake for 25-30 minutes or until loaf is golden brown and sounds hollow when smacked lightly on the bottom. You can also check the internal temp of the bread with a thermometer and remove from the oven when it achieves 190-200 degrees F. Transfer to a wire rack to cool completely.
Notes
- Don’t Over-Proof: Letting the dough rise too long can cause it to lose its shape during baking. Stick to the recommended times.
- Make It Sweet: For a sweeter challah, add an extra tablespoon of sugar to the dough.
- Mix-Ins: Soak raisins or dried fruit in hot water for 10 minutes before kneading them into the dough to prevent them from drying out during baking. You can also fold in chocolate chips, diced marzipan, roasted apples or sprinkle in cinnamon.
- Room Temperature: If you plan to enjoy your challah within a day or two, store it at room temperature. Wrap it tightly in plastic wrap or place it in an airtight container to keep it fresh. Avoid refrigerating as this can dry out the bread.
- Freezing Challah: Challah freezes beautifully and is perfect for making ahead. Once the bread has cooled completely, wrap it tightly in plastic wrap and then in foil to prevent freezer burn. Freeze for up to 2 months.
- Thawing Challah: To thaw, leave the bread at room temperature for a few hours or overnight while still wrapped to retain moisture. For a freshly baked feel, warm it in the oven at 300°F for 10–15 minutes.
- Pro Tip: If you have leftover challah, it’s perfect for repurposing into French toast, bread pudding, or croutons!
 Like this recipe? Rate & comment below!


So excited to add this to my special Shabbats and High Holidays. Thank you for the joy!
Yay! Enjoy!
Making this tomorrow. If my guests are coming over at 7 pm. should I start the challah at around 2:30 so it’s warm upon their arrival?
Sorry I missed this! Yes, you can or just put the finished challah in the oven to warm it.
Is there any way to correct if you maybe overdid it in the flour? I did exactly 4 cups as the recipe says but mine is not nearly as sticky as yours after the first rise and before braiding. Also should the towel in the first and/or the 2nd rise be moist or dry?
I use a dry towel to cover. At this point, don’t worry. It’s better if it’s not too sticky. Is it not yeasty and stretchy though? You had fresh, not expired yeast, right? Temp of the water was in the range, correct?
Would whole wheat pastry flour work?
I haven’t tried this bread with whole wheat pastry flour. Whole wheat flour can sometimes taste bitter and “wheat-y” in recipes that don’t have a lot of sugar. They are also a lot heavier. I really don’t know how this would turn out.
If I am making 2 round challahs do I bake them at the same time on one large baking sheet or on 2 sheets at different times?
When you say, 1 large baking sheet, do you mean a 3/4 sheet pan? If so, yes. Tell me what size you mean and how big your oven is. Otherwise, I would do one large loaf.
Any ideas of how to make this gluten-free?
I have not tested a GF version yet, so sorry!
What do you think about just substituting gluten free flour for the flour in this recipe and everything else staying the same?
I don’t know, sorry. I saw a recipe recently that called for a combo of 2 cups of an all-purpose GF flour blend + 1 cup of potato starch with a little less liquid than mine, but everything else approximately the same. The author states the dough is every soft and should be rolled with a very gentle touch and also recommends making two loaves over one.
Made challah this past weekend and a friend gave me a vegan version, that my daughter made-not bad!
Definitely will try soaking the raisins next time, as we did not. Thank you for sharing
Oh, interesting! Is challah actually challah without eggs? Asking for reals. I thought challah was an egg bread…or maybe it’s just a braided bread. Hmmmm….
I think it definitely needs eggs or it will not be that beautiful golden color, IMO. Can’t wait to try this!
Agree!
Hi Marcy, can I have your vegan challah recipe? Did it use aquafaba in place of eggs?