Why You’ll Love This Recipe
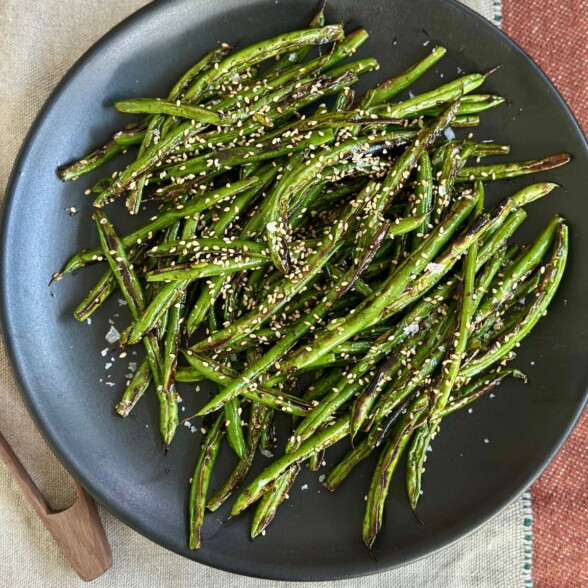
I am a huge fan of vegetables, but green beans have never been my favorite because they often require so much extra work to taste good. Usually, you have to blanch them in a large pot, plunge them into an ice bath, then sauté in a large skillet. Even then, they often lack flavor. Broiling them raw is a total game-changer. Like my Roasted Green Beans and Shallots with Lemon and Thyme, this method is fast, efficient, and creates a savory flavor that makes fresh green beans the star of your meal.
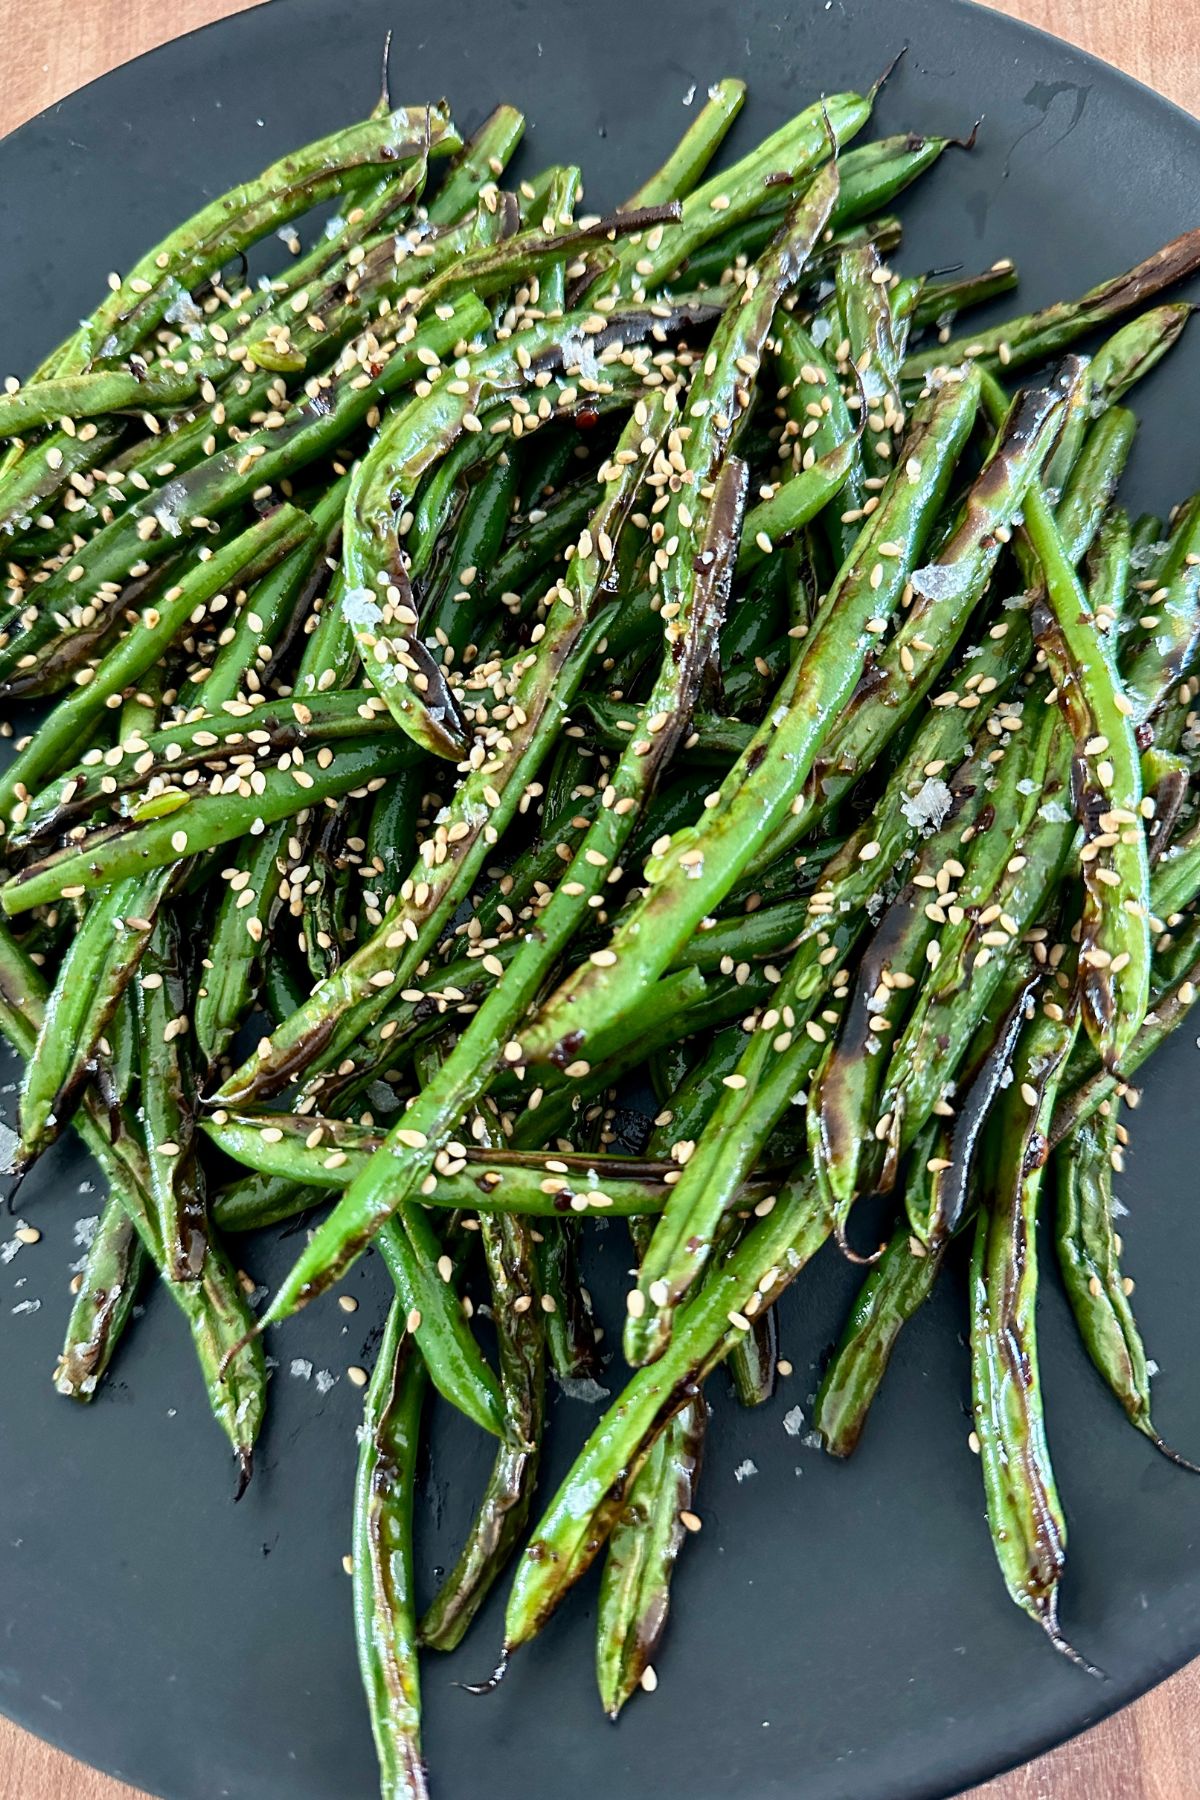
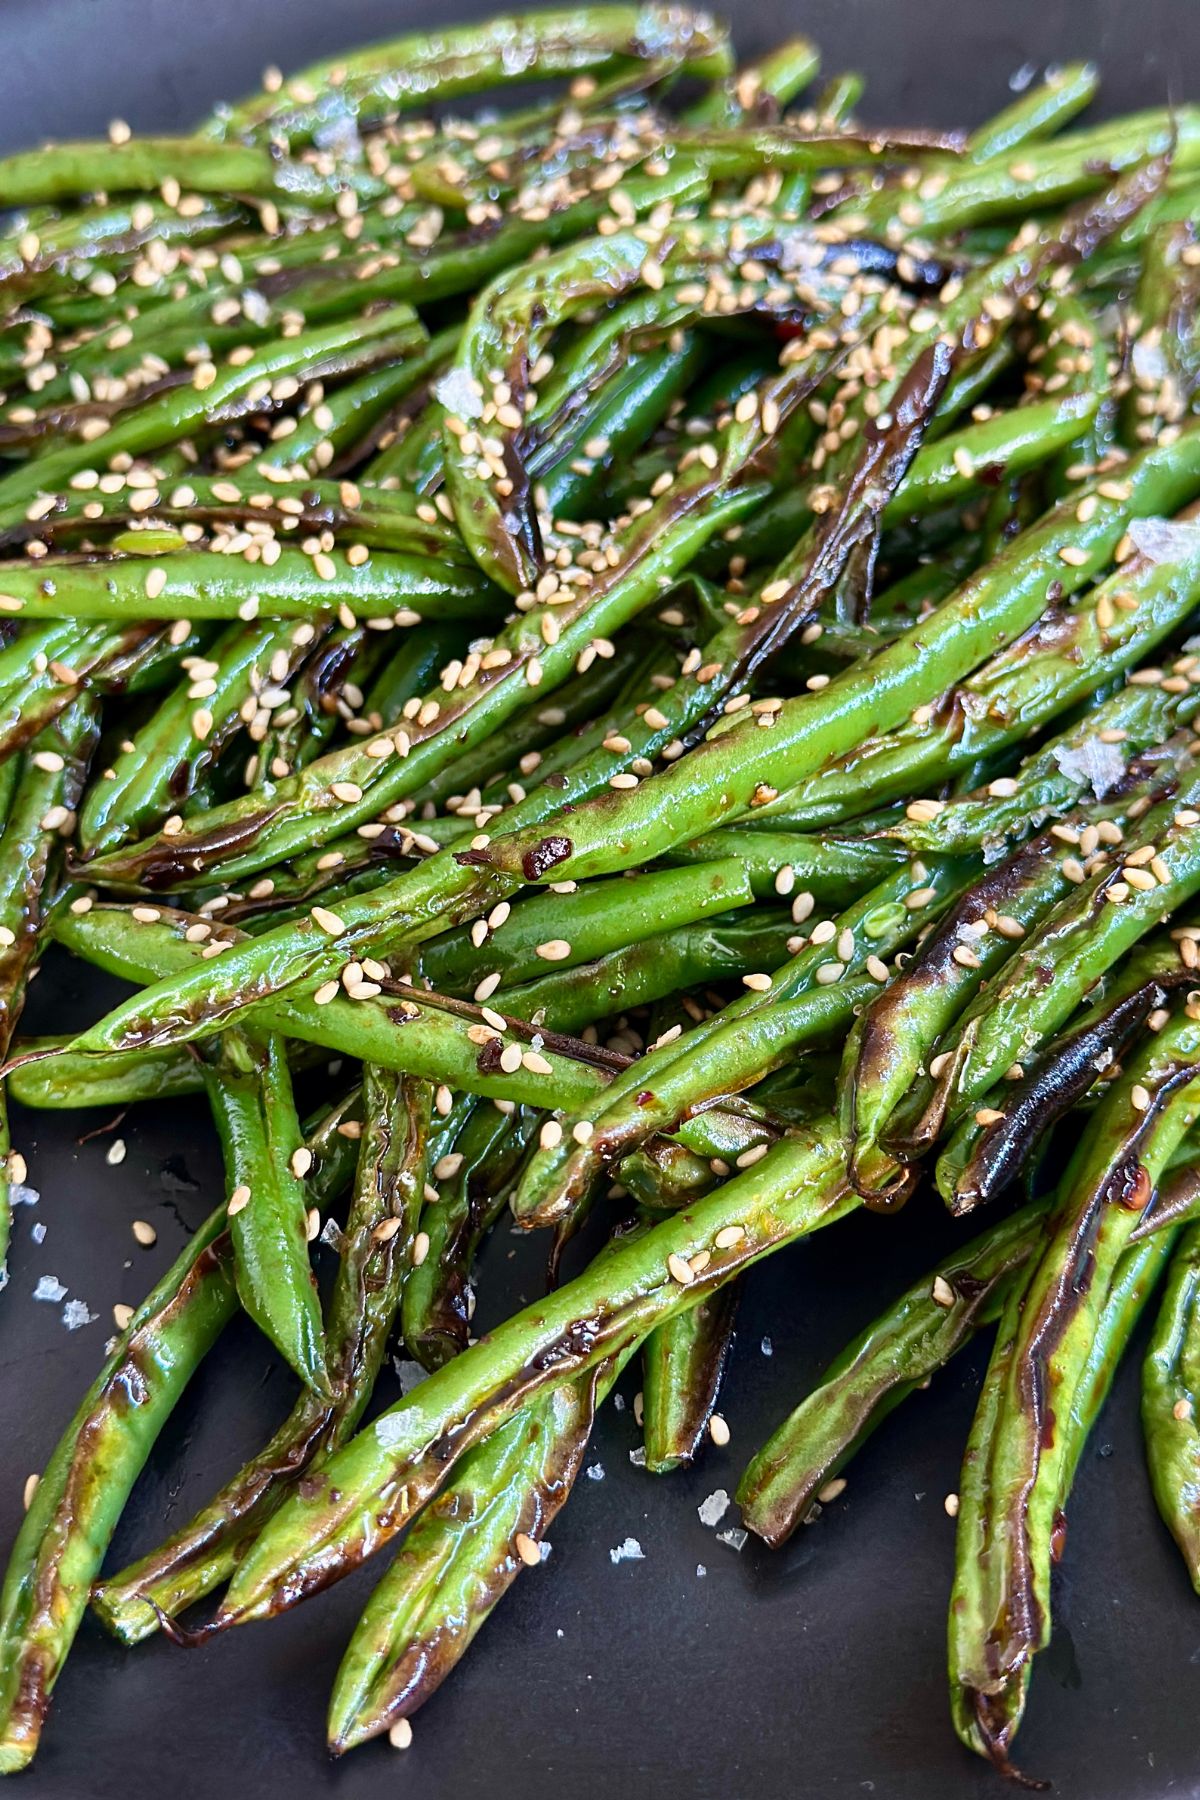
One of my favorite parts about this recipe is that you can customize it with whatever you have on hand. After broiling, toss the blistered green beans with lemon juice and red pepper flakes for brightness, or drizzle with soy sauce for a salty, umami finish. Also, you can use the spicy mayo from my sushi bake recipe for an extra kick. No matter which variation you try, this is one of the best new ways to enjoy green beans.
You will love how quickly this comes together on a baking sheet. It is also a great option for a Thanksgiving side dish or any holiday spread.
Ingredients You’ll Need
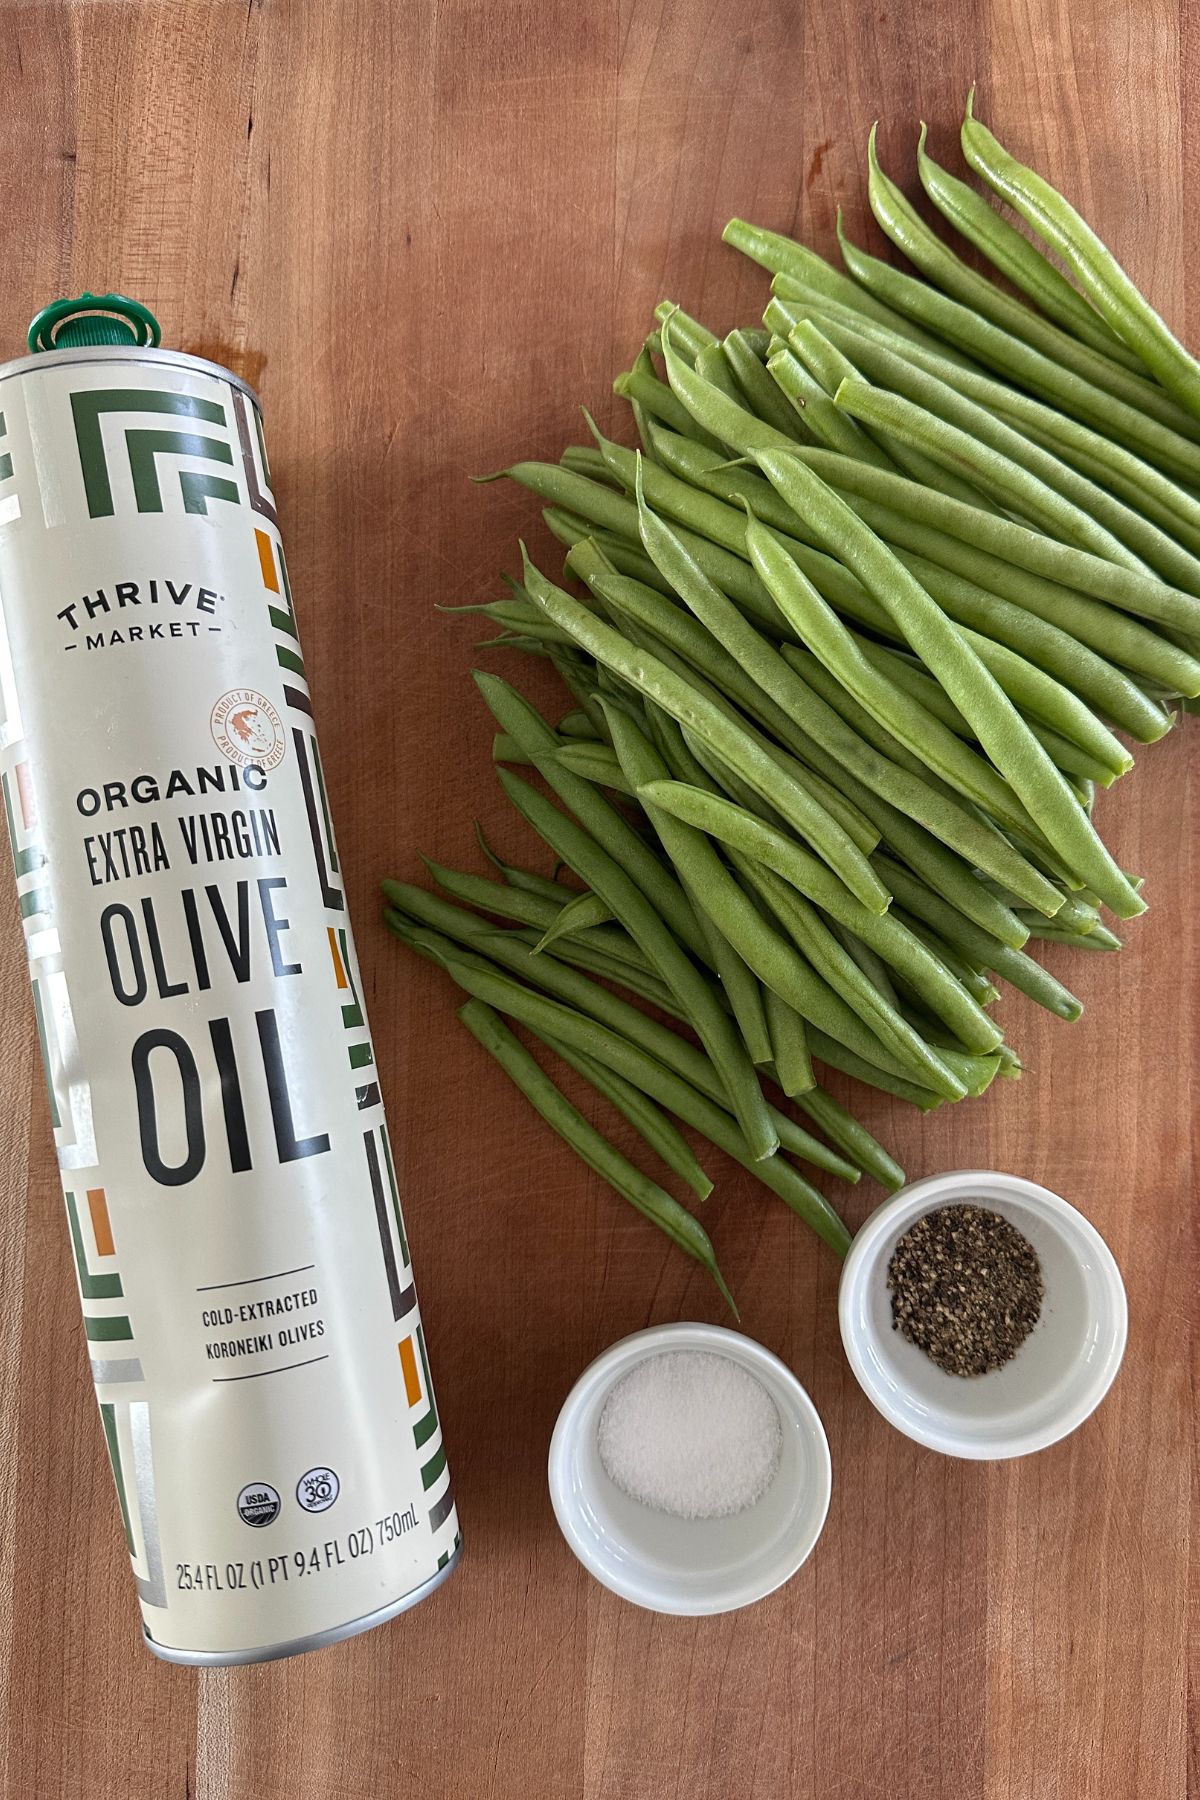
- Fresh green beans: For best results, use high quality beans. Frozen beans will not blister as well.
- Olive oil or avocado oil: Helps the beans brown evenly without sticking.
- Sea salt or kosher salt: Brings out the natural flavor.
- Freshly ground pepper: Adds a little bite.
- Toasted sesame oil (optional): You can blend this with the olive oil for extra depth.
- Optional sauce: Soy sauce, garlic oil, or spicy mayo for extra flavor (I used Fly by Jing zhong sauce).
How to Make Blistered Green Beans
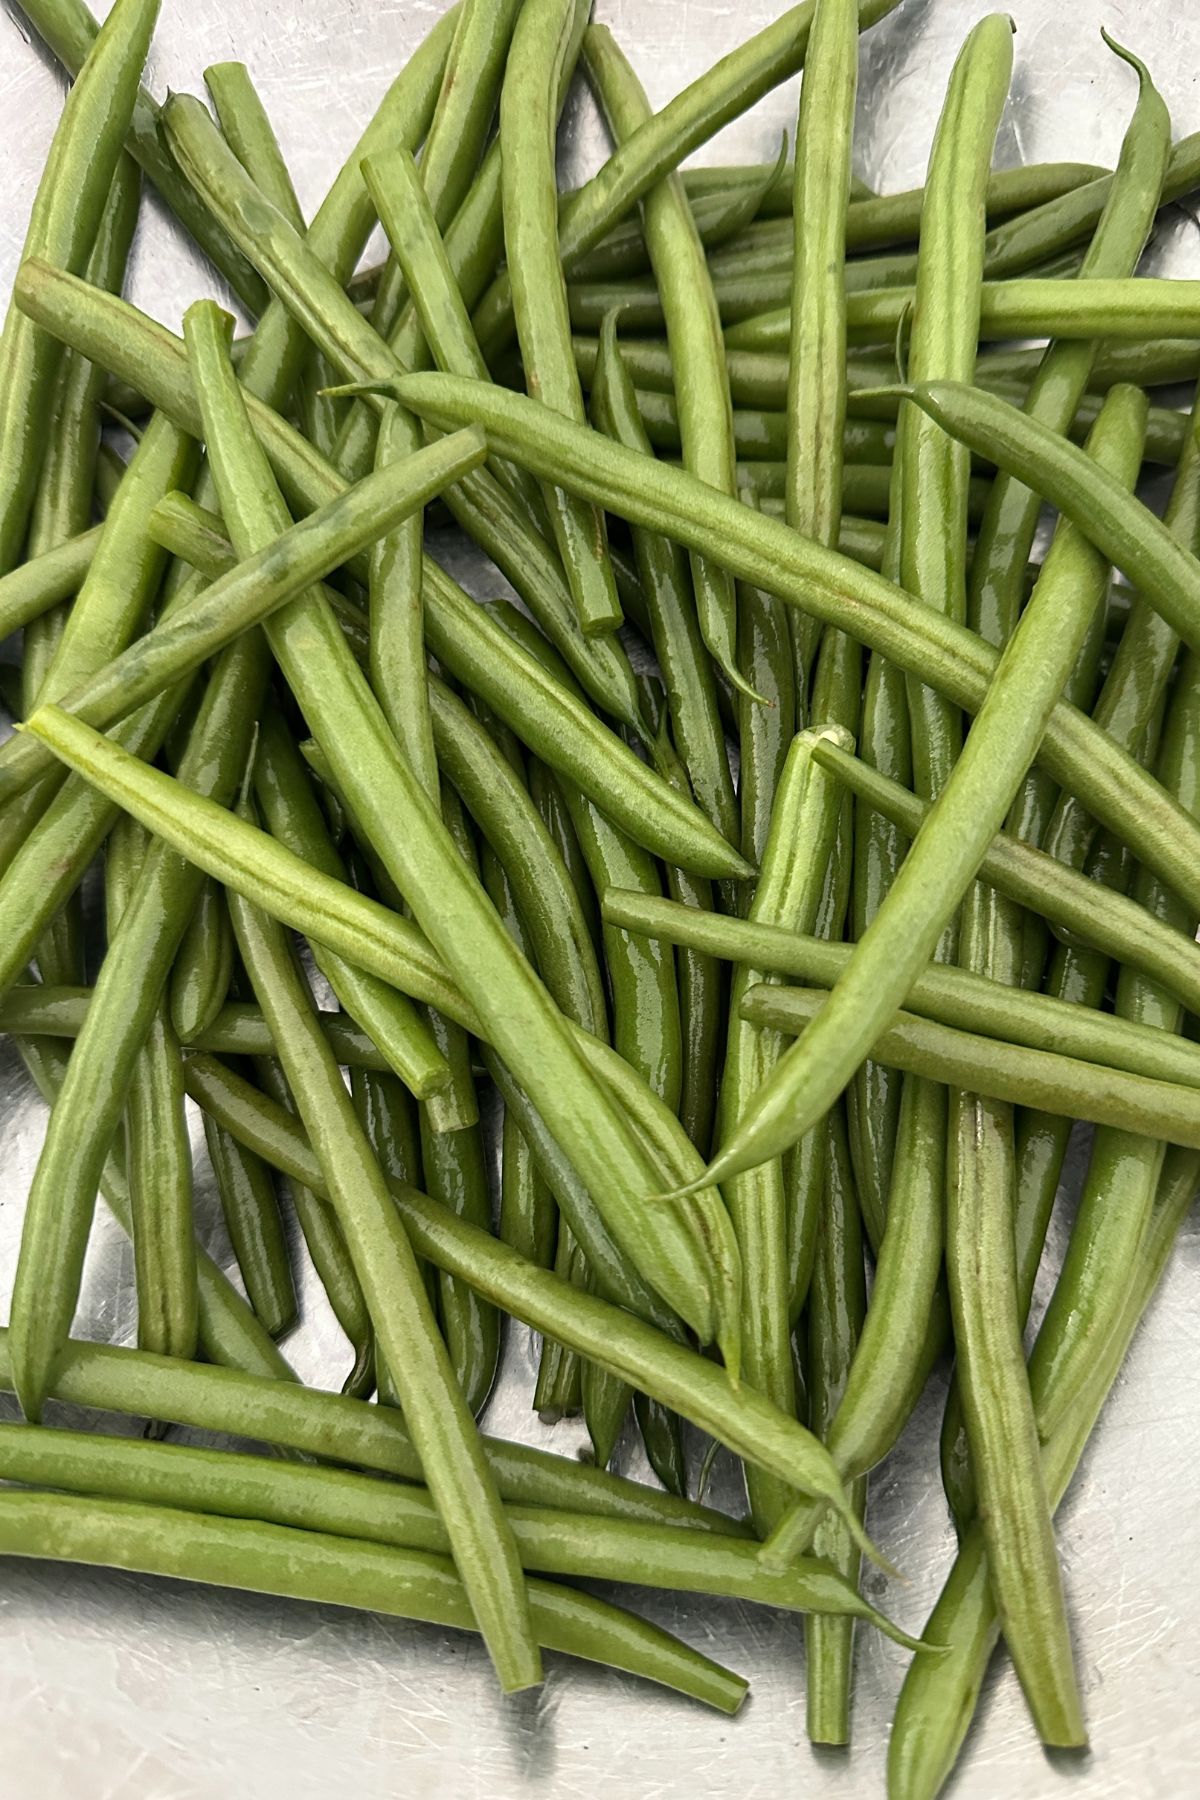
Step 1: Position your oven rack about six inches below your broiler and preheat to high. Trim the fresh green beans and toss them in a bowl with the oil, kosher salt, and ground pepper.
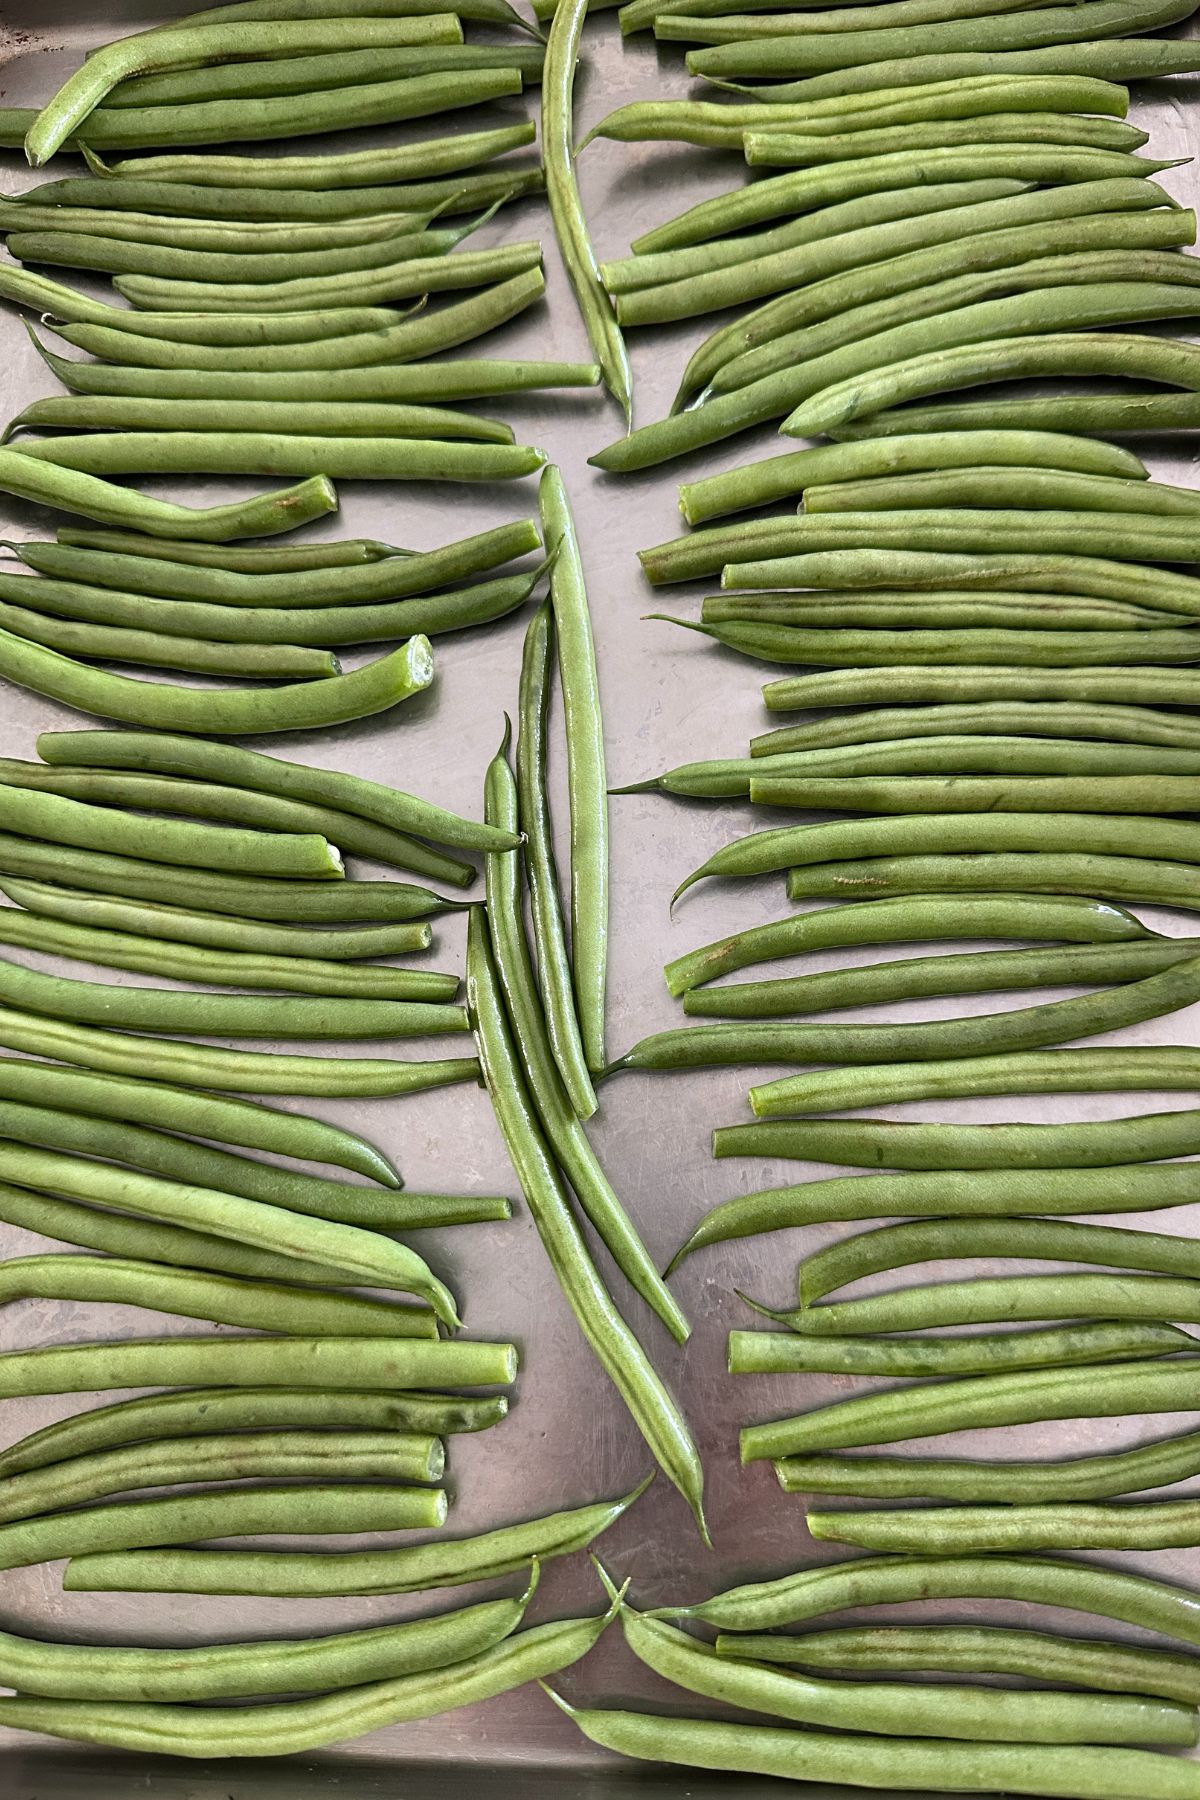
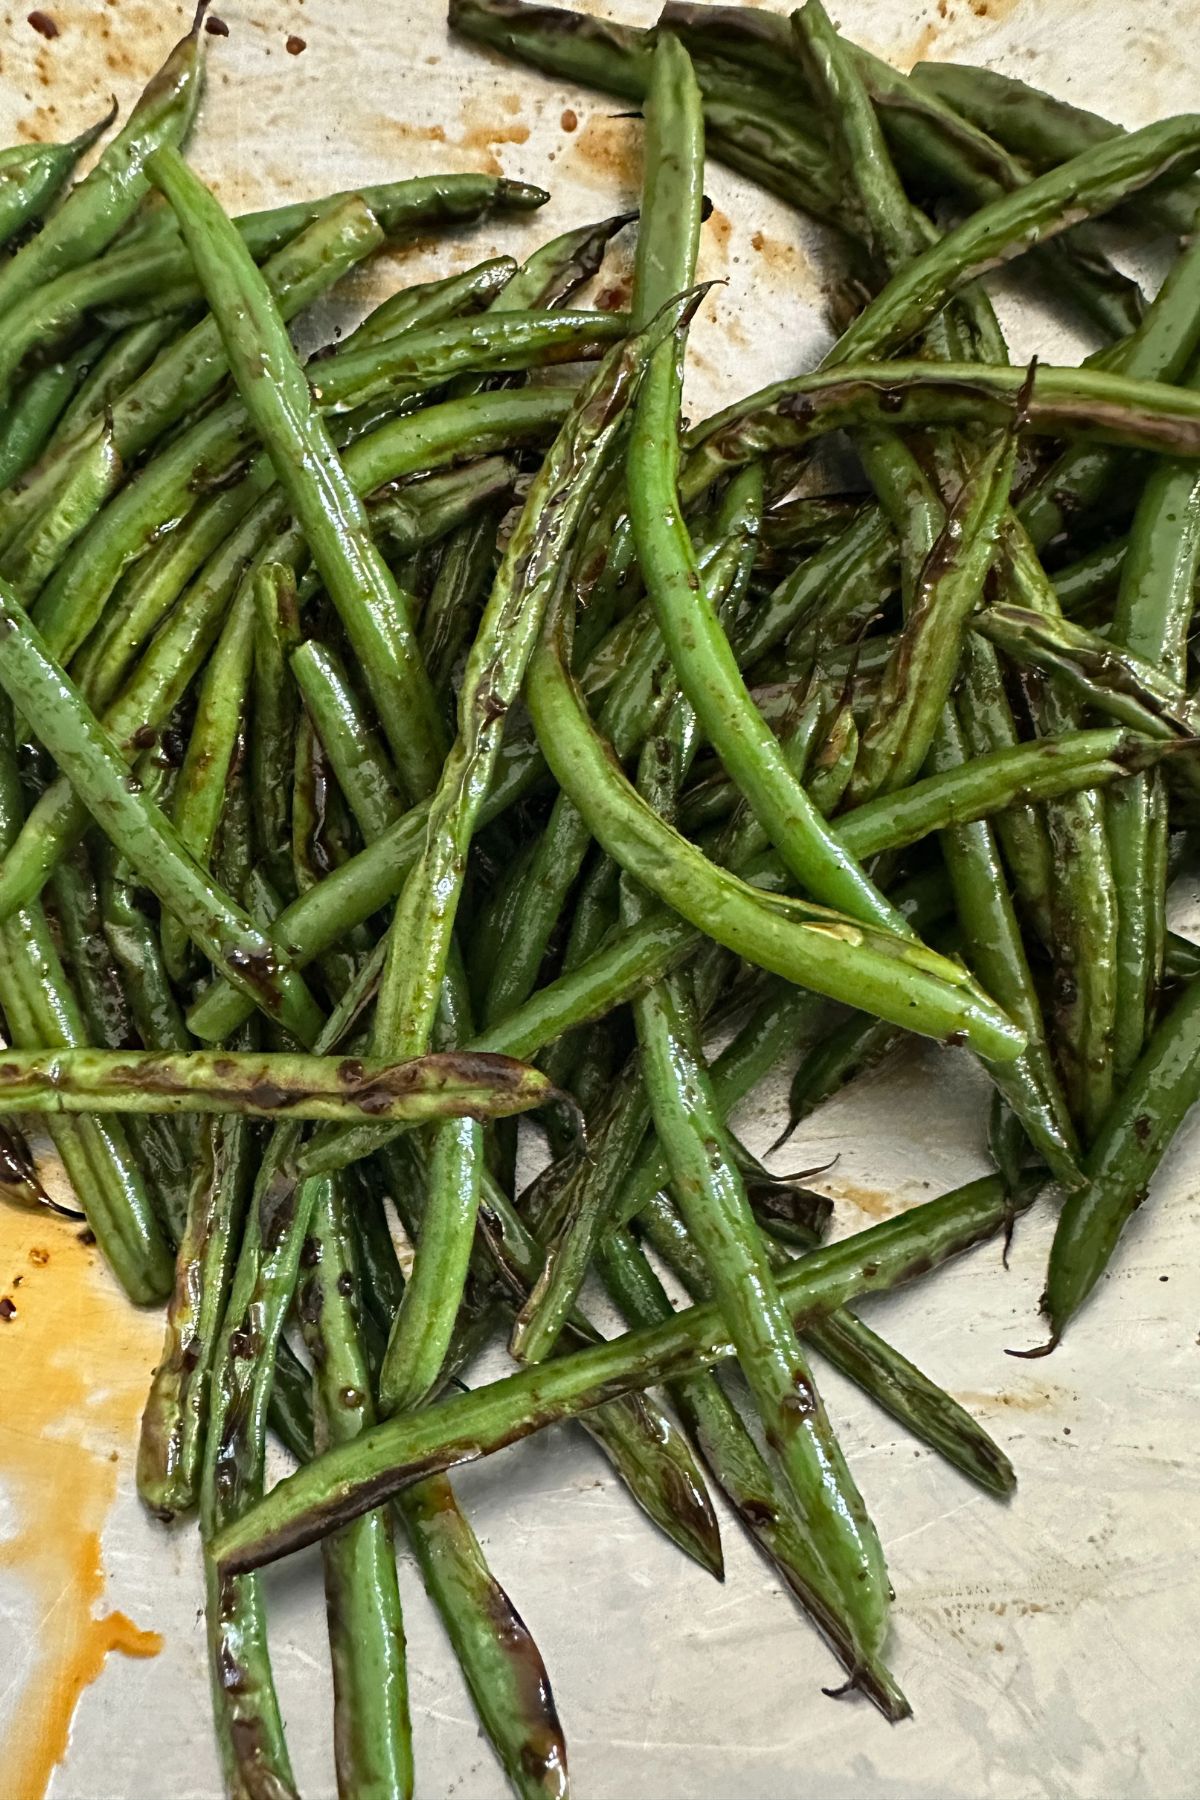
Step 2: Arrange the beans in a single layer on a baking sheet. Do not line the pan with parchment paper.
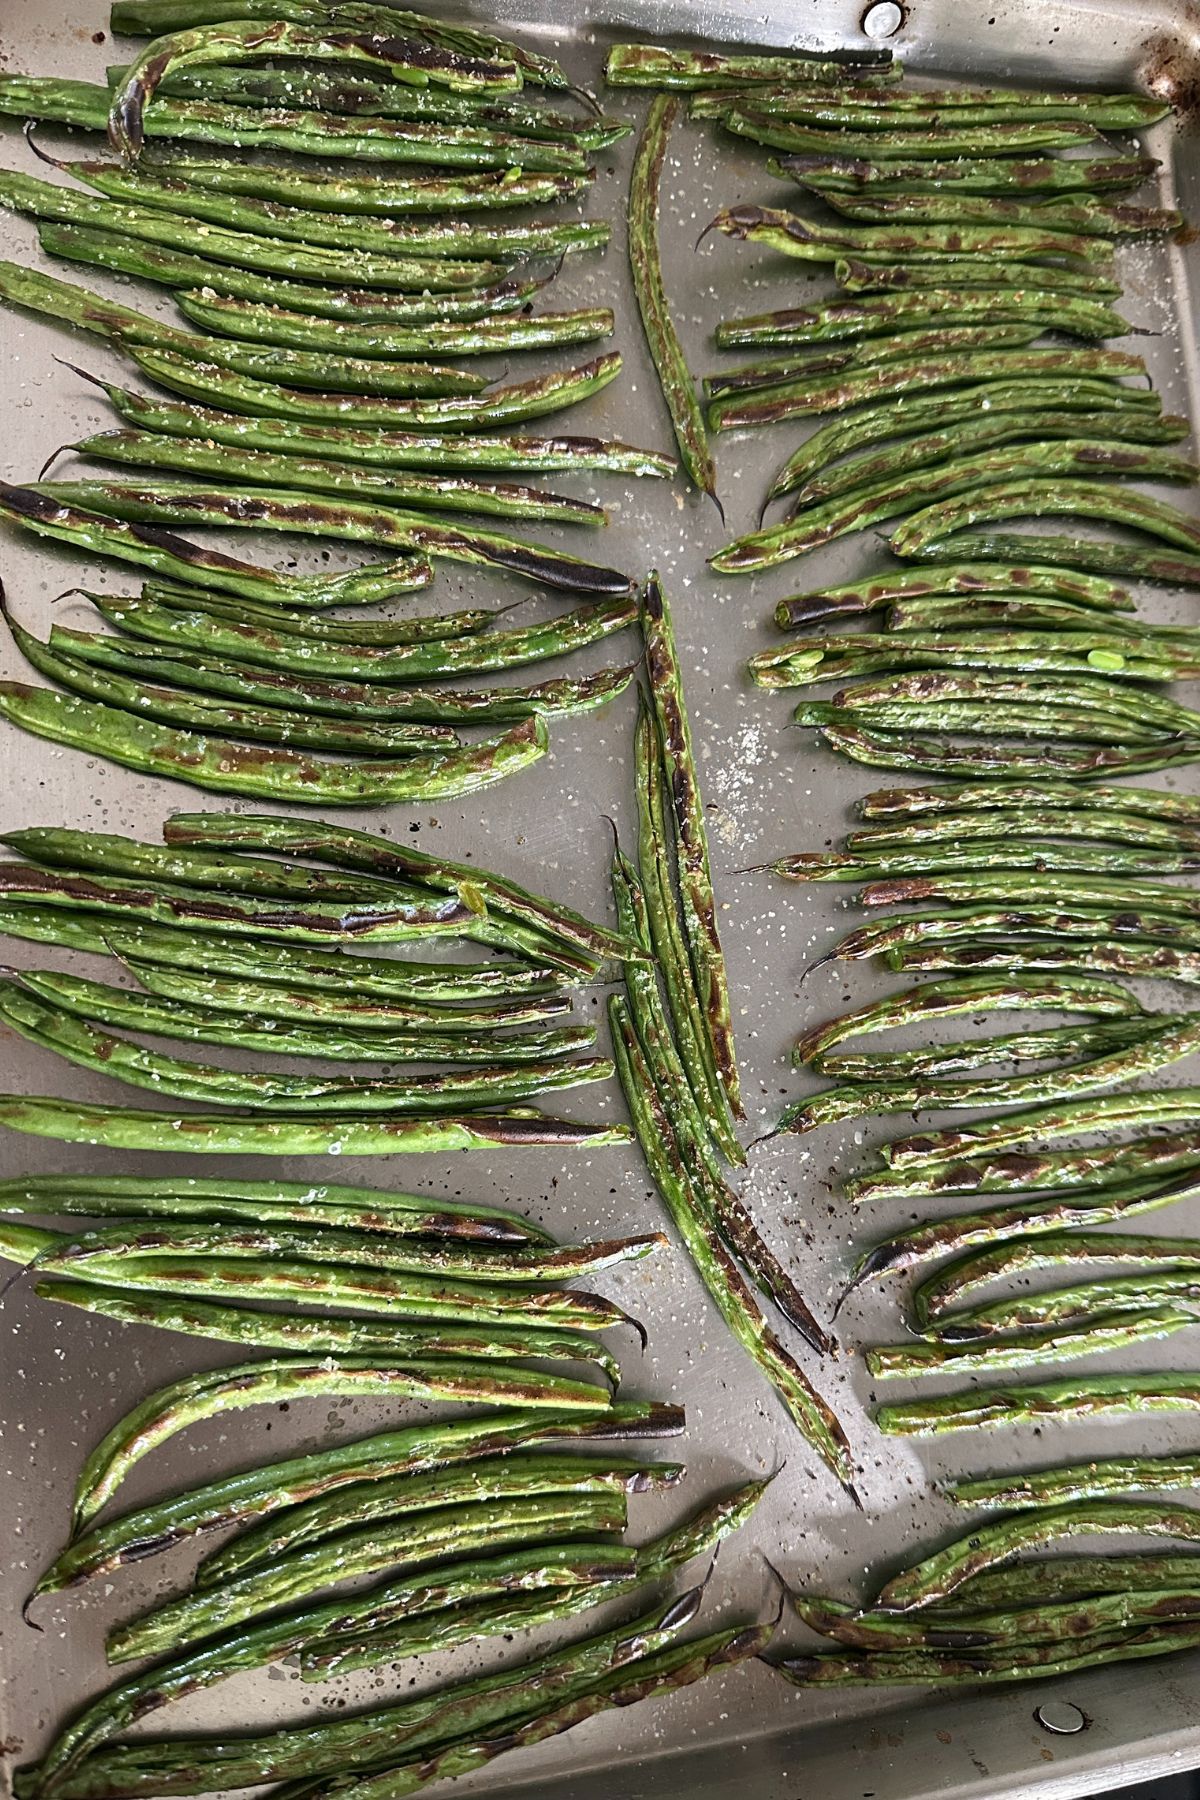
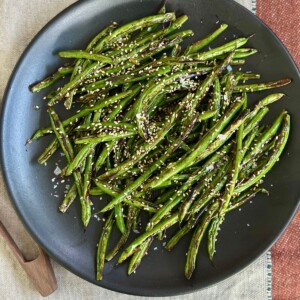
Step 3: Broil for five to eight minutes, watching closely, until the beans are tender and have dark charred spots.
Step 4: Transfer the blistered green beans to a serving bowl and toss with lemon juice, soy sauce, or any other sauce you enjoy.

Broiling vs Skillet vs Air Fryer
You might be wondering how broiling compares to using a large skillet or an air fryer. While you can make blistered beans in a skillet, the baking sheet under a broiler is the fastest way to achieve even charring without constant stirring.
The air fryer also works but may require multiple batches. If you want the easiest method, broiling is the clear winner.
Troubleshooting Tips
- If your beans burn quickly, move the rack down to create more distance from the broiler.
- For extra crisp edges, do not overcrowd the pan. Always cook in a single layer.
- If you want a milder flavor, reduce broil time by one to two minutes.
Serving Suggestions
You can toss these green beans with toasted nuts like almonds or cashews, sprinkle with crumbled feta or goat cheese, drizzle with flavored oils like chili oil, or top with crispy shallots and red pepper flakes for heat and texture.
These are perfect served alongside grilled chicken, roasted salmon, or a simple grain bowl. You can also serve them with holiday mains like turkey or glazed ham.
Recipe FAQs
No, you do not need to blanch them. Broiling raw beans saves time and keeps a firmer texture.
I recommend fresh green beans. Frozen beans tend to steam instead of blister.
Make sure you do not overcrowd the baking sheet. Always cook in a single layer.
Yes, but they are best enjoyed right after cooking. If you prep them in advance, reheat them under the broiler for one to two minutes.
Keep them in an airtight container in the refrigerator for up to three days. Reheat under the broiler or in a hot skillet.
I hope this quick blistered green beans recipe becomes your go-to side. It is one of the easiest ways to get a delicious, charred flavor without fuss. You can also pin this recipe or share it with friends to keep it handy for later.
Try this for your next dinner and let me know how it turns out in the comments. If you are looking for more ideas, check out my Lemon Garlic Asparagus or my Easy Summer Orzo Salad.
More Side Dish Recipes
If you give this recipe a try, snap a pic and tag @pamelasalzman so I can see your beautiful creations. I also really appreciate readers taking the time to leave a star rating and review! I have started a weekly Monday newsletter with tips, musings, new recipes not published here, fun new finds, and more. Subscribe for free here.
For more delicious recipes and to learn how to be a better cook, check out my monthly online cooking classes. I have been teaching people for 15 years how to cook healthy food that their families love! Join me!
Quick Blistered Green Beans Recipe
Ingredients
- 14 ounces green beans, trimmed
- 1 Tablespoon olive oil or avocado oil or 2 parts olive oil + 1 part toasted sesame oil
- Sea salt to taste
- Freshly ground black pepper to taste
- Optional: some sort of sauce, I used Fly by Jing zhong sauce
Instructions
- Position an oven rack 6 inches below the broiler unit and preheat the broiler to HI.
- Toss beans with oil and sprinkle with salt and pepper. Arrange in one layer on a half sheet pan (don’t line with parchment or it will burn).
- Place the sheet pan under the broiler and cook until tender and a little charred, about 5-8 minutes.
- Toss in a serving bowl with any sauce you like.
Notes
- If your beans burn quickly, move the rack down to create more distance from the broiler.
- For extra crisp edges, do not overcrowd the pan. Always cook in a single layer.
- If you want a milder flavor, reduce broil time by one to two minutes.
 Like this recipe? Rate & comment below!