

Supermarket tomatoes have nothing on summer, garden tomatoes. Tomatoes need sunlight, heat, and rich soil to develop their sweet flavor and juiciness. And once picked, they should not be refrigerated in order to preserve that sweetness. Even though tomatoes are super versatile and can be showcased in a million ways, my favorite way to eat them is literally picked right off the plant with a sprinkle of salt. When I was growing up, I would go out into the garden with a salt shaker!
Last week in Spain, almost as basic, I ate toast with grated fresh tomato, olive oil and salt every day for breakfast. Heaven. Add in a beautiful cheese and it’s better than heaven.
I love all types of tomatoes. My father planted some yellow heirloom tomatoes this year which had tremendous flavor. I am always partial to cherry and grape tomatoes because they are so sweet and don’t water down a salad. But really, if it’s a tomato that’s grown properly in the summer, I won’t turn it down.
Tomatoes are full of Vitamin C, fiber and lycopene, an antioxidant that gives the tomatoes their red color. Lycopene is a potential protector against the risk of certain types of cancer and cardiovascular diseases. The only downside to tomatoes is that they are part of the nightshade family which also includes eggplant, peppers (all types), and potatoes. Nightshades can cause inflammation in some people, especially in the joints. Something to think about if you or someone you cook for has arthritis.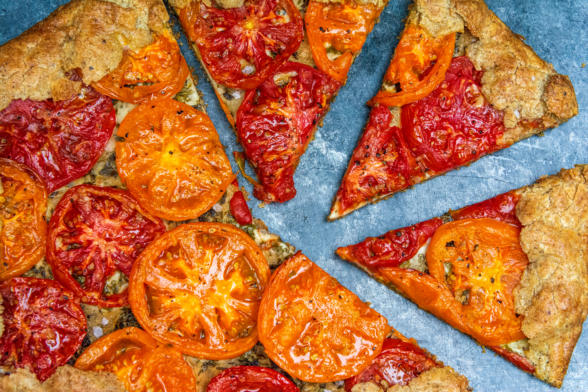
I have a very popular recipe on my site for a zucchini and gruyere tart. I’ve been making it for (gasp) 30 years. I have made it as written in both quarter and half sheet pans, and as a galette which is what you see in these photos. I have also made the tart with tomatoes instead of zucchini and it is fabulous. Is pastry the healthiest thing in the world. Heck no. But it’s one of those things I will only eat when made from scratch with organic ingredients and I don’t eat a lot of it.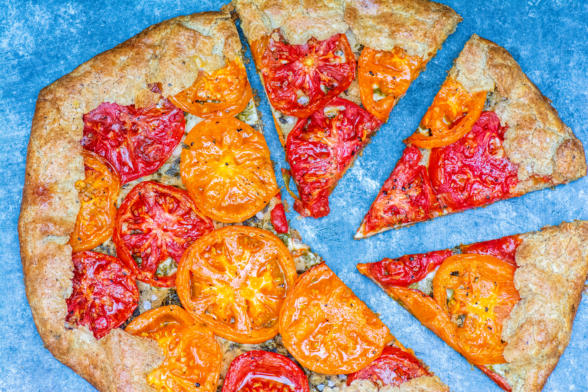
I recently came across this tomato tart from the Bonjon Gourmet’s site with a promising gluten-free crust so I attempted a hybrid of my zucchini-gruyere tart with her rustic tomato tart with her gluten-free crust and I was thrilled with the results. I thought her crust was lovely and flaky and not too difficult to work with. I made the tart several times with different variations on the filling and herbs.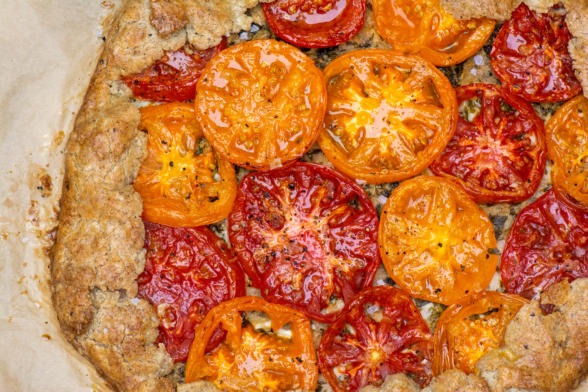
I have made it exactly like the zucchini tart, only swapping tomatoes for the zucchini – delicious. And in this version, I cheated and took the easy route: no mustard, but with an egg wash over the bottom crust to prevent sogginess; no gruyere, instead a spread of Miyoko’s chive vegan soft cheese; no herb oil, but instead minced fresh parsley and basil. I finished the whole tart with a drizzle of olive oil, flaky salt and black pepper. My father-in-law said it was the best tart he’s ever had. Wow!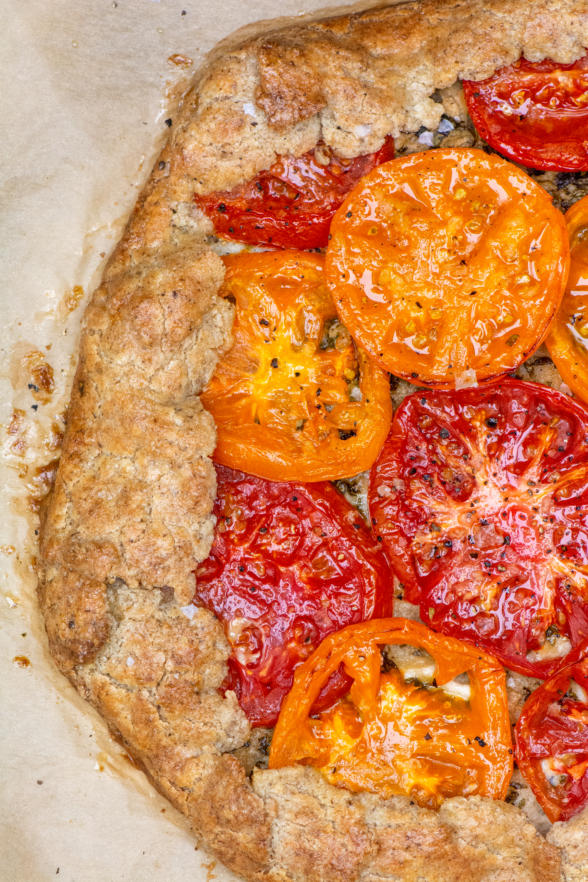
Every time I make pastry, I make a few extra discs and freeze them because a beautiful tart like this is easy to put together once the dough is done. Not up for making your own? Just buy frozen pie crust, defrost and lay it down on a parchment-lined baking sheet and fill it as you wish. Fold the edges of the crust up, brush with an egg wash and bake. It’s a lot easier than it looks. A savory tart is wonderful for dinner with a salad, cut into small pieces with drinks for hors d’oeurves, and a natural on a brunch buffet.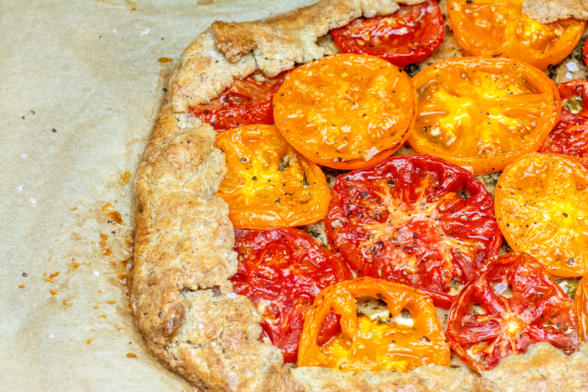
Here are some links if you want to take a few recipes and make your own version of this:
The Bonjon Gourmet’s Rustic Heirloom Tomato Tart
My Stone Fruit Crostata with a Spelt Crust (you can use the crust and omit the sugar)
I’d love to hear if you make this. Please tag me on instagram @pamelasalzman #pamelasalzman so I can see your creations!
Shop the recipe by clicking on the images below:

Rustic Heirloom Tomato Tart With Gluten-Free Crust

Ingredients
- 1 recipe Flaky Gluten-Free All Butter Pie Dough, preferably the buttermilk variation made in the food processor and given two turns, chilled (or your favorite pie dough recipe for one 9-inch crust)
- GF oat flour, for rolling the dough
- 2 pounds heirloom tomatoes, about 4 large sliced crosswise a scant 1/2 inch thick
- Fine sea salt, as needed
- 1 egg, beaten well
- 6.5 ounces Miyokos vegan soft cheese with herbs
- 2 Tablespoons each minced fresh basil and parsley
- 2 Tablespoons unrefined, cold-pressed, extra-virgin olive oil
- 1 large garlic clove, minced
- Flaky sea salt
- Freshly ground black pepper
Instructions
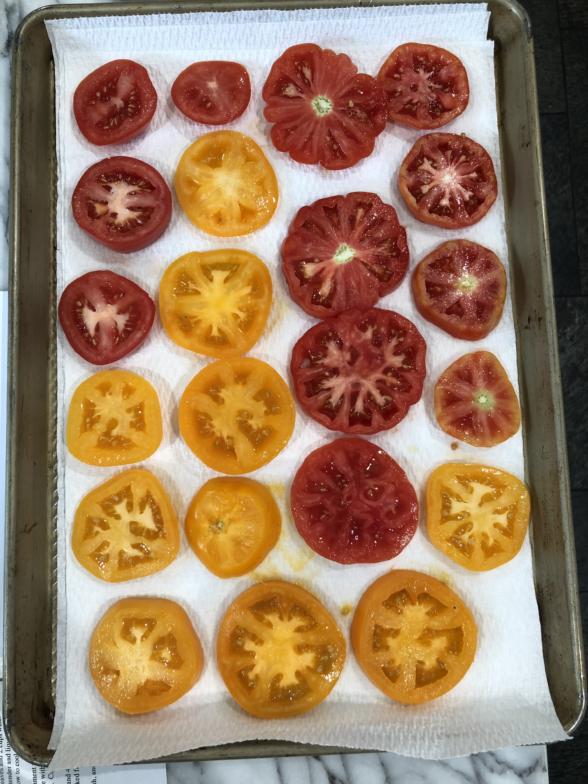
- While the pie dough chills, spread the sliced tomatoes over a triple layer of paper towels placed on a rimmed baking sheet and sprinkle with 1/4 teaspoon salt. Let sit for 30 minutes (longer is fine), then blot the tomatoes dry with more paper towels, and flip them over onto a fresh stack of paper towels. Sprinkle the second sides with 1/4 teaspoon salt and let sit 30 minutes. Blot dry.
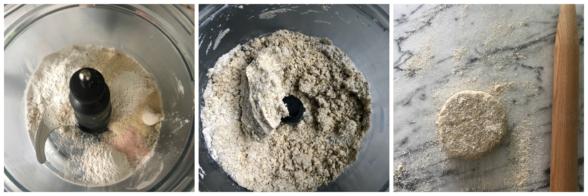
- Let the dough stand at room temperature until slightly softened, 5 minutes in a warm kitchen or 15 minutes in a cool kitchen. Sandwich the dough between 2 large pieces of plastic wrap dusted lightly with oat flour, and gently begin pressing it flat then roll it into a 12 by 16 inch rectangle. As you work, periodically peel back the top piece of plastic, dust the dough lightly with oat flour, replace the plastic, grasp the dough sandwich with both hands and flip the whole thing over. Peel off the new top piece of plastic, dust with flour and continue to roll. If the dough is uneven, cut off the long bits, and press them onto the short bits, rolling to adhere. When your rectangle measures 12 by 16 inches, trim the sides so that they're even and straight. If your dough becomes soft or sticky at any point, slip it onto a baking sheet, plastic wrap and all, and chill it for 10-20 minutes to firm the butter,
- When the crust is rolled out, slide the dough onto a baking sheet (unrimmed if you've got one), still on the plastic , and chill until firm, 20 minutes.
- Position the rack in the lower third of the oven and preheat to 400 degrees.
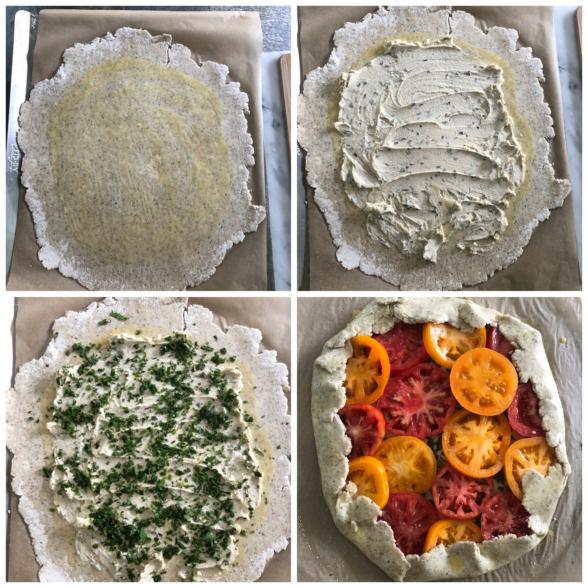
- Remove the dough from the refrigerator and brush the whole thing with a thin layer of beaten egg. Leaving a 1 1/2 -inch rim on all sides, spread evenly with soft cheese and herbs. Layer the sliced, drained tomatoes over the top, overlapping them slightly, using only as many will fit in a single layer. Fold the dough edges over to form a crust, and brush with the beaten egg.
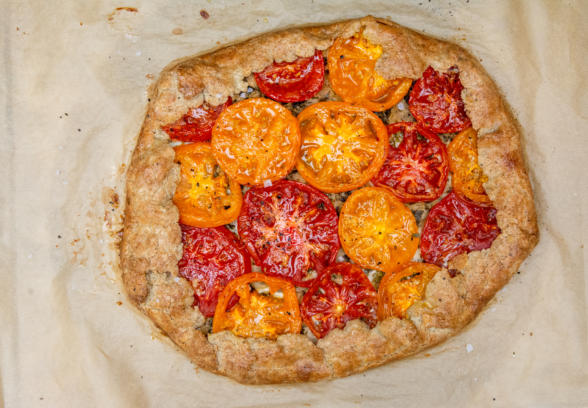
- Transfer the tart to the oven and bake until the crust is golden and the filling bubbles, 50-60 minutes, peeking under the crust to make sure it isn't burning toward the end. While the tart bakes, stir together the olive oil and garlic.
- Remove the tart from the oven, drizzle with the garlic oil and a sprinkle of flaky salt and pepper, and finish with fresh basil or parsley leaves. Cut the tart into rectangles and serve warm.
- The tart is best within a few hours of baking, but leftovers keep well, refrigerated airtight, for up to 3 days, Reheat slices in a cast iron skillet set over a low flame; this will help the bottom crust crisp.
Notes
6 -8 Tablespoons ice water, (from 1 cup ice cubes filled with cool water)
1/2 cup sweet white rice flour (mochiko)
1/4 cup plus 2 Tablespoons GF oat flour
1/4 cup millet flour
1/4 arrowroot powder
2 Tablespoons tapioca starch
2 1/2 Tablespoons finely ground chia seed (I grind mine in a coffee grinder)
1 Tablespoon unbleached cane sugar
1/2 teaspoon fine sea salt
8 Tablespoons cold, unsalted butter (preferably European-style such as Straus), sliced 1/4 inch thick
1 teaspoon apple cider vinegar Variation with buttermilk: Omit the vinegar. For the liquid in the recipe, stir together 4 Tablespoons cold buttermilk with 4 Tablespoons of ice water. Proceed with the recipe, adding more ice water if needed to moisten the dough after all the buttermilk mixture has been added. Add all the dry ingredients to the bowl of the food processor and scatter the butter slices over the top, but don't pulse them in yet. Place the bowl on the food processor, put the lid on, and open up the pouring spout. While pouring in the ice water mixture, pulse the processor in short bursts. By the time the liquid is added, the butter should be broken down into the size of peas. Give the dough a squeeze to make sure it's properly hydrated, pulsing in more ice water if needed. Wrap and chill the dough, making the turns if you like for extra flake.
 Like this recipe? Rate & comment below!


Have you found a good dairy alternative to use in recipes like this? I’m thinking the Miyoko’s butter might work…. I don’t like using coconut oil because of the coconut flavor.
Earth Balance works the best, but you need to decrease the salt in the recipe. Miyoko’s works well, too. I do not care for coconut oil in pastry.