Supersmooth, Light-as-Air Hummus - Pamela Salzman Skip to content

Supersmooth, Light-as-Air Hummus

Supersmooth, Light-as-Air Hummus by Pamela Salzman

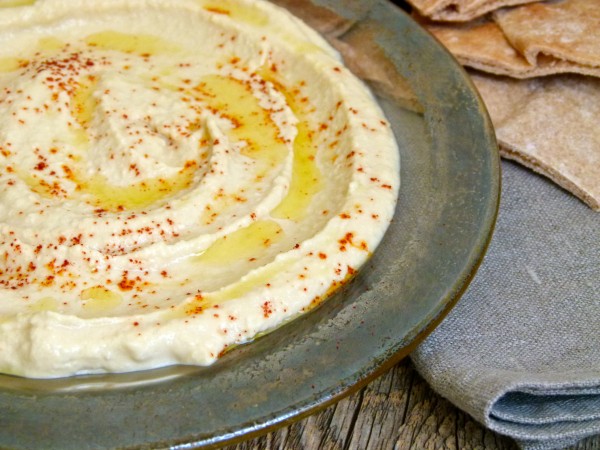
Why is the best hummus always in restaurants, especially Middle Eastern ones?  I think I make a delicious, flavorful hummus that has a great consistency and is better than the ones you find in the supermarket.  But, it doesn’t compare to the silky, light and creamy hummus that I’ve had in restaurants.  I want that kind.  The kind that will drip, not plop, off your pita if you’re not careful.  The kind you can suck up with a straw.  You know what I mean.

cook the soaked, drained chickpeas with a little baking soda before boiling

skim off the skins

I got into bed with a book the other night, because reading helps me wind down and relax from my typically crazy day.  But of course, I read cookbooks in bed before I go to sleep which is an absolutely terrible idea because that does nothing to quiet my overactive brain which doesn’t stop thinking, thinking, thinking!  Regardless, I was reading Yotam Ottolenghi and Sami Tamimi’s not-so-new, but gorgeous book , “Jerusalem.”  So many recipes, so little time, people.  I turned to their recipe for “Basic Hummus” and I swear I almost flipped the page without so much as a glance, because like I said, I already have a perfectly great hummus recipe which I have actually turned into four different flavors.  But then I thought “have some respect, you never know.”

drain the chickpeas and process to a chunky paste

love this raw tahini

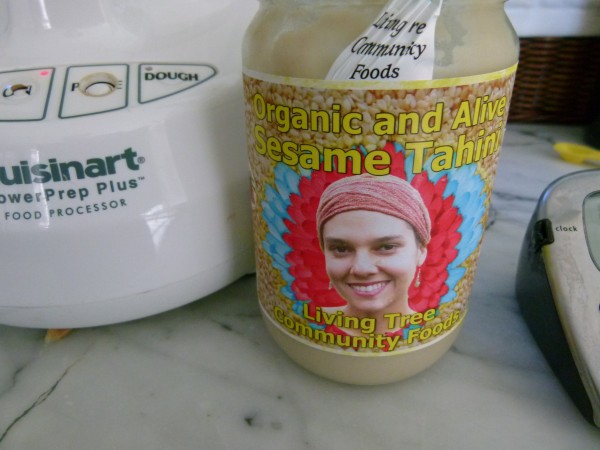
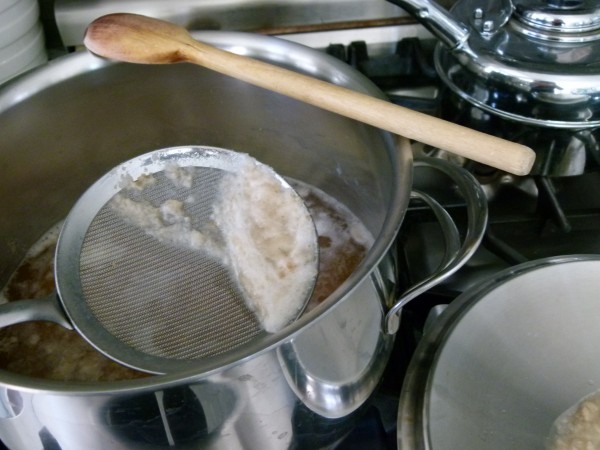
The word “supersmooth” caught my attention immediately and then I knew I found it — the hummus of my dreams.  Let me jump to the chase.  The Ottolenghi hummus is the kind I love at restaurants and they tell me all their secrets.  Most importantly, the chickpea skins are removed after cooking and before pureeing.  I know!!!  Why didn’t I think of that?  But before you think I have the kind of time to sit around peeling chickpea skins, think again.  After soaking and draining the chickpeas, they are cooked with a little baking soda and then water is added to boil the beans.  Most of the skins float to the top of the pot and you just skim them away.  I know!!!  Brilliant.  They also add a lot more tahini (sesame paste) than I do which makes the hummus so creamy.  And water.  I would never have thought to add water, but it really makes the hummus lighter and cleaner than adding the chickpea liquid which is how I do it.  “Better late than never,” is what I was thinking.

Supersmooth, Light-as-Air Hummus by Pamela Salzman

Supersmooth, Light-as-Air Hummus by Pamela Salzman

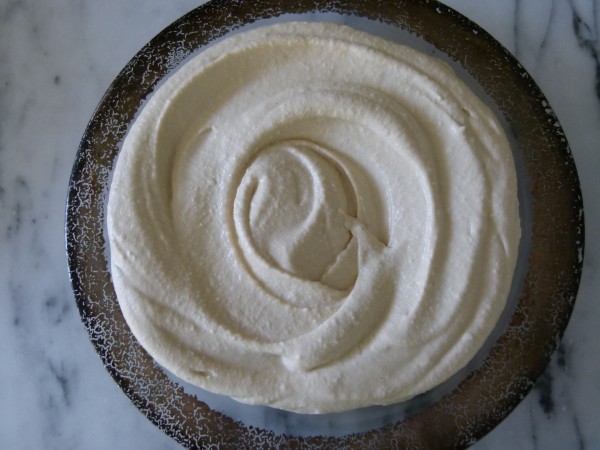
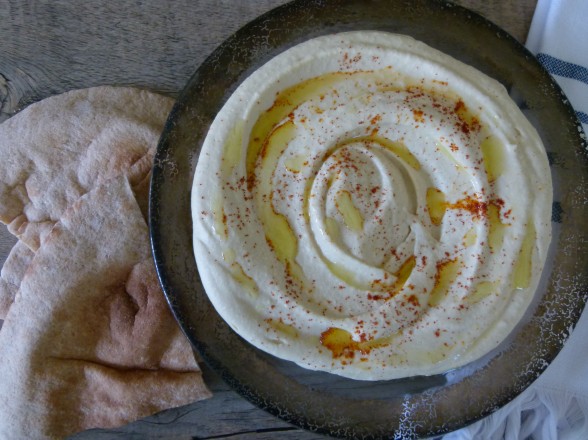
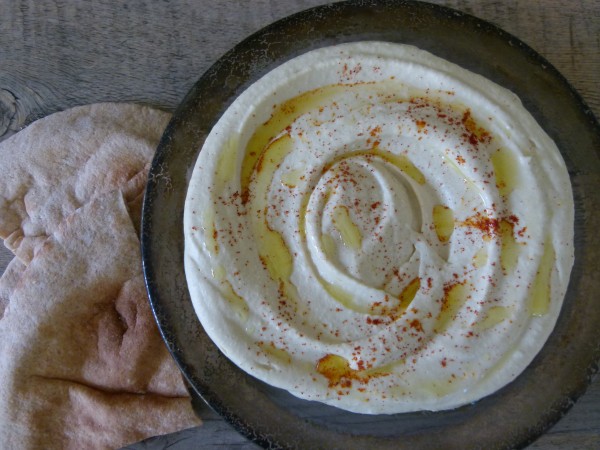
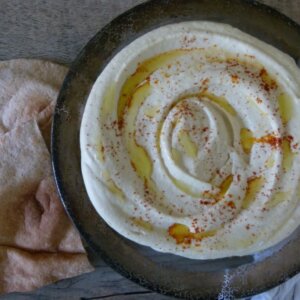
I wouldn’t say that my first attempt came out quite as smooth as Ottolenghi’s primarily because not all the chickpeas lost their skins and I was not about to go peeling them, but it was really, really good and very smooth.  You can see the image of that below.  I also tasted the hummus after adding 2/3 cup of tahini instead of the recommended 1 cup + 2 Tbs. and I thought it was divine.  I made it a second time and did take the time to pull off any skins that didn’t come off during the boiling process and the hummus was a tad bit creamier, but I’m not sure it was worth the extra 12 minutes it took me to do that.  You should do whatever makes sense to you and if you have the time, feel free to pick out every last skin.  For that matter, you can buy canned cooked chickpeas and pull off the skins and proceed from there.

This is the one I made first where I did not remove every single last chickpea skin.

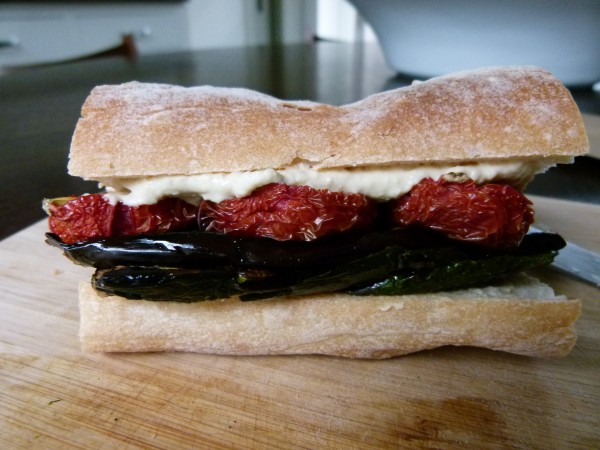
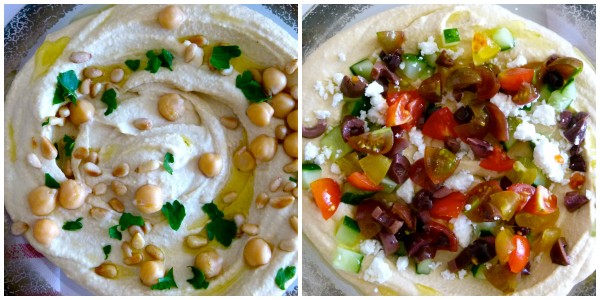
I served this to friends the other night, friends who have had my hummus a million times and they all said “where did you get this?  This is so good.”  I know, a tad insulting since the implication was that I could not have made it, but I was totally fine with that.  Since then, we’ve enjoyed this immensely with pita bread and raw veggies (wow, I could actually hear you yawn through the computer), slathered on a baguette with grilled veggies and slow roasted tomatoes (my recommendation), and dolloped on a Greek salad with chicken souvlaki (we had this for dinner the other night — major hit!).  There is an insanely beautiful picture in the book of the hummus topped with whole cooked chickpeas, pine nuts, chopped parsley, cooked lamb and the whole thing drizzled with olive oil.  A-mazing.

Grilled veggies, slow roasted tomatoes and hummus on baguette | pamela salzman

No matter how you make it, hummus is rather nutritious and especially high in protein and fiber.  It’s one of the more healthful spreads and dips, provided you don’t go to crazy on the pita bread or chips.  I have even used it in place of mayonnaise in chicken salad.  I have even eaten it with a spoon.  I have even dreamt about it.  You will too, until you make it!

Supersmooth, Light-as-Air Hummus by Pamela Salzman

jacked up hummus | pamela salzman

4.7 from 10 reviews
Supersmooth, Light-as-Air Hummus
Author: 
 
Ingredients
  • 1 ¼ cups dried chickpeas (garbanzo beans)*
  • 1 teaspoon baking soda
  • 6 ½ cups water
  • 1 cup light tahini paste (Ottolenghi recommends 1 cup + 2 Tablespoons, but I thought anywhere between ⅔ and 1 cup was great)
  • ¼ cup freshly squeezed lemon juice
  • 4 medium cloves garlic, crushed
  • 1 ½ teaspoons sea salt
  • 6 ½ Tablespoons ice cold water
  • Unrefined olive oil and sweet paprika for finishing, if desired
Instructions
  1. Place the chickpeas in a large bowl and cover with at least 4 inches of cold water. Allow to soak 6-8 hours.
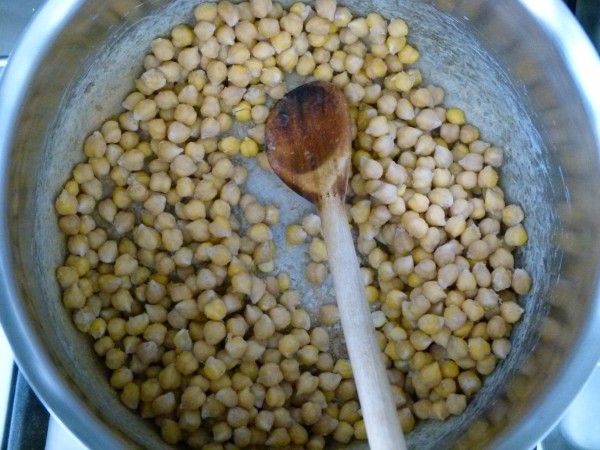
  2. Drain the chickpeas. In a medium saucepan over high heat, add the drained chickpeas and the baking soda. Cook for about 3 minutes, stirring constantly. Add the water and bring to a boil. Make sure the water covers the chickpeas by at least 2 inches. Reduce heat and simmer, skimming off and foam and any skins that float to the surface. The chickpeas cook faster this way and may only need from 20-40 minutes to become tender, but possibly longer. You know they’re done if you can squish a chickpea in between your thumb and forefinger.
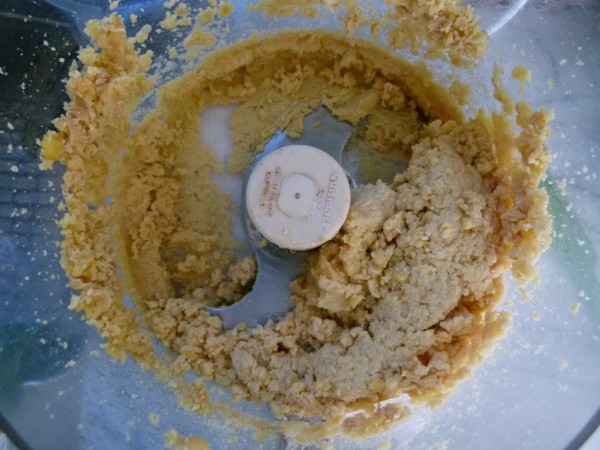
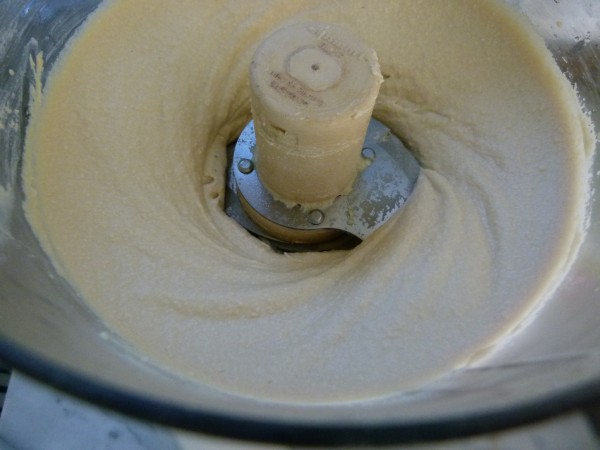
  3. Drain the chickpeas. You will have about 3⅔ cups. Transfer the chickpeas to a food processor fitted with the metal blade and process until you get a stiff paste. With the machine running, add the tahini, lemon juice, garlic, and salt. Lastly, slowly drizzle in the ice water and allow it to mix for about 5 minutes until you get a really smooth and creamy paste. I actually set my timer for 5 minutes and washed the dishes in the meantime.
  4. Transfer to a serving bowl and allow the hummus to rest for at least 30 minutes. If not serving right away, refrigerate until needed. Make sure to remove it from the refrigerator at least 30 minutes before serving. If desired, drizzle with olive oil and sprinkle with paprika.
Notes
*Or you can use 2 15-ounce cans of cooked chickpeas, drained, and peel the skins manually. Place the peeled chickpeas in the food processor and proceed with Step 3.

Related Recipes

Comments

80 Comments

  1. I accidentally found your blog ehen I was looking for exactly such a recipe. Due to you I’m eating the softest and fluffiest hummus I’ve ever made!
    Thank you <3

    • So happy you found this recipe. It’s the best!

  2. Hi!! How would I change this if using the jovial jarred chickpeas ?

    XX

    • You can use 2 jars of the jovial cooked chickpeas, drained, and peel the skins manually. Place the peeled chickpeas in the food processor and proceed with Step 3. You will probably need to wing it a bit and use slightly less of the other ingredients since the jovial jars are a slightly less than 15-ounce cans. Hummus is very flexible, so it will turn out well. Just taste it as you go.

  3. Where do you buy tahini paste? I can’t find it anywhere on the westside!

    • Tahini and tahini paste are the same thing! Jane, tahini is in every market you go to, including Trader Joe’s, Vicente Foods, Whole Foods, Pavilions. It’s usually in the section with nut and seed butters.

  4. Hi, how long is hummus ok in fridge when made fresh? When store bought?
    Thanks,
    Brett!

    • Fresh, probably 5-6 days. Store bought usually has citric acid or another preservative, so a few weeks.

  5. I tried a method that restaurants use here in New York City to remove any remaining chickpea skins and it worked like a charm. After cooking the chickpeas on the firm side let them cool. Then put them in a big bowl of cold water and gently rob them together to loosen the skins which float to the top and pour them off. May have to do this a few times. Easy peasy.

    • I’m so excited to try this method! So no baking soda at all?? Thanks!

  6. So I made Solomonov’s recipe which is very similar to this one in your blog….and mine was incredibly bitter:(. I thought maybe it was the 1 cup of tahini because I’ve never used that much before. But the recipe is almost the exact same. Does this recipe have a bitter taste? Is that just how Israeli hummus is?! Any help or suggestions would be great!

    • I would say to taste your tahini. Tahini can be bitter depending on the brand. I haven’t had any experience with this recipe tasting bitter, but I always use fresh tahini that I know has a consistent flavor.

      • Sorry I’m replying here but I couldn’t figure out how to leave a comment. This recipe looks great! A couple questions: I usually use the chickpea water in my hummus. Can I still do this with the baking soda in the water? Or will that taste weird. Also, what does ice water do for the hummus, as opposed to room temperature water?

        • I think it would taste weird. 🙁 The ice water helps to lighten up the emulsion.

          • I read a tip that said the secret to that light and fluffy hummus is to process the chickpeas with the water first.

            • interesting! i’ll give that a try next time!

    • That’s waaaaaay too much tahini and garlic, (in my opinion) Here’s my recipe if you want and it’s simply delicious!
      Hummus For one 14-15 oz can of chickpeas

      1 14-15 oz can (peeled) chickpeas

      5 tblspns of plain tahini paste

      1 medium-large clove of garlic

      Olive oil (spend the money and buy good olive oil)

      3-5 tblspns lemon juice (I never measure my lemon juice, as I kind of just squirt a little bit in as it’s processing)

      Salt to taste

      And grnd sumac to top hummus with, (it has a lot more flavor than paprika)

      Basically, I put my peeled chickpeas, tahini, garlic, a little oil and lemon juice in the food processor to get the process started. As it’s mixing, slowly pour oil until you get the nice creamy texture you like. I like a lot of lemon juice in mine, but you can taste as you process Once you get that texture you like, put just a little pinch of salt. When you serve it, drizzle a little olive oil and sprinkle some sumac atop.

      • Sounds great!

  7. I love this recipe and have made it with great success in the past, however, this time the consistency came out super thick. I added a extra couple tablespoons of ice water when it wasn’t becoming smooth in the mixer but, after refrigerating overnight, it thickened even more. Where did I wrong wrong this time? I was tempted to keep adding water under smooth but was afraid it would compromise the flavor. Thx!

    • Hmmm, not sure! Did you check the tenderness of the beans before you pureed them? I would salvage it by adding room temp water and taste for seasoning.

  8. Thanks for sharing This recipe Pamela. I tried it today and OMG. It is so good. I have to say that I was worried because most of the skins didn’t float. I could extract only a very tiny portion of the full amount. But it didn’t matter, the result was great. I used around 3/4 cup of tahini.
    I couldn’t stop smiling, seriously I had tried to get creamy hummus several times with no luck.
    Thanks again 🙂

    • So luscious, I know! And so good for you!

  9. Help!!! Making this recipe makes me gag and vomit. The smell of the baking soda in the pot with the chickpeas is horrendous. I mean it smells for hours afterwards. My husband hates it too. The end product is great but I can’t really even stand to make it anymore. What are we doing wrong? No one else has commented on the smell so, is it just us??

    • That is so weird! No one else has given me that kind of feedback and I have made this hummus so many times without any bad smell. I wonder what kind of a pot you are using and if there is a reaction between the pot and the baking soda… otherwise, buy canned chickpeas and peel off as many of the skins as you have the patience to do and try it that way. 🙂

    • OMG this is the worst smelling thing I’ve ever made. I followed a slightly different recipe that also used baking soda, and the smell is just beyond horrible. My chickpeas are on the stove now, and I was getting ready to chuck them. I was googling around for a while to find out why it smelled so horrible, and this comment is all I could find. I’ll try to hold out until the end if it’ll taste good…

      • Yikes! What else did you add besides the baking soda and chickpeas (and water)? When I cook beans with baking soda, the smell is no different from the smell of cooking beans without baking soda. The baking soda helps soften the skins so that they disintegrate or just slough off. Give the beans a good rinse after you drain them The hummus should still be great.

  10. I never thought I liked hummus until I tried this recipe. I always liked the idea of hummus and knew it was the preferred dip for crudites and the like, but I’ve only ever tried store-bought. This recipe, however, is INCREDIBLE. I can’t thank you enough, Pamela, for sharing it with us. It’s truly changed what I think about hummus, and I am so excited to try it in all the applications you recommended. Thank you for your blog and your consistently amazing food!

    • Delighted to read your comment, Holly. Thank you!

  11. Wow, so I thought 1 cup of tahini was an insane amount to add to a hummus recipe until I just decided to try it. So glad I did, this is the best tasting and textured hummus ever!! Did add more water in the end to smooth is out more but wow is it delicious! And kept most of the skins on since they didn’t come off so easy, still smooth, not grainy like every other recipe I tried in the past. It’s a keeper!!

    • I know, I thought the same thing. So glad you are happy with the outcome!

  12. I didn’t follow the recipe here but I wanted to see how your method of cooking the chickpeas with baking soda worked out. It didn’t. What a gooey mess. I feel like, based on previous comments here, that you need to rewrite the recipe to let people know the skins don’t just simply pop up to the top, easy peasy. They don’t. A few do, along with other whole chickpeas, but the majority are mixed in making it almost impossible to remove them. I was able to get some but wasted too much time doing it and gave up. The one benefit it would seem to using baking soda is that the chickpeas cooked quicker than normal, though they had a wee bit of chalky texture to them that doesn’t happen with slower cooking. I make hummus often, using a variety of methods, and honestly didn’t notice a difference in the texture this time.

    • Hi Shelly, Thanks for writing in. Whereas I appreciate all feedback, if you didn’t follow the recipe as you admitted, it’s a little unfair to suggest the recipe doesn’t work. As I wrote, this is an Ottolenghi recipe which has been widely adapted by many food bloggers with success. I have made hummus dozens of times without any problem using this method. What I have surmised is that when people rapidly boil the beans as opposed to simmer them gently, that’s when things can go awry. But even if the skins aren’t easy to remove, they can be blended into the hummus and almost disappear, resulting in a super smooth, light hummus.

    • How can you say the recipe doesn’t work when you started off your review by saying you didn’t follow the recipe? Maybe you have a typo in your review?

  13. Hi Pamela,
    Firstly let me say wow, what an amazing site you have, I love the crisp clean look and the images are fantastic, they really pop with colour and style.

    I loved your recipe, it turned out even better than I could have possibly imagined, yes it was a bit fiddly at times but it was really worth it. I added chopped red chillies to mine, well half, so I had a nice zingy one for me and a less hot one for guests. It went down well. So well I blinked and it was gone.

    I never would have thought to use baking soda for hummus but now I am a convert to the cause. Once again Pamela, let me say thank you for sharing your knowledge and talent with the world. I will be a regular visitor to your site from now on

    • Thank you for your generous email, Lee. I love the idea of adding chilies since I, too, love anything spicy. I’ll have to try that! Thank you!

  14. After years of making “lumpy” hummus, I was excited to try this recipe because of the technique for removing the skins, but I must be doing something wrong. For me, the baking soda seems to be working *too* well. Not only does it break down the skins, it causes the beans themselves to fall apart. The skins and tiny bean bits are tangled together in sort of a lumpy sludge — there’s no way to separate them. I tried rinsing off the cooked beans in a collander, but the pieces are small enough and soft enough that they pass right through the holes along with the skins.

    I’m using dried beans soaked for 8 hours, drained, cooked with baking soda for 3 minutes, then boiled for 20 minutes.

    What am I missing?

    • Hmmmmm, I really have no idea. Usually the opposite is the case where the beans aren’t soft enough after 20 minutes. And 20 minutes isn’t even long. This is an Ottolenghi method which I have used many, many times. If you have a slow cooker, perhaps try cooking the beans with baking soda in the slow cooker. Start with 3 hours on high and see if that works better for you. Although I think this experience you had was a fluke, unfortunately.

    • I just had another thought — when you cooked the beans, were you vigorously boiling them or simmering? I have found that an aggressive boil causes the beans to lose their shape, as opposed to gentle bubbles/simmering.

      • The first time I tried this, I used a vigorous boil with the lid off. The second time, I put the lid back on and turned the heat down to a moderate simmer. I also reduced the baking soda by half. One or the other helped a tiny little bit, but not enough to separate the beans from the skins.

        Interestingly, I went ahead and finished the recipe the second time, and the hummus came out perfectly smooth — even with the skins still in.

        • Glad you achieved a successful result the second time around! The vigorous boil is what broke down the beans the first time. Simmering is the preferred technique. And I think the baking soda helps to soften the skins to the point that they will puree incredibly easily, even if they haven’t fully been removed. Thanks for reporting back! 🙂

    • I live in Trinidad & Tobago (where the well known chick peas sandwitch, “Doubles” was born). I have been trying to figure how to make a smooth hummus for some time, and tried your method. Just like others here, i was not able to separate the skins, but what i realized that the skins were considerably softened and yielded a smooth finish. My only change after doing a few batches and scaling is to use less Bicarb and especially so if you are doubling the recipe. Or it will end up with that soapy taste. In Trinidad the people who sell Doubles commercially end up with a very soft mushy chick peas that i have noticed is not possibly even with pressure cooking. And often you get the bicarb taste. So even in other recipes bicarb is used to soften the chick peas skins. Thanks for the recipe.

      • That’s all so interesting! Thanks for the feedback and the info, Wilmark. 🙂

  15. My 9 month old son loves it! I use roasted garlic and added avocado. Now even my picky 4 yr old daughter is asking for it to snack on. We just love the super smooth and creamy texture.

    • roasted garlic and avocado are the perfect add-ins. Yum!

  16. Wonderful! I have made so many hummus recipes, but this was definitely the best. I’m going to try the roasted garlic variation next time. Thanks for posting!

    • So many variations you can try! 🙂

  17. I sprout the garbanzo beans before I cook them in but of baking soda …. Every single skin comes off by itself:):) than I blend them in vitamix with crushed ice and olive oil, tahini and garlic

    • sounds perfect!

  18. First of all, this is my new absolutely favoritest website.

    I’m not a very good cook. Usually when I try a new recipe, it RARELY turns out as expected. But I tried this one. When the chickpeas were done cooking, I thought I didn’t get nearly enough skins, and the final product was such a mess of soft chickpeas, I couldn’t tell the skins from the beans. I almost threw the batch away.

    But I didn’t. And, ultimately, the result was the MOST AMAZING hummus I’ve ever had. The consistency is like frosting. So smooth and light. And it doesn’t need even one extra grain of salt. Or garlic. Or lemon. Or ANYTHING!. SO GOOD! And, a bonus you can’t possibly imagine — my husband did NOT have to add hot sauce to it (which he does to most things).

    Thank you for this. My confidence is bolstered!

    • Phew! I was getting a worried after the first paragraph. I am so happy it worked out for you!!! Thanks for sharing. You never know who might find herself in a similar situation and not know whether or not to bail. 🙂

  19. Hi Pamela, I just stumbled upon this when trying to find a bigger food processor to make hummus. (I want to make more than 1kg at a time)

    I feel like im in a similar situation! I love the hummus I make. I use the same ingredients as you, different amounts, I think its perfect. I EVEN ADD THE CHICKPEA LIQUID!! which ill change in the next batch. But ive never thought to remove the skins (which I just mentioned to my mum and she laughs and says yeah but it takes a while. She doesnt know that theres a faster way)

    Im cooking the chickpeas right now. I added the baking soda etc. the water im boiling it in is dark like ive burnt it, theres a bit of a burnt smell, it could be the baking soda. there arent skins floating to the top, its more like 1 big mush of chickpeas and the separated skin.

    so my question is…

    is the pan meant to be preheated to hot so when you put the in chickpeas and baking soda it will start cooking very high straight away?

    Do you leave the lid on when boiling and what temperature do you boil at? normally I put the lid on and leave the stove on low heat and slowly boil.

    Is there a way to remove the skins if you cant skim them off while they are boiling?

    thank you

    • Hmmmm……I’ve never had the chickpea liquid go dark or burnt. I would taste it and make sure it tastes fine. Perhaps there’s a chemical reaction happening with your pot? I take cold pot out of the cupboard and add the chickpeas and water. No need to preheat the pot. I bring up to a boil at high heat and then lower heat to low so the water simmers. You need plenty of water so that it doesn’t evaporate before the beans are tender. Otherwise you can remove the skins manually, but yikes! That seems like a lot of work. A little extra water in the hummus might help get it a bit thinner…..

  20. Hi,

    I am excited to make this! How long would you say it keeps in the fridge? 🙂

    • 4-5 days no problem. It does thicken up when it is refrigerated though. Just leave it at room temp to get less firm.

  21. quick tip I learned from america’s test kitchen for canned chickpeas! If you drain them, coat them in about 2 tbsp baking soda and then heat them for a minute or so in a skillet the skins will fall off super easily! I haven’t ever tried this with the dried ones that I cook at home but with canned ones it is so easy!

    • Oh cool! I thought that only worked when cooking from a dried state. Thanks!

  22. Hello. Love your recipes and creativity! I’m confused if you sautéed the chickpeas in the saucepan for 3 minutes first before you add the water? Thank you:)

    • Thanks, Leora. Yes, that’s what you do!

  23. Hi Pamela: We love the humus recipe and have made it twice…once with canned chickpeas (very laborious removing the skins) and once with fresh cooked chickpeas (still had to remove the skins and still laborious). Does the baking soda soften the remaining skins enough that they don’t have to be removed? Not many of my skins floated to the surface.

    Thanks!

    • First of all, you do not need to do this method of removing all the skins. You can make perfectly good hummus with the skins on, but it just isn’t this light and smooth. The baking soda should help get the chickpeas softer than if you didn’t use it, and it helps to break down the skins a little, but you still have to remove them manually somewhat. Otherwise, try cooking them with baking soda and not removing the skins and see if you like the texture enough. 🙂

      • Thank for your prompt reply!

  24. I tried this recipe, but could I have possibly overworked my hummus? It was so thick and stiff? In fact, my food processor was HOT after waiting allotted time. I used peeked canned beans… I’m remaking it soon with soaked dried beans and thought I’d ask…thank you so much!

    • SOunds like you didn’t have enough liquid. Did you remember to add the tahini and the water?

      • Thank you so much for the reply- I did add the tahini and water. As a side note, I remade with the cooked/peeled fresh beans. It was much lighter-less stiff. Tasty hummus!

  25. why not just put your chickpeas through a foley mill or potato ricer to screen out the skins?

  26. Wow, this really is the smoothest hummus ever! I used 5 cloves roasted garlic, rather than fresh and added about 1/2 tsp cumin. Delicious!

    • Love both those additions!!

  27. It’s a small suggestion however, for decorative and taste enhancement purposes, instead of sprinkling paprika over the hummus before serving, try sumac

    • You are quite right, Bill! I actually have some sumac from a Fattoush obsession I had. I actually prefer it to paprika and it would be marvelous here. Excellent suggestion, thank you!

      • As one other hummus groupie suggested I also half fresh garlic and half roasted garlic puree which I make 5 pounds at a time.

        The garlic-flavoured olive oil that it bakes in can’t be beat on just about anything including sprinkling on traditional hummus.

        • I can’t find any way to disagree with that. 5 pounds at a time, eh? Nice!

  28. This is the best hummus recipe I’ve tried. So flavorful and smooth! Love it, thank you!!

    • Glad it was yummy for you, Katie!

  29. I dont see where you use the 1 tsp baking soda that you have in the ingredients list.

    • Good question, Kathi. The baking soda is used to cook the dried chickpeas, not as a hummus ingredient. See Step 2. It helps to dissolve the skins so you can just skim them off. If you are using pre-cooked chickpeas (like from a can), you won’t need the baking soda. Hope that makes sense!

  30. What about roasting the garlic like you do in the white bean dip recipe?
    Thanks!

    • Huh! Never thought about that. I bet it would be delicious. Go for it and let me know how it turns out please.

  31. Embarking on new hummus recipe. Feeling like I’m cheating on the old hummus recipe! Do you still recommend adding kombu when soaking/boiling the chickpeas?

    • Too funny! Sure, why not on the kombu. It adds alkalinity and increases digestibility, but it’s not a dealbreaker either way.


Add a Comment

Your email address will not be published. Required fields are marked *

Rate this recipe:  

Signup to receive updates about new recipes and more

I come from a large Italian-American family with 28 first cousins (on one side of the family!) where sit-down holiday dinners for 85 people are the norm (how, you might ask – organization! But more on that later …).

Some of my fondest memories are of simple family gatherings, both large and small, with long tables of bowls and platters piled high, the laughter of my cousins echoing and the comfort of tradition warming my soul.

kitchen-matters-buy-book
Buy on Amazon
quicker-than-quick
Buy on Amazon