Grain-free Chocolate Zucchini Cake Recipe and VIDEO

You’re either going to love me or hate me for this post.  Why?  Because this grain-free chocolate cake which just so happens to have zucchini in it is AMAZING.  You will love how rich and chocolaty it is,  how moist and tender.  You will be utterly amazed that this cake has no flour of any kind and that there is zucchini in it.  Zucchini!   It is sweetened with maple syrup and that’s all.  After your first bite, you might exclaim, “Three cheers for Pamela!”

All the ingredients -- one bowl

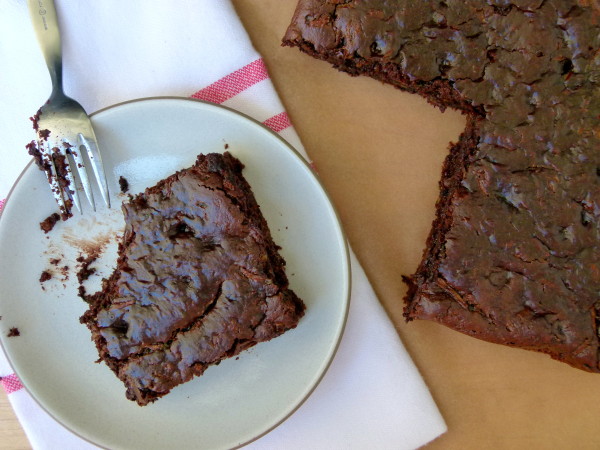
Orrrrrrr, you will find this cake, which is more like a cross between a brownie and cake, completely irresistible and TOO amazing.  You will walk by it on the countertop and find the uncontrollable need to even out all the edges until you are left with a mere crumb.  But you’ll convince yourself it’s healthful!  It contains almond butter and zucchini.  Zucchini!  And you will not be able to stop eating it.  The next time you make it you will freeze most of it so that you are not tempted by its chocolaty goodness and inhale three-fourths of it before the kids get home.  But you cannot stop dreaming about this cake so you find out it even taste good FROZEN because there is no waiting when it comes to this cake.  And after you eat all of the frozen cake, you might exclaim, “I curse the day I met Pamela!  Darn this chocolate amazingness!”

Batter


Grain-free Chocolate Zucchini Cake | Pamela Salzman

And that’s what I’m talking about.

Even Mr. Picky himself went crazy for this cake.  I actually came clean and told him there was zucchini in here and he didn’t care!!  If you are nut-free, don’t sweat.  Substitute sunflower butter in an equal amount and it will work perfectly.  Sunflower butter does have a slightly nuttier flavor, almost like peanut butter.  But I when I made the cake with sunflower butter for some nut-free people, they couldn’t detect it.  Make it.  Devour it. Love it.  Share it.  Tell me all about it.

Grain-free Chocolate Zucchini Cake | Pamela Salzman

Grain-free Chocolate Zucchini Cake | Pamela Salzman

5.0 from 23 reviews
Grain-free Chocolate Zucchini Cake Recipe and VIDEO
Author: 
Serves: makes 1 8 x 8 or 9 x 9-inch cake
 
Ingredients
  • coconut oil or butter for greasing pan
  • 1 cup creamy, unsweetened, unsalted almond butter, raw or roasted, or sunflower butter for a nut-free cake
  • ⅓ cup pure Grade A maple syrup or raw honey
  • ¼ cup raw cacao or cocoa powder
  • ¼ teaspoon fine ground sea salt
  • 1 teaspoon instant coffee powder (optional)
  • 1 teaspoon baking soda
  • 1 large egg
  • 1 teaspoon pure vanilla extract
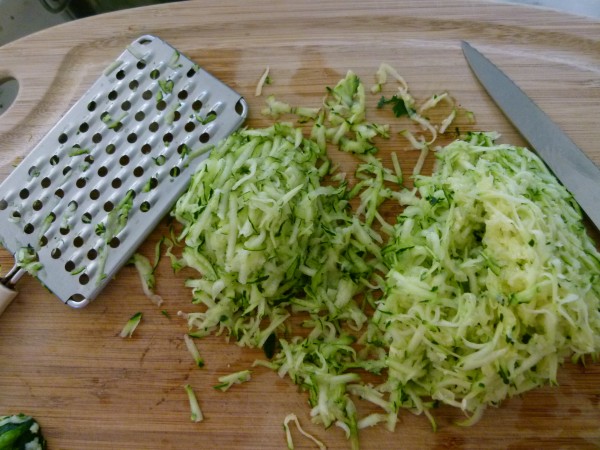
  • 1 ½ cups of shredded zucchini, about 2 small
  • 1 cup dark or semi-sweet chocolate chips
Instructions
  1. Preheat oven to 350 degrees. Grease an 8 x 8 or 9 x 9-inch pan. If you want to remove the cake from the pan in one piece, line it with unbleached parchment paper as well.
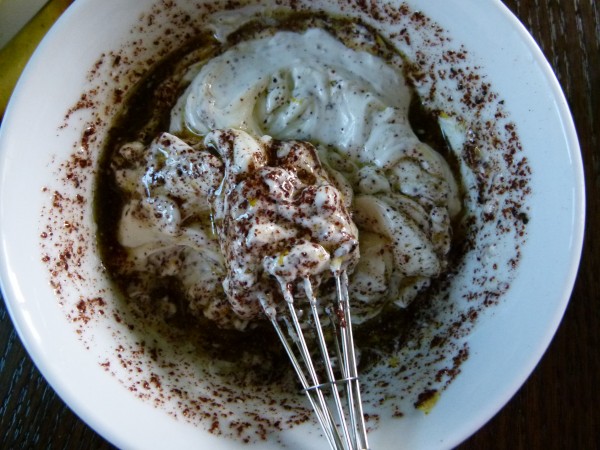
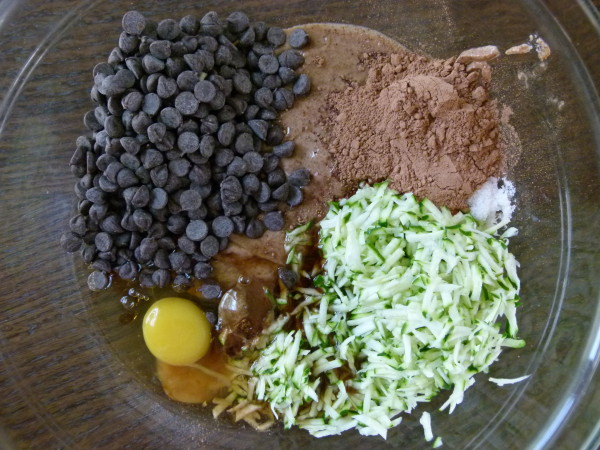
  2. In a large bowl combine the almond butter, maple syrup, cacao powder, salt, coffee powder, egg, vanilla, and baking soda until smooth.
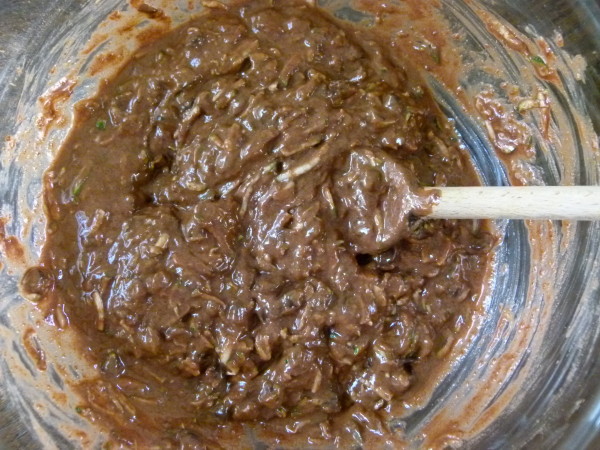
  3. Stir in zucchini and chocolate chips.
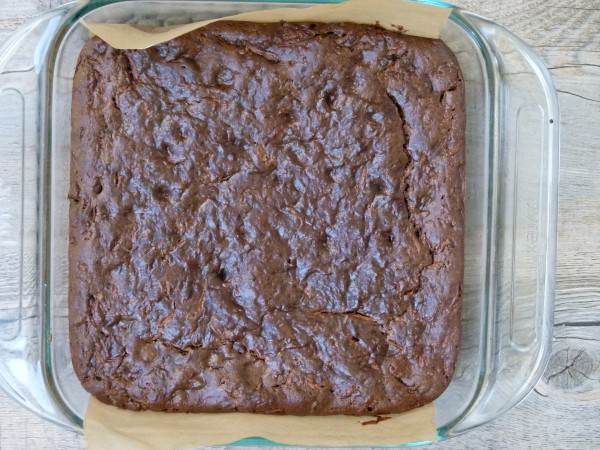
  4. Pour into prepared pan and bake until just set and a toothpick comes out clean or with dry crumbs. Do not overbake. A 9 x 9 pan will take 35-45 minutes. An 8 x 8 pan will take 40-50 minutes. Allow to cool before serving.
Notes
Notes: You can also add ½ cup chopped walnuts or pecans to the batter.

Mediterranean turkey and zucchini burgers recipe

mediterranean turkey and zucchini burgers | pamela salzman

I’m a happy mama since I picked up Mr. Picky from sleepaway camp on Saturday.  13 days is just too long for me to be apart from that guy.  I have been enjoying all the stories, hanging on every word as if he traveled around the world.  Bless his heart, Mr. Picky “snuck” some food from camp to bring to my husband and me.  Thankfully, it was from breakfast the morning he left and not from last week.  From his backpack he pulled out a paper cup with a few pieces of melon for me and a cup with mini cinnamon buns mixed with tater tots for my husband.  What does that tell you?

grated zucchini

While Mr. Picky can’t stop talking about his counselors, his bunk mates and all the competitions in which he participated, I had to find out about the food.  What was your favorite dinner?  Did you eat any vegetables?  What did you drink?  Blah, blah, blah.  I’m so predictable, but I have no self control.  I have to give the camp props that soda is not served.  I don’t know if I could handle that.

that's everything!

So what I have gathered is that Mr. Picky didn’t eat any protein at breakfast ever since, go figure, the camp doesn’t serve Organic Pastures Raw Organic Milk, and Mr. Picky still doesn’t eat eggs or cheese.  And it also sounds like the only vegetable he ate was cucumber.  So we have some catching up to do!  One thing that my son loves is any type of burger, even veggie burgers.  I made these turkey burgers the week before he left and he loved them so they’re going on the dinner menu again this week.  It’s another winner recipe from Yotam Ottolenghi’s “Jerusalem” cookbook.

12 patties

yogurt-sumac sauce

If you’re bored with plain burgers, these are so different and delicious.  And a great way to make a (small) dent in your zucchini crop.  They are moist, herby and they’ve got a great kick to them.  If spicy isn’t your thing, you may want to cut back to a pinch of cayenne.  Although if you make the sumac sauce, which is delicious, it really cuts the heat from the burgers.  But I’m not really doing dairy these days and Mr. Picky didn’t want any sauce, so I only made half the recipe for the sauce and I thought it was the perfect amount.  I also didn’t use traditional buns when I made these.  Bread will just detract from the tastiness of these burgers!  Instead we ate them on lettuce leaves with some chopped cucumbers and tomatoes, right up my alley.  Of course if you want a more traditional burger, you can probably get 6 “standard” size patties and pile them onto buns with all your favorite fixings.  Delish!

mediterranean turkey and zucchini burgers | pamela salzman


View this post on Instagram


A post shared by Pamela Salzman (@pamelasalzman)


Mediterranean turkey and zucchini burgers recipe
Author: 
Serves: 4-6 (Makes about 18 1½ ounce burgers or 12 2½ ounce burgers)
 
Ingredients
  • 1 pound ground turkey (I like dark meat)
  • 1 large zucchini, coarsely grated (scant 2 cups)
  • 3 scallions, white and green parts, thinly sliced
  • 1 large egg
  • 2 Tablespoons chopped mint
  • 2 Tablespoons chopped cilantro
  • 2 cloves garlic, grated or minced
  • 1 teaspoon ground cumin
  • 1 teaspoon sea salt
  • ½ teaspoon freshly ground black pepper
  • ¼ teaspoon cayenne pepper (perfect for us, but the original recipe called for ½ teaspoon; you can use even less if you don’t want them spicy)
  • unrefined olive oil, coconut oil or ghee for searing

  • For the Sour Cream & Sumac Sauce:
  • Scant ⅓ cup full-fat Greek yogurt
  • Scant ¼ cup sour cream (or use all Greek yogurt)
  • ½ teaspoon grated lemon zest
  • ½ Tablespoon freshly squeezed lemon juice
  • ½ small clove garlic, grated or minced
  • 2 ¼ teaspoons unrefined, cold pressed, extra virgin olive oil
  • 1 ½ teaspoons sumac
  • ¼ teaspoon sea salt
  • a few grinds of freshly ground black pepper
Instructions
  1. Make the sour cream and sumac sauce by placing all the ingredients in a small bowl. Stir well and set aside or chill until needed.
  2. In a large bowl, combine all the ingredients for the patties except the olive oil. Mix gently with your hands and then shape into about 18 burgers, each weighing about 1 ½ ounces or 12 burgers, each weighing about 2 ½ ounces.
  3. Pour enough oil into a large frying pan to form a layer about 1/16 inch thick on the pan bottom. Heat over medium heat until hot, then sear the patties in batches on both sides. Cook each batch for about 5-7 minutes on each side, adding oil as needed, until golden brown and cooked through.
  4. Serve warm or at room temperature, with the sauce spooned over or on the side.


Roasted vegetable lasagne recipe

I feel like my universe is in a state of transition right now.  Although I’m sensing this shift in energy in lots of people, not just me.  We’ve transitioned from vacation to school, about to move from summer to fall, and we’re starting to change what we wear.  It’s natural for us to adapt from warmer to cooler weather by adding an extra layer or wearing warmer clothes.  We can think of food in the same way.  It has the ability to warm us up or cool us down.  Even the way you cook or don’t cook your food can change how “warming” or “cooling” it is.  The most cooling form of a vegetable is its raw state, which is why I favor lots of salads and raw soups like gazpacho in the summer.  But today we had the first break in our heat wave and as I scoured the farmers market feeling a little chilly in my short sleeves, I had a hankering for roasted vegetable lasagne.

But before you think of the lasagne you eat in the dead of winter — the heavy, cheesy, carb-y, stick-to-your-ribs-and-thighs kind — think again.  Let’s call this one “Transition Lasagne.”  It’s warm, flavorful and satisfying, but it’s mostly vegetables with a mere couple of ounces of pasta in the entire pan, so it’s super light too.  I also use mozzarella only on the top layer and no one seems to have noticed the difference.  If you’ve made lasagne before, you follow the same basic steps of layering except here we use thick slices of roasted vegetables in place of sheets of pasta.  There’s still one layer of pasta, though.  I tried this with all veggies and it was a little too watery.  The top layer of blanched collard greens is really pretty too.  I got the idea from NY Times columnist, Martha Rose Shulman, who published a beautiful “Lasgana with Collard Greens” a few months ago.  Just like Ms. Shulman’s, not only is this lasagne lighter and fresher than the traditional, but no doubt more healthful too.

This is exactly what I wanted on a day like today and my family was pretty psyched when they came to the table, too.  Mr. Picky psyched about vegetable lasagne?  Ok, no, he wasn’t.  He picked it apart, scraping the cheese off both the pasta and the zucchini so that it was more palatable to him and the eggplant came over to my plate.  This is actually progress.  Last year he wouldn’t have eaten any of it!  Does this make me crazy?  Not really.  Because I know that transitioning to being a good eater doesn’t just happen with a change in the weather.

5.0 from 1 reviews
Roasted Vegetable Lasagna
Author: 
Serves: 6-8
 
Ingredients
  • 1 medium eggplant, about 1 ¼ pounds
  • 1 ½ pounds of zucchini, about 3 medium, trimmed and cut lengthwise into ½-inch slices
  • Olive oil for brushing on vegetables
  • Sea salt and freshly ground black pepper
  • 3 large collard green leaves
  • 3- 3 ½ cups of marinara sauce (depending on how saucy you like it)
  • 15 ounce container whole milk ricotta
  • 1 large egg (helps to bind the ricotta)
  • ½ cup grated Parmesan or Pecorino cheese, divided
  • 4 sheets no-boil lasagna noodles or your favorite gluten-free pasta, cooked and drained
  • 4 ounces grated mozzarella cheese, about 1 cup
Instructions
  1. Preheat oven to 375 degrees. Line 2 baking sheets with unbleached parchment paper.
  2. Slice the stem off the eggplant and with a vegetable peeler, peel a few strips off the eggplant so that you don’t get 2 end pieces that are all peel. It will be hard to cut through the lasagne otherwise. Slice the eggplant lengthwise into ½-inch slices. Arrange the eggplant in one layer on one baking sheet and the zucchini in one layer on the other. Brush both sides of the vegetables with oil. Sprinkle with sea salt and pepper. Roast until tender, about 30 minutes. Then lower the temperature to 350 degrees.
  3. Bring a large pot of water to a boil. Add a tablespoon of kosher salt and the collard leaves. Pull them out after 2 minutes.
  4. In a medium bowl, combine the ricotta, egg and 6 Tablespoons of Parmesan cheese.
  5. Spread ½ cup of marinara sauce on the bottom of a 13 x 9 baking dish. Arrange the roasted eggplant slices on top of the sauce in one layer, squishing them together a bit so there aren’t too many open spots. Take ⅓ of the ricotta mixture (about ⅔ cup), and with a spoon gently spread it over the eggplant slices. Spread ⅔ - ¾ cup of marinara sauce over the cheese mixture.
  6. Next, spread half the remaining ricotta mixture over the pasta sheets (I usually hold the pasta in my hands to do this.) Arrange the pasta in one layer over the eggplant/cheese/sauce and top with another ¾ cup of sauce.
  7. Repeat with the zucchini slices, remaining ricotta mixture and ⅔ - ¾ cup of sauce.
  8. Finally, place the collard greens in one layer on top. Spread ⅔ - ¾ cup of sauce on top of the greens, then sprinkle the mozzarella cheese and Parmesan over the sauce. Cover the dish tightly with foil and bake for 30 minutes. Remove from the oven, uncover and bake another 15-20 minutes until cheese is bubbly and golden. You can broil the top if it doesn’t brown enough. Lasagne is easier to cut (use a serrated knife) if you allow it to sit for a few minutes.
Notes
You can replace one of the layers of vegetables with a layer of pasta, if you prefer. You can also make this “cheesier” by adding a sprinkle of mozzarella in between each layer.

Vegetables can be cooked the morning of or the day before to save yourself some time.

Farro with roasted vegetables and roasted tomato dressing recipe

We had such a nice Labor Day weekend.  I hope you did, too.  We were able to squeeze in some beach time, family time, yoga (for me) and our annual block party, which was great fun.  The combination of the balmy weather and refrain from “labor” made me wish that summer would last just a little longer.  Although, as I mentioned in my gazpacho post, I am riding the summer tomato train for as long as possible.  Since this may very well be my last recipe of the year with tomatoes, I am sharing a goodie.

The inspiration for this recipe came from Deb at Smitten Kitchen who adapted it from Gourmet magazine.  The original recipe called for Israeli couscous, which I couldn’t help but substitute out for a more whole (and tastier) grain like farro.  But what makes this dish special is the incredible dressing which uses slow-roasted tomatoes as it’s base.  What could be better, tomatoes and grains with a tomato dressing?  It’s the perfect recipe for a tomato-fanatic like me!

Ok, I can read your mind.  It’s not the fastest recipe on the planet.  The cherry tomatoes have to be washed, dried, halved, arranged on a baking sheet and roasted for an hour.  Although you don’t have to arrange the tomato halves like soldiers in the photo here.  I thought it would look nice that way, but now I realize it just makes me look obsessive compulsive.  Anyway, I was making this on Friday afternoon to bring to the beach for a potluck, and I tried timing the tomato prework. Excluding the roasting bit, I think it only took me about 15 minutes which I did while watching an episode of “Barefoot Contessa.”  Can I just say I wish Ina Garten would invite me over to cook, play bridge and drink cocktails with her and her friends, especially TR.  Sigh.  Speaking of Ina, do you remember her Orzo with Roasted Vegetables from 2001?  Gasp, was that really 11 years ago?  You know, the one that we all made a gajillion times for every backyard barbeque and potluck for years.  Loved it, but OD’ed on it for sure.  Ina’s salad was easy, but definitely involved some labor, and yet we all thought it was worth it.

Ok, this recipe is like that for me!  A little extra work, but worth it, worth it, worth it!  I taught this last September and again to a group this past July, all the while thinking how divine it is and how much I love it.  And then, while watching Ina on Friday afternoon, that orzo salad popped into my head and I changed this recipe on the spot by cutting the amount of farro in half and adding a bunch of roasted vegetables in its place.  The good news — it was A-MAZING, so much better than the original!  The bad news – it was A-MAZING, so much better than … the way I had taught it to A LOT of students.  Guilty face.  Well, I guess that’s what blogs are for!


View this post on Instagram


A post shared by Pamela Salzman (@pamelasalzman)


Farro with Roasted Vegetables and Roasted Tomato Dressing
Author: 
Serves: 6-8
 
Ingredients
  • 2 pints cherry tomatoes, about 1 ½ pounds
  • 6 small-medium garlic cloves, UNpeeled
  • ¼ cup unrefined cold-pressed extra-virgin olive oil + additional for vegetables
  • ¼ cup warm water
  • 1 teaspoon fresh lemon juice
  • 1 teaspoon sea salt + additional for vegetables
  • ¼ teaspoon freshly ground black pepper + additional for vegetables
  • 1 bunch asparagus, trimmed
  • 5-6 medium zucchini
  • 1 cup farro
  • Kosher salt
  • ½ cup Kalamata olives, pitted and chopped
  • ⅓ cup chopped fresh flat-leaf parsley
  • ¼ cup chopped fresh basil
  • 1 teaspoon chopped fresh thyme (only if you’ve got it)
Instructions
  1. Preheat oven to 250 degrees. Halve tomatoes through stem end and arrange cut-side up in one layer on a large baking sheet. Add garlic to pan and roast about 1 hour, or until tomatoes are slightly shriveled around the edges. Cool in the pan for 30 minutes.
  2. Peel the garlic and put in a blender with oil, water, lemon juice, salt, pepper and ½ cup roasted tomatoes. Blend until very smooth.
  3. Turn the oven to 400 degrees. Arrange the asparagus on a large baking sheet and drizzle with oil plus a sprinkle of salt and pepper to taste. Chop the zucchini into 1-inch cubes. Toss with olive oil and arrange in one layer on a baking sheet. Sprinkle with salt and pepper to taste. Roast asparagus for 12 minutes or until tender. Roast zucchini 35 minutes or until caramelized. Chop asparagus into 1-inch pieces.
  4. Bring a large pot of water to a boil. Add a few substantial pinches of kosher salt and the farro. Cook until farro is tender, but still al dente, about 20-25 minutes. Drain very well and transfer to a serving bowl.
  5. Add olives, remaining tomatoes, asparagus, zucchini, herbs and dressing to farro. Toss to combine and taste for seasoning. Serve warm or at room temperature.


Zucchini bread pancakes recipe

A few years ago, someone suggested I teach a class with a breakfast menu.  At first I didn’t think it was such a good idea because breakfast seems kind of easy, at least too easy to be taught in a cooking class.  In our house the rotations is oatmeal or muesli, scrambled eggs, smoothies, yogurt and granola, pancakes and leftovers from last night’s dinner.  But the more I thought about it, I realized there was a nice variety of fun, delicious and healthful recipes I could share.  Because I do believe breakfast is nutritionally the most important meal of the day, especially for children, I knew these recipes needed to provide sustenance, long-lasting energy and stable blood sugar.  My first breakfast class was a great success and I have continued the tradition every June (arbitrary selection of month) since then.

I tend to follow a similar formula each June based on what my family and I love to eat for breakfast, both on the weekdays and weekend.  I always teach a smoothie, muffin, egg-based dish and a pancake recipe.  When I was growing up, pancakes were for Saturday mornings when Mom had time and no one was rushing off to work or school.  I too love lingering over a plate of pancakes on the weekends, but by making the batter the night before and teaching my older girls how to cook their own, we enjoy them on a school mornings, as well.  If you’re thinking it’s a little boring to eat plain old pancakes twice a week, I would agree with you!  We add lots of different things to our pancakes while they’re cooking and the kids each seem to have their own favorite combo, such as fresh raspberries and mini-chocolate chips or diced banana and pecans.

But for my breakfast classes, I needed to debut more than just buttermilk pancakes with a different fruit each time.  I’ve posted most of my favorites by now, including oatmeal pancakes and pumpkin pancakes.  Both are really delicious!  After seeing a recipe by fellow Foodily tastemakerJoy the Baker, for carrot cake pancakes, I had an idea to make pancakes with the same flavors in zucchini bread.  To me, zucchini bread really isn’t about the zucchini, which I think is a little tasteless but does add nice moisture to muffins and quick breads.  I’m mostly in it for the sweet spiciness of cinnamon and nutmeg, perhaps combined with a few nuggets of walnuts.  What’s not to love?  And zucchini bread pancakes could be made with almost no added sweetener — so great!

These pancakes made it on the menu this past June and I think they were a big hit.  I made them successfully with several different flours, including whole wheat pastry, whole spelt, and sprouted whole wheat.  The latter two flours tend to create a thicker batter, so I used a bit less of those, but they made for a nice hearty pancake.  Whole wheat pastry flour is very light, almost mimicking white flour, but still has all the fiber and bran of whole wheat, which it is.  We also played around with adding pecans, blueberries or the oft-requested chocolate chips, but personally I love them completely plain with either a thin drizzle of maple syrup or a dollop of whole yogurt.  Such a delicious breakfast for the long weekend as well as for a first day of school.  I hope you all enjoy a fantastic Labor Day!

Zucchini Bread Pancakes
Author: 
Serves: makes about 12 4-inch pancakes
 
Ingredients
  • 1 ¾ cups sprouted wheat flour or 2 cups whole wheat pastry, white whole wheat or whole spelt flour (or a combo)*
  • 1 teaspoon aluminum-free baking powder
  • 1 teaspoon aluminum-free baking soda
  • 1 teaspoon fine sea salt
  • 1 Tablespoon ground cinnamon
  • scant ¼ teaspoon ground nutmeg
  • 2 cups buttermilk**
  • 2 large eggs
  • 1 teaspoon pure vanilla extract
  • 1 Tablespoon 100% pure maple syrup
  • 3 Tablespoons unsalted butter, melted
  • 2 cups shredded zucchini
  • Melted, unrefined coconut oil or unsalted butter for brushing the griddle
Instructions
  1. Preheat a griddle to 400 degrees or medium heat.
  2. Combine the flour, baking powder, baking soda, salt and spices in a large mixing bowl.
  3. In a medium bowl or 4-6 cup measuring cup, whisk together the buttermilk, eggs, vanilla, maple syrup and melted butter until well blended. (A blender can do this easily, too.) Fold in shredded zucchini.
  4. Pour the wet mixture into the dry ingredients and stir until just combined.
  5. Brush the griddle with coconut oil and spoon about ¼ cup of batter onto the griddle. Add blueberries, chocolate chips, diced banana or chopped walnuts to the surface, if desired. When bubbles start to form on the surface of the pancake and the edges become slightly dry, flip it over and cook until done. Maintain the heat on medium-low or 400 degrees.
Notes
*Gluten-free: substitute 1 cup buckwheat flour and 1 cup brown rice flour for the wheat flour. Or you can use GF oat flour, too, such as ¾ cup oat flour, ¾ cup buckwheat flour and ½ cup brown rice flour.

**No buttermilk? Sub half unsweetened yogurt and half whole milk. Or use 2 cups milk, omit the baking soda and use 2 teaspoons baking powder instead.

Summer garden frittata recipe

While I was away last week, my husband thought it would be a great idea to refinish the cabinets in the kitchen.  No wait, we might as well do all the cabinets in the entire house, he thought to himself.  Why do those four words generally end up as a bad idea?  Why do people think that a small project might as well be a big project?  We had a simple plan.  Mr. Picky and I would go back East to bring Daughter #1 to camp while my husband brought Daughter #2 to camp and we would come back a week later and my house would look like nothing had ever happened except that my kitchen cabinets would look pretty and fresh instead of beaten up because I’ve taught a hundred cooking classes in my kitchen.

Guess what?  This is what my kitchen still looks like!  And so does the rest of my house until who knows when.  So yours truly is in a bit of a funk because she didn’t get to make and photograph the sure-to-be-adorable and tasty raspberry-blueberry-yogurt popsicles she wanted to post today for Fourth of July.  Pouty face.  And yours truly has been eating take-out since she returned home from Long Island on Friday night.  Verrry pouty face.  I’ll get to the frittata in a minute.  What I’d like to discuss is takeout.  I definitely struggle with finding places to eat when I do need to eat out.  Fresh, organic, seasonal prepared food is not as common as you would think, even in Manhattan Beach, California. So I’ve been to Le Pain Quotidien for breakfast two days in a row and Veggie Grill for lunch two days in a row and Whole Foods for one meal.  And here’s what I’ve got to say — holy $$$$$! friends.  How do people eat out all the time?  It’s downright unaffordable.  Not only that, it’s beyond difficult for everyone to agree on what to eat.  Dinner should not be a democratic decision!  Seriously, the last few days have totally reinforced what I have said about cooking at home being easier, cheaper and always more healthful.

Now let’s get to the frittata, which I photographed at my house two weeks ago and again at my parents’ house last week (two different frittatas, naturally.)  I was going to post this recipe next week, but like I said, my husband thought it would be nice to surprise me.  Pouty face.  In any event, a frittata recipe fits in perfectly with my anti-takeout sentiment.  Eggs, and therefore frittatas, are an incredibly versatile and high-quality source of inexpensive protein.  They are also very easy to make on the fly with whatever you’ve got in your kitchen/garden.

I prepare frittatas all year long varying the ingredients based on what’s in season.  Click here for a delicious swiss chard frittata recipe.  A few weeks ago, when I saw zucchini blossoms at our farmers’ market with beautiful, tender zucchini, I knew I had to make what I call “Summer Garden Frittata.”  It’s the frittata I make most often in the summer and it’s really about celebrating whatever my garden or market has to offer.  My family inhaled these last week.  You certainly don’t need to use zucchini blossoms, especially if you can’t find them, but I think they’re so pretty and they have a nice, subtle flavor.  The blossoms without a zucchini attached are the male flowers which basically just sit around the plant doing absolutely nothing while the female blossoms actually produce zucchini.  Why not put those males to good use?  I’m here to tell you that if you don’t find something for them to do, you never know what kind of trouble they’ll create for you.

Summer Garden Frittata
Author: 
Serves: 6 (although when I'm hungry, I could eat a fourth of this frittata)
 
Ingredients
  • 2 Tablespoons unrefined, cold-pressed extra-virgin olive oil + additional
  • 1 bunch scallions, trimmed and sliced
  • 3 cloves garlic, sliced thinly
  • 3 medium zucchini (about 1 pound), ends trimmed and sliced thinly by hand or by the slicing disk of the food processor
  • Fine grain sea salt
  • Freshly ground black pepper
  • 8 large eggs
  • ¼ cup chopped fresh basil leaves
  • ½ cup ricotta cheese or goat cheese or feta (optional, but I used feta in the photographs)
  • 5-6 zucchini blossoms (optional, I used 4 large ones)
  • ½ cup cherry tomatoes or 2 Roma tomatoes, sliced
Instructions
  1. Preheat oven to 375 degrees. In a 10-inch skillet, warm the olive oil. Sauté the scallions until softened. Add the garlic and cook for 1 minute. Add the zucchini slices and a generous pinch of salt and sauté until tender, about 6 minutes.
  2. In a large mixing bowl, beat the eggs, basil, 1 teaspoon salt, and a few grinds of black pepper. Stir the cooked zucchini mixture into the eggs and combine well.
  3. Place the skillet back over medium heat and add a little extra oil if the pan seems dry. Pour the egg and zucchini mixture into the pan. Arrange the zucchini blossoms on the surface of the frittata or chop and scatter on top. Dollop tablespoonfuls of the ricotta and the cherry tomatoes around the frittata. Transfer skillet to the oven and bake until firm, about 40 minutes.
Notes
Alternatively, bake in a larger skillet for less time for a thinner frittata.

Or, cook gently over medium-low heat, covered until slightly set on the bottom, 15-20 minutes. Transfer the skillet to the oven and broil until the top is slightly puffed and golden, about 3-5 minutes. Serve warm or room temperature.


Zucchini-potato latkes

So what does a nice Italian girl from New York make for her nice Jewish husband for Hanukkah?  Zucchini-potato latkes, of course!  Believe me, you don’t have to celebrate Hanukkah to enjoy these little patties.  Grated potatoes mixed with a little onion and lots of fresh zucchini all fried to crispiness.  Mr. Picky has declared that this is the only way he’ll eat zucchini.  So be it.  But uh oh.  That fried bit does make latkes an “occasional” food, which is why we only indulge in them a mere once or twice a year.  Even though frying is a rather unhealthful way to cook, I’ll do it since the latkes are so much more tasty that way.

What’s funny about my education in latke-making is that I learned what I know from an unlikely source — my Puerto Rican mother-in-law, who also did not grow up Jewish.  Darn that woman can make the best latkes in the world!  Although she wouldn’t dare put in any zucchini or sweet potatoes in hers, I have accumulated some great tips from her that I will share here:

  • Russet or Idaho baking potatoes have the highest starch content and the lowest moisture content, which is good for making crispy latkes. But Yukon Gold (medium starch) work great, too.
  • Wear disposable gloves so your hands don’t smell like potatoes and onions for a day.
  • Squeeze out excess water from the potatoes — again helps to keep them crispy and keep them from falling apart.
  • Use the shredding disc on the food processor to make this job a breeze.  I also shred my onions (and zucchini), but my mother-in-law chops the onions and pulses them with the metal blade to avoid getting any big pieces.
  • Don’t make them too big.  The interiors won’t get fully cooked and they may not hold their shape well.
  • Fry them in an inch of oil — this helps to get all sides crispy so they don’t fall apart.  (I can’t bring myself to cook in that much oil and that’s one reason my mother-in-law’s latkes are better than mine.)
Whatever you celebrate, here’s hoping your holidays are happy!

5.0 from 2 reviews
Zucchini-Potato Latkes
Author: 
Serves: makes 30 2 ½ -inch latkes or 20 3-inch latkes
 
Ingredients
  • 2 pounds medium zucchini, about 6, ends trimmed
  • 1 ½ pounds Russet potatoes, about 2, peeled or unpeeled, and cut to fit a food processor
  • 2 medium yellow onions, peeled and quartered
  • 3 large eggs, lightly beaten
  • 1 Tablespoon sea salt
  • A few grinds of black pepper
  • ½ - ¾ cup panko bread crumbs or matzo meal
  • Olive oil for frying (or a refined peanut oil or grapeseed oil has a higher smoke point, although not exactly healthful)
Instructions
  1. Shred the zucchini in a food processor fitted with the shredding attachment and place in a colander over a large bowl (my preferred method.) Toss with 1 tablespoon kosher salt and allow to drain for 30 minutes. Call your kids to the kitchen so they can watch the next step. Place the zucchini in a kitchen towel and squeeze out as much liquid as possible. There's a ton! Do not add salt to the mixture again. Or shred the zucchini with the potatoes and onions. You will get out more moisture though if you salt them first.
  2. In the bowl of a food processor fitted with the shredding attachment, shred the potatoes and onions. Again, squeeze out as much liquid as humanly possible. Let the mixture rest for a minute and squeeze again.
  3. Place all the shredded vegetables in a large bowl. Add the eggs, salt (do not add if you salted the zucchini early), pepper and bread crumbs to the vegetables and combine well.
  4. Heat the oil (I use olive) in 2 large skillets until hot, but not smoking. An inch of oil will give you the best results.
  5. Using about 2-3 tablespoons of the zucchini-potato mixture, form the latkes into 2 ½-inch pancakes. Flatten slightly and carefully place into the pan. When the edges are brown and crisp, turn them over and continue cooking until deep golden. I usually flatten them slightly in the pan when I flip.
  6. Lay paper towels on a cooling rack or brown paper bag. Transfer the latkes from the pan to the rack. Sprinkle with sea salt if desired. Serve immediately with applesauce or sour cream (if you must).
Notes
TO BAKE LATKES:

Preheat oven to 425 degrees. Brush a baking sheet with oil. Place formed (raw) latkes on baking sheet and brush tops with oil. Bake 10-15 minutes, or until undersides are golden. Flip latkes and bake another 10-15 minutes until golden on both sides. They won’t be as crispy as the traditional, but a good alternative if you don’t like to fry.

TO FREEZE AND REHEAT LATKES:

Cook, cool and freeze immediately. Reheat at 425 degrees for 10 minutes or until heated through.


Zucchini-gruyere tart

Do you remember the first cookbook you ever bought?  Not counting the Calling All Girls Party Book in second grade, I bought my first cookbook with my own money in 1987, the year I graduated from high school.  My Aunt Maria drove me out to one of her favorite gourmet food shops in the Hamptons on Long Island.  Loaves and Fishes was a darling little shingled cottage in Sagaponack and run by a mother-daughter team named Anna and Sybille Pump.  All these years I thought I was their biggest fan, but apparently I’m not the only Loaves and Fishes admirer.  The famous Ina Garten has adapted a recipe or two (or more) from Anna and even dedicated one of her cookbooks to her.

I basically taught myself how to cook from Loaves and Fishes. When The Loaves and Fishes Party Cookbook came out, I scooped it up and read it cover to cover.  Anna Pump taught me how to entertain with ease and it was from this book that I learned what I could prep in advance, an education that still serves me today.  Loaves and Fishes is still around.  I actually visited the cook shop in Bridgehampton last summer.  I wouldn’t say that the recipes in the book are the most healthful or that I even use many of them today, but this recipe for zucchini-gruyere tart from the first book is my hands-down favorite hors d’oeuvre ever.  It should be in the Hors D’oeuvre Hall of Fame.  I have been making it for 24 years and it has never failed me (even when I’ve used  zucchini from (shhhh!) Mexico when they’re out of season here.)  I have also made it with heirloom tomatoes instead of zucchini and it’s always a showstopper.

Manhattan Beach has the potluck thing down.  Last weekend my friends Kristy and Sarah hosted a lovely “small plates night” at Sarah’s home.  You MUST do this sometime.  Everyone brings an appetizer or a bottle of wine and has a fabulous time catching up and watching the sun set over the ocean (it helps that Sarah lives right in front of the Pacific.)  I brought the zucchini tart which I cut into 64 slightly-bigger-than-bite-size pieces and it vanished faster than the chardonnay, which is saying something.

Please don’t be intimidated by the pastry crust — if you’ve rolled out sugar cookie dough, you can do this.  But if you don’t want to, just buy 2 premade pastry crusts and fit it to the baking sheet.  Puff pastry would be another option here.  Every time I make it, I apply the tips I learned from my first books and I blind bake the crust the day before and leave it at room temperature.  Also the day before I shred the cheese, slice the zucchini, make the herb oil and refrigerate them all separately.  After working (i.e. cooking) all day and shuttling kids to their activities, all I needed to do before the party was assemble the tart and freshen up while it baked in the oven.  Now, go find an excuse to make this and then thank Anna Pump.

Zucchini-Gruyere Tart
Author: 
Serves: yields approximately 100 1-by-2-inch pieces (I usually cut them larger to yield 64-72 pieces)
 
Ingredients
  • CRUST:
  • 1 ½ cups unbleached all-purpose flour
  • 1 cup whole wheat pastry flour (or use all regular white flour)
  • ¾ cup (1 ½ stick) unsalted butter, chilled and cut into 12 pieces
  • ½ teaspoon sea salt
  • 2 small egg yolks
  • 5 Tablespoons cold water
  • FILLING:
  • 4 medium zucchini, about 1 ½ pounds
  • 1 cup fresh parsley leaves
  • 3 cloves of garlic, peeled
  • ¼ cup fresh basil leaves
  • 1 Tablespoon coarsely chopped fresh thyme
  • ½ teaspoon ground black pepper
  • ½ teaspoon sea salt
  • ½ cup unrefined, cold-pressed extra-virgin olive oil
  • 5 Tablespoons Dijon mustard
  • ¾ pound Gruyere cheese, grated
  • ⅓ cup finely grated Pecorino-Romano or Parmesan cheese
Instructions
  1. To make the crust, place the flour, butter and salt in the bowl of a food processor fitted with the metal blade. Pulse 5 times. Add the egg yolks and pulse 2 more times. With the motor running, and the water through the feed tube. Process only until the dough begins to stick together. Transfer the dough to a floured surface and quickly form it into a ball. Wrap the dough in parchment and refrigerate it for 30 minutes.
  2. Preheat the oven to 400 degrees.
  3. Cut the zucchini diagonally into ⅛- inch slices and place them in a large bowl. (A mandoline makes this task very easy. You can do this the day before and refrigerate, covered.)
  4. Put the parsley, garlic, basil, and thyme in the bowl of a food processor fitted with the metal blade. Sprinkle with the pepper and salt and process until the herbs are chopped fine. With the motor still running, add the olive oil through the feed tube. (You can dot his the day before and keep refrigerated in an airtight container.) Pour the herb mixture over the zucchini slices and mix well.
  5. Roll out the pastry dough to a ⅛-inch thickness. Fit it into a 18-by-12-by-1-inch pan. Cover the pastry with parchment paper, including the corners. Pour pie weights over the parchment paper, filling the pan. Bake the crust for 15 minutes. Remove parchment and weights and bake the tart pastry for 5 minutes more. *
  6. Spread the mustard over the bottom of the crust. Distribute the cheeses over that. Arrange the zucchini in overlapping rows, covering the cheese. Pour whatever herb mixture is left in the bowl over the zucchini.
  7. Reduce the oven temperature to 375 degrees and bake the tart for 30 minutes more.
Notes
The tart pastry can be blind-baked up to the day before, cooled and left covered at room temperature until ready to fill and bake.