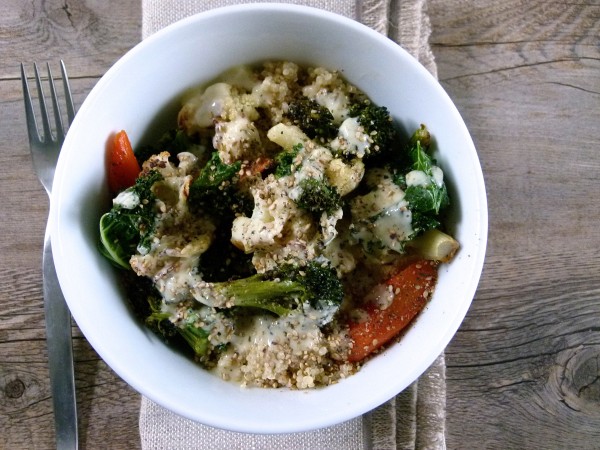
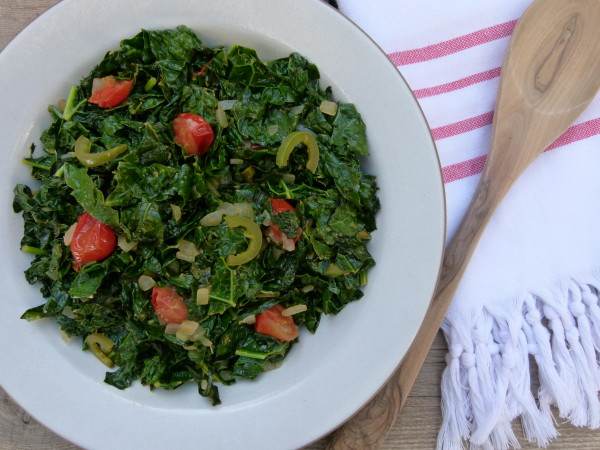
Mexican-style Sauteed Greens Recipe

Mexican-style sauteed greens | Pamela Salzman

You know what never happens?  I never make at home for dinner something that I am currently teaching in one of my classes.  Why?  Because I normally eat it several times a week and I am not super motivated to eat it any more than that, no matter how good it is!  This is even more true towards the end of the month after I have taught the same recipes a dozen or more times.

kale

Well, never say never because I have been teaching this Mexican-style sautéed greens recipe all month and I made it for dinner Monday night.  Why?  Because there is never any left after my class!  Everyone has just gone crazy for this recipe and finished every last morsel before I had my chance.  I look forward to these slightly spicy, tart greens and then….none for me.

jalapenos

I am really obsessed with Mexican food.  I love the bright, fresh, punchy flavors.  And the ingredients are easy to come by in Southern California.  I do find it hard, though, to come up with a wide variety of vegetable side dishes to complement whatever Mexican main dish I am making.  I have a lot of salads in my repertoire.  If you haven’t tried my Mexican Chopped Salad or my Avocado, Jicama and Mango Salad or the Cilantro Lime Slaw, those are just fabulous and deliver a lot of nutrition at the same time.

add the cherry tomatoes

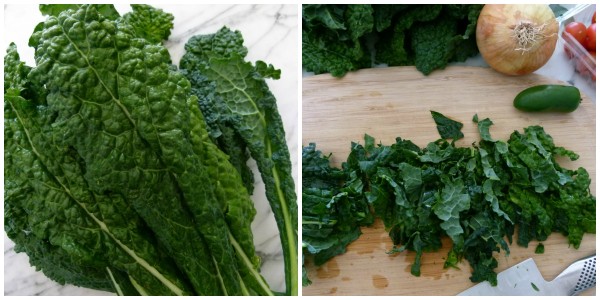
But when I stumbled up this recipe for Quelites, I knew I found a new favorite Mexican side dish.  Quelites actually refer to a type of weed, also known as lamb’s quarters, but in the above mentioned recipe, mustard greens are used.  Mustard greens are a tad bitter for my husband and Mr. Picky, so I tried this recipe with lots of combinations of milder greens, like spinach, baby kale and chard, as well as dinosaur kale.  Love, love, love, love, LOVE!

Mexican-style sauteed greens

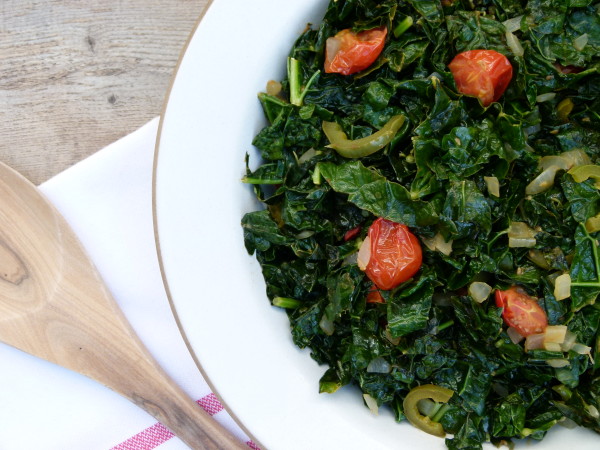
What I like best about this recipe is how the acidity from the lemon juice and the sweetness from the tomatoes tone down any bitterness from the greens (if you’re using mature kale, for example.)  I don’t think this recipe is very hot, even with an entire jalapeño, although I do remove the seeds, which is where the heat is more concentrated.  But it’s hot enough for my heat-averse guys.  I just add a few shakes of hot sauce to my greens and I’m happy.

Mexican-style sauteed greens | Pamela Salzman

I have eaten these Mexican-style greens with rice and beans (so simple and so good!), as well as chicken enchiladas and tacos.  If you follow me on Instagram or Facebook, you saw that I made them for dinner this week with a veggie paella (Spanish, not Mexican, but so what) and then the next day with scrambled eggs and a corn tortilla.  Whatever you’re making for Cinco de Mayo, this will be the perfect, healthful side!

Mexican-style sauteed greens | Pamela Salzman

5.0 from 5 reviews
Mexican-style Sauteed Greens
Author: 
Serves: 4
 
Ingredients
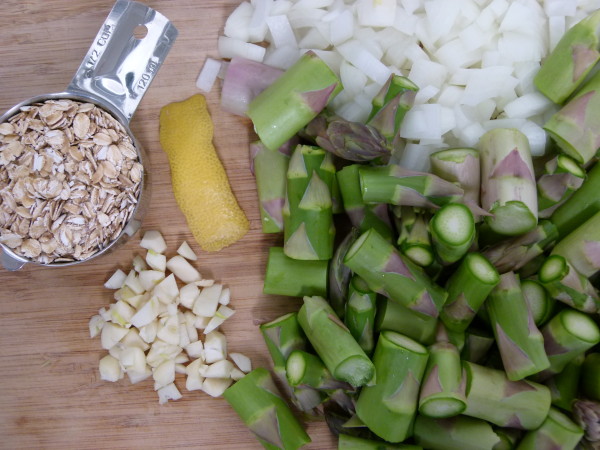
  • 1 Tablespoon unrefined, cold-pressed, extra-virgin olive oil
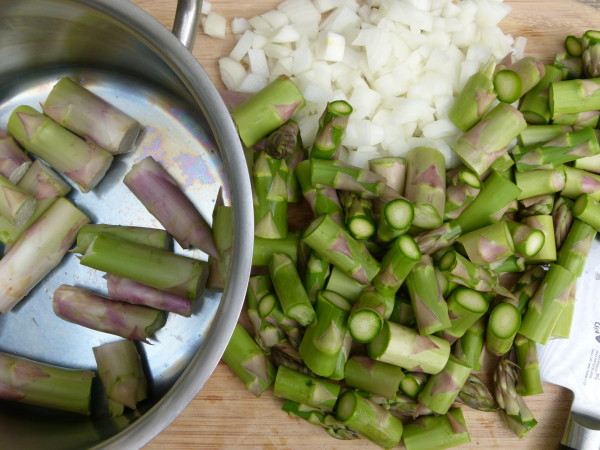
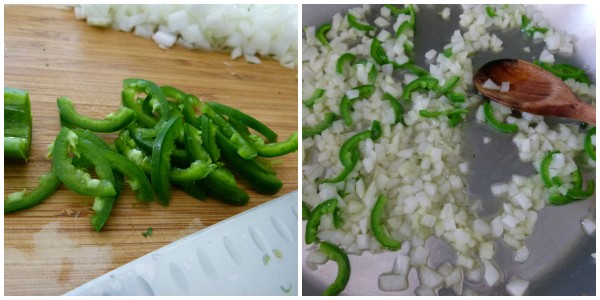
  • ½ onion, finely diced
  • 1 jalapeno, thinly sliced (remove seeds to make it milder)
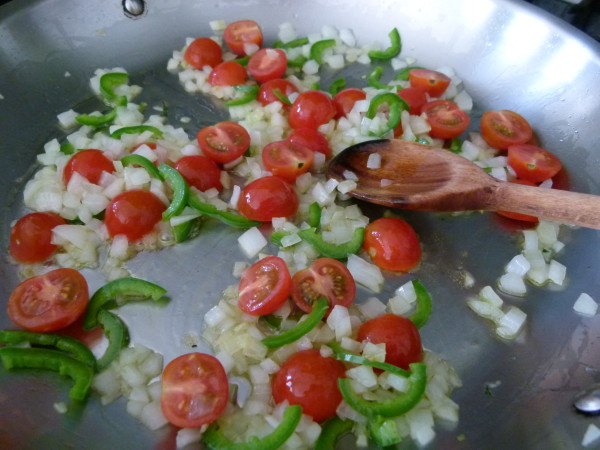
  • 1 cup cherry tomatoes, halved
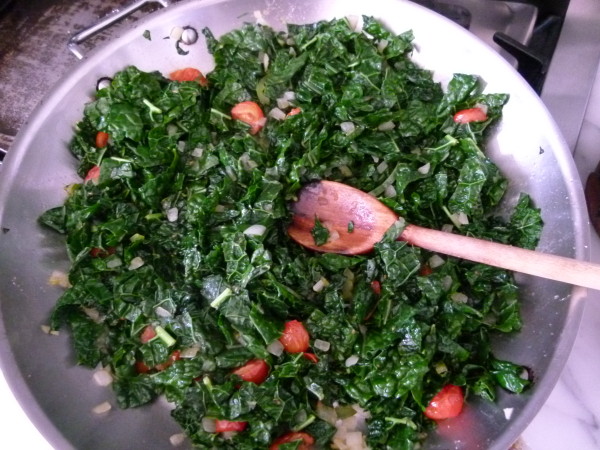
  • 1 pound kale, stems removed and leaves cut into strips or 10 ounces baby greens such as baby kale, Swiss chard and spinach
  • Sea salt and freshly ground black pepper to taste
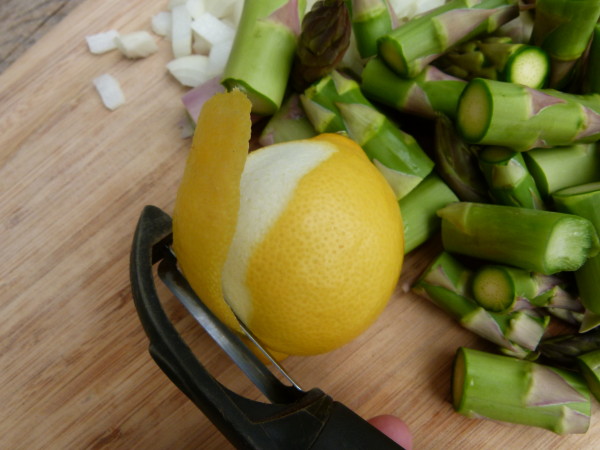
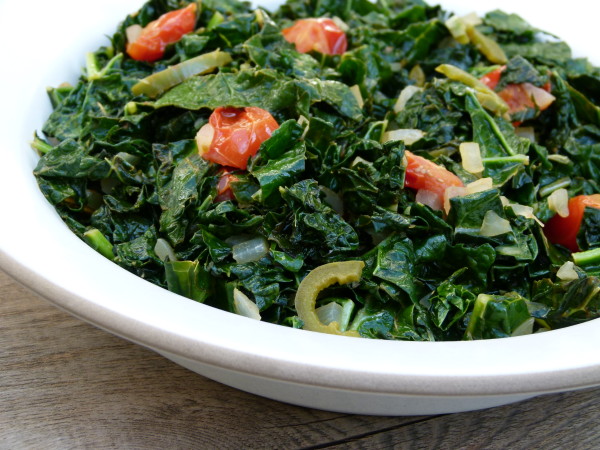
  • 1 Tablespoon fresh lemon juice
Instructions
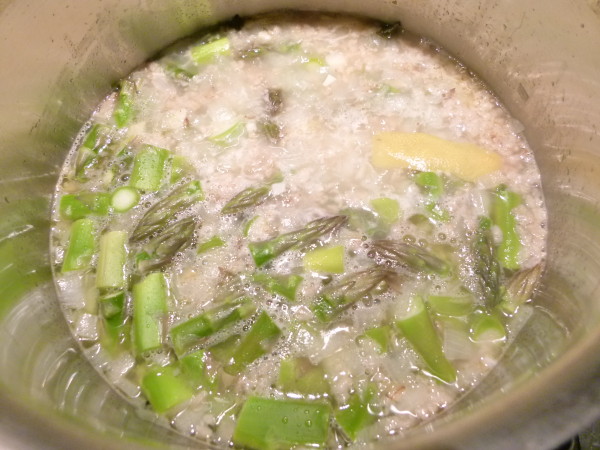
  1. In a large sauté pan, heat the oil over medium heat.  Add the onion and jalapeno and cook until onion is tender and translucent, about 3 minutes.
  2. Add tomatoes and cook for another 2 minutes, or until tomatoes just start to lose their shape.
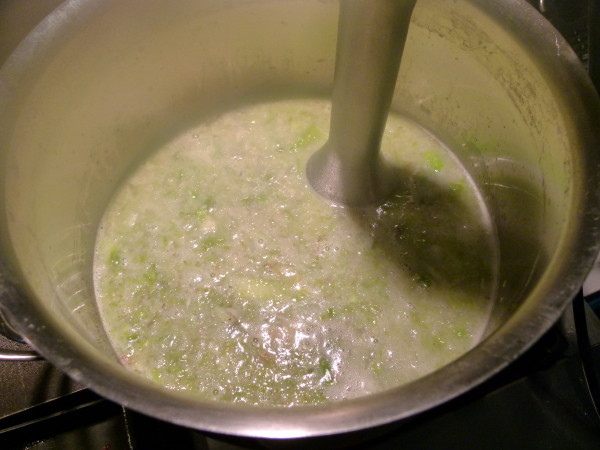
  3. Add the greens and a sprinkle of sea salt and black pepper.  Cook, stirring frequently, until greens are wilted and just tender.  Sturdier greens will take longer than baby greens.
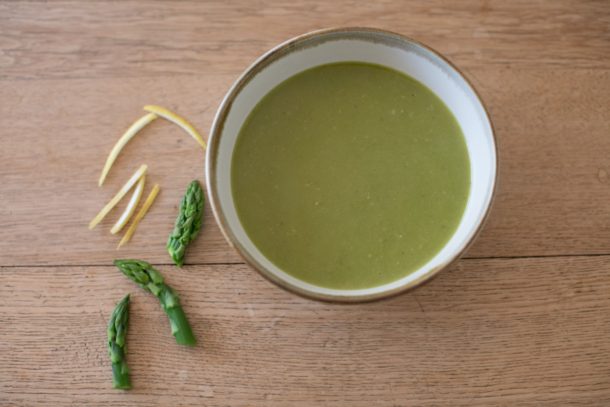
  4. Pour lemon juice on top and taste for seasoning.  Serve immediately.

Roasted Vegetable Buddha Bowl with Lemon-Tahini Dressing Recipe

Roasted Vegetable Buddha Bowl with Lemon Tahini Dressing | Pamela Salzman

We all have those recipes we love but don’t make very often (for me it’s chicken pot pie and spanakopita.)  And then there are the recipes you rely on when you don’t want to think about what to make.  Those are your go-to, no-fail, everyone-loves-this recipes.  I wish I had an endless supply of those.  But I am going to share one of my-go’s with you today!  This roasted veggie buddha bowl is just that.  I swear I could eat this every day.  I taught this recipe in my classes in January and I actually did eat it every day and I never got tired of it.

Vegetables reading for roasting

A Buddha bowl is really just a simple combination of (usually) lightly steamed vegetables on top of a gluten-free grain, like brown rice, and often topped with a sauce or dressing of sorts.  It is a very clean and healthful meal, but very satisfying.  Personally, I prefer all my meals in a bowl.  I love when all my food gets combined and every bite has a little bit of everything.  It’s Mr. Picky’s worst nightmare.

After you roast your vegetables, add kale and roast some more

A Buddha bowl is flexible.  Clean out of the vegetable crisper and use what you’ve got.  Not in the mood for rice?  Use quinoa or millet.  Soy or peanut-based sauces are very popular on Buddha bowls, but I am kind of obsessed with my lemon-tahini dressing from this salad, so I adapted that for this recipe.  And even though I said a Buddha bowl is usually made with steamed vegetables, who says you can’t roast them?  Like with a little coconut oil until the edges are just a bit crispy.  Heaven!

Perfectly roasted veggies and crispy kale

I make dinner for my family every night (and if you follow me on Instagram or Facebook, you would know exactly what that looks like!)  Even though I am a big proponent of one meal for all, there always those days I ate a late lunch after a class and I’m not feeling like the roast chicken and potatoes I am making for dinner that night.  This Buddha bowl is my go-to on nights like that.  I’ll make a big pan of roasted veggies for all of us and then whip up this dressing and a pot of steamed quinoa and voila!  I have something a little lighter and I’m a happy camper.  That’s not to say that my husband and my kids don’t like Buddha bowls.  They all really do, especially my girls.  As you would imagine, Mr. Picky doesn’t exactly eat his in a bowl.  Rice in one separate, distinct area on a plate, roasted veg in another and hold the dressing, please.  No problem, dude.

lemon-tahini dressing

If you decide to make this dressing for your Buddha bowl, you really have a nice vegetarian meal no matter what grain you use since tahini is basically just sesame paste.  Sesame seeds are high in protein, good fats and did you know, calcium?  Just good to know if you’re looking for non-dairy sources of calcium.  And if you make this with broccoli and kale, you have a very calcium-rich meal.  I also like to sprinkle everything my Buddha bowl with gomasio, a macrobiotic condiment which is just a mixture of sesame seeds and sea salt.  The one I use by Eden Organic also has seaweed in it.  If you have all the other ingredients, but not the gomasio, make this anyway — you will love it and you will feel awesome after eating it.  Have a lovely weekend!

How to assemble your buddha bowl

ready for a bite

so yummy


5.0 from 1 reviews
Roasted Vegetable Buddha Bowl with Lemon-Tahini Dressing
Author: 
Serves: 4-6
 
Ingredients
  • Dressing (makes about 2 Tablespoons/serving):
  • 3 Tablespoons fresh lemon juice, about 1 small lemon
  • 2 small cloves of garlic, grated or minced or just smash the cloves if you don't actually want to eat the garlic, but still have a subtle garlic flavor
  • ¼ cup raw tahini (roasted tahini is fine, but raw is a little milder)
  • 3-4 Tablespoons room temperature or warm water
  • ¼ cup unrefined, cold-pressed, extra-virgin olive oil
  • ¾ teaspoon sea salt + more to taste
  • pinch of cayenne (optional)
  • 8-10 cups mixed vegetables such as 1 head of broccoli, cut into bite-sized florets and stems, trimmed and chopped AND 1 head cauliflower, cut into bite-sized florets*
  • 2 Tablespoons melted unrefined coconut oil or unrefined olive oil
  • 3-4 large leaves of kale, washed, dried, stems removed
  • Sea salt and freshly ground black pepper to taste
  • Steamed brown rice, millet or quinoa for serving (optional)
  • Plain or seaweed gomasio for sprinkling on top (optional)
Instructions
  1. Preheat oven to 400 degrees. Line a large baking sheet with unbleached parchment paper.
  2. Make the dressing (or you can make while the vegetables are roasting): in a small bowl, whisk together the lemon juice, garlic, tahini, water, olive oil, salt and cayenne until well blended. Just use the amount of water you need to get the consistency you want.
  3. In a large bowl, toss the broccoli and cauliflower with the coconut oil. Don’t wash the bowl yet. Place the broccoli and cauliflower in one layer on the prepared baking sheet. Season with salt and pepper to taste. Roast for about 20-30 minutes, or until tender and golden in spots. I like to turn the vegetables after about 15 minutes.
  4. Take the kale leaves and rub them around the bowl with any remaining coconut oil until lightly coated. Tear until large pieces and sprinkle with a pinch of salt and pepper. Place on top of the broccoli and cauliflower in the oven and roast until the kale is just crispy, about 5-10 minutes.
  5. If you’d like to eat this as a “bowl,” place a scoop of rice/millet/quinoa in a bowl and top with the vegetables. Spoon some sauce over everything and sprinkle with gomasio, if desired.
Notes
*Other roasted veggies that would be great are beets, carrots, and sweet potatoes!

Roasted fingerling potatoes with gremolata recipe

roasted fingerling potatoes with gremolata |  pamela salzman

I hope you all had a merry Christmas!  We’ve had such an amazing few days with my family in New York.  Christmas Eve is always such a special night and this year was no exception, with 94 of us at my aunt’s house for dinner.  NINETY-FOUR.  And four ladies announcing they are expecting so we’ll be 98 next year?  My aunt is an absolute genius to be able to orchestrate a sit-down pot-luck for so many.  I swear she could run a small country.  Heck, she could probably run THIS country! We were in four different rooms eating 7 or 8 different types of fish (and a few veggies for good measure.)  Although it’s really not about the food for me, instead my favorite moment of the evening is listening to all the little ones sing around the Christmas tree watching the staircase in hopes that Santa makes an appearance, which he always does.  Then everyone screams and the flash bulbs go off as if there were paparazzi in the house.  It never gets old for me.

zesting lemon

ingredients in the gremolata

Christmas Day is always the perfect balance to the evening before.  It’s quieter, just 17 of us at my parents’ house and my mom is in charge.  We always start the meal with tortellini in chicken broth, which my kids love.  Then she makes a beef tenderloin with a red wine sauce, stuffed mushrooms, green beans with shallots and a green salad.  This year I was hoping to add these amazing potatoes to the menu.  I made them for Jenni Kayne’s holiday cooking class a few weeks ago and I knew they would be perfect with my mom’s menu.  They would actually be perfect with almost any menu!  But I’ll admit, I bailed at the last minute, thinking we had plenty of food already, I was a little tired from having gone to bed at 2:00 in the morning, and no one would care if we had or didn’t have potatoes on Christmas.  Really, everyone looks forward to all the cookies after dinner anyway.

gremolata

Alas, I still would love to share this recipe with you because I know you will love it and I know you will find a place for it in one of your upcoming weeknight dinners or even for something as special as New Year’s Eve.  I love crispy, roasted potatoes plain and simple, but these have an extra umph from the gremolata.  Gremolata is an Italian garnish traditionally made with finely chopped fresh parsley, raw garlic and grated lemon zest.  I’ve had it before on osso buco, roasted vegetables and even pasta.  It’s just bursting with flavor and freshness and makes ordinary potatoes out of this world.  I love it!  For this version of gremolata, I added a little orange zest, crushed red peppers, and fresh mint and thyme, all of which I adore with potatoes.  I also made the gremolata once with a little fresh rosemary instead of the thyme and dropped the chili flakes just because — also delicious!

baby fingerling potatoes

Try and find these teeny fingerling potatoes if you can.  They are so creamy and super easy to use since you just just have to wash and dry them, no peeling, no chopping.  BUT, if your market only offers Yukon Gold or red skinned potatoes, go for it.  They’ll still be delicious.

roasted halfway

I am hoping you are finding time to rest and restore your energy this week.  Acting like a superhero is totally overrated and people who look like they do it all don’t, and if they do, they’re exhausted.  Being a good parent or a good host/hostess or a good cook is good enough.  Sounds like a good new year’s resolution for me for 2014!

roasted fingerling potatoes with gremolata |  pamela salzman

Roasted Fingerling Potatoes with Gremolata
Author: 
Serves: 6
 
Ingredients
  • 1 Tablespoon grated lemon zest (about 2 lemons)
  • 1 teaspoon grated orange zest (about half an orange)
  • ⅓ cup fresh parsley leaves and tender stems, finely chopped
  • 2 heaping Tablespoons fresh mint leaves, finely chopped
  • 2 teaspoons fresh thyme leaves, finely chopped
  • 1 large clove of garlic, minced or grated
  • a pinch of red pepper flakes
  • 2 pounds small fingerling potatoes, washed, dried and halved (leave whole if they are only an inch or so long)
  • 3 Tablespoons unrefined olive oil, divided
  • Sea salt and freshly ground black pepper to taste
Instructions
  1. Preheat the oven to 400 degrees.  Line a large baking sheet with unbleached parchment paper.
  2. Make the gremolata:  in a small bowl mix together the zests, herbs, garlic and red pepper flakes.  Set aside.
  3. Place the potatoes on the prepared baking sheet and toss with 2 tablespoons of olive oil.  Spread the potatoes in an even layer and sprinkle with ¾ teaspoon of sea salt and black pepper to taste.  Place in the oven for 35 minutes.
  4. After 35 minutes, remove the potatoes from the oven and add another tablespoon of olive oil and half the gremolata.  Toss until well combined.  Place back in the oven for another 10 minutes or until potatoes are tender and golden.
  5. Remove from the oven and transfer to a serving bowl.  Toss with the remaining gremolata and taste for seasoning.  Sprinkle with an extra pinch of salt and pepper, if desired.  Serve warm or at room temperature.

How to Cook and Debone a Whole Fish

whole roasted branzino | pamela salzman

You can totally do this.  The idea of roasting and deboning a whole fish sounded incredibly intimidating to me when one of my students asked me to prepare it in a class for her husband’s birthday.  She said, “the only dish I must request is whole roasted branzino — it’s my husband’s absolute favorite and I would love to know how to make it.”   “So would I!” I thought to myself.  But instead I offered with confidence, “Absolutely!  I will show you how to make the best branzino.”  My family ate branzino once a week for a month until I had it just right.

rinse fresh fish

I have taught whole roasted branzino in a few classes now, and most recently at Jenni Kayne’s house for her Holiday Class with The Chalkboard.  I wanted to post this recipe now, because Christmas Eve is around the corner and whenever I think of Christmas Eve, I think of fish. It is traditional in Italian homes to eat seven or more different types of fish on that night.  I don’t know what we’ll have this year,  but typically we start off the evening with spaghetti with clam sauce.  Then a few people in my family will make the most classic Italian Christmas Eve fish, baccalà, a dried and salted cod.  There are also usually eel, mussels, salmon, stuffed clams, shrimp and crab.  However, I will most likely never see branzino at our Christmas Eve table because it’s not something you make for a crowd, and we are a CROWD, anywhere from 60-80 people.

sprinkle inside the cavity with salt

Believe me, it’s not that roasting a whole fish is difficult.  In fact, it is just as easy, if not easier, than roasting a whole chicken.  If you can find really fresh branzino, aka Mediterranean snapper, there is very little you need to do to it for it to taste good.  Isn’t that always the way when you start with good ingredients?  But I usually make one whole fish per person and that would need to be a ginormous oven to cook 60 of these.  Besides that, most people don’t know how to debone a fish and I wouldn’t want to sit there fileting dozens of these beauties.  And therein lies the tricky part about roasting a whole fish — getting to the actual meat when there’s still a head and a tail and loads of bones in the way.  Of course, I am going to show you right here how to do this so you’ll be able to have your way with a whole fish when you go out to eat or if you have a dinner party, you can do this for your guests.

ready to be roasted

I found these beauties at my local Whole Foods for $12.49 per pound.  Look for clear, shiny eyes and glossy, not slimy skin.  It should also smell fresh like the ocean and not “fishy.”  You have every right to ask the fishmonger if you can take a sniff of the fish.  People do it all the time, and the fishmongers are used to it.  I do, however, consider this a special occasion fish, not because of the price, but because it flew first class from Greece to get to my market.  Normally I try to limit (not necessarily eliminate) imported fish given the heavier environmental impact versus those locally caught.  If you can’t find branzino in your area, walleye or another small whole fish in the 1 to 1 1/2 pound range will do.

roasted and ready to debone

A whole roasted fish stays nice and moist because of the bones and the skin, which I think also give it great flavor.  All you need is a healthy sprinkling of salt inside the cavity along with lemon slices and some fresh parsley or fennel fronds.  After you take the bones out, you can choose to leave the skin or or remove it.  A final drizzle of olive oil, a sprinkle of salt and a quick squeeze of lemon is all you need to have an amazing piece of fish.

step-by-step deboning a fish

deboning a fish

deboning a fish

just a drizzle of olive oil and a squeeze of lemon is all you need

Whole Roasted Branzino
Author: 
 
Ingredients
  • 6 1 to 1 ¼ pound whole sea bass or striped bass, scaled and gutted (you ask the fishmonger to do this for you)
  • Sea salt
  • 2 lemons, sliced into thin rounds
  • 6 sprigs of parsley or some fennel fronds + extra fennel fronds for the pan
  • Unrefined, cold pressed extra-virgin olive oil
Instructions
  1. Preheat the oven to 450 degrees. Rinse each piece of fish and pat dry with paper towels.  Arrange some fennel fronds on a parchment-lined baking sheet and place the fish on top of the fronds.   You don’t have to use fennel fronds, but I like the flavor they infuse.
  2. Season the cavity of the fish with a healthy pinch of sea salt.  Fill each cavity with some parsley or fennel fronds and 2 slices of lemon.
  3. Drizzle the fish with olive oil and sprinkle with sea salt.
  4. Roast the fish for 20 minutes.  Take a peek under the skin along the backbone.  The flesh should be opaque and not translucent.
  5. To filet the fish, use two large spoons or a large spoon and a fork and start by removing the head and the tail.  They should break off easily from the rest of the body.   Remove lemon and parsley from the cavity.  Scrape all the flabby pieces off the bottom of the fish.  Turn the fish around and run the spoon along the backbone of the fish to remove the small bones at the top.  Wedge your spoon into the middle of the fish to open up the fish so you can remove the spine.  Lift the spine from the flesh. Take the meat off the skin, if desired, and transfer to a warmed plate.  Sometimes I run my finger across the flesh to make sure I got all the bones.  Don’t worry if you missed a few, just warn your dinner companions ahead of time that you’re not an expert and that there may be a pin bone or two.
  6. Sprinkle with sea salt and drizzle with olive oil and a little more lemon if you wish.

Minted Sweet Pea Dip


minted pea dip | pamela salzman

In as much as I promote buying and preparing fresh produce, I really have no problem with using frozen sometimes.  Frozen vegetables are supposedly picked at their peak and frozen immediately, allowing less deterioration of nutrients.  I can’t, however, say the same about canned.  Thumbs down on that one.  In general, I tend to use frozen vegetables more in cooked dishes than in raw.  There are quite a few frozen vegetables which are staples in my kitchen including artichoke hearts, edamame, corn, chopped spinach and especially peas.

everything into the food processor and you're done!

Believe me, I adore fresh peas.  If they are picked off the vine and prepared right away, they can be so amazingly tender and sweet.  But if they’ve been sitting around for too long, those sugars become a little starchy.  Plus, they do take a bit of time to remove from the shell, which sadly I don’t have the leisure to do on a busy weeknight.

if you decide to grill bread, brush with a little olive oil first

Peas are a great source of protein and fiber, so I love adding them to pastas, soups, stews and grain-based dishes for a complete protein.  Peas also contain substantial amounts of many other vitamins and minerals, including Vitamins C and K, as well as Folate and Manganese.  I post the contents of my kids’ lunch boxes every Monday on Facebook, so I know many of you saw a lunch Mr. Picky made a month or so ago with frozen peas as the entrée and frozen corn as the side dish. (They defrost by lunchtime!)  That was by far the quickest healthful lunch we’ve packed all year!

grilled bread

Although fresh peas come into season in the Spring, I use frozen the whole year long.  I first taught this delicious dip in a December holiday hors d’oeuvres class, but I made it recently for a dinner and it really sang spring.  This dip is a bit like hummus, the Mediterranean dip made from pureed chickpeas, tahini (sesame paste) and garlic, although not quite as thick and rich.

light and fresh

Instead, this has such a lovely light, fresh flavor from the mint and lemon zest.  It  would be such a nice addition to your Easter festivities, whether you’re doing a brunch, lunch or dinner.  Even if you have your whole menu planned,  I bet you have almost all the ingredients to make this dip today.  Best of all, it can be made in about 5 minutes or less.  Seriously!  You can definitely serve this dip with pita chips or toast points.  But I love it with crudités like carrots or endive leaves or my favorite (and more indulgent), slices of grilled baguette.  If you have some nice Pecorino-Romano cheese, shave a little sliver onto each crostini and you will be in heaven!

a little indulgent on bread, but delicious!

I wish you all a beautiful and joyous Easter.  My husband and I were feeling brave enough to take the three kiddies to Europe again, so we’ll be in London for the next week.  I hope to post some pictures of our adventures on Facebook!  Always interested to hear about your faves and must-sees!

minted pea dip | pamela salzman

Minted Sweet Pea Dip
Author: 
 
Ingredients
  • 2 cups fresh (already shelled) or frozen green peas, defrosted (original recipe used 3 cups)
  • zest of one lemon
  • 3 Tablespoons fresh lemon juice
  • 1 small garlic clove, chopped
  • ¼ cup packed fresh mint leaves
  • 2 Tablespoons extra-virgin olive oil
  • 1-2 Tablespoons raw tahini
  • ¼ teaspoon sea salt
  • Crostini
  • French baguette, cut into ½ inch slices
  • ¼ cup extra-virgin olive oil
  • ¼ cup grated Parmesan or Pecorino cheese (optional)
Instructions
  1. If using defrosted frozen peas, skip to Step 2. If using fresh peas, fill a large bowl with ice water. Bring a pot of water to a boil, add peas and cook for 2-3 minutes. Plunge them into the ice bath to halt the cooking process. Drain well and pat dry.
  2. Place all the dip ingredients in a food processor and puree. Serve with crostini and/or raw crudités. If you assemble the dip on crostini, you can also shave pecorino or parmesan on top of each hors d’oeuvre or sprinkle grated cheese on top and drizzle a good olive oil over all of them.
Notes
Crostini Instructions:

Preheat oven to 350 degrees.  Line a baking pan with parchment paper.
Brush each side of bread with olive oil and place on pan.
Bake for 15 minutes, turning after 7 or 8 minutes.  Use immediately or store in an airtight container for several days.
Or preheat a grill over medium heat and grill the bread (brushed with a little olive oil) until slightly charred on both sides.  This only takes a couple of minutes.

Creamy, Dairy-free Asparagus Soup Recipe and Video

Creamy, Dairy-Free Asparagus Soup | Pamela Salzman
Photography by Morgan Pansing

I remember growing up in New York and feeling gipped when Spring rolled around.  Why?  Because 90% of the time it was still cold!   My parents told me that last Saturday it was snowing.  Brrrrrr!  Sort of doesn’t really match the image I used to have of spring — lying under a flowering tree, daffodils and tulips under a sunny sky.  I’d rather hunker down with a bowl of hot soup wearing a beanie and not a bonnet.

woody ends in a pot for asparagus stock

But nature is giving us some new foods to enjoy, to help us detoxify all the stuff weighing us down from winter.  I’ve been making mostly thick and hearty meal-in-a-bowl soups like lentil or mushroom-barley.  But I saw gorgeous green local asparagus at the farmer’s market the other day and jumped for joy.  And then I made asparagus soup!  Since the season is so short, I will prepare it at least once a week until I see the words “from Mexico” and then it’s adios asparagus!

a little lemon peel gives the soup a really nice bright flavor

ingredients

Believe it or not, asparagus is a total powerhouse vegetable.  It is rich in antioxidants which protect against free radical damage. Asparagus also contains high amounts of histones, folic acid, and nucleic acid, which boost the immune system.  It contains high levels of the amino acid asparagine, which serves as a natural diuretic, and increased urination not only releases fluid but helps rid the body of excess salts. This is especially beneficial for people who suffer from edema (an accumulation of fluids in the body’s tissues) and those who have high blood pressure or other heart-related diseases.  And it is a particularly rich source of glutathione, a detoxifying compound that helps break down carcinogens and other harmful compounds. This is why eating asparagus may help protect against and fight certain forms of cancer, such as bone, breast, colon, larynx and lung cancers.

looks weird, but after you puree it, it tastes delicious!

This creamy soup is so lovely and EASY.  Easy enough to make tonight on a moment’s notice and special enough to serve for your holiday luncheon or dinner.  Guess what?  Passover is next Monday night and Easter is in less than two weeks.  Time to get those menus in order!  This soup is perfect and of course, it gets its creaminess not from dairy, but from one of my favorite non-dairy tricks, oats!  Crazy, right?  You cook rolled oats with the asparagus and puree everything to a thick and silky creaminess which tastes nothing of oats and only fresh asparagus!  If you need this soup to be Passover-friendly, you can substitute 1 pound of Yukon Gold potatoes for the oats.

puree with an immersion blender or in batches in a blender

I have made this soup with all vegetable broth and it was terrific.  I tried it will all chicken stock and I thought it was a little too chicken-y.  My favorite way is with half chicken stock and half asparagus stock — amazing!  What’s asparagus stock?  You take the woody ends from the bottom of the asparagus spears and simmer them in water until you have a lovely, delicately-flavored asparagus broth.  This would also be awesome for a vegetarian asparagus risotto!  (Easy-to-follow instructions are at the bottom of the recipe.)  Happy Spring!

Creamy, Dairy-Free Asparagus Soup | Pamela Salzman

Creamy, Dairy-Free Asparagus Soup | Pamela Salzman

4.9 from 8 reviews
Creamy, Dairy-free Asparagus Soup
Author: 
Serves: 6
 
Ingredients
  • 2 Tablespoon unrefined olive oil, unsalted butter or unrefined coconut oil
  • 1 medium onion, diced
  • 4 cloves garlic, roughly chopped
  • ½ cup old fashioned rolled oats (check label for gluten-free)
  • 2 bunches of asparagus, about 2 pounds, woody ends trimmed* and stalks cut into 1-inch pieces
  • 2 cups chicken or vegetable stock, preferably homemade
  • 2 cups water (or asparagus stock – see note at bottom of recipe)
  • 1 large piece of lemon peel, about 2 inches
  • 2 teaspoons sea salt (more if you use unsalted stock)
  • Freshly ground black pepper to taste
Instructions
  1. In a medium saucepan, heat the olive oil. Add the onion and sauté over medium heat until tender and translucent, about 8 minutes.
  2. Add the garlic and cook for 2 more minutes, stirring frequently.
  3. Add the remaining ingredients to the pot. Bring soup to a boil and lower to a simmer. Cover pot and cook for 10 -15 minutes until asparagus is very tender.
  4. Turn off heat and remove the lemon peel. Or for a more assertive lemon flavor, blend the peel or half the peel with the soup. Puree the soup until smooth, either directly in the pot with an immersion blender or in batches in a blender (keep the lid open a crack.)Ideas for garnishes: steamed asparagus tips, garlic croutons, shaved Pecorino-Romano cheese or chopped chives.
Notes
*Save the ends for vegetable stock (recipe here) or boil the ends in 3 cups of water for 20-30 minutes for an asparagus stock. This should yield approximately 2 cups of asparagus stock, but measure anyway.


Creamy, Dairy-Free Asparagus Soup | Pamela Salzman

Grilled broccolini with lemon-parmesan breadcrumbs recipe

Every food magazine seems to be offering an entire grilling issue this month and for good reason.  In most parts of the country, summer is “the” season for outdoor cooking and grilling is an easy and tasty way to prepare a wide variety of foods we love.  If you’ve been hanging out at this site for a bit, you probably know that I’m not so fond of grilling animal protein too often since it can be carcinogenic.  Since this is not the case for other foods, I will, however, grill just about anything else from vegetables and fruit to potatoes and pizzas.

Although many of my students ask me for new ways to prepare chicken and fish, I tend to keep the animal protein simple and focus on interesting ways to cook my favorite food group, vegetables.  And I am always on the lookout for interesting, new vegetables to cook.  Enter broccolini!  I had never heard of broccolini until probably six or seven years ago, although it has been around since about 1998.  It is sometimes referred to as “Baby Broccoli,” “Chinese Kale” or the very appetizing name “Aspiration” (Who in the world came up with that one?  Certainly no one with picky kids.)  Broccolini is technically a hybrid between regular broccoli and Chinese kale, but it has a more tender stem and sweeter flavor than both.  Some people think it tastes like a cross between asparagus and broccoli and that seems pretty accurate to me.  However you call it, we love, love, love it!

Broccolini and all its cruciferous cousins are vegetables you want to include regularly in the meal rotation since they are nutritional powerhouses with lots of anti-cancer compounds.  We eat a lot of broccolini and broccoli, so I am all about mixing it up a bit so we don’t get bored with the same old, same old.  Broccolini is just made for the grill.  Its tender stems cook as quickly as asparagus do and the grill adds a fabulous charred flavor to the florets.  Normal broccoli tastes fabulous on the grill too, but you have to slice the thick stems in order for it to cook properly and then it looks a little awkward.

This is hardly a recipe and at its simplest you just coat the broccolini in olive oil, sprinkle them with salt and pepper and grill few minutes on each side.  The only trick is to avoid burning the florets which is possible if you just stay at the grill the whole time and don’t leave to check your email.  Done.  This is super easy for weeknights and cool enough to serve to your foodie friends.  If a simply grilled vegetable isn’t sophisticated enough for you, you can brush the cut side of a couple lemons with olive oil and grill them cut-side down for a few minutes to squeeze on the broccolini with or without a dusting of Parmesan cheese.  Or, make these ridiculously addictive Lemon-Parmesan Breadcrumbs which are so good on these broccolini as well as grilled asparagus, pasta, roasted cherry tomatoes and just about a hundred other things.  I have successfully used many different gluten-free breads to make them, used Pecorino (sheep cheese) instead of Parmesan (cow), and eliminated the cheese altogether.  I’ve heard the saying, “you can’t make everyone happy.”  I’m not so sure about that!

Grilled Broccolini with Lemon-Parmesan Breadcrumbs
Author: 
Serves: 6
 
Ingredients
  • 2 bunches broccolini, washed, dried, dry ends trimmed (about 1 pound)
  • Unrefined olive oil for drizzling the broccolini + 2 Tablespoons
  • Sea salt and freshly ground pepper to taste
  • A few slices of fresh bread or a roll, but nothing too “flavored,” hard crusts removed
  • 3 Tablespoons grated Parmesan or Pecorino-Romano cheese
  • Zest of 1 small lemon
  • 1 clove garlic, peeled and cut in half
Instructions
  1. Preheat a grill over medium heat. Too hot and the florets will burn. Not hot enough and you won’t get a char.
  2. Drizzle the broccolini with oil and toss with your hands until they’re evenly coated. (I put them on a sheet pan.) Season with salt and pepper.
  3. Make the breadcrumbs: cut the bread into cubes and place in the bowl of a food processor fitted with a metal blade. Process into crumbs. Measure 1 cup of crumbs.
  4. In a small bowl, combine crumbs with Parmesan, lemon zest and a pinch of salt.
  5. Heat 2 Tablespoons oil in a large skillet over medium heat and add the breadcrumb mixture and the garlic. Toast the breadcrumbs, stirring frequently until they start to turn golden brown, like toast. Carefully taste the breadcrumbs to make sure they’re crunchy, but don’t burn your mouth doing it. When they’re done, immediately transfer to a bowl, otherwise they’ll burn sitting in the pan. Remove garlic and discard.
  6. Place broccolini on the grill and cook until tender, but slightly charred, about 3 minutes. Flip over and cook the other side another 3 minutes. Be careful not to burn the broccolini. Place on a platter and scatter the breadcrumbs on top or serve separately.
Notes
You can skip the breadcrumbs and serve instead with lemon wedges and/or shaved or grated Parmesan.

Spinach Risotto Healthy Recipe

Spinach Risotto Recipe

I had a bad day recently and what I really wanted to do was inhale a pan of brownies, but I had just published a post about how I beat a sugar addiction and I didn’t want to be a healthy hypocrite.  Instead I set out to make a pot of spinach risotto, my culinary equivalent to a big hug.   If you’re not a spinach fan, I’m not going to be much fun for you this week and next.  We are on the verge of spring, Nature’s new year.  I really feel the resurgence of energy and life that comes back in spring and I get so motivated to start fresh, clean a closet, reorganize a drawer, set some healthful resolutions.  Nutritionally speaking, Nature wants us to start fresh, too, so she gives us lots of dark leafy greens like spinach.  If winter added a few pounds or you have a build-up of mucus or stagnant energy, leafy greens can help.  You already know that greens are super nutrient-dense, but it’s all that chlorophyll that helps the liver to detoxify.  Now if you’re in a habit of eating seasonally, you don’t even need to know this since you would make it happen naturally.

Spinach

As I mentioned in my Spinach and Avocado Smoothie recipe, you have a fantastic window of opportunity with St. Patrick’s Day coming up to make green food.  So I thought today would be a great time to post this spinach risotto recipe.  Please don’t get put off by the word “risotto.”  It doesn’t imply something hard to make, easy to screw up or super labor intensive.  In fact, risotto is something I make when I don’t have a lot of time or I need to make do with bits of this or that in the fridge.  This time around I was overzealous  with my purchase of spinach and wanted to find a good place for it.

Most people think making risotto requires a permanent spot in front of the stove and non-stop stirring.  Not so.  You do have to add a bit of broth to the pot every five minutes and give a quick stir, but you can be accomplishing other things at the same time, such as testing someone on his spelling words, prepping some vegetables, or breaking up an argument between two teenage girls over borrowing clothes.  If you don’t have the patience to be in the presence of teenage girls in the kitchen for too long to stir traditional risotto every five minutes, check out my very easy Artichoke and Spinach Barley Risotto — saute, dump and bake.  Otherwise, timing is the only tricky part since you want to serve risotto as soon as it’s done.  My first round of photos didn’t turn out all that great, so I reshot the plate about 15 minutes later and the risotto had already lost its lovely soupiness and thickened up.  Not the end of the world, of course, but I prefer risotto a little more “pourable.”

Risotto is often served as a first course for dinner, but we’re not in a habit of eating dinner in courses at our house, are you?  So I serve it as a side with other dishes that are a little lighter.  The night I photographed this, I served it with roasted shrimp and a green salad.  I very often serve fish with risotto, such as spice-rubbed or poached salmon with a fresh tomato salsa.  Steamed asparagus, roasted carrots or a grated carrot salad would also complement nicely.  If you do think you will serve this as part of a St. Patrick’s Day dinner, why not give everybody a jump start on spring cleaning and serve everything green?  Enjoy!

Spinach Risotto Recipe

5.0 from 2 reviews
Spinach Risotto
Author: 
Serves: 6 as a side dish
 
Ingredients
  • 12 ounces spinach leaves, washed
  • 3 ½ - 4 cups chicken or vegetable stock, preferably homemade
  • 2 Tablespoons unrefined, cold pressed, extra virgin olive oil or unsalted butter
  • 1 medium onion, diced
  • 3 cloves garlic, finely chopped
  • 1 ½ cups Arborio rice, do NOT rinse
  • ½ cup dry white wine
  • 1 teaspoon fine grain sea salt
  • zest of 1 lemon
  • ⅓ cup grated Parmesan or Pecorino-Romano cheese
Instructions
  1. In a wide saucepan you will use for the risotto, bring ½ an inch of water to a boil. Add the spinach leaves and cover. Steam for one minute. Stir the spinach and continue to steam until just wilted.
  2. Transfer the spinach to a blender (I pull the spinach out with tongs) and discard the cooking liquid. Puree the spinach and set aside.
  3. In a medium saucepan, bring all the stock to a boil and turn off the heat. In the same saucepan that the spinach was cooked in, warm the olive oil over medium heat. Add the onion and sauté gently until tender and translucent, about 3-4 minutes. Add the garlic and sauté for another minute or two.
  4. Add the rice to the onions and stir to coat with the oil. Set your timer for 20 minutes. Sauté rice for 2 minutes. Pour the wine into the saucepan and stir occasionally until it has been absorbed.
  5. Add the salt, zest, and 1 cup of the warmed stock and bring to a lively simmer. The pot should be simmering with active, not furious bubbles. Once the stock has almost been fully absorbed, add another ladleful or about ½ cup and stir occasionally.
  6. After 20 minutes, taste the rice for doneness. Ideally, it is still al dente.
  7. Stir in the cheese and spinach puree. Give the risotto a nice, brisk stir. Turn off the heat and allow to sit for 5 minutes. It should be loose and almost soupy. Serve immediately.