Vegan gingerbread recipe

Vegan Gingerbread | Pamela Salzman

Vegan Gingerbread | Pamela Salzman

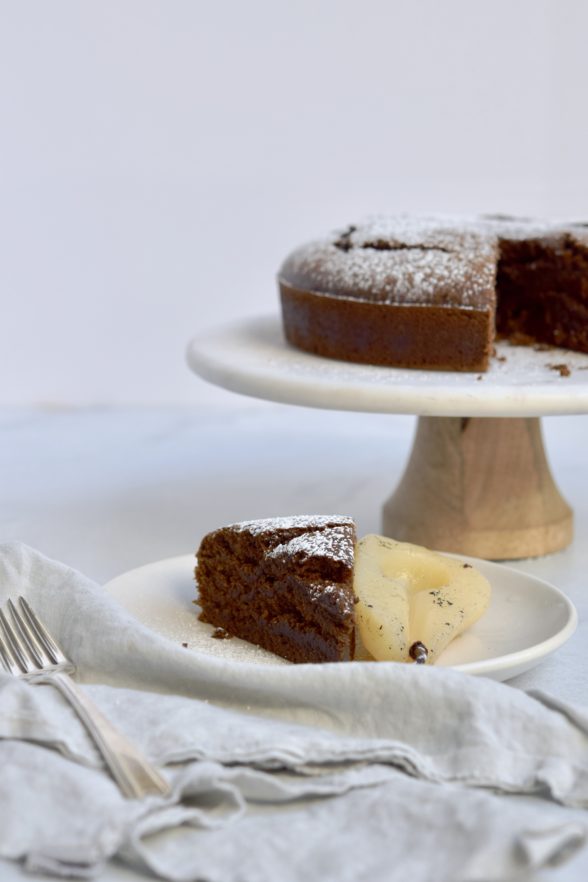
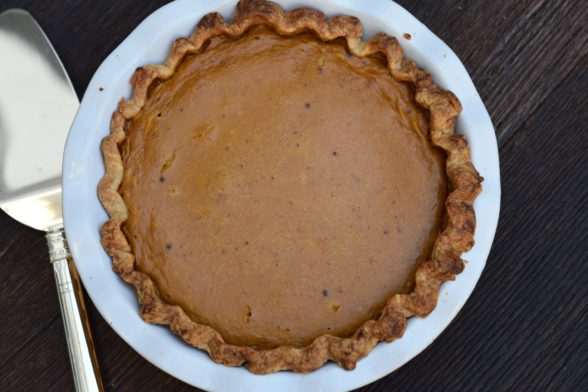
Nothing says “holiday” to me like the smell of gingerbread baking in the oven.  I am crazy about that combination of molasses and fragrant spices that are quintessential to gingerbread.  I have made lots of different baked goods with this characteristic flavor — gingerbread pancakes, waffles, cookies, biscotti, and of course, the classic gingerbread cake, my most favorite of all.  I even make a pan of gingerbread for Thanksgiving as my official signal that the holidays have begun.  But my feeling is if you’re going to make gingerbread, you really need to go for it.  I use a heavy hand with the spices, especially, you guessed it, GINGER.  This recipe, I have to admit, is DELICIOUS.  It’s exactly what I want it to be — high-quality ingredients like whole wheat pastry flour, coconut oil, maple syrup and molasses that come together to make a moist, dense, intensely flavorful cake.  Daughter #1 said to me recently, “who knew gingerbread could be this good?”  Love her.

Actually, my whole family loooves this cake, even Mr. Picky whom I have caught more than once in the last month in the pantry with the door closed sneaking extra gingerbread.  The cake always gets eaten rather quickly at our house.  In fact, I should really adapt the recipe to fit a much larger pan.  The only time my kids didn’t like this was when I used blackstrap molasses.  I wanted to see if they could taste the difference which they did and said, “no, thank you!”  Molasses is the by-product of refining sugar and is sold in grades according to how much it as been boiled.  “Blackstrap” molasses is the result of the last boiling and thus has the most intense flavor and the highest mineral content.  I figured this was a good thing, but molasses is rather bitter and blackstrap molasses is way too bitter for my kids.  So I gave up a little extra iron and potassium for “regular” unsulphured molasses that would taste good to them.

During the holidays, I’m in the business of making people happy, which in turn makes me happy.  And this gingerbread does both.  Enjoy!

vegan gingerbread recipe | pamela salzman

Vegan Gingerbread | Pamela Salzman

4.7 from 9 reviews
Vegan Gingerbread
Author: 
Serves: makes 18 muffins or 1 8x8-inch pan
 
Ingredients
  • ¾ cup unsulphured molasses (not blackstrap)
  • ¾ cup 100% pure maple syrup (Grade B is fine)
  • ½ cup unsweetened applesauce
  • ½ cup melted unrefined coconut oil or unsalted butter
  • 2 ½ cups whole wheat pastry flour or white whole wheat flour*
  • 1 ½ teaspoons baking soda
  • ½ teaspoon fine grain sea salt
  • 3 teaspoons (1 Tablespoon) ground ginger
  • 3 teaspoons (1 Tablespoon) ground cinnamon
  • ¾ teaspoon ground cloves
  • 1 cup hot water
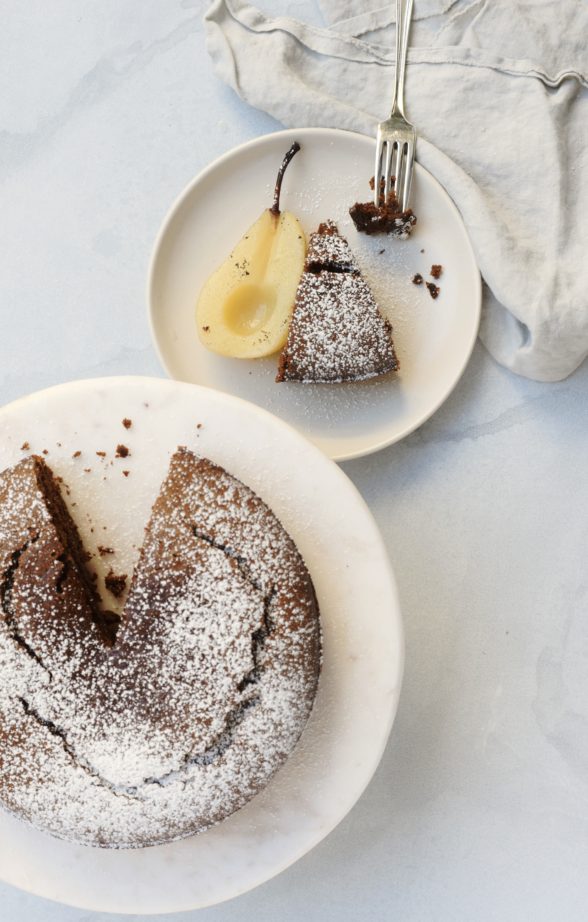
  • 1 teaspoon powdered sugar for dusting (optional)
Instructions
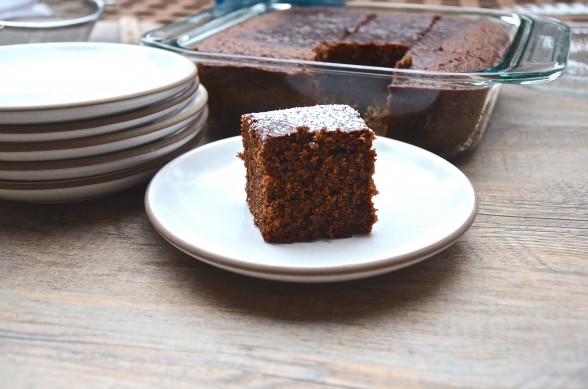
  1. Preheat the oven to 350 degrees. Line a muffin tin with paper liners or grease and flour an 8-inch square baking dish.
  2. In a blender, combine the molasses, maple syrup, applesauce and coconut oil. Blend until smooth.
  3. In a large bowl, sift together the flour, baking soda, sea salt and spices.
  4. Pour the wet ingredients into the dry and mix until just combined. Stir in the hot water. Pour into the prepared pan.
  5. Bake 20-25 minutes for muffins or 35-50 minutes (ovens vary wildly) for an 8-inch cake, until a cake tester inserted in the center comes out clean. Allow to cool before serving. Sift powdered sugar over cake, if desired.
Notes
*Gluten-free version, substitute the following for the 2 ½ cups of wheat flour:

1⅞ cups brown rice flour (measure 2 cups, then take out 2 Tablespoons)

7 Tablespoons potato starch (measure ½ cup, then take out 1 Tablespoon)

2 ½ Tablespoons tapioca flour

1 ¼ teaspoon xanthan gum

Pumpkin pie


There are very few recipes that debuted on my first Thanksgiving menu 16 years ago that are still going strong today.  Roast turkey, cranberry sauce and mashed potatoes are staples year after year, as is a traditional pumpkin pie.  Despite all my rantings about how destructive sugar is to your health,  I honestly can’t imagine Thanksgiving without pumpkin pie.  I wouldn’t even care if no one liked it, I would still make two of them.  I remember the first pumpkin pie I ever made when I was in high school.  I followed the recipe on the can of Libby’s pumpkin puree and poured it into a store-bought pie crust.  Heaven.


Since then I have adjusted the recipe to be much more wholesome, and dare I say, much more delicious.  I traded in store-bought piecrust for homemade, canned pumpkin (bye-bye BPA) for freshly roasted (hello yummy rich pumpkin flavor), refined sugar for maple syrup (and much less of it), and canned evaporated milk for heavy cream.  Sure, heavy cream is rich in saturated fat, but I would rather eat a couple of spoonfuls of a high quality organic cream than canned milk.  Would you ever drink canned milk or feed it to your kids?  I didn’t think so.  I use organic raw cream when I can get it, or I buy a nonhomogenized, but pasteurized organic cream from Straus Family Creamery.  I have made a dairy-free version of this pie using coconut milk and it’s just as delicious (it does not taste like coconut, either.)  Of course there’s still lots of butter in the crust.  Last year, I made one pie with a white flour-based crust and another with a whole wheat pastry flour-based crust.  Only my sister-in-law and I liked the whole wheat one.  As my mother-in-law says, “You two like anything that you know is good for you.”  Partially true.  This year I will go back to all white flour pie crusts and the wholesomeness comes to an end right there.

Speaking of which, I am quite conscientious about consuming very little sugar during the year, but come Thanksgiving I feel like I have earned a piece of pie (or two) and I don’t feel bad about enjoying it.  The problem comes the next day when I’m looking for that sugar fix again at 4:00 in the afternoon.  And the next day.  And the day after that.  Guess what?  I’m not alone.  Thanksgiving starts not only the beginning of the holiday season, but a time when lots of people pack on a few extra pounds from overindulging too often.  I love celebrating just as much as the next person, but I definitely don’t love trying to lose weight (it’s not as easy as it used to be!)  I look forward to Thanksgiving dinner and dessert, especially after I’ve worked so hard to make it special and delicious, but this year I’m going to be a little more mindful the next day.  At least until Christmas.


Pumpkin Pie
Author: 
Serves: makes one 9-inch pie
 
Ingredients
  • Pie Crust:
  • 1 ¼ cups unbleached all-purpose white flour or spelt flour
  • ½ teaspoon fine sea salt
  • ½ cup (1stick) cold unsalted butter, cut into 8 pieces
  • 2-4 Tablespoons ice water
  • Filling:
  • ½ teaspoon fine sea salt
  • 1 teaspoon ground cinnamon
  • ½ teaspoon ground ginger
  • ¼ teaspoon ground cloves
  • pinch of ground nutmeg
  • 1 cup heavy cream or coconut milk (not light)
  • 1¾ cups fresh or canned pumpkin puree (1 15-ounce can)
  • 3 large eggs
  • 6 Tablespoons pure maple syrup or brown sugar
Instructions
  1. Make the crust: Place the flour and salt in the bowl of a food processor fitted with the metal blade. Add the butter and pulse 10 times.
  2. Turn the food processor on and slowly pour in 2 Tablespoons ice water. Stop the machine and carefully (watch the blade!) grab a small handful of dough and squeeze it in your hand. If it holds together well, you’re done. If it’s crumbly, add another tablespoon of ice water and blend. The goal is that when you squeeze the mixture in your hand that it forms a moist, but not sticky ball of dough. Transfer the dough to a piece of parchment paper or plastic wrap and shape into a disc. Wrap well and refrigerate for at least 30 minutes.
  3. Preheat the oven to 375 degrees. On a lightly floured work surface, flour a rolling pin and roll dough into a 12-inch round. While you’re rolling out the pastry, you should always be able to move it easily around the work surface without sticking. Add additional dustings of flour as needed. Fit the circle into a 9-inch pie plate and crimp edges. Refrigerate if it feels too soft.
  4. Prick the bottom of the crust all over with a fork. Line the crust with a piece of parchment (like the one the dough was wrapped in), and fill it with pie weights or dried beans (the ones in the photo I've had since college!). Bake until lightly golden around the edges, about 20 minutes. Remove parchment and weights. Return crust to the oven and bake for another 5 minutes until light golden all over. Cool completely on a wire rack (this can take up to an hour so you may want to turn the oven off.)
  5. Preheat the oven again to 375 degrees. In a small bowl, whisk together the salt and spices (if you are using brown sugar instead of syrup, add the sugar now.)
  6. In a large bowl or with a mixer, whisk together cream, pumpkin puree, eggs and maple syrup. Add spice mixture and combine thoroughly.
  7. Pour mixture into the cooled crust and bake until filling is set (it will jiggle like gelatin, but it will be a little soft in the center), about 50-60 minutes. The filling will firm up as it cools. This can be made the day before. I like to keep it refrigerated.

Pumpkin pancakes with sauteed apples

Now that my daughters are teenagers (sigh), I encourage them to invite their girlfriends to have sleepovers at our house on the weekends.  I don’t always get my wish, but I do like having them home so I can keep an eye on everyone and then I don’t worry so much.  Not only that, but the girls’ friends give me more gossip than they do, and enquiring moms want to know!  Last weekend, my husband and Mr. Picky were away on a guy’s trip and I had 6 girls keeping me company.  I used to dread sleepovers because there would always be one early bird that would wake everyone up at 5:00 am and then you had a Miss Cranky Pants to deal with the rest of the day.  Let me tell you, some sleep mechanism kicks in when the kids hit middle school and then you can’t wake them before noon if your life depended on it.

Last Sunday, I was able to get in a workout and shower before I heard the first signs of life at 10:30 am.  Still foggy and misty out, I wanted to make a cozy breakfast for everyone.  I had cooked some fresh pumpkin puree the day before with pumpkin pancakes in mind — my absolute favorite!  Before I even got started, the 13-year-olds were mumbling something about not being hungry.  I would not be discouraged.  I noticed two sad-looking Golden Delicious apples on the counter that I knew no one would ever eat.   I decided to peel and slice those and gently saute them in a little butter while I preheated the griddle and assembled the pancake batter.

This is just a twist on the classic buttermilk pancake recipe that is a weekly staple in our house.  The pumpkin puree adds a beautiful copper color to the batter as well as a little Beta-carotene.  And then all those fantastic warming spices add the flavor that says Fall!  If you have pumpkin pie spice, I’m sure that would work fine here, too.  Just like my standard pancake recipe, you can make this batter the night before.  I have taught my girls how to cook their own pancakes, so very often I will leave the batter on the counter for them to cook with their friends at whatever time they saunter downstairs and I’m free to get my day going.

I normally just serve these pancakes with a little maple syrup or with this incredible apple cider syrup we picked up at a roadside farm in the Hamptons this summer.  The girls like to add chopped pecans to the pancakes when they’re cooking on the griddle, but the sauteed apples were a special treat and ridiculously simple to make.  When they were tender I drizzled on them the tiniest amount of syrup and a dash of cinnamon.  Crazy good!  I made a plate to photograph and then said to the girls, “Look how pretty this is.”  Their eyes bugged out and someone said, “Yum!  Like that actually looks good.”  Actually??  Like, whatever.

Pumpkin Pancakes with Sauteed Apples
Author: 
Serves: 4-5
 
Ingredients
  • 1 ½ cups whole wheat pastry flour*
  • 1 ½ teaspoons aluminum-free baking powder
  • 1 teaspoon aluminum-free baking soda
  • 1 teaspoon fine sea salt
  • 1 teaspoon ground cinnamon
  • ½ teaspoon ground ginger
  • ¼ teaspoon ground nutmeg
  • pinch of ground cloves
  • 1 ½ cups buttermilk**
  • 2 large eggs
  • ½ cup fresh or canned pumpkin puree (NOT pumpkin pie filling)
  • 1 Tablespoon pure maple syrup
  • 3 Tablespoons unsalted butter, melted
  • Coconut oil for brushing the griddle
  • Sauteed apples as accompaniment, optional:
  • 2-3 apples, peeled, cored and sliced
  • 2 Tablespoons unsalted butter or coconut oil
  • 1 teaspoon maple syrup
  • a dash of cinnamon
Instructions
  1. Preheat a griddle to 400 degrees or medium heat. (On some stovetops, 350 or 375 degrees is fine.)
  2. If you are making the sautéed apples, heat a large skillet over medium heat. Melt the butter and add the apples. Lower the heat slightly and gently sauté until tender, about 10 minutes. Drizzle with 1 teaspoon maple syrup and a dash of cinnamon and toss to combine. Remove from heat.
  3. Combine the flour, baking powder, baking soda, salt and spices in a large mixing bowl.
  4. In a blender or medium mixing bowl, combine the buttermilk, eggs, pumpkin puree, maple syrup and melted butter until well blended.
  5. Pour the wet mixture into the dry ingredients and stir until just combined.
  6. Brush the griddle with coconut oil and spoon about ¼ cup of batter onto the griddle. Add chopped pecans or walnuts to the surface, if desired. When bubbles start to form on the surface of the pancake and the edges turn slightly dry, flip it over and cook until done. Serve warm with sautéed apples or maple syrup.
Notes
To make the pancakes gluten-free, substitute 1 ½ cups of Bob’s Red Mill All-Purpose Gluten-Free Baking Mix + 1 ¼ teaspoons of xanthan gum or substitute ¾ cup brown rice or GF oat flour and ¾ cup buckwheat flour.

**You can also substitute half yogurt and half regular milk for the buttermilk. Or, use 1 ½ cups milk, omit the baking soda, and use 2 teaspoons baking powder instead.


Vegetable fried rice recipe

When parents struggle with “what to make for dinner,” one tip I like to offer is to find a dish that everyone likes to eat when you go out, and try to make it at home.  Fried rice, however, is a food that I thought I could never make at home.  I don’t know why it seemed to be out of my cooking league and only something the family could enjoy on the three annual birthday trips to Benihana.  But the last time we were there for Mr. Picky’s birthday, I watched in amazement at what it took for our chef to make fried rice — not a lot!  I could make this at home!  I took mental notes of what was used on the griddle — cold rice, beaten eggs, a few vegetables, soy sauce and a curious creamy spread our chef told me was “garlic butter.”  Hmmm…..

Before I gave this a go at home, I needed to check around a bit to see if there was anything else I needed to know.  It seems that fried rice is actually pretty straightforward provided you do one very important thing — use cold, cooked rice.  Warnings abounded wherever I turned — one can never, ever, possibly even consider making fried rice with fresh rice otherwise you will have a mushy, disastrous mess.  One thing you need to know about me is that I am a naysayer.  Oh, really?  Well I need to see it to believe it.  And I that’s how I learned….never to use fresh rice when making fried rice because I’m here to tell you that you will indeed have a mushy, disastrous mess.

Fried rice is something that was invented in order to use up leftover rice and whatever bits of vegetables and meat you have from the night before.  It is eaten as a snack in China, never as a meal.  Don’t tell my kids, because they’re getting it as an entree.  When you add scrambled eggs, peas, shiitake mushrooms and broccoli to long-grain brown rice, you have yourself plenty of protein.  I often pack this the next day in a stainless thermos for the kids’ lunch and I have enjoyed it for breakfast as well.  It is actually the perfect little meal with protein, good carbs, and some fat for stable blood sugar and long-lasting energy.

Stir-frying anything requires all your chopping to be done in advance since things move so quickly.  You can get this out of the way as early as the night before, if you want.  If you have leftover rice and all your vegetables are prepped ahead, fried rice can be cooked in minutes.  Traditionally in China, the eggs are added with the rice so that the egg coats each grain of rice.  I do it a little differently since Mr. Picky doesn’t enjoy eggs yet.  I cook the beaten eggs in ghee (a clarified butter great for higher heat cooking) first and then remove them, chop them up and add them in at the end.  That way Mr. Picky can pick out all the egg easily.

You can really add whatever vegetables you have on hand and you certainly don’t need to use as many as I do. (The vegetables above were used in fried rice I made for a class where the recipe was doubled.)  The key is to dice everything pretty small, about the size of peas, although the broccoli can be slightly larger.  That way you can stir-fry them in the wok or pan and you don’t need to blanche them in a separate saucepan.  I like washing dishes as much as Mr. Picky likes eggs.  If your picky eater won’t go for brown rice, he’ll never know it here.  The shoyu is going to change the color of the rice to brown anyway.  To make this gluten-free, substitute wheat-free tamari and you’re all set.  Vegans can drop the egg, use all sesame oil and still enjoy a high-protein dish.  Don’t forget — Chinese New Year begins on February 3rd!

5.0 from 1 reviews
Vegetable Fried Rice
Author: 
Serves: 6 as a side dish, 4 as a main
 
Ingredients
  • 2 Tablespoons ghee, divided
  • 2 large eggs, beaten
  • 1 Tablespoon toasted sesame oil, plus more for drizzling if desired
  • 1 teaspoon grated or minced peeled, fresh ginger
  • 2 garlic cloves, minced
  • 4 scallions, sliced thinly on the diagonal
  • Vegetables:
  • 1 carrot, diced
  • 1 onion, diced
  • ½ cup frozen peas, defrosted
  • Handful of shiitake mushrooms, stems removed; caps wiped clean and diced
  • 1 head broccoli, cut into very small florets and stems diced, about 2 cups
  • 4 cups COLD, COOKED brown rice, preferably long-grain
  • 2 Tablespoons shoyu or more to taste (I tend to go more)
  • Toasted sesame seeds for garnish (optional)
Instructions
  1. Heat a wok or large sauté pan over medium-high heat. Add 1 Tablespoon ghee. Scramble the eggs in the pan until cooked through. Transfer the eggs to a cutting board and set aside.
  2. Add 1 Tablespoon sesame oil and 1 Tablespoon ghee to the wok. Saute the ginger, garlic and scallions until fragrant, about 1 minute.
  3. Add the vegetables and sauté until softened. Add the rice and shoyu and toss everything around in the wok until heated through. Chop up the cooked eggs and stir into the rice. Taste for seasoning and add additional shoyu or sesame oil, if desired. Sprinkle with sesame seeds for fun!
Notes
If you are using leftover cooked vegetables or meat, dice them up and add with the rice.

I shared this recipe with Healthy Child, Healthy World!