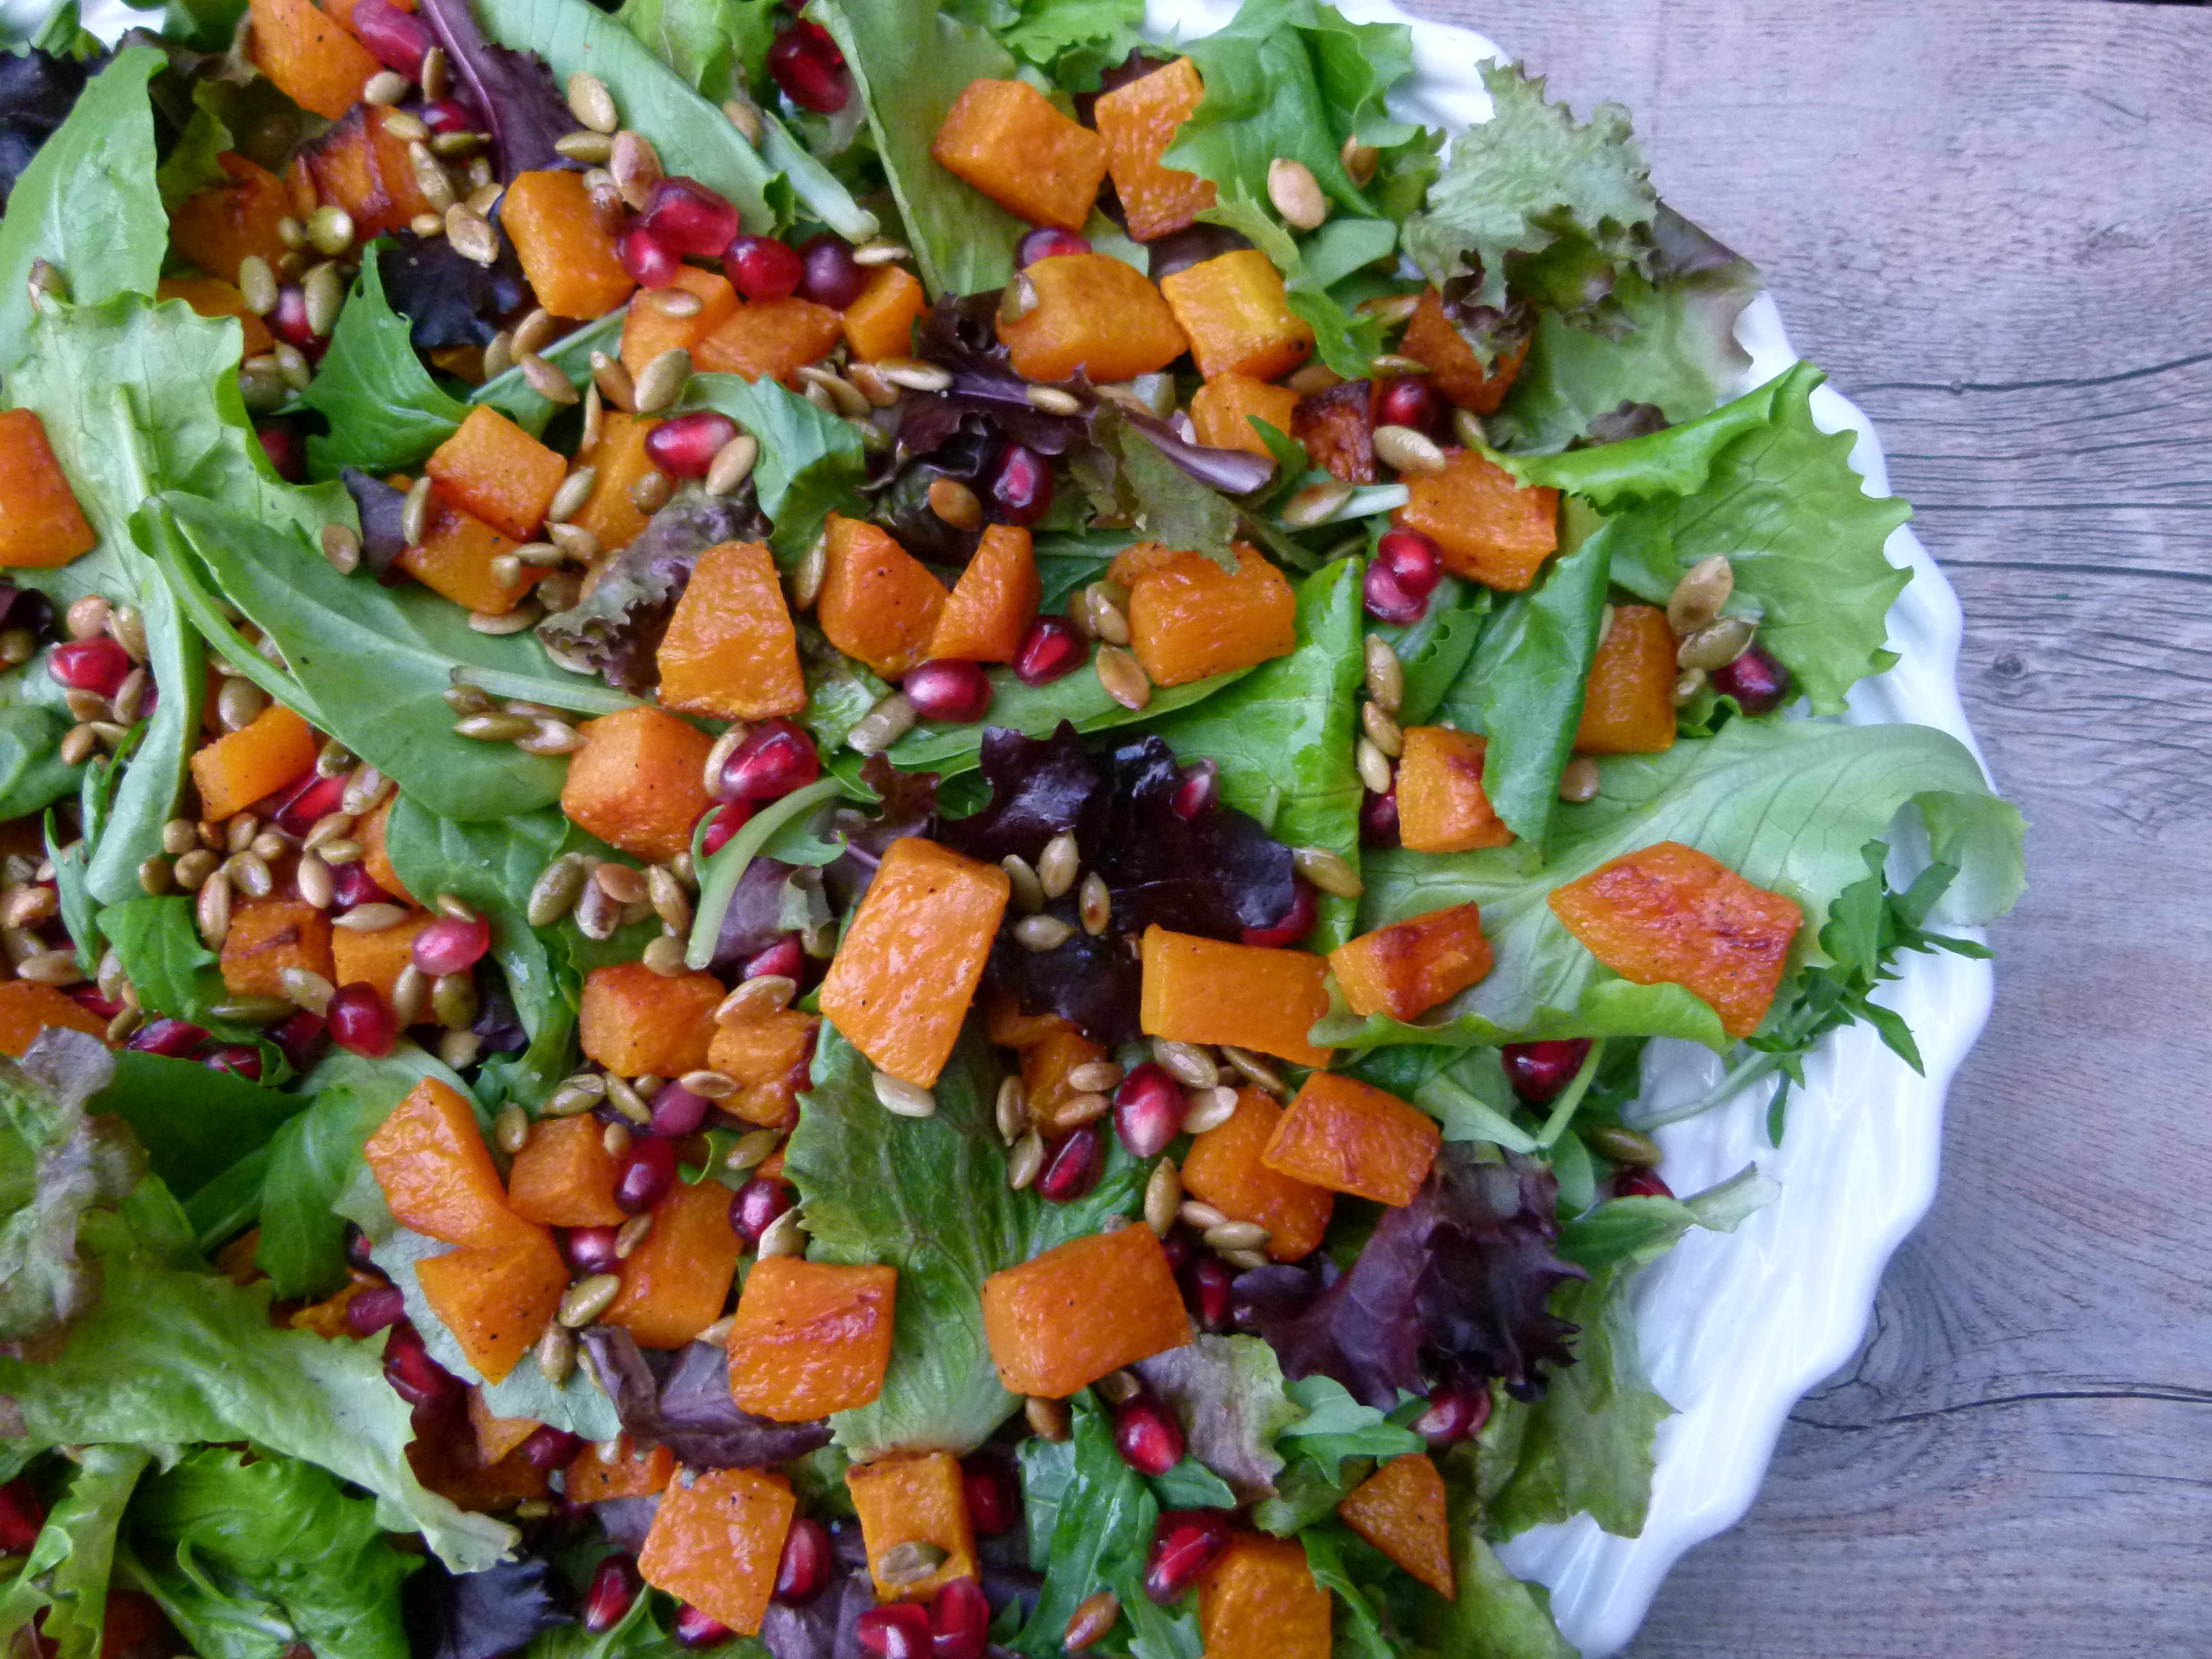
Mini-empanadas with mixed greens

Well, like it or not, it’s officially holiday season!  Even though there’s so much to love about the holidays, I just wish it didn’t all happen at once.  Do you ever have that feeling?  But one thing I truly look forward to is getting together with friends for a good, old-fashioned cocktail party, provided I get invited to one.  I love mingling and chatting with lots of different people and eating fun little noshes at my leisure.  However, if you ask me, I do think there’s a little room for improvement in the hors d’oeuvres arena.  (Maybe that’s why I don’t get invited to too many parties.)  You know what I mean, right?   Lots of baked brie with chutney, sad-looking crudite with not-homemade hummus, or tomato-basil bruschetta…in the winter!  We’re going to step it up a notch today, folks.  You need to bring an hors d’oeuvre to a party either this weekend or next, correct?  Although I have several fab party recipes on the site already, these empanadas are tied for my favorite with the Zucchini-Gruyere Tart, which is a winner every time.

Empanadas are these delicious little savory hand pies.    It’s almost like a small tart that has been folded over.  Whereas there are infinite fillings you can use, empanada pastry dough is usually stuffed with seasoned ground beef and fried.  We’re not doing any of that.  When I noticed a recipe for empanadas in Deborah Madison’s Vegetarian Cooking for Everyone using leafy greens and olives, I knew I had to try them.  I have tweaked the recipe over the years to make it simpler and sometimes I add finely diced precooked turkey sausage to the greens — delicious, I tell you.  My kids are crazy for them and I really don’t think they even know what they’re eating.

After my last class the Friday before Thanksgiving when I thought I might collapse, I realized that two months ago I had volunteered my house for a pot luck dinner the NEXT night because, you know, it seemed like a bonehead  good idea at the time.  Well, what was a good idea was that I offered to do a turkey since I would have a leftover demo bird from Friday’s class as well as an hors d’oeuvre, knowing full well that I could make these scrumptious little empanaditas in October and freeze them.

Daughter #1 and I had fun making them one afternoon when she had a day off from school.  You don’t have to make the pastry from scratch like I did.  I have seen prepared empanada pastry rounds in specialty markets, or you can cut out rounds from pie crusts.  But if you have ever made cut-out cookies, you can do this.  I normally just roll out the little rounds and leave them with imperfect edges, but I was surprised that my daughter wanted to take the time to use round cookie cutters to make them “prettier.”  If you don’t want or need to freeze the empanadas, you can roll out the rounds the day before and keep them well-covered.  You can also make your filling in advance and then assemble the empanadas before you bake them.  Let me just tell you right now, you should make these whether you’re party-bound or not and freeze them for a rainy day.  My kids will pull them out of the freezer and pop them into the toaster oven for an after school snack or to eat with a bowl of soup on the weekend.  You can even stick them in a lunchbox!  Do my good ideas ever end?  Can you tell I’ve had too much green tea today?!


Mini-Empanadas with Mixed Greens
Author: 
Serves: makes 24 mini-empanadas
 
Ingredients
  • Empanada Dough:
  • 3 ¾ cups all-purpose flour (you can sub out ½ cup with whole wheat pastry)
  • ¾ teaspoon fine grain sea salt
  • 1 Tablespoon granulated sugar
  • 2 sticks + 2 Tablespoons cold unsalted butter, cut into pieces
  • ½ cup + 2 Tablespoons ice water
  • Filling:
  • 2 Tablespoons unrefined, cold-pressed extra virgin olive oil or ghee
  • 1 small onion, finely diced
  • 2 garlic cloves, finely chopped
  • ¼ cup chopped fresh parsley
  • ¼ teaspoon red pepper flakes
  • 12 cups mixed chopped greens such as Swiss chard, beet greens, kale, spinach, and/or escarole
  • ⅔ cup shredded fontina cheese (optional)
  • Sea salt and freshly ground black pepper to taste
  • 1 beaten egg + 1 Tablespoon milk
Instructions
  1. Make the dough: In the bowl of a food processor fitted with the metal blade, combine the flour, salt and sugar. Add the butter and pulse until the butter is in pea-sized pieces. With the machine running, slowly add the water through the feed tube and pulse until a ball of dough comes together.
  2. Transfer the dough to a piece of parchment paper or plastic wrap. Use your hands to pat the dough into a disk. Wrap the dough with the parchment (or plastic wrap) and refrigerate for at least 1 hour.
  3. Divide the dough into 24 pieces: first cut 8 equal wedges, like a pizza. Then cut each wedge into three pieces. Roll each piece into a 4-inch circle. Transfer to a sheet pan and refrigerate.
  4. Preheat the oven to 375 degrees. Make the filling: Heat oil or ghee in a large skillet over medium heat and add the onion, garlic, parsley and red pepper flakes. Saute until the onion is tender, about 4 minutes. Add the greens and sea salt and pepper to taste and cook until softened, about 8 minutes, stirring occasionally. If there’s a lot of moisture, drain some of the liquid.
  5. Add the cheese to the greens and taste for seasoning. Allow to cool slightly before filling the pastry.
  6. Place a spoonful of filling on the lower half of each dough circle, then fold the pastry over and seal the edges with the tines of a fork. Brush with the beaten egg and milk mixture. Bake for 20-25 minutes or until browned. (If you are baking these directly from the freezer, bake an additional 10-15 minutes.) Serve warm or at room temperature.
Notes
If you would like to add some precooked turkey sausage to the filling, take 4 (about 12 ounces) and diced them up. Add them to the pan with the onion, etc. Reduce the greens to 10 cups.

If you have a few tablespoons of leftover filling, save it the next day for an omelet. Yum!


Rustic butternut squash soup with fennel and wild rice

One way that I have learned how to be a more confident cook is by identifying certain “formula” recipes and then just changing the ingredients around to come up with something that seems like a different recipe. One day last year after I was bored with making Mushroom and Barley Soup for the umpteenth time, I changed a few ingredients based on what I had in the fridge and voila!  A new soup was born.  After a weekend of over-indulging (I keep leaving the house just before 4:00 when I know the craving for pumpkin pie will hit), this is exactly the kind of thing I want to eat.   It is light, but filling and very satisfying.  A bonus is that it is awesome with turkey stock, which I have loads of right now.  The kids are also happy to have this soup in their thermoses at school for a nourishing lunch, especially if I toss in a little shredded leftover turkey.


You can use any vegetables or grains you want or even substitute white beans or chickpeas, but one of my rules for a good diet is variety.  The day I made up this soup, I poked around the pantry and found a lonely bag of wild rice that I hadn’t said hello to in a while.  Funny thing about wild rice is that it’s actually not a rice at all, but really a grass.  And most of the wild rice that we find in our local markets is not really “wild,” but cultivated.  I love it all the same.   (Not) wild (not) rice is an absolutely delicious and nutritious whole food that you probably never eat.  It is nutty and almost smoky-sweet with a great chewy texture.  Wild rice is extremely high in folic acid (an essential B-complex vitamin lacking in many people’s diets), potassium and fiber.  Plus, that dramatic black color provides some powerful phytonutrients that aren’t easy to come by in nature.

Although this recipe came about as a pleasant surprise (just like my third child!), it has since become a regular in my repertoire.  Some things in life are just meant to be.

5.0 from 1 reviews
Rustic Butternut Squash Soup with Fennel and Wild Rice
Author: 
Serves: 6-8
 
Ingredients
  • 1 Tablespoon unrefined, cold-pressed extra-virgin olive oil
  • 1 Tablespoon unsalted butter (or use all oil)
  • 1 onion, chopped
  • 1 garlic clove, chopped
  • 1 carrot, chopped
  • 1 celery stalk, chopped
  • 2 fennel bulbs, trimmed and chopped
  • 3 sprigs of fresh thyme
  • 1 cup wild rice (or whole grain of choice -- adjust cooking time accordingly)
  • 2 teaspoons sea salt (double this if using unsalted stock) + more to taste
  • 1 teaspoon freshly ground black pepper
  • 8 cups vegetable, chicken or turkey stock (preferably homemade)
  • 1 medium butternut squash, peeled and chopped (about 5 cups)
  • a few green leafies, such as Swiss chard, coarsely chopped (if using chard, chop stems and keep separate from leaves)
  • 1-2 Tablespoons apple cider vinegar, to taste (optional)
Instructions
  1. In a large stockpot, melt the oil and butter over medium heat. Add onion, garlic, carrot, celery, and fennel (add chopped chard stems, if using.) Sauté until vegetables are tender, about 8 minutes.
  2. Stir in the thyme, rice, stock, salt and pepper. Bring to a boil, partially cover and reduce heat. Simmer for 25 minutes.
  3. Stir in butternut squash, cover slightly and simmer for an additional 25-30 minutes or until squash is tender. Add chopped greens and stir until wilted.
  4. Taste for seasoning and garnish with fennel fronds, if desired. If you like a little acidity, add a few drops of apple cider vinegar. (I think the soup is better with the vinegar.)


Turkey Stock

Ahhhhh, the day after.  I hope you had a lovely holiday.  Ours was everything I hoped it would be — lots of happy people in the house and no major disasters in the kitchen.  The best thing I did this year was have everyone sign up for three tasks on the pre-Thanksgiving schedule.  It was actually very fun working in the kitchen with the kids and my husband.  I did have to let the girls listen to their music however, so now I have the first two verses  of “Super Bass” down pat, but apparently I do not have moves like Jagger.  It’s so important for kids to learn basic cooking skills when they’re young.  It will serve them well later.  Maybe they won’t turn out like my darling husband who when asked to peel four carrots, responded “what do you mean by that?”

Our big feast, however, has made me not want to cook another thing until Sunday, at the earliest.  No one is even permitted to utter the words “What’s for…?”  I’m off duty until further notice.  So I’m still in my pajamas (it doesn’t matter what time you’re reading this, I’ll still be in my pajamas), about to start my holiday shopping online while 2 large stockpots of turkey broth simmer away.  Ok,  I lied.  I’m not cooking another thing, except turkey stock.

By now you know I am obsessed with homemade stocks.  True, all that straining and stock pot-washing is a bit of a pain, but the reward is so worth it.  You literally cannot buy stock that equals homemade, although I hear that one of my local markets, Bristol Farms, sells a homemade stock and it is about $7/pint or something absurd.  On a day like today, when I am hanging around the house, it is no work at all to stick some turkey carcasses and a bunch of bones in a big pot with water and some vegetables.  What I love about making stock from a leftover Thanksgiving turkey is that there is almost nothing to do — very little skimming before the liquid comes to a boil and hardly any fat that rises to the surface the next day.  You can basically use it right away and mine is well seasoned since I dry rubbed my turkeys with salt.

I will make a nice pot of chunky butternut squash and fennel soup with wild rice tomorrow.  Oh, you’d like the recipe?  If you promise to give it a try, I’ll post it on Tuesday.  But the broth also comes in handy when we reheat leftovers tonight.  I don’t use a microwave, so my preferred method of reheating food is in a covered saucepan with a little stock or water.  I’ll freeze the rest and pull it out for turkey and vegetable soup or if one of the kids comes home from school with a scratchy throat.  In which case I’ll heat it up and hand out mugs of broth like medicine.  For now, today is my day to rest and restore my energy for the month ahead, because moms like me have no time to come down with a scratchy throat.

5.0 from 1 reviews
Turkey Stock
Author: 
Serves: makes about 4 quarts, depending on the size of your stockpot
 
Ingredients
  • 1 leftover turkey carcass + any leftover bones or wings
  • 2 onions, peeled and quartered
  • 3 carrots, halved
  • 3 stalks of celery, halved
  • 1 Tablespoon apple cider vinegar
  • 5-7 quarts of water (this depends on the size of your pot)
Instructions
  1. Remove any meat still left on the turkey and discard anything you stuffed in the cavity. Place the turkey carcass and bones in a large stockpot with COLD water. I just fill the pot to about 2 inches below the rim. You can break the carcass up to fit the pot, if necessary.
  2. Put the heat on high and bring to a boil. Immediately lower the heat to the gentlest simmer and skim any foam that surfaces.
  3. Add the vegetables and apple cider vinegar and continue to simmer, partially covered for about 2-5 hours (or as long as you have.)
  4. Strain the stock (use a fine mesh sieve to make it very clear) into a large bowl or individual containers and cool before refrigerating. Keeps in the refrigerator 3-4 days or frozen up to 3 months.


Cranberry Sauce with Apples and Raspberries

Cranberry Sauce with Apples and Raspberries | Pamela Salzman
Photo by Carley Rudd

I use a cranberry sauce recipe for Thanksgiving that has been in my family longer than I have.  My aunt received the recipe over 40 years ago from a colleague in New Jersey, who received it from someone who lived in her apartment building in New York City.  I have loved this cranberry sauce for as long as I can remember.  It makes no sense to me why I ever tried other recipes since this one is everything a cranberry sauce should be — uncomplicated, tart, slightly sweet, chunky and fresh.  My kids eat it in a bowl with a spoon, on top of oatmeal, pancakes, or French toast, or swirled into plain yogurt.  And of course, it’s divine on turkey or a turkey sandwich.

The original recipe shows its age a bit since it calls for 1 pound of fresh cranberries, because Ocean Spray used to make their bags in 1-pound sizes.  Now they’re 12 ounces.  The recipe also calls for frozen raspberries instead of fresh because I don’t think you could possibly get fresh raspberries in November 40 years ago.  I have made my own small changes, but it still tastes just as delicious.  I couldn’t help trying to cut back on the sugar a bit by substituting apple juice for water and reducing the quantity of sugar.  And this year I used sucanat in place of granulated sugar and no one could tell the difference.  My aunt’s recipe originally called for “chopped pecans to taste” which I have never put in simply because when I first started making the cranberry sauce, pecans were out of my budget.  So I’ve left them out all these years and I can’t say I miss them.

One thing that has never changed is that I make the cranberry sauce every year the Sunday before Thanksgiving because my aunt does, too.  We call each other on Sunday morning.  In fact, I just got off the phone with her.  “Are you chopping apples?”  “I sure am!”  I make enough for our Thanksgiving dinner with a little for leftovers (two times the recipe.)  But my aunt makes vats of it and then drives around town delivering jars of cranberry sauce to all of her lucky friends.  Our conversation cracked me up this year as she informed me she found BPA-free plastic containers for her sauce and this year she went organic with all the fruit.  I think she’s been reading my blog.  Although when I mentioned the sucanat to her, she said “don’t push it.”

Happy Thanksgiving to you all!


View this post on Instagram


A post shared by Pamela Salzman (@pamelasalzman)


5.0 from 2 reviews
Cranberry Sauce with Apples and Raspberries
Author: 
Serves: makes about 5 cups
 
Ingredients
  • ½ cup granulated sugar, coconut sugar, maple sugar, or sucanat (you can add more if you like it sweeter)
  • 1 cup unsweetened apple juice
  • 1 pound fresh cranberries, washed and picked through for bruised ones
  • 1 10-ounce bag of unsweetened frozen raspberries or 10 ounces fresh raspberries
  • 2 apples* (any variety is fine), peeled and diced (same size as a cranberry)
  • chopped pecans to taste (optional)
Instructions
  1. In a large saucepan, combine the sugar or sucanat and apple juice and bring to a boil. Add cranberries, cover and boil until berries pop, about 5-8 minutes.
  2. Add raspberries and stir.
  3. Add apples and cook 1 minute.
  4. Add chopped nuts if desired.
  5. Cool to room temperature and refrigerate.
Notes
*This will thicken as it cools and the apples will turn red. The more tart the apples, the more pectin and the thicker the sauce will get.

Good idea to make this the Sunday before Thanksgiving!


Traditional roast turkey with gravy

My husband and I offered to host Thanksgiving at our new home a few months after we were married in 1995.  We were young and naive, but we were excited to play house with all our new china and crystal.  To prepare for the big day, my husband bought the firewood and I did absolutely everything else.  (You can see who was the naive one.)  I’ll never forget when he suggested I call the local Koo Koo Roo to order a cooked turkey for Thanksgiving dinner, “you know, just so we’re sure it’s good.”  I was slightly insulted at the suggestion, but I knew where he was coming from.  I had never cooked an entire turkey before and I was a bit intimidated.  For most people, the turkey is the centerpiece of the Thanksgiving meal.  If I screwed it up, I thought, the holiday would be a disaster.  So my plan was simple —  don’t screw up the turkey.

I called people I trusted — my mother, my mother-in-law and my aunt.  You know what they say about asking people’s advice.  I got three different opinions on how to cook a turkey which taught me that there’s no one right way to do this.  However in the years that followed I learned that there is more than one way to mess it up.  I’ve had my share of mishaps, which only reinforced to me that no matter what goes wrong, you’ve just got to roll with it because there’s usually a solution.  Like in 1996 when I carved into the turkey and it was rather raw undercooked in the center.  So we just cut it into slices and pan-sauteed them with a little stock.  Everyone complimented me on how moist the turkey was!  Funny enough, my worst disaster came last year when I was really feeling like a pro, having cooked so many Thanksgiving dinners for my family and taught so many of the same classes.  I had my two beautiful turkeys in the garage refrigerator and in the process of transferring 2 pans of stuffing the night before, I was distracted and inadvertently left the garage refrigerator door open.  All night.  When I came down the stairs in the morning and noticed one pan of stuffing still on the countertop, I knew what I did.  My garage is usually about 80 degrees and so were the turkeys.  I sat down and wondered if I had just ruined Thanksgiving.  That’s what you get for being so smug, I thought.  Instead I sent my husband to Whole Foods at 7:00 am where he was able to buy two 17-pound already brined turkeys.  Thanksgiving was saved, although a little saltier than I would have liked.  But you also know what they say about beggars.

Here’s what I’ve learned about turning out a fabulous turkey:

  • Before seasoning, check both the neck and main cavities to remove extra turkey parts like the neck and giblets.
  • Season it well and as early (like 2-3 days before) as possible for the best flavor and a very moist turkey;  I use about 1 Tablespoon kosher salt per 5 pounds of turkey.  See below for where to distribute the salt.
  • Pull the turkey out of the refrigerator a minimum of 1 hour and maximum of 2 hours before roasting.  Your bird will cook more evenly, especially in the center.
  • The heat in most ovens comes from the top, so roast your turkey on the lowest oven rack to protect the breast meat from drying out.
  • If you decide to baste, do so very quickly so the oven door isn’t opened for more than 30 seconds.
  • Use an instant read thermometer to determine if your turkey is properly cooked.  Do not rely on a timer!
  • Start testing earlier than you think you should.  Every oven is different and I’m noticing that the free-range birds are cooking more quickly than not free-range.
Turkey Weight Approximate Roasting Time
10 to 12 lb. 2 1/2 to 3 hours
12 to 14 lb. 2 3/4 to 3 1/4 hours
14 to 16 lb. 3 to 3 3/4 hours
16 to 18 lb. 3 1/4 to 4 hours
18 to 20 lb. 3 1/2 to 4 1/4 hours
20+ lb. 3 3/4 to 4 1/2 hours


Ironically, Koo Koo Roo went out of business years ago, but my kitchen is still open and bustling on Thanksgiving and my husband thinks I make the best turkey in town.


Traditional Roast Turkey with Gravy
Author: 
Serves: 10-12
 
Ingredients
  • 12-14 pound fresh turkey, giblet bag and neck removed, rinsed, patted dry and seasoned with 3 Tablespoons* kosher salt as soon as you bring it home from the market (2-3 days in advance is best)
  • *2 Tablespoons in the cavity, 2 teaspoons on breast and 2 teaspoons on thighs and legs. Whatever is left on your hands, rub on the breast meat underneath the skin.
  • freshly ground black pepper
  • 1 onion, quartered
  • 1 celery stalk, cut into thirds
  • small bunch of parsley sprigs, thyme sprigs and/or sage leaves
  • 1 lemon, quartered
  • 1 apple, quartered or cores from 2 apples
  • 6 Tablespoons unsalted butter, melted
  • 1-2 cups stock or water
  • Gravy
  • ¼ cup white wine
  • 5 Tablespoons all-purpose flour
  • 3 cups chicken or turkey stock, preferably homemade
  • sea salt and freshly ground black pepper to taste
Instructions
  1. The day of roasting, take turkey out of refrigerator and wipe dry with paper towels. Bring to room temperature, about 60-90 minutes.
  2. Preheat oven to 425 degrees. Position a rack in the lowest rung of the oven. Oil a V-shaped rack in a roasting pan.
  3. Sprinkle a little freshly ground black pepper in the cavity and then add in the onion, celery, herbs, lemon and apple. Truss the turkey by tying the legs together. Brush the skin all over with some of the butter.
  4. Place the turkey on the rack in the pan, breast-side down. Bend the wing tips behind the back. Roast for 40 minutes, basting with butter after 20 minutes. Reduce the heat to 325 degrees, turn breast side up (I usually wear clean rubber gloves to do this) and add 1 cup stock or water to the roasting pan. Continue to roast, basting with the remaining butter until used up and then with the pan juices every 20-30 minutes. Add additional stock to the roasting pan if you notice there are no pan juices with which to baste the turkey.
  5. Roast until golden and cooked through. After about 2 ½ hours, start testing for doneness by inserting an instant-read thermometer in the thickest part of the breast away from the bone; it should register 165-170 degrees. You may also test the thigh – it should read 180 degrees. The turkey should roast a total of about 3 hours or 13-15 minutes per pound, but it can range from 2 ½ to 3 ½ hours.
  6. Transfer to a cutting board or warmed platter and cover loosely with aluminum foil until ready to carve, at least 20 minutes (I prefer longer.) Use the pan juices to make gravy.
  7. To prepare the gravy: Pour all the pan juices, including the fat into a gravy separator. Allow the fat to separate from the juices.
  8. Heat the roasting over medium heat on the stove and add the pan juices plus the apple brandy. Bring to a boil and lower heat to a simmer for 2-3 minutes, stirring with a wooden spoon to dislodge any brown bits that stick to the bottom of the pan. Strain into a bowl or you can use the gravy separator again.
  9. In a saucepan over medium heat, warm the reserved fat from the gravy separator until it is bubbly. You should have at least 3-4 Tablespoons. If you don’t, add some olive oil or butter. Add the flour and whisk rapidly to cook the flour, about 2-3 minutes.
  10. Whisk in the strained pan juices and 3 cups of stock to the saucepan until smooth. Bring to simmer and cook until thickened, about 5 minutes. Season to taste with salt and pepper. Keep warm on lowest heat. Add additional stock as needed to achieve desired consistency.


To carve:

Follow the same principles in carving a whole roasted chicken.  Cut into the joints, in between the connecting bones and it will be a breeze.  I carve in this order:

  1. Wings
  2. Drumsticks
  3. Thighs
  4. Breasts, which I take completely off the turkey and slice crosswise against the grain.

Don’t forget to save the carcass and bones for stock!

Brussels Sprouts with (Turkey) Bacon and Dates

My husband and I used to go out to dinner much more than we do now.  When the kids would to go to bed at 7:00 pm, it was a lot easier to tuck them in, leave them with a babysitter after they were asleep and still manage to have dinner out at a reasonable hour.  Well, (bed)times have changed and so has my desire to out to restaurants.  Call me a party pooper, but I’d much rather enjoy a simple meal at home with a few good friends and end the evening with a competitive game of Sequence or Bananagrams.  Can you imagine how much fun I’m going to be when I’m 60?

I do have a few favorite restaurants, though, one of which is the wildly popular, (but not in a cheesy LA-way) Gjelina in Venice, California.  It’s earthy, rustic, but still sophisticated and there’s kale on the menu in three or four different dishes.  And most importantly, they make it all taste divine in a way that I can’t.  Last year, I had these incredible char-grilled Brussels sprouts with bacon and dates that I became obsessed with.  I literally dreamt about them and all that sweet, salty, lightly charred goodness.  I was incredibly excited when my friend Laura had her birthday dinner there a few months later and I was able to enjoy the Brussels sprouts again.  But unfortunately, Gjelina is not the type of restaurant which gives out its recipes.  I knew some version of these sprouts had to be on our Thanksgiving table last year, so I set out to make my version of the dish, which I like just as much and it doesn’t cost me $8/serving.

What’s funny about my obsession with Brussels sprouts is that I despised them as a child most likely because my mother bought them frozen and then boiled the life out of them.  But if you can roast them or sear them in a pan and cook them until they’re tender, they are just amazing.  Brussels sprouts are also incredibly good for you, as are all the cruciferous vegetables.  They contain loads of fiber, folate, potassium, Vitamin C and some very powerful anti-cancer sulfur compounds.  And if Brussels sprouts’ nutritional profile doesn’t impress you, the green color adds some vitality to a normally very beige Thanksgiving spread.

These Brussels sprouts are fabulous and will have an encore appearance at our Thanksgiving buffet this year, although it’s not the best dish to make for an enormous crowd (more than 25 or so.)  Last year I had three large skillets going on the stovetop and I don’t think I could have wedged in another.  I pull the turkeys out of the oven to rest for about 30-40 minutes and start my gravy right away since that can sit on the stove on low heat while I tend to the salads and vegetables in the remaining 20 to 30 minutes or so.  If you would like to make this to bring to someone else’s house, do ask your host if he or she can accommodate your making this on the spot.  Otherwise, you can make it before you leave your house and reheat it gently just before dinner with a few tablespoons of stock.  Of course, these Brussels sprouts are no one-hit wonder.  They’re easy enough to make any night of the week, which you’ll just have to do since Gjelina was crazy enough to take them off the menu!

Brussels Sprouts with (Turkey) Bacon and Dates
Author: 
Serves: 6, depending on how many other sides you are serving
 
Ingredients
  • 2 Tablespoons unrefined, cold-pressed extra-virgin olive oil
  • 2 Tablespoons unsalted butter
  • 1 ½ pounds medium Brussels sprouts, ends trimmed and halved
  • 4 ounces nitrate-free turkey bacon, chopped (optional)
  • 1 large shallot, finely diced
  • 1 garlic clove, minced
  • 4-6 large, pitted dates, chopped (they’re much easier to cut when cold)
  • 2 Tablespoons balsamic vinegar
  • ½ cup chicken or vegetable stock
  • Sea salt and freshly ground black pepper
Instructions
  1. Heat a large skillet (12-14 -inch is good) over medium high heat. Add olive oil and butter.
  2. Make sure you are wearing an apron so any splattering doesn’t mess up your outfit. When butter is melted, add Brussels sprouts cut side down and season them with 1 teaspoon sea salt and a few grinds of black pepper. Allow the sprouts to brown without burning and then turn to brown on the other side. Lower the heat to medium and cook the sprouts another 3-4 minutes, until they soften slightly.
  3. Move the sprouts to one side of the pan and add the diced turkey bacon to the pan and cook for 3-4 minutes until it starts to crisp around the edges.
  4. Stir in the shallots, garlic and dates and cook another minute or so until the shallots are tender.
  5. Pour in the balsamic vinegar to deglaze any brown bits on the bottom of the pan. Add the chicken stock and cook until just a glaze remains. Taste for salt and pepper. Serve immediately.
Notes
Do ahead: Wash, dry, trim and halve the Brussels sprouts the day before and keep refrigerated.

You can dice your bacon, shallot, garlic and dates the day before, too, but I usually do this about an hour before I start the recipe.

If you must make this ahead, reheat gently with an extra few tablespoons of stock.

Butternut squash salad with pomegranates and toasted pumpkin seeds

butternut squash salad with pomegranates and pumpkin seeds | pamela salzman

Although I love planning and cooking the whole Thanksgiving meal, a few years ago I decided I was just plain bored with the same old same old.  The problem was that no one else was.  My family and regular Thanksgiving guests wanted no deviation from tradition.  I hinted at the notion that maybe, perhaps I would replace the standard stuffing with a fabulous grain-based recipe I had been testing.  A rebellion!!!  Oh, come on people.  Like you need more bread?  Fine, the stuffing stays.  But that didn’t prevent me from trying to show everyone how overly starchy Thanksgiving is.  So I asked, “Can we do away with the mashed potatoes or make them more interesting with some roasted garlic or cauliflower puree?”  I’m sure you can guess how that went.


Someone asked me the other day what is my favorite part of the Thanksgiving meal.  I’ll give you three seconds to guess.  Okay, time’s up.  The vegetables!  Too obvious, I know.  Actually, it’s really the salad that is the highlight of the meal for me because I can change it up every year and it’s the only way I get to have any fun at all.  The beautiful colors of the vegetables do a lot to balance out all that beige, not to mention balance out all the carbs.  I also love eating something raw with all that cooked food.  But from a logistical perspective, salads can be made without the use of a stove or oven, which is a saving grace on Thanksgiving.  And, as if it couldn’t get any better, salads, for the most part, can be prepped in advance.

This butternut squash salad is something I made for Thanksgiving a few years ago and I still make it often for entertaining or for potlucks during the fall.  It’s beautiful, healthful, delicious and showcases the season’s great produce.  I have a theory that fruits and vegetables that grow during the same season usually complement each other very well.

On that note, there aren’t too many fall salads that wouldn’t be more fabulous with the addition of a handful of pomegranate seeds.  In fact, I think every Thanksgiving salad I’ve made in the last 8 years has had pomegranate seeds scattered throughout.  My kids and I are obsessed with them.  It was a happy day in our house the day I came home from the farmer’s market with the first pomegranates of the season.  I’ve even taught my kids how to seed them — Mr. Picky, who is a Virgo, is rather meticulous about getting every last seed out.  We open the pomegranates under water and gently push the seeds away from the peel.  It’s actually quite therapeutic, but more importantly, it keeps me from making a trip to the dry cleaner.  Also, people tell me that the already seeded pomegranates always seem a bit soggy.  They’re certainly much more expensive and why would you pay your grocery store a premium when you’ve got kids to do the job?

butternut squash salad with pomegranates and toasted pumpkin seeds | pamela salzman

butternut squash salad with pomegranates and toasted pumpkin seeds | pamela salzman

5.0 from 1 reviews
Butternut Squash Salad with Pomegranates and Toasted Pumpkin Seeds
Author: 
Serves: 6-8
 
Ingredients
  • ⅓ cup raw hulled pumpkin seeds (pepitas) or chopped pecans
  • 3 Tablespoons unrefined, cold-pressed extra-virgin olive oil or unrefined melted coconut oil + 1 teaspoon olive oil for the pumpkin seeds
  • 1 3-pound butternut squash, peeled, seeded and cut into ¾ -inch dice
  • 1 Tablespoon fresh thyme leaves or 2 teaspoons chopped fresh rosemary (I accidentally left it out in this picture.)
  • 1 ½ teaspoons sea salt
  • freshly ground black pepper to taste
  • 8 ounces mixed baby greens
  • ½ cup fresh pomegranate seeds
  • Dressing:
  • 2 Tablespoons fresh lemon juice
  • 2 Tablespoons fresh pomegranate juice (or orange juice)
  • ½ teaspoon sea salt
  • A few twists of freshly ground black pepper
  • 2 teaspoons minced shallot
  • 2 teaspoons maple syrup or raw honey
  • 6-7 Tablespoons cup unrefined, cold-pressed extra-virgin olive oil
Instructions
  1. Preheat oven to 400 degrees.
  2. Place the pumpkin seeds in a skillet and toast over low heat until lightly browned. Drizzle with 1 teaspoon olive oil and a pinch of sea salt. Remove from heat and set aside. Try not to eat them all while you’re cooking everything else.
  3. Toss the squash with thyme and olive oil or coconut oil and place on 2 baking sheets. Season with sea salt and pepper. Roast for 35-40 minutes, turning once until tender and caramelized.
  4. For the dressing: in a small bowl combine lemon juice, pomegranate juice, shallot, maple syrup, sea salt and pepper. Whisk in olive oil until emulsified.
  5. Place salad greens on a platter and toss with enough dressing to coat lightly. Separately drizzle the butternut squash with some dressing and add to the greens. Sprinkle with the pomegranate seeds and pumpkin seeds. Taste for salt and pepper.
Notes
Dressing can be made a few days ahead and kept refrigerated.

Pumpkin seeds can be toasted the day before.

Salad greens can be washed and dried a few days in advance and rolled up in a damp kitchen towel or plastic bag and kept in the refrigerator.

Butternut squash can be cut up the day before and kept refrigerated.

Pomegranate can be seeded several days in advance and kept refrigerated.


Pumpkin pie


There are very few recipes that debuted on my first Thanksgiving menu 16 years ago that are still going strong today.  Roast turkey, cranberry sauce and mashed potatoes are staples year after year, as is a traditional pumpkin pie.  Despite all my rantings about how destructive sugar is to your health,  I honestly can’t imagine Thanksgiving without pumpkin pie.  I wouldn’t even care if no one liked it, I would still make two of them.  I remember the first pumpkin pie I ever made when I was in high school.  I followed the recipe on the can of Libby’s pumpkin puree and poured it into a store-bought pie crust.  Heaven.


Since then I have adjusted the recipe to be much more wholesome, and dare I say, much more delicious.  I traded in store-bought piecrust for homemade, canned pumpkin (bye-bye BPA) for freshly roasted (hello yummy rich pumpkin flavor), refined sugar for maple syrup (and much less of it), and canned evaporated milk for heavy cream.  Sure, heavy cream is rich in saturated fat, but I would rather eat a couple of spoonfuls of a high quality organic cream than canned milk.  Would you ever drink canned milk or feed it to your kids?  I didn’t think so.  I use organic raw cream when I can get it, or I buy a nonhomogenized, but pasteurized organic cream from Straus Family Creamery.  I have made a dairy-free version of this pie using coconut milk and it’s just as delicious (it does not taste like coconut, either.)  Of course there’s still lots of butter in the crust.  Last year, I made one pie with a white flour-based crust and another with a whole wheat pastry flour-based crust.  Only my sister-in-law and I liked the whole wheat one.  As my mother-in-law says, “You two like anything that you know is good for you.”  Partially true.  This year I will go back to all white flour pie crusts and the wholesomeness comes to an end right there.

Speaking of which, I am quite conscientious about consuming very little sugar during the year, but come Thanksgiving I feel like I have earned a piece of pie (or two) and I don’t feel bad about enjoying it.  The problem comes the next day when I’m looking for that sugar fix again at 4:00 in the afternoon.  And the next day.  And the day after that.  Guess what?  I’m not alone.  Thanksgiving starts not only the beginning of the holiday season, but a time when lots of people pack on a few extra pounds from overindulging too often.  I love celebrating just as much as the next person, but I definitely don’t love trying to lose weight (it’s not as easy as it used to be!)  I look forward to Thanksgiving dinner and dessert, especially after I’ve worked so hard to make it special and delicious, but this year I’m going to be a little more mindful the next day.  At least until Christmas.


Pumpkin Pie
Author: 
Serves: makes one 9-inch pie
 
Ingredients
  • Pie Crust:
  • 1 ¼ cups unbleached all-purpose white flour or spelt flour
  • ½ teaspoon fine sea salt
  • ½ cup (1stick) cold unsalted butter, cut into 8 pieces
  • 2-4 Tablespoons ice water
  • Filling:
  • ½ teaspoon fine sea salt
  • 1 teaspoon ground cinnamon
  • ½ teaspoon ground ginger
  • ¼ teaspoon ground cloves
  • pinch of ground nutmeg
  • 1 cup heavy cream or coconut milk (not light)
  • 1¾ cups fresh or canned pumpkin puree (1 15-ounce can)
  • 3 large eggs
  • 6 Tablespoons pure maple syrup or brown sugar
Instructions
  1. Make the crust: Place the flour and salt in the bowl of a food processor fitted with the metal blade. Add the butter and pulse 10 times.
  2. Turn the food processor on and slowly pour in 2 Tablespoons ice water. Stop the machine and carefully (watch the blade!) grab a small handful of dough and squeeze it in your hand. If it holds together well, you’re done. If it’s crumbly, add another tablespoon of ice water and blend. The goal is that when you squeeze the mixture in your hand that it forms a moist, but not sticky ball of dough. Transfer the dough to a piece of parchment paper or plastic wrap and shape into a disc. Wrap well and refrigerate for at least 30 minutes.
  3. Preheat the oven to 375 degrees. On a lightly floured work surface, flour a rolling pin and roll dough into a 12-inch round. While you’re rolling out the pastry, you should always be able to move it easily around the work surface without sticking. Add additional dustings of flour as needed. Fit the circle into a 9-inch pie plate and crimp edges. Refrigerate if it feels too soft.
  4. Prick the bottom of the crust all over with a fork. Line the crust with a piece of parchment (like the one the dough was wrapped in), and fill it with pie weights or dried beans (the ones in the photo I've had since college!). Bake until lightly golden around the edges, about 20 minutes. Remove parchment and weights. Return crust to the oven and bake for another 5 minutes until light golden all over. Cool completely on a wire rack (this can take up to an hour so you may want to turn the oven off.)
  5. Preheat the oven again to 375 degrees. In a small bowl, whisk together the salt and spices (if you are using brown sugar instead of syrup, add the sugar now.)
  6. In a large bowl or with a mixer, whisk together cream, pumpkin puree, eggs and maple syrup. Add spice mixture and combine thoroughly.
  7. Pour mixture into the cooled crust and bake until filling is set (it will jiggle like gelatin, but it will be a little soft in the center), about 50-60 minutes. The filling will firm up as it cools. This can be made the day before. I like to keep it refrigerated.