Gingerbread Trifle with Poached Pears Recipe

gingerbread trifle with poached pears | pamela salzman

One of my favorite smells is gingerbread baking in the oven.  That warm, spicy fragrance which reminds me of decorating cookies for Christmas as a child and cozying up in front of the fire with some tea and a moist chunk of gingerbread. My kids love it, too.  Over the last few years, I’ve taught four gingerbread-ish recipes in my classes from Molasses Ginger Cookies and Gingerbread Biscotti to Vegan Gingerbread and Gingerbread Cut-out Cookies.  Last year, I pulled out all the stops with this Gingerbread Trifle.  I have to say, this is my favorite one.  This trifle is a bit of a show-off dessert, but it’s just about the prettiest presentation and the flavors are WOW!

making the poached pears

making homemade pudding

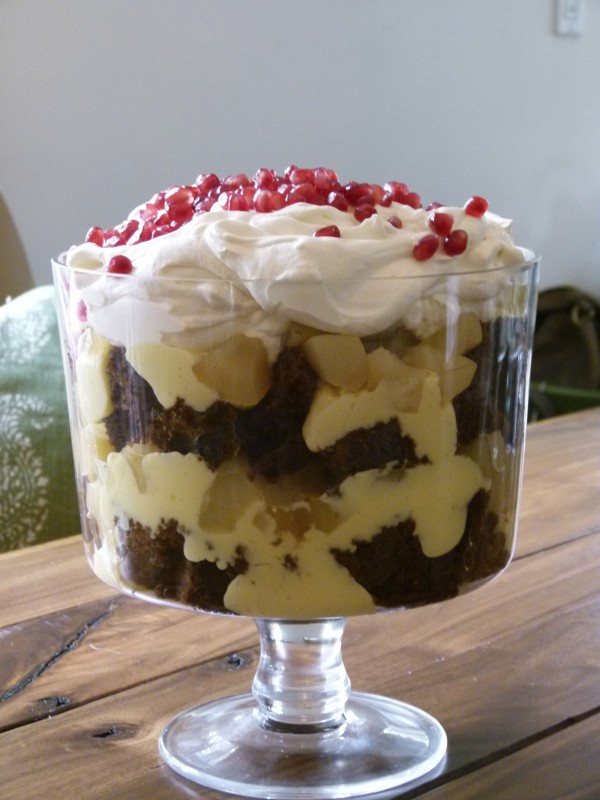
A trifle is a dessert made of layers of cake, custard, fruit and sometimes liqueur.  It is usually assembled in a glass trifle dish which has high sides so you see all the beautiful layers.  Very dramatic!  But you can make infinite combinations of the ingredients.  The cake can be yellow cake, sponge cake, angel food cake, pumpkin bread and so forth.  The cream can be whipped cream, curd, pudding or custard.  The fruit can be peaches, berries, pears, cranberry sauce and so on.  It’s best to keep the fruit seasonal, though.  I bought my trifle dish a few years ago at Crate and Barrel, but I don’t think they sell it anymore.  A similar one can be found at Williams-Sonoma or amazon.  Amazon also has this other one, which is slightly different, but very pretty too.  Truth be told, any glass bowl would be fine, as would individual glass cups, mason jars or stemless wine glasses like I did at Jenni Kayne’s house last year for her Christmas class with vogue.com.  How darling are these??

assembling trifle

gingerbread trifle with poached pears | pamela salzman

Don’t look at the recipe just yet because it’s like 3 pages long.  BUT — that’s if you want to make every single component from scratch.  I did teach my students how to do it all homemade, of course.  But seriously you could buy it all and not even need a recipe to make the most gorgeous, delicious trifle.  You can obviously buy gingerbread cake or make it from a mix.  Click here for my vegan gingerbread recipe with step-by-step photos.  You can buy vanilla pudding or make a fast whipped cream.  And you can buy canned pears.  I know, I know.  Canned pears?!!  I personally wouldn’t buy canned fruit (lots of lost nutrition there and not into cans lined with BPA,) but I also know how stressful the holidays are and if that’s what you have to do, then by all means do it.  But if I can encourage you to try one or more of these components from scratch, I will tell you they can all be made 1-2 days in advance and then you’re just assembling the dessert without a care in the world.  And this recipe for poached pears is BEYOND delicious!  You will not get anything as good canned.  Just saying.

gingerbread trifle with poached pears | pamela salzman

I think this is the perfect dessert for Christmas and/or New Years and everything in between.  I actually made it last year for Thanksgiving and not a morsel was left.  You can get your kids to help you assemble this because it’s the easiest thing in the world to layer and kids love patterns, as in A-B-C-A-B-C.  Once you fall in love with this dessert, I know you will start dreaming about the next holiday for which can make a trifle!

gingerbread trifle with poached pears | pamela salzman

Gingerbread Trifle with Poached Pears
Author: 
Serves: 8-10
 
Ingredients
  • For an 8 x 8 pan of gingerbread:
  • ¾ cup unsulphured molasses (not blackstrap)
  • ¾ cup 100% pure maple syrup (Grade B is fine)
  • ½ cup unsweetened applesauce
  • ½ cup melted unrefined coconut oil or unsalted butter
  • 2 ½ cups whole wheat pastry flour or white whole wheat flour*
  • 1 ½ teaspoons aluminum-free baking soda
  • ½ teaspoon fine grain sea salt
  • 3 teaspoons (1 Tablespoon) ground ginger
  • 3 teaspoons (1 Tablespoon) ground cinnamon
  • ¾ teaspoon ground cloves
  • 1 cup hot water
  • For the Pastry Cream (or you can make or buy pudding):
  • ½ cup cane sugar
  • 6 large egg yolks
  • 6 Tablespoons non-gmo corn starch
  • 2 ½ cups whole milk
  • 1 vanilla bean, split lengthwise or 1 teaspoon pure vanilla extract or vanilla bean paste
  • 2 Tablespoon unsalted butter, at room temperature
  • For the Poached Pears:
  • 1 (750-ml) bottle white wine, such as Riesling or Viognier
  • 1 cup water
  • ¾ cup cane sugar
  • 1 whole vanilla bean, split and scraped
  • 1 whole clove
  • 1 cinnamon stick
  • 1 star anise
  • 6 firm Bartlett, Anjou or Bosc pears, peeled, halved and cored
  • For the Whipped Cream:
  • 1 ½ cups heavy cream
  • 2 Tablespoons cane sugar or powdered sugar
  • ½ teaspoon pure vanilla extract
  • 1 cup pomegranate seeds (click here for my favorite method of de-seeding a pomegranate)
Instructions
  1. To make the gingerbread:  preheat the oven to 350 degrees and grease and flour an 8-inch square baking dish.
  2. In a blender, combine the molasses, maple syrup, applesauce and coconut oil.  Blend until smooth.
  3. In a large bowl, whisk together the flour, baking soda, sea salt and spices.
  4. Pour the wet ingredients into the dry and mix until just combined.  Stir in the hot water.  Pour into the prepared pan.
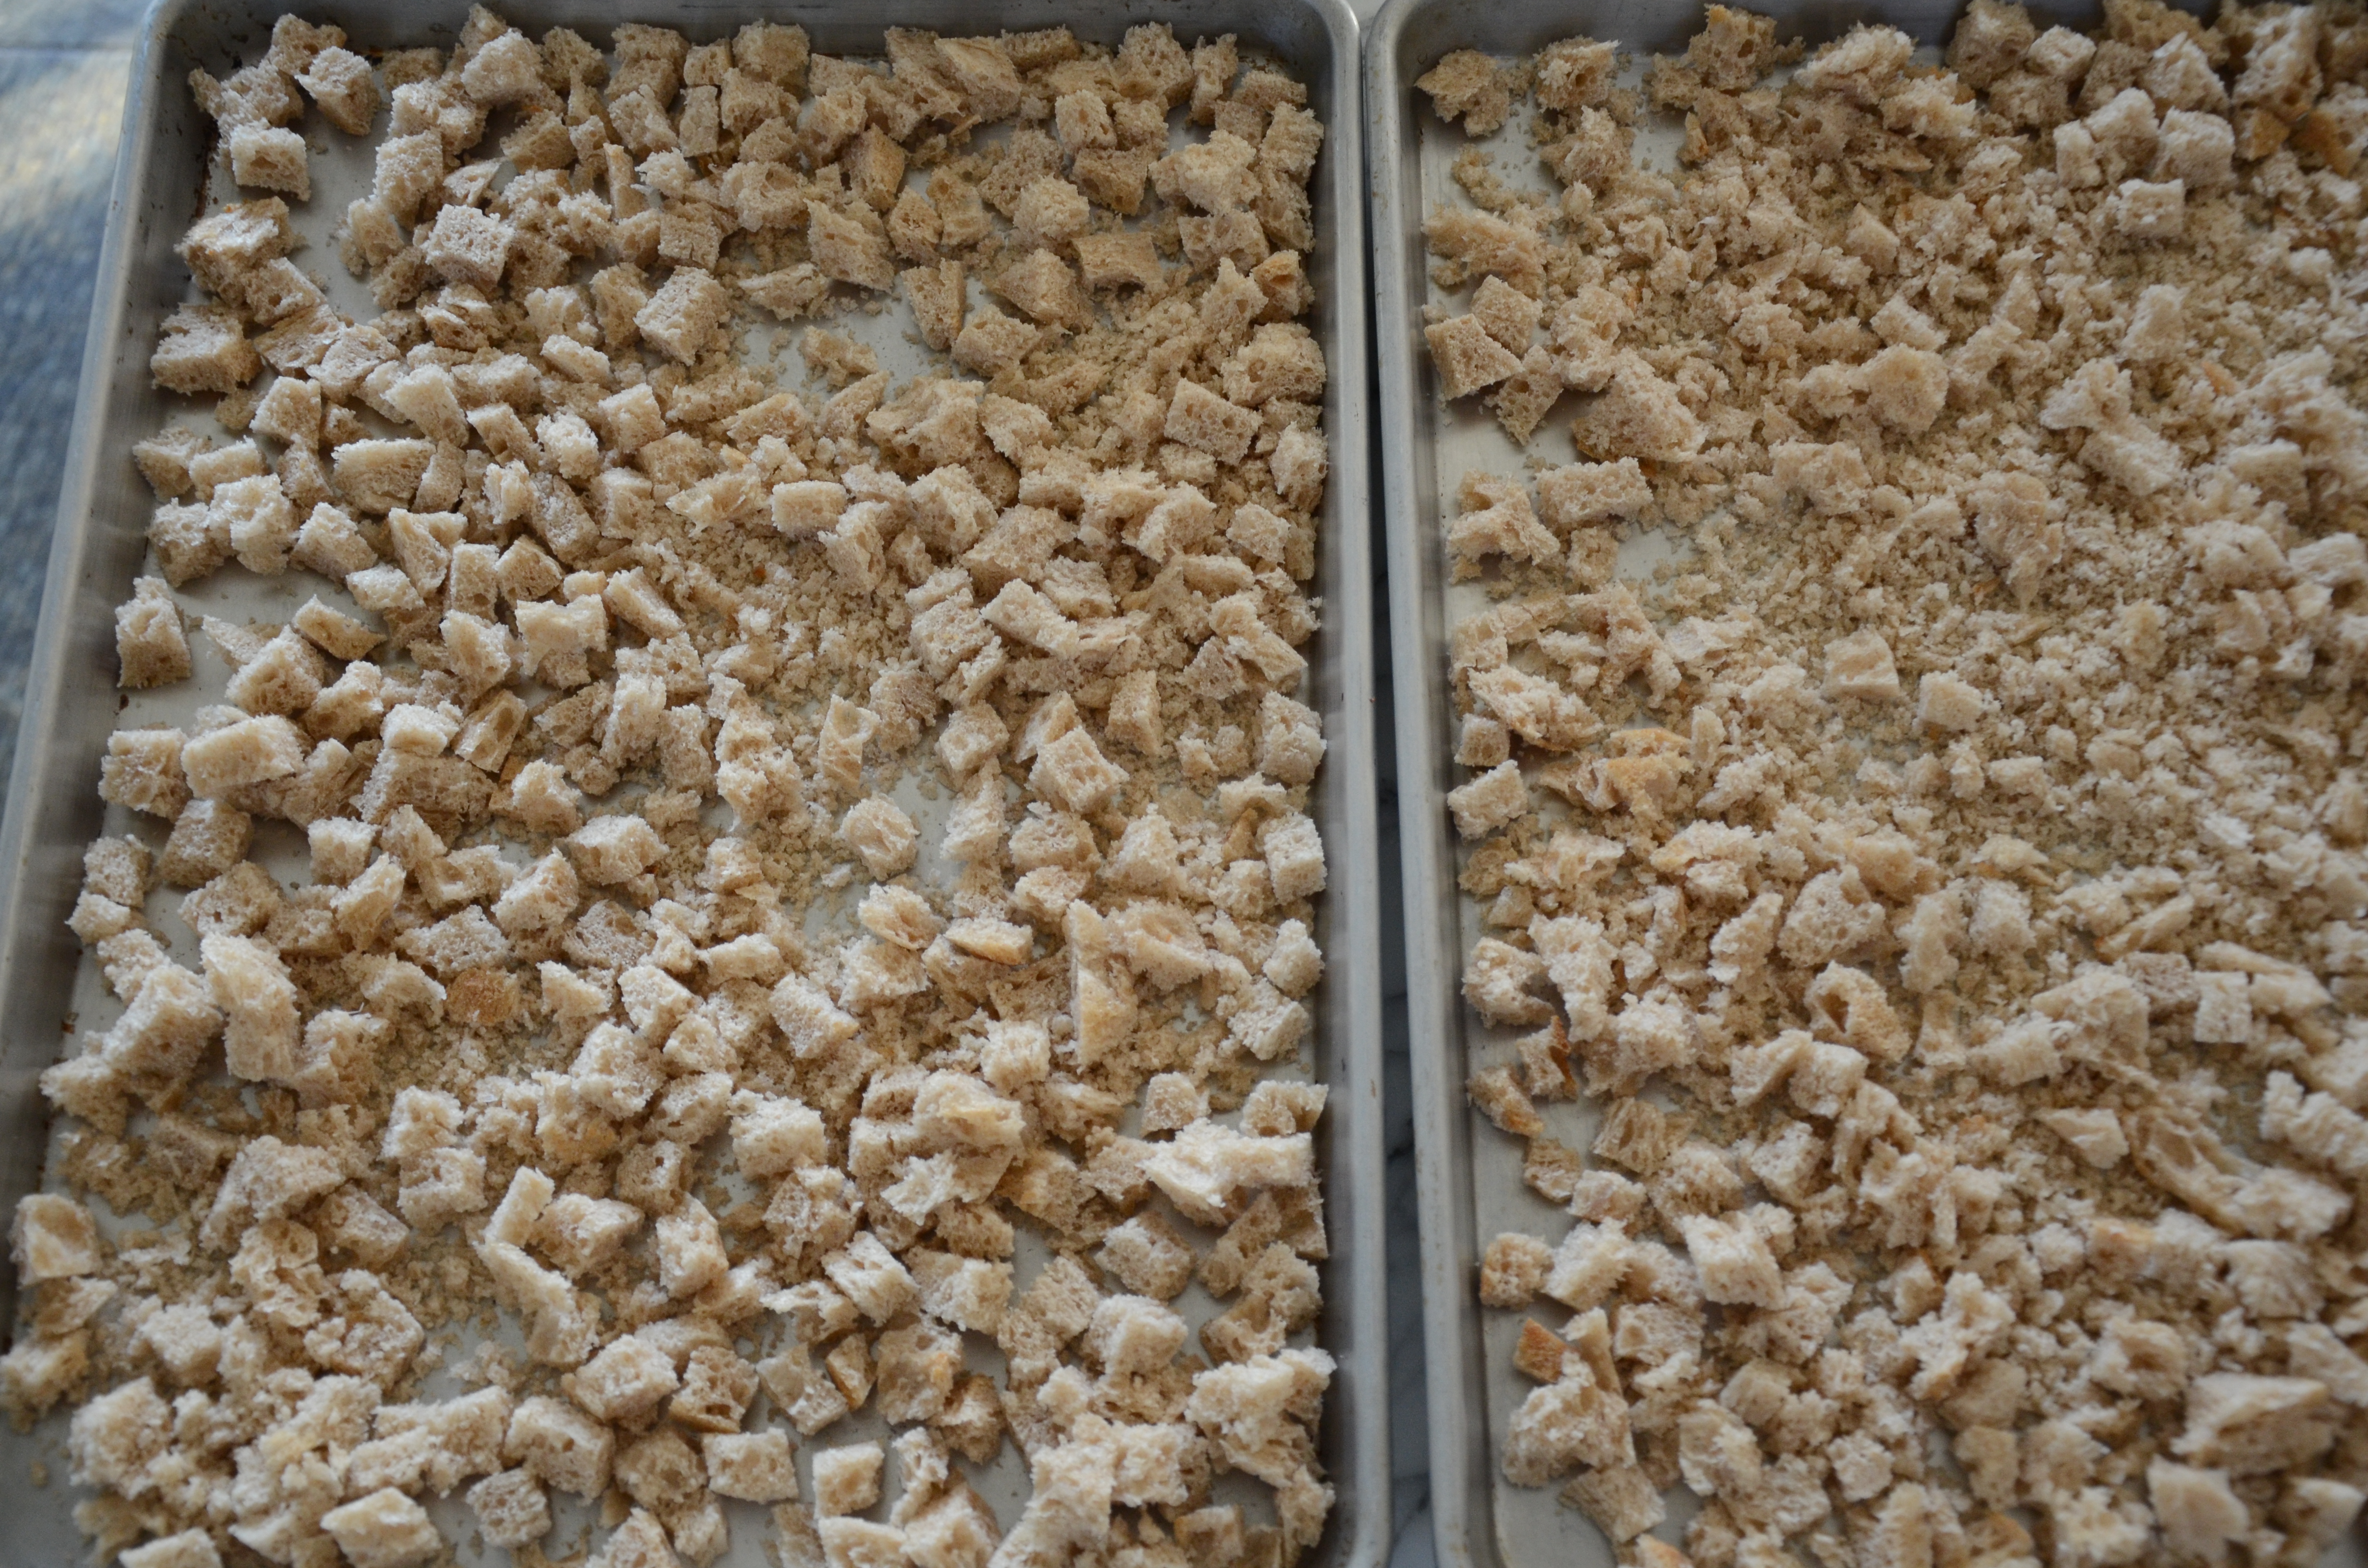
  5. Bake 45-55 minutes (ovens vary wildly) until a cake tester inserted in the center comes out clean.  Cool for 15 minutes, remove from pan and place on wire rack and allow to cool completely. You can freeze this or make this several days ahead.  Cut into ½ –inch cubes and set aside.
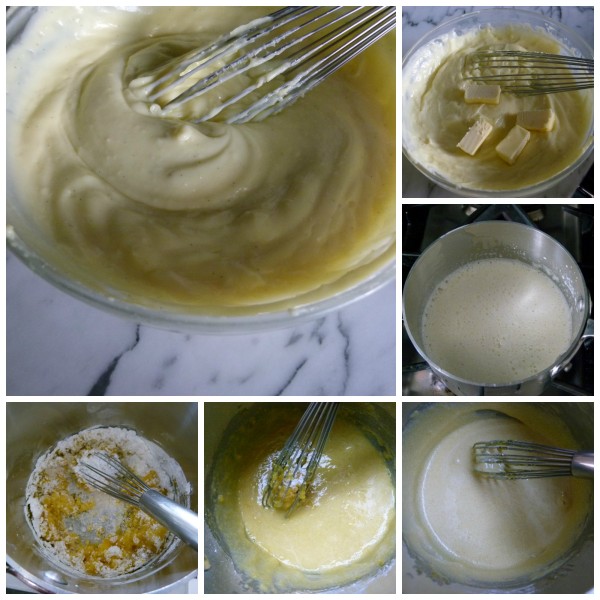
  6. To make the pastry cream:  in a medium saucepan whisk the sugar, egg yolks and cornstarch together until thick and pale.
  7. Meanwhile, in a small saucepan over medium heat bring the milk and vanilla bean (if using) just to a boil (just until milk starts to foam up). Remove from heat and add about ½ cup slowly to egg mixture, whisking constantly to prevent curdling (if you get a few pieces of egg (curdling) in the mixture, pour through a strainer).                                                                               –continued-
  8. If using vanilla bean, remove from mixture and scrape out seeds and add the seeds to the egg mixture.
  9. Pour the remaining milk into the egg mixture, whisking constantly.  Bring the egg-milk mixture to a boil over medium heat whisking constantly. When it boils, whisk mixture constantly for another 30-60 seconds until it becomes thick. Remove from heat and whisk in vanilla extract if you are using that instead of the bean.  Immediately transfer the pastry cream to a clean bowl, whisk in the butter and allow to cool on the countertop for a few minutes.
  10. Press a piece of plastic wrap directly on the cream to prevent a skin from forming.  Refrigerate.  You can make this up to 2 days in advance.
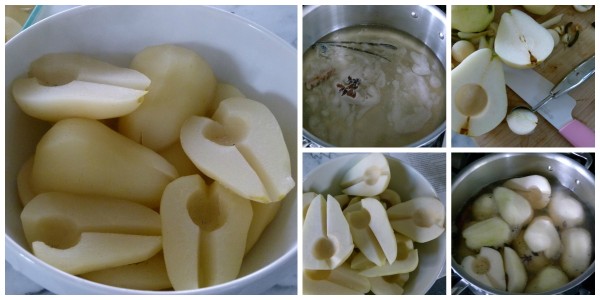
  11. To poach the pears: place the white wine, water, sugar, scraped vanilla beans, vanilla pod, clove, cinnamon and star anise into a saucepan large enough to hold all the pears. Bring to a boil, stirring to dissolve the sugar.
  12. Decrease the heat to medium low and place the pears into the liquid.  Cover and cook for 20-25 minutes or until tender and easily pierced with a knife. Remove the pears from the liquid and chop into ½-inch pieces.
  13. Remove the vanilla bean from the saucepan, increase the heat to high and reduce the syrup to approximately 1 cup of liquid, approximately 20 to 25 minutes. Do not allow the syrup to turn brown. Pour the syrup over the diced pears and refrigerate until cool, at least 1 hour.  You can do this up to 2 days in advance.
  14. About 30 minutes before assembling the trifle, make the whipped cream: If you can think about it ahead of time, place your mixing bowl and whisk in the freezer. In a deep bowl or electric mixer, whisk the cream, sugar and vanilla together until soft peaks from. Refrigerate until ready to use.
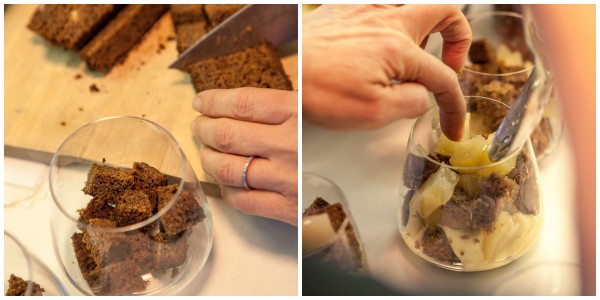
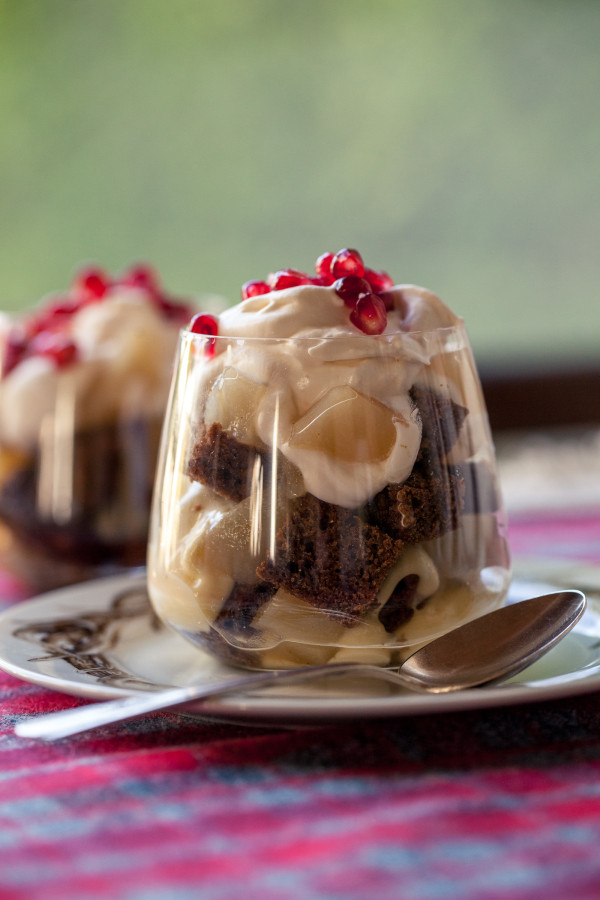
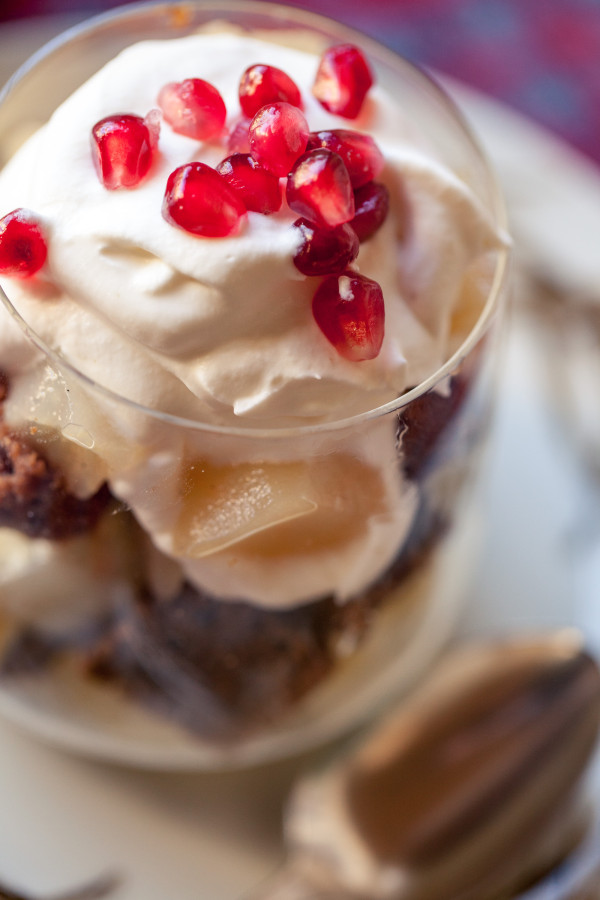
  15. To assemble the trifle: place half the gingerbread on the bottom of a 7 ½ or 8 inch trifle bowl or other deep bowl.  (You can also do individual trifles in glass jars.)  Spread half the pastry cream on top, then half the pears (remove with a slotted spoon,) then half the whipped cream, then half the pomegranates.  Repeat layers, ending with the whipped cream and then the pomegranate seeds.  Or don’t add the whipped cream until the top.

Holiday Test Kitchen with Zelana Montminy and Gina Ragnone

Pamela, Gina and Zelana

A few weeks ago, my friends Zelana and Gina came over to play in the kitchen with me.  The three of us all have the love of cooking in common, but more specifically, cooking with natural foods.  Zelana, whom her readers call Dr. Z.,  has her masters and doctorate degrees in clinical psychology, is a wellness expert and TV Host appearing on the TV Guide Network as well as other networks such as E! and Good Morning America on ABC.  Gina is a holistic health coach and partner in a delicious LA vegan cafe called Falabar.  Plus she makes the most incredible sprouted snack mix called “Gigi’s Remix.”  We thought it would be fun to try out some holiday recipes on each other and we had a blast, in addition to a delicious lunch!

cooking with the ladies

We each picked a dish that was really easy to make and we kept it vegan.  Zelana made a yummy “creamed” Swiss chard, which is very exciting for any dairy-free folks since there was no cream used at all.  Zelena used coconut milk to make it creamy,but somehow it didn’t taste coconut-y at all.  Gina roasted these delectable miso-maple Brussels sprouts, which is something I’ve always wanted to try.  I am crazy for miso, which is a salty soybean paste, and I am crazy for maple.  Sweet and salty is my thing and on the Brussels sprouts it was amazing.  I put together a fresh, seasonal twist on my classic kale salad to which I added thinly sliced raw fennel, pomegranates, toasted pistachios and fresh mint.  It was refreshing, crunchy and would be great with a meat meal or veggie.  After lunch, we indulged in some vegan Magic Bars which satisfied the sweet tooth in all of us, while still keeping the ingredients clean.  So many of our readers asked us for the recipes, that I decided to post them here.  They would be the perfect addition to any holiday dinner!

Since this wasn’t a planned post, our images are all from our iPhones!  Let me know if you have any questions about the recipes since I am lacking the normal step-by-step photos.

"Creamed" Swiss Chard

Dr. Z’s “Creamed” Swiss Chard

serves 6

2 teaspoons olive oil 
2-3 large bunches of rainbow chard, washed and chopped, stems kept separate from leaves
2 medium shallots, finely chopped
1 garlic clove, finely chopped
1 tablespoon all-purpose flour of choice
1 teaspoon ground nutmeg + an extra pinch 
Sea salt, to taste 
Freshly ground pepper, to taste
1 cup coconut milk, unsweetened (use full fat for a creamier consistency)
1 teaspoon orange zest, finely grated 
  1. Heat olive oil in a large skillet over medium heat.
  2. Add chopped shard stems, shallots and garlic and saute, stirring frequently, until tender and translucent.
  3. Stir in flour, 1 teaspoon of nutmeg, salt and pepper to taste and cook for a couple minutes until fragrant.
  4. Pour in coconut milk, stirring frequently over high heat, until thickened and reduced by half .
  5. Add in chard leaves and orange zest, cook until soft and coated.  Season with an extra pinch of nutmeg and sea salt to taste.
Miso-Maple Brussels Sprouts

Gigi’s Maple-Miso Glazed Brussels Sprouts

serves 4

4 cups medium brussels sprouts, ends trimmed and cut in half through the core

1 Tablespoon unrefined, cold-pressed olive oil 

Sea salt and black pepper to taste

1/4 cup white miso

1/4 cup pure maple syrup

  1. Pre-heat oven to 375*F  and line a baking sheet with unbleached parchment paper.
  2. Toss sprouts with the oil until evenly coated and arrange on prepared baking sheet.  Season with salt and pepper.
  3. Roast for 20 minutes until just slightly browned. (Larger sprouts will take longer.)
  4. Whisk together the miso and maple syrup in a large bowl.
  5. After the sprouts have cooked for 20 minutes, remove them from oven, let cool for a bit and add to the bowl with the maple-miso dressing.  Toss the sprouts until evenly coated and return them to the baking sheet.
  6. Cook for an additional 10 minutes or so, depending on how crispy you like them.  You can also broil them until browned and very crispy, just be careful not to let them burn.
  7. Remove from oven and let cool slightly before serving.

Kale Salad with Fennel

Pamela’s Raw Kale Salad with Fennel, Pomegranates and Mint

serves 4-6


2 bunches black kale (a.k.a Tuscan, lacinato, or dinosaur kale), about 12-14 ounces, washed and dried

1 bulb fennel, ends trimmed, halved and thinly sliced 


Dressing:

2 teaspoons minced shallot

½ teaspoon fine sea salt

A few twists of freshly ground black pepper

2 Tablespoons fresh lemon juice or unseasoned rice vinegar

2 Tablespoons fresh orange juice

2 teaspoons 100% pure maple syrup

6-7 Tablespoons unrefined, cold-pressed extra-virgin olive oil

1/2 cup pomegranate seeds (click here for how to seed a pomegranate)

1/2 cup shelled, toasted pistachio nuts

1/4 cup small, fresh mint leaves (large leaves can be chopped)

  1. Strip the kale leaves from the stems and compost or discard the stems.  Finely shred the leaves with a sharp knife.  Place in a serving bowl with the fennel.
  2. Prepare the dressing:  whisk all the ingredients in a small bowl until emulsified or place all dressing ingredients in a glass jar with a lid and shake until emulsified.
  3. Add enough dressing to coat the kale and fennel lightly.  Massage the dressing into the kale leaves and fennel slices with your hands to soften the leaves.
  4. Add the pomegranate seeds, pistachios, mint leaves and toss.  Salad can be served at once or allowed to sit and soften further.   This salad would be delicious with crumbled feta, too.

Turkey and spinach quesadillas with cranberry salsa recipe

turkey and spinach quesadillas with cranberry salsa | pamela salzman

I know you are all in major Thanksgiving prep mode.  But I wanted to post this recipe for the day after if you are planning that far ahead.  And if that is the case, you and I are probably good friends, or should be.  One of the reasons I absolutely love the day after Thanksgiving is because I sit in my pajamas until noon like a lady of leisure and make everyone bring me things like tea and slippers, and fetch me the remote control because I slaved over that meal for days and days and I deserve to sit on that couch for as long as I feel like it.  Ha!  Once a year, it’s nice to be queen for the day.

salsa prep

I also love the day after Thanksgiving for the leftovers.  Leftovers mean I don’t really have to cook, but I do need to figure out how to repurpose turkey and potatoes and such in a tasty way.  I used to just literally reheat everything and we would have another Thanksgiving dinner the next night with some fresh turkey vegetable soup from simmering the turkey bones all day.  But personally, I have tired of that sameness two days in a row and have begun to look for ways to redo leftovers that don’t seem like leftovers.  I have made turkey shepherd’s pie and turkey pot pie (use turkey instead of chicken in this recipe), as well as Southwestern turkey and black bean chili and turkey, butternut squash and wild rice soup and so on.

cooking green onions

cooking the quesadillas

But this year, I am really going off in a different direction with these Turkey and Spinach Quesadillas with Cranberry Salsa. Has this New Yorker been in Los Angeles too long?  By the sound of today’s post, you might think so.  Or maybe it’s because as I write this, it’s 75 degrees and my mind isn’t going toward something heavy like turkey stew.  I like this recipe for a variety of reasons, the first of which is that it’s tasty.  Another reason is that it’s so easy and I don’t need multiple pots and pans and cutting boards.  I am kind of not into cooking this Friday.  Lastly, I like the twist of a different, fresh flavor.

or try with avocado instead of cheese

My family all had different opinions about this recipe which is why my life stays interesting.  Mr. Picky still will not eat cheese because he thinks it’s the devil and I won’t eat it often because it’s not great for me, so the two of us tried the turkey quesadilla without cheese and with avocado instead.  Delicious!  The creamy from the avocado was a perfect replacement for the melted cheese, in our opinion.  As for the salsa, my husband likes cilantro 50% of the time and in the cranberry sauce was not one of those times.  One of my daughters put plain cranberry sauce on her quesadilla and liked that just fine and thought that would be a better way to present this recipe since there was no extra work involved there.  True.I also loved the cooked green onions, but there’s a good chance you might not have those lying around, so if you could easily sub cooked regular onions if you’re motivated.  No judgment from me if you’re not, though.

Hope you have an amazing holiday!  We all have so much for which to be grateful!

turkey and spinach quesadillas with cranberry salsa | pamela salzman

turkey and spinach quesadillas with cranberry salsa

Turkey and Spinach Quesadillas with Cranberry Salsa
Author: 
Serves: 4-8
 
Ingredients
  • Salsa:
  • 1 cup whole-berry cranberry sauce
  • ¼ cup chopped fresh cilantro
  • 2 Tablespoons chopped green onion or finely diced shallot
  • 1 Tablespoon fresh lime juice
  • ¼ teaspoon ground cumin
  • ½ jalapeno, seeded and minced
  • pinch of sea salt
  • Quesadillas
  • 1 Tablespoon unrefined, cold-pressed, extra-virgin olive oil
  • ¼ cup 2-inch pieces of green onion
  • a few teaspoons unsalted butter or more olive oil
  • 8 (8-inch) whole grain tortillas (I like Rudi’s whole spelt and Food For Life sprouted grain)
  • 1 cup (4 ounces) shredded Monterey Jack cheese
  • 2 cups chopped cooked turkey
  • 4 handfuls baby spinach leaves
Instructions
  1. Prepare the salsa: combine all ingredients in a bowl.  Cover and refrigerate.
  2. Prepare quesadillas:  heat a large skillet or griddle over medium-high heat.  Warm olive oil and sauté the green onions for a couple of minutes until tender.  Remove the onions and lower the heat to medium.
  3. Add a little butter or oil to the pan, place a tortilla on the pan and sprinkle cheese over the tortilla, Top the cheese with ¼ of the onions, ½ cup turkey and a handful of spinach leaves.  Cover with a tortilla.  Cook until the underside is lightly golden and flip over.  Cook until cheese is melted.
  4. Make remaining three quesadillas in the same way, adding a little extra butter to the pan if necessary to prevent sticking.
  5. Cut each quesadilla into 4 wedges and serve with prepared cranberry salsa or plain cranberry salsa.

Whole roasted maple-brined turkey recipe

whole roasted maple-brined turkey recipe | pamela salzman

This is it, my last Thanksgiving recipe for you.  And it’s my favorite way to make turkey as of late.  I taught this method in all my November classes last year and a few this year and I was consistently thrilled with the results.  I don’t even like turkey, but this was juicy and so flavorful.  Even if you have solidified your Thanksgiving menu, I’m not too late with this one since you are probably making turkey of some sort.  Let’s get down to the nitty gritty of making a good turkey:

Buy a fresh, organic turkey (they taste better than frozen and/or Butterball chemically-injected ones).  If you bought a frozen turkey, plan for a few days to defrost in the fridge.  Do not thaw in brine!

Don’t forget to remove the neck and giblet bag from the cavities (including the neck.)

Brine it.  You can dry brine (which means you’re rubbing the turkey inside and outside with kosher salt 2-3 days before) or wet brine 24 hours in advance.  A wet brine is a salt-water solution, usually with brown sugar and some other flavors.  Brining gets the salt deep into the meat to season it well and keeps the turkey juicy.  Both brines do this.  The advantage of a dry brine is that it’s easier, especially if you’re cooking a super large turkey.  All you have to do is rub it with salt.  ANd it takes up less space in the fridge.  The advantage of a wet brine is that it’s faster and you can add different flavors to the solution.  The only time you don’t want to brine a turkey is if it is a KOSHER bird.  Those have already been brined.  If you can find a good quality organic, kosher turkey, go for it.  You don’t have to prep it in advance = easier.  I have tried NOT brining a turkey, and instead seasoning it just before cooking.  Not the same.  DO the brine.  If you don’t have room in your fridge, place the turkey in the brine in a pot in a cooler with ice and it will be just fine.

brining a whole turkey | pamela salzman

Allow the turkey to come to room temperature before cooking.  Promise me you’ll take the turkey out of the refrigerator at least one hour before cooking it, otherwise the interior will be underdone and the exterior will be overcooked and dry.  That does not have to happen.  For the largest birds (over 20 pounds), leave out of the fridge and out of the wet brine (if you’re using it) for 2 hours before roasting.  12-18 pounds leave out for 90 minutes before roasting.  Less than 12 pounds leave out for at least an hour before roasting.

bend the wings back and start with the turkey b

Use a meat thermometer to determine whether or not your turkey is ready.  You cannot go by the chart on the turkey wrapping or by a recipe.  I have made over 150 turkeys in my life in lots of different ovens and trust me, you need a meat thermometer to say the thickest part of the breast, which is on the side closer to the neck, registers between 160-165 degrees.  The thigh should register around 175 degrees.  Check this post here to see if your thermometer is accurate!

Allow the turkey to rest for at least 20 minutes before carving.  The juice will redistribute and the turkey will be juicer.  If you take the turkey out and cut it too soon the juices with pour onto your cutting board.  That would be sad.  Feel free to allow the turkey to rest a little longer, up to 40 minutes is fine.  But keep it covered with a piece of foil so it stays warm while you make gravy and bake your stuffing.  Click on this post for carving help.

You don’t have to follow this recipe for a great turkey, but you should employ the above strategy.  Here are my other turkey recipes on my site:

Whole Roasted Dry -Brined Turkey  (this post has videos and more details about cooking, carving and making the gravy!)

Herb-Roasted Whole Turkey Breast

You will have a delicious turkey, I am sure.  But, if something goes wrong, here are some tips:

If you have dry turkey meat: carve the turkey and pour hot chicken or turkey stock over it.  No one will know!

If your turkey is undercooked and you’ve already cut into it, remove the thigh and drumstick and take the breasts off the carcass.  Put all the pieces into the roasting pan and put back in the oven until they reached the desired temp.

Good luck!! Leave a comment on any recipe if you have questions!

whole roasted maple-brined turkey | pamela salzman

Whole Roasted Maple-Brined Turkey
Author: 
Serves: 12-14 without leftovers
 
Ingredients
  • 12-14 pound fresh turkey, giblet bag and neck removed, rinsed
  • For the brine:
  • 1⅓ cup kosher salt (such as Diamond Crystal)
  • ½ cup maple syrup or brown sugar
  • 1 quart hot water
  • 1 orange, cut into crosswise slices
  • 1 lemon, cut into crosswise slices
  • 1 Tablespoon black peppercorns
  • 2 teaspoons allspice berries
  • 1 gallon ice cold water
  • 1 onion, quartered
  • 3 or 4 parsley sprigs, thyme sprigs and or sage leaves
  • 3 sprigs of fresh rosemary
  • 1 apple, quartered or cores from 2 apples
  • 6 Tablespoons unsalted butter, melted or olive oil
  • 1-2 cups stock or water
  • Gravy
  • ¼ cup dry white wine
  • 5 Tablespoons all-purpose flour
  • 3 -3 ½ cups chicken or turkey stock, preferably homemade
  • sea salt and freshly ground black pepper to taste
Instructions
  1. I like to brine the turkey for about 14-18 hours. You can brine it, remove it from the brine and then store it in the refrigerator for a day until you are ready to cook it. To make the brine: Dissolve the salt and maple syrup in the hot water. Take the orange slices and carefully squeeze them into the mixture. Add the lemon, peppercorns and allspice berries.
  2. Place the brining bag in a large stockpot. Add the cold water to the bringing bag and then the warm mixture. Place the turkey in the brine breastside down and make sure the whole bird is covered with liquid. Seal the bag securely and place pot in the refrigerator for 12-18 hours.
  3. Remove the bird from the brine and rinse with cold water. Pat dry. Refrigerate until ready to cook or proceed with recipe.
  4. The day of roasting, take turkey out of refrigerator and wipe dry with paper towels. Bring to room temperature, about 60-90 minutes.
  5. Preheat oven to 425 degrees. Position a rack in the lowest rung of the oven. Oil a V-shaped rack in a roasting pan.
  6. Sprinkle a little freshly ground black pepper in the cavity and then add in the onion, herbs, and apple. Truss the turkey by tying the legs together. Brush the skin all over with some of the butter or oil.
  7. Place the turkey on the rack in the pan, breast-side down and pull the wings behind the back. Roast for 40 minutes, basting with butter or oil after 20 minutes. Reduce the heat to 325 degrees, turn breast side up (I usually wear clean rubber gloves to do this) and add 1 cup stock or water to the roasting pan. Continue to roast, basting with the remaining butter or oil until used up and then with the pan juices every 20 minutes. Add additional stock to the roasting pan if you notice there are no pan juices with which to baste the turkey.
  8. Roast until golden and cooked through. After about 2 hours, start testing for doneness by inserting an instant-read thermometer in the thickest part of the breast away from the bone; it should register 165-170 degrees. You may also test the thigh – it should read 180 degrees. The turkey should roast a total of about 2 ¾ hours, but it can range from about 2 ½ - 3 hours or 12-14 minutes/pound.
  9. Transfer to a cutting board or warmed platter and cover loosely with aluminum foil until ready to carve, at least 20 minutes (I prefer longer.) Use the pan juices to make gravy.
  10. Prepare the gravy:
  11. Pour all the pan juices, including the fat into a fat separator.   Allow the fat to separate from the juices.
  12. Heat the roasting pan over medium heat on the stove and add the pan juices, leaving the fat in the fat separator.  Add the wine to the roasting pan.  Bring to a boil and lower heat to a simmer for 2-3 minutes, stirring with a wooden spoon to dislodge any brown bits that stick to the bottom of the pan.  Strain into a bowl or you can use the gravy separator again or wait until Step 4 and strain into the gravy saucepan.
  13. In a saucepan over medium heat, warm the reserved fat from the gravy separator until it is bubbly.  You should have at least 3-4 Tablespoons.  If you don’t, add some olive oil.  Add the flour and whisk rapidly to cook the flour, about 2-3 minutes.
  14. Whisk in the strained pan juices and 3 cups of stock to the saucepan until smooth.  Bring to simmer and cook until thickened, about 5 minutes.  Season to taste with salt and pepper.  Keep warm on lowest heat.  Add additional stock as needed to achieve desired consistency.


Planning a happy thanksgiving 2014: 1 week to go!

This post has been edited from the original which was published on November 17, 2011.

Wow, the last three weeks have gone by so quickly!  I am so excited to celebrate Thanksgiving.  We have a super fun crew joining us this year and I am also looking forward to some one-on-one time with the kids, especially my older daughter who will be home from college for the first time since August!    I used to get all of them in the kitchen Thanksgiving morning to help me with pies or trimming green beans or whatnot, but my two daughters have taken to sleeping until noon on days off.  However I had a stroke of genius three years ago, which was to tack my Thanksgiving to-do list on the refrigerator and have everyone sign up for three tasks.  Even my husband gets in on the fun!

My last class is Friday, so I’ll start getting busy this weekend.  I always plan Thanksgiving day down to the last detail because I don’t like forgetting things and a schedule makes me feel more relaxed, which equals more fun for me!   But just because Thanksgiving is the star of the show this week doesn’t mean that I can forget about normal life on very other day.  So I think about regular meals and activities, too.  Here’s what my schedule will look like from Sunday until we eat on Thursday at 4:00 pm (-ish).  This shouldn’t make you feel exhausted, but merely show you what you can do ahead for your own Thanksgiving!

Sunday

Go grocery shopping for most perishable items, bread for stuffing and food for remaining dinners this week.

Make cranberry sauce (I used to make applesauce on Sunday too, but my friend Caitlin is bringing it this year.)

Arrange tables and chairs

Write out placecards for table (a good job for one of the kids)

Dinner:  orange and rosemary-glazed chicken, cauliflower-potato mash, and broccoli

make bread cubes for stuffing

Monday

Make salad vinaigrettes

Make bread cubes for stuffing

Make ice cream

5:30 Bring Mr. Picky to soccer practice

Dinner:  roasted vegetable enchiladas, salad

Tuesday

11:00 – 1:00 cooking with blogger friends Zelana Montminy and Gina Ragnone

Shop for last perishable items from farmer’s market

Pick up turkeys.  Brine in the morning.

Buy flowers for entry table, family room and living room and put together table arrangements

Set table (I’ll set one place setting for the kids to copy and they can do the rest.)

Wash and dry greens (salad)

Toast pumpkin seeds (salad)

Seed pomegranates (salad)

Shred gruyere (tart)

Shred manchego (salad)

Defrost chicken/turkey stocks

Dinner:  pumpkin and black bean chili, spinach quesadillas

Wednesday

Make butternut squash soup

Chop onions for soup, stuffing and roasted vegetables

Slice zucchini (tart)

Steam, bread cauliflower

Blind bake crust (tart)

Herb oil (tart)

Make stuffing

Prep vegetables for Maple-Mustard Roasted Veggies

Thinly slice Brussels sprouts

Cut butternut squash into cubes for salad

Make sweet potato casserole

Bake pecan pies

Remove turkeys from wet brine and rinse (do not rinse dry-brined turkeys)

Set up for coffee and tea service

Check powder room

Dinner: spice-rubbed salmon, brown rice, sautéed Swiss chard

Before bed:  make sure garage refrigerator door is closed! (Four years ago, I left the door open to my extra fridge in the garage all night long.  OMG. Disaster!  Needed to buy two new turkeys on Thanksgiving morning!)

Thursday

6:00 am wake and shower

Make cornbread (small oven)

Bake pumpkin pies (large oven)

Bake coffee cake (small oven)

Make gingerbread (large oven)

9:15 Take turkeys out of refrigerator

All desserts must be out of large oven by 10:30 am

Bake apple pie (small oven)

10:45 turkeys go in large oven breast side down at 425 degrees

11:25 turn oven down to 325 degrees and flip turkey breast side up

12:00 reheat soup and serve with cornbread

tidy up kitchen

get dressed and dry hair (a girl’s gotta look good!)

Put mixing bowl and beaters in freezer for whipped cream

Roast butternut squash for salad (small oven)

1:30 Peel potatoes and make mashed potatoes; keep in bowl, covered, over pot of simmering water

2:15 zucchini tart in small oven

2:30 fry cauliflower and heat tomato sauce; serve hot

3:00 serve hors d’oeuvres; start testing turkey temperature

3:00 – 3:30 take turkey out of oven

Put vegetables in large oven at 400 degrees

Make gravy

Reheat stuffing in small oven

Bake sweet potato casserole in large oven

Chop apples for Brussels sprout salad, assemble both salads

Light candles, pour water in glasses, set out cranberry sauce and applesauce

Place turkey platter in oven to warm up

3:50-4:00 Carve turkeys

4:00 Dinner is served

After dinner:  whip cream (do not overbeat!), coffee and tea, sparkling water

Make notes on what to remember for next year.  Next year??!!

How to make and roll out pie crust VIDEO

It’s pie season if you haven’t noticed.  And even though I don’t think we should be eating too much dessert, I am a sucker for a good, seasonal fruit pie.  Making pie is my favorite Thanksgiving task, and I love do everything from scratch, including the crust.  I taught myself since no one in my family ever made pie crust, including my auntie who I think is the best cook in the world.  I do think a homemade crust is far superior to the ones in the grocery stores, but if that’s what you have to use, it’s not a deal breaker.

If you are a do-aheader, you can actually make and freeze your pie crusts now for Thanksgiving.

I have written a blog post about making a homemade pie crust before over here, as well as posted several divine pies, including apple, pumpkin and pecan.  But I also thought a video would be helpful, too.  So here you go.  Let me know if you have any questions.  You’ve got this!


For the recipe with measurements, here’s the link to that post.

The best pecan pie recipe (no corn syrup added)

pecan pie without corn syrup | pamela salzma

I’m taking a quick break from Friday Favorites so that I can focus on sharing Thanksgiving recipes until the big day arrives!

pecans!

Want to know my favorite moment of Thanksgiving day?  When I get to relax with a cup of tea and sink my teeth into a slice or two (OMG, am I serious?) of homemade pie.  It’s my reward for the cooking marathon that leads up to that point and I enjoy every bite.  I make three different pies on Thanksgiving, including apple, pumpkin and pecan, all of which I absolutely love, and this pecan pie is absolutely perfection.

pecan pie base

Bourbon and brown rice syrup

I taught this pecan pie in my classes last year and everyone went bonkers for it.  It has been a staple on my personal Thanksgiving menu for 20 years, but I have changed the recipe a bit every  few years.  Admittedly, the first 12 years of pecan pie baking, I did use the dreaded, over-processed, GMO corn syrup.  It’s one of the two traditional sweeteners in pecan pie.  But in my defense, did I know in 1998 that brown rice syrup existed?  No, I did not.  Since I discovered brown rice syrup I have used it in my granola, granola bars and rice crispy treats.  It’s a terrific sticky, caramel-y, minimally-processed sweetener that works really well in place of corn syrup.  Itp is made by breaking down the starch in cooked rice, turning it into easily digestible sugars.  The good news is that there is no fructose in rice syrup, so it shouldn’t have the same negative effects on liver function and metabolic health as regular sugar.  The bad news is that rice syrup is still a concentrated sweetener with few nutrients, so I don’t consider it health food, just a higher quality sweetener.  The other bummer is that arsenic has been found in rice syrups and products sweetened with them. For this reason, I would use rice syrup in moderation and not start adding it to your daily tea.

ready to get poured into pie crust

From the original recipe, I have also swapped coconut sugar for brown sugar and added a little bourbon for boozy depth.  This pecan pie is still rich and sweet, but not cloyingly so, and I don’t feel ill after eating a piece on Thanksgiving.  Just don’t look at the calorie count for a piece of nut pie — you’ll just pass out.  I only eat pecan pie on Thanksgiving, so I don’t worry about the calories too much.  Eating it for breakfast the next day, that’s a different story.  And that is why I have take-out boxes for my guests.  Because I am weak and cowardly in the presence of this pecan pie.

pecan pie without corn syrup or refined sugar | pamela salzman

I know many of you can’t deal with making pie crust, and that is fine.  There are plenty of perfectly good pre-made crusts that you can find in the freezer section of the grocery store.  However, if you are interested in making the crust from scratch, yay!  Come with me over to this post where I show you the step-by-step on how to do it.  I will also be posting a pie crust video any day now.  By the way, you can actually make your Thanksgiving pie crusts today and freeze them.  Just a thought.  I make pecan pie the day before Thanksgiving and leave it in the dining room until the next day.  Leftovers should be store in the fridge.

pecan pie without corn syrup or refined sugar | pamela salzman

Since pecan pie is rich enough, I eat it plain.  But whipped cream and ice cream would not be a terrible accompaniment, believe me.  I mean, if you’re going to go for it, just go big.  I cannot wait for Thanksgiving!

pecan pie without corn syrup or refined sugar | pamela salzman

5.0 from 4 reviews
Pecan Pie
Author: 
Serves: makes 1 9-inch pie
 
Ingredients
  • 1 recipe for single pie crust (see below)
  • all purpose flour for dusting the counter
  • 3 large eggs
  • ¾ cup coconut palm sugar or brown sugar
  • ¼ teaspoon sea salt
  • ¾ cup brown rice syrup
  • 2 teaspoons pure vanilla extract
  • 1 Tablespoon bourbon or dark rum (I prefer bourbon)
  • 3 Tablespoons unsalted butter, melted
  • 1 cup chopped pecans*
  • 1 cup pecan halves**
Instructions
  1. Roll disk of pie dough on a lightly floured countertop, regularly checking to make sure disk is not sticking to counter. Roll into a 12-inch round. Fit pastry into a 9-inch pie plate. Tuck the overhanging pastry under itself and crimp the edges or use a fork to make a decorative border. Refrigerate pie shell until ready to fill pie.
  2. Preheat oven to 350 degrees.
  3. Place the eggs, sugar, salt, brown rice syrup, vanilla, bourbon and butter in a bowl and mix to combine. Stir in the chopped pecans.
  4. Pour the filling into your pie plate (it will only look half full) and arrange pecan halves in decorative pattern on top. Bake for 45 minutes or until filling is just set. If you use a frozen pie crust, it will take an extra 10-15 minutes to bake.
  5. Allow the pie to cool completely before serving.
Notes
*For a richer flavor, toast pecans in a 350 degree oven for about 8 minutes or until fragrant, then chop coarsely.

**Or use all chopped pecans and skip the decorative top.

Single Pie Crust

1 ¼ cups all-purpose flour or white spelt flour

½ teaspoon cane sugar

½ teaspoon sea salt

1 stick (8 Tablespoons) unsalted butter, cut into pieces

2-4 Tablespoons ice water


Place the flour, sugar and salt in the bowl of a food processor fitted with the metal blade and pulse a couple times until blended.
Add the butter to the flour and pulse until the mixture resembles small peas.
Pour 2 Tablespoons of ice water on top of the flour mixture and pulse about 10 times.  Avoiding the blade, carefully grab a small handful of dough and squeeze together.  If the dough holds together without crumbling, it’s ready to be formed into a disc.  If it’s too dry, pulse in another few teaspoons of ice water until dough holds together.
Transfer dough to a piece of parchment and bring dough together to form a ball. Wrap in parchment and refrigerate at least 30 minutes at which point it will be ready to roll out.  Or you can keep the dough refrigerated for 2-3 days, or in the freezer, well wrapped for 2-3 months.


Planning a happy thanksgiving 2014: 2 weeks and counting!

This post was originally published on November 10, 2011.

Thanksgiving is 2 weeks away!  Is the exclamation point there to emphasize panic or joy?  I’m excited!  I’ve been teaching quite a few Thanksgiving-themed classes as of late and I’m feeling spirited.  Don’t let these Thursday posts stress you out.  The whole point is to show you what you can do in advance, not what you must do in advance.  All these tips and strategies are most relevant to the hosts and hostesses who are preparing most or all of the meal themselves and who have a busy schedule leading up to the holiday.  If I didn’t get a lot of these tasks completed early, I don’t see how I could pull off this meal without tons of stress.

Here’s what you can get done this week:

  • Get your knives sharpened Especially your carving knife.  A razor-sharp knife is the most important tool in your kitchen.  In my area, you can get your knives sharpened at Sur La Table, the farmer’s market and at the local cutlery store at the mall.  I think Sur La Table charges $1/inch.
  • Make your grocery lists  I make three lists:
  1. Non-perishables (e.g., flour, spices, wine, nuts, dried fruit)  I buy these now.
  2. Perishables to buy one-week ahead (e.g., winter squashes, butter, hard cheeses, potatoes)
  3. Perishables to buy two days before (e.g., turkey, dairy, bread for stuffing, all other fruits and vegetables)
  • Buy to-go containers  I always make too much food and I like sending care packages home with my guests to enjoy the day after, especially our single friends.  This year I am definitely packing up all the extra desserts so that they aren’t tempting me the next afternoon when I’m shopping for holiday gifts online.  I love the idea of having people bring their own reusable containers, but for me it’s easier to get these disposables from my local Smart & Final.  I also saw some brown paper to-go boxes on amazon.

  • Clean out the refrigerator  I’ll get to this over the weekend.  Now is a great time to get rid of food past its prime or to get creative with the last spoonful of nut butter or those four olives just to make more space in the fridge.  I have a second, inexpensive refrigerator in the garage which really comes in handy for big dinners.  If you don’t have the extra space, see if one of your neighbors is going away for the holiday and can store your chutney and jam collections for a few days.

  • Check your instant read thermometer   This tool the only way you’ll be able to tell if your turkey is cooked properly, so it’s important that it’s accurate.  If you’re unsure, stick the tip of the thermometer into boiling water.  If the temperature reads 212 degrees Farenheit, you’re good to go.