Grilled artichokes with lemon-caper dipping sauce recipe

grilled artichokes with lemon-caper dipping sauce | pamela salzman

There are a few things I love ordering in restaurants because I never make them at home, either because my family doesn’t like it or it’s too difficult or I just don’t have access to the ingredients.  Whenever I used to see artichokes on any menu, in any form, I would order them.  I absolutely love artichokes, but I was always intimidated to try to make them so I looked at them as a treat.  My grandmother used to make a fabulous stuffed artichoke, which really didn’t seem too difficult when she prepared them, but I was still confused even looking at a whole raw artichoke.

artichokes

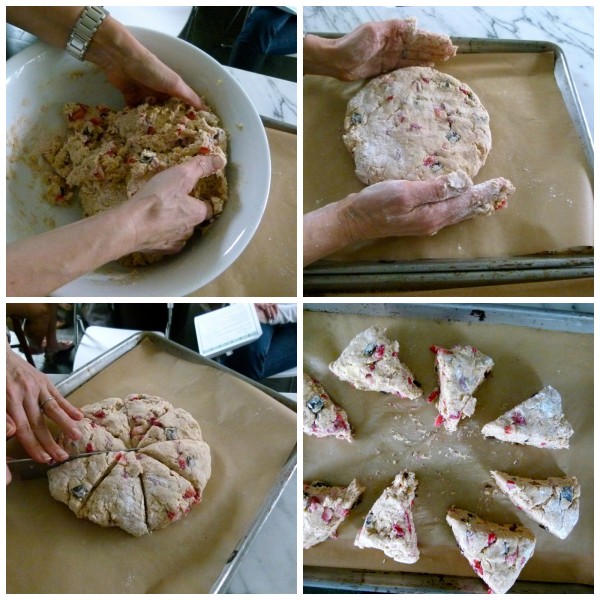
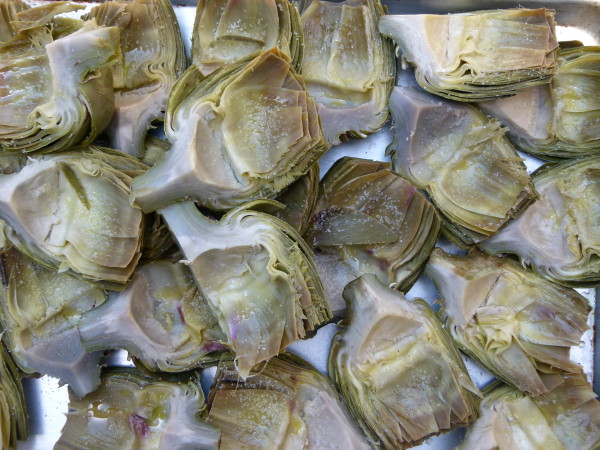
I eventually learned how to clean and steam and artichoke and I have to say it’s really straightforward and not difficult at all.  If you’re not there yet, head over to my video on how to do it. But grilled artichokes still seemed daunting to me.  Until I found out those are no big deal either!  Since I taught this recipe in my classes last spring, I have learned an even better method for preparing artichokes for the grill.  I steamed them whole last year and cut them afterwards which is a little tricky because the artichokes are already soft and some of the leaves come off when I tried cutting the artichokes in half.  So I fixed that problem by cutting the artichokes in half (or quarters if they’re huge) before steaming.  That way they stay nice and neat.  Always learning with artichokes!

prepping artichokes | pamela salzman

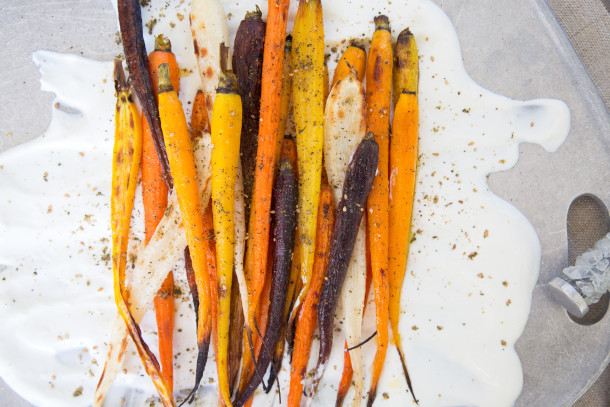
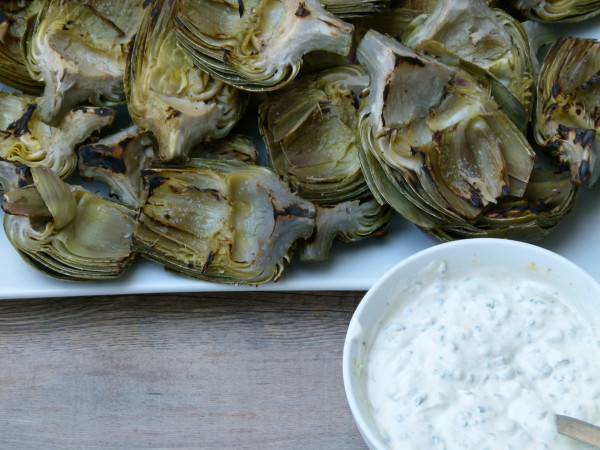
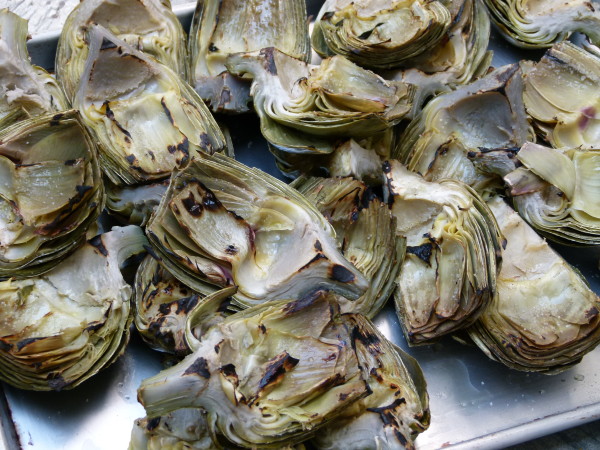
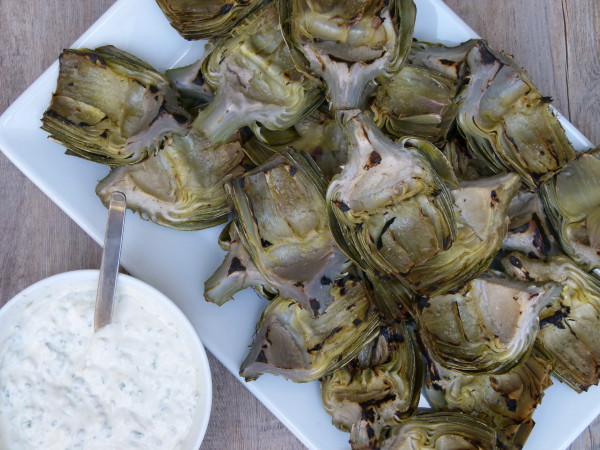
Personally, I love artichokes grilled more than any other preparation.  The leaves pick up a great smoky flavor from the grill as well as a boost of flavor from a brushing of olive oil and a pinch of salt.  I taught this recipe with a delicious lemon-caper dipping sauce, but I think grilled artichokes are good enough to eat plain.

artichokes cleaned and steamed

After my instruction in class, everyone said the same thing, “that’s it?!”  Yep, that’s it.  Pretty easy.  Although let’s not confuse “easy,” with “quick” or “instant” because preparing artichokes and cooking artichokes is not a quick job.  It does require a little patience.  The great part about grilled artichokes though, is that you can steam the artichokes ahead of time, cool them and then you can grill them later in the day or even the next day.  Perfect for entertaining or a busy weeknight.

lemon-caper dipping sauce | pamela salzman

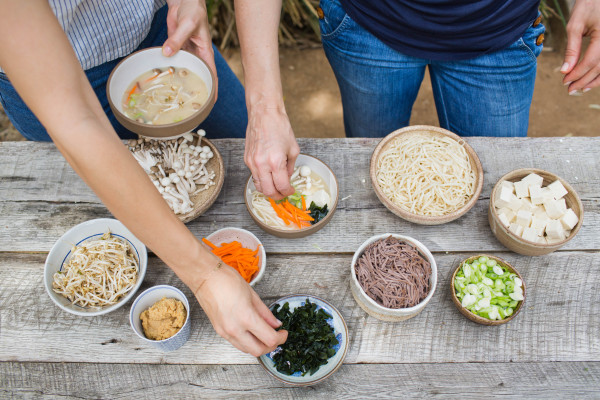
I think grilled artichokes are fantastic for casual entertaining.  I say casual because you are using your hands and scraping the leaves with your teeth.  Artichokes might be a little awkward to eat in front of the new boss or someone you don’t know very well.  Just saying.

grilled artichokes | pamela salzman

The lemon-caper dressing shared here is just a suggestion. It’s kind of like a healthified remoulade sauce.  The sauce would also be really nice on a simple piece of baked or broiled fish.  I also like to dip artichoke leaves in a simple vinaigrette (click here for my two favorites) or aged balsamic mixed with olive oil and a pinch of salt and pepper.  And please don’t forget to eat the heart which I think is the very best part and the easiest since you don’t have to work like you do with the leaves.  If you’re not convinced to give these a try, read this post on all the health benefits of artichokes!
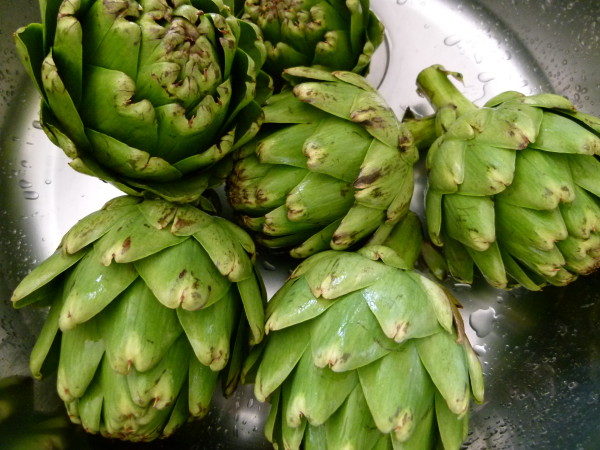
grilled artichokes with lemon-caper dipping sauce | pamela salzman

4.7 from 3 reviews
Grilled Artichokes with Lemon-Caper Dipping Sauce
Author: 
Serves: 6
 
Ingredients
  • 3 whole artichokes
  • Unrefined, cold-pressed, extra-virgin olive oil for brushing artichokes
  • Sea salt and freshly ground black pepper to taste
  • Sauce:
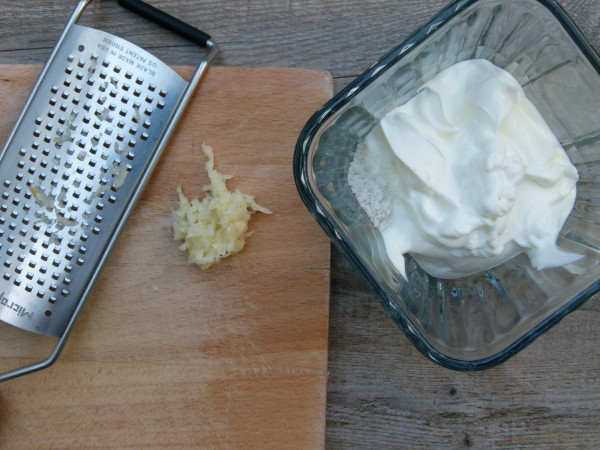
  • ½ cup plain, unsweetened Greek yogurt (I use whole)
  • ¼ cup soy-free Vegenaise or your favorite mayonnaise
  • 2 Tablespoons drained capers, chopped
  • 2 Tablespoons minced fresh chives
  • Zest of 1 lemon (skip this if you are not a huge lemon fan)
  • 1 Tablespoon fresh lemon juice
  • 1 teaspoon Dijon mustard
  • ¾ teaspoon sea salt
  • a few grinds of freshly ground black pepper
Instructions
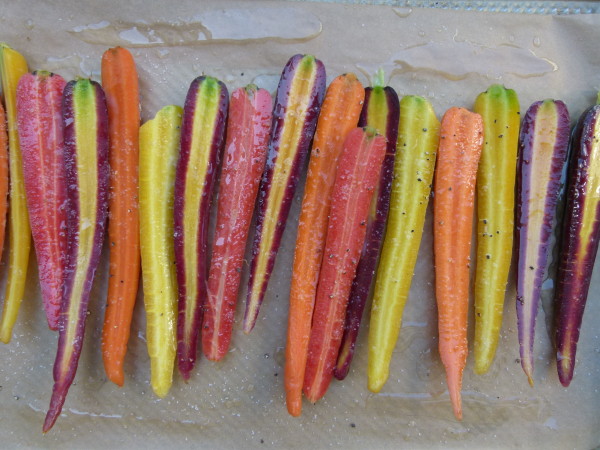
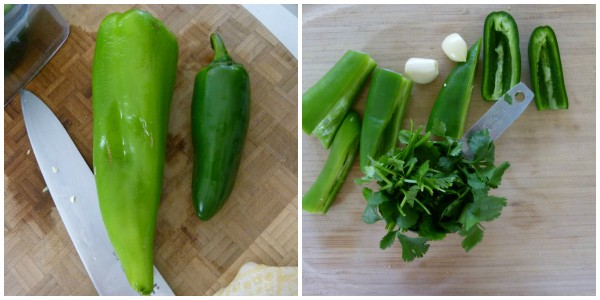
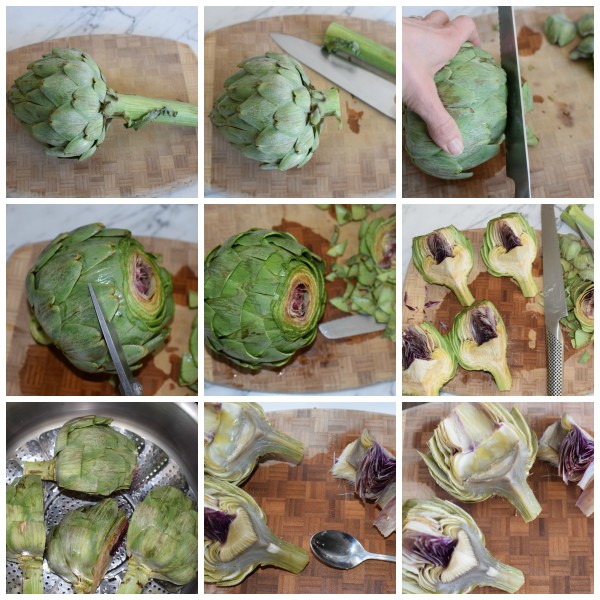
  1. Trim the artichokes:  Remove the outer layer of small, tough leaves from the stem end.   Trim the stem to create a flat bottom and discard cut stem.  With a very sharp serrated knife (like a bread knife), cut off the top 1 inch of each artichoke.  Use scissors to snip the tips of the remaining leaves.  Cut the artichoke in half through the stem end.
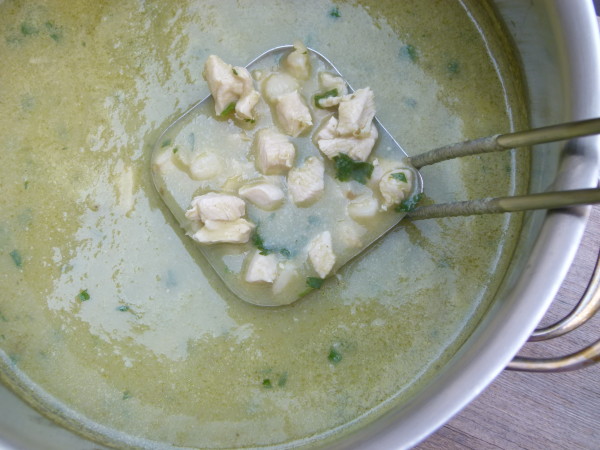
  2. Cook the artichokes:  put a steamer insert in a large pot of water and bring water to a simmer.  Add artichoke halves to steamer insert and cover.  Steam artichokes until stem can be pierced easily with a knife, about 25-35 minutes depending on size.  Remove artichokes from the saucepan and set aside until cool enough to handle.  Preheat the grill on medium heat.
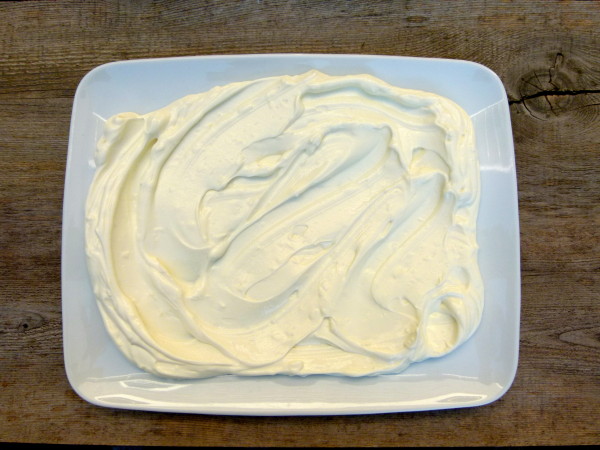
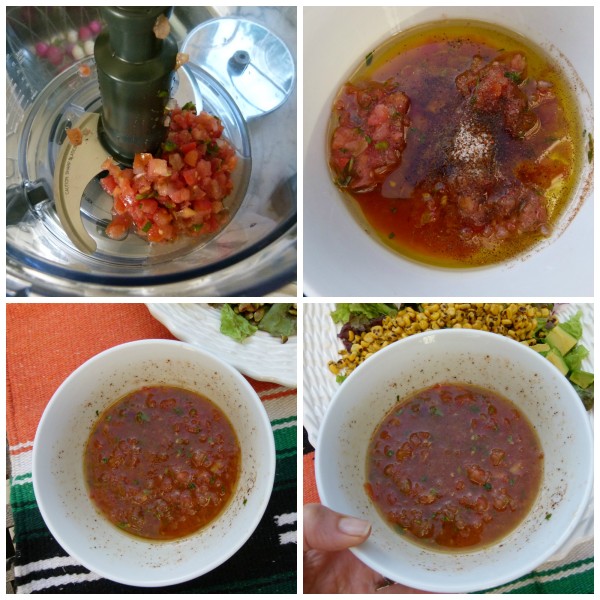
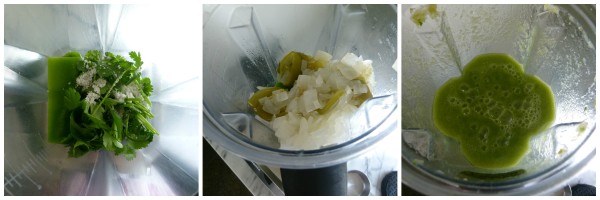
  3. Make the sauce:  In a medium bowl combine all the sauce ingredients and taste for seasoning.
  4. Remove the chokes:  Pull out the lighter leaves in the center of the artichoke to expose the fuzzy choke.  With a spoon, scoop out the choke (but not the heart) and discard.
  5. Brush inside and outside of the artichoke with olive oil, sprinkle with salt and pepper and grill until char marks appear, about 5-10 minutes.  Flip over and grill on other side.  Serve with lemon-caper dipping sauce.


Roasted carrots with garlic yogurt recipe

© RB Photography
© RB Photography

I’m squeezing in another recipe before Mother’s Day in case you need a surefire hit for your lunch or brunch this weekend.  I taught this roasted carrot recipe in my March classes and I didn’t get one bite the entire month because there were never any left!  I made a huge quantity every time and it was never enough.  Everyone flipped for these.  So I know if you make them, they will be an instant hit.  Plus, this is the easiest recipe so I know you will have success!

multi-colored carrots

The inspiration for this recipe came from a guide we met while we were in Turkey last summer.  We had the loveliest guide, a very intellectual professor who was quite serious about the ruins he was showing us.  And then he asked me what kind of work I did and when I responded I was a cooking instructor with a food blog, he stopped in his tracks.  “I would love to be a food blogger,” he responded.  I thought that was so cute and endearing.  So of course, the history lessons went out the window because all our guide wanted to talk about was food, Turkish food especially.  This was fine with me because I am fascinated with cuisines from all over the world.  I always learn so much when I travel and our trip to Turkey was no exception.

making the garlic yogurt

Long story short, our guide convinced me there was an easy and delicious Turkish recipe I had to share with my American students.  He told me to quickly sauté grated carrots and top them with a thick garlic yogurt.  “That’s it!  And it’s so good,”  he proudly exclaimed.

spread the garlic yogurt on platter

I tried it shortly after we returned home and it was indeed an easy recipe and it was indeed delicious.  I loved the contrast of the sweetness of the carrots and the tartness of the yogurt.  But it was rather unattractive, especially after mixing the grated carrots with the yogurt.  I’m sure you can imagine.  So the recipe I am posting today is, I hate to say it, a more attractive twist on my Turkish tour guide’s recipe.  But it is just as delicious and just as simple.  I have served this for many a dinner.  It is delicious alongside roasted chicken or lamb, as well as salmon.  But I think this would be delicious on a brunch menu with a quiche or frittata and a green salad.

roasted carrots with garlic yogurt | pamela salzman

Carrots are incredibly delicious roasted, if you haven’t tried them this way.  Even standard orange carrots develop an incredible sweetness when roasted.  I love to use unrefined coconut oil when roasting because it just enhances the natural sweetness of the carrots and it has a higher smoke point than unsaturated fats, but you can use olive oil, too.  I very often see purple carrots at my farmers market and Carnival heirloom carrots at Trader Joe’s.  Those are especially beautiful to use for this recipe!  If the carrots are thin, I don’t even bother to cut them.  The larger ones I slice in half.

roasted carrots with garlic yogurt | pamela salzman

© RB Photography
© RB Photography

The one question I was asked more than any other was about the raw garlic in the yogurt and if there was a substitution.  There really isn’t that much of it and I personally don’t think the garlic flavor was really that pronounced, but for those people who really don’t like it, I would say to omit it or blend roasted garlic into the yogurt.  Roasted garlic is much more mellow and sweet than raw.  Check this link for how to roast garlic.  I also think there are other roasted vegetables that would be delicious with the yogurt, like eggplant or cauliflower, even curried cauliflower.  Here’s hoping someone makes this for you this Mother’s Day!

roasted carrots with garlic yogurt | pamela salzman

© RB Photography
© RB Photography

5.0 from 2 reviews
Roasted Carrots with Garlic Yogurt
Author: 
Serves: 4-6
 
Ingredients
  • 2 bunches farmer’s market carrots, tops trimmed or 1 ½ pounds regular carrots, cut in half lengthwise
  • 4 Tablespoons unrefined coconut oil, melted or unrefined olive oil
  • sea salt and freshly ground black pepper to taste
  • za’tar (optional)
  • Garlic Yogurt: (if you love yogurt, double the recipe)
  • ¾ cup whole, unsweetened Greek yogurt
  • 1 medium-large clove garlic, grated
  • ⅜ teaspoon sea salt
Instructions
  1. Preheat the oven to 400 degrees.  Line a baking sheet with unbleached parchment paper.
  2. Place the carrots on the prepared baking sheet and toss to coat with coconut oil.  Arrange carrots in one layer and sprinkle with salt and pepper.
  3. Roast carrots for 20-25 minutes, until tender but still with a bite.
  4. Meanwhile, make the yogurt sauce.  Combine all ingredients in a small bowl.
  5. When carrots are done roasting, sprinkle them with za’tar.
  6. Spread the garlic yogurt in the center of a platter and arrange the carrots on top.

Whole grain strawberry scones recipe (gluten-free version, too!)

whole grain strawberry scones | pamela salzman

One of my guilty pleasures is a traditional English tea.  We used to live within walking distance of the Penninsula Hotel in Beverly Hills which (in my opinion) had the best tea in the city.  I used to take my girls on their birthdays for a special treat and I also remember celebrating my one of my birthdays there with some friends.  When we were in London with the kids two years ago, I could have cared less about any meal other than tea.  I really indulged that week and I enjoyed every glutinous (and gluttonous) crumb.  I love every aspect of a proper tea, from the tea itself to the sandwiches to the scones and clotted cream.  Lucky for me, by the time the small desserts are served, I am usually too stuffed to bother.

mix dry ingredients with diced strawberries and dark chocolate

My girls always lit up when the scones were served.  And so did I.  I would take a scone over a muffin any day.  Scones are a low-sugar (but high-flour) biscuit, basically.  They are are supposed to be light and tender and not too sweet since they are served with fruit preserves.  What’s funny is that even though scones feel light, they are anything but.  Most scone recipes call for lots of butter and heavy cream to keep them from being a dry hockey puck!

grate butter to keep it in pieces

I like plain scones just as much as ones with currants.  And a warm scone with a cup of tea makes me instantly relax for some reason.  Ironically, even though I love classic scones, I don’t make them that way at home.  I think we have spent enough time together to know that I don’t use white flour unless it’s absolutely necessary.  Same goes for sugar.  So naturally my scones will use whole wheat pastry flour or whole spelt flour instead.  I have a taste for the nuttiness of whole grain flours as well as a preference for lower glycemic and more nutritious foods.  But if you don’t, or you want these to taste more like “regular” scones, feel free to sub an equal amount of white flour.  Or use half whole wheat pastry and half white flour.

toss in the grated butter

To further deviate from traditional scones, this recipe includes fresh strawberries and on occasion dark chocolate chunks.  Gasp!  I started testing this recipe with freeze-dried and regular dried strawberries and the scones were amazing.  And then I realized how much money I was spending on bags of dried strawberries and I thought it was a little silly to make such expensive scones.  So I turned to fresh strawberries which are actually a little tricky to work with because they’re a tad wet.  So the scone recipe can actually support 1 1/2 cups of stuff, but not 1 1/2 cups of fresh strawberries.  You can do 1 cup of fresh strawberries + 1/2 cup dried.  Or 1 cup fresh strawberries + 1/2 cup fresh blueberries.  Or you can take this recipe and turn it into blueberries scones, using 1 1/2 cups of fresh blueberries.

forming the scones

whole grain strawberry scones | pamela salzman

Well, it’s Mother’s Day this Sunday and I’m just saying that moms like a little attention.  They like to feel appreciated.  To wake up on Mother’s Day with breakfast in bed is a very nice way to start the day, especially if the breakfast-makers clean up after themselves in the kitchen, too.  (This is very important!)  These scones would be a good idea.  If you don’t have time to make scones on Sunday morning, why not make them today and freeze them today?  Pull them out of the freezer the night before and warm them in the oven the next morning.  One of these scones with a hot cup of tea and a little love from my kiddos, who would also abstain from bickering the whole day, is my dream morning.  Hint, hint.

whole grain strawberry scones | pamela salzman

whole grain strawberry scones | pamela salzman

whole grain strawberry scones | pamela salzman

Whole Grain Strawberry Scones
Author: 
Serves: makes 10-12 scones
 
Ingredients
  • 3 cups whole wheat pastry flour or whole spelt flour (GF version on reverse)
  • 1 Tablespoon aluminum-free baking powder
  • ¾ teaspoon baking soda
  • ½ teaspoon sea salt
  • 1 ½ sticks (12 Tablespoons) cold unsalted butter
  • 1 cup diced fresh strawberries
  • 1 cup buttermilk, plus more as needed and for brushing tops
  • ⅓ cup grade A maple syrup
  • 1 teaspoon pure vanilla extract
  • optional add-ins: ½ cup fresh blueberries or ½ cup dark chocolate chunks
Instructions
  1. Preheat the oven to 450 degrees.  In a large mixing bowl, whisk together the flour, baking powder, baking soda, and salt.  Grate the butter into the bowl with a hand grater.  Use the paper wrapping to hold the butter.  Or cut the butter into pieces and working with a few pieces at a time, scoop some flour and butter mixture into your hands.  Squeeze butter with your fingertips pressing your thumbs across your fingers to flatten the butter into petal shapes.  Repeat until all butter is flattened and coated with flour mixture.
  2. Add strawberries (plus blueberries and/or chocolate if using) to flour/butter mixture and combine.
  3. In a separate mixing bowl, whisk together buttermilk, maple syrup, and vanilla.  Slowly add buttermilk mixture to flour/butter mixture, whisking constantly to combine, just until mixture begins to form clumps.  Add more buttermilk if necessary, 1 tablespoon at a time, until no dry flour remains in the bowl.
  4. Transfer mixture to a parchment-lined baking sheet.  Lightly dust your hands with flour and gather mixture into a ball, squeezing to form a dough (it may still crumble slightly).
  5. Flatten dough to a 1” thickness and fold in half.  Flatten and fold once more.  Gently shape into a 1” thick, 7” diameter round.  Cut into 10-12 wedges (or you can do a rectanglar and cut into squares), then separate them ½” apart.
  6. Brush tops with buttermilk.  Bake scones until puffed, golden brown on top, and hollow-sounding when tapped on bottoms, 15-18 minutes.  Let cool slightly on a wire cooling rack.

GLUTEN-FREE STRAWBERRY SCONES

adapted from King Arthur

makes 8 scones


1 ¾ cups King Arthur Gluten-Free Multi-Purpose Flour or 2 1/4 cups brown rice flour blend

¼ cup maple sugar or cane sugar

2 teaspoons aluminum-free baking powder

½ teaspoon xanthan gum

½ teaspoon sea salt

½ cup (1 stick) cold unsalted butter or cold coconut oil

¾ cup diced fresh strawberries

2 large eggs

1/3 cup cold milk or almond milk

1 teaspoon pure vanilla extract

optional add-ins: ¼ cup fresh blueberries or dark chocolate chunks


  1. Preheat the oven to 400 degrees.  Line a baking sheet with unbleached parchment paper.
  2. In a large mixing bowl, whisk together the flour, sugar, baking powder, xanthan gum, and salt.
  3. Grate the butter into the bowl with a hand grater.  Use the paper wrapping to hold the butter.  Or cut the butter into pieces and working with a few pieces at a time.  Scoop some flour and butter mixture into your hands.  Squeeze butter with your fingertips pressing your thumbs across your fingers to flatten the butter into petal shapes.  Repeat until all butter is flattened and coated with flour mixture.
  4. Add strawberries (plus blueberries and/or chocolate if using) to flour/butter mixture and combine.
  5. In a separate mixing bowl, whisk together eggs, milk, and vanilla.  Slowly add milk mixture to flour/butter mixture, stirring to combine, just until mixture begins to form clumps.  The dough should be cohesive, but very sticky.
  6. Drop the dough by the 1/3-cupful onto the prepared pan.  Let rest for 15 minutes.
  7. Bake for 15-20 minutes,  until golden brown.

Restaurant-Style Mexican Rice Recipe (aka Spanish Rice) + a Paleo Version!

Restaurant-Style Mexican Rice | pamela salzman

You cannot have a proper fiesta without rice.  Whether it’s green, red or speckled with cilantro, rice is the perfect side to soak up juicy beans or shredded chicken, or what I like to do, to mix into a crunchy salad.  Plus leftovers are amazing the next day in a burrito or for a twist on my brown rice bake with kale and mushrooms, a Mexican brown rice bake!

saute veggies

I’m calling this recipe “Restaurant-style Mexican Rice” because I have no idea if this is the kind of rice you could find in Mexico, but I know you can get it in Mexican restaurants here.  Except my version uses brown rice.  Is brown rice better for you than white?  Maybe a little, especially if you take the time to soak it.  It doesn’t raise your blood sugar as much as white rice due to the higher fiber and protein content.  But if you don’t soak your brown rice, white has less arsenic and is more digestible.  To tell you the truth, I eat and enjoy both and you can use white rice here if you want.  Just remember that it takes much less time, about 18 minutes.

add water or stock

If you wanted to try to make brown rice for your family for the first time, this is the the perfect recipe.  Why?  Because all the tomato paste will tint whatever rice you are using and white will look the same as brown in the end!   If your kids cannot handle bell peppers in their rice, feel free to leave it out.  But it does add flavor, so I just let my son pick out whatever he doesn’t want.  And don’t wait for Cinco de Mayo to serve this.  I actually make this rice for Meatless Monday rice bowls for dinner, too.  With some beans and a roasted or sautéed vegetable, plus avocado if you have it, you have a highly nutritious and very tasty meal that everyone will love.  If you caught my Instagram last night, I served it with simple pinto beans, Mexican-style sautéed kale and a chipotle cashew cream sauce I made up.  Everyone loved it!

fluff with a fork

I also made a Paleo/Grain-free/Low-Carb version because I have quite a few paleo students now.  It was totally delicious!  In a large skillet, saute the vegetables and garlic until tender.  Add the tomato paste and 2 Tablespoons of water plus about 1/2 teaspoon salt, 1/2 teaspoon oregano and black pepper to taste. Add riced cauliflower from 1 head of cauliflower. (see this recipe for how to do that).  Saute until cauliflower is tender.  Taste for seasoning and enjoy!

Restaurant-Style Mexican Rice | pamela salzman

Restaurant-Style Mexican Rice | pamela salzman

Restaurant-Style Mexican Rice
Author: 
Serves: 6-8
 
Ingredients
  • 2 Tablespoons unrefined, cold-pressed extra virgin olive oil
  • 1 onion, finely chopped
  • 4 garlic cloves, finely chopped
  • 1 jalapeno, ribs and seeds removed and finely chopped
  • 1 green bell pepper, diced
  • 1 red bell pepper, diced
  • 2 cups long-grain brown rice, rinsed and drained
  • 2 Tablespoons tomato paste
  • 3 teaspoons sea salt
  • ½ teaspoon dried oregano
  • 3 ¾ cups water, vegetable stock or chicken stock
Instructions
  1. Heat the olive oil in a medium-large heavy pot over medium heat. Add the onions, garlic, chile and bell peppers. Saute for 5-6 minutes, or until the vegetables are tender.
  2. Stir in the rice, tomato paste, sea salt, oregano and water. Bring to a boil over high heat. Decrease the heat to medium-low, cover and simmer without stirring for 50 minutes, or until the rice is tender and the liquid is absorbed.
  3. Remove from heat. Let stand, covered, for 10 minutes before serving.
Notes
You can add more tomato paste if you want a darker color or more tomato flavor.
* Keep ribs and seeds for a little extra heat
Once the rice is removed from the heat, you can add some fresh corn kernels or cooked black or pinto beans for a vegetarian main dish.

Fiesta salad with salsa vinaigrette recipe

Whenever I plan the amount of food I make in my classes, I always make sure I have tons of whatever salad I am teaching.  96% of my students are women and women loooooove salad.  And so do I.  I could eat salad for breakfast, lunch and dinner.  First course, side dish or main course.  I love lots of color, texture and juiciness.  And I love playing around with what’s in season.

toasted pepitas | pamela salzman

One of my pet peeves is a salad of lettuce, tomato and cucumber all year round.  People, this is so boring and completely out of synch with the seasons, unless it is summer.  Get some red cabbage in there or some microgreens, herbs or radishes.  Or something creamy like avocado, feta or peaches.  Crunchy like nuts, seeds or jicama.  There are infinite possibilities for salads and every meal is more complete and more delicious with a salad in it.

cutting an avocado | pamela salzman

If you are planning a Mexican or Tex-Mex meal for Cinco de Mayo or otherwise, this salad is perfecto.  It is super simple as it is written, but I will offer you a dozen ways you can make it more interesting and I’m sure you can come up with a dozen more.  The best part of this salad is the dressing, which uses salsa or pico de gallo as the base.   Chances are, if you are having a Mexican-inspired meal, you very likely have salsa on hand.  And this is a great recipe to make the day after your Mexican meal when you likely have leftover salsa on hand.  Speaking of dressing, I love this salsa vinaigrette not only only a salad, but on top of grilled fish, chicken or steak, too.  Or on a big platter of grilled veggies.

salsa vinaigrette | pamela salzman

In these photos, I used fire-roasted corn, but if you can’t find it or corn isn’t in season yet, use pinto beans.  Shredded chicken or steak is amazing in here, as are cucumbers, grilled red onions or zucchini, cubes of Monterey Jack cheese or tortilla strips.  If you want to add all these, go ahead and make lots more dressing.  The dressing stays fresh in the refrigerator as long as the salsa is fresh.  The pico de gallo in the pictures is made fresh at my Whole Foods, but it only stays good for about 4 or 5 days.

One of the best things about a salad as part of your meal is that you can usually prep the whole thing in advance and just assemble at the last minute.  This salad is no exception.  Greens can be washed and dried two days ahead.  Vinaigrette can be made 2 days ahead. Radishes can be sliced the day before.  This really is the perfect salad for your fiesta!


Fiesta Salad with Salsa Vinaigrette
Serves: 6 as a side dish (double to serve as a main dish)
 
Ingredients
  • Vinaigrette:
  • ½ cup fresh pico de gallo (pulse it in the food processor if it’s too chunky)
  • 3 Tablespoons unrefined, cold-pressed extra-virgin olive oil
  • ½ - ¾ teaspoon sea salt or to taste
  • freshly ground black pepper to taste
  • 2-3 teaspoons raw honey
  • a couple pinches of chili powder
  • 2 ears of corn, shucked or 1 ½ cups thawed frozen fire-roasted corn or cooked pinto beans
  • 8 cups chopped lettuce like Romaine or Butter lettuce
  • 1 cup thinly sliced radishes
  • 1-2 ripe avocados, sliced or cubed
  • ⅓ cup pepitas, toasted and drizzled with ¼ teaspoon olive oil and sprinkled with sea salt OR sub a handful of tortilla strips instead of the pepitas
Instructions
  1. To make the vinaigrette, whisk all the dressing ingredients in a bowl until combined. Set aside.
  2. Preheat a grill to medium. Grill corn directly on the grill, turning occasionally until lightly charred on all sides. Remove from the grill and place on a cutting board. Cut the kernels off the cob.
  3. Place the lettuce, corn kernels, radishes, avocados and pepitas in a salad bowl. Dip a piece of lettuce into the dressing and taste for seasoning. Drizzle salad with enough dressing to coat lightly and combine gently.
Notes
You can substitute finely shredded cabbage for some of the lettuce, add shredded Jack cheese or crumbled Cotija cheese, shredded chicken, steak or chunks of grilled salmon or shrimp.  Also, different salsas have different acidity levels, so taste the dressing before adding to the salad and season accordingly.

Chicken posole verde recipe

chicken posole verde | pamela salzman

I decided to be more forward-thinking this year and post some new delicious Mexican recipes early in anticipation of Cinco de Mayo, which is one of my favorite food holidays.  Not that I don’t make Mexican, or Tex-Mex meals all year round, of course.  I know a lot of people who are planning celebrations the weekend before Cinco de Mayo and are already asking me what they should make.  I really don’t know too many people who don’t love Mexican food and it’s a great meal to make for a crowd, kids included.  If you haven’t noticed, DIY parties are all the rage and Mexican menus fit the bill perfectly with their topping bars for tacos, fajitas and soups.

I prefer to cook hominy from scratch

Speaking of soups, have you ever had posole, also spelled pozole?  I had never heard of it until about 5 years ago, when my husband came back from a lunch and was raving about the posole.  When anyone in my family comes home raving about anything, *BING*, note to self:   “learn how to make that from scratch!”

prepping tomatillos

Posole is is a traditional Mexican soup or stew, which once had ritual significance. It is made from hominy, plus meat, usually pork, but also chicken or turkey or pork rinds, chili peppers, and other seasonings and garnish such as cabbage, salsa and limes and/or lemons.  I have seen many recipes for posole, red or green, vegetarian or with meat, different seasonings, but there is always hominy.  Hominy is an interesting food.  It comes from dried field corn, also known as maize, not to be confused with sweet corn which you enjoy off the cob in the summer.  The corn is prepared by removing the skins after soaking them in the mineral lime (cal), which changes the flavor (for the better) and releases the niacin, making this slightly processed grain healthier than simple dried corn or cornmeal.  (I took this from the Rancho Gordo website.)  Not surprisingly, cooked hominy tastes like corn tortillas, but in a form of a chewy little nugget.  Quite tasty.

chili peppers

You can buy prepared hominy which I have only seen in cans (probably lined with BPA, sadly) or you can buy dried and cook it yourself, which is what I did when I taught this in my classes a few years ago and what I still do when I want to make posole.  It is an extra step for sure, so if you want this to be a really fast recipe and you don’t mind cans, by all means buy it prepared.  I have only seen dried hominy sold by Rancho Gordo, which is an exceptional source for dried beans, especially heirloom varieties, grains and spices.  Some retail stores sell Rancho Gordo products or you can purchase directly from their website.  But I know from some students that you might be able to find other brands of dried hominy in Latino markets or in the “ethnic foods” aisle of some supermarkets.

verde

When I decided to make posole for the first time, I took no timing wondering red or green.  I much prefer green (tomatillo-based), especially in the spring and summer, because it’s so much lighter and fresher than red (tomato-based.)  We all loved that first batch and I knew it would be great to teach in a class.  I especially love setting out a topping bar for posole because all those add-ins give such great texture, color and really turn this soup into a meal.  I love adding avocado, cabbage, radishes, cilantro and feta, which I think is a perfectly good, and more healthful sub for the more traditional Cotija cheese.  The kids like to add tortilla chips or strips, naturally.

chicken posole verde | pamela salzman

This soup reheats well and freezes well, too.  You can serve posole as a meal or with veggie quesadillas and/or Mexican chopped salad on the side.  If you want this to be vegetarian, just use veggie stock and drop the chicken.  Maybe add in a little quinoa or some sweet peas.  Stay tuned for more fantastic, healthful Mexican recipes to come in the next couple weeks!

chicken posole verde | pamela salzman

chicken posole verde | pamela salzman


5.0 from 1 reviews
Chicken Posole Verde
Author: 
Serves: 6
 
Ingredients
  • 1 large onion, chopped
  • 1 pound tomatillos, husked, stemmed, washed and halved
  • 1 anaheim chili, seeds discarded, quartered
  • 1 jalapeño, seeds discarded, halved (leave seeds if you like it hot)
  • 2 garlic cloves
  • ¾ cup fresh cilantro, divided
  • 2 pounds boneless, skinless chicken breasts, diced
  • 1 teaspoon dried oregano
  • 2 ½ teaspoons sea salt, divided
  • freshly ground black pepper to taste
  • 2 Tablespoons unrefined, cold pressed, extra virgin olive oil
  • 4 cups chicken stock, preferably homemade
  • 3 ½ cups cooked hominy* or 1 29-ounce can, drained and rinsed
  • Suggested garnishes: cubed avocado, sliced radishes, shredded romaine or green cabbage, cilantro, Cotija or crumbled feta, and/or tortilla chips (optional)
Instructions
  1. Combine onion and tomatillos in a medium saucepan with 1 cup of water. Bring to a boil, lower to a simmer, and cook, covered until vegetables are tender, about 10 minutes. Drain.
  2. Transfer vegetables to a blender with the chilis, garlic, ½ cup cilantro and 1 ½ teaspoons sea salt and puree until smooth.
  3. Season the chicken with oregano and 1 teaspoon salt and pepper to taste. Set aside.
  4. Heat oil in a large saucepan over medium heat. Pour puree into the pan and lower heat to medium low. Cook, uncovered, stirring frequently, until thickened, about 10 minutes.
  5. Add the broth, hominy and chicken to the saucepan. Cover and simmer until the chicken is tender, about 10 minutes. Chop the remaining ¼ cup fresh cilantro and stir into the pot. Taste for seasoning.
  6. Serve posole with suggested garnishes.
Notes
*To cook dry hominy, soak in lots of water 6 hours or overnight.  Drain and cook in a pot with fresh water.  Bring to a boil, lower heat to a simmer, and cook for about 90 minutes to 2 hours or until tender.  Drain and it is now ready to use.


Miso Soup Bar with Jenni Kayne and ripplustan.com

Miso Soup Bar with Jenni Kayne | pamela salzman

I have always been a huge fan of a toppings bar for several reasons.  I’ve noticed my kids tend to eat more of whatever I’m serving when they can control what goes on their plate.  I also think it’s so much more fun when your guests can participate in and interact over the meal.  Lastly, preparing a topping bar ahead of time allows the cook (me and you) to be free and enjoy themselves rather than worrying about timing everything perfectly and accommodating everyone’s different dietary restrictions.

miso soup bar with jenni kayne and pamela salzman

I have shown on this site topping bars for everything from oatmeal to baked potatoes, from salads to tacosJenni Kayne was telling me one day about her ski trip and how much she loved the soup bar at the ski lodge for lunch.  Let’s do a Miso Soup Bar post!  Great idea!  Today’s post is also up on her fantastic blog Rip + Tan, too.  We shot this at Jenni’s amazing house after a class one day.  Of course she had a few dozen perfect bowls to use for all the ingredients!

Miso soup is so healing, really easy to make and my whole family loves it.  Miso paste has a rich, savory, umami-like quality about it.  But I am pretty particular about what kind of miso to buy, so please read my tips.

·      Miso is fermented so therefore it contains healthy bacteria which helps our digestive system and immune system.

·      It is a complete protein and contains all of the essential amino acids.

·      High in antioxidants, so it is anti-aging (yay!)

·      Miso is alkalizing to our cells and tissues.

·      It contains linoleic acid, a fatty acid that helps you maintain beautiful healthy skin.

·      The isoflavones in miso can help regulate hormones.

·      The sodium in miso does not have a negative affect on the cardiovascular system like table salt does.

·      There is an acid present in miso called zybicolin that helps detoxify the body and eliminate elements taken in through pollution, radioactivity, and artificial chemicals in our soil and foods.

·      Miso is a good source of the B12 vitamin, which is a B vitamin most commonly found in fish and land animals, so important for vegetarians and vegans.

miso

Here are some do’s and don’ts for buying and preparing miso:

DO:

  • Buy organic or at least non-GMO (genetically-modified organism) since the main ingredient is soybeans which are almost always GMO, unless certified organic.
  • Buy miso that is naturally fermented (look on the label to make sure there is a bacteria, on the list of ingredients).  Fermented soy is much easier to digest then non-fermented and fermented foods, in general, increase the concentration of beneficial bacteria in the digestive tract. Probiotic organisms aid in digestion, and also play an important role in maintaining and strengthening the immune system.
  • Buy unpasteurized miso, so it’s live.
  • Substitute miso for dairy products such as parmesan (but leave out the salt in the recipe) cheese.  See this pesto recipe as an example
  • Store in your fridge for months, even a year and a half!

DON’T:

  • Boil miso- it will destroy the live enzymes.  Always add miso at the last minute, off the heat.
  • Assume miso is gluten free- it often can contain barley and/or other gluten grains.  Check ingredients.
  • Buy miso outside the refrigerated case at the supermarket.  It won’t be live.  Unpastuerized, and therefore refrigerated, miso contains live good bacteria, which help your body assimilate nutrients from food.

Different types of miso: The different colors of miso are related to how long the miso was fermented and the composition of ingredients (usually rice or barley).   White miso is fermented for the shortest period of time and has the lightest/sweetest flavor, followed by yellow, and then red.  Brown miso has fermented for the longest period of time and has the strongest/saltiest flavor.

topping bar for miso soup | pamela salzman

For the soup bar, we had all the toppings assembled before the broth was even made since that took literally minutes to prepare.  We settled on the assortment of ingredients you see in the images.  Clockwise from the miso in the small bowl on the left:

Organic White Miso (we used Miso Masters)

Sprouted Organic Tofu (we used Wildwood Organics)

Carrots

Bean Sprouts

Soup

Wakame (seaweed)

Udon noodles

Soba noodles (100% buckwheat from Eden Organics)

enoki mushrooms (brown and white)

center:  scallions

Other great ideas for toppings include, but aren’t limited to, soft-boiled eggs, cooked shrimp or pork, shelled edamame, cabbage, spinach, bok choy.  Have fun!

miso soup bar | pamela salzman

5.0 from 1 reviews
Miso Soup
Author: 
Serves: 4
 
Ingredients
  • 4 ¼ cups of water
  • 1 (6-inch) piece kombu (dried kelp)
  • 1 cup dried bonito flakes (These are smoked, dried flakes of fish. Optional, but delicious)
  • ½ cup rehydrated wakame (soak according to package directions and chop, if necessary)
  • 4 Tablespoons organic and unpasteurized miso (I use white)
  • Shoyu or tamari to taste, if desired
  • Toppings, if desired: grated carrots, thinly sliced mushrooms, scallions, baby spinach, cubes of firm tofu, cooked shrimp or pork, soft-boiled egg, bean sprouts, seaweed
Instructions
  1. Make the dashi (broth): In a medium saucepan over medium-high heat, bring the water and kombu to a boil. Remove the pan from heat and add the bonito flakes. Cover the pan and allow to steep for 5 minutes.
  2. Strain stock through a fine mesh sieve or a cheesecloth-lined colander into a large bowl or another saucepan. If you are not using the stock immediately, allow to cool uncovered and then refrigerate it, covered for up to a week.
  3. Transfer all but ½ cup of stock back to the original saucepan and heat until hot.
  4. Whisk miso into the reserved ½ cup of stock until smooth. If you think you will consume all of the soup now, stir all of the miso mixture to the heated stock and serve immediately. Otherwise, add a spoonful of the miso mixture to each individual bowl and ladle hot stock on top. Add desired toppings.
Notes
Miso is a live food.  In order to preserve its beneficial enzymes, do not boil it.


The perfect spring salad recipe

the perfect spring salad | pamela salzman

I just had to squeeze in this last recipe before Easter (and Passover) in the hopes that some of you are still looking for inspiration!  I taught this salad all last month in my classes and it was THE salad I seemed to make all the time last year when I had people over for dinner in the spring.  Spring is the operative word here since there is no mistaking in what season this salad lives.   I mean just look at it!  It is everything spring should be  — bursting with lightness, color and a breath of fresh air!  And full of veggies that come into being in the spring.  Plus it’s beautiful and it will go perfectly with whatever you’re making.  Leg of lamb, perfect.  Baked ham?  Perfect.  Roast chicken or fish.  Perfect.

cut watermelon radishes crosswise

The key with this salad is the balance of textures and colors.  You want to keep everything somewhat delicate which is why I love Bibb or Butter lettuces.  I found this beautiful red-leaf butter lettuce at my farmers market and used it for every class.  But then you need to do your best to slice all the hard and crunchy stuff as thinly as you can, again to keep things light.  I used my food processor to thinly slice the cabbage, carrots and radishes.  If you have a 2mm or 1 mm slicing disc for your Cuisinart, I would use that.  My new Breville has an adjustable slicing disc, so I turned it to just under 1 mm.  I especially like bitter vegetables like radishes to be on the thin side.  If you don’t have a food processor and your mandolin scares you (I don’t blame you), then just get out your sharpest knife and do your best.  You can even do matchsticks for the radishes and grated carrots.

try to find heirloom carrots


Trader Joe's Organic Microgreens

See if you can find beautiful heirloom carrots in purple or yellow and watermelon radishes like the ones here which are so dramatic!  I was able to find such carrots at my farmers market as well as Trader Joe’s.  My Whole Foods has had these radishes for the last three weeks.  Stunning!  They will make you look so good.  Your family and friends will be so impressed with whatever dish is graced with sliced watermelon radishes!  Truth be told however, my favorite component of this salad is the fresh chives.  Light, grassy with a very mild onion flavor, chives are like the most delicate green onions.  I just love them in this salad and others, too.  You know how much I enjoy shallots in my salad dressings, but I don’t add them here because the shallots offer enough of that flavor.  Even if you don’t make this recipe, consider adding chopped fresh chives to your next salad.  I know you won’t be disappointed!

the perfect spring salad | pamela salzman

You can do so much with this salad including adding feta, mint leaves, walnuts, avocado, oranges or kumquats.  There’s plenty of dressing for you to add in any of these.  Speaking of dressing, since there’s nothing in this one that can spoil, feel free to make this well in advance.  I’m sure it would do just fine in the fridge for 2 weeks.  It will firm up though because of the olive oil, so remember to pull it out of the fridge at least 20 minutes before you wish to serve it.

the perfect spring salad | pamela salzman

I hope you have a beautiful holiday, shared with the ones you love!  xoxo

the perfect spring salad | pamela salzman

the perfect spring salad | pamela salzman

the perfect spring salad | pamela salzman

The Perfect Spring Salad
Author: 
Serves: 6-8
 
Ingredients
  • For the salad:
  • 1 large or 2 small heads butter lettuce, washed, spun dry and leaves torn into bite size pieces (about 16 cups)
  • 1 cup thinly sliced red cabbage
  • 4 radishes, sliced as thin as possible
  • 2 carrots, preferably purple, scrubbed clean and julienned or sliced super thin
  • ½ 1.75 ounce box micro greens
  • 1 bunch fresh chives, chopped
  • For the dressing: (this will provide slightly more than you need, but will allow for a few add-ins)
  • 1 ½ teaspoons Dijon mustard
  • 3 Tablespoons apple cider vinegar, preferably raw
  • ½ teaspoon sea salt
  • Freshly ground black pepper to taste
  • 6-8 Tablespoons unrefined, cold-pressed, extra-virgin olive oil (depending on strength of vinegar)
  • 1 teaspoon raw honey
  • Other additions/substitutions: a few kumquats sliced crosswise, chopped sugar snap peas, thinly sliced fennel, avocado, feta cheese, edible flowers, walnuts, mint leaves, flaky sea salt
Instructions
  1. Place the butter lettuce in a large bowl and layer the remaining ingredients on top.
  2. Place all the ingredients for the dressing in a bowl or screw top jar and whisk or shake to combine.
  3. Drizzle just enough dressing to coat lightly and toss together.  Finish with a sprinkle of flaky sea, if desired.