I just dropped off my oldest at college this past weekend. Up until this point, nothing has made me feel as old as saying to someone, “I have a child in college.” And it doesn’t help when people respond with, “Wow!” Rub it in. Thank heavens for Mr. Picky who is in elementary school and still asks me to cuddle him at night.
My daughter goes to school in Dallas. So when I visit, I make sure to b-line for some good Tex-Mex food. You all know my weakness is guacamole and chips. Guacamole = healthy food. Chips, not so much. In LA you can find places to give you jicama with your guacamole. In Texas, not so much. So I try not to overdo it when I’m there, but I’m not always successful.
Although I grew up in New York, California cooking has stolen my heart. Lightness, freshness, color. It’s addictive. And the best avocados! Come visit me and we’ll have fun just prancing around the farmers markets. We can make this salad, which is like fancy-pants guacamole.
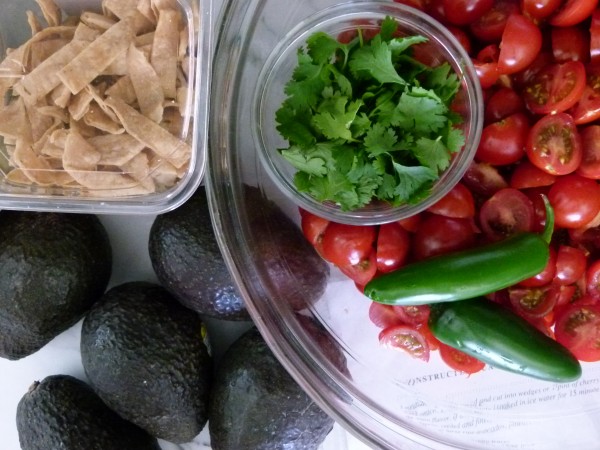
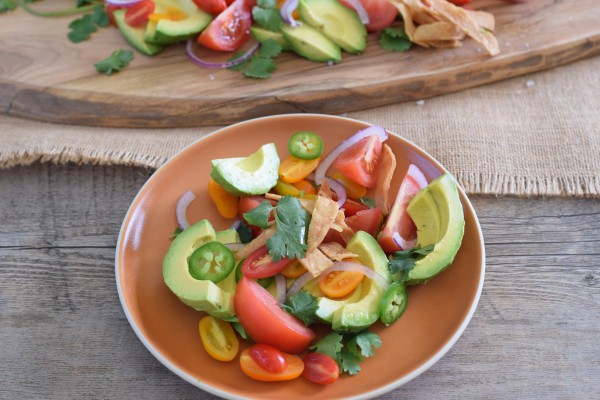
I taught this salad last year or the year before and it is one of my favorites. First of all, it takes minutes to pull together. Second, it includes two of my favorite foods, tomatoes and avocados, which I will remind you are both insanely delicious right now. Use whatever tomatoes look great and have fun mixing colors and shapes and sizes. Lastly, it’s basically guacamole that I can eat with a fork or on top of a piece of fish or grilled chicken and I don’t feel the need to have 25 tortilla chips along with it.
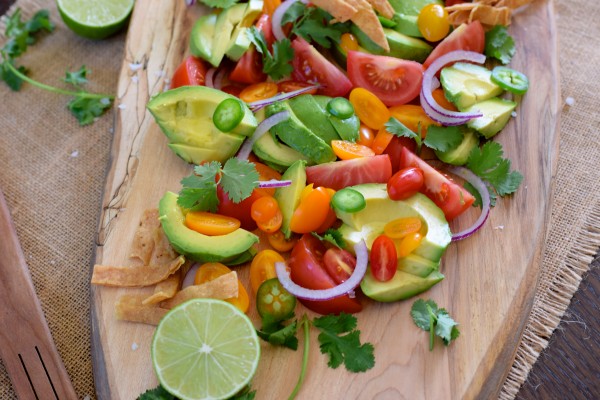
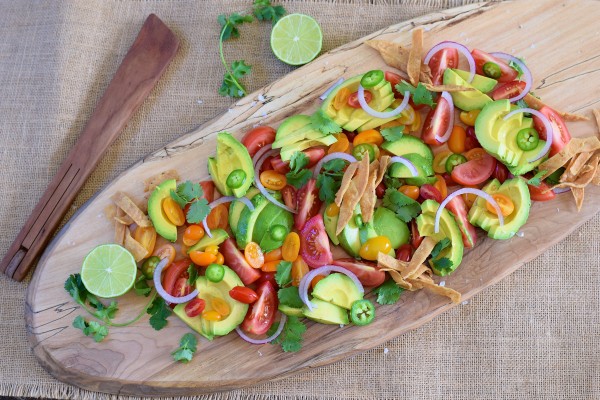
It also happens to look very pretty on a buffet. But tomatoes are leaving us soon, friends. Enjoy it ALL while you can, because you’re going to blink your eyes and they’ll be gone.
optional: serve with broken corn tortilla chips on top or around the side of the salad
Instructions
Place the tomatoes, red onion and jalapeño on a platter. Arrange the avocado slices on top. Scatter the cilantro leaves all over.
Whisk together the lime juice, salt, hot sauce and oil together and drizzle all over salad. It’s best not to toss this salad, otherwise the avocados will get messy. Taste for seasoning and add additional salt if necessary. A sprinkle of flaky sea salt is nice.
Serve with tortilla chips on the perimeter of the platter or crushed on top, if desired.
Notes
The amounts for the ingredients are merely guidelines. Feel free to adjust quantities to suit your taste.
This is the last hurrah before school starts and then the recipes start getting more serious. Throughout the summer, I’ve assembling more than cooking, presenting meals at irregular hours, winging it a bit. But with the first day of school looming, I know I have to get my act together and have a plan for three well-balanced meals a day. But until then, we’ll keep eating these popsicles for breakfast or to cool off in the afternoon.
I’ll let you in on a little secret: my weakness (beside guacamole and chips) is ice cream. I hardly ever eat it anymore, even the clean recipes I have on my site for dairy-free, refined sugar-free cashew ice cream. Once I start, it’s hard for me to stop, so I try to stay away from ice cream altogther. But I still crave it, especially ice cream with chunks of something tucked inside like chocolate chips, nuggets of banana, a swirl of peanut butter or a salty almond. Now look what I’ve done. I’ve gotten myself all worked up.
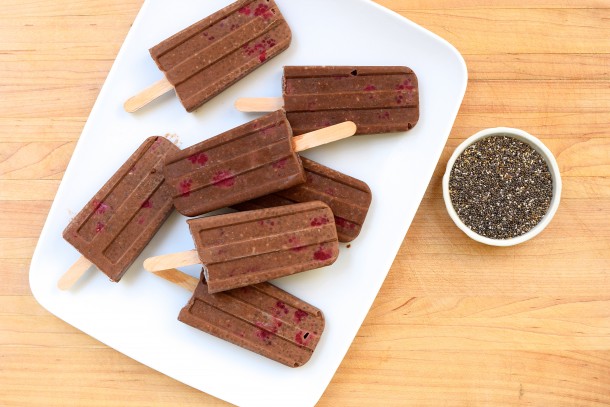
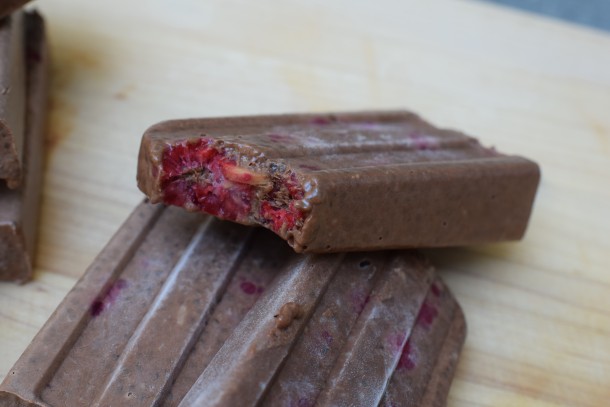
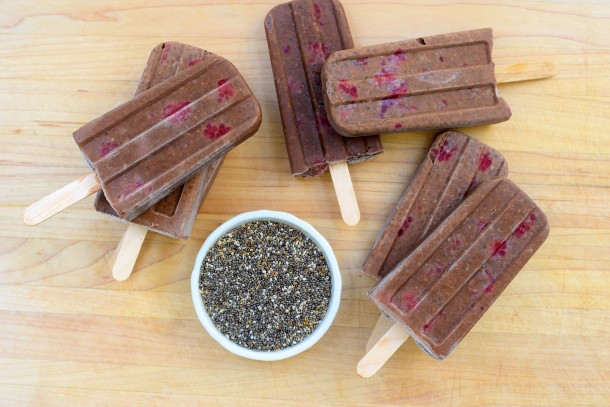
A homemade popsicle is my answer to an ice cream craving. It’s sweet, cold and creamy. It takes a little longer to eat. It’s a reasonable serving size and therefore an acceptable calorie count. And I can make it the way I want. My kids and I have been devouring these chocolate chia pudding popsicles. I got the idea from seeing Martha Stewart on The Today Show. She took a small container of plain yogurt and swirled some fruit into it and then stuck a popsicle stick into it and froze it. I thought that was a clever breakfast to-go for the warmer first days of school. We eat a lot of chia pudding for breakfast and snacks. My son prefers the chocolate version which I make with raw cacao powder and the next day we’ll add in fresh fruit or shredded coconut and the like. Chia seeds are really high in protein, fiber and good fats, so they make a great breakfast or substantial snack. So I took some leftover chocolate chia pudding, stirred some fresh raspberries into it and poured it into popsicle molds. Voila! Delicious and a truly healthful treat!
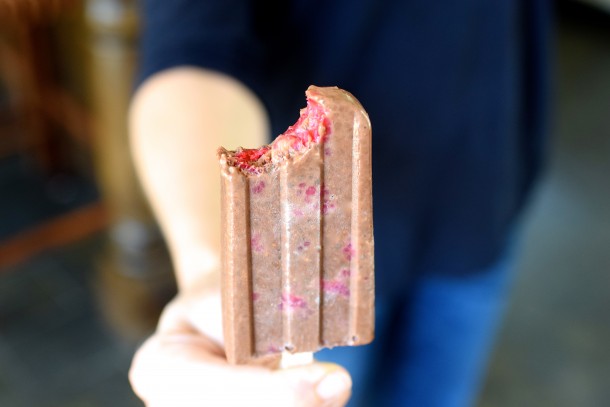
I think these are like a chocolate popsicle with texture. I kept the sweetness pretty low, but if you want this to feel more like a dessert, it would be super easy to make it sweeter. Just add a little honey or maple syrup to the pudding before freezing and you’ve done it. Or use more dates if that’s how you’d like to go. I love the combo of chocolate and raspberries, but you can keep these straight chocolate or add coconut or chopped cherries or strawberries or even raw cacao nibs if you’re a hardcore superfood junkie!
One message I am always trying to get through to my students is that so many recipes are just formulas that you can tweak into dozens of other recipes. Chia pudding is one of those. Once you know the basic ratio of chia seeds to liquid to sweetener, you can change it to any number of flavor combinations, like strawberry-basil, blueberry-almond or mango-coconut. You can blend fruit into the almond milk if you don’t want chunks. Or just stir pieces into the pudding if you want the texture. Or mini chocolate chips would be nice. And then there’s peaches and raspberries. Or lemon. Or banana. I can do this all day. Savor these popsicles in case they’re you’re last ones until next summer!
1 ¼ cups unsweetened almond milk or a combination of coconut milk and almond milk
3-6 pitted dates or sweetener of choice, to taste
½ teaspoon pure vanilla extract
2-2 ½ Tablespoons raw cacao or unsweetened cocoa powder, depending on how chocolaty you like it
¼ cup chia seeds
¾ cup fresh or frozen raspberries
4-6 popsicle sticks
Instructions
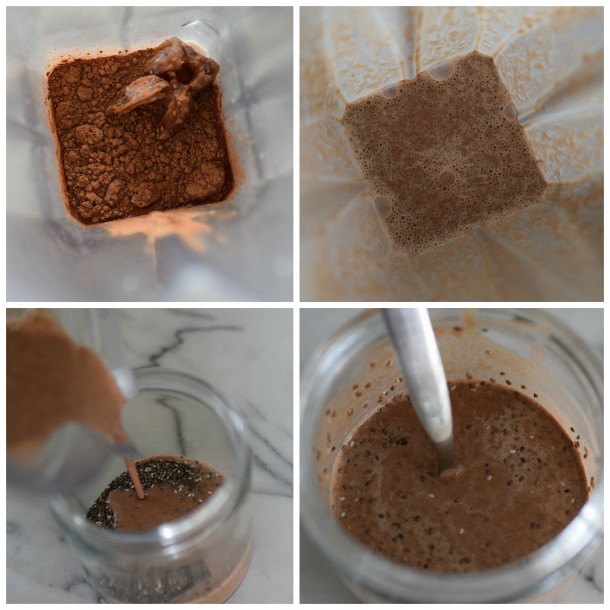
Place almond milk, dates, vanilla and cacao in blender and process until dates are pulverized. A Vitamix does a great job with this. If your blender leaves the dates too chunky, you can strain the mixture before adding it to the chia seeds.
Pour chia seeds into a medium container and add almond milk mixture. Stir immediately to combine otherwise you may end up with blobs of chia seeds. Allow to sit on countertop and stir every 5 minutes. After 15 minutes, it should have thickened.
Cover and refrigerate for at least an hour.
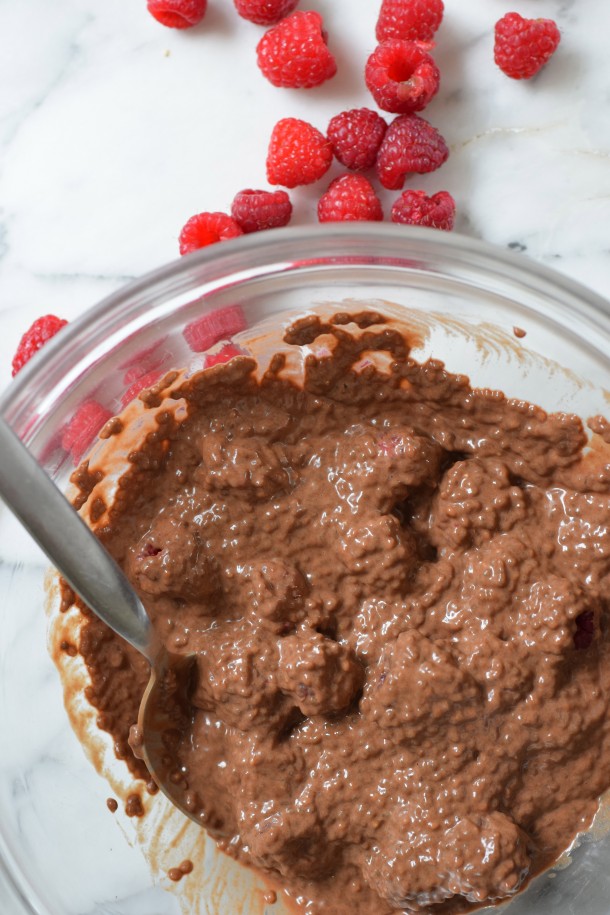
When the pudding mixture is completely thickened, stir in the raspberries. Divide the pudding into popsicle molds and insert a stick in the center of each. If your molds hold 3 ounces of liquid, you should be able to get 5-6 popsicles out of this recipe.
Notes
The sweetness is to taste, so taste the mixture before refrigerating and adjust accordingly. If you don't want to use dates, try Grade A maple syrup, honey, coconut sugar or whatever you prefer.
I just returned home from a beautiful vacation on Long Island with my family. It’s always my favorite week of the year and I enjoy the time even more when the weather is perfection like it was last week (barring the crazy 30-minute quasi-tornado on Tuesday morning.) I try to visit my parents in August rather than earlier in the summer because my father’s vegetable gardens are much more abundant now. I think one of the best, most rewarding things in life is to be able to grow your own food. On so many levels it’s good for you and good for the earth.
It can be very confusing to know what’s in season these days since we can buy virtually anything at any time. But if you’ve ever gardened, you know that certain vegetables are planted during certain times of the year. When I was growing up, I knew strawberries were only around for a short time so I would eat as many as humanly possible to take advantage of nature’s little springtime gift. Same with tomatoes. In fact, my mother loves telling me the story of when I was little and I ate so many unripe green tomatoes out of my father’s garden that I made myself sick. I guess you can have too much of a good thing.
Here’s a newsflash for some people: bell peppers are a summer vegetable. Sure you can buy them all year, but they’ll be imported and likely not organic. Another newsflash is that bell peppers are usually on the Environmental Working Group’s “Dirty Dozen” list of most highly contaminated produce, so I always buy organic or not at all. Yikes. Now I look back and thank my lucky stars my father grew lots of peppers without pesticides.
Sweet bell peppers have a soft spot in my heart because they were one of Mr. Picky’s first “approved” vegetables. I can even remember the day he tried a stick of raw red bell pepper and said, “Hey, this is good! It’s juicy!” Munch, crunch. Then I went overboard trying to put sweet bell peppers in everything because I thought they were my ticket to broadening his limited palate. Well my strategy didn’t exactly work. But I’m glad I went pepper-crazy because I found this recipe for Parmesan peppers and it has become a favorite.
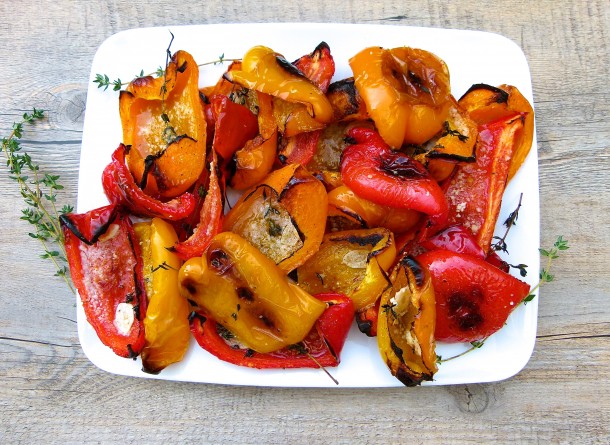
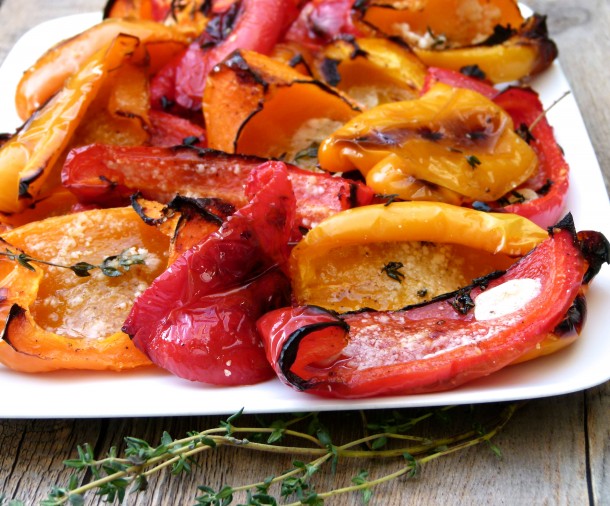
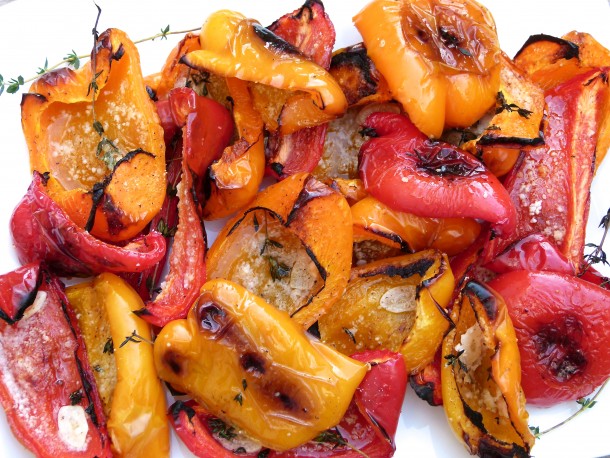
Parmesan peppers is one of the easiest and tastiest side dishes. It gets multiple flavor boosts from garlic, thyme, lemon and Parmesan cheese, although I often use Pecorino, a sheep’s milk cheese. It’s true that my son prefers his bell peppers raw (“juicy and crunchy”), I prefer the sweeter flavor and silky texture from roasted peppers. One sliver of these peppers wrapped around a bite of fish or roasted chicken is just delicious. And if you can find two (or even three) colors of peppers, this is a really beautiful side dish. And I repeat, easy!
So the big question is, does Mr. Picky eat this? And the answer is, almost. What does that mean? Like most kids, he’s slow to come around to vegetables and he likes to try things on his own terms. It’s annoying for sure, but it is pretty normal. So the first couple of times I made this, he was like “no way I’m eating that.” He did have the obligatory taste, but nothing more after that. More recently, he has eaten an entire piece and declared, “it’s pretty good, but I’m fine with one piece, thanks.” The last time he had one piece and said, “it’s good and I’m pretty sure I’ll eat more next time.” Welcome to my world!
While there are no guarantees in life, these peppers have always been a hit with everyone else who has tried them, including my two daughters. What I do know for sure is that summer and local peppers won’t be around forever, so do enjoy them while you can.
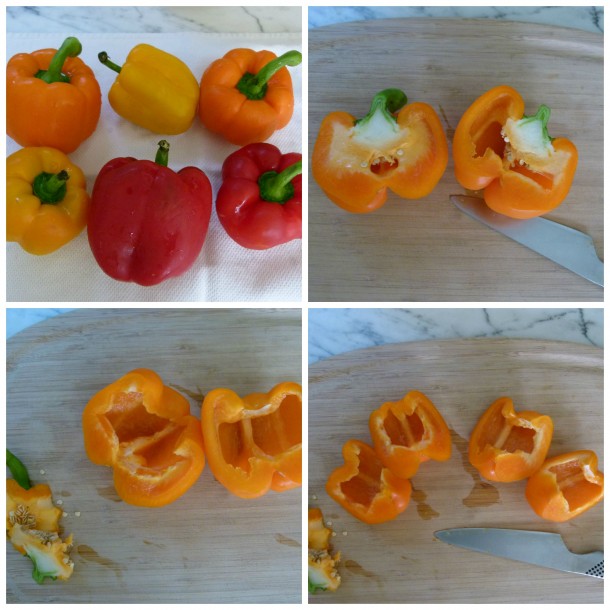
4 bell peppers (a mix of yellow, red and orange is nice)
1 clove thinly sliced garlic
8 thyme sprigs
1 Tablespoon unrefined, cold pressed, extra virgin olive oil
sea salt and freshly ground black pepper
¼ cup grated Parmesan or Pecorino
juice of ½ lemon, if desired
Instructions
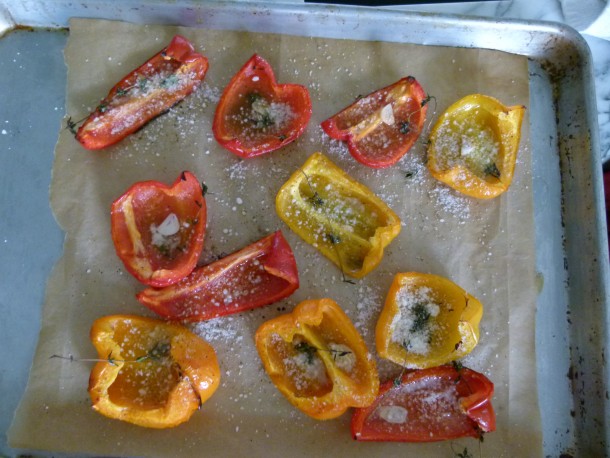
Preheat oven to 425 degrees and line a baking sheet with parchment paper.
Stem, core and quarter bell peppers; place on prepared baking sheet.
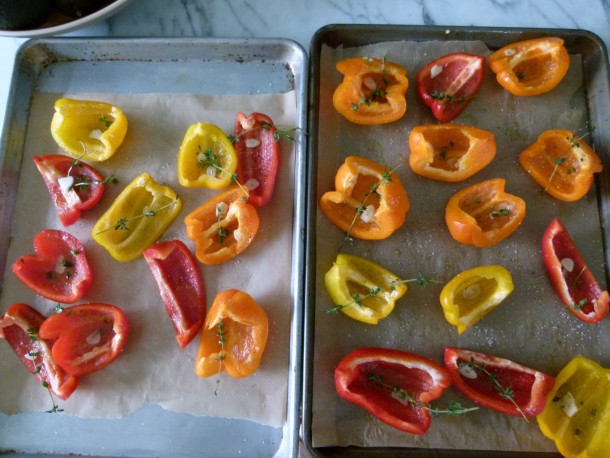
Toss with garlic, thyme and olive oil; season with salt and pepper.
Arrange skin side down in a single layer and roast until softened, about 30 minutes.
Remove from oven and preheat the broiler.
Sprinkle the peppers with Parmesan and place under the broiler until the cheese is melted and peppers are slightly charred. This will only take a minute or two.
Remove from oven and drizzle with lemon juice, if you like. You can leave the thyme sprigs, but they are not to be eaten.
Notes
Feel free to leave out the cheese if you need. These are also great with a few capers sprinkled on when they come out of the oven.
I just arrived in New York for my annual summer vacay with my parents, my sisters and their families. We’ve descended upon my parents’ house in Long Island for a week of old fashioned backyard fun with a few trips to the beach and the ice cream parlor. It also involves some serious menu planning for 12-16 people at any given meal. If such persons were all adults, this task would be less challenging than if half of them were children ages 1-19. But I love a challenge!
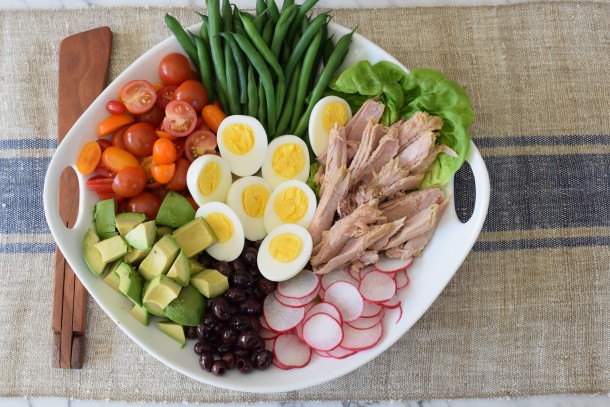
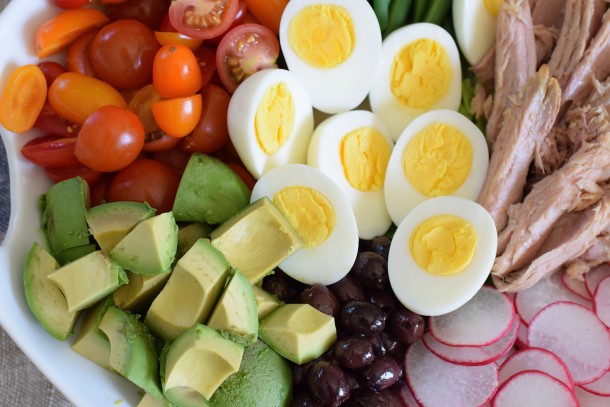
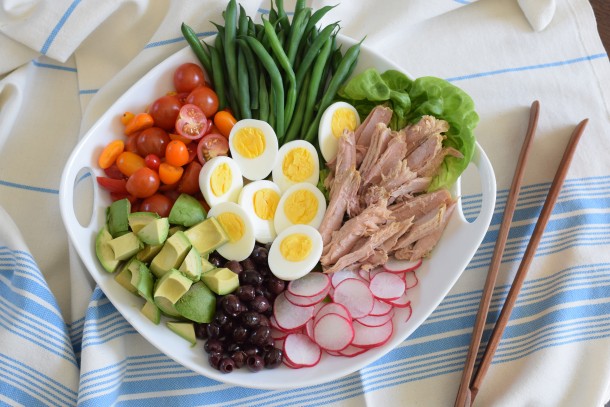
Sometimes for lunch we’ll make a giant composed salad where each component has its own space and I serve the dressing in a small pitcher on the side. I notice the kids (and picky adults, in general) eat much more of a composed salad than a tossed one. My son, Mr. Picky, can always find something to choose from a composed salad versus one that is tossed, especially if there’s one ingredient that’s offensive and touching everything else. Touching ingredients is a deal breaker!! This version of a classic Nicoise salad is always a winner, plus it’s one of my favorite salads of all time.
The classic typically contains oil-packed tuna, hard boiled eggs, tomatoes, green beans (usually the small haricot verts), Nicoise olives, and boiled potatoes. It’s a perfect salad for summer because it can all be prepped ahead and served cold or at room temp. And it’s a meal unto itself.
But I have made so many versions of this salad subbing chicken or slow-roasted salmon for the tuna or even white beans for the tuna for a vegetarian version. Regular string beans for the haricot verts. Even cucumbers have worked nicely. But in this version, which I call a “California Nicoise,” I sub in the very Cali avocado for the potato, because everyone seems to be watching his or her carbs lately! Because of the versatility of this salad, it was a hugely popular in my classes last summer with everyone — Paleo-types, vegetarians, vegans, gluten-free peeps and so on.
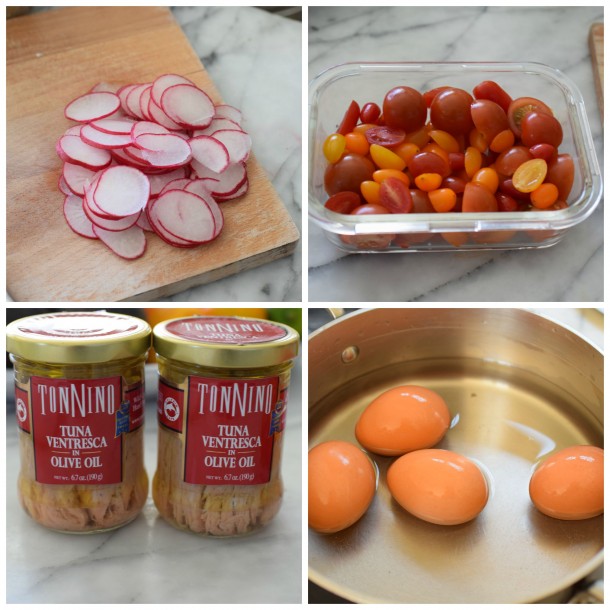
Visually, I think this salad is so beautiful and quite healthful, too. It is well balanced with high quality protein, fat and lots of veggies. I love using the very best tuna for this salad. I featured this Tonnino oil packed wild tuna in a recent Five Friday Favorites and it is perfect here. If you want to use standard canned tuna, just drizzle a little olive oil on top for added flavor.
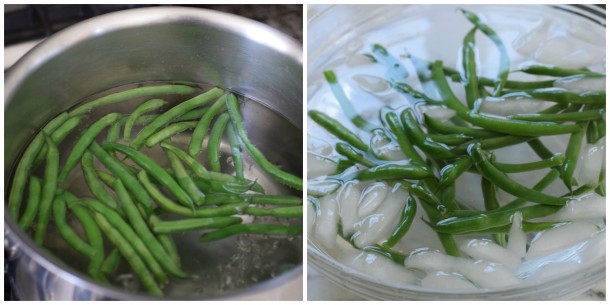
Green beans can be blanched, radishes sliced and eggs boiled the day before and refrigerated. But again, feel free to sub other ingredients if that would make you happy. And if you notice more takers than usual for this salad, perhaps employ the composed method for other salads too!
⅓ cup unrefined, cold-pressed extra-virgin olive oil
8 ounces haricot verts (thin French green beans) or string beans, trimmed
2 Tablespoons kosher salt
4-6 hard-boiled large eggs,**peeled and halved lengthwise
1-2 cans high-quality tuna, preferably packed in olive oil, drained and broken into pieces
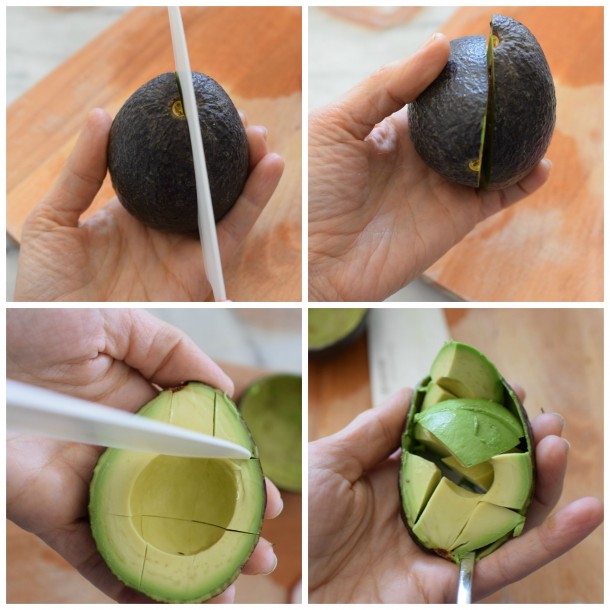
1 large avocado, cubed***
½ cup olives, preferably Niçoise
¾ pound cherry tomatoes, halved
4 radishes, trimmed and thinly sliced
Bibb lettuce leaves to line platter, if desired, or shredded as a bed for the lettuce
Instructions
Whisk all the dressing ingredients together in a medium bowl or shake in a screw-top jar.
Prepare a bowl of ice water for the green beans. Bring a large pot of water to a boil and add kosher salt. Add the beans and set a timer for 3 minutes. After beans have cooked for 3 minutes, test for tenderness. They should be crisp-tender, but not taste raw. Drain and immediately submerge in the ice water bath. Drain after 5 minutes or so and pat dry. Can be done the day before and refrigerated.
Assemble the salad by arranging ingredients in separate groups. I like to line the platter with lettuce either just under the tuna or the entire platter. Drizzle everything with dressing or leave on the side for each person to dress his/her own salad.
Notes
*Ingredient amounts can vary based on preferences. **Place uncooked eggs in a saucepan and cover with water. Place over high heat and bring to a boil. Cover, turn off heat and time for 10 minutes. Rinse with cold water or transfer to a bowl of cold water. Can be done a day ahead and peeled before serving. ***the avocado is in place of the traditional boiled, small new potatoes. But use 1 pound of potatoes if you prefer.
My kids can’t get enough of these zucchini fries and I can’t get enough of hearing them beg me for vegetables! After I returned home from New York last week, my son, the one and only Mr. Picky, said, “I don’t know what you’re making for dinner this week, but please include zucchini fries!” Pinch me.
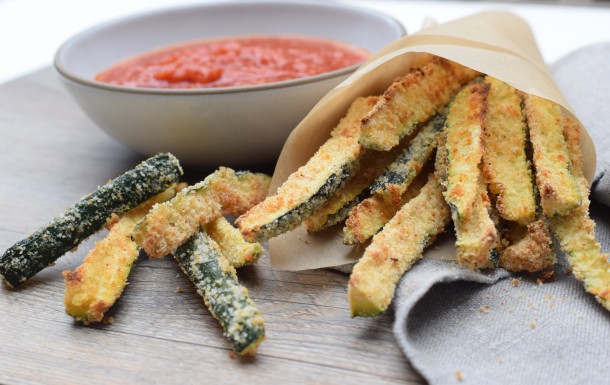
I know the recipe is posted on the Today Show website, but I didn’t actually demo the recipe during my segment and I do have some tips to share. Keep in mind, if you love zucchini fries when you go to a restaurant, these are similar, but not exactly the same. Those are deep-fried, and we all know deep-fried food, EVEN A VEGETABLE, is really, really bad for you. Sorry to remind you, but restaurants use the lowest quality oil to fry foods and they use it over and over and over again. It is like a big vat of inflammation and free-radicals and transfats and likely GMO’s — everything you want to avoid. So we’re going to bake these, ok?
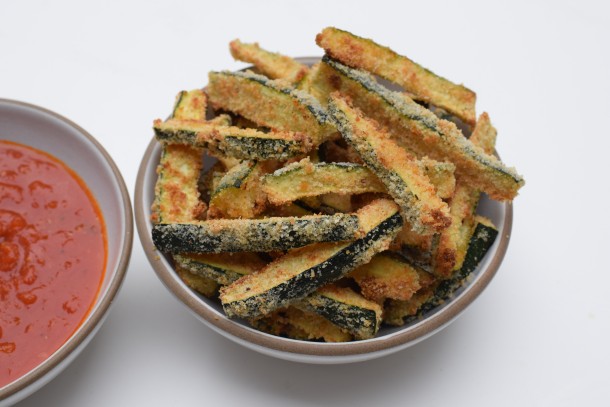
They’re still going to be crispy and tasty, they’re just not going to be greasy. Perfect reason to dip these fries into something. I eat them as is, but my husband (just a grown-up kid really) likes these dipped in tomato sauce (homemade recipe here) or Ranch dressing (homemade recipe here) and my son will also eat them with mustard. I find two things to be true with kids and vegetables — they love dips and they like things that resemble French fries. That makes this recipe a double winner!
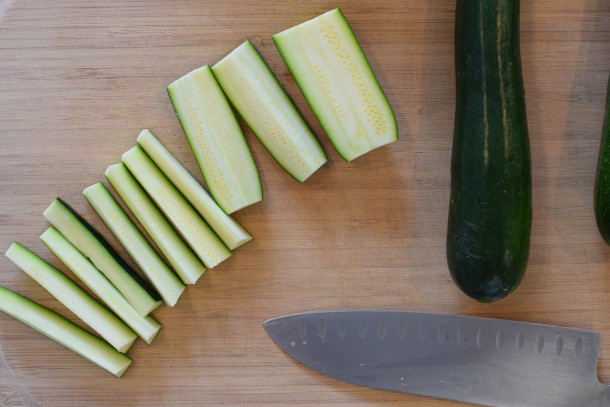
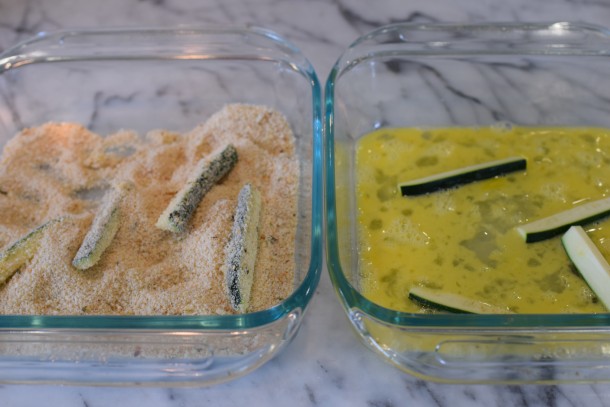
But I’m not going to lie — even though this is an easy recipe, requiring no special skills or culinary training, they’re kind of a pain to make because you’re dipping a lot of zucchini sticks into egg and then breadcrumbs and arranging them just so on a baking sheet. My advice is to get your kids or someone to help you and then this becomes no big deal. You can also cut the zucchini in the morning to save on prep time before dinner.
I know so many of you have zucchini coming out of your ears right now. Try not to let them grow too big. For this recipe especially, you want to select small to medium zucchini which contain fewer seeds and aren’t bitter like some big ones. And the trick is to cut them into the size no bigger than a normal adult finger. If you cut them too big, they won’t get tender enough and if you cut them too small, they can get dried out.
The only problem with this recipe is that it never makes enough. It says “serves 6,” but that’s hardly true. I actually never got to eat 1 fry during the entire month I taught this recipe because there were never any left. Once you start, you can’t stop. So for the first time, I can’t answer the question “how long do leftovers last in the fridge?” No matter how many you make, there won’t be any!
1 cup dry bread crumbs (use GF breadcrumbs to make these GF)*
¼ cup freshly grated Parmesan or Pecorino cheese (omit to make these dairy-free)
1 teaspoon garlic powder
½ teaspoon ground paprika
⅛ teaspoon dried oregano
⅛ teaspoon crushed red pepper
1 teaspoon sea salt
2 large eggs**
Unrefined, cold-pressed extra virgin olive oil spray
Instructions
Preheat the oven to 425 degrees. Line 2 baking sheets with parchment paper and brush parchment with olive oil.
To cut your zucchini into fries, cut each zucchini in half crosswise. Cut each half lengthwise into halves or in thirds, and each one of those pieces into 4 sticks or into ½-inch wide sticks.
In a shallow dish, combine breadcrumbs, Parmesan, garlic powder, paprika, oregano, red pepper and salt. In a separate shallow dish beat eggs very well.
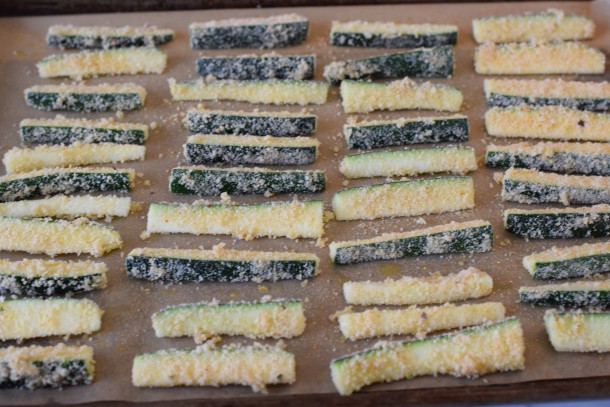
One by one, dip each zucchini stick into the egg mixture, then into the bread crumb mixture. Shake to remove any excess and place on the baking sheet.
Once all are coated with breadcrumb mixture and on the prepared baking sheet, spray with olive oil.
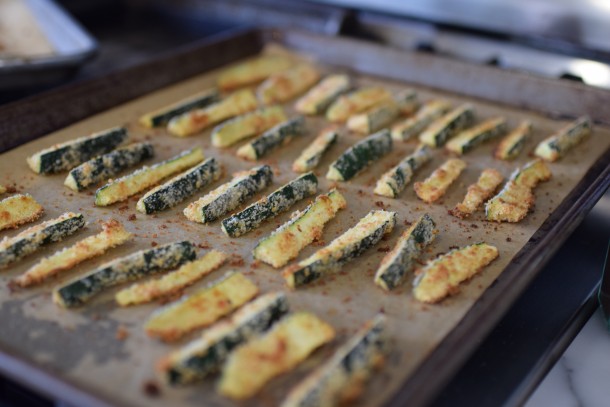
Bake for 15-20 minutes, or until golden and crispy on the outside and soft on the inside, flipping over halfway to ensure browning on both sides. Serve plain or with marinara sauce or Ranch dressing.
Notes
*Do not use panko bread crumbs instead of the standard bread crumbs. They do not stick as well. **You can also dip the zucchini in olive oil instead of eggs for an egg-free version.
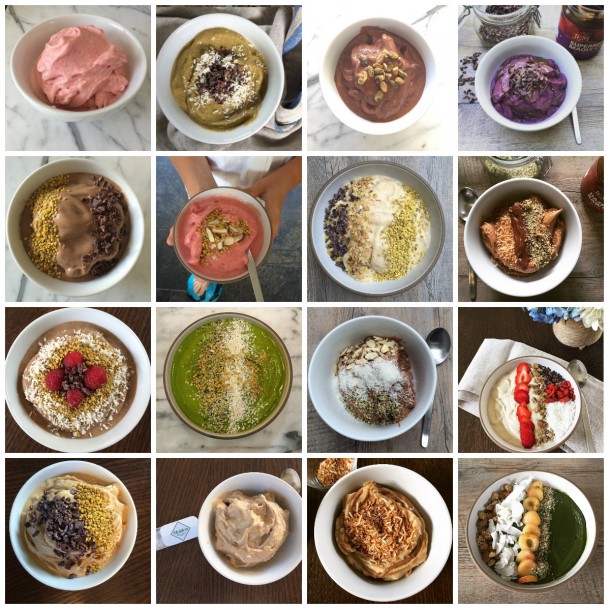
I live and teach in Los Angeles where people grab onto a food fad and hold on for dear life. Until the next cool thing comes around. Acai bowls were all the rage a few years ago. Maybe they haven’t made it to your neck of the woods yet, but no matter because you can make one yourself. Not only are acai bowls delicious, but they are a pretty healthy snack. It’s almost like a not-as-sweet soft serve made with frozen acai, frozen bananas and frozen strawberries plus a little juice or almond milk to help blend it. But it’s the toppings (like granola, coconut, nuts, banana) that make an acai bowl even more delicious because of the contrast in textures. And then when acai bowls weren’t exciting enough, pitaya bowls came onto the scene.
And then someone figured out that you could pour your smoothie into a bowl and top it with any number of great toppings and eat it with a spoon instead of a straw. Genius.
Most people seem to make their smoothie bowls pretty liquid-y, but slightly thicker than a normal smoothie, at least so the toppings don’t sink. I personally like them as thick as an acai bowl or soft serve. I taught these in my breakfast classes last year and everyone preferred the thicker versions. There is no right or wrong way to do it. BUT, if you want to eat this as a meal replacement, I recommend getting some protein in the smoothie or in the toppings.
Protein could be:
nuts or nut butter
seeds, like hemp, flax meal, sunflower, pumpkin or chia
protein powder
These are some of my recent creations that I have posted on Instagram and Facebook, but like I said — there are infinite possibilities. Watch my video if you’re a visual learner and also because I show you how to make a smoothie bowl in a Vitamix and a food processor.
And if you really need an actual recipe just to get you started, see an example below. Or just make your favorite smoothie with a little less liquid, pour it into a bowl and add lots of toppings! Have fun and stay cool!
3 ripe bananas, peeled and cut into 1-inch pieces, about 2 cups (if you’re using a Vitamix or another high-powered blender, you can cut bananas into larger pieces), FROZEN or 1 ½ ripe bananas, frozen and 4 frozen figs
1 cup frozen strawberries
¼ - ½ cup unsweetened almond milk or milk of choice (or even more if you want a pourable smoothie)
½ teaspoon pure vanilla extract (optional)
sweeten to taste with a few teaspoons (more or less) of raw honey, Grade A maple syrup or a couple drops of stevia, if necessary (you might not need any)
Toppings: bee pollen, hemp seeds, raw cacao nibs, toasted coconut, chopped walnuts or almonds, granola
Instructions
Place bananas and strawberries in the bowl of a food processor or Vitamix or other high-powered blender. Add almond milk, vanilla and sweetener to taste. Process until smooth and creamy. I find that the food processor needs a little more liquid and a few more seconds to achieve the desired consistency, which is like soft serve ice cream.
Transfer the ice cream to bowls and serve immediately with toppings, if desired. If eating this as a meal for breakfast, try to add protein toppings such as nuts or seeds or add a scoop of protein powder to the blender. If you use a sweetened protein powder, add a handful of ice to the blender so the smoothie is not too sweet.
You can also store the smoothie bowl in the freezer for another time, but you’ll need to allow it to sit on the countertop to soften up for a few minutes before eating so that it’s scoopable.
Notes: these measurements are flexible. Use more strawberries if you like or sub blueberries.
Notes
Notes: these measurements are flexible. Use more strawberries if you like or sub blueberries.
Another variation: chocolate smoothie bowl – use 4 frozen bananas, 2 Tbs. raw cacao powder, ¼ - ½ cup almond milk, ½ teaspoon pure vanilla extract, sweetener if necessary
Mocha smoothie bowl: make chocolate smoothie bowl with 2 teaspoons instant coffee powder
Chocolate peanut butter smoothie bowl: make chocolate smoothie bowl with 2 Tablespoons (or more) natural peanut butter.
Happy Friday, friends! Guess what happened to me after I came back from Mexico? I got sick! I couldn’t believe it. My girlfriend did too, and our husbands were spared, thankfully. I am not going to bore you and gross you out with the very unpleasant details, but suffice it to say my digestive system was compromised for a while. I have spent the last few weeks building it back. And that’s when it hit me I’ve never shared my favorite products for keeping your gut healthy and robust. Hence the theme for this week’s Five Friday Favorites!
A healthy gut is so, so important in keeping our immune system strong (80% of your immune system resides in your gut) and aiding our bodies with digestion, which in turn gives us energy and makes us feel better in our everyday lives. A healthy gut also allows you to absorb more nutrients from your food, which makes every last leafy green worth it!
The goal in consuming any of the following items is to create a thriving population of good bacteria in the gut that will far outnumber the bad bacteria. Most populations around the world partake in some sort of regular fermented or cultured condiment (e.g. kimchi, yogurt, raw cheese, traditionally brewed soy sauce, etc.) with their meals, but not so much in the US. Here are some of my favorite ways to boost your gut health.
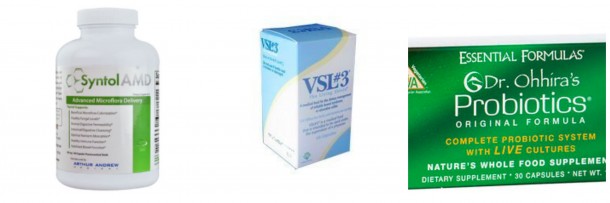
Probiotic Supplements
If you aren’t necessarily into eating fermented cabbage or if you are trying to cut back on the dairy, there is the option of taking a probiotic capsule on its own, as a supplement. In general, I am very reluctant recommend supplements because so many of them are absolute garbage and made with low quality ingredients. You really need to know which are the brands worth buying. And even then, we should be trying to get our nutrients through whole foods and not a pill. But if you had to take one supplement, I would recommend taking a probiotic. I take a probiotic daily and when I was sick after Mexico, I took even more (tinnitus 911 reviews).
My acupuncturist, Jason Handler, recommends VSL as well as Syntol AMD by Arthur Andrew Medical, which I have used before. I tend to switch products from time to time and I am using Dr. Ohhira’s which I bought on thrive market.com and have used BioK before with success. My friend and holistic nutritionist, Elissa Goodman, loves Renew Life 100 or 150 billion. You may experience a little discomfort when you first start taking probiotics as your body is trying to adjust to the balancing of bacteria. Temporary symptoms could including bloating, gas and going to the bathroom more often. My best advice is to play around with different capsules and try them out until you find one that feels the best for your body.
****
You may have heard about fermented foods being good for the gut. Products like kimchi and kefir are lining the shelves at health food stores- but is this whole fermentation thing a fad or should you believe the hype? In my opinion, I do think we should be consuming fermented foods!! When foods are fermented or cultured, a healthy, live bacteria is developed which is beneficial for our bodies. Here are some of my favorite fermented products:
Firefly Kitchens Raw Fermented Veggies
There are many brands out there, so feel free to experiment or stick with your own favorite. But I really like these veggies by Firefly Kitchens. Take already healthy veggies like cabbage, kale, and carrots, add some herbs, spices, garlic, and onions and you are left with an extremely healthful, easy-to-digest snack. While I would not go around claiming that this tastes as good as avocado toast, they are kind of tasty and so worth it to do something so good for your body. Even just 2 Tablespoons a day with lunch or dinner will provide you with amazing beneficial bacteria and digestive enzymes. My favorite is the Emerald City Kraut. These veggies are available at certain Whole Foods- you can check online here. But don’t be afraid to try a sample of another brand at your local farmers market or health food store.
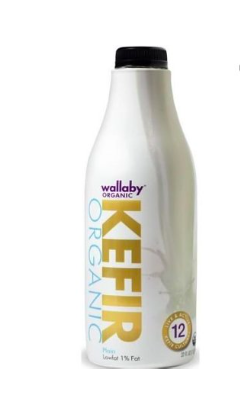
Wallaby Organic Kefir
Kefir (pronounced ka-FEER) is creamy, tart, drinkable yogurt/buttermilk-tasting product that contains healthy bacteria that have become present due to the fermentation process. The bacteria in kefir can colonize the intestinal tract and kefir also contains a greater range of bacteria than yogurt does, as well as yeasts.
Kefir is so versatile and can be used in place of buttermilk for certain dressings, or anywhere you use yogurt such as smoothies or with fruit and granola. Do note however that the bacteria is only present when eaten raw, so when swapping out Kefir for buttermilk in things like your morning pancakes you won’t get those fermented benefits. I love this organic Kefir by Wallaby that I buy at my local Whole Foods. But there are a few health food stores where you might even find coconut kefir if you are dairy-free.
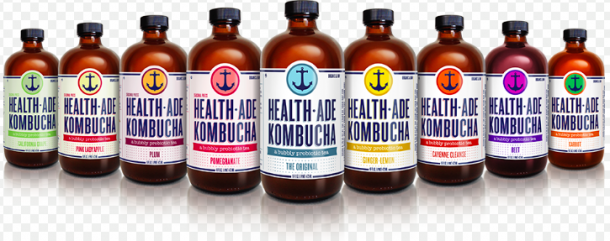
Health-Ade Kombucha
Kombucha is tea that has been fermented to develop good bacteria. This Kombucha by Health-Ade is my favorite, is made locally in Los Angeles and comes in a variety of flavors such as pink lady apple, beet, and ginger-lemon. One reason (besides being downright delicious) I like this particular Kombucha is because the company is committed to using all organic fruits and vegetables for their flavorings, never use plastics or metals that can leech during production, and they use UV-sensitive bottles to ensure that none of the bacteria is damaged by sunlight. These teas are bubbly and tart and are a perfect afternoon pick-me-up. Health-Ade is sold at most health food stores and often times at juice shops and cafes- check out their website to find a retailer near you!
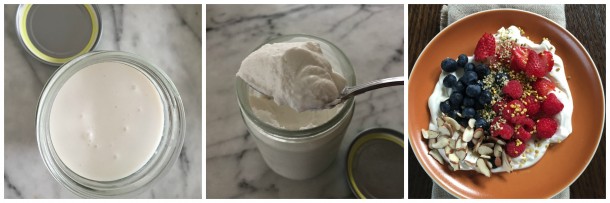
Homemade Coconut Yogurt
I do eat dairy, but I limit my intake, especially of cow dairy. Coconut milk-based products are a great alternative. This homemade coconut yogurt has become an absolute game-changer in my house. I don’t know what took me so long to come around to making my own, since there are pretty much zero clean store-bought options for coconut yogurt. However, after watched my friends’ CJ Nutrition‘s Youtube how-to, I realized how dead simple this is to make!
All you need is 14 ounces of coconut milk (I like Aroy-D because it’s packaged in tetra-paks, not cans), a glass jar, and a probiotic capsule. I read in the comments section of the video that C&J Nutrition had the best success with a capsule called VSL#3 (also mentioned above.) It is available on Amazon but I just called my local Walgreens and they had the pills available for sale individually. Check out the video for specific instructions but essentially you just add the probiotic capsule to the coconut milk and stir! It’s a 3-day process, but there’s almost nothing to do while the probiotic does its thing. The yogurt ferments on your countertop and then can be stored in the fridge. You can save a little bit of the yogurt then to start another batch. I have been enjoying my yogurt on smoothie bowls, granola, oats, and with fruit! And the fact that it is fermented is just a bonus on top of its thick, creamy deliciousness!
14 ounces full fat coconut milk* (I prefer Aroy-D)
1 probiotic capsule (I use VSL#3)
Instructions
Pour the coconut milk into a clean glass jar with a tight-fitting lid.
Open the probiotic capsule using your fingers and pour the contents into the coconut milk. Stir well. Using a fork helps to break up the clumps of powder.
Place the lid very loosely on top of the jar. Don’t screw it on at all, you want plenty of air to get to the mixture within, but want to cover it from any dust or dirt.
Let sit on the countertop, out of direct sunlight, for 24 hours undisturbed.
After 24 hours, stir mixture again (it should ne starting to thicken) and let sit for another 24 hours, undisturbed.
After 48 hours total, your yogurt should be able to coat the back of your spoon. If you refrigerate it now, it will be the consistency of regular yogurt. If you let it sit for another 12-24 hours, it will become the consistency of thick Greek yogurt.
Store in the refrigerator with the lid tightly sealed.
Notes
*You are not using the coconut beverages in the refrigerator section. This is the pure coconut milk you find in a can or, in the case of Aroy-D, small tetra-pak boxes.
I hope you had a fantastic 4th of July weekend! There’s a good chance if you hosted a party, that you have some leftover hamburger or hot dog buns lying around. What were you planning on doing with them? Bread crumbs? Great idea. Croutons? Another great idea. Putting them in the freezer for the next time you make burgers or dogs? Good luck with that one. My freezer is basically one-third buns. They’re all freezer-burned too, because I was lazy and threw the bags in there and didn’t bother to wrap the buns tightly in foil first. And my kids reject previously frozen buns. They would rather eat a hot bog or a burger without a bun over one that has been previously frozen. It’s kind of annoying since we’re a family of 5 and you can’t buy a bag of 5 buns. And I cannot handle wasting food, even a silly hamburger bun.
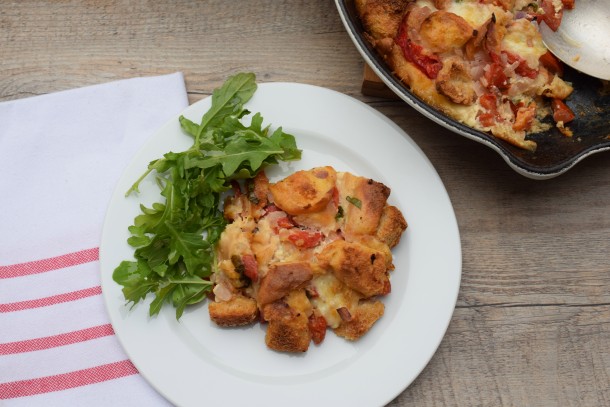
So I came up with this strata using leftover hamburger buns that had been sitting in my freezer and that I absolutely knew would end up in the compost bin. Stratas are kind of like savory bread puddings, more bread-y than an egg-y quiche or frittata . I actually prefer a frittata, but my husband and kids love their bread! I posted a strata on my site a few years ago with spinach, tomatoes and feta. Super delicious and I love that you can put it together the night before to soak in the fridge and then you bake it in the morning easy peasy.
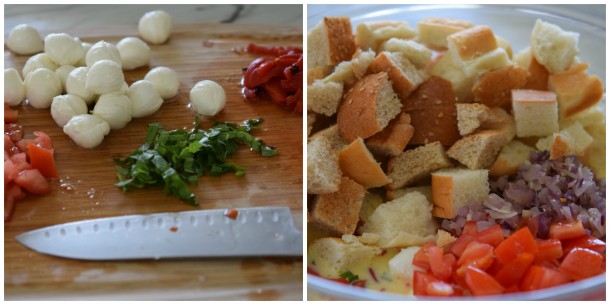
I essentially took what I had — a large tomato, half a red onion, a handful of baby mozzarella balls and a jar of roasted peppers in the fridge, plus some basil from my patio, and combined them with eggs and milk and voila! No one had any idea that I used leftover, previously frozen buns. And no one had any idea they were all different, including a whole grain sprouted bun! Of course, gluten-free buns work equally well. A strata is so versatile that if you had some leftover roasted zucchini, you could throw it in there too. Or a link of leftover sausage or a handful of corn kernels. And if you wanted a higher proportion of eggs, go for it. Just bake until the strata feels “set.” So no liquid gushes out when you push on the center of the strata and it kind of bounces back a bit.
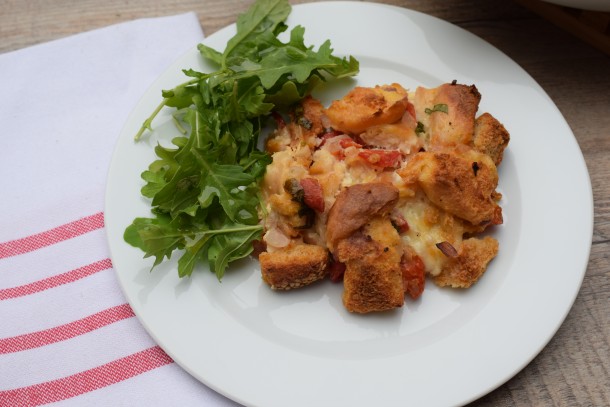
What’s also cool about this is that you can make it for breakfast, lunch or (Meatless Monday) dinner. I served it in these photos with some lightly dressed arugula and I think that’s the best accompaniment or just a simple green salad. But any non-starchy vegetable, like green beans or summer squash, would be great, too. Because bread is the main ingredient, I wouldn’t serve another starch with a strata. But I would serve it with a cold glass of rosé. Happy summer!
1 Tablespoon unrefined, cold pressed, extra virgin olive oil, plus more for greasing skillet
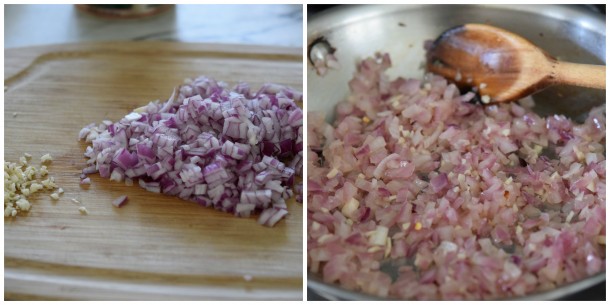
½ large red onion, diced
2 cloves of garlic, minced
a pinch of red pepper flakes
4 large eggs
1 cup whole milk or unsweetened, plain hemp milk or milk of choice
¾ teaspoon sea salt (or 1 teaspoon if your mozzarella is unsalted)
¼ teaspoon ground pepper
6 ounces bocconcini (baby fresh mozzarella cheese), drained if in water
1 large tomato, seeded (if desired) and diced
1 roasted red or yellow bell pepper, sliced into thin strips
a handful of basil leaves, julienned
5-6 ounces of whole wheat, spelt or sourdough bread, cut into 1-inch cubes, about 8 cups, preferably a little stale
For the Salad:
6 ounces baby arugula
good aged balsamic vinegar
unrefined, cold pressed, extra virgin olive oil
sea salt
Instructions
Warm the olive oil in a large skillet over medium heat. Add the onion and sauté until tender, about 3-4 minutes, add the garlic and red pepper flakes and sauté until fragrant, about 30-60 seconds, then remove from heat and set aside.
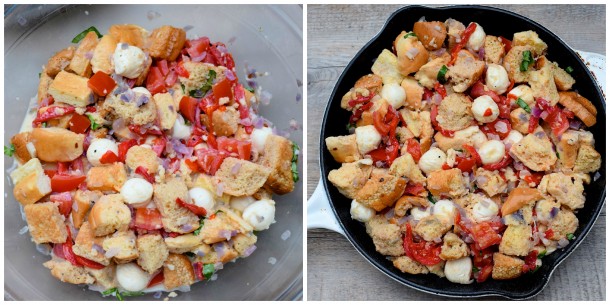
In a large bowl, beat the eggs with the milk, sea salt and pepper. Stir in the bocconcini, tomato, roasted red pepper, basil, bread and onion-garlic mixture, cover with plastic wrap and refrigerate overnight. You don’t have to soak overnight, but I love the way the bread soaks up the mixture. Feel free to put it straight in the oven.
If you soaked it overnight, remove the strata from the refrigerator and preheat oven to 375 degrees. Lightly grease a 10-inch skillet (or a 9-inch pie plate or equivalent) with olive oil and pour the strata mixture into the skillet.
Bake for 40-50 minutes or until egg mixture is set and top is golden brown.
Remove strata from oven and allow to cool slightly.
While the strata is cooling, toss the arugula with a drizzle of balsamic vinegar and olive oil (just enough to coat) and sprinkle with salt.
Top the strata with the arugula salad and serve, or cut the strata into serving size pieces and top each piece with arugula salad.
Notes
Unbaked strata can be frozen if wrapped tightly. Thaw in the refrigerator before baking, uncovered.
MINI-STRATAS: grease 4 individual ramekins or muffin tins. First layer bread then vegetables and cheese. Last, pour egg, milk, salt and pepper on top. Refrigerate overnight, if desired. Bake for 25-30 minutes.