Whole Grain and Almond Pulp Apple Quick Bread Recipe

whole grain apple quick bread with almond pulp | pamela salzman

I know not all of you are making your own almond milk and therefore aren’t desperate for almond pulp recipes.  But believe it or not, it’s one of the most common SOS’s I receive in my email inbox.  “More uses for almond pulp, please!”  “I have a freezer full — HELP!”  Believe me, I’m in the same boat since I make almond milk twice per week.  And almonds are expensive, so it is nice to have several great ways to use the resulting pulp which might otherwise be thrown out.  Or snuck into someone’s smoothie and at this point, my son is onto me.  “Mom, did you put almonds in here again?!”  Maaaaay-be.

dry mix and almond pulp

I actually do have two recipes on the blog already which use almond pulp, a banana quick bread and pancakes.  Both use almond pulp AND a whole grain flour.  I haven’t not had excellent results with recipes that only use almond pulp.  Unless of course I enjoy eating something that looks like tree bark.  I like nutritious food, but even I have my limits.  Adding a little flour is the way to go.  Gluten-free flour blends with a little xanthan gum works, too.

apples, walnuts and dates

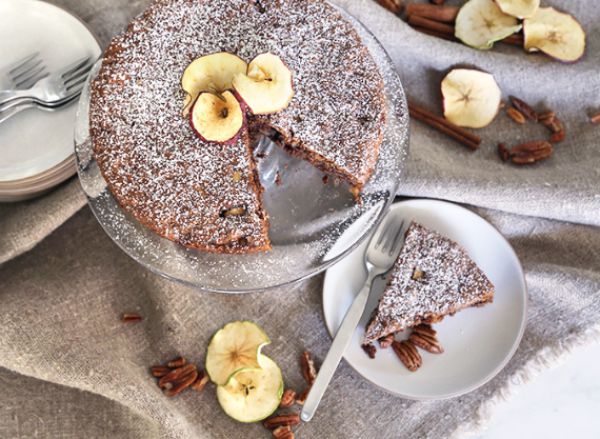
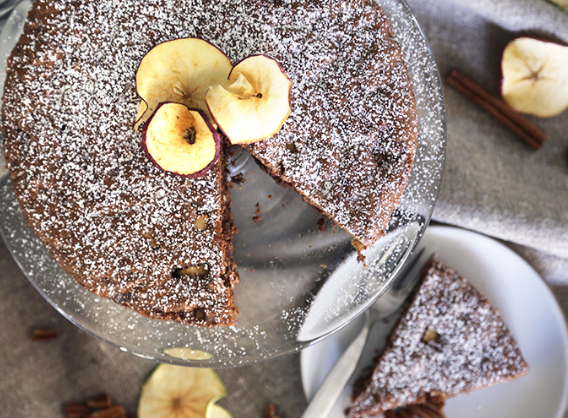
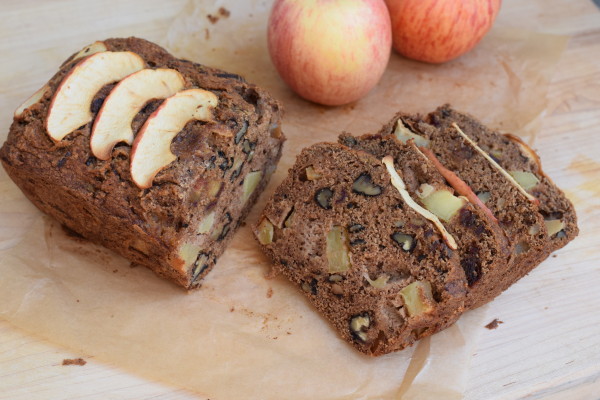
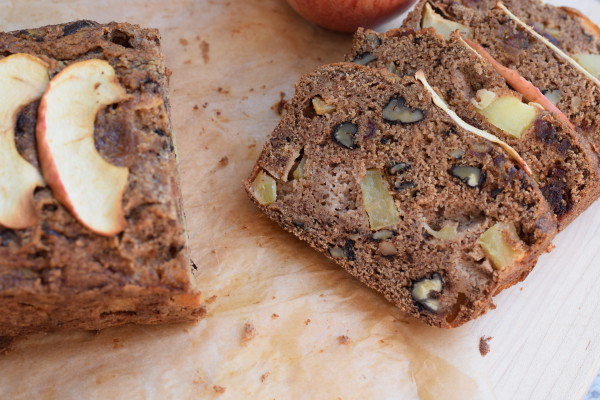
The temperature outside may say one thing, but it is technically fall.  So I am embracing the change in produce with an apple recipe.  Everyone in my family loves apple anything, so I figured this was a safe bet.  And it was devoured on the first day.  Chunks of tender apples, cinnamon and spices and some little surprise nuggets of caramel-y dates all nestled in a moist bread.  Perfect with a cup of tea or a turmeric latte.  And if you’re not using almond pulp, I don’t want you to feel left out.  I bet you can take my zucchini bread recipe and just adapt it with apples and the spices from this recipe.

whole grain apple quick bread with almond pulp | pamela salzman

What’s wonderful about using almond pulp though, is that it gives a nice protein boost to whatever you’re making.  Normally I don’t like to give the kids muffins or quick breads for breakfast unless I can add a smidge of protein like nut butters or a side of yogurt.  But the almond pulp changes everything.  In fact, I offered some to Mr. Picky for breakfast a few weeks ago, on a school day mind you, and he said, “I can have just this?  Without anything else?  Really?”  Munch, munch.  And then he added,”Did you put protein in here??”  Definitely onto me.

whole grain apple quick bread with almond pulp | pamela salzman

whole grain apple quick bread with almond pulp | pamela salzman

5.0 from 2 reviews
Whole Grain and Almond Pulp Apple Quick Bread Recipe
Author: 
Serves: 1 8 ½ X 4 ½ -INCH LOAF
 
Ingredients
  • ¼ cup unrefined coconut oil*, melted plus additional for greasing pan
  • ½ cup 100% pure maple syrup, Grade A or Grade B
  • 2 large eggs
  • 1 teaspoon pure vanilla extract
  • 1 cup whole wheat pastry flour or whole spelt flour
  • ¾ cup almond pulp (from 1 cup soaked almonds used for almond milk)
  • 1 teaspoon baking soda
  • ½ teaspoon aluminum-free baking powder
  • ½ teaspoon fine grain sea salt
  • 1 ½ teaspoon ground cinnamon
  • ¼ teaspoon ground nutmeg
  • ⅛ teaspoon ground cloves
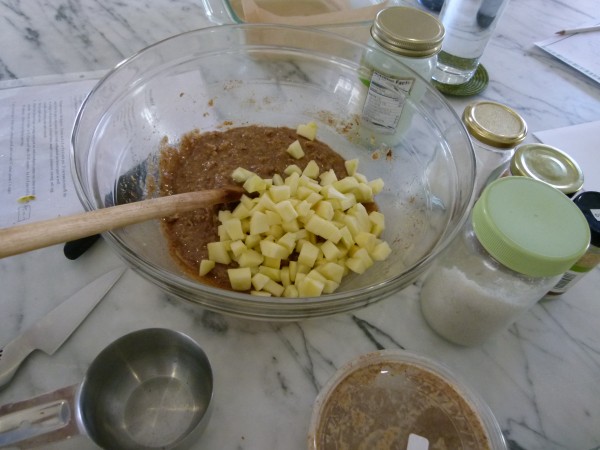
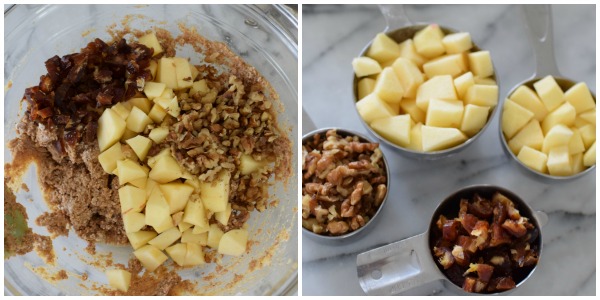
  • 1 ½ cups diced, peeled apple, about 1 large
  • ½ cup chopped walnuts or pecans
  • ½ cup pitted, diced dates (or you can use raisins)
Instructions
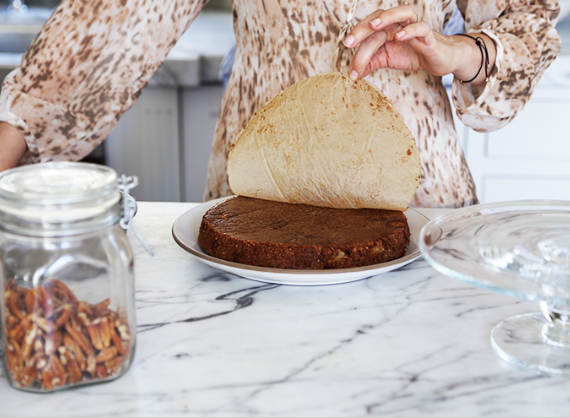
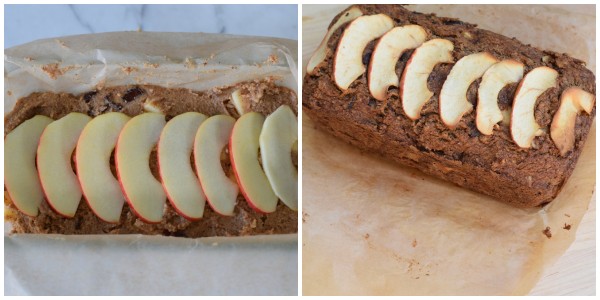
  1. Preheat oven to 350 degrees. Lightly grease an 8 ½ “ x 4 ½ “ loaf pan, or if aluminum, grease it and line it with parchment paper.
  2. In a blender, process the oil, maple syrup, eggs and vanilla until combined. This helps to emulsify the oil and keeps your bread from being greasy.
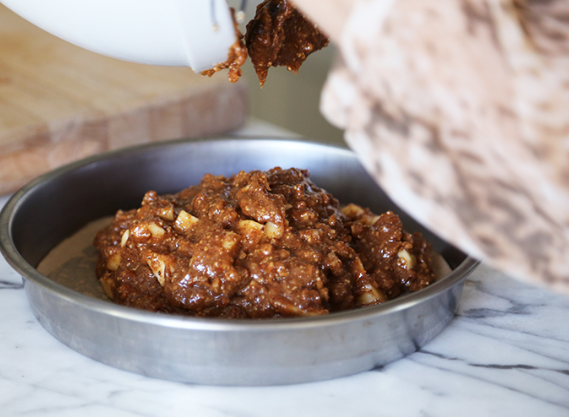
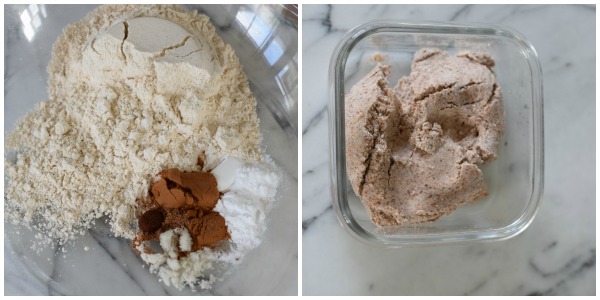
  3. In a mixing bowl, whisk together the flour, almond pulp, baking soda, baking powder, salt, cinnamon, nutmeg and cloves. Stir the wet ingredients into the dry. Fold in the apple, walnuts, and dates. Pour into the prepared pan.
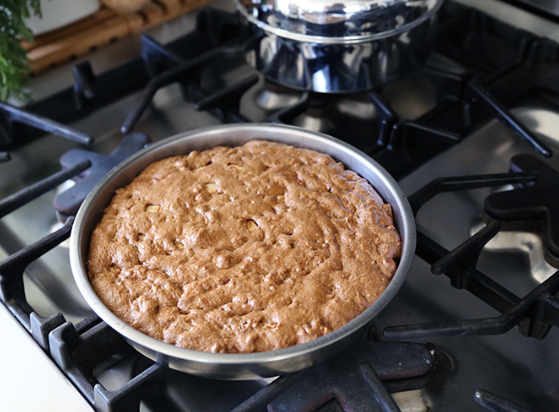
  4. Bake for 50-60 minutes or until a tester inserted in the center comes out clean. Cool slightly, about 10 minutes. Remove from pan and cool completely.
  5. You can also make these in standard muffin tins and bake for about 20—25 minutes. This will yield 12 muffins.
  6. After one day, best stored in the refrigerator.
Notes
*I haven't tested it, but I'm sure olive oil would also work.


How to Make Healthy and Delicious Summer Rolls *VIDEO*

I love summer rolls — crunchy, fresh, and flavorful all wrapped in a delicate rice paper wrapper.  Summer rolls are one of those things I never thought I could make at home.  The wrappers, the rolling, the sauce!  Not only are they way easier than I imagined, but they can be quite the nutritious dish to boot.  Filled with loads of raw veggies and herbs, a summer roll is like a salad all wrapped up in a neat little package.  In the video above, I go a pretty traditional route with avocado, cabbage, carrots and herbs, but also I use less traditional roasted sweet potato sticks and shredded Brussels sprouts.  Rice paper is so neutral.  Who says you couldn’t put a cobb salad in there or poached chicken, corn, cabbage and barbecue sauce?  I say the sky’s the limit and can we talk about perfect these would be for school lunches?!  Per-fect!

If you want to make these in advance, cover them with a damp paper towel and refrigerate for ideally up to one day, but I’ve even kept them 2 or 3 days.

healthy and delicious summer rolls | pamela salzman

5.0 from 4 reviews
Healthy and Delicious Summer Rolls
Author: 
Serves: 8 rolls
 
Ingredients
  • For the sauce:
  • 2 Tablespoons creamy peanut butter, preferably organic (or cashew or almond butter)
  • 1 Tablespoon unrefined, cold-pressed extra-virgin olive oil
  • 1 Tablespoon unseasoned rice vinegar
  • ½ Tablespoon raw honey (choose a mild flavor)
  • ½ Tablespoon water
  • ½ Tablespoon shoyu or gluten-free tamari
  • pinch sea salt
  • pinch cayenne pepper
  • For the summer rolls:
  • 8 (8-inch) rice paper rounds, plus additional in case some tear
  • 1 large sweet potato, (peeled if desired) and cut into ¼” matchsticks
  • unrefined coconut oil or extra virgin olive oil for drizzling
  • sea salt and black pepper to taste
  • 4 medium brussels sprouts, thinly sliced or shredded
  • ¼ head of small red cabbage, thinly sliced or shredded
  • 2 medium carrots, shredded, grated, or julienned
  • 1 large avocado, cut into thin slices
  • handful each of fresh mint leaves, basil leaves and cilantro leaves
  • Other possibilities: cooked shrimp, chicken, tempeh or tofu, cooked rice noodles
Instructions
  1. To make the sauce: whisk together all of the ingredients in a bowl or a glass jar and set aside. *
  2. To make the summer rolls: Drizzle the sweet potatoes with oil and sprinkle with salt and pepper. Roast in a 400 degree oven for 18-20 minutes until tender.
  3. Fill a shallow baking dish or a skillet with warm water. Soak 1 rice paper round (make sure there are no holes) in warm water until pliable, 30 seconds to 1 minute. Remove from the water and transfer to a plate or cutting board.
  4. Spread 2 teaspoons of peanut sauce on the rice paper (or omit and use as a dip once rolls are assembled) and top with 2-3 large mint leaves, 1-2 large basil leaves, a pinch of cilantro leaves, a
  5. pinch each of the Brussels sprouts, cabbage, and carrot, a few sticks of sweet potato, and a couple of avocado slices, taking care not to overstuff. Roll up rice paper tightly around filling, folding in sides and continue rolling.
  6. Transfer summer roll to a plate and cover with dampened paper towels.
  7. Make the remaining rolls in the same manner. Serve rolls halved on the diagonal.
  8. Store in the fridge covered with a damp paper towel 2-3 days.
Notes
* Sauce can be refrigerated for up to 5 days. Bring to room temperature and re-emulsify before using.

You are going to have so much fun making these summer rolls!

By the way, I have a YouTube channel!  I would love it if you subscribed over here.  Thank you!

How to perfectly cook gluten-free pasta

how to perfectly cook gluten-free pasta | pamela salzman

I was chatting with a few ladies in my class the other day about cooking for their gluten-free children.  Whereas it is certainly easier to find gluten-free alternatives today than it was 10 years ago, apparently cooking gluten-free pasta is still tricky for many people.  So I promised them that I would write a post ASAP.  Voila!

save the pasta water

As you know, I am not gluten-free and neither is my husband nor my kids.  BUT, because gluten is a pro-inflammatory protein (found in many grains like wheat) and usually in a lot of processed food,  I do limit our gluten to no more than one serving a day.  I also think it’s important to have as much variety in our diet as possible to expose yourself to the benefits of many different foods, so that’s another reason I try to mix it up a little in the pasta department and work some gluten-free options into our meals.

the secret to perfectly cooked gluten-free pasta | pamela salzman

I grew up eating a lot of pasta.  My father is from Italy and my mother is Italian-American.  So I know how to cook traditional durum wheat pasta with my eyes closed.  But gluten-free pasta is not the same.  It can be starchy, sticky, clumpy and lose it’s shape if you cook it the same way as regular wheat pasta.  So I wanted to share my technique that I have used successfully for many years.  Keep in mind that different brands and especially different flour blends will take different amounts of time, but the technique is the same.  Here goes:

Boil plenty of water.

Add 1 Tablespoon of kosher salt. (This is to flavor the pasta.  No need to waste expensive sea salt here.)

Add pasta and stir often. (This is so that the pasta doesn’t stick to each other.)  You do not need to add oil to any pasta, gluten-free or otherwise.

When you add the pasta, set your timer for the least amount of time that the package directions indicate.  For example, with Trader Joe’s Brown Rice and Quinoa spaghetti, it says to cook for 7-10 minutes.  I set my timer for 7 minutes.

Lower the heat so that the water simmers, and is not raging boiling.  This is important.  Rapid boiling is what causes the pasta to lose its shape.

MOST IMPORTANT STEP:  When the timer goes off, turn off the heat and let the pasta remain in the hot water.  Taste the pasta.  It should still be a little hard.  Scoop out a little pasta water and reserve.

Allow the pasta to sit in the hot water with the heat off until you have your desired tenderness, which means you may need to test it every 30 seconds.

Drain and immediately toss with your sauce, pesto or whatever.  DO NOT RINSE PASTA, unless you want to use it in a cold dish.  The starches on the outside of the pasta will help sauces, etc. stick.  Use the reserved pasta water to add extra moisture to the pasta as needed.  Keep in mind, gluten-free pasta does not sit as well as regular pasta, so try to serve immediately or at the least, keep that reserved pasta water on hand in case.

My last post on Friday highlighted my favorite GF pasta of the moment, Trader Joe’s Organic Quinoa and Brown Rice pasta.  There are others I like too.  I wrote a post on my favorites a few years ago here which included brands like Tinkyada and Bionaturae.

Crispy salt and vinegar potatoes recipe

crispy salt and vinegar potatoes | pamela salzman

Roasted potatoes are a no-brainer side dish that I can confidently place on most of my dinner menus.  Whether they’re cut into sticks, wedges or quarters, with rosemary or thyme or just with sea salt, everyone loves tender, crispy potatoes.  If I have an extra few minutes, I’ll par boil, smoosh, and then roast them.  (Recipe here.)  And if I really want to wow everyone, I’ll make them extra crispy and toss them with vinegar.  My son (who normally likes to keep his food as simple as possible) absolutely loves these because “it’s kind of like eating salt and vinegar potato chips.”  Only better!  Picture a warm and crusty potato potato with a little tang and salt and you have my dream spud.

taters

If you’re in the never-ending SoCal heatwave, feel free to wait until the temperature dips below 90 degrees before you make these since you’ll be cranking up the oven pretty high.  With high oven temps (i.e. 400 and above,) we need to be mindful of damaging the fat we use.  The best and most healthful way to go is with saturated fats which can withstand higher temperatures without oxidizing.   The reason we want to avoid oxidized fats is because they are pro-inflammatory and have developed free radicals.  The saturated fats I use regularly for high heat cooking are ghee, which is a clarified butter, and coconut oil.  I also use duck fat once in a blue moon and primarily on potatoes.  With this recipe, duck fat would be ideal, but I use a combination of ghee and olive oil.  The flavor of all ghee would be a little strong, so I prefer to temper it with some olive oil.  In addition, combining olive oil and a saturated fat will help protect the olive oil when cooking.  If you’re not ready for ghee or you don’t have any, you can use all olive oil.

roughed up

transfer to a baking sheet

This method of roasting potatoes is my favorite, even without the vinegar.   It’s definitely a little more work than cutting them and throwing them on a sheet pan, but the crispy bits can’t be beat and we all fight over them.  The idea is to boil the potato pieces first and then beat them up or “chuff” them a little, thereby creating a rough exterior and more edges to get crispy.  It’s a genius method I adapted from Jamie Oliver.  The idea for the vinegar and salt comes from this Bon Appetit recipe.  However you can definitely put your own spin on this, adding cheese on top of the potatoes in the last 5-10 minutes or serving them with a spicy mustard.  You are going to looooove these!

crispy salt and vinegar potatoes | pamela salzman

crispy salt and vinegar potatoes
Author: 
Serves: 4-6
 
Ingredients
  • 2 pounds baby Yukon gold potatoes, halved, or cut into 2-inch pieces*
  • 1 cup plus 2 Tablespoons distilled white vinegar, divided (or finish the potatoes with a malted vinegar like Aspall's)
  • 1 Tablespoon kosher salt
  • 1 Tablespoon ghee, melted
  • 1 Tablespoon unrefined, cold-pressed, extra-virgin olive oil (or omit the ghee and use all olive oil)
  • Sea salt and freshly ground black pepper, to taste
  • 2 Tablespoons chopped fresh chives, optional
Instructions
  1. Preheat oven to 450 degrees and line a large rimmed baking sheet with parchment paper.
  2. Combine the potatoes, 1 cup of vinegar and kosher salt in a medium saucepan with a lid; add water to cover by 1”. Bring to a boil, reduce heat, and simmer until potatoes are almost tender, about 15-20 minutes or until a knife can be inserted easily into the potatoes but there’s just a little resistance in the center.
  3. Drain the potatoes in a colander and return them to the pot. Cover with the lid and give the pan a really good shake to fluff up the potatoes; these soft, loose edges will become really crispy during roasting. If you want, you can scrape the edges and tops of the potatoes with a fork to create even more fluffy bits.
  4. Add the oil/ghee to the baking sheet and place in the oven for 10 minutes until very hot. (Or leave the ghee and oil in a bowl and place the bowl on the baking sheet in oven.) Carefully add the potatoes to the hot oil, then sprinkle with sea salt, to taste. Return to the oven and roast until potatoes are crispy and golden brown, about 50-60 minutes, turning once halfway through to ensure even browning.
  5. Remove from pan and place in a serving bowl, add remaining 2 Tablespoons of vinegar and more sea salt, to taste. Sprinkle with chives, if using and serve hot.


Curried Chicken Salad Recipe

curried chicken salad | pamela salzman

I’m sure you all pushed away your keyboards and ran into the kitchen to poach chicken after Monday’s post, right?  Perfect!  Now let’s do something healthy and delish with your chicken.  I have a recipe for the BEST curried chicken salad I have ever eaten!   Even my family, which to my chagrin prefers more “simple” flavors, loves this salad.

shred chicken

apples, green onions, celery

I thought it would be a great time to post this curried chicken salad since you might be looking for some new options for school and/or work lunch.  At it’s most basic, curried chicken salad is just what it sounds like — chicken salad with curry mixed in.  I use a yellow curry powder, which is a blend of different anti-inflammatory spices like turmeric, cumin, coriander, fenugreek and many others.  But as opposed to basic, standard chicken salad to which I add celery and onion, I like to add a little something sweet to balance the curry.  My husband and I disagree on whether diced apple or halved grapes is better.  I think they’re both good, but since I am a sucker for crunch, I usually add apples.

curry dressing

curry dressing

I used to make Ina Garten’s version with Major Grey chutney and white wine, but the chutney is not something I usually use and it was taking up space in the fridge.  So I created my own blend of ingredients, including apricot preserves, to mimic the sweet, hot, tart flavor of the chutney.  This is the best part of the dressing.  So, so good and flavorful!  I also like to use shredded, as opposed to cubed or diced chicken, because I think the nooks and crannies of the shredded chicken pick up more of the dressing.

curried chicken salad | pamela salzman

curried chicken salad

You can make it the day before and tuck it inside of a pita or 2 slices of hearty, whole grain bread.  Or, as I like to do it, eat it in a lettuce cup.  A little avocado would put this over the top!  Feel free to make this spicy or change up the preserves.  I think any variation of orange, apricot, peach or kumquat would be great.  I like the St. Dalfour brand which is sugar-free and without added preservatives.  I think this might become your new favorite chicken salad!  For you vegheads, I may try to do a tofu version of this.  How does that sound?!

5.0 from 2 reviews
Curried Chicken Salad
Author: 
Serves: about 2 quarts, serves 6
 
Ingredients
  • 3 bone-in, skin-on chicken breasts (technically split breasts), about ¾ pound each
  • ½ small onion, peeled
  • 4 large garlic cloves, smashed
  • 1 Tablespoon additive-free kosher salt
  • 2 stalks celery, diced
  • 2 scallions, white and green parts, chopped
  • 1 cup chopped apple (about 1 medium apple) or 1 cup grapes, halved
  • ¼ cup golden raisins (or dark raisins, if you prefer)
  • ½ cup roasted, salted cashews, chopped (slivered almonds are also good)
  • ½ cup plain, whole Greek yogurt
  • ¼ cup mayonnaise (I like soy-free Vegenaise)
  • 3 Tablespoons apricot or peach preserves, preferably no sugar added like St. Dalfour
  • 1 ½ tablespoons curry powder
  • 2 teaspoons white wine vinegar
  • ½ teaspoon sea salt + more to taste
  • ¼ teaspoon ground ginger
  • pinch cayenne pepper
  • butter lettuce or sandwich bread, for serving
Instructions
  1. Place the chicken in a saucepan with the onion, garlic, salt and peppercorns and add water to cover.
  2. Bring to a boil over high heat, reduce heat to low, cover and simmer until the chicken is just cooked through, about 25 minutes.
  3. Allow chicken to cool in the poaching liquid.
  4. Remove the skin and bones and shred the meat into large, bite-size pieces. Set aside in a large bowl.
  5. Add the celery, scallions, apple or grapes, raisins and cashews to the chicken.
  6. In a medium bowl, combine yogurt, mayonnaise, preserves, curry powder, vinegar, salt, ginger, and cayenne pepper.
  7. Pour on top of the chicken and salad ingredients and combine to coat well with dressing. Adjust seasonings to taste.
  8. Store leftovers in the refrigerator for up to 3 days.
Notes
Or you can use 6 cups of shredded, already cooked chicken instead of poaching chicken from scratch.


How to Poach Chicken

how to poach chicken | pamela salzman

There are a few basic techniques I think are worth knowing how to do, such as scrambling eggs, cooking rice, and making a versatile salad dressing among other things.  In that category, I also include poaching chicken (if you eat chicken obviously.)  I thought this was a good time to do a refresher on this technique since back to school has made many of us desperate for make-ahead meal tips and fodder for school lunches.  Enter poached chicken.

how to poach chicken | pamela salzman

Poached chicken is very easy to do and provides limitless options for meal planning.  It is delicious in chicken salad, with mixed greens or grains and a vinaigrette, in enchiladas or quesadillas, in a sandwich or wrap, and so on.  Poaching is probably the cleanest way to cook chicken, since we avoid the formation of carcinogenic compounds that are created when we grill and sear, or cook animal protein for long periods of time at high temps.  Read this article if you would like to learn more.  So if you’re going to eat animal protein, steaming, poaching and low temps are the most healthful ways to go.

how to poach chicken | pamela salzman

If it’s so much better to poach and steam chicken, why don’t we do it all the time?  Because unfortunately,  it’s not as flavorful as searing and roasting.  All those crispy brown bits, albeit carcinogenic, are tasty.  So once in a while, it’s a good idea to change it up a bit.  And if you’re looking for cooked chicken to add to meals, try poaching.  We’ll add some extra flavor by including onion, garlic, salt and pepper to the poaching liquid though.

how to poach chicken | pamela salzman

Poach some chicken on a Sunday and have it for a couple of days’ worth of lunches and dinners during the week.  You can also freeze poached chicken, wrap it well in aluminum foil or plastic wrap and use it within 3 months.  This week I will also share one of my favorite salads using poached chicken.  Stay tuned!

how to poach chicken | pamela salzman

how to poach chicken | pamela salzman

How to Poach Chicken
Author: 
Serves: about 4 cups of chicken
 
Ingredients
  • 2 large bone-in, skin-on chicken breasts, about 1 ¾ pounds+
  • ½ small onion, peeled
  • 4 large garlic cloves, smashed
  • 1 Tablespoon additive-free kosher salt
  • ½ teaspoon whole black peppercorns
Instructions
  1. Place the chicken in a saucepan with the onion, garlic, salt and peppercorns and add water to cover.
  2. Bring to a boil over high heat, reduce heat to low, cover and simmer until the chicken is just cooked through, about 25 minutes.
  3. Allow chicken to cool in the poaching liquid.
  4. Remove the skin and bones and slice, shred or cube the meat to use as desired.
  5. You can place the bones back in the poaching liquid with some fresh chicken parts and some carrots and celery and simmer very gently to make a stock. Click here for how to make chicken stock.


Grain-free Cinnamon Apple Cake Recipe

grain-free cinnamon apple cake | pamela salzman

One of the first desserts I made my boyfriend-now-husband was the Chunky Apple Walnut Cake from The Silver Palate Cookbook.  Do you remember that book?  Even though it’s from 1982, I still have it on the shelf in my kitchen with more current titles.  It was probably the second cookbook I ever bought and still one of my all-time favorites.  That Chicken Marbella is legendary!

mixing it altogether

But I might have won my husband’s heart with that apple walnut cake.  It was dense, sweet and chock full of apples and walnut pieces.  I actually healthified it many years ago with whole wheat flour, coconut oil and sucanat, with delicious, but still decadent results.  But lately I’ve been trying to limit the gluten and indulge in it when it counts (e.g. crusty bread, pizza).  After the wildly successful grain-free chocolate zucchini cake (if you haven’t made that, you must!), I decided to do a twist on that and make a cinnamon apple version.

grain-free cinnamon apple cake | pamela salzman

This apple cake is very different from the Silver Palate one, but my husband has also come around to a lighter, more healthful way of eating, especially since we hit 40. When he and the kids went crazy for this grain-free cake, I knew I had to teach it in my classes.  It was a big hit there, too.

grain-free cinnamon apple cake | pamela salzman

When September rolls around, it’s not only back to school, but apple season and the Jewish new year, too.  This was the perfect week to post this recipe since this Sunday is the first night of Rosh Hashana.  Even if you don’t celebrate the Jewish holidays this cake is a delicious treat in a lunch box or after dinner with a dusting of powdered sugar to make it look a little fancier.  My husband loves pieces of walnuts or pecans in here, but my son preferred a version I tested with raisins.  Either way, this is a more wholesome, clean cake than most out there and who can resist tender chunks of apple enveloped in a sweet and cinnamon-y cake?   And you won’t know this is flour-free or grain-free.  It tastes as good as “normal” cake no matter how you slice it.

grain-free cinnamon apple cake | pamela salzman

It freezes beautifully and I found out that it even tastes great frozen after I tried to tuck some away so that I wouldn’t be tempted to eat it.  Can someone please explain “self control” to me?  Who eats frozen cake???  I am planning on making at least one of these for my Rosh Hashana luncheon next Monday and I know I won’t have to worry about leftovers.

grain-free cinnamon apple cake | pamela salzman


5.0 from 5 reviews
Grain-free Cinnamon Apple Cake Recipe
Author: 
Serves: 1 cake
 
Ingredients
  • unrefined coconut oil or unsalted butter for greasing pan
  • 1 cup creamy, unsweetened, unsalted almond butter, raw or roasted (or use unsweetened sunflower butter for a nut-free cake)
  • ⅓ cup pure Grade A maple syrup or raw honey
  • 1 teaspoon ground cinnamon
  • ¼ teaspoon ground nutmeg
  • ¼ teaspoon fine ground sea salt
  • 1 teaspoon baking soda
  • 1 large egg
  • 1 teaspoon pure vanilla extract
  • 1 large apple, peeled, cored, and cut into ¼” cubes (about 1 ½ cups)*
  • 1 cup chopped pecans or walnuts (or you could use raisins)
Instructions
  1. Preheat oven to 350 degrees. Grease an 8 x 8 or 9 x 9-inch pan or an 8- or 9-inch round pan. If you want to remove the cake from the pan in one piece, line it with unbleached parchment paper as well. You do not have to grease the parchment paper.
  2. In a large bowl combine the almond butter, maple syrup, cinnamon, nutmeg, salt, egg, vanilla, and baking soda until smooth.
  3. Stir in apple pieces and nuts or raisins.
  4. Pour into prepared pan and bake until just set and a toothpick comes out clean or with dry crumbs. Do not overbake. A 9 x 9 pan will take 35-45 minutes. An 8 x 8 pan will take 40-50 minutes. Allow to cool before serving.
Notes
I like the chunks of apple in the cake, but you can also use 1½ cups of shredded, peeled apples (about 2-3 medium apples.)

DIY Vanilla Extract and a Gifting Idea

how to make vanilla extract | pamela salzman

Is it too early to start thinking about the Christmas holidays.  Absolutely.  Do I do any of my holiday gift buying before Labor Day?  Under no circumstances.  I might have my meal plan figured out for the week, but I’m the mom on Halloween morning looking for electrical tape to try and make a Bat Man costume.

But, I do have a great idea that you can do now for holiday gifts or holiday baking — DIY vanilla extract!  Why am I talking about this now after I just said I don’t plan for the holidays this far in advance?  Because although vanilla extract takes minutes to make, it requires about 6 weeks to sit and brew.  Still a little early to think about this, but lots of holidays are coming up and I will not be thinking about making vanilla extract in November.  #thanksgivingtrumpsall

My assistant Lauren gave me a bottle of homemade vanilla extract last year for Christmas and I was absolutely delighted to receive it.  First of all, I just love homemade gifts, especially homemade food gifts!  And vanilla is something I use a lot of, so I was really grateful to be given something so good AND useful.  I love the essence of vanilla in baked goods and desserts.  In fact, I think it’s one of those ingredients that has a natural sweetness to it without actually containing a sweetener.  Just an FYI, even if you don’t make your own vanilla extract, do read the ingredient label on commercially-prepared ones.  Somehow manufacturers are allowed to use the word “pure” on the label while adding things like corn syrup solids.  So troubling.

Recently, I had Lauren provide me a little tutorial on making vanilla extract and give me all her sources for labeling and making these look so cute.  Here’s what you’ll need:

split the vanilla beans | pamela salzman

Grade B Vanilla Beans:  Grade B beans are best for extract as they are too dry for cooking, but still are high quality in taste and flavor.  We used  3/4 of a pound of these Madagascar bourbon vanilla beans.  Bourbon, by the way, refers to the island of Bourbon in Madagascar, not the alcohol.  Bourbon vanilla is the most flavorful of all the vanillas and what I use for all my baking.

Vodka: Vodka used because it has no flavor, as opposed to other other alcohols.  You don’t need to buy the best vodka to make vanilla extract.  Any mid-level 80-proof vodka will do.  Figure on spending about $15-20 for a 1.75 liter bottle.  We used 2 bottles.
Large glass jar:  This is to brew the extract.  We used this gallon kombucha jar which was $10 on amazon.
bottles
For gifting, there are obviously hundreds of options, but here is what we used in the pictures on this post:
Glass bottles: I like the idea of gifting 4 ounce bottles since that is a standard size for vanilla extract.  These are the bottles we used which as you can see are dark glass.  Clear glass is fine for brewing, but for long term storage, dark glass is better since light is no friend to extracts.  In general, specialtybottles.com is a great source for lots of different bottles.
hoemmade vanilla extract perfect for holiday gifts | pamela salzman
Labels:  I love the labels Lauren used.  It makes the gift more personal and printable labels are especially nice if you don’t have nice handwriting. These Avery kraft square labels were found on amazon.
baker's string | pamela salzman
String: Not necessary, but I use this baker’s string for many gifts from my kitchen.  I think it’s adorable.  Red is perfect for the holiday, but there are lots of pretty colors available.

Here’s what you do:

1-2 months before you want vanilla extract, prepare the batch.  I like the ratio of 4 whole vanilla beans to 8 ounces of vodka.

Split the vanilla beans lengthwise and place them in the large bottle.  Cover the beans completely with vodka.  Secure the lid on the bottle and swirl it around a bit.  Store at room temperature for 4-6 weeks, the longer the better.  It will darken as time passes.  The batch above has been sitting for 6 weeks.

When you transfer the extract to smaller bottles for gifting, add the beans to the bottles as well.  As you use the extract, just keep adding a little vodka to replace what you took out.  Vanilla extract lasts indefinitely.  You can also take vanilla beans from which you scraped the seeds and add them to vanilla extract in the works.

Store finished extract in the pantry (not the refrigerator) away from light and heat.

Have any of you made other extracts?  I think I have the extract-making bug!