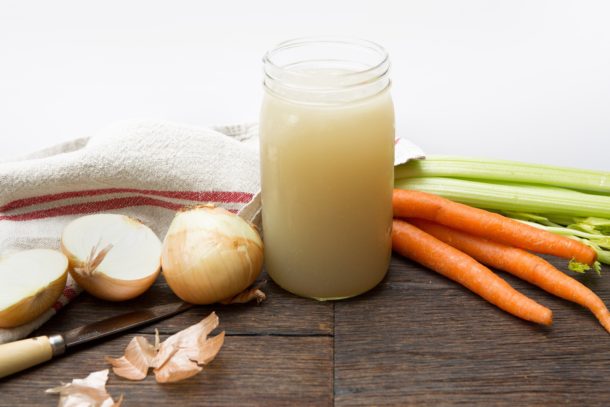
Vegetable stock recipe

I really think it’s worth the effort to make stock from scratch, not only because it’s more nutritious, but because homemade just tastes so much better than the one you get from a box.  Many times you can get away with using water in a soup, but using a flavorful stock will usually make it better.  Vegetable stock is much easier and quicker to make than chicken stock (you actually don’t want to simmer it for longer than an hour.)  I like to cut my vegetables first because I think you get more flavor released into the broth.  This vegetable stock is also great to use in pureeing baby food if you need a little extra liquid.

The recipe below is for my basic vegetable stock, but if I know what I’m using it for, such as a soup with asparagus and leeks, I will add other extras from those vegetables, too.  The tops of leeks and the woody ends from asparagus make a great addition to stock.  Just make sure everything is washed before putting it into the pot.  My mother taught me to take fresh vegetable scraps that you would normally compost and keep a bag of them in the freezer.  When you have a full bag of scraps, just put them in a pot with some additional chopped vegetables and water, and presto!  practically free stock.  The addition of kombu in my recipe is completely optional.  It is a sea vegetable and gives your stock an extra boost of minerals.  Use it if you have it on hand.

Make sure you simmer the stock and don’t boil it vigorously since more liquid will evaporate that way.  I don’t add salt to make vegetable stock, so keep that in mind when you are using this in a recipe.  You may need to add a little extra salt to have the proper seasoning.

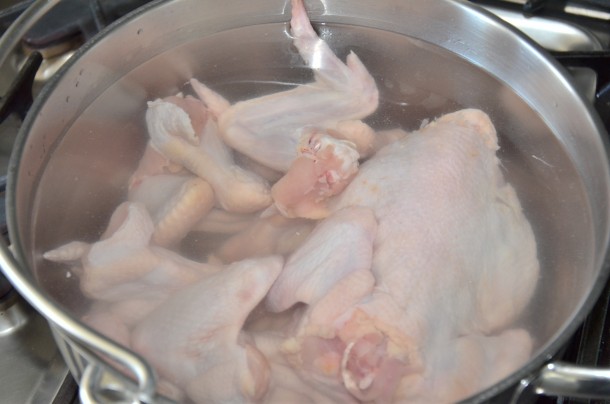
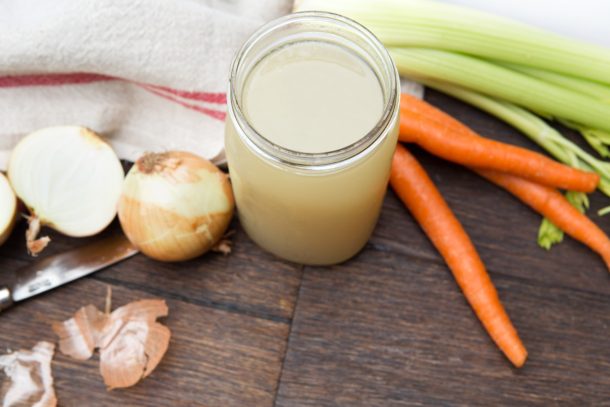
Vegetable stock lasts for 5 days in the refrigerator and up to 3 months in the freezer.  I like to freeze it in 2-cup and quart containers because those are the sizes I use most often.  But you can freeze the stock in any size container, even ice cube trays.  If you are freezing in glass, make sure you freeze your liquid without a lid since it will expand.  Once the stock is frozen solid, cover it tightly to protect is from freezer burn.  Also check out my recipe for homemade chicken stock.

Happiness is a freezer full of homemade stock!

Vegetable Stock
Author: 
Serves: makes 3 quarts
 
Ingredients
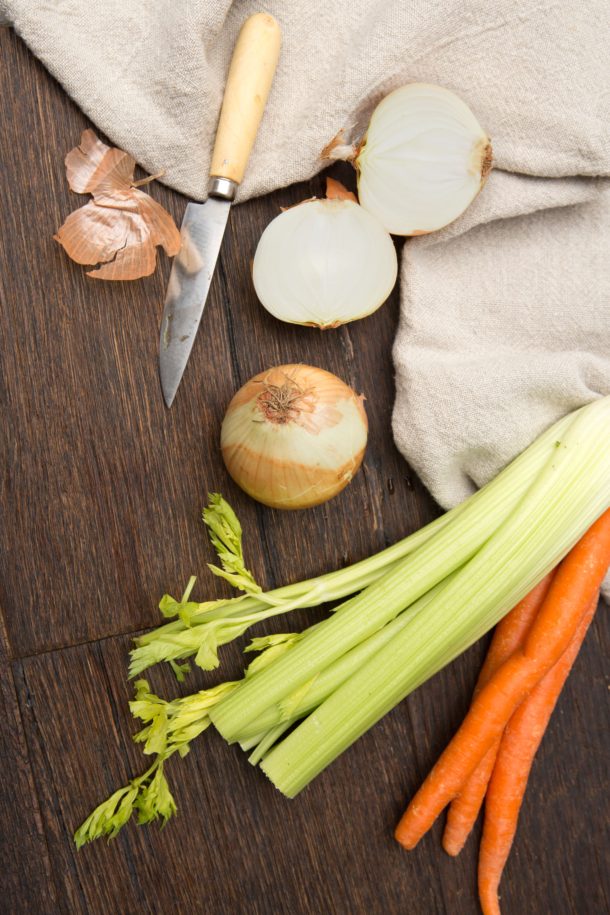
  • 3 large onions, cut into large chunks
  • 2 large parsnips, unpeeled, cut into large chunks
  • 2 large carrots, unpeeled, cut into large chunks
  • 3 celery stalks, cut into large chunks
  • 8 ounces white mushrooms, chopped
  • 6 large garlic cloves, crushed
  • a few sprigs fresh parsley
  • 2 sprigs fresh thyme or 2 bay leaves
  • 4 quarts water
Instructions
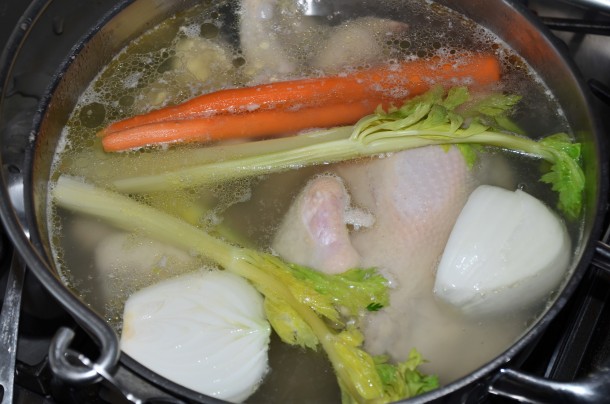
  1. Place all the ingredients in a large pot and bring to a boil over high heat. Lower the heat and simmer uncovered for 30-60 minutes.
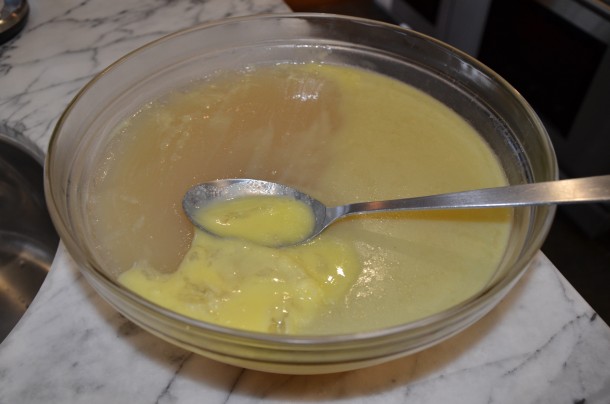
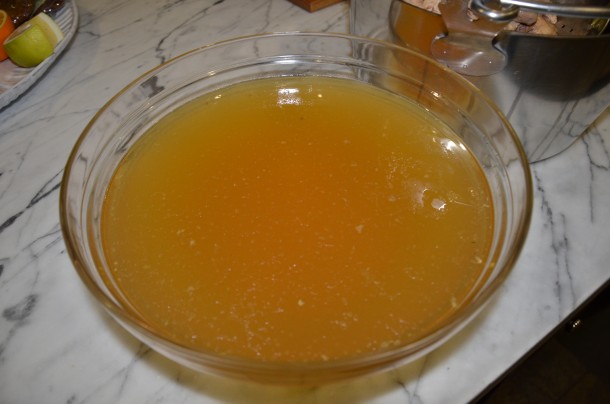
  2. Remove the pot from the heat and strain the stock into a large bowl. Push against the vegetables to extract additional liquid. Discard the vegetables.
  3. Store in the refrigerator for up to 5 days, or in the freezer for up to 3 months.
Notes
To increase the nutrients, simmer the stock with a strip of kombu.

Other vegetables or scraps you can add that you might otherwise compost or discard: tops of leeks, parsley stems, woody ends of asparagus, shiitake mushroom stems, carrot peels, ends from squashes, etc. You can freeze these scraps until you are ready to make stock. I usually avoid sulfur-containing vegetables such as cabbage, broccoli and cauliflower since their flavors can be overpowering.

Whole grain buttermilk pancakes recipe

Packaged pancake mixes confuse me.  The idea behind packaged food is to provide the consumer convenience.  That is, it should be more convenient for you to use a boxed pancake mix than to make pancakes from scratch.  But let’s think about this one.  When you use a packaged mix, you need to measure the mix, measure the different liquids you will be adding to the mix, crack eggs, mix it all together, grease your griddle and cook the pancakes.  So basically you are paying a premium so that you don’t have to measure the baking soda, baking powder and salt.  And you have to take whatever else the manufacturer decides is necessary to add in there, such as preservatives.  Sure, you can buy a mix with dehydrated milk powder and dehydrated eggs, so that you’re only adding water, but really, you can do better.  A lot better.

First of all, you can make absolutely delicious pancakes very easily without a mix and with more nutritious ingredients.  I love using whole wheat pastry flour for this which is lighter than whole wheat flour, but still still milled from the whole grain, so nothing important has been removed and you still keep all the fiber, protein and nutrients.  More importantly, the pancakes don’t taste whole wheat-y or feel heavy.  Gluten-free people — do not fret.  I make pancakes twice per week and if the kids are getting wheat in their lunchboxes, I always make gluten-free pancakes for breakfast by substituting GF oat flour, brown rice flour and buckwheat flour for the wheat.  They are just as tasty and just as “normal” as wheat flour pancakes, although the buckwheat imparts a slight lavender color to the batter.  Also, don’t be put off by the buttermilk.  If you don’t have it, substitute half yogurt and half milk and the pancakes will turn out the same.

For those of you who think pancakes are strictly for the weekends, I have excellent news.  You can make your batter the night before and keep it refrigerated until the morning.  I was always taught that the leavening agents lose their potency if the batter, dough or whatnot is not cooked immediately.  Not so.  I actually did a side-by-side test with 12-hour old batter and freshly made, and they both rose equally.  If cooking pancakes on a weekday is positively out of the question, then make a huge batch on the weekends and freeze them with pieces of wax or parchment paper in between each one.  Just promise me you won’t use a microwave to reheat them!

Pancakes are a winner breakfast in our house because everyone can customize his or her own pancakes without creating more work for me.  After I pour batter on the griddle, the kids come over with their favorite add-ins.  Daughter #1 likes raspberries or diced strawberries; Daughter #2 prefers diced bananas; Mr. Picky chooses mini chocolate chips; and the Husband drops in blueberries.  The key here is to wait until the batter has set slightly on the griddle so that when you add your fruit or chips the batter doesn’t spread and thin out.

If you decide you love these pancakes and you will make them regularly, by all means quadruple the dry ingredients, combine well and store your “mix” in the pantry in a glass container with directions:  “Use 1 1/2 cups + 1 Tablespoon of mix for pancake recipe.”  Now that’s convenience!

Update 1/30/12:  I accidentally mismeasured the buttermilk today and used 2 cups, so I decided to use 2 cups of flour as well, but keep all the other measurements the same.  The pancakes were still light and fluffy, but just a bit more substantial.  The kids liked them a lot.  So if you like your pancakes a little heavier, you can adjust those measurements accordingly.


4.0 from 1 reviews
Whole Grain Buttermilk Pancakes
Author: 
Serves: 4-5
 
Ingredients
  • 1 ½ cups whole wheat pastry flour, white whole wheat flour or whole spelt flour*
  • 1 teaspoon aluminum-free baking powder
  • 1 teaspoon aluminum-free baking soda
  • 1 teaspoon fine sea salt
  • 1 ¾ cups buttermilk**
  • 2 large eggs
  • 1 teaspoon pure vanilla extract
  • 1 Tablespoon 100% pure maple syrup
  • 4 Tablespoons unsalted butter, melted
  • Melted, unrefined coconut oil or more butter for brushing the griddle (melt the coconut oil in the same small saucepan you used to melt the butter)
Instructions
  1. Preheat a griddle to 400 degrees or medium heat.
  2. Combine the flour, baking powder, baking soda and salt in a large mixing bowl.
  3. In a medium bowl or 4-6 cup measuring cup, whisk together the buttermilk, eggs, vanilla, maple syrup and melted butter until well blended. (A blender can do this easily, too.)
  4. Pour the wet mixture into the dry ingredients and stir until just combined. Lumps are okay!
  5. Brush the griddle with coconut oil and spoon about ¼ cup of batter onto the griddle. Allow to set for a minute or two before adding blueberries, chocolate chips or diced banana to the surface, if desired. When bubbles start to form on the surface of the pancake and the edges become slightly dry, flip it over and cook until done, another minute or two. Maintain the heat on medium-low or 400 degrees.
Notes
*Gluten-free: substitute ¾ cup buckwheat flour and ¾ cup brown rice flour for the wheat flour. Or you can use GF oat flour, too, such as ½ cup oat flour, ½ cup buckwheat flour and ½ cup brown rice flour.

**No buttermilk? Sub half unsweetened yogurt and half whole milk. Or use 1 ½ cups milk, omit the baking soda and use 2 teaspoons baking powder instead.


My favorite everyday salad dressing recipes

My Favorite Everyday Salad Dressings | Pamela Salzman

My Favorite Everyday Salad Dressings | Pamela Salzman

If you’re just starting to tinker with the idea of eating more healthfully, but don’t know where to begin, may I nudge you toward making your own salad dressings?  Why?  First of all, salad dressings or vinaigrettes are something you probably use regularly.  Second, they are simple to make.  And last but not least, I have never found a bottled salad dressing that uses the kind of high-quality oils and ingredients I prefer to use.  In fact, most bottled dressings not only contain refined oils, but also sugar or high-fructose corn syrup, preservatives, stabilizers and lots of other mysterious things I can’t even pronounce — never a good sign.

My Favorite Everyday Salad Dressings | Pamela Salzman

Truthfully, when I was growing up, we ate loads of fresh salads and we never made vinaigrettes.  It was my job to dress the salad and all I did was drizzle the olive oil over the greens about three or four times around the salad bowl and the vinegar over once.  I would sprinkle it with a little salt and voila!  Sometimes I still do that if I’m in a rush and I don’t have dressing already made in the fridge.  But more often than not, in the beginning of the week I will combine a few simple ingredients in a clean jar with a lid (love reusing nut butter jars for this) and shake, shake, shake!

My Favorite Everyday Salad Dressings | Pamela Salzman

I have lots of dressings I use for different salads, but there are two that are my standbys for a bowl of simple mixed greens.  Both have a base of unrefined extra-virgin olive oil which is very rich in oleic acid, a very stable monounsaturated fatty acid, as well as Vitamin E and loads of antioxidants.  All bets are off when you use refined olive oil where all the nutrients have been stripped away and you’re basically left with a bottle of free radicals.  The olive oil I buy is in a dark glass bottle and after the word “Ingredients” it says in the tiniest print that I can barely read since I turned 40, “unrefined extra-virgin organic olive oil.”    Forget low-fat or non-fat salad dressings.  Most of those contain MSG or MSG-derivatives with tricky names like “hydrolyzed vegetable protein” or “autolyzed yeast extract.”  We need fat on our salad to help us assimilate all the fabulous fat-soluble vitamins in the vegetables!  What a waste to eat Vitamins A, D, E and K without the presence of fat to help our intestines absorb those nutrients.

My Favorite Everyday Salad Dressings | Pamela Salzman

Lemon juice is super alkalizing to our bodies and raw, unpasteurized apple cider vinegar is so enzyme-rich — both are my favorite acids for dressings.  I personally love the lemon juice dressing, but I came up with the apple cider vinegar/brown rice vinegar dressing when I was at my mother-in-law’s house and she asked me to whip up a salad dressing that she would like.  I was thrilled to make her something delicious so that she would stop using a packaged brand that rhymes with Shmood Shmeasons.  Alas a convert!  It has become a very popular dressing in my house and hers.

The basic rule of thumb with a vinaigrette is to mix 1 part acid (lemon juice, vinegar) with 3-4 parts oil.  Adjust the ratios to suit your taste and build from there with salt and pepper, garlic or shallots, mustard or fresh herbs, if you have them.  Once you get into the habit of making salad dressings regularly, you won’t even have to measure your ingredients anymore.  So long Shmishbone!

My Favorite Everyday Salad Dressings | Pamela Salzman

5.0 from 4 reviews
My Favorite Everyday Salad Dressings
Author: 
 
Ingredients
  • everyday salad dressing #1 (with lemon juice)
  • 1 medium garlic clove, minced or 1 small shallot, finely diced
  • ¾ teaspoon fine grain sea salt
  • a few turns of freshly ground black pepper
  • 1 teaspoon Dijon mustard
  • 2½ - 3 Tablespoons freshly squeezed lemon juice
  • ½ cup unrefined, cold-pressed extra-virgin olive oil
  • _______________________________________________
  • everyday salad dressing #2 (with cider or red wine vinegar)
  • 1 small shallot, minced (about 2 teaspoons)
  • ¾ -1 teaspoon fine grain sea salt
  • freshly ground black pepper to taste
  • 1 teaspoon Dijon mustard
  • 2 teaspoons raw honey or 100% pure maple syrup
  • 2 Tablespoons unpasteurized apple cider vinegar or red wine vinegar
  • 2 Tablespoons unseasoned rice vinegar
  • ¾ cup unrefined, cold-pressed extra-virgin olive oil
Instructions
  1. Either whisk together in a small bowl or place all the ingredients in a glass jar with a lid and shake until emulsified.
  2. Both dressings can be made ahead and kept in a glass jar in the refrigerator for 5-7 days. Because olive oil solidifies when chilled, you will need to remove it from the refrigerator well before you want to use it in order for it to become pourable. Or you can leave the dressing at room temperature in a cool, dark place for a few days.


My Favorite Everyday Salad Dressings | Pamela Salzman

How to make fresh pumpkin purée recipe

Few things say Fall like the pumpkin, along with all the delicious things that you can make with one.  Every year I stock up on multiples cans of pumpkin puree for muffins, pancakes, oatmeal and, of course, pie.  But this year is different.  After being discouraged by all the BPA in can liners that our bodies absorb, I decided pumpkin purée from scratch was worth trying.  Well, wouldn’t you know – not so difficult and not surprisingly the fresh pumpkin tastes infinitely better than canned!  Certainly it is way easier to pop a can open, but I am now a convert.  I tried multiple methods of cooking pumpkin – steaming, cut in half, covered.  The winner was roasting the pumpkin whole, with several slits cut into the flesh and tented with foil.  Most of the time, the pumpkin was flavorful and smooth.  Unfortunately, Mother Nature is not always consistent, so not every pumpkin turns out the same.

pumpkin puree|pamela salzman

pumpkin puree|pamela salzman

pumpkin puree|pamela salzman

pumpkin puree|pamela salzman


I’m sure pumpkin’s dark orange color is a clue to how rich it is in Beta-carotene, which your body converts to Vitamin A.  If not, you need to read my blog more often!  Also, let’s not forget that pumpkin is loaded with fiber, Vitamin C, Folate and Vitamin E.  Can you say nutritional powerhouse?

Roast away and freeze your purée for a rainy day.   Stay tuned for a delicious recipe using pumpkin purée.

pumpkin puree|pamela salzman


how to make fresh pumpkin purée recipe
Author: 
Serves: 5-6 Cups
 
Ingredients
  • 1 5-6 pound pumpkin
Instructions
  1. Preheat the oven to 375 degrees.
  2. Begin with a pumpkin suitable for eating, such as Sugar Pie. Poke the pumpkin all over with a knife and place on a parchment-lined baking sheet.
  3. Tent with aluminum foil and bake for about 1 ½ hours* until very tender and starting to lose its shape.
  4. When the pumpkin is cool enough to handle, cut in half and remove the seeds and stringy center. Separate the flesh from the skin and puree the flesh in a food processor until smooth. Do this in batches, if necessary.
Notes
A smaller pumpkin requires less cooking time.

Homemade chicken stock recipe

Homemade Chicken Stock | Pamela Salzman

I am starting my first post with one of my obsessions – homemade chicken stock.  Since chicken stock is something I use quite regularly, especially during soup season, I thought it would be a good idea to get a recipe out there right off the bat.

A chicken stock made from scratch is heads and shoulders above anything you can buy in a box or (worse) a can.  Not only is the taste superior when you make it yourself, but it is so much more healthful, too.  When the kids go back to school and the weather turns colder, it is very important to nourish ourselves with foods that boost the immune system.  Prepared properly, chicken stock is rich in minerals, aids in digestion, and strengthens the immune system.

homemade chicken stock | pamela salzman


Making stock does not require a lot of work, but it does take some time on the stove to simmer.  I like to make stock on a day when I know I’ll be around for 5 hours or so and I usually make 2 large stockpots at once.  Stock can stay in the refrigerator for 3-5 days or be frozen for up to 3 months.

homemade chicken stock|pamela salzman

Just so you know, I’m all about efficiency, and this is the first of many opportunities to apply “green” principles — which can save you some green.  Let’s say you just made a flavorful roast chicken last night – instead of tossing the carcass in the garbage (this is a simple example of adaptive reuse!), save it for chicken stock, it will yield a very rich broth.  That way you get multiple meals from a single purchase, saving you time and money.  Who said it wasn’t easy to be green?

Pamela Salzman 11

homemade chicken stock|pamela salzman

Tips for making a flavorful, nutrient-rich stock:

  • Bones!  Use fresh chicken parts such as backs, necks, wings and feet, if you can get them.  (Toss the feet in the pot first so they don’t float to the top and stick out.  That really freaked me out the first time I did that!)  You can also use a whole chicken if you like to have poached chicken meat to use afterwards.
  • Cold water – it will draw lots of flavor from the bones.
  • A gentle simmer – this will result in a clear broth.
  • A little acidity (such as vinegar) – to draw lots of minerals and amino acids from the bones.
  • Time – the longer it simmers, the more flavor you will have.
  • Turkey, too – you can do the same thing with your leftover turkey carcass from Thanksgiving.


Let me just warn you right now – once you’ve cooked with homemade stock, you’ll never go back to a box!

homemade chicken stock|pamela salzman


homemade chicken stock | pamela salzman


Photo by Sarah Elliott for Pamela Salzman
5.0 from 1 reviews
homemade chicken stock recipe
Author: 
Serves: Makes about 5 quarts
 
Ingredients
  • 1 whole free-range chicken or 4 pounds of bony chicken parts, such as backs, necks and wings (if you can get chicken feet, use them!)
  • 6 quarts cold water*
  • 1 Tablespoon apple cider vinegar**
  • 1 large onion, peeled and halved
  • 2 carrots, peeled
  • 2 celery stalks, cut if necessary
  • Few sprigs of fresh parsley
  • 2 Teaspoons sea salt
Instructions
  1. Wash the chicken and remove gizzards from the cavity. Place chicken and/or chicken parts in a large stainless steel stock pot. (You can cut the chicken into pieces if you need to in order to fit in the pot.) Add the cold water and vinegar. Put the temperature on high and bring to a boil.
  2. Immediately turn heat to low and skim with a slotted spoon any foam that rises to the surface. Try not to skim any of the fat or you will lose a bit of flavor. At this point, it is important to keep the stock to a bare simmer and NOT a boil.
  3. After skimming off all the foam, add all the vegetables except the parsley. Cook uncovered at the gentlest possible simmer for 4 to 5 hours. (I like to go as long as 12 hours.( You want to see tiny bublles just barely breaking the surface. If the heat from the burner does not go low enough , partially cover the pot or leave your stock pot half on the heat and half off.
  4. About 10 minutes before finishing the stock, add the sea salt and parsley (this will impart additional mineral ions to the broth).
  5. Strain the stock into a large glass bowl. Remove the chicken meat from the carcass, if using a whole chicken, and discard the remaining solids. Cool before refrigerating.
  6. Ladle through a fine mesh sieve into quart-sized containers or whatever size is most useful and refrigerate overnight. The next day, skim off the congealed fat at the top of each container. Refrigerate the stock for up to 5 days or freeze for up to 3 months. I have been using BPA-free containers from letsgogreen.biz as well as Sistema. I also reuse glass quart-size jars from yogurt and Vegenaise. Just soak the labels off and wash before adding your stock.
Notes
*Cold water draws the flavor out of the meat and bones.

**Acidic wine or vinegar adding during cooking helps to draw minerals, particularly calcium, magnesium and potassium, into the broth.