Kale and White Bean Minestrone Recipe

white bean and kale minestrone | pamela salzman

I think that sports are awesome for kids.  They’re fun!  The kids get exercise, make new friends, learn about competition and trying your best, and lots of other life lessons which I am constantly repeating to my children to the point of annoyance.  “It’s not over ’til it’s over!”  “Today is a new day!”  Love those.

Mr. Picky is 10 years old and he will basically play as many sports as his schedule and we will allow.  I can’t possibly let him participate in everything that strikes his fancy because then I would truly have no life and he would be exhausted.  He plays soccer all year plus basketball in the winter, baseball in the spring and tennis in the summer.  But can I just vent for one second?  Soccer, basketball, tennis — all good.  Normal practice schedule.  Short games. Love it.  10-year-old baseball?  T-O-R-T-U-R-E.

aromatics chopped

Forget about the fact that I think baseball is dreadfully boring.  I could watch any of my kids blow dirt and I would enjoy cheering them on.  But there’s not a lot of action in baseball and we’re committed to two 2-hour games a week plus a 2 1/2 hour practice on Saturdays.  Ugh.  And, those Thursday night games on metal bleachers and wind blowing from the West.  I am always chilled to the bone when I get home on Thursday nights.  That’s why I bribed Mr. Picky not to play baseball this year.  I offered my son cold hard cash if he would pick up lacrosse in the spring instead.  “What are you talking about, Mom?  I am definitely playing baseball.”

“Really, dude?  There’s nothing I can give you to make you not play?  Nothing?”

“I don’t even have to think about that.  I’m playing.”

“Everybody has a price, little man.  Just name it.”

“Mom, you’re acting weird.  Please stop.”

So frustrating!  “You know what, kid?  You have NO future in politics!  None!  Remember that!”

Seriously, I would have offered him a THOUSAND dollars not to play and I honestly think he would have turned it down. Drat.

tomato paste and rosemary

So, if you follow me on Instagram, Facebook or Twitter, you know I post my family’s dinner every night.  I won’t promise high quality images, just the real deal.  But you should start expecting slow cooker meals and/or soups and stews on Thursdays for the next 2 1/2 long months.  Games are from 5:30 – 8:00 pm and I don’t expect my daughters to wait until 8:15 to eat (or at 4:30 for that matter.)  So I need something that can stay warm for a few hours without drying out.

mash some white beans


parmesan rind

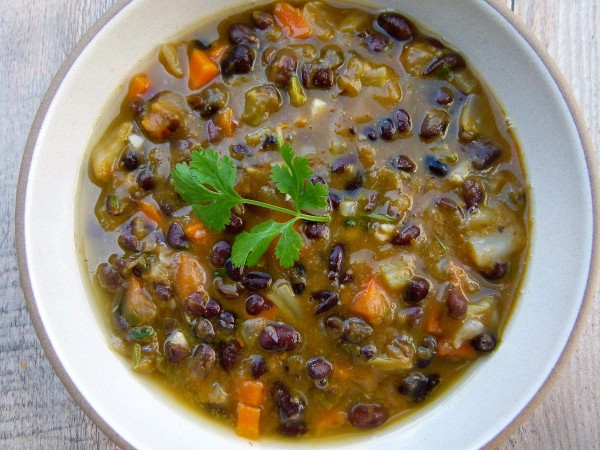
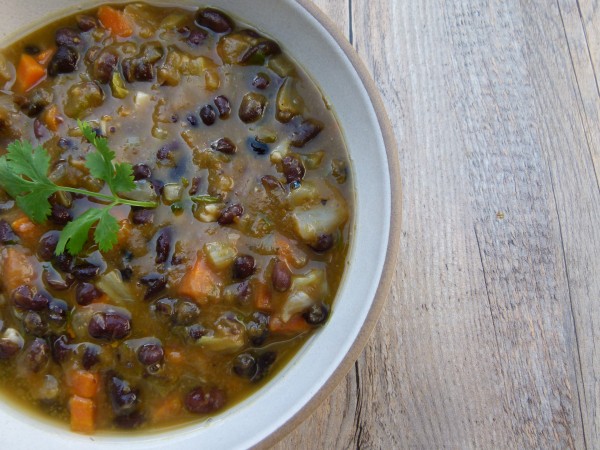
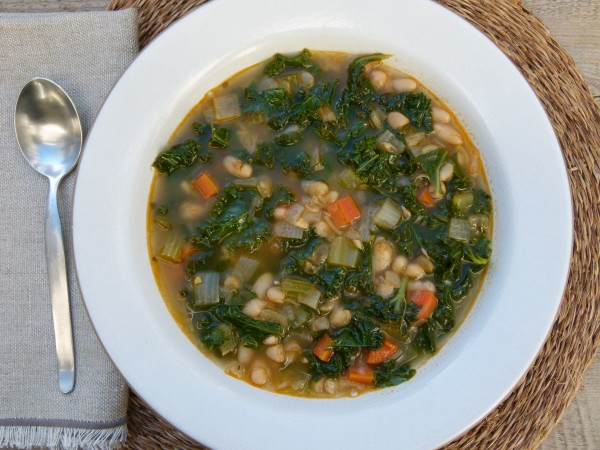
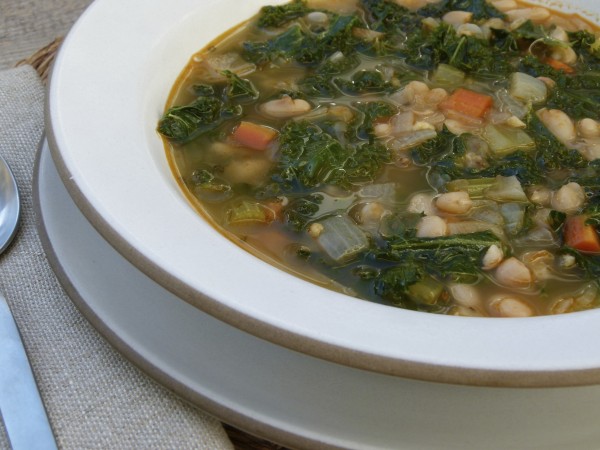
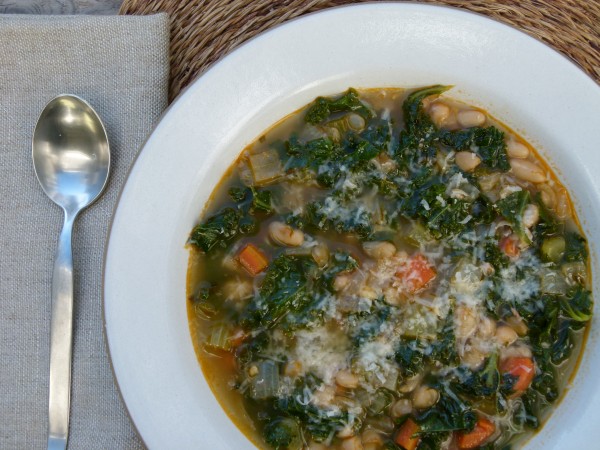
I know the first day of spring is this week and I couldn’t be more thrilled.  But let’s face it, the temperature doesn’t all of a sudden go up by 15 degrees on March 21st.  Soups are still in play! (That was a cheesy pun, but I couldn’t resist.)  I love, love, love this kale and white bean minestrone.  I taught this soup in my classes last month, but I have been making a version of this forever.  It’s hearty and flavorful, but still light since it’s all veggies and beans.  I make it with chicken stock very often, but also with vegetable stock.  Sometimes Mr. Picky and I will eat something before the game like peanut butter toast and then have a bowl of hot soup like this when we get home.  Really hits the spot.  Because the beans add great protein, I’ll also reheat leftovers for school lunch the next day.

soup in progress

white bean and kale minestrone

I think kale is amazing in this soup, but I have also made it with Swiss chard and I think collards would be great, too.  Sometimes I’ll add a little extra tomato paste to make it more tomato-y.  But I almost never make it without my secret ingredient, a rind of Parmesan cheese.   This makes this soup so flavorful and rich without you actually eating cheese.  Although I can never resist grating some fresh Pecorino on top.

white bean and kale minestrone | pamela salzman

Sadly, I think many of you are bracing for another snow storm.  This soup’s for you!

white bean and kale minestrone | pamela salzman

5.0 from 2 reviews
Kale and White Bean Minestrone
Author: 
Serves: 6
 
Ingredients
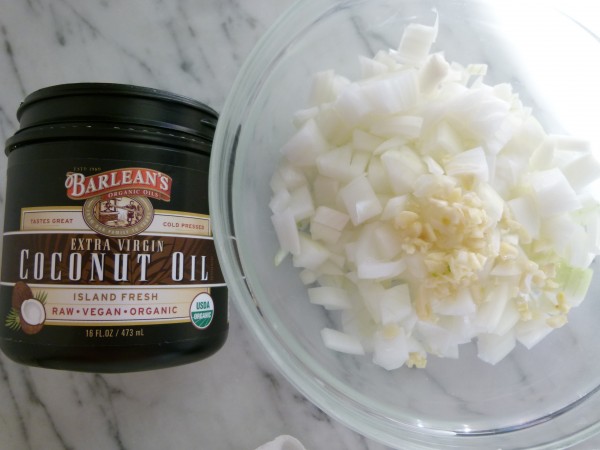
  • 3 Tablespoons unrefined, cold pressed extra-virgin olive oil
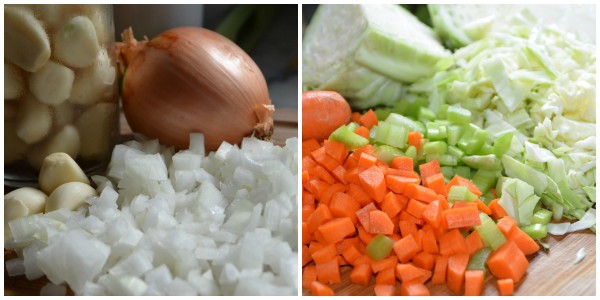
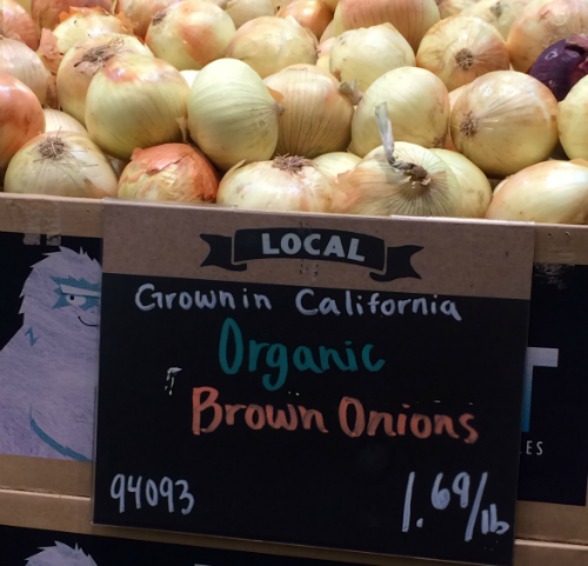
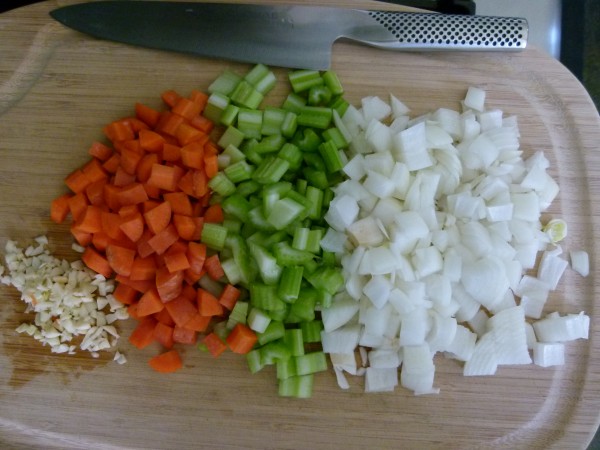
  • 1 onion, chopped
  • 2 carrots, peeled and chopped
  • 2 stalks of celery, chopped
  • 6 cloves of garlic, chopped
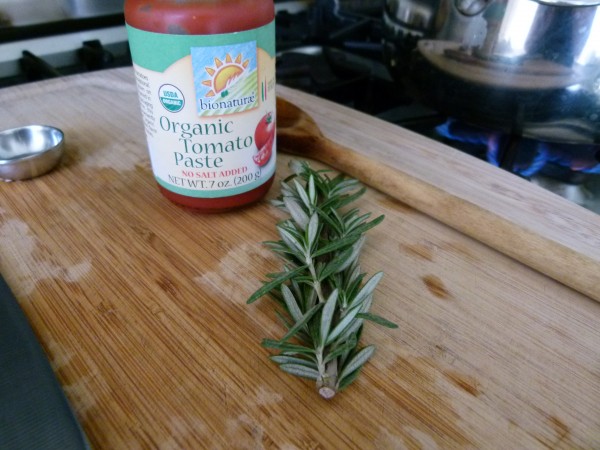
  • 2 Tablespoons tomato paste ( I like Bionaturae)
  • 1 teaspoon fresh rosemary, chopped (measure the rosemary, then chop)
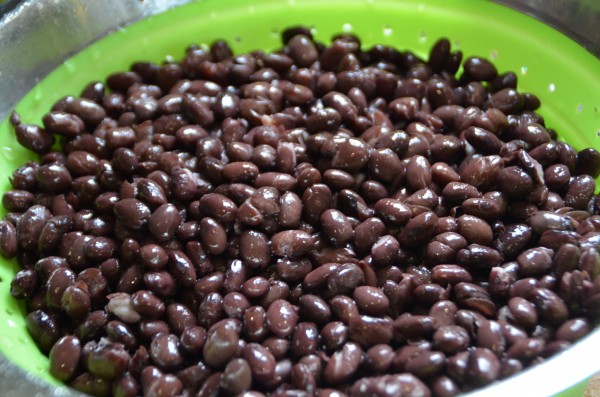
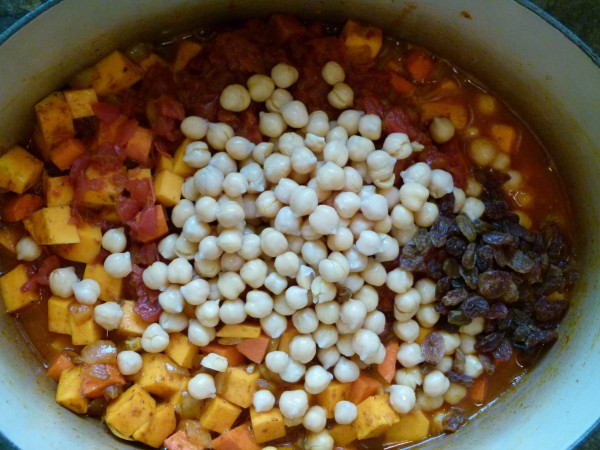
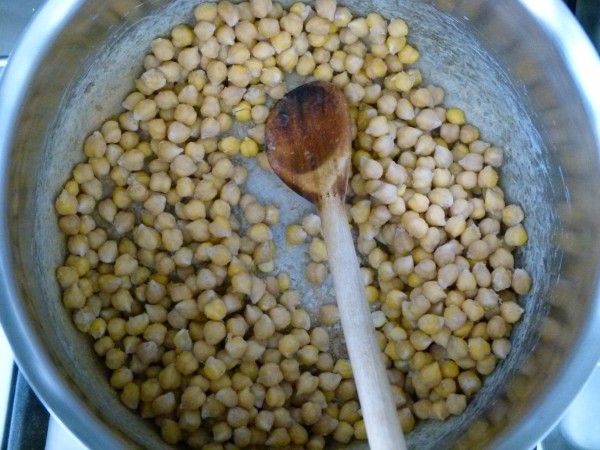
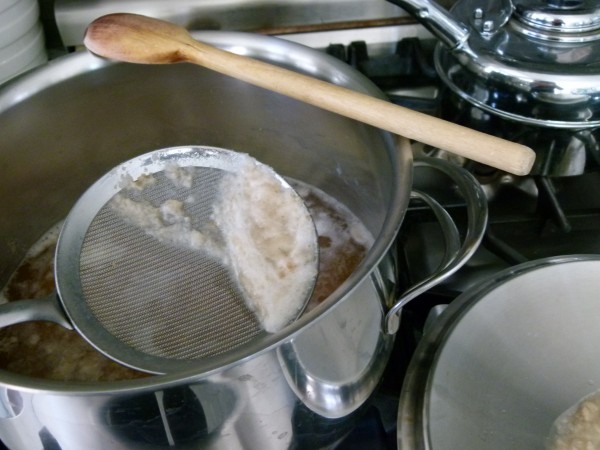
  • 3 ½ cups of cooked white beans (such as Cannellini or Great Northern) or 2 15-ounce cans, drained and rinsed* click here to learn how to make your beans from scratch
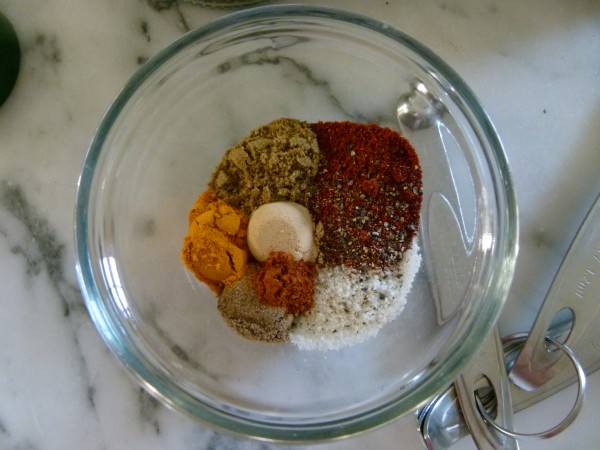
  • 2 teaspoons sea salt and freshly ground black pepper to taste (You will need about 3 teaspoons of salt if your stock is unsalted.)
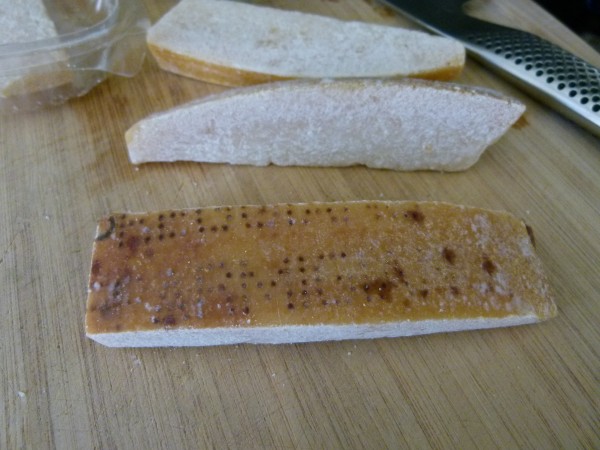
  • piece of rind from Parmesan cheese (if you have it, otherwise don’t worry about it)
  • 6 cups of chicken or vegetable stock, preferably homemade or 4 cups stock + 2 cups water
  • 6 cups of stemmed, coarsely chopped kale or Swiss chard leaves*
  • Accompaniments: serve with garlic toast, a drizzle of olive oil and/or grated Pecorino or Parmesan cheese
Instructions
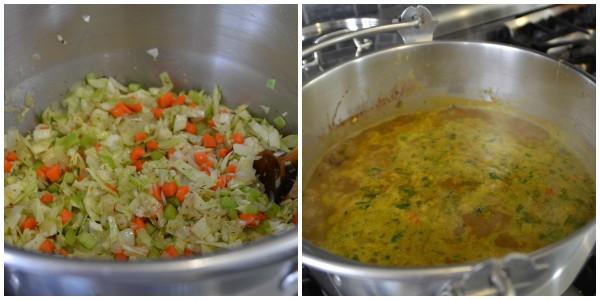
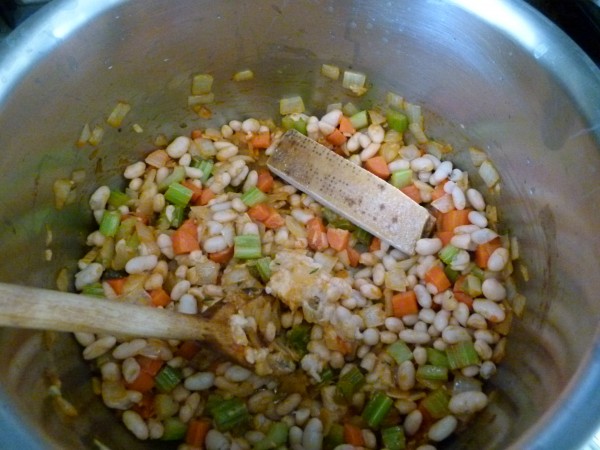
  1. Warm oil in a large pot over medium heat. Add chopped onion, carrots, celery and garlic and sauté until tender and translucent, about 6-8 minutes.
  2. Stir in the tomato paste and rosemary and cook for 2 minutes, or until fragrant.
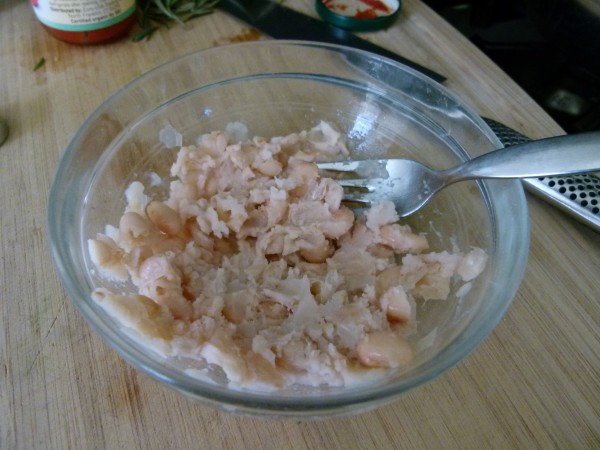
  3. Add the white beans, salt, pepper and parmesan rind. Try to mash a few of the beans in the pot. This will help thicken the soup later.
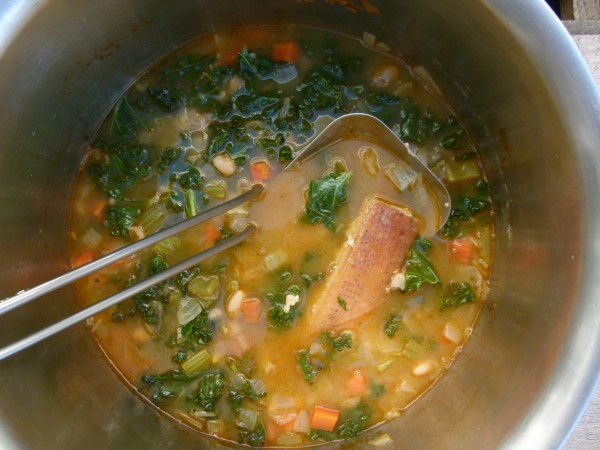
  4. Pour in the stock. Raise the heat to high and bring soup to a boil. Lower heat so that soup gently simmers and partially cover the pot. Simmer for 20 minutes (or longer if you want), or until vegetables are tender.
  5. Stir in kale leaves and simmer another 8 minutes or until kale is tender. Taste for seasoning and serve with or without desired accompaniments.
Notes
*Or you can use 1 can of beans and 1 pound of chopped Yukon Gold potatoes.

**If you use Swiss chard, separate the stems from the leaves before starting the recipe and chop both.  Sauté the chopped stems with the onions and add the chopped leaves at the end.

Black bean and pumpkin soup recipe

black bean and pumpkin soup | pamela salzman

Nothing is as comforting to me as a one-pot, hearty meal in a bowl.  I love substantial soups and stews, especially ones with beans or legumes.  I very often make soups on the weekend for lunch or for a Meatless Monday dinner.  They also make a fantastic school lunch for the kids the next day.  This black bean and pumpkin soup is P-E-R-F-E-C-T for a chilly fall day, especially on Halloween if you want to send everyone off with a filling, warm meal.  This is almost like a chili because of the beans and the small amount of cumin and oregano, but not quite as thick.  My favorite ingredient in here is the pureed pumpkin which gives the soup a little body.  So much nutrition in one bowl!

veggies prepped

This soup is a really easy one if you use canned pumpkin and canned beans.  I’m so glad more manufacturers are responding to our desire for BPA-free products.  There are more and more companies who are using cans without BPA.  That is particularly relevant to this recipe because I know you can find organic pumpkin puree in BPA-free packaging by a company called Farmer’s Market or by Pacific Foods and organic black beans in BPA-free cans by Eden organic.  A gentleman behind the customer service desk at Trader Joe’s told me they don’t use BPA in their cans, except canned tomatoes.  I haven’t verified this yet with the company, but I am excited if that’s the case!

cooked black beans

BPA-free pumpkin options

Also exciting is the fact that for the first time in a loooong time, I have Mr. Picky’s Halloween costume ready to go.  This never happens in our house quite this early, as in a week before Halloween.  Poor kid one year made a Batman costume the night before out of grey baseball pants and an cape from an old zombie costume of his sister’s.  This year he is going as a punk rocker complete with wig and (temporary) nose ring.  All of his costumes must involve eyeliner or face paint and this year will be no exception.  My girls are not trick-or-treating this year.  I think the novelty has worn off.  That and my husband said there will be no teenage children of his trick-or-treating without a costume.  I agree — way lame.

soup in progress

Ideally the girls will stay safe at home with a few friends and a pot of black bean and pumpkin soup on the stove and enough in their bellies that they only feel the need to eat a couple pieces of candy and not a basketful.  Believe me, I am not the party pooper you might think I am.  I know full well that on Halloween night, Mr. Picky will take all of his candy and hoard it behind the extra towels underneath his bathroom sink.  I leave them there without letting on that I know his little secret.  Until Valentine’s Day when I need to make room for the fresh loot.

Hope you have a fun and safe Halloween!  This Thursday is exactly four weeks before Thanksgiving.  You know what that means!

black bean and pumpkin soup | pamela salzman

5.0 from 2 reviews
Black Bean and Pumpkin Soup
Author: 
Serves: 6
 
Ingredients
  • 2 Tablespoons unrefined, cold pressed extra-virgin olive oil or coconut oil
  • 1 large onion, diced
  • 4 garlic cloves, finely chopped
  • 2 carrots, diced
  • 2 stalks celery, diced
  • 1 ½ cups diced green cabbage
  • 1 teaspoon ground cumin
  • 1 teaspoon dried oregano
  • a pinch or more of cayenne or to taste (optional)
  • 4 ½ cups cooked black beans or 3 15-ounce cans, drained and rinsed (click here for how to cook beans from scratch)
  • ½ cup cilantro leaves and stems, chopped
  • 1 ¾ cups pumpkin puree or 1 15-ounce can (not pumpkin pie filling) (click here for how to make pumpkin puree from scratch)
  • 2-3 teaspoons sea salt, or to taste
  • a few grinds of freshly ground black pepper
  • 2 ½ cups vegetable stock, chicken stock or water
Instructions
  1. In a large pot, heat the olive oil over medium heat.  Add the onion and garlic and sauté until tender and translucent, about 6 minutes.
  2. Add the carrots, celery, cabbage, cumin, oregano and cayenne* and toss to coat with the oil, onions and garlic.  Sauté for a couple minutes or until the vegetables no longer look raw.
  3. Add the beans, cilantro, pumpkin puree, salt and pepper and stock.  Bring to a boil and lower the heat to a simmer.  Cook partially covered until the vegetables are tender, about 18-20 minutes.  Taste for seasoning.
Notes
I have made this soup several different ways. If you want a little more heat, you can sauté a diced jalapeno pepper (do this in Step 1) and/or add a teaspoon of ground chipotle pepper (add this with the other spices.) If you want a little smokiness without the heat, add a teaspoon of smoked paprika with the other spices. You can also puree part of the soup for a thicker consistency. Lots of options!


Butternut squash and chickpea stew recipe

butternut squash and chickpea stew | pamela salzman

I have been consistently making Monday our meatless night, although I often have another vegetarian dinner during the week as well.  This week I was excited to cook something with one of the many winter squashes I have bought recently.  I taught this vegan butternut squash and chickpea stew last February and I was waiting for the change in seasons to make it again.  As opposed to most stews, this one doesn’t take hours to cook and was perfect for a busy weeknight.  Actually, I was so busy on Monday that I had to serve it with white basmati rice instead of brown rice (nobody’s perfect!)  I also made a delicious kale salad with avocados, pomegranates and sliced almonds.  It was the perfect meal for me.  I also love this stew because it can be made the day before and reheated, or made earlier in the afternoon and left on the stove, off the heat, until dinner time.

brown onions

coconut oil and onions


spices

I was really delighted that my son, also known as, but soon to be formerly known as, Mr. Picky, ate everything on his plate (kale, chickpeas, carrots, onions, rice) except the butternut squash.  This is major progress and I am very encouraged by how far he has come since the days not too long ago when he wouldn’t have eaten a single bite of this stew.  Small steps, but they all get there eventually.

butternut squash

stew in the making

This stew has a little bit of a Moroccan kick to it.  I used really flavorful (and anti-inflammatory) spices like turmeric, ginger, coriander and a little cayenne.  The cayenne gives it just enough heat, but not too much that you would think this is spicy.  I think this would be delicious for a Halloween dinner, whether you are entertaining or just filling everyone up before trick-or-treating.  That’s my strategy, you know.  I don’t prohibit the kids from eating a little candy on Halloween night, but I give them a nice hearty, substantial dinner so they’re not hungry when they leave the house.  Pretty tricky, Mom!

butternut squash and chickpea stew | pamela salzman

5.0 from 4 reviews
Butternut Squash and Chickpea Stew
Author: 
Serves: 4-6
 
Ingredients
  • 2 Tablespoons unrefined coconut oil or olive oil (I use coconut oil and I really like Barlean’s)
  • 1 onion, chopped
  • 3 cloves garlic, chopped
  • 2 teaspoons paprika
  • 1 teaspoon sea salt + extra for seasoning at the end
  • ¾ teaspoon ground cumin
  • ½ teaspoon freshly ground black pepper or to taste
  • ½ teaspoon ground coriander
  • ½ teaspoon ground turmeric (feel free to add more if you like it)
  • ½ teaspoon ground ginger
  • ⅛ teaspoon cayenne pepper (optional)
  • 3 cups 1-inch cubes of peeled butternut squash (about 1 ½ pounds)
  • 2 large carrots, peeled and cut into ¾-inch pieces
  • 1 pound fresh tomatoes, peeled, seeded and diced or 14 ounces boxed, drained
  • 2 Tablespoons fresh lemon juice
  • 1 ½ cups cooked chickpeas or 1 15-ounce can, drained and rinsed
  • a handful of golden raisins or currants
  • 1 cup chicken stock, vegetable stock or water
Instructions
  1. Heat oil in a large saucepan over medium heat. Add the onion and sauté until tender and translucent, about 6 minutes. Add garlic and cook another 1 minute or until fragrant.
  2. Add salt, pepper and all spices to the onions. Sauté for a minute.
  3. Add the squash and carrots and toss to coat with the spices.
  4. Add tomatoes, lemon juice, chickpeas, raisins and stock/water. Bring to a boil and cover. Lower the heat and simmer over low or medium/low heat until squash is tender and flavors have melded, about 40 minutes. Taste for seasoning and add extra salt and pepper as desired.
Notes
Feel free to stir some spinach or chopped chard leaves in at the end.  Delicious served over quinoa, millet, rice, spaghetti squash or couscous.


Indian basmati rice with peas recipe

Indian basmati rice with peas | Pamela Salzman

I am 100% Italian and I absolutely love pasta, but I also looooooove rice.  Love!  I am crazy about all kinds of rice and it shows in my pantry.  I have so many varieties of both white and brown rice and I never get tired of it.  Overeating pasta doesn’t make me feel great and makes it very hard for me to maintain any semblance of an ideal weight.  But I digest rice really well and I think it’s so versatile and really easy to pair with food from any cuisine, even Italian!

I have made rice into pudding, baked it with eggs and vegetables for a scrumptious breakfast, wrapped seaweed around it, and topped it with beans and vegetables.  This week I made a delicious vegetable paella for dinner which I know I am going teach in a class one day.  Total winner!

rice, turmeric, butter, salt, garlic

I know rice has gotten some bad media attention in the last year due to some scary reports about unsafe levels of arsenic found in many rice products.  Please read this article I wrote last year so that you are informed and don’t get freaked out.  There are ways you can significantly reduce any arsenic present in whole rice (not much you can do about arsenic in rice cakes or rice cereal, which is why I have reduced the kids’ exposure to rice-derived products.)  Basmati rice, which I think has the best flavor and is my favorite variety, also seems to have the least amount of arsenic.  Lucky me!

all in the pot

I have a beautiful and very healthful rice recipe I’d like to share and I don’t want you to get scared off by the unusual color or that I labeled it “Indian.”  I know there are some of you out there who think you don’t like Indian food.  And maybe you tried some from a not-so-great place and it was lousy.  In that case, I don’t blame you.  BUT.  Let’s leave the past behind and look forward to something that IS delicious.  Furthermore, this rice recipe is so basic and neutral.  It’s not spicy nor doesn’t it have a flavor that is outside of most people’s comfort zone.  It will go with that roast chicken you’re making later or my spice-rubbed salmon.  And if you’re vegetarian, you can just eat this bowl of golden goodness with a green salad or some roasted vegetables (eggplant is nice right now) and you’ll be all set.   Rice and peas together will give you plenty of protein, not to worry.

bring to a boil

The crazy beautiful color of this rice comes from turmeric, the most talked about, most popular spice of the moment that is basically anti everything you don’t want.  Anti-cancer, anti-inflammatory, anti-viral, etc.  Someone just told me that there was a study done on Indians (people living in India) because they have the lowest incidence of Alzheimer’s disease and it is attributed to their abundant intake of turmeric.  I try to use fresh turmeric when I juice and I have been using it in place of saffron, as well (like in that vegetable paella I was talking about.)   I have also included turmeric in my DIY taco seasoning and Chicken and Vegetable Curry.  Just be forewarned, it stains like mad so use extra caution when serving anything with turmeric, even be careful of your countertops.  (As a last resort, I have had success using a drop of Clorox Clean-up to get out a stubborn turmeric stain in my white marble countertops.)

If you have leftovers of this rice, definitely consider using it in lunchboxes the next day.  Are we surviving making lunches??  See this post if you’re still at a loss.  Back to rice — make this!  Try something new!  Let me know how it goes!

Indian basmati rice with peas | Pamela Salzman

4.8 from 11 reviews
Indian Basmati Rice with Peas
Author: 
Serves: 6
 
Ingredients
  • 1 ½ cups basmati rice, either brown or white
  • 3 cups water
  • 2 Tablespoons unsalted butter, coconut oil or olive oil (I think butter tastes best.)
  • 1 ½ teaspoons sea salt
  • 1 ½ teaspoons ground turmeric (you can use more, but you’ll taste it)
  • 2 cloves crushed garlic
  • ½ cup frozen peas
  • chopped cilantro to taste, if desired
Instructions
  1. Rinse your rice in a fine mesh sieve, if desired. Transfer rice to a medium saucepan and add all ingredients except peas and cilantro.
  2. Bring to a boil, cover and lower to a simmer. Cook white rice for 18-20 minutes, brown rice for 45-50 minutes, or until all water has evaporated.
  3. Add frozen peas to rice and allow to sit, covered, for 10 minutes.
  4. Fluff rice with a fork and transfer to a serving bowl. Sprinkle with chopped cilantro, if desired.
Notes
If you are concerned about arsenic, you should soak your rice in water for 1-8 hours before using it.  That process also makes brown rice more digestible.  If you do soak the rice, you will cook it in less time and you can use a few Tablespoons less water, depending on how long you soaked it.  Test brown rice for doneness after 35 minutes, and white rice after 15 minutes.

Lentil and rice-stuffed baby eggplants

Lentil and Rice Stuffed Baby Eggplants | Pamela Salzman

Lentil and Rice Stuffed Baby Eggplants | Pamela Salzman

I had a dream the other night that I was swept away by a strong current of water and I was being pulled quickly down a stream.  My head was above water, barely, but I could not neither stop the raging rapids nor could I find a way out of the water.  And then I saw the sign, “Welcome to September.”   Seriously, this month has been a whirlwind, a blur.  My three kids started school (three different schools, mind you), I cooked and cooked for the Jewish holidays which came very early this year, I resumed teaching cooking classes four days a week, soccer season started and two of my kids have September birthdays.  I told Mr. Picky that his birthday party, as usual, would be in October.  Can I ask you people a question?  How do you do it all?  I am in awe!

slice from the bottom of the eggplant leaving the stem intact


scoop out the flesh of the eggplant

Quite honestly, the only area of my life where I am organized is food.   I sit down every Sunday night and plan my meals and grocery list for the whole week.  If I didn’t do that, I can guarantee we’d be eating cereal and not-homemade almond milk for breakfast, lunch and dinner, or at least meals that could be prepared at the last minute.  And whereas there are a lot of fabulous quickies out there, I would hate to miss out on a recipe like this one here.

this is your stuffing mixture

Lentil and rice-stuffed baby eggplant will never win an award for fastest dish in the West, but it’s also not that complicated either and it is mighty, mighty tasty.  In fact, it is one of my favorite vegetarian entrees.  I only make it in summer and early fall when I can find these adorable baby eggplants, sometimes referred to as Italian eggplants, Baby Bells or bambino eggplants.  So cute!  By the way, eggplants contain many heart-healthy nutrients including dietary fiber, folate, Vitamins B3 and B6, magnesium and potassium.  Eggplant is also rich in many phytonutrients and antioxidants which are important for reducing free radical formation and preventing cellular damage.  However, eggplant is a member of the nightshade family of vegetables which also includes tomatoes, potatoes and peppers.  Nightshades can aggravate nerve-related or inflammatory health conditions, such as arthritis.  Just good to know.

Finish cooking on the stove, covered

My family loves this dish, although Mr. Picky will only eat the rice and lentil mixture from the inside.  No problem.  The recipe that inspired this one was a meat and rice-stuffed eggplant, which is good, but I like this veggie version much more.  I almost always do this dish ahead or in stages, so at the end of the day all I have to do is put it back on the stove to simmer and cook through.  You can prep all the ingredients in advance and then sauté and cook everything later.  Or you can go so far as to stuff the eggplant and refrigerate everything in the pan until the end of the day.  Keep in mind this recipe calls for uncooked white rice because uncooked brown rice wouldn’t cook properly inside the eggplant.  If you wanted to use brown rice, you will have to precook it.  Use 1/2 cup raw or 1 1/2 cups cooked.  You can also use precooked lentils and this recipe is much quicker.

Lentil and Roce-Stuffed Baby Eggplants | Pamela Salzman

I have even eaten this eggplant the next day as a cold or room temperature leftover and it is delicious.  I hope you try this one!

Lentil and Rice Stuffed Baby Eggplants | Pamela Salzman

Lentil and Rice-Stuffed Baby Eggplants
Author: 
Serves: 6
 
Ingredients
  • ½ cup uncooked black or French lentils (or 1 ½ cups COOKED)
  • 6 (6- to 7-inch long) small Italian eggplants (about 7-8 ounces each)
  • ¼ cup unrefined cold pressed extra-virgin olive oil
  • 3 Tablespoons pine nuts
  • 1 large onion, finely chopped
  • 3 garlic cloves, finely chopped
  • 1 pound fresh tomatoes, peeled, seeded and diced or boxed/canned with juice
  • 2 cups chicken stock or vegetable stock
  • 2 ¼ teaspoons sea salt, divided
  • freshly ground black pepper to taste
  • ½ cup uncooked long-grain white rice (I like basmati)
  • 3 Tablespoons golden raisins
  • 1 teaspoon ground cumin
  • ¾ teaspoon ground allspice
  • a few tablespoons chopped flat-leaf parsley for garnish (optional, but pretty)
  • ½ lemon
Instructions
  1. Bring a medium saucepan of water to a boil and add the uncooked lentils and a healthy pinch of salt. Simmer 20 minutes and drain. Skip this step if you use cooked lentils.
  2. Slice a sliver off the bottom of each eggplant and discard. Using a melon baller, a mini ice cream scooper or a small metal measuring spoon, hollow out each eggplant while keeping the skin intact. Reserve scooped out eggplant flesh, if desired.
  3. In a large 12-inch skillet, heat the oil over medium heat. Fry the pine nuts until golden, about 1 minute. Do not walk away from the pan! Transfer with a slotted spoon to a bowl.
  4. Sauté onion and garlic in the skillet until tender, about 6-8 minutes. Transfer ½ cup of onion mixture to the bowl with the pine nuts. To the skillet add the tomatoes, a little of the reserved eggplant flesh if you want, stock, 1 teaspoon sea salt and freshly ground pepper to taste. Bring to a simmer while you stuff the eggplants.
  5. Add cooked lentils, rice, raisins, cumin, allspice, 1 ¼ teaspoon salt and black pepper to taste to the bowl with the onions and pine nuts. Combine well. Stuff the mixture into the eggplants and transfer the stuffed eggplants to the skillet (along with any unstuffed filling). You don’t have to fill the eggplants to the top since the stuffing will expand a bit. Simmer, covered, carefully turning once (if you remember), until everything is cooked through, 50 – 60 minutes.
  6. Squeeze lemon over everything and sprinkle with parsley.
Notes
You can substitute ¾ lb. ground beef or lamb for the lentils. If using grass-fed beef, add a few tablespoons of olive oil to the meat mixture, otherwise it will be too dry.
You can also use this mixture to stuff halved bell peppers.


Supersmooth, Light-as-Air Hummus

Supersmooth, Light-as-Air Hummus by Pamela Salzman

Why is the best hummus always in restaurants, especially Middle Eastern ones?  I think I make a delicious, flavorful hummus that has a great consistency and is better than the ones you find in the supermarket.  But, it doesn’t compare to the silky, light and creamy hummus that I’ve had in restaurants.  I want that kind.  The kind that will drip, not plop, off your pita if you’re not careful.  The kind you can suck up with a straw.  You know what I mean.

cook the soaked, drained chickpeas with a little baking soda before boiling

skim off the skins

I got into bed with a book the other night, because reading helps me wind down and relax from my typically crazy day.  But of course, I read cookbooks in bed before I go to sleep which is an absolutely terrible idea because that does nothing to quiet my overactive brain which doesn’t stop thinking, thinking, thinking!  Regardless, I was reading Yotam Ottolenghi and Sami Tamimi’s not-so-new, but gorgeous book , “Jerusalem.”  So many recipes, so little time, people.  I turned to their recipe for “Basic Hummus” and I swear I almost flipped the page without so much as a glance, because like I said, I already have a perfectly great hummus recipe which I have actually turned into four different flavors.  But then I thought “have some respect, you never know.”

drain the chickpeas and process to a chunky paste

love this raw tahini

The word “supersmooth” caught my attention immediately and then I knew I found it — the hummus of my dreams.  Let me jump to the chase.  The Ottolenghi hummus is the kind I love at restaurants and they tell me all their secrets.  Most importantly, the chickpea skins are removed after cooking and before pureeing.  I know!!!  Why didn’t I think of that?  But before you think I have the kind of time to sit around peeling chickpea skins, think again.  After soaking and draining the chickpeas, they are cooked with a little baking soda and then water is added to boil the beans.  Most of the skins float to the top of the pot and you just skim them away.  I know!!!  Brilliant.  They also add a lot more tahini (sesame paste) than I do which makes the hummus so creamy.  And water.  I would never have thought to add water, but it really makes the hummus lighter and cleaner than adding the chickpea liquid which is how I do it.  “Better late than never,” is what I was thinking.

Supersmooth, Light-as-Air Hummus by Pamela Salzman

Supersmooth, Light-as-Air Hummus by Pamela Salzman

I wouldn’t say that my first attempt came out quite as smooth as Ottolenghi’s primarily because not all the chickpeas lost their skins and I was not about to go peeling them, but it was really, really good and very smooth.  You can see the image of that below.  I also tasted the hummus after adding 2/3 cup of tahini instead of the recommended 1 cup + 2 Tbs. and I thought it was divine.  I made it a second time and did take the time to pull off any skins that didn’t come off during the boiling process and the hummus was a tad bit creamier, but I’m not sure it was worth the extra 12 minutes it took me to do that.  You should do whatever makes sense to you and if you have the time, feel free to pick out every last skin.  For that matter, you can buy canned cooked chickpeas and pull off the skins and proceed from there.

This is the one I made first where I did not remove every single last chickpea skin.

I served this to friends the other night, friends who have had my hummus a million times and they all said “where did you get this?  This is so good.”  I know, a tad insulting since the implication was that I could not have made it, but I was totally fine with that.  Since then, we’ve enjoyed this immensely with pita bread and raw veggies (wow, I could actually hear you yawn through the computer), slathered on a baguette with grilled veggies and slow roasted tomatoes (my recommendation), and dolloped on a Greek salad with chicken souvlaki (we had this for dinner the other night — major hit!).  There is an insanely beautiful picture in the book of the hummus topped with whole cooked chickpeas, pine nuts, chopped parsley, cooked lamb and the whole thing drizzled with olive oil.  A-mazing.

Grilled veggies, slow roasted tomatoes and hummus on baguette | pamela salzman

No matter how you make it, hummus is rather nutritious and especially high in protein and fiber.  It’s one of the more healthful spreads and dips, provided you don’t go to crazy on the pita bread or chips.  I have even used it in place of mayonnaise in chicken salad.  I have even eaten it with a spoon.  I have even dreamt about it.  You will too, until you make it!

Supersmooth, Light-as-Air Hummus by Pamela Salzman

jacked up hummus | pamela salzman

4.7 from 10 reviews
Supersmooth, Light-as-Air Hummus
Author: 
 
Ingredients
  • 1 ¼ cups dried chickpeas (garbanzo beans)*
  • 1 teaspoon baking soda
  • 6 ½ cups water
  • 1 cup light tahini paste (Ottolenghi recommends 1 cup + 2 Tablespoons, but I thought anywhere between ⅔ and 1 cup was great)
  • ¼ cup freshly squeezed lemon juice
  • 4 medium cloves garlic, crushed
  • 1 ½ teaspoons sea salt
  • 6 ½ Tablespoons ice cold water
  • Unrefined olive oil and sweet paprika for finishing, if desired
Instructions
  1. Place the chickpeas in a large bowl and cover with at least 4 inches of cold water. Allow to soak 6-8 hours.
  2. Drain the chickpeas. In a medium saucepan over high heat, add the drained chickpeas and the baking soda. Cook for about 3 minutes, stirring constantly. Add the water and bring to a boil. Make sure the water covers the chickpeas by at least 2 inches. Reduce heat and simmer, skimming off and foam and any skins that float to the surface. The chickpeas cook faster this way and may only need from 20-40 minutes to become tender, but possibly longer. You know they’re done if you can squish a chickpea in between your thumb and forefinger.
  3. Drain the chickpeas. You will have about 3⅔ cups. Transfer the chickpeas to a food processor fitted with the metal blade and process until you get a stiff paste. With the machine running, add the tahini, lemon juice, garlic, and salt. Lastly, slowly drizzle in the ice water and allow it to mix for about 5 minutes until you get a really smooth and creamy paste. I actually set my timer for 5 minutes and washed the dishes in the meantime.
  4. Transfer to a serving bowl and allow the hummus to rest for at least 30 minutes. If not serving right away, refrigerate until needed. Make sure to remove it from the refrigerator at least 30 minutes before serving. If desired, drizzle with olive oil and sprinkle with paprika.
Notes
*Or you can use 2 15-ounce cans of cooked chickpeas, drained, and peel the skins manually. Place the peeled chickpeas in the food processor and proceed with Step 3.

Cilantro-Lime Rice and an Unexpected Rice and Bean Burrito Bowl

Cilantro-Lime Rice from Pamela Salzman

We all love to cook, right?  Ok, maybe some us just like to cook.  And I know that I’m the biggest cheerleader of planning your meals ahead so that dinnertime is stress free and a walk in the park.  Yeah.  Well, gotta tell you that this week did not go as planned.  One day especially was just a doozy.  There was a lot of traffic on the way home from work.  AND I forgot to defrost the chicken I wanted to make for dinner.  AND I had to pick up one daughter who I thought had a ride home.  AND my other daughter wanted “to go study at the library, can I please have dinner right now?” AND I had a headache.  Can you see my grumpy face?

cilantro and lime

I had this whole orange chicken thing planned with spicy sweet potatoes and sautéed spinach.  Sounds nice, right?  Well, the chicken was frozen solid and I had no time to roast sweet potatoes.  You know what cooks really fast?  White rice.  I know, it has nothing going for it.  A totally devoid food, nutritionally-speaking.  However, white rice is a bit easier to digest than brown and as the well-respected nutritionist Linda Prout claims, you can close the nutritional gap with white rice by eating a few extra forkfuls of spinach.  And did I mention my headache?  Sold!  White rice it is!  And with some doctored up black beans out of a (BPA-free can), I would figure something else out so that I wouldn’t need to get take-out.

chopped cilantro, lime juice, olive oil

It’s not that I am completely opposed to take-out once in a while.  But where I live, there really aren’t too many good take-out options and what is decent is so expensive.  Even with a headache, it doesn’t make me happy to spend $80 on dinner for the five of us when I know I can make something good for under $20.  And the meal I put together on this particular night probably cost me under $10.  For the five us.  And I didn’t have the guilt of throwing away a hundred plastic to-go boxes and bags.

One fast-food restaurant that my family likes is Chipotle, which we never get here at the beach, but I always google when I am traveling for a soccer tournament with Mr. Picky and I’m in the middle of who-knows-where.  We all love rice and beans, especially the kids and Chipotle has a yummy cilantro rice that I thought would be perfect with beans and some quick veggies.  It ended up being a really satisfying, nutritious and easy meal that the kids asked me to make again.  I’ve noticed that anytime the kids get to “assemble” their own dinner, they are very pleased.  I put out the cilantro-lime rice, black beans, two fresh salsas that I purchased at the farmer’s market, my cheater guacamole, leftover grilled asparagus and some quick-roasted carrots.  Everyone except Mr. Picky made deconstructed burrito bowls which were DELICIOUS.  He, of course, can’t have have different food groups touch each other, so 4 bowls and 1 plate, please.

rice and bean burrito bowl

I know a few of you will frown at my white rice, but I also believe in keeping it real.  The internet and social media allow people to show the side of themselves that they want to be shown, which is usually only what is positive and perfect and sometimes unrealistic.  It can be a bit daunting to think that the grass is always greener on the other side or that every food blogger can seamlessly put together a visually perfect, well-balanced, delicious meal every night.  That is certainly not me and I can’t say that I aspire to that level of competence.  But rather I hope that whatever curveball life throws me whether it’s in the kitchen or out, I will find a way to roll with it and not worry about the fiber content.

rice and bean burrito bowl

3.0 from 2 reviews
Cilantro-Lime Rice
Author: 
Serves: 4-6
 
Ingredients
  • 1 cup long-grain rice or basmati rice, brown or white
  • 2 cups water
  • 2 teaspoons unrefined olive oil, coconut oil or unsalted butter
  • 1 clove garlic, crushed
  • 1 teaspoon sea salt
  • juice of ½ lime
  • 3 Tablespoons chopped fresh cilantro (chop, then measure)
  • 2 teaspoons unrefined olive oil
Instructions
  1. If you have time, soak the rice in a bowl with lots of water to cover. Allow to sit at room temperature for 1-8 hours. Drain. If you're not sure why you should soak your rice, read this post on arsenic and rice.
  2. In a small saucepan, add drained rice, 2 cups water, 2 teaspoons oil or butter, garlic and salt. Bring to a boil, lower to a simmer and cook covered for 15 minutes for white rice or 45 minutes for brown rice. (If you didn’t have a chance to soak your rice, cook another few minutes.) Turn off the heat and allow to sit covered for an additional 5 minutes.
  3. In your serving bowl, combine lime juice, cilantro, remaining 2 teaspoons oil and cooked rice. Toss to combine.

Minted Sweet Pea Dip


minted pea dip | pamela salzman

In as much as I promote buying and preparing fresh produce, I really have no problem with using frozen sometimes.  Frozen vegetables are supposedly picked at their peak and frozen immediately, allowing less deterioration of nutrients.  I can’t, however, say the same about canned.  Thumbs down on that one.  In general, I tend to use frozen vegetables more in cooked dishes than in raw.  There are quite a few frozen vegetables which are staples in my kitchen including artichoke hearts, edamame, corn, chopped spinach and especially peas.

everything into the food processor and you're done!

Believe me, I adore fresh peas.  If they are picked off the vine and prepared right away, they can be so amazingly tender and sweet.  But if they’ve been sitting around for too long, those sugars become a little starchy.  Plus, they do take a bit of time to remove from the shell, which sadly I don’t have the leisure to do on a busy weeknight.

if you decide to grill bread, brush with a little olive oil first

Peas are a great source of protein and fiber, so I love adding them to pastas, soups, stews and grain-based dishes for a complete protein.  Peas also contain substantial amounts of many other vitamins and minerals, including Vitamins C and K, as well as Folate and Manganese.  I post the contents of my kids’ lunch boxes every Monday on Facebook, so I know many of you saw a lunch Mr. Picky made a month or so ago with frozen peas as the entrée and frozen corn as the side dish. (They defrost by lunchtime!)  That was by far the quickest healthful lunch we’ve packed all year!

grilled bread

Although fresh peas come into season in the Spring, I use frozen the whole year long.  I first taught this delicious dip in a December holiday hors d’oeuvres class, but I made it recently for a dinner and it really sang spring.  This dip is a bit like hummus, the Mediterranean dip made from pureed chickpeas, tahini (sesame paste) and garlic, although not quite as thick and rich.

light and fresh

Instead, this has such a lovely light, fresh flavor from the mint and lemon zest.  It  would be such a nice addition to your Easter festivities, whether you’re doing a brunch, lunch or dinner.  Even if you have your whole menu planned,  I bet you have almost all the ingredients to make this dip today.  Best of all, it can be made in about 5 minutes or less.  Seriously!  You can definitely serve this dip with pita chips or toast points.  But I love it with crudités like carrots or endive leaves or my favorite (and more indulgent), slices of grilled baguette.  If you have some nice Pecorino-Romano cheese, shave a little sliver onto each crostini and you will be in heaven!

a little indulgent on bread, but delicious!

I wish you all a beautiful and joyous Easter.  My husband and I were feeling brave enough to take the three kiddies to Europe again, so we’ll be in London for the next week.  I hope to post some pictures of our adventures on Facebook!  Always interested to hear about your faves and must-sees!

minted pea dip | pamela salzman

Minted Sweet Pea Dip
Author: 
 
Ingredients
  • 2 cups fresh (already shelled) or frozen green peas, defrosted (original recipe used 3 cups)
  • zest of one lemon
  • 3 Tablespoons fresh lemon juice
  • 1 small garlic clove, chopped
  • ¼ cup packed fresh mint leaves
  • 2 Tablespoons extra-virgin olive oil
  • 1-2 Tablespoons raw tahini
  • ¼ teaspoon sea salt
  • Crostini
  • French baguette, cut into ½ inch slices
  • ¼ cup extra-virgin olive oil
  • ¼ cup grated Parmesan or Pecorino cheese (optional)
Instructions
  1. If using defrosted frozen peas, skip to Step 2. If using fresh peas, fill a large bowl with ice water. Bring a pot of water to a boil, add peas and cook for 2-3 minutes. Plunge them into the ice bath to halt the cooking process. Drain well and pat dry.
  2. Place all the dip ingredients in a food processor and puree. Serve with crostini and/or raw crudités. If you assemble the dip on crostini, you can also shave pecorino or parmesan on top of each hors d’oeuvre or sprinkle grated cheese on top and drizzle a good olive oil over all of them.
Notes
Crostini Instructions:

Preheat oven to 350 degrees.  Line a baking pan with parchment paper.
Brush each side of bread with olive oil and place on pan.
Bake for 15 minutes, turning after 7 or 8 minutes.  Use immediately or store in an airtight container for several days.
Or preheat a grill over medium heat and grill the bread (brushed with a little olive oil) until slightly charred on both sides.  This only takes a couple of minutes.