Planning a happy thanksgiving — 4 weeks and counting!

This post has been edited from the original, which was published on October 27, 2011.  I adore Thanksgiving.  I love the traditions, the food, the Macy’s parade on television while I am making my pies, the football games.   I love moving the family room furniture after the last football game is over to extend the dining room table.   I love hearing everyone share why they’re grateful.  I have cooked every Thanksgiving for the last 18 years, as well as dozens of Thanksgiving-themed cooking classes.   I have made lots of mistakes and in the process learned a thing or two about how to execute and enjoy  a very happy Thanksgiving.  Every Thursday from today until the big day, I will share my best tips, strategies and a few good recipes to set you up for a successful holiday.  Let’s get started!

4 Weeks Before Thanksgiving

  • Guest list  Now is a good time to invite family and friends for the holiday, even if they are regulars.  I send an email out to all our guests with the schedule for the day, especially when we will sit down for dinner.  We live on the West Coast, which means the second football game is over at 4:00.  Anyone that wants to come for the earlier game is welcome to do so.  There’s coffeecake, fruit and coffee in the morning.  A mugful of soup and cornbread around noon; hors d’oeuvres at 3:00 pm and dinner is at 4:00 or whenever the game is over.  You know that I pray for no overtime!
  • Plan your menu Planning the Thanksgiving menu requires a bit of strategy and balance.   Make sure you have a balance of cooked and raw food (one thing I have learned is no matter how big your kitchen or how many ovens you have, it’s never enough on Thanksgiving!); protein, starches and vegetables (I find most Thanksgiving menus to be too starchy;) and ingredients (make sure not every recipe has dried fruit and nuts in it.)  Know what dishes need an oven and when because if you’re making turkey and you have one oven, you won’t be baking too much in the hours before dinner.

Also, know your audience.  I love trying new recipes, but my family looks forward to the same traditional standbys every year.  There was almost a revolution when I took Breaded Cauliflower off the menu in 2007 ( I now serve it as an hors d’oeuvre.)  So I compromise by making the classics (traditional roast turkey with gravy and cranberry sauce, mashed potatoes, stuffing, and pumpkin pie), but I also try out a new salad or vegetable side dish every year.

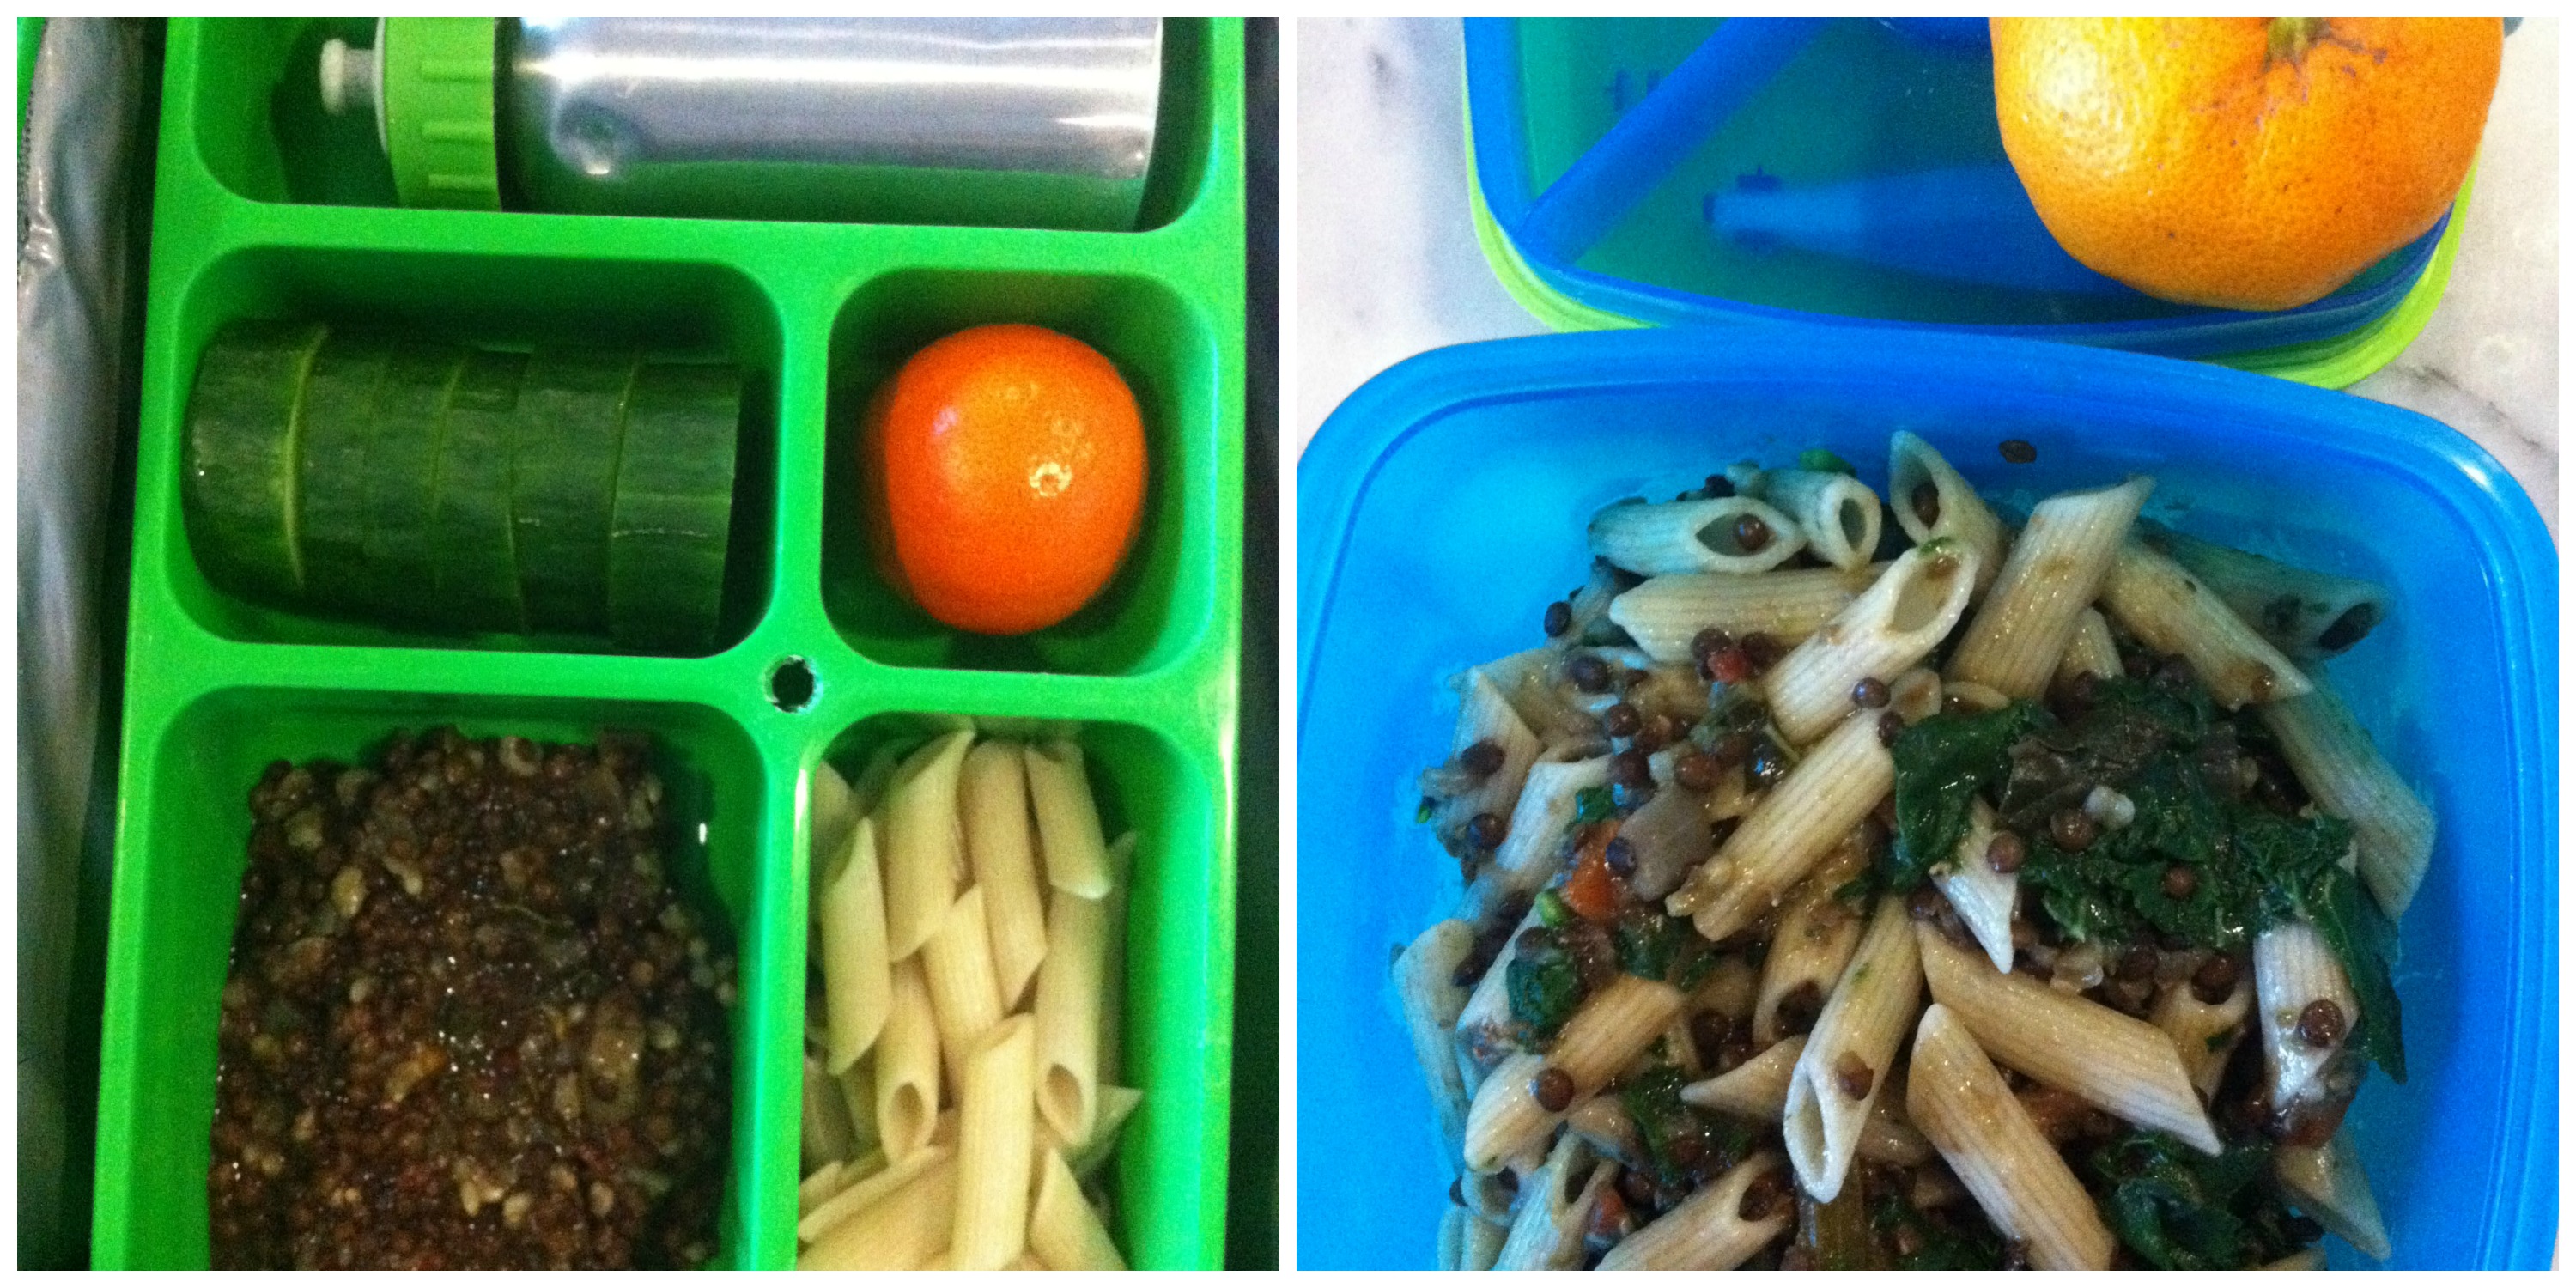
Also, just because you’re cooking overtime for Thanksgiving dinner, doesn’t mean your household won’t be needing dinner the night before and breakfast the morning of.  Instead of ordering takeout pizza on Wednesday night, make and freeze a casserole in the weeks ahead or plan for your easiest 20-minute meal.  The same goes for Thanksgiving day, especially if you have young children in the house.  You can save your appetite and get by on a piece of fruit for the day, but your four-year-old cannot.  I always make a pot of butternut squash soup the day before and a pan of cornbread to be served around noon to tide anyone over until the big meal.

  • Outsource    Do as I say here.  Don’t do as I do.  You don’t have to make everything yourself.  In fact, most people would be delighted to contribute something to the holiday which will alleviate the pressure on you.  But you must be specific otherwise you’ll end up with 4 pumpkin pies and no green vegetables and we all know what I think about that.  “Thank you, Caitlin for your offer to bring something.  I think I’ll take you up on it.  We have neither stuffing nor apple pie yet.  Would you like to tackle one of those?”
  • Write out a schedule Take the time to plan everything that you need to do over the next four weeks and put it on the computer so you have it for future holidays.  By taking a little time now, you will save yourself stress, anxiety and HOURS later.  Trust me on this.  You can see my detailed schedule as an example.
  • Photocopy your recipes from books and magazines I remember my first Thanksgiving with a stack of cookbooks and magazines taking up valuable counter space and my wasting so much time looking up each recipe multiple times.  Ugh!  Put your photocopied recipes in sheet protectors and create a dedicated Thanksgiving or holiday binder organized by category.  This just might be the most useful tip I give you.
Here’s what I am probably making this year:
Breakfast:
Coffeecake, fruit, coffee and tea
Lunch:
Butternut Squash or Sweet Potato-Coconut Soup and Cornbread
Hors D’oeuvres:
Breaded Cauliflower with Tomato Dipping Sauce
Dinner:
Applesauce
Mashed Yukon Gold Potatoes
Maple-Mustard Roasted Vegetables
Balsamic Roasted Onions
Dessert:
Homemade Vanilla Ice Cream
Freshly Whipped Cream
Click here for loads of Thanksgiving recipe ideas!

Choosing Higher Quality Halloween Candy

healthier halloween candy | pamela salzman

Halloween conjures up images of kids in cute costumes, trick or treating and tons of candy.  Even though I think sugar is horrible for our bodies, I still participate in Halloween and give out candy to the neighborhood kids who come knocking.  This year I started to wonder if there were higher quality options for Halloween treats.  I asked my good friend Rachel Sarnoff, the founder of MommyGreenest.com to tell me what I need to know about buying better candy.


Rachel:  “I love Halloween, but the candy can be full of tricks—not treats—for kids.

Conventional candy manufacturers force as many as 200,000 children to work the fields of Africa’s Ivory Coast to cultivate the cocoa exported to make chocolate.


The sugar in Halloween candy is typically derived from beets, which have been genetically modified to withstand massive doses of glyphosate herbicides: Half of the sugar in the United States now comes from GMO sugar beets.


And then there are the food dyes: Blue 1, Red 40, Yellow 5, and Yellow 6, have all been linked to allergic reactions and behavioral problems in children.


Not only are these chemicals dangerous, they’re discriminatory: After European manufacturers were required foods to display a food dye warning label, they began to substitute natural colors for dyes—but only in Europe. Nestle, for example, announced in 2012 that they were phasing out use of all artificial food additives from their entire confectionery line in the U.K., but not the U.S.


What’s the answer? This Halloween, look for candy that’s free of food dyes, corn syrup, conventional (read: GMO) sugar, artificial flavors and preservatives. Or just make it easy on yourself and buy USDA Certified Organic, which is guaranteed by our government not to contain synthetic ingredients.


No tricks there!”

:  :  :  :  :  :  :  :  :  :  :  :  :  :  :  :  :  :  :  :   :  :  :  :  :  :  :  :  :  :  :  :  :  :  :  :  :  :  :  :  :  :  :  :  :  :  :  :

Rachel Lincoln Sarnoff blogs as Mommy Greenest, was Healthy Child Healthy World’s CEO and editor of Children magazine—before she had three of her own. Want a less judgmental, more sustainable family life? Follow her @RachelLSarnoff!


I was so motivated by Rachel’s info that I did some digging and found a few good options for less toxic candy:

Unreal Candy  Although not fair trade, Unreal Candy does not contain GMO’s, corn syrup or preservatives.  Basically high quality versions of Snickers, Reeses peanut butter cups, M&Ms and Milky Way bars.

Yum Earth   100% certified organic lollipops, gummy bears and candy drops (fruit snacks, too) which are also free of corn syrup and artificial colors.

Surf Sweets   All certified organic and no artificial colors or flavors.  The mini packs of Halloween fruity bears look good!

Glee Gum   Gum made with made with sustainably harvested rainforest chicle.  No GMOs, no aspartame, no sweeteners, no artificial colors or flavors.

Endangered Species Chocolate  Natural, ethically-traded chocolate in fun packaging for Halloween.  Endangered Species also gives back 10% of their annual profits to environmental non-profits.

For Halloween and the rest of the year, the Natural Candy Store has many options for — you guessed it — more natural candy!


Mastering School Lunches

How to Master School Lunches | Pamela Salzman

My kids do not like to buy lunch at school, even if I wanted them to.  The options aren’t that great, but they also complain about long lines and then not having enough time to eat.  That definitely doesn’t fly with Mr. Picky who is very anxious to play ball as soon as possible after eating.  So with my children’s participation, I make lunch every day.

taquitos, yellow peppers, oat bar, blueberries

When I give lectures to parenting groups, lunchbox food is always a hot topic.  Believe me, I too feel pressure to make a well-balanced lunch that my kids will eat.  After all, lunch is different from breakfast and dinner when I am sitting next to them, making sure they eat their protein and encouraging them to “just take one bite” of something new.  Kids need to be well fueled to get through the school day and lunch is a big part of that.  For about the last year, I have been posting my kids’ school lunches once a week on Facebook and more recently on Instagram.  I don’t think I’m the most original lunch-maker out there, but since my cooking class students and readers often ask me for new lunch ideas, I thought it easiest to show you in a post just how we get it done around here.  Obviously, my kids have different likes and dislikes from yours, so there are many, many more options out there than what I am showing you!

vegetable frittata, salad, chocolate oat bar, tangerine

Here are my tips for stress-free lunch-making:

Plan the night before.  This doesn’t mean you have to make lunch the night before, although you can, but at least you’ll have a plan and you don’t have to spend a minute figuring it out in the morning when time is limited.  Coming up with lunch the night before also helps me sleep better.  It sounds crazy, but I have had restless nights while my brain ruminated lunch options for the next day.  It’s not too early to think about lunch options at dinnertime either.  Leftovers are my favorite source for a good lunch!

salads, fruit, hummus

Ask your kids for their input.  I asked Mr. Picky to make me a list of his favorite lunch foods so that I would have it handy.  But the way I really get my kids’ input is getting them in the kitchen with me (the night before) to help me figure it out.  This helps me know that they’re actually going to eat whatever is in there.

Go for a balanced meal.  I look to include protein, complex carbs (those that contain fiber and/or protein), a vegetable and a fruit.  Protein digests more slowly and helps us feel full for longer.  It also helps fuel the brain and keeps our moods stable.  Protein can be animal protein such as turkey, chicken or fish, eggs, quinoa, cheese or yogurt, edamame, beans, peas or lentils, peas, nuts or seeds.  Protein can also include baked goods made from almond flour.  Complex carbs are whole grains like brown rice or barley, or pasta, bread or tortillas made from whole grains, beans or lentils.  A lunch consisting of a bagel with jelly, an apple, some pretzels and carrot sticks is lacking in protein.  This lunch could be made more balanced with the addition of some protein like a hard-boiled egg, hummus, a yogurt or some cheese, for example.  My kids don’t expect a sweet treat, but sometimes I add one, and sometimes I don’t.

couscous, carrots, strawberries, yogurt, cookie

Stock substantial basics in the pantry and the freezer so you always have something to fall back on.  Let’s say you didn’t make it to the market the way you thought you would and there aren’t any leftovers from dinner to work with.  Being able to pull from your pantry or the freezer can be a lifesaver.  The items I need to have on hand for my kids are spelt or sprouted grain tortillas, shredded cheese, canned beans, different types of pasta, canned tuna, quinoa, nuts and seeds, and nut butters.  I try to keep the freezer stocked with corn and peas, edamame, homemade muffins and quick breads, pesto, meatballs, cooked brown rice.  I have a friend who freezes sandwiches for the entire week and I am considering freezing poached or grilled chicken for salads and sandwiches.

Brown rice, beans, cookies, peach, cucumbers

Make the most of leftovers from dinner.  This is where I look first.  My kids will take a thermos with soup, lentils, reheated stir-fry, or rice and beans, for example.  Leftover chicken or steak can be cut up to top a salad or tucked into a quesadilla.  Frittatas can be eaten at room temperature either plain or in a pita.  See below for more ideas.

Brown rice and kale bake, nectarine, red peppers, pecans, cookie

Get the right equipment.  I am partial to stainless steel and BPA-free plastics.  I use thermoses from the camping section at Target or from Lunch Bots.  My son has two different lunch boxes, one from GoGreenLunchBoxes and another from Planet Box.  My daughters use stainless steel containers from Lunch Bots.  I also like the containers from Sistema.  My trick with keeping things warm in the thermos is to fill it with boiling water and allow the thermos to heat up for 10 minutes.  Empty the water and add your hot food.  It won’t stay hot, but warm is good enough for my kids.  I also give the kids reusable water bottles which if filled with ice and water can double as an ice pack.

Examples of our lunches: 

SANDWICHES and WRAPS:  grilled or poached chicken (sometimes with barbecue sauce or pesto instead of typical mustard), poached chicken turned into chicken salad, turkey, leftover steak, panini with leftover grilled or roasted vegetables and cheese or pesto, tuna salad, hummus and vegetables, nut butter (or sunflower butter for nut-free schools) w/all-fruit preserves or sliced bananas, frittata in a pita.  You can even use toasted waffles or plain pancakes as the “bread” for sandwiches.  If your kids don’t like bread or wraps, put everything in a big lettuce leaf.  You can even take the same ingredients you would put in a sandwich and skewer them on toothpicks.

poached chicken w/BBQ sauce & avocado, trail mix, tangerine

QUESADILLAS:  I make these the morning of and they’re warm when they go in the lunchbox so I don’t want to wrap them in plastic.  I use aluminum foil here.  Mr. Picky doesn’t like cheese, so he’ll take a plain tortilla with chicken or beans on the side.  My daughters like pizza quesadillas with or without spinach or leftover vegetables and/or pesto, black or pinto beans with cheese, any leftover chicken or steak can be added easily.

SALADS:  My daughters love salads for lunch and that makes my life very easy.  Wash your lettuce when you get home from the market and roll it up in damp kitchen towels until you need it.  I always have a jar of my Everyday Salad Dressing #2 which goes with everything!  I will make a salad out of anything:  any lettuce or spinach, cooked pasta, cooked beans (canned is fine), feta/pecorino/parmesan, leftover cooked chicken or steak, quinoa, leftover cooked vegetables, corn, winter squash, dried fruit, nuts/seeds.  I just make sure I get some protein in there.

salad, banana bread, grapes

PASTA:  My kids will eat any kind of pasta with practically anything mixed in.  Again, I just make sure it’s a high fiber pasta like whole spelt or brown rice and I want to get some protein in there.  For example, even if it’s whole spelt penne and tomato sauce, I will add cooked white beans, pine nuts and/or parmesan cheese.  The girls will eat pasta with pesto, but Mr. Picky will not.  I have also mixed pasta with Everyday Salad Dressing #2, chickpeas and vegetables for a great pasta salad and my kids love Asian Noodle Salad with a peanut butter-based dressing and whatever vegetables you like. Both of these can be done the night before.

2 versions of lunch

pasta with white beans, tomatoes and spinach

SOUP:  I make a lot of soup during the fall and winter, usually once on the weekend and once during the week.  My kids’ favorites are lentil, white bean and potato, minestrone, tortilla with chicken, and chili.

minestrone soup, granola bar, tangerines

YOGURT:  Plain, whole yogurt topped with granola or “faux granola,” i.e. nuts, seeds, dried fruit and coconut.  Or turn yogurt into a dip for vegetables.

FRUIT and VEGGIES:  I’ll pack whatever is in season, cooked or raw, whole or cut.

leftover lentils two ways


cut apple trick

Have you mastered making school lunches?  Please share your favorite tips and tricks!

How to Care for Your Knives: Top 7 Do’s and Don’ts


how to care for your knives

You’ve heard it from professional chefs and home cooks alike:  your knives are your most important tools in the kitchen.  I would give up my Vitamix and my food processor for my best chef’s knife.  I have a few (not a big fancy set of) high quality knives that I use all the time.  But even good knives get dull and dull knives are not only difficult to work with, not fun to cook with, but they are also dangerous.

how to care for your knives

I teach cooking classes very often in private homes and I use my students’ equipment when I do.  This includes their knives.  (I stopped bringing my own knives because I am much too absent-minded and have forgotten one or two!)  I have had the pleasure of using knives that are well cared for and razor sharp and ones that can barely cut a straight line through butter!!  I have found that this discrepancy has less to do with the quality of the knives (although that is part of it) as much as how the owners maintain them.  I’ve mentioned to a few ladies some tips for protecting their knives, and most of the time the response was “I never knew that!”  Once I even suggested to one of my students that if she had her knives professionally sharpened, cooking would be much more fun.  She had her doubts until she brought her knives to a cutlery shop and had a much easier time prepping food after that.

So I have put together a list of my tips for how to take good care of your knives so that you may have an easier, safer and more pleasurable experience in the kitchen, and protect your investment at the same time!

how to care for your knives

DON’T: Put your knives in the dishwasher.  I know many people like to put everything in the dishwasher, but keep your knives out of there.  The dishwasher will bang your knives around which will ding and damage the blades.  In addition, the heat from the drying cycle can warp your blades.

DO:  Hand wash your knives with warm soapy water and dry them right away.

DON’T: Put wet knives away in a drawer or cutting block.  The blade can develop mold or mildew.  Also, if your blade is carbon steel, it can rust if left wet for extended periods of time.

DO:  Dry your knives right after washing.

DON’T:  Use your knives on plastic, glass, granite, marble or stone.  These surfaces will either dull the knife blade more quickly than necessary or will damage the edge of your blade.

DO:  Use your knives on wood cutting boards.

DON’T:  Throw all your knives together into a drawer where they’re going to bang against each other and miscellaneous utensils.  This can dent, ding and damage your blades over time.

DO:  Store your knives in a knife block or cover each blade with a protective sheath (even a heavy piece of paper with a rubberband is better than nothing.

DON’T: Use a particular knife for the wrong task.  Using a paring knife to cut through chicken bones is going to damage the knife.  Also, don’t act crazy and try to use your kitchen knives to pick a lock, remove nails from the wall, pry open your kid’s piggy bank, scrape the grates of your barbecue, break up the huge block of ice in your ice maker, and so on.  That’s not what kitchen knives were designed to do.

DO:  Know what knife is for what task and leave it at that.

DON’T: Think that your knives will stay sharp forever.  The more you use them, the sooner they will need to be sharpened.

DO: Get your knives sharpened every 6 months or thereabouts.

DON’T: Sharpen your own knives unless you know what you’re doing.  I know that most knife sets come with a honing steel and I have seen a few grinding blocks in people’s kitchens, but if you don’t know how to use these, you can really mess up the blade.

DO:  Get your knives sharpened professionally at a local cutlery store or cookware shop.  I sharpen my knives regularly myself with a whetstone, but I also take them to my local Sur La Table or Thee Cutlery, a knife store at my local mall.  This tends to cost about $1/inch, e.g. a knife with an 8-inch blade costs $8 to get sharpened.  I have heard that a supermarket in my neighborhood sharpens knives while you shop, but I have also heard they don’t do a good job.  Ask someone you trust  (like a restaurant chef) where to go in your town if you’re not sure.  There are also good videos on YouTube if you want to learn more about sharpening yourself.

How to care for your knives

What you should know about food labeling

This post is part of a series I am doing for Positively Positive.

If you are trying to adhere to a healthful diet and lifestyle, it is helpful to educate yourself about what foods will support your health better than others. Whereas it should be clear that choosing as many whole, unprocessed foods as possible is the best approach, most people still buy some packaged foods.

I am obsessive about reading labels on packages in order to help me make the best choice I can. But the FDA allows food manufacturers, even for organic products, to take so many liberties in wording and, furthermore, don’t insist that everything in your food be labeled as such that it could be argued that we consumers are being deceived.

Here are some guidelines to help you understand what much of this labeling really means.


“Natural” or “Pure”      The words sound wholesome and even healthful, but whether you are buying chicken or juice or vanilla extract, these words mean practically nothing since there is no official definition for what can be labeled “natural” or “pure.”  For example, “natural chicken” just means it is chicken and not play dough. It doesn’t guarantee anything healthful, organic, or good for you. Food labeled “natural” can contain processed white sugar, pesticides, heavy metal toxins, MSG, and lots of other non-natural ingredients. Also note that if you see “natural flavors” listed in the ingredients of a “natural” product, don’t think here’s anything natural about them. Natural flavors are created in a lab and are supposed to imitate flavors found in nature. Not exactly natural.

How to segment citrus fruit

Juicy citrus segments and pinwheels

Right now is probably not the most exciting time of the year for fruit, even in Southern California.  Sure, we have amazing citrus coming our of our ears, but that’s pretty much it.  Pomegranates and persimmons just finished.  Even the apples we  buy now were picked a few months ago and kept in cold storage.  They’re great for cooking in desserts or on top of morning oatmeal, but they’re not as crunchy, crispy, and juicy as they were in November.  Mr. Picky keeps asking me, “are strawberries in season yet?”  Almost, little guy.

slice off a little from the top and bottom

But like I said, citrus fruits are in full force and I buy a wide assortment every week, including blood oranges, navels, Satsuma tangerines, and grapefruits, to name a few.  You probably already know that citrus fruits contain tons of Vitamin C, a very powerful antioxidant which is so helpful during cold and flu season, but keep in mind fresher is better since fruits lose 10% of their Vitamin C every day they are off the vine.  My family goes through quite a bit of citrus fruit between breakfast, lunch boxes, and after school snacks.  Sometimes I’ll even put some citrus segments in salads just for fun.  Blood oranges are especially tasty in Raw Kale Salad or mixed greens with an Asian vinaigrette.

hug the fruit as you cut with the knife


But I have made an interesting observation about grapefruit and my family.  They absolutely love grapefruit, but when I buy them, they seem to sit around untouched.  Everyone seems to think of grapefruit as a breakfast-only food and no one takes the time in the morning to cut them for eating.  Is it that we’re always short on time in the morning?  Is it that everyone is too lazy?  Perhaps a little of both.  I supposed grapefruits do take a few minutes more to prep than other citrus fruits since merely peeling a grapefruit leaves the white bitter pith which no one really cares for.   But if I segment a bunch of grapefruits when I come home from the market and put them in a container in the fridge, the kids fight over the last bite.  I’ve even seen Mr. Picky sitting at the kitchen counter with a bowl of grapefruit, a fork and his homework.  Would you call this “healthful convenience food?”  If so, I’ll take the extra time in the beginning of the week to do this for my family if it means they’ll eat fruit instead of the Halloween candy they don’t know I know they have stashed under their bathroom sinks behind the extra toilet paper.  What, was I born yesterday?

segmenting citrus

cut alongside the other membrane and wedge the segment out

this will get eaten lickety split

While I was segmenting grapefruits, a technique you can also use for larger oranges, I decided to demo how to cut smaller citrus into “pinwheel” slices.  These take a little less time and make for a beautiful presentation for citrus salads or to add to winter salads.

segmenting citrus

pinwheels

pinwheels

I didn’t have any images for this post, but I have done a citrus pinwheel salad with oranges, blood oranges, and tangerines which is just so pretty.  On the  site I posted a salad with spinach, blood oranges and beets to which you can add seared wild salmon.  That is a great light meal for a weeknight or guests.  Grapefruit and avocado is a classic pairing.  However you slice them, citrus fruits are worth the effort!

segmented and pinwheel citrus | pamela salzman

how to segment citrus fruit

  1. Using a very sharp knife, slice a bit off the top and the bottom of the grapefruit so it sits flat on a cutting board.
  2. Starting at the top of the grapefruit, cut the peel away from the fruit following the natural curve of the fruit down towards the cutting board.  The idea is to take off the peel, white pith and membrane, but not to remove too much of the fruit.  Continue around the entire grapefruit until no more peel is remaining.
  3. Take the grapefruit in one hand positioned over a bowl (to catch the juices) and the knife in the other hand.  Identify the white lines in the grapefruit which separate the segments from each other and slice as close to the white line as possible cutting down to the center of the grapefruit.  Cut alongside the membrane holding the segment and wedge the piece out with the knife.
  4. Continue with the remaining segments.  The leftover membranes can be eaten if you like.


how to cut citrus pinwheels

  1. Using a very sharp knife, slice a bit off the top and the bottom of the fruit so it sits flat on a cutting board.
  2. Starting at the top of the fruit, cut the peel away following the natural curve of the fruit down towards the cutting board.  The idea is to take off the peel, white pith and membrane, but not to remove too much of the fruit.  Continue around the entire piece of fruit until no more peel is remaining.
  3. Place the fruit on its side and slice crosswise into pinwheels.


How to thicken soups and stews without cream, butter or flour

I make a lot of soups and stews for the family, especially from September through May.   I know many of you have been freezing your buns off on the East Coast and Midwest lately and are likely craving a bowl of steamy, thick, rich soup to warm your body and soul.  I love all types of soups from brothy to substantial and hearty, but I always try to keep them nutritious and clean.   Fortunately, I have learned a few tricks for making soups and stews richer or creamier without using the old-fashioned techniques of a roux, heavy cream, flour or cornstarch.  Actually, my mom taught me to thicken my stews by mashing softened butter with equal parts all-purpose flour and stir that in the pot towards the end of cooking which works just fine, but these days many people are dairy and/or gluten-intolerant or looking to save a few calories wherever possible without sacrificing flavor and nutrition.  Why add unnecessary fat, non-nutritive calories, and/or hard-to-digest ingredients if you can achieve the same result more naturally?

Here are my favorite tricks for thickening soups and stews:

pureeing cooked vegetables and stock — this is the method I use most often.  I like to take a cup of vegetables and stock (leave any pieces of animal protein in the pot) from the cooked soup and blend them in a blender or mini food processor and then add it back to the pot.

white beans — cooked Cannellini or Great Northern beans have a bland, neutral flavor and fantastic creaminess when they are pureed.    Take a can of beans with a cup of hot stock from the soup and blend together until smooth, then add back to pot.  Or cook beans with soup and puree the entire soup, beans included.  Beans add great fiber and protein, as well!  I love this recipe for Potato and White Bean Soup and this post for how to cook your beans from scratch.  Otherwise, Eden is my favorite BPA-free, organic brand.

Yukon Gold potatoes — potatoes add a lovely richness and neutral flavor to soups, especially if you can puree some or all of them.  Use same technique above, either cook potatoes separately, puree with hot stock and add to the soup or cook potatoes with the soup and puree in the pot.  The Yukon Gold variety has a nice buttery flavor and you get the benefits of a whole food.  Check out Potato and White Bean Soup, as well as Cauliflower and Roasted Garlic Soup.

rolled oats — sounds weird, I know.  But if you plan on a pureed soup, you won’t detect any oatmeal.  The rolled oats not only thicken the soup and add great fiber, but add an amazing silkiness.  I use rolled oats in my Puree of Asparagus Soup which I can post this Spring.  Several manufacturers sell gluten-free rolled oats, such as Bob’s Red Mill

coconut milk instead of cream — okay, you won’t be saving many calories using coconut milk, but I am a huge fan of unrefined coconut products and their myriad health benefits.  And generally speaking unrefined coconut products are easier to digest than pasteurized cow dairy.  I love coconut milk in my Sweet Potato Soup, Chicken Tikka Masala, Thai Coconut Chicken Soup (to be posted soon!), as well as any soups with winter squash.  It’s so smooth and rich with a subtle sweetness and it won’t make your soup taste like a piña colada — promise!  My favorite brand is Native Forest which supposedly doesn’t contain BPA in their can liners.

ground nuts, like almonds or cashews —  I’ve seen this in some Spanish or North African soups.  The nuts add some high quality protein, as well.  I use cashew butter or ground cashews in my Chicken and Vegetable Curry.

immersion blender — sure you can puree with a standard blender, but you have to do it in batches and veeerrrry carefully so that you don’t create a heat explosion.  Then you need to pour the puree into another container and puree what’s left in the pot.  Too much work for me and I don’t love the extra dishwashing involved.  Stick an immersion blender directly in the pot and puree as much or as little as you like.  Rinse the immersion blender in the sink and put it away.  I have the Breville immersion blender which I love, but some of my students bought the Cusinart which they think is great.

What are your tried and true methods of thickening soups?

In the Vegan Kitchen: Christmas with Jenni Kayne and The Chalkboard

One of my favorite things to do is plan menus for special occasions and holidays.  I’m sure you gathered from my multiple enthusiastic posts leading up to Thanksgiving that I really enjoy the whole process, but my main goal is to pull together a celebration that I can enjoy with everyone else.  So when my friend and student Jenni Kayne and the team at The Chalkboard asked me to teach a Christmas cooking class as part of their “In the Vegan Kitchen” series, I was very excited!

First of all, I loooooooove Christmas!  But not all the commercial nonsense.   I love getting together with my enormous family in New York and celebrating all of our fun traditions.  I have the best time decorating my parents’ tree with my kids and listening to all the little ones singing carols from song books my oldest daughter made when she was in 3rd grade.  Totally true!  And I always look forward to indulging in my Aunt Maria’s multitude of unbelievable cookies.  Just for the day, of course!

But Christmas at Jenni’s house would be different.  Although I place a major emphasis on plant foods on this blog, in my classes, and at home, I am no vegan.  If it weren’t for feta cheese and eggs, I could probably do it.  Regardless, my task was to create and teach a fabulous vegan Christmas menu for some fabulous ladies.  Besides Jenni, a few of my regular students attended including Shiva Rose (do check out her blog — I always learn so much from her), Lauren Soloff from The Granola Project, Nicole Simone (a gorgeous woman with a gorgeous voice), Ambre Dahan, design director of Joe’s Jeans, as well as some newbies like Lauri Kranz, a woman after my own heart with her incredible business Edible Gardens LA, and Rachel Craven, who designed some of the beautiful linens Jenni used for the meal.  Speaking of Jenni, if you haven’t checked out her amazing blog, Rip + Tan, you must.  She is so stylish and chic, and I admire everything she pulls together.  Lucky for us, she reveals all her amazing sources on her site.

Back to the menu, I wanted to teach recipes that are delicious and healthful whether you are a vegan or not.  We started with one of my favorite hors d’oeuvres, Beet, Butternut Squash and Apple Skewers.  It’s basically a few of my favorite winter salad ingredients roasted, skewered and then drizzle with a simple balsamic vinaigrette.  (If you’re not vegan or dairy-free, feel free to add a cube of feta.   Shhhhhh!)  These are so easy that usually I get my kids to make all the skewers for me.

My mom always serves stuffed mushrooms as a side dish on Christmas.  So for the main meal, I came up with Creamy White Bean and Spinach-stuffed Portobello Mushrooms.  I made a really meaty, substantial and flavorful filling for the mushrooms based on pureed white beans and roasted garlic which also added a little protein to the dish.  Next I made a fun Quinoa and Arugula Salad with Avocados, Grapes, Almonds and a Smoked Paprika Dressing.   When I tested this on my family they all loved it, except Mr. Picky who still has yet to try salad with vinaigrette.  I just served him all the salad components separately, except the arugula.  And the quinoa. One day.  Although I think everyone’s favorite was the Shredded Brussels Sprouts with Caramelized Shallots.  They really are delicious and cook very quickly so you can prep the sprouts in advance and cook them at the last moment.

Lastly I showed the class a delicious and beautiful Pear and Cranberry Tart which I am planning to make for my family’s Christmas this year.  All the recipes were also gluten-free since Jenni is GF.  That wasn’t a factor until the dessert, but I was able to use Bob’s Red Mill GF oat flour with success.  I tested the tart with both coconut oil and Earth Balance in place of butter.  The coconut oil was perfect in the crust and worked fine in the crumb topping, but I think Earth Balance was much better in the topping.  But overall, this was a really natural, not-to-sweet seasonal dessert which I think Kate was going to sneak home so she could eat it for breakfast the next day!

It was a lovely time that I shared with some amazing women!  For more photos and all the recipes, please check out the post “In the Vegan Kitchen:  Festive Holiday Feast” over at The Chalkboard.  And Jenni has meticulously detailed everything from flowers to flatware to recipes on her blog ripplustan.com.  I will be posting at least one step by step of the recipes in the next week or so, mostly likely the tart.  In the meantime, I can’t wait for Christmas!!!