Why You Should Use Unbleached Parchment Paper

roasting veggies on a parchment-lined baking sheet

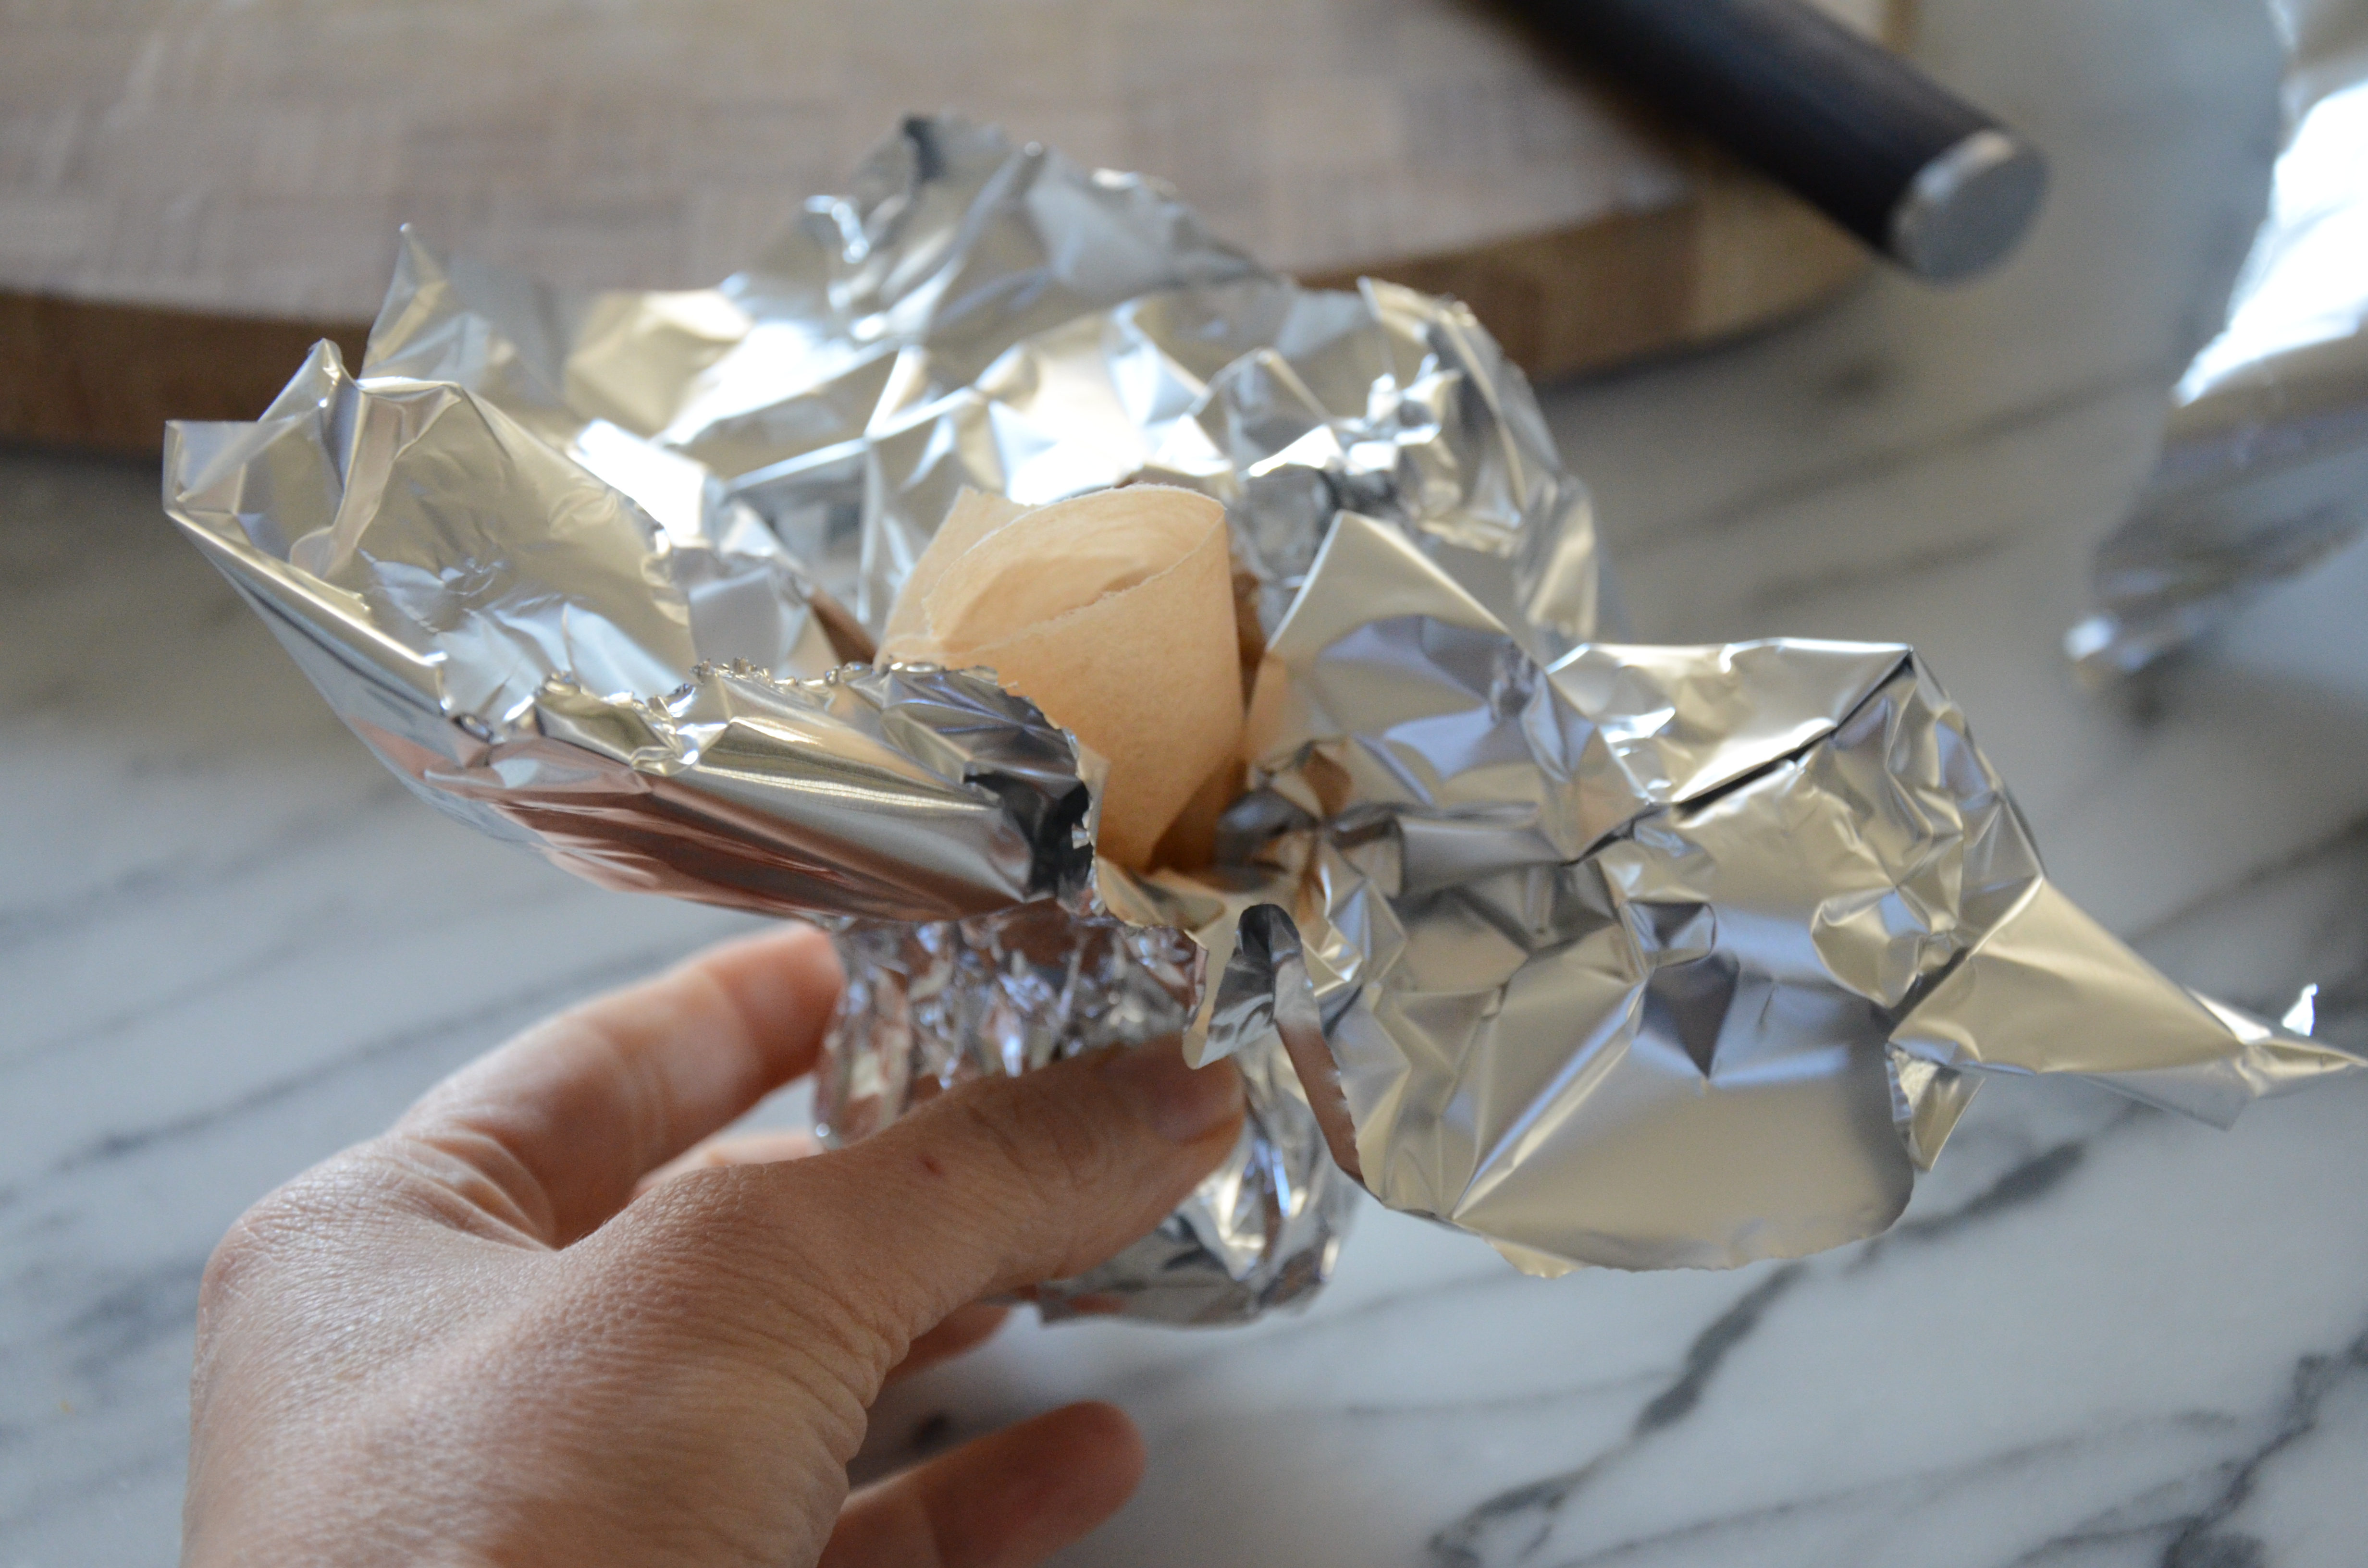
You have probably noticed that I line my baking sheets with unbleached parchment paper instead of cooking directly on the surface or lining them with aluminum foil.  And if I want to roast a head of garlic, I always wrap it first in unbleached parchment paper and then aluminum foil.  Since I have been fielding a lot of questions about this practice recently from some newbies in my cooking classes, I thought I would shed some light on it here.

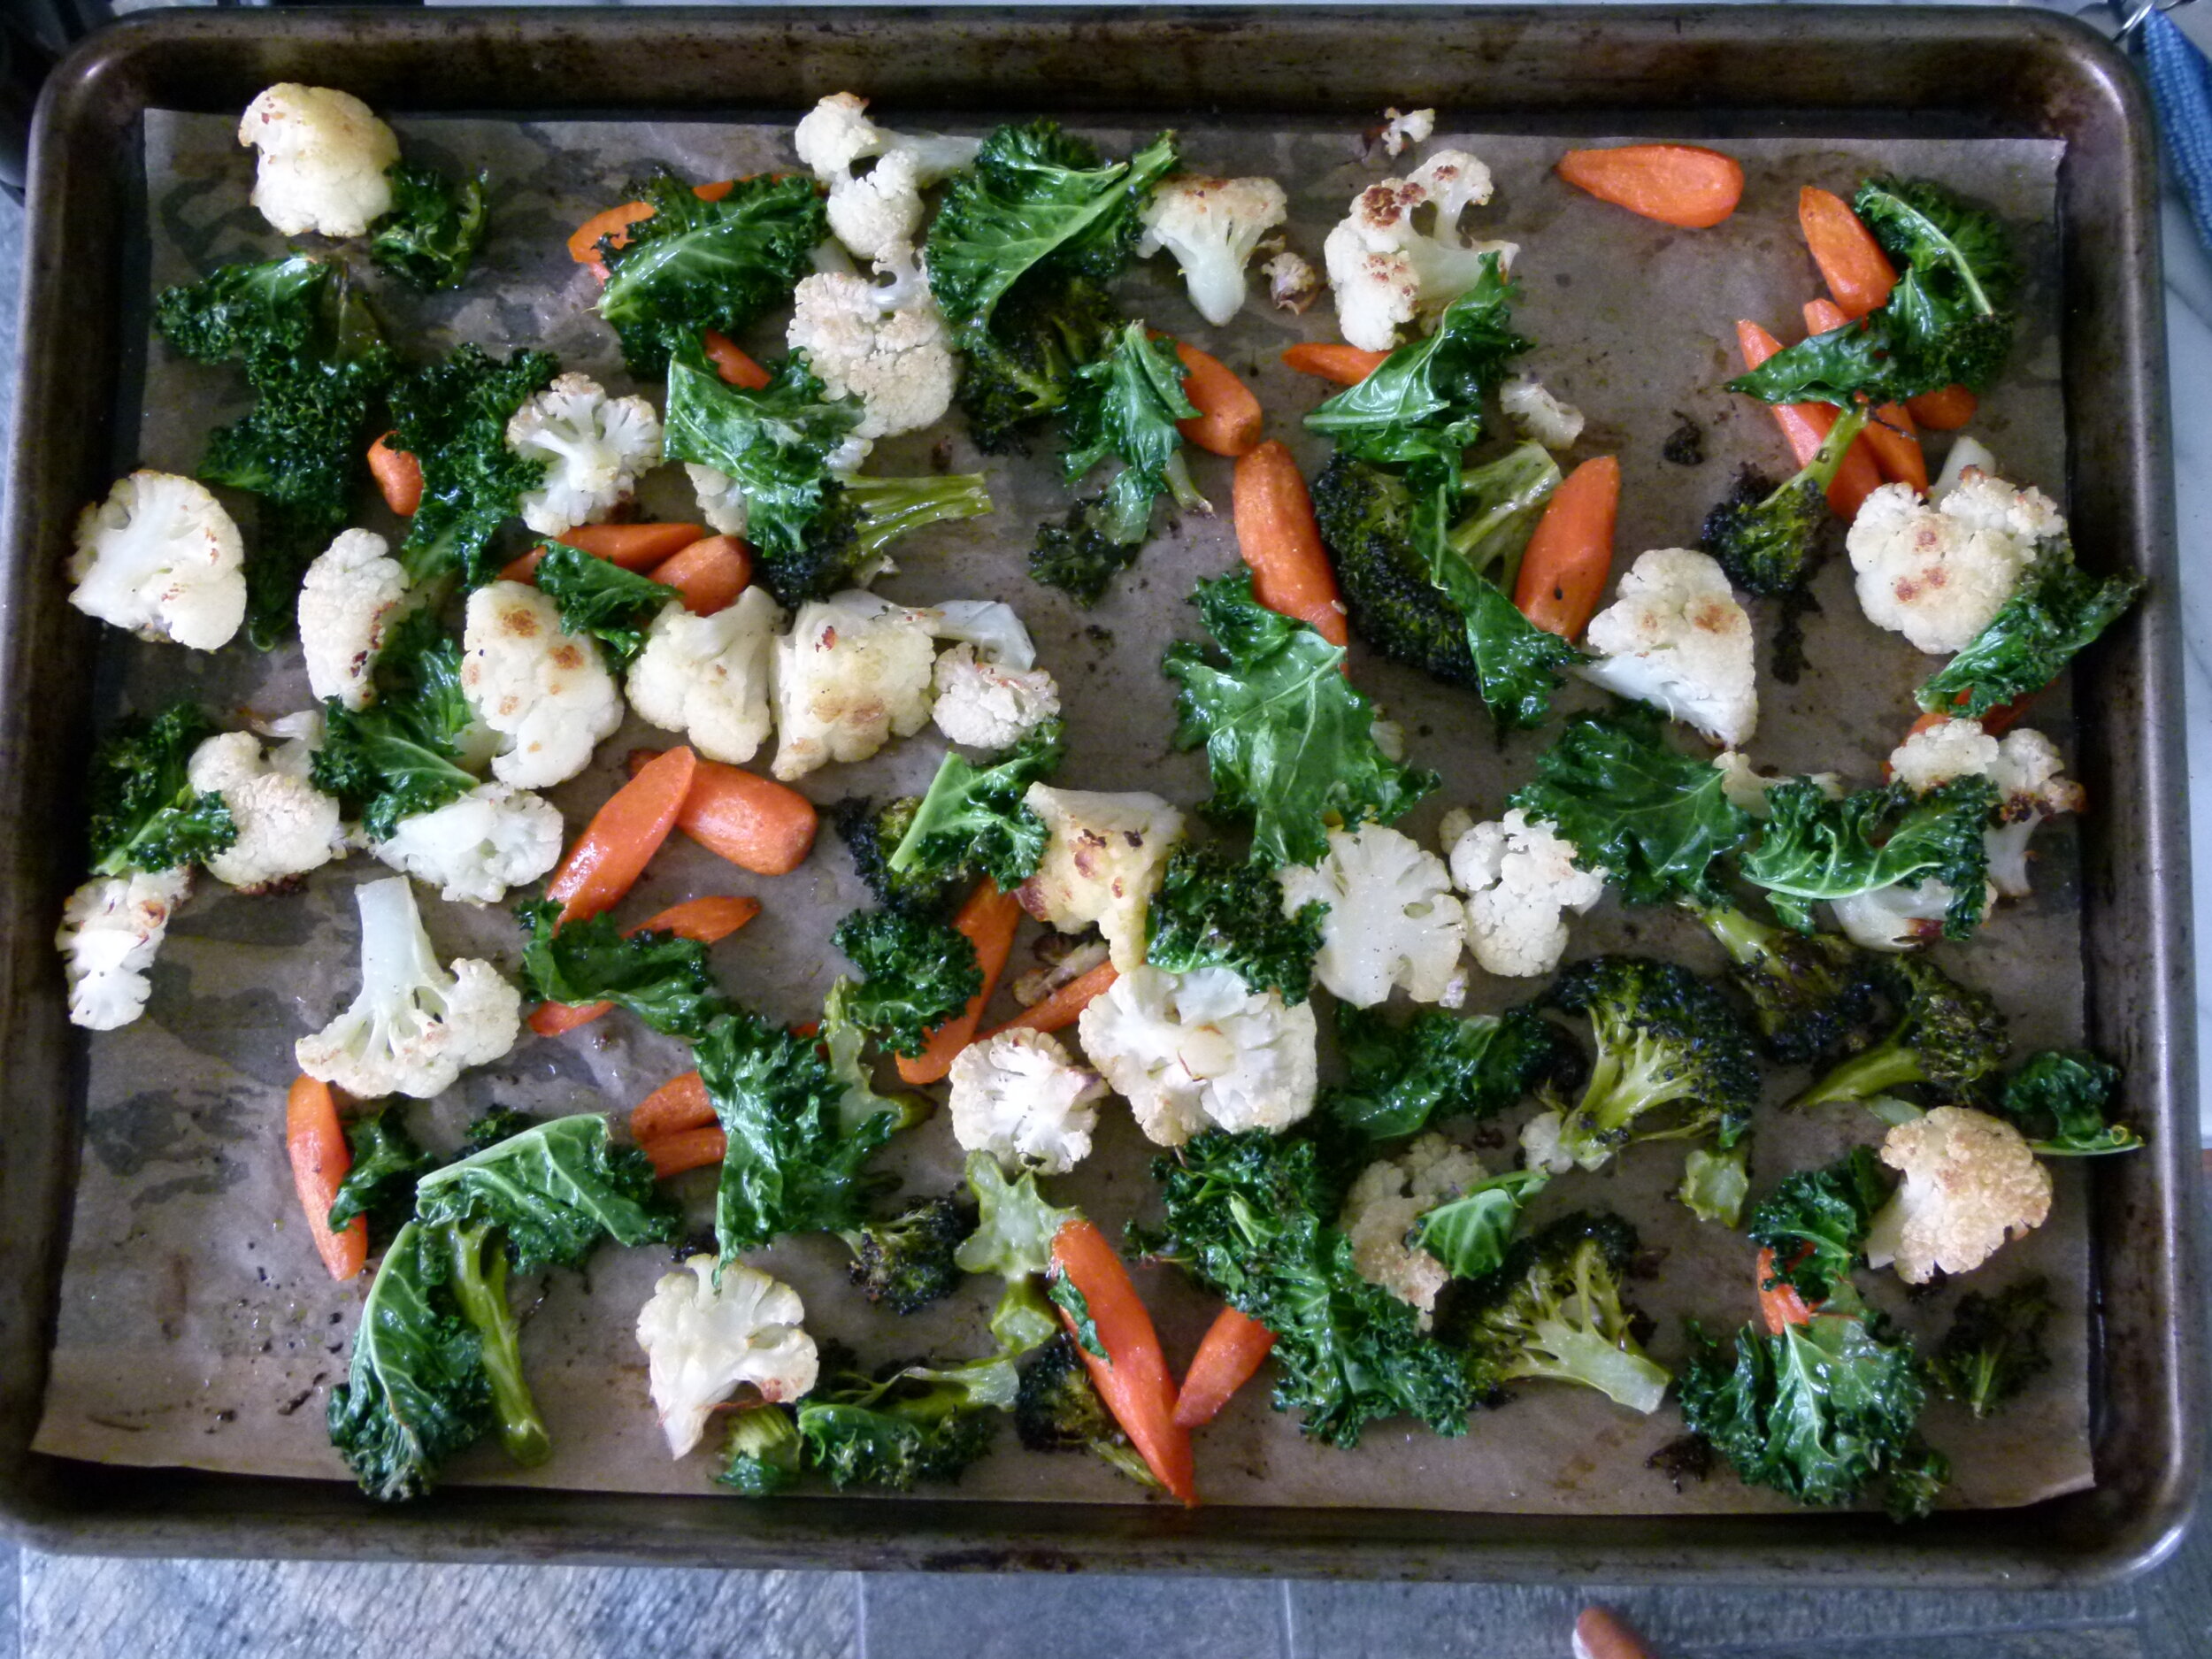
There is research that suggests that when aluminum is heated (which is what we do when we cook, naturally), some of it leaches into our food.  The amount of aluminum that leaches increases with higher heat and acidity (e.g. wine, tomatoes, citrus.)  Although I use rimmed untreated aluminum or nonstick baking sheets almost daily for roasting vegetables or baking cookies, I always line them with unbleached parchment paper to provide a buffer so that my food does not come into contact with either of those materials.  I also never allow food to come into contact with aluminum foil when cooking.  If you own anodized aluminum cookware, this has been treated and sealed so that the aluminum doesn’t react or leach when heated.  This is ok.  There is, however, untreated aluminum cookware in restaurant supply stores and hardware stores and you should definitely not use these.

to roast garlic, wrap in parchment then foil

I will readily admit that any link between aluminum consumption and Alzheimers is controversial.  But aluminum is a known neurotoxin which means in excessive quantities, it disrupts the natural processes of a healthy brain and can lead to problems.  Um, no thanks.  We already consume aluminum whether we like it or not if we eat out or consume processed foods, drink municipal water, use vaccines or antiperspirants.  Many (not all) over-the-counter medicines such as antiacids and buffered aspirin, also contain aluminum although .   Read the product labels to know for sure.  This post isn’t intended to cover all sources of aluminum, but rather focus on protecting ourselves from this heavy metal in the kitchen.  So my point is that if I can control my exposure to aluminum at home in an easy way, I am going to do that.

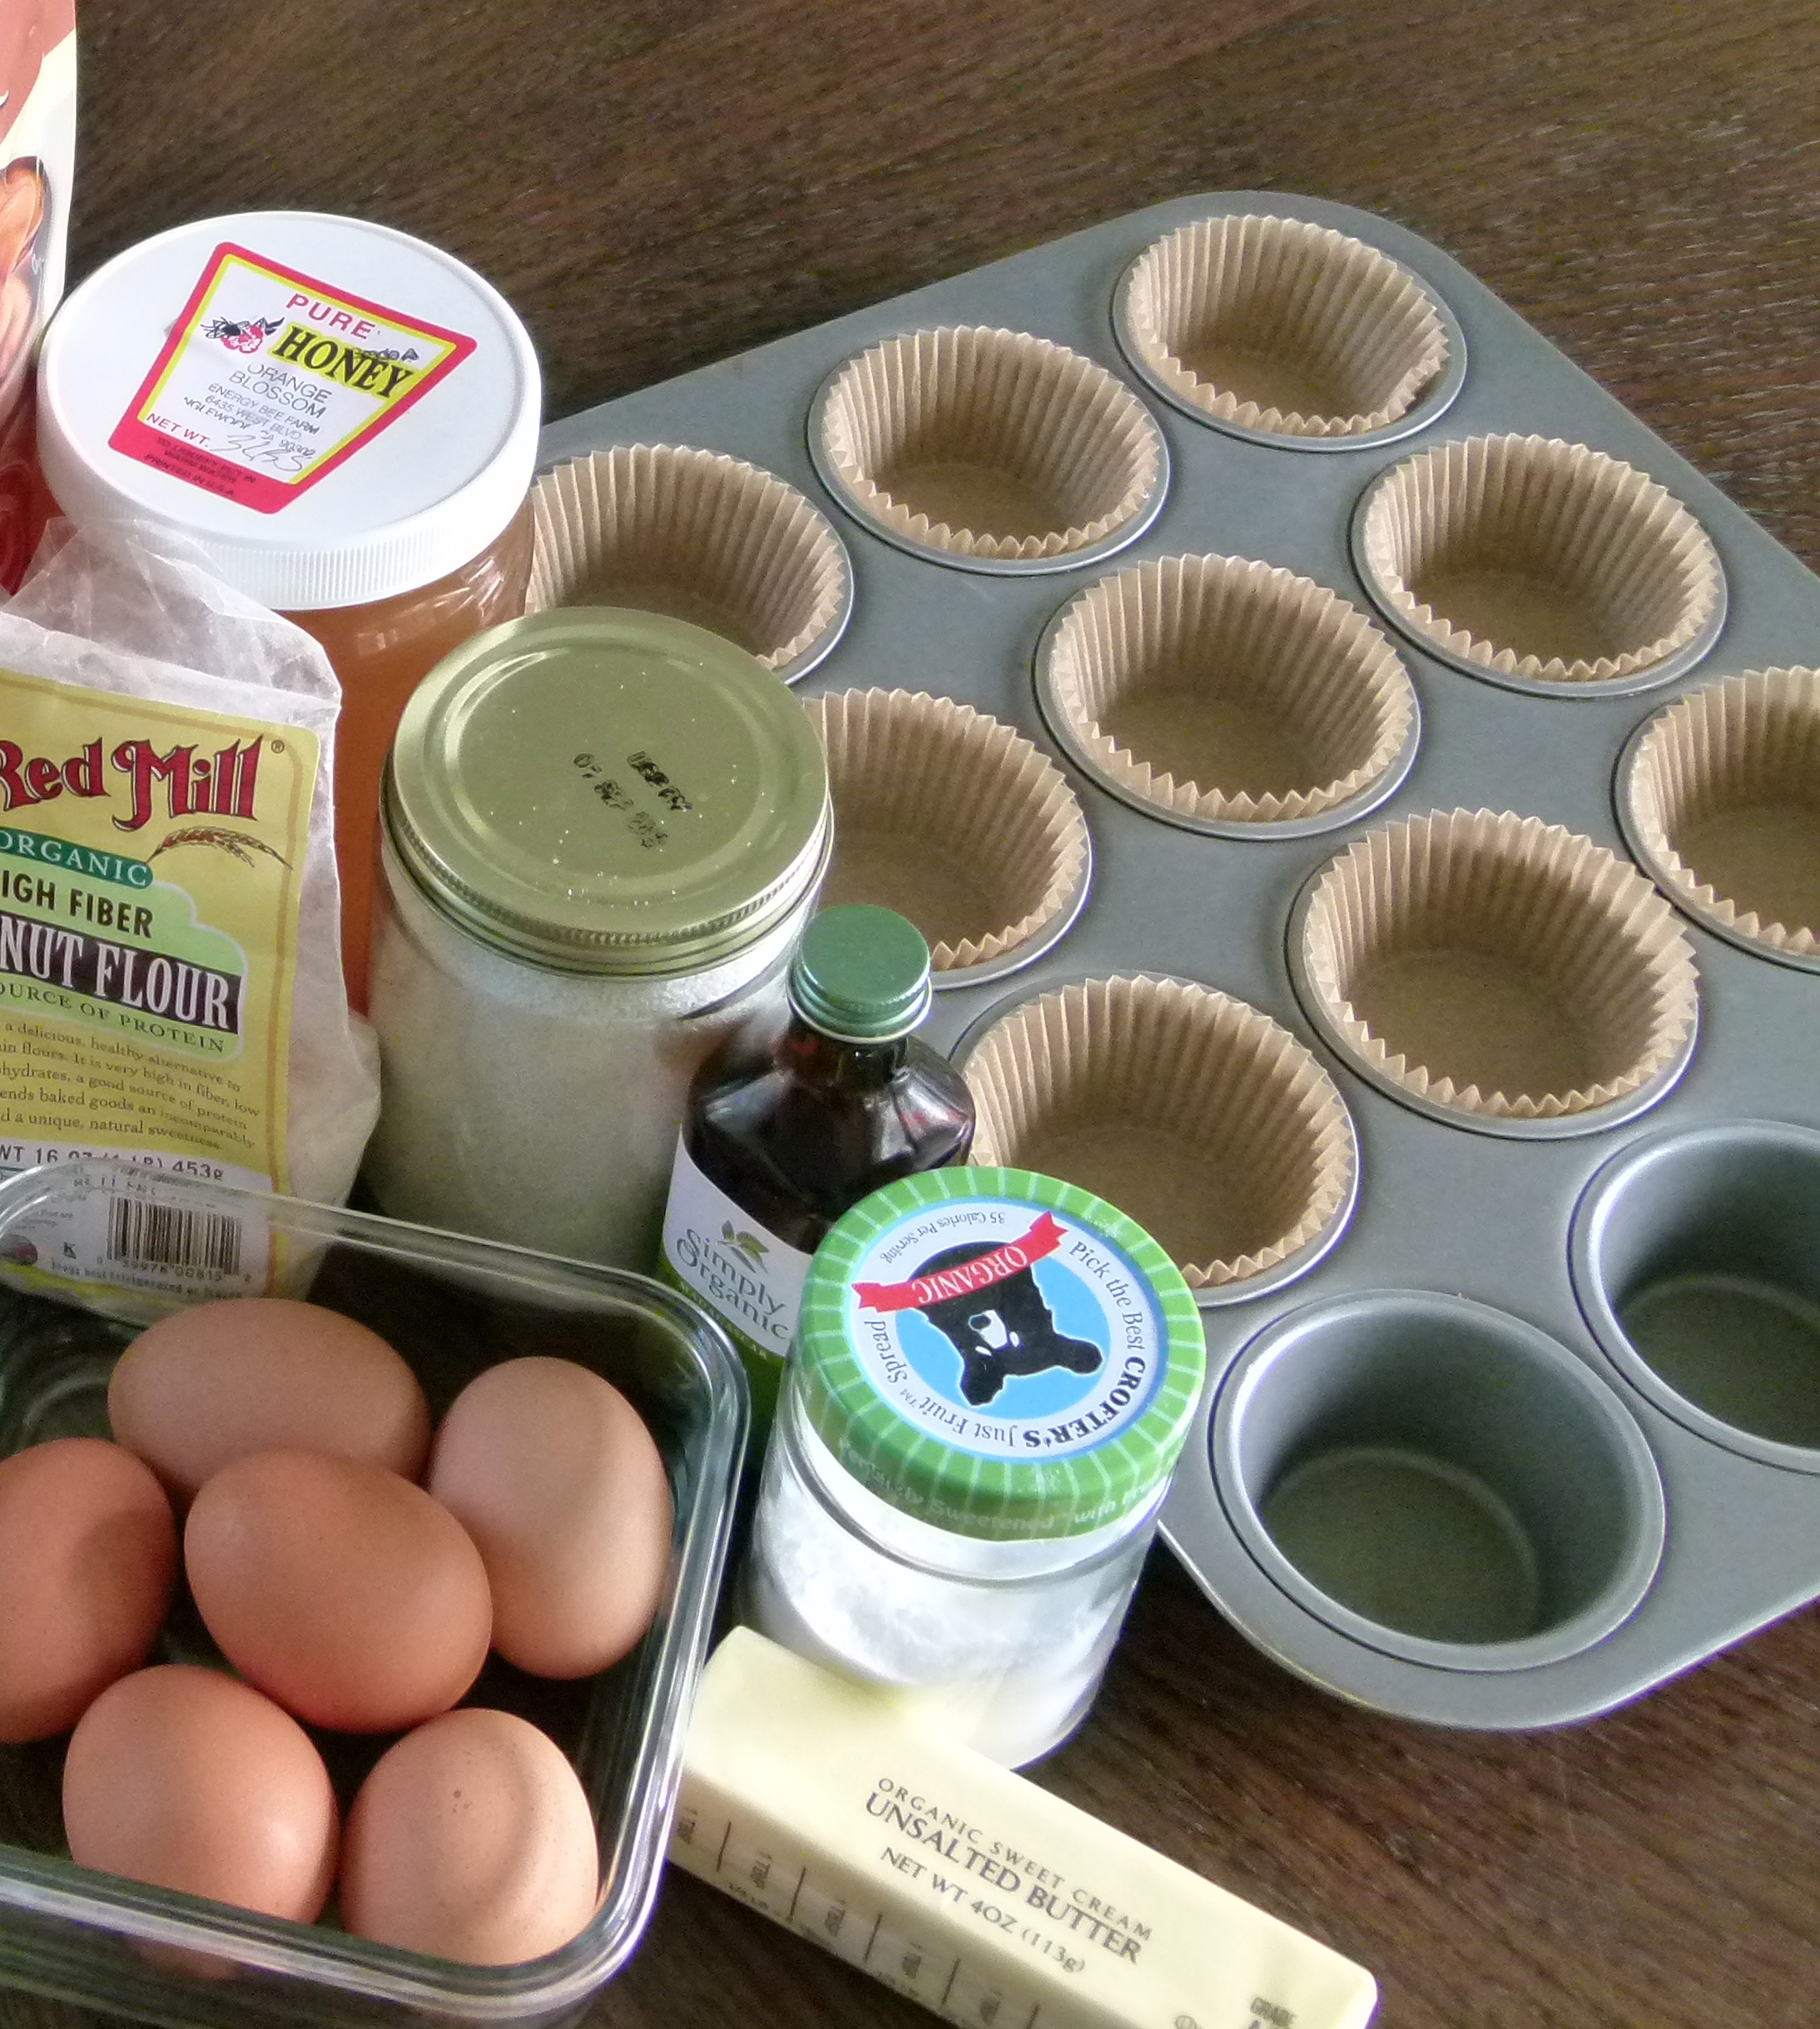
I also want to specify using unbleached, and not bleached parchment paper.  Bleached parchment paper when heated can/may/might leach dioxin, which you can read about here and why I advise you to avoid it.  There are several brands of unbleached parchment paper which are available at your local grocery store or on Amazon.  I like Beyond Gourmet and If You Care unbleached parchment paper.  I also love these unbleached parchment baking cups for lining your muffin tins.  If you like to wrap a food in aluminum foil to roast in the oven or grill, simply wrap it in unbleached parchment first and then aluminum foil so it doesn’t burn like that head of garlic above.

unbleached parchment muffin liners

Please be be warned that parchment paper is not the same thing as waxed paper which is not meant to be heated!  Another option is to use silicone mats on your baking sheets which are washable/reusable and do not leach any harmful chemicals when heated.  I sometimes use silicone mats for mild-tasting food (like cookies, not fish) or for an easy-to-clean food (like cookies, not balsamic-roasted cherry tomatoes.)

As always, feel free to shoot me your questions or add your knowledge to this subject!

Why You Should Soak Your Nuts and Seeds

almonds

Per my last post, nuts and seeds should be soaked for the same reasons as grains and legumes.  Nuts and seeds also contain compounds that impair digestion, reduce mineral absorption and nutrient levels.  However, by soaking nuts and seeds in water, those anti-nutrients are neutralized, thereby resulting in a much more nutritious food.

Nuts can be soaked in plain filtered water or water with a pinch of sea salt for a few hours or up to 12 hours.  Once they have been soaked, drain and rinse the nuts before proceeding.  Soaked nuts can then be blended with fresh water and strained to make an easy nut milk.   Soaked, blended cashews become very thick, creamy and neutral in taste and can be used in many ways as a , including sour cream, heavy cream, and milk.

You can certainly eat soaked nuts without any further ado.  In fact, I rather like soaked walnuts, which taste a little juicier and less bitter than fresh.  But soaked nuts are a little soggy and can get moldy if not refrigerated and consumed within a couple of days.

You can dehydrate nuts in a dehydrator, which will dry out the nuts at a temperature of 115 degrees Farenheit or less in order to preserve any live enzymes, if the nuts were truly raw to start out with.  Keep in mind, most nuts in the US that are labeled “raw” have actually been pasteurized and heated to a point that destroys the live active enzymes and makes them “unsproutable.” (Sprouting can occur only with a live food and takes longer, e.g., a few days, than just soaking.)  Truly raw domestic nuts, such as almonds, can be purchased directly from the grower, either online or at your local farmers market.  Otherwise, it is possible to buy imported, raw nuts from the supermarket.

If you don’t have a dehydrator, you can still dry out soaked nuts in an oven at a low temperature, such as 250 degrees to get them a little crispy.  It is still advisable to store dehydrated or baked soaked nuts in the refrigerator to ensure they stay fresh for longer.

Consumers, as well as food manufacturers, have responded to the demand for soaked nuts and seeds.  If you don’t want to do it yourself, there are now soaked, sprouted and dehydrated nuts available at many natural food stores, online, and at farmers markets.

soak your nuts!

Why You Should Soak Your Grains

Soak Your Grains!

Jenni Kayne asked me to share with her readers one of her favorite tips that I have taught in class — soaking grains.  So we have collaborated on a today’s post!  Do check out her amazing lifestyle website, ripplustan.com which is one of my favorite sources for learning about new products, entertaining ideas and of course, fashion!

I am a big fan of a mostly plant-based diet and more importantly, I emphasize as many whole, unprocessed foods as possible.  Whole grains can definitely be part of a healthful diet, but they are much more nutritious and digestible when prepared the way our ancestors did by soaking, fermenting or sprouting them before cooking or eating.

Whole grains contain an anti-nutrient called phytic acid which binds with certain minerals (e.g.  zinc, phosphorous, calcium and iron) and  prevents them from being absorbed by the body.  Phytic acid is also very hard on the digestive system.  Most of the phytic acid is contained in the exterior bran and germ layers of the grain.  Ironically, whole grains are much higher in minerals than polished or refined grains, but we won’t receive those benefits unless we neutralize the phytic acid.

Phytic acid is also an enzyme-inhibitor which keeps the grains/seeds dormant until the conditions for germination are just right.  Not only does phytic acid prevent seeds from sprouting, it also helps protect them from predators by blocking digestive enzymes so that the seeds stay untouched as they pass through our digestive tract.

Soaking, fermenting or sprouting your grains before cooking them will neutralize the phytic acid and release the enzyme inhibitors, thus making them much easier to digest and making the nutrients more assimilable.  Phytic acid can be neutralized in as little as 7 hours when soaked in water with the addition of a small amount of an acidic medium such as vinegar or lemon juice.  Soaking also helps to break down gluten, a hard-to-digest protein found in grains such as wheat, spelt, rye and barley.

Fortunately, grains are very easy to soak.  You just need to start the process the night before or the morning of the day you want to eat them.  Pour grains into a bowl and cover with warm or room temperature filtered water.  Add a tablespoon of something acidic, such as yogurt, raw apple cider vinegar, lemon juice, whey or kefir, for example.  Cover and allow to sit at room temperature for at least 7 hours or longer.   Change the water after 24 hours if you’re still soaking.  Drain and rinse the grains before cooking with fresh water.

Even though 7-8 hours is the minimum recommended for soaking, even a few hours is better than nothing.  An extra benefit to soaking grains is a shorter cooking time.  The longer you soak them, the less time is needed to cook and also less water.  There’s no formula to figuring this out, but usually if you soak 1 cup of brown rice for 8 hours, you can reduce the cooking time from 50 minutes to about 40 and use about 1/3 cup less water.  For 1 cup of soaked quinoa, you can cook for about 10 minutes and use 1 ½ cups of water.

If you’ve been eating whole grains, nuts and seeds for years without soaking, don’t stress.  A small amount of phytic acid is reduced just by the cooking process alone.  But for minimal effort, you can significantly improve the digestibility and nutrition of these important foods.

The Best Drink to Start Your Day: Warm Water and Lemon

Warm water with lemon

It’s a new year and chance are, you’ve made some resolutions.  I spent New Year’s Eve with my husband’s family, and when we went around the table sharing our goals for 2014, most of us had better health and a leaner body on our minds.  I once read some good advice about setting resolutions: don’t be vague and say, “I want to get healthier.”  Instead, set specific, more measurable goals for yourself, such as “I will drink 8 glasses of water a day,”  “I will exercise a 30 minutes/4 days a week,” or “I will go to sleep by 10:00 pm Sunday through Thursday.”

From my personal experience, I have found that to be good advice which has helped me stick to my resolutions better than before.  I have also found that fewer, smaller changes can gradually bring us to where we want to be and have a longer-lasting impact.  Of course, it depends on one’s personality, but I don’t have what it takes to make lots of drastic changes overnight.

One new year’s resolution that I made many, many years ago (which I learned from an ayurvedic practitioner) that is still going strong is starting the day with a mugful of warm water with fresh lemon juice.  Rarely does a day go by, no matter what the season, no matter where I am, when I don’t enjoy this easy, inexpensive, and health-supportive beverage.

Here are some of the benefits to drinking warm lemon-water at the start of your day:

1.    Rehydrates the body.   Sleeping so many hours without fluid intake generally leaves you slightly dehydrated when you wake up.  All the systems in your body need water to function properly and a glass of water warm helps keep everything running smoothly.

2.    Stimulates the digestive system for the day. The citric acid in lemon juice stimulates the production of gastric juices in the stomach.  What’s also interesting is that lemon juice has a molecular composition similar to digestive fluids such as saliva and hydrochloric acid and enhances their processes.  Lemon juice can also help relieve symptoms of indigestion and nausea.

3.  Helps finish the detoxification process the and clear the digestive tract.  Lemon also stimulates and helps cleanse the liver, our body’s detoxifying organ.  Lemon juice helps stimulate the production of bile which helps to eliminate toxins.

4.    Boosts the immune system.  Lemons contain incredibly high levels of Vitamin C, a powerful antioxidant and immune-booster.

5.    Helps beautify the skin. The skin benefits from hydration and detoxification, but in addition, the antioxidants in lemon also scavenge free radicals which contribute to premature aging.  Furthermore, lemon juice’s anti-bacterial properties are a natural cleanser for the skin, liver and gall bladder.

cut a washed, organic lemon in half

Here’s how easy this is:  First thing in the morning, before you eat or drink anything else, wash a lemon (preferably organic) and cut it in half.  Squeeze the juice from one lemon half into a large mug or heat-proof cup.  Add warm, filtered water (not boiling water which will destroy some of the vitamins and enzymatic properties in the lemon) to the mug.  Drink slowly.  If it’s not inconvenient for you to wait 30 minutes to eat breakfast, do so.  This will ensure your body absorbs as many nutrients as possible.

Here’s to a healthful 2014!

A Holiday Cooking Class with Jenni Kayne and The Chalkboard

beautiful table

table setting

I had the pleasure of once again joining The Chalkboard Mag (one of my favorite sites), Jenni Kayne and her friends in the kitchen for another cooking class and luncheon, this time with a Christmas theme.  Even though I make a big effort to plan and get organized for Thanksgiving, I absolutely adore Christmas.  I love all the traditions I share with my family, looking for and sharing the perfect gifts, and I love planning the menu. So I was very excited to help out with this class!

Jenni and Nathan setting the table

Jenni and I lean towards a vegetarian diet, but we also both like fish.  In my family, we eat many different kinds of fish on Christmas eve, from clams and mussels to cod fish and eel, so I thought for this class, cooking individual whole fish would be delicious and a great thing to learn how to do.   I think that everyone had an especially fun experience deboning their own roasted fish!

whole roasted branzino

fun deboning fish

Summerland Farm to Frontdoor provided me with the most beautiful, fresh, locally-grown produce for the rest of the menu.  Summerland sources produce from local farms and delivers to your door.  How great is that?!  You should check them out if you live in LA.  The rest of the menu included mushroom toasts using one of my favorites, Hen of the Woods mushrooms, a salad with fennel and pomegranates and roasted baby fingerling potatoes with gremolata.  The salad was just a version of this one that I taught and posted a few years ago.  I basically left off the apples since I didn’t think that would pair well with fish.  For dessert, I made individual gingerbread trifles with poached pears.  In my regular classes I’ve been making the dessert in a traditional trifle dish, but they looked so adorable in these stemless wine glasses!  I hope to share all these recipes with step-by-step photos with you this week!  If you can’t wait, Jenni posted all the recipes on her blog, Rip + Tan.

Hen of the Woods mushroom toasts

potatoes with gremolata

mixed greens with fennel and pomegranates

Even though my focus that day was on the menu, I couldn’t help but be so inspired and captivated by what Jenni and her talented designer-friend, Nathan Turner did with the decor, especially the main dining table.  Maurice from Bloom & Plume provided the most insanely gorgeous floral arrangements.  He used these amazing bark containers from Nathan Turner’s shop and filled them with peonies (my favorite flower!), garden roses, eucalyptus and hops.  It was seriously so perfect — lush and organic-feeling, simple, but elegant.  I want to recreate the entire look for Christmas at my parents’ house!  One of the reasons I love Jenni’s blog is not only does she have the most amazing taste, but she generously shares all her sources for everything from glassware to fabrics to candles.  So if you do want to steal this look, head over to Rip + Tan.

desert table!

the gorgeous place settings

It was lovely morning and luncheon with even lovelier company.  For even more photos and details and to get you inspired for holiday entertaining, visit Rip+Tan and The Chalkboard Mag!

Planning a happy thanksgiving — 1 week and counting!

This post has been edited from the original which was published on November 17, 2011.

Wow, the last three weeks have gone by so quickly!  I am very excited to celebrate Thanksgiving — we have a super fun crew joining us this year — and I am also looking forward to some one-on-one time with the kids.   I used to get all of them in the kitchen Thanksgiving morning to help me with pies or trimming green beans or whatnot, but my two daughters have taken to sleeping until noon on days off.  However I had a stroke of genius two years ago, which was to tack my Thanksgiving to-do list on the refrigerator and have everyone sign up for three tasks.  I asked my husband to help too, because good gracious the man needs to brush up on his cooking skills!

My last class is Monday night, so I’ll start getting busy this weekend and then I’ll go full steam ahead on Tuesday.  I always plan Thanksgiving day down to the last detail because I don’t like forgetting things and a schedule makes me feel more relaxed, which equals more fun for me!   But just because Thanksgiving is the star of the show this week doesn’t mean that I can forget about normal life on very other day.  So I think about regular meals and activities, too.  Here’s what my schedule will look like from Sunday until we eat on Thursday at 4:00 pm (-ish).  This shouldn’t make you feel exhausted, but merely show you what you can do ahead for your own Thanksgiving!

Sunday

Go grocery shopping for most perishable items, bread for stuffing and food for remaining dinners this week.

Make cranberry sauce (I used to make applesauce on Sunday too, but my friend Caitlin is bringing it this year.)

Arrange tables and chairs

Write out placecards for table (a good job for one of the kids)

Dinner:  orange and rosemary-glazed chicken, cauliflower-potato mash, and broccoli

make bread cubes for stuffing

Monday

Make salad vinaigrettes

Make bread cubes for stuffing

Make ice cream

4:00 leave to teach cooking class in Brentwood

Dinner:  spaghetti squash bowls with beans, roasted vegetables, and guacamole

Tuesday

9:30 am Dentist appointment for Mr. Picky

Shop for last perishable items from farmer’s market

Pick up turkeys.  Brine in the morning.

Buy flowers for entry table, family room and living room and put together table arrangements

Set table (I’ll set one place setting for the kids to copy and they can do the rest.)

Wash and dry greens (salad)

Toast pumpkin seeds (salad)

Seed pomegranates (salad)

Shred gruyere (tart)

Shred manchego (salad)

Defrost chicken/turkey stocks

Dinner:  Italian wedding soup and grilled cheese sandwiches

Wednesday

Chop onions for soup, stuffing and roasted vegetables

Slice zucchini (tart)

Make soup

Steam, bread cauliflower

Blind bake crust (tart)

Herb oil (tart)

Make stuffing

Prep vegetables for Maple-Mustard Roasted Veggies

Thinly slice Brussels sprouts

Cut butternut squash into cubes

Make sweet potato casserole

Bake pecan pies

Set up for coffee and tea service

Check powder room

Dinner:  shrimp with tomatoes, white beans and spinach, rice

Before bed:  make sure garage refrigerator door is closed! (Three years ago, I left the door open to my extra fridge in the garage all night long.  OMG. Needed to buy two new turkeys on Thanksgiving morning!)

Thursday

6:00 am wake and shower

Make cornbread (small oven)

Bake pumpkin pies (large oven)

Bake coffee cake (small oven)

Make gingerbread (large oven)

9:15 Take turkeys out of refrigerator

All desserts must be out of large oven by 10:30 am

Bake apple pie (small oven)

10:45 turkeys go in large oven breast side down at 425 degrees

11:25 turn oven down to 325 degrees and flip turkey breast side up

12:00 reheat soup and serve with cornbread

tidy up kitchen

get dressed and dry hair (a girl’s gotta look good!)

Put mixing bowl and beaters in freezer for whipped cream

Roast butternut squash for salad (small oven)

1:30 Peel potatoes and make mashed potatoes; keep in bowl, covered, over pot of simmering water

2:15 zucchini tart in small oven

2:30 fry cauliflower and heat tomato sauce; serve hot

3:00 serve hors d’oeuvres; start testing turkey temperature

3:00 – 3:30 take turkey out of oven

Put vegetables in large oven at 400 degrees

Make gravy

Reheat stuffing in small oven

Bake sweet potato casserole in large oven

Chop apples for Brussels sprout salad, assemble both salads

Light candles, pour water in glasses, set out cranberry sauce and applesauce

Place turkey platter in oven to warm up

3:50-4:00 Carve turkeys

4:00 Dinner is served

After dinner:  whip cream (do not overbeat!), coffee and tea, sparkling water

Make notes on what to remember for next year.  Next year??!!

Planning a happy thanksgiving — 2 weeks and counting!

This post was originally published on November 10, 2011.

Thanksgiving is 2 weeks away!  Is the exclamation point there to emphasize panic or joy?  I’m excited!  I’ve been teaching quite a few Thanksgiving-themed classes as of late and I’m feeling spirited.  One of my students said to me today that my Thanksgiving planning blogs are stressing her out.  Yikes!  Of course that was not my intention.  The whole point is to show you what you can do in advance, not what you must do in advance.  All these tips and strategies are most relevant to the hosts and hostesses who are preparing most or all of the meal themselves and who have a busy schedule leading up to the holiday.  If I didn’t get a lot of these tasks completed early, I don’t see how I could pull off this meal without tons of stress.

Here’s what you can get done this week:

  • Get your knives sharpened Especially your carving knife.  A razor-sharp knife is the most important tool in your kitchen.  In my area, you can get your knives sharpened at Sur La Table, the farmer’s market and at the local cutlery store at the mall.  I think Sur La Table charges $1/inch.
  • Make your grocery lists  I make three lists:
  1. Non-perishables (e.g., flour, spices, wine, nuts, dried fruit)  I buy these now.
  2. Perishables to buy one-week ahead (e.g., winter squashes, butter, hard cheeses, potatoes)
  3. Perishables to buy two days before (e.g., turkey, dairy, bread for stuffing, all other fruits and vegetables)
  • Buy to-go containers  I always make too much food and I like sending care packages home with my guests to enjoy the day after, especially our single friends.  This year I am definitely packing up all the extra desserts so that they aren’t tempting me the next afternoon when I’m shopping for holiday gifts online.  I love the idea of having people bring their own reusable containers, but for me it’s easier to get these disposables from my local Smart & Final.

  • Clean out the refrigerator  I’ll get to this over the weekend.  Now is a great time to get rid of food past its prime or to get creative with the last spoonful of nut butter or those four olives just to make more space in the fridge.  I have a second, inexpensive refrigerator in the garage which really comes in handy for big dinners.  If you don’t have the extra space, see if one of your neighbors is going away for the holiday and can store your chutney and jam collections for a few days.

  • Check your instant read thermometer   This tool the only way you’ll be able to tell if your turkey is cooked properly, so it’s important that it’s accurate.  If you’re unsure, stick the tip of the thermometer into boiling water.  If the temperature reads 212 degrees Farenheit, you’re good to go.

Planning a happy thanksgiving — 3 weeks and counting!

This post has been edited from the one originally published on Thursday, November 3, 2011.

If you followed the advice in my post last Thursday, perhaps you now have a general idea of how many guests you will be hosting on Thanksgiving.  If not, it’s time to get on the phone and do some inviting!  Do you have a good balanced menu and have you taken guests up on their offers to bring something?   This week we have a few more tasks that we can check off the list.

3 weeks before thanksgiving

  • Order the Turkey  If you eat turkey on Thanksgiving, it’s a good idea to order it now.  I have always ordered a fresh, free-range, organic turkey, because in my opinion they have a tasty turkey flavor and are better for you than most other alternatives.  The only thing that may be better is a heritage turkey, which has a much stronger turkey flavor and supposed to be more moist.  It will have less breast meat though and will be more expensive.  Avoid “self-basting” turkeys which are injected with anything from chicken fat to salt to chemicals.  True, they are easier to cook, but I think they taste more like salt than turkey and they are just full of stuff you don’t want to feed your family.

Here are some questions that will help you decide size:

How many ovens do you have?  If you have one large oven that can accommodate two turkeys side by side and an extra oven to spare (you’re so lucky!), then you have the option of cooking two smaller birds versus one large one.  But with two small ovens, you may not want them both being monopolized by turkeys.

Are your guests dark meat-eaters or white meat-eaters?  You will get more white meat by weight from one large bird than from two smaller.  Likewise, you will get more dark meat from two smaller birds than from one large one.

How big a turkey should you buy?  The rule of thumb is one pound of turkey per person.  So if you are expecting 16 guests, you should order a 16 pound turkey.  That doesn’t mean that you will have 1 pound of meat per person, though.  I think this is only a good rule if you don’t want leftovers, if your guests are not big eaters, and/or you have an good number of dark meat eaters versus all white meat eaters.   Two years ago I cooked two 17-pound turkeys for 20 adults and 5 kids and I had just enough leftovers for the five of us for dinner the next day.  Last year I cooked two 18-pound turkeys for 24 adults and 5 kids and we had the same amount of leftovers.   My point is that I think 1 1/4 pounds per person is a safer bet.

Do you have a bad back?  What does this have to do with anything?  A very large turkey is mighty challenging to keep pulling out of the oven to baste.  I find two smaller turkeys much more manageable, if you have the oven space.


  • Planning Your Table Decor  I don’t do anything fancy for my table decorations, but it’s nice to make the table look special.  Now’s the time to check your linens for stains and make sure you have enough napkins, plates and glassware.  I generally like to do something simple with fresh flowers in autumnal colors and add in a few of the kids’ Thanksgiving art projects from years past.   I just adore Jenni Kayne’s table setting at the top of the post and below.  Check out all her lovely holiday photos and ideas on her ripplustan.com blog — beautiful!  But you can put out bowls of apples and pears or gourds and nuts, add in a few votive candles and it will look beautiful.  If tablescape isn’t your thing, you can always order from your local florist or full service market.  Just get on it this week.  I just dropped off my heirloom pumpkins at Rolling Greens to have them insert succulents.  Those arrangements last quite a while, so I figured why not enjoy them this month and not have to worry about doing it in two weeks!

succulents in pumpkins via Ripplustan.com Screen Shot 2013-11-06 at 3.57.35 PM

succulents in pumpkins via Ripplustan.com


  • Make your pie crusts and freeze them  You can freeze them in disc form or roll them out, fit them into pie plates and freeze them, well wrapped.
  • Make your homemade stock and freeze it  I use over a gallon of chicken stock on Thanksgiving for soup, stuffing and gravy.

  • Make your dry mixes for pie fillings, cornbread and other baked goods.  Not only are there never enough ovens on Thanksgiving day, but there are never enough measuring cups and spoons either.  I measure out the dry ingredients, store them in a glass jar and label each jar, e.g. “Dry Mix for 2 Pumpkin Pies.”  I didn’t label them the first year I did this and let me tell you — pumpkin pie spices smell A LOT like apple pie spices.
  • Check your inventory of helpful tools and appliances  Here’s my list of Thanksgiving essentials:
  1. Instant-read thermometer — the only way to know if your turkey is ready.
  2. Roasting pan(s) and rack(s)
  3. Fat separator
  4. Twine for trussing
  5. Baster
  6. Potato Ricer — for making the best mashed potatoes
Lots of options!
More recipes to come, but look here for my Thanksgiving recipes.  And also check out my Foodily page and Pinterest boards for more recipes and table decor ideas.  Last but not least, I’ll be sharing lots of tips every day on Instagram so be sure to follow me there!