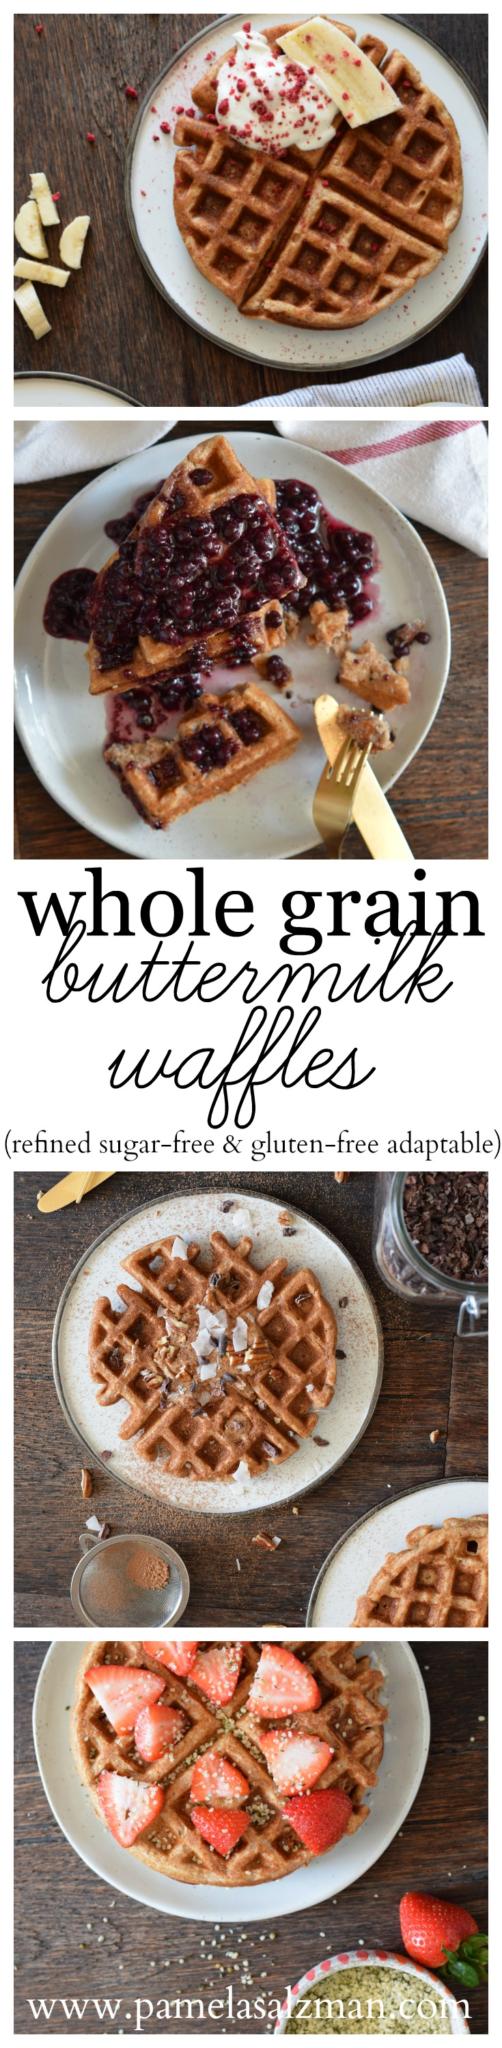
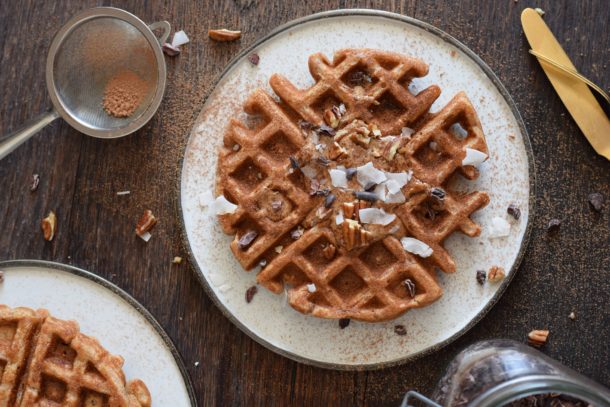
Whole grain buttermilk waffles recipe (refined sugar-free, gluten-free adaptable)

whole grain buttermilk waffles recipe (refined sugar-free, gluten-free adaptable) | Pamela Salzman

whole grain buttermilk waffles recipe (refined sugar-free, gluten-free adaptable) | Pamela Salzman

I never posted my waffle recipe on my site because I really didn’t know if most people owned a waffle maker.  Plus, I don’t want to nudge anyone to buy an expensive appliance that s/he may not get much use out of.  Annnnnd, I had never found a good waffle iron that wasn’t lined with Teflon.  But if you saw in my Friday Favorites back in October, I found the waffle maker of my dreams and it’s under $40.  No Teflon, easy to use, no PFTE’s or PFOA’s.  Go check out my link if you are interested in more of the specifics.  Sooooo, since so many of you have asked me for the recipe on Instagram, I am finally happy to oblige.

cast of characters

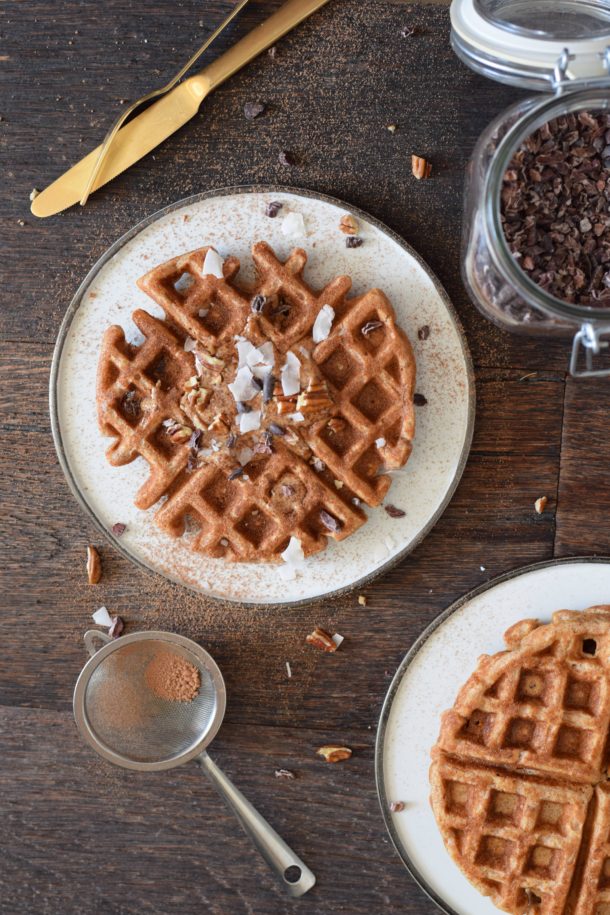
This waffle recipe isn’t that much different from my Whole Grain Buttermilk Pancake recipe, but it’s designed to have more heft.  These waffles are still light but hearty and subtly sweet.  My kids are so used to whole wheat pastry flour and whole spelt flour that whole grain pancakes and waffles taste “normal” to them.  But if you haven’t used whole grain flours yet or your family doesn’t like the nuttiness, try going half and half or even using 1/2 cup whole flour and 1 1/2 white flour to start.  I personally enjoy whole grain flours because they actually have some flavor, as well as the fact they don’t leave me feeling like I ate a candy bar for breakfast.  I like to see what bits of random flours (e.g., oat, buckwheat, cornmeal) I have in the fridge that I can use up for a truly multigrain waffle.

dry ingredients

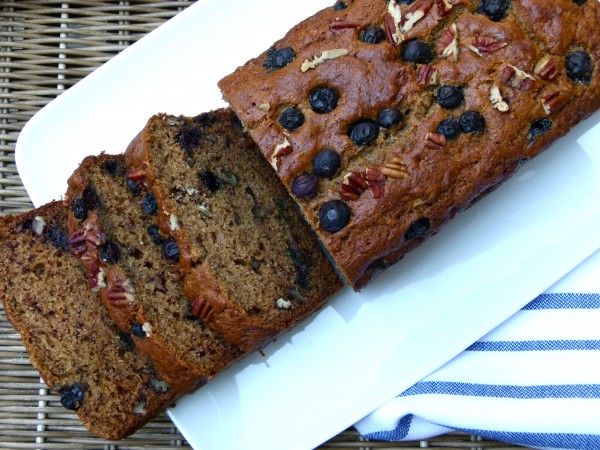
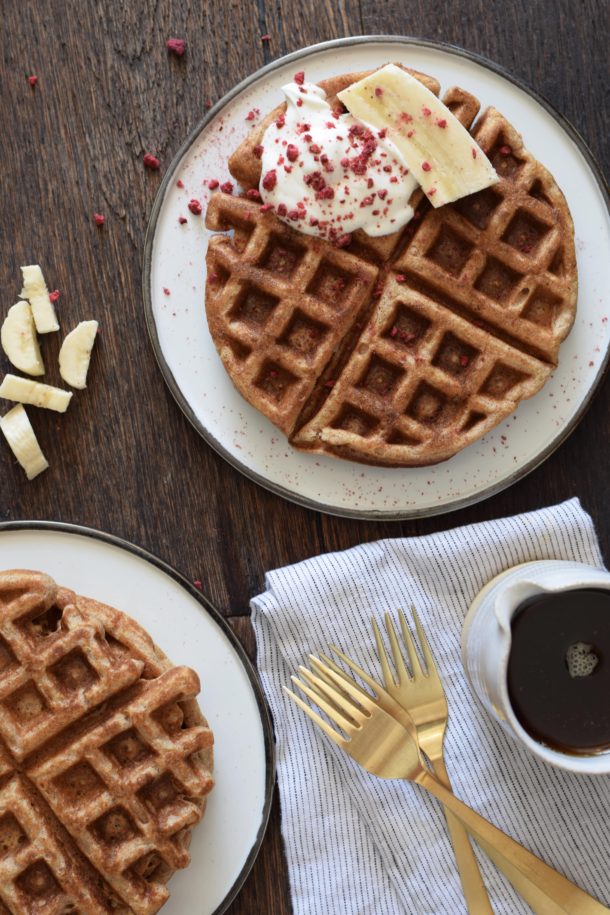
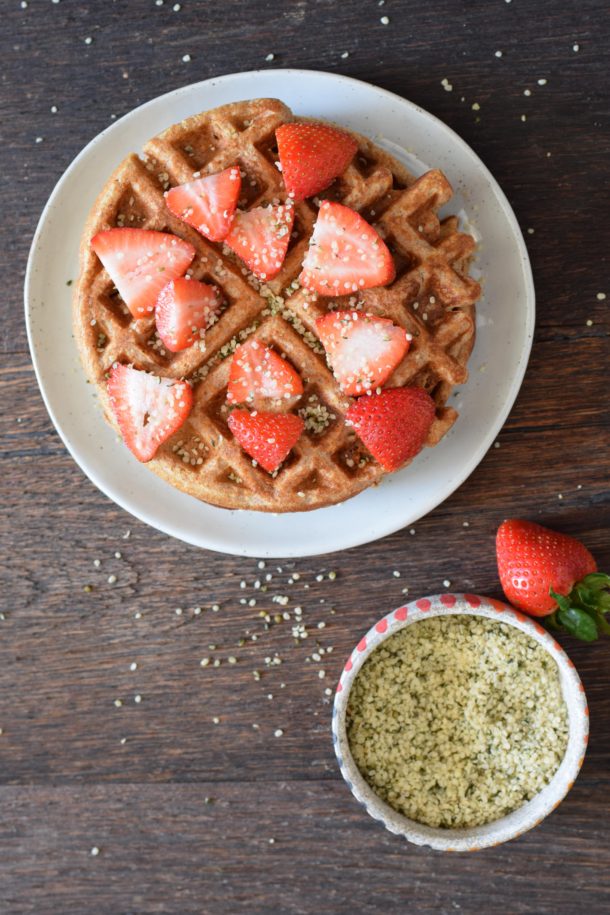
These waffles are the perfect backdrop for tons of different seasonal fruit combos with or without maple syrup or a dollop of yogurt.  Sometimes I let Mr. Picky add some mini chocolate chips for fun.  He doesn’t use maple syrup, so I’m ok with the small amount of extra sugar.  I usually like to finish the batter and make all the waffles even if it’s too much for all of us, and either save them for the next day or freeze them for another time.  They go right into the toaster oven for a re-crisping.  You might even try using homemade waffles out as sandwich bread for a quick PB&J.

batter up!

I wish I had posted this yesterday or last week for you all you snow bunnies who have been cooped up with schools closed again.  Waffles are a great breakfast if you’re not in a super big rush since you can only make one at a time.  Although my kids are staggered out the door in the morning and I taught them how to use the waffle iron, so it works out pretty well for me on a weekday.  There are a few occasions coming up when it might be a nice treat to make waffles.  February 14th is obviously Valentine’s Day and it’s on a Saturday this year, so that’s a perfect day to make these.  Or if everyone’s off from work and school on Monday, February 16th for President’s Day, that would also be a good time to try this recipe out.  And since we’re celebrating something, why not go all out with some organic whipped cream piled high?  I approve!

whole grain buttermilk waffles recipe (refined sugar-free, gluten-free adaptable) | Pamela Salzmanwhole grain buttermilk waffles recipe (refined sugar-free, gluten-free adaptable) | Pamela Salzman whole grain buttermilk waffles recipe (refined sugar-free, gluten-free adaptable) | Pamela Salzmanwhole grain buttermilk waffles recipe (refined sugar-free, gluten-free adaptable) | Pamela Salzman


Whole Grain Buttermilk Waffles
Author: 
Serves: 4-5
 
Ingredients
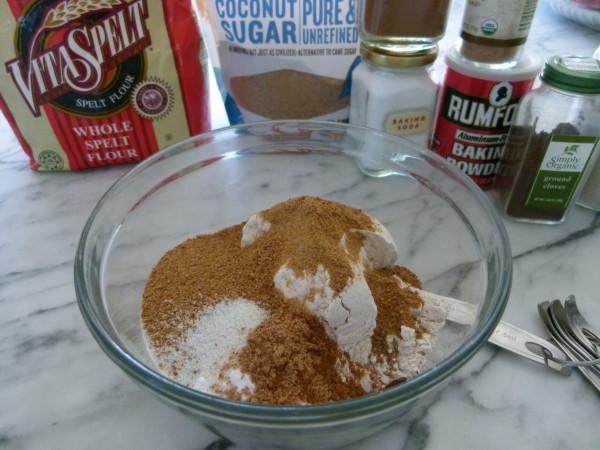
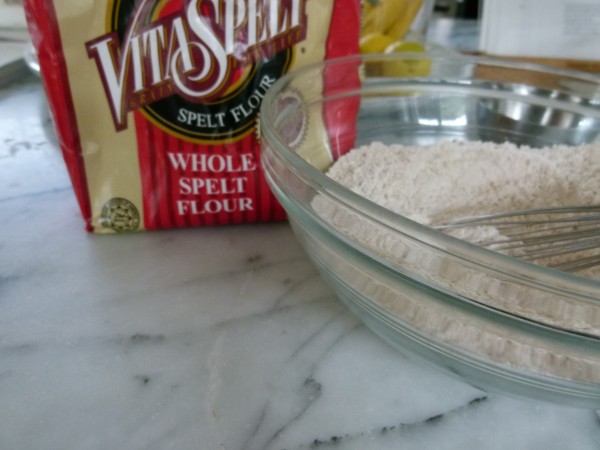
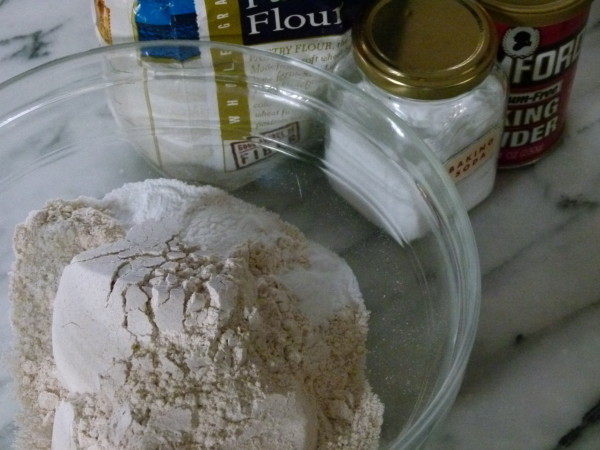
  • 2 cups whole wheat pastry flour, white whole wheat flour or whole spelt flour or a blend of these and other whole grain flours*
  • 1 ½ teaspoons aluminum-free baking powder
  • 1 teaspoon baking soda
  • ½ teaspoon fine sea salt
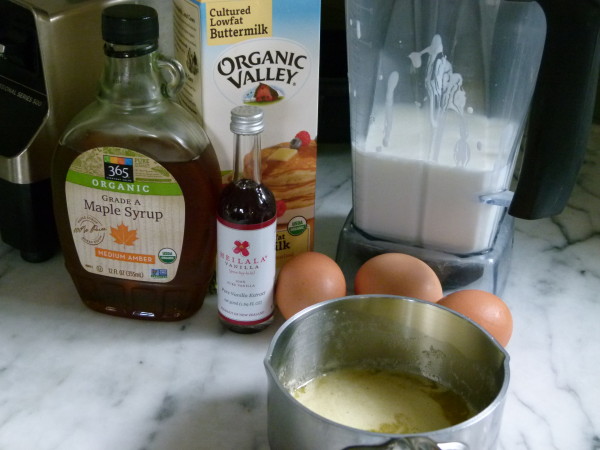
  • 2 cups buttermilk**
  • 3 large eggs
  • 1 teaspoon pure vanilla extract
  • 1 Tablespoon 100% pure maple syrup
  • 6 Tablespoons unsalted butter, melted
  • Melted, unrefined coconut oil for brushing the waffle iron
Instructions
  1. Preheat waffle iron to desired heat level.
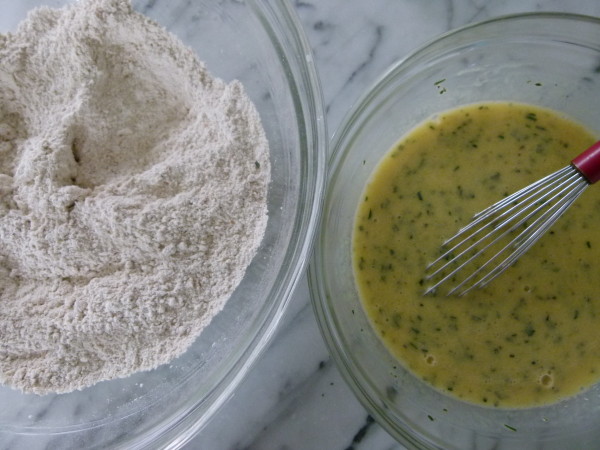
  2. Combine the flour, baking powder, baking soda and salt in a large mixing bowl.
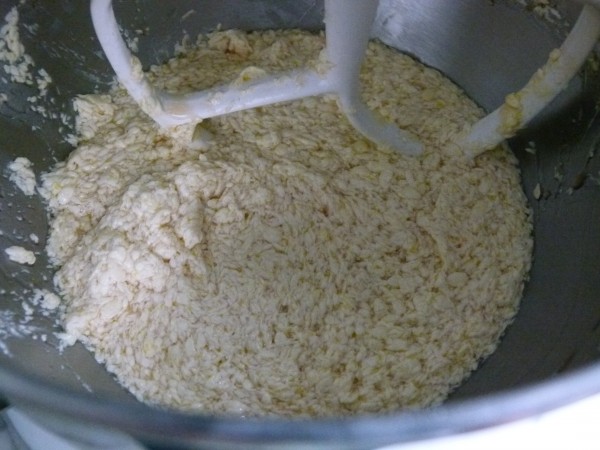
  3. In a medium bowl or 4-6 cup measuring cup, whisk together the buttermilk, eggs, vanilla, maple syrup and melted butter until well blended. (A blender can do this easily, too.)
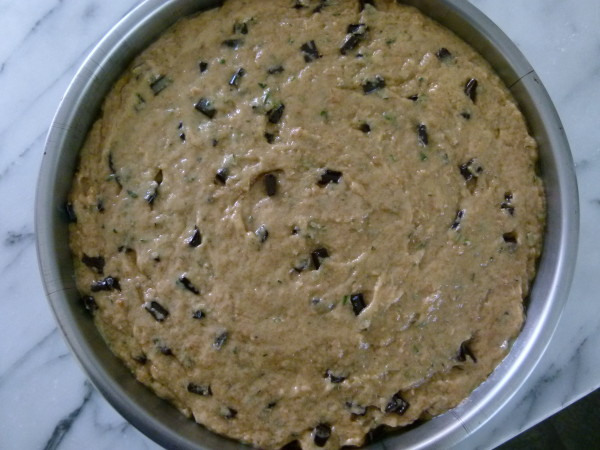
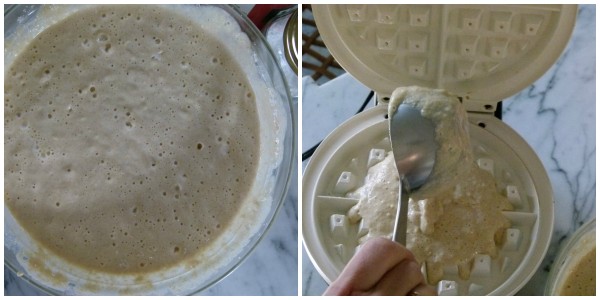
  4. Pour the wet mixture into the dry ingredients and stir until just combined.
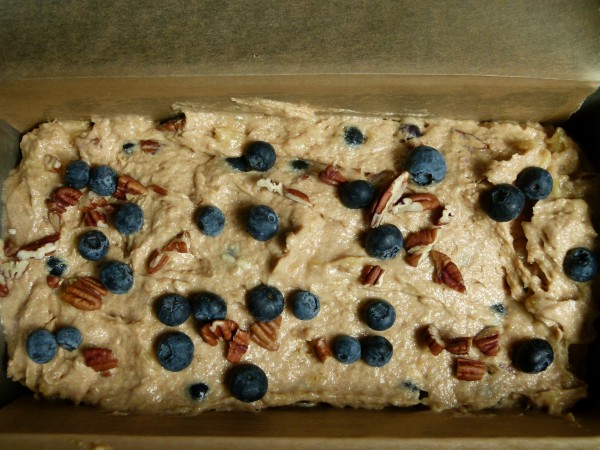
  5. Brush the inside of the waffle iron with coconut oil and spoon about a scant ½ cup of batter onto the middle. Add blueberries, chocolate chips or diced banana to the surface, if desired. Close the waffle iron and follow the manufacturer’s directions for cooking the waffles.
Notes
*Or you can use GF flour blend, such as ⅔ cup oat flour, ⅔ cup buckwheat flour and ⅔ cup brown rice flour.  Millet flour can also be use.

**No buttermilk?  Sub half unsweetened yogurt and half whole milk.


whole grain buttermilk waffles recipe (refined sugar-free, gluten-free adaptable) | Pamela Salzman

Vegan apple spice snacking cake recipe (refined sugar-free)

vegan apple spice snacking cake | pamela salzman

I just took stock of my pantry because baking season has officially begun.  It started slowly with a few batches of cookie dough for back to school lunches.  Then Mr. Picky’s birthday rolled around last week and whoosh it’s Rosh Hashana this Wednesday night already!  I don’t need to tell you what is just around the corner, do I?

grease the cake pan and line with parchment if desired

Thankfully, I share the Jewish holiday cooking with my mother-in-law and sister-in-law.  We each host a meal and cook whatever we want.  I have the first day of Rosh Hashana lunch, as well as the break fast on Yom Kippur evening.  The break fast is actually one of my favorite holidays to host because people literally starve themselves for 24 hours (no water either!) and then come to my house to eat.  I could basically serve anything and it would be a hit!

dry ingredients

One of the nice traditions of the Jewish new year is eating seasonal foods.  Love that!  Apples are likely the most important food along with honey which symbolize the hope of a sweet year ahead.  I have been loving the new crops of local apples flooding the markets over the past month.  My kids particularly love Honeycrisp, Pink Lady (my personal fave), Granny Smith.  I use apples all over the place at this time of year — turned into applesauce, sautéed on top of pancakes and waffles, cooked into oatmeal, chopped in salads and folded into simple snacking cakes like this one.

wet ingredients

I saw a recipe a few years back for a Depression era chocolate cake called “Wacky Cake.”  The cake didn’t use any “expensive” ingredients like eggs, milk or butter and I think got it’s name “wacky” because somehow the crazy recipe actually produced a moist, delicious cake.  There are a gajillion recipes for the classic chocolate Wacky Cake, but last year I decided to put a twist on the (vegan) recipe and use apples and spices instead.  Delicious!

batter before apples and raisins


diced apples and golden raisins

The result was a moist, fragrant and just sweet enough little cake that I think is just perfect for after school snacks, lunch box treats, brunch or anytime you need a seasonal dessert for a fall gathering, like Rosh Hashana!!  I make some sort of apple dessert every year for my luncheon, but I am very fond of this one because it is so darn easy and it freezes amazingly well.  It is also pretty clean: whole grain flour, minimal amount of unrefined coconut sugar, and very little oil (I use unrefined coconut oil.)  My entire family loves it!

add walnuts to the top of the cake

You can do different things with this easy cake.  You can double the recipe and bake the cakes in 9-inch round pans for a 2-layer cake.  I would use this vegan frosting or a classic cream cheese frosting to go between the two cakes and on top.  If you don’t like raisins, leave them out.  Or instead of placing the walnuts halves on the top of the cake, chop them up and fold them into the batter.  Or make this into muffins.  For my do-aheaders, make this today and freeze it for the upcoming holiday (Rosh Hashana, Halloween, Thanksgiving — GASP!)  If you are celebrating the new year this week, may it be a sweet one!
vegan apple spice snacking cake

vegan apple spice snacking cake | pamela salzman


Vegan Apple Spice Snacking Cake
Author: 
Serves: makes 1 8 x8 cake or 12 standard muffins
 
Ingredients
  • 1 ¾ cups whole wheat pastry flour or whole spelt flour
  • ½ cup coconut palm sugar or brown sugar or cane sugar
  • 1 teaspoon baking soda
  • 1 teaspoon ground cinnamon
  • ½ teaspoon aluminum-free baking powder
  • ½ teaspoon sea salt
  • ¼ teaspoon ground nutmeg
  • ⅛ teaspoon cloves (optional)
  • ¼ cup melted coconut oil or unsalted butter (not vegan)
  • 1 Tablespoon apple cider vinegar or distilled white vinegar
  • 1 teaspoon pure vanilla extract
  • ½ cup water
  • ½ cup orange juice*
  • 1 large apple, peeled, cored and diced, about 1 cup
  • ½ cup unsulphured raisins (optional)
  • 16 raw walnut halves, if desired
Instructions
  1. Preheat oven to 350 degrees. You can grease your pan with coconut oil or butter and line it with unbleached parchment paper if you want to remove it from the pan to serve it. Otherwise, no greasing necessary if you will cut pieces from the pan to serve.
  2. Whisk together the flour, sugar, baking soda, cinnamon, baking powder, salt and nutmeg. Make a well (indentation) in the flour mixture.
  3. Pour the coconut oil, vinegar, vanilla, water and orange juice in the well and stir until everything is just combined. Do not overmix!
  4. Fold in diced apple pieces and raisins.
  5. Pour batter into pan and smooth out top. If you want, evenly space walnut pieces over batter. Bake for 30 – 40 minutes or until a toothpick inserted in the center comes out clean.
Notes
*Or use all water and up the coconut sugar to ⅔ cup.  You can also add diced dates.

Whole Grain Olive Oil Cake with Rosemary and Dark Chocolate Recipe (refined sugar-free)

whole grain olive oil cake with rosemary and dark chocolate | pamela salzman

I made this cake once to bring a friend’s house for dinner and people were stealing each other’s crumbs.  I served it to my family and my son spit it out.  Just being honest.  It would be really awesome to say that my family loves everything I make, that my 10-year-old scarfs down whole grain cakes with rosemary and dark chocolate and never, ever, ever asks for Flaming Hot Cheetos.  But alas, I live in the real world with at least one child, as well as one adult, whose palates are rather, shall we say, simple.

ingredients


chopped rosemary

But if I catered to the lowest common denominator in my house all the time, we’d never get to know the deliciousness that is this nutty, earthy, lightly sweet cake with a savory infusion of rosemary.  And dark chocolate!  Maybe it sounds like a weird combo to you.  I actually wasn’t sure myself when I first whisked these ingredients together, but the scent emanating from my oven was enough to convince me that this is a very tasty cake.

mix wet into dry

time to be baked

I love rustic desserts.  The flavors are deep and I don’t have to worry about anything looking too perfect.  And I think anything rustic lends itself better to whole grain flours.  I found this recipe in one of my favorite cookbooks, Good to the Grain, by Kim Boyce.  She uses refined flours and refined white sugar, but I actually think the cake tastes better and more interesting with whole spelt and whole wheat pastry flour, and sweetened with maple syrup.  I also don’t find myself in a sugar coma after eating a piece of this.

whole grain olive oil cake with rosemary and dark chocolate |pamela salzman

I mentioned that I have made this cake for after dinner, but I think it would also be lovely for a brunch.  Sweet and savory all in one easy-to-bake cake.  Maybe with a dollop of Greek yogurt.  Love it.  No thanks, Mr. Picky?  No problem.  More for me!

whole grain olive oil cake with rosemary and dark chocolate | pamela salzman

5.0 from 1 reviews
Whole Grain Olive Oil Cake with Rosemary and Dark Chocolate Recipe
Author: 
Serves: 8
 
Ingredients
  • 1 cup unrefined, cold pressed, extra virgin olive oil + extra for greasing pan
  • ¾ cup whole spelt flour (or use all purpose)
  • 1 ½ cups whole wheat pastry flour or all-purpose flour
  • ¾ cup Grade A maple syrup or natural cane sugar*
  • 1 ½ teaspoons aluminum-free baking powder
  • ¾ teaspoon sea salt
  • 3 eggs, at room temperature
  • ¾ cup whole milk or unsweetened hemp milk, at room temperature
  • 1 ½ Tablespoons fresh rosemary, finely chopped (measure, then chop)
  • 5 ounces bittersweet chocolate (70% cacao), chopped into ½-inch pieces
Instructions
  1. Preheat the oven to 350 degrees. Grease a 9-inch round cake pan with olive oil.
  2. Whisk the dry ingredients (including cane sugar, if using) in a large bowl. Set aside.
  3. In another large bowl, whisk the eggs thoroughly. Add the maple syrup (if using), olive oil, milk and rosemary and whisk again.
  4. Using a spatula, fold the wet ingredients into the dry, gently mixing until combined. Stir in chocolate. Pour the batter into the pan, spreading evenly and smoothing the top.
  5. Bake for about 45-50 minutes, or until the top is domed, golden brown and a skewer inserted into the center comes out clean. The cake can be eaten warm or cool from the pan, or cooled, wrapped tightly in plastic, and kept for 2 days.
Notes
*If using cane sugar, add with the dry ingredients.  If using maple syrup, add with the wet ingredients.


Blueberry-Banana Spelt Bread Recipe (gluten-free version too!)

blueberry-banana bread | pamela salzman

This year I am trying to get an early jump on the beginning of school.  I actually say that every year and I still end up in those ridiculous lines at Staples on the first day of school.  My oldest daughter is going into 12th grade (I am clutching my heart right now), so you would think that I had this thing down.  So not the case.  Until now.  I just figured out really late in the game that I need to outsource, meaning I need to delegate some of these tasks to other people.  No, I don’t all of a sudden have a staff of helpers at my disposal.  But I do have capable children that have waaaaaay more time on their hands than I do and they can navigate the internet like nobody’s business.  Why didn’t I think of this 10 years ago?

these are ripe bananas

The kids have just ordered their supplies, backpacks and lunch paraphernalia online and helped fill out a stack of forms (they all know their birthdays and where we live, right?).  This has been such a huge help that I am even going to ask them to start helping with their lunches.  Just don’t tell them yet.  I need to figure out a way to break this to them gently!

wet mix


whole spelt flour

I also thought I would start stocking the freezer with some goodies so weekday meal preparation goes a little more smoothly.  I made a few delicious quick breads last week and halved each of them.  One half to enjoy now and the other half is frozen for a rainy day, i.e. a future school day breakfast or lunchbox snack.  I dug into my archives (have I been online long enough to have an archive?) and put a summer twist on my date-sweetened banana bread, one of my absolute favorite, wholesome quick breads.  I actually made three loaves — one with whole spelt flour and two with a blend of gluten-free flours with which I have been experimenting lately.  I am using more and more spelt flour instead of whole wheat, especially in sweet things.  Read about why I love spelt here!  And since I know so many of you wan to avoid gluten, I also made a couple of loaves with different gluten-free flours.  You can always use your favorite store-bought gluten-free flour blend (my favorite is King Arthur) plus some xanthan gum, but those can be a bit pricey.  Either way, it reminded me how versatile most recipes are and that I only need to change a few ingredients to make something more seasonal and/or new.  All the loaves turned out amazing and the kids gobbled them up!

sprinkle some blueberries and nuts on top too

This weekend I’m also going to make and freeze some cookie dough, brown rice for rice bakes, fresh fruit for smoothies and chicken stock since the weather has started to get a little chilly here.  How are you getting organized for the beginning of the new school year?  Would love for you to share.   May the force be with all of us!

blueberry-banana spelt bread | pamela salzman

blueberry-banana spelt bread | pamela salzman

5.0 from 2 reviews
Blueberry-Banana Spelt Bread
Author: 
Serves: makes 1 9 x 5-inch loaf
 
Ingredients
  • 8 Tablespoons unsalted butter or unrefined coconut oil, at room temperature
  • ½ cup maple syrup (I prefer Grade A which has a more subtle flavor)
  • 2 large eggs, at room temperature
  • 1 Tablespoon pure vanilla extract
  • 2 cups whole spelt flour or whole wheat pastry flour
  • 1 teaspoon baking soda
  • ½ teaspoon aluminum-free baking powder
  • ½ teaspoon fine grain sea salt
  • 3 large ripe bananas, peeled and mashed (about 1 cup)*
  • 1 cup fresh blueberries
  • ½ cup chopped pecans or walnuts (optional)
Instructions
  1. Preheat the oven to 350 degrees. Grease the bottom and sides of a 9x5-inch loaf pan. Line with parchment paper, if desired.
  2. Beat the butter with the maple syrup in the bowl of a mixer fitted with a paddle attachment. Add the eggs and vanilla and combine well. The mixture will look curdled and that is normal.
  3. In a medium bowl mix together the flour, baking soda, baking powder and sea salt. Add to the wet mixture and combine until just blended. Fold in the mashed bananas and most of the blueberries and nuts. Save a few bleuberries and nuts for the top of the loaf.
  4. Pour into the prepared pan and sprinkle the reserved blueberries and nuts on top. Bake for 55-65 minutes, or until a toothpick inserted in the center comes out clean. Cool in the pan 10 minutes and then remove the bread and transfer onto a rack.
Notes
*Do not attempt this with bananas that are unripe.  They are neither sweet enough nor soft enough.


this one is gluten-free

Gluten-free dry mix to sub for the 2 cups of spelt flour:

½ cup sorghum flour

½ cup millet flour

½ cup sweet rice flour

¼ cup GF oat flour

3 Tablespoons potato starch

1 Tablespoon tapioca starch

1 teaspoon xanthan gum


How To Make Pie Crust

I am a total sucker for seasonal fruit desserts, and pies are no exception, especially in the summer and fall.  But we know each other well enough by now to know that I’m not a big dessert pusher.  I think overdoing sugar and refined foods like white flour can really compromise your health.  But,  during the holidays when the apples, pears and pumpkins are at their peak, I rationalize it all by adding a hefty dose of love to my pies!

What is nice about seasonal fruit desserts is that the fruit should be naturally sweet enough that we don’t need to add too many sweeteners to make them taste fabulous.  Typically, I use 4-6 Tablespoons of sweetener in a whole pie which can serve 8-10 people, and I don’t think that’s over the top.  Many cakes call for 2 cups of sugar just to provide you with a reference point.

Looking on the bright side, I love how “homemade” pies are.  The fruit is peeled and cut by hand, and if you make your own crust, that too is rolled and shaped by your loving hands.  In fact, I think pies look better and more special when they have that imperfect crimping and uneven glaze – a telltale sign that this came out of my kitchen.

Many people have told me that making pie crust looks intimidating.  But if you’ve ever made and rolled out cookie dough, it’s actually easier than that!  Even though I have a pie recipe posted on the site, I thought it would be helpful to include a step-by-step post for how to make pie crust.  Here are a few tips to help:

  • Necessary tools  You don’t need much, but a food processor or a pastry blender are very helpful.  If you have neither, I have used 2 knives with success.  On the other hand, besides an empty win bottle in a pinch, I haven’t found a good substitute for a rolling pin, which you’ll need to roll out the dough.
  • Cold Keeping everything cold is half the battle in making excellent dough.  If the butter warms up, it can make your dough too soft and it can melt on you.  Butter can be cut ahead and put back in the fridge.  Even your flour can be refrigerated.  And it is essential that the water you add is ice cold.  Some people like to make their pies in the morning, before the kitchen heats up.  And keeping this tip in mind, if you have to take a break from making your crust, or if your pie is ready to go in the oven but it seems a little soft and sticky, place everything into the refrigerator to firm it all up.
  • Butter  I know there are many people who can argue that a combination of butter and shortening or butter and lard make the tenderest, flakiest pie crusts, but you couldn’t pay me to eat Crisco or hydrogenated oils and I don’t have access to organic lard from grass-fed cows, so that’s not an option.  Organic butter is a natural, whole food and I’m ok with it in moderation.
  • Flour  Here’s the problem.  I hardly ever use white flour.  It’s refined and processed and basically a dead food with no nutrition.   I love using whole wheat pastry flour or white whole wheat flours whenever I can in place of white flour, but not in pastry dough.  Whole grain flours tend to result in a much drier, more crumbly dough which isn’t very easy to roll out.  It also tastes more “whole wheat-y” which my family doesn’t care for when they’re eating an apple pie.  If you must include some whole grain in your dessert, you can make the dough with half white and half whole wheat pastry flour.  I used to make half my pies like this for Thanksgiving and my sister-in-law and I were the only ones who would eat the wheat ones.  What’s the point of that?  Another option is to use white spelt flour, which is more water soluble than wheat flour, is a little more digestible and has a sweeter flavor.  White spelt flour makes very nice pastry.  If you just can’t go there, fruit crisp is always an option!
  • Water  Pie crust recipes should give you a range for how much water to use because it’s impossible for every cook to be working under the same conditions.  Moisture is something that will vary in the air, flour and butter that we use.  Always start with the lower range of water listed and increase as needed.
  • Don’t over mix  Pie crust is not like cake batter.  You actually do NOT want to completely blend the butter into the flour.  In fact, it is ideal if you have little pea-sized pieces of butter in your dough.   When the crust bakes in the oven, the heat will cause the moisture in the butter to steam up, creating the wonderful flakiness you want.
  • Give it a rest  This is a step you don’t want to skip since it accomplishes two important things.  Allowing your dough to chill out in the refrigerator helps the gluten in the dough relax so you don’t have tough pastry and it also firms up that butter again (see second tip above.)  30-60 minutes is enough time to do this, however you can absolutely refrigerate the dough for a couple of days or freeze it for a few months, if necessary.
  • Rolling it out  If your dough has been in the refrigerator for more than an hour, you may need to let it sit on the countertop for 15 or 20 minutes so that it will be easy for you to roll out.  If the dough starts cracking, it’s likely because it’s too cold.  Lightly flour your countertop and your rolling pin and start rolling from the center out, regularly checking to make sure your dough can always move around on your countertop without sticking.  If you really have a hard time rolling out the dough, you can stick it between two pieces of plastic wrap and roll it out that way.  To know if you’ve rolled it out enough, invert the pie plate over the rolled out dough.  If you have a good two inches beyond the rim of the plate, you’re good to go.
  • Moving the dough to a pie plate It sounds trickier than it is.  I usually gently fold the dough in half and transfer it to a pie plate that way, but you can also roll the dough around the rolling pin and then unroll it onto the pie plate.  Fit it into the plate.
  • Blind baking Sometimes a recipe will tell you to prebake the pie crust before filling it.  This is common with liquidy fillings such as custard or pumpkin, or if you cook the filling separately and you won’t be putting the pie in the oven.  With the crust inside a pie plate, prick the crust all over the place with a fork.  Place a piece of parchment paper on top of the crust and fill the parchment with pie weights or dried beans (the beans won’t be edible after you bake them, though.  Just keep them for the next pie.  I’ve been using the same dried beans since college –swear!)  This prevents the crust from puffing up.
  • Finshing  It doesn’t have to be perfect.  Do your best and have fun.  I seal the top and bottom crusts together and use my thumbs and pointer fingers from both hands to pinch the dough.  Or an easier method is use the tines of a fork and press the crust all along the rim of the plate.  Lastly I cut a couple slits in the center of the top crust so steam can escape and you won’t have a watery pie.  Glazing with an egg wash makes the pie look beautiful, but if egg is out of the question, you can use a little cream.

Although I have made many pies in my day, I still love learning how to do things better.  Please share your favorite tips and tricks for making pie crusts and pies.  I’d also love to hear what desserts you are all making for Thanksgiving!!!!


5.0 from 1 reviews
Pie Crust
Author: 
Serves: makes enough for a 9-inch double-crust pie
 
Ingredients
  • 2 ½ cups all-purpose flour or white spelt flour
  • 1 teaspoon cane sugar
  • 1 teaspoon sea salt
  • 2 sticks unsalted butter, cut into pieces
  • 5-8 Tablespoons ice water
Instructions
  1. Place the flour, sugar and salt in the bowl of a food processor fitted with the metal blade and pulse a couple times until blended.
  2. Add the butter to the flour and pulse until the mixture resembles small peas.
  3. Pour 5 Tablespoons of ice water on top of the flour mixture and pulse about 10 times. Avoiding the blade, carefully grab a small handful of dough and squeeze together. If the dough holds together without crumbling, it’s ready to be formed into a disc. If it’s too dry, pulse in another few teaspoons of ice water until dough holds together.
  4. Transfer dough to a piece of parchment and bring dough together to form a ball. Divide in half and shape into two disks. Wrap each disk in parchment and refrigerate at least 30 minutes at which point it will be ready to roll out. Or you can keep the dough refrigerated for 2-3 days, or in the freezer, well wrapped for 2-3 months.

Homemade graham crackers recipe

There are some things that I just don’t think are worth making from scratch (like puff pastry) and then there are some things I can’t believe can be made from scratch and taste good, like graham crackers.  Wait, not just “good,” but amazing!   Who doesn’t remember eating graham crackers as a child?  But you always got them out of a box, right?  Not anymore.  Be prepared to have your life changed!

Even though my mom didn’t allow many over-the-top sweets in the house, graham crackers sometimes made the cut.  Whereas Ho-Ho’s and Twinkies were definitely taboo, graham crackers seemed relatively benign and not overly sugary.  My mom bought Honeymaid, which we used to smear with peanut butter or cream cheese or just dunk in milk.  My kids would like to do the same, but I rarely buy packaged cookies.  First of all, I think that homemade always beats store-bought.  And it’s hard to find treats made with unrefined ingredients and without lots of scary chemicals.

Last June and July my summer intern Hannah and I went graham cracker crazy, making a new batch or two every week.  I finally settled on this recipe here which my friend Cheryl helped me with.  These graham crackers have just the right amount of sweetness, which makes them a perfect snack for your little guys and for s’mores.  I like using a combination of whole spelt or wheat flour and brown rice flour.  Rice flour is very light and has a grittiness that I think is ideal for graham crackers.  If you don’t have it, just use all spelt or wheat flour and they will still be delicious.  But I think the key with graham crackers is to ask yourself how perfect you want them to look. I so admire people who have the patience for making things look like they popped out of Martha Stewart Living because I don’t.  I will admit, I did my best with the batch I photographed for this post, but normally I leave my ruler in the drawer.  If you are giving these as a gift, using them for s’mores, or offering them to a large group of children, you may want the crackers to be as uniformly sized as possible so it might be worth the effort to measure out the dough and where you cut your lines.

This recipe is otherwise crazy simple,  but makes a great impression.  Last summer my go-to dessert for entertaining was a s’mores bar with these homemade graham crackers which Mr. Picky helped me bake on more than one occasion.  To me, having my kids helping me in the kitchen is the best part of making your favorite treats from scratch.   I also love that you can put into them what you want.  All organic ingredients?  No problem!  Half the sugar of their traditional counterparts?  Go for it!  Lots and lots of love?  Always!

5.0 from 1 reviews
Homemade Graham Crackers
Author: 
Serves: makes 24 3 x 3½ -inch crackers
 
Ingredients
  • 1 ¼ cups whole wheat, whole wheat pastry, white whole wheat or spelt flour
  • 1 ¼ cups brown rice flour (or just use all wheat/spelt flour)
  • ½ cup coconut palm sugar, sucanat or brown sugar
  • 1 teaspoon baking soda
  • 1 teaspoon ground cinnamon
  • ½ teaspoon sea salt
  • ½ cup (1 stick) unsalted butter, cold and cut into pieces
  • ¼ cup honey
  • ¼ cup milk, non-dairy milk or water
  • 1 teaspoon pure vanilla extract
Instructions
  1. Preheat oven to 350 degrees.
  2. In the bowl of a food processor or mixer, pulse or stir the dry ingredients until combined.
  3. Add the butter pieces to the dry mixture and pulse or process until it looks like coarse meal.
  4. Add the honey, water, and vanilla and process until a ball of dough comes together. Pull the ball of dough out of the food processor and cut it in half. It is a very soft dough. But if it’s super sticky or if your kitchen is warm, refrigerate the dough 30 minutes.
  5. Roll out one ball of dough between two sheets of parchment paper to a 10 x 12” rectangle or about ⅛” thick. Remove the top sheet of parchment and slide the bottom sheet of parchment with the rolled out dough to a baking sheet. With a pizza wheel or a sharp knife, cut the dough into rectangles. If desired, prick the dough with the tines of a fork to create the classic graham cracker “dots.” Repeat with second ball of dough.
  6. Bake for 18-22 minutes or until the edges are starting to turn brown. Remove from oven and cut crackers again along the same lines with a pizza wheel or knife. Allow to cool on the pans for about 2 minutes. Separate crackers from each other and cool on racks. If some crackers seem a little thicker than others, put them back in the warm oven with the heat OFF for 10 more minutes and up to an hour. This will dry them out a bit and ensure that they will be crispy.
  7. Cool completely and store in an airtight container.
Notes
To make gluten-free graham crackers, use 2 ½ cups all-purpose gluten-free flour blend, such as King Arthur plus ½ teaspoon of xanthan gum in place of the wheat and rice flours.


Cornbread (with quinoa!) Recipe

Let me just start out with a disclaimer — I am not from the South.  I am a Yankee, which means I like my cornbread with half cornmeal and half flour and a drop of sweet and that’s that.  If you are a true Southerner and wouldn’t dream of adding honey or sugar or maple syrup to your cornbread, I hope we can still be friends.  I didn’t grow up eating it and I have no recipe that was passed down from my grandmother.  But my husband and my kids love cornbread, especially at certain times of the year and I love preparing them good food that makes them happy.

After I posted my Thanksgiving menu a few months ago, I had many inquiries about my cornbread recipe, so I figured I would share it just before the Super Bowl when you might be whipping up a big pot of chili.  Even if you’re not eating something that goes well with cornbread, you will be delighted with this quick bread just by itself.  My husband loves to split a wedge of the bread, toast it and slather it with a little more butter or honey or strawberry preserves for a nice treat.  I typically like a barely sweet cornbread, which this is if you use 4 Tablespoons of honey.  You can adjust the sweetness level according to your preference, but the best part about this bread is how moist and corny it is (even after several days.)     I’m not sure anyone in my family knows that I add cooked quinoa to the batter.  And it’s not because I’m the kind of person that sneaks healthful food into recipes and doesn’t say anything.  I’m not clever enough for that.  But I do try to use food efficiently and one day I had a bit of quinoa left in the fridge and since quinoa and corn go really well together, I decided to add it to the corn bread batter.  You don’t notice it at all, except that I think the quinoa adds a nice moistness to the bread and a great boost of protein.

I’ve made this cornbread so many times with different combinations of ingredients based on whom I am feeding or what is available to me in the pantry and it has never disappointed.  Although I’ve learned something about how certain foods affect the end result.  Dairy, such as milk and butter, result in a slightly more golden color to the finished bread.  Coconut oil leaves a slightly sweet, subtly tropical aftertaste.  The whole spelt flour is slightly coarser than whole wheat pastry, and made the bread feel a little more “whole grain.”  If you use olive oil, you can taste it if the bread is still warm, but not after it has cooled a bit, but that will also depend on the kind of olive oil you use.  Take this as a foundation recipe and have fun with it.  Drop the honey and add diced cooked bacon, finely chopped jalapenos, or shredded cheese.  Or prepare as is with some vanilla extract and blueberries or raspberries for a sweet treat.

Are you entertaining for the Super Bowl?  I would love to hear what you’re making.  I am making guacamole and baked chips, but I’ll also serve it with jicama.  I’ll make a giant pot of Vegetable Chili tomorrow and reheat on Sunday.  I am also doing a Baked Potato Bar with lots of toppings (what in the world is easier to make than a baked potato?)  I actually love a baked potato topped with chili!  A big chopped salad and cornbread for sure!  Daughter #1 told me she’s in charge of desserts.  I’m nervous.  Other fun foods for the big game can be Roasted Vegetable and Black Bean Enchiladas (especially the casserole version), a Taco or Fajita bar, Cilantro-Lime Slaw or a make-your-own sandwich bar with grilled chicken.  I know my family in NY will be making some form of baked pasta, meatballs, sausage and peppers.  Know your audience, I guess!

If you have leftover guacamole and/or salsa after the game, save it for a great soup recipe on Monday.   Have fun!

5.0 from 2 reviews
Cornbread (with quinoa!)
Author: 
Serves: makes 1 8x8-inch pan or 12 muffins
 
Ingredients
  • 1 cup whole wheat pastry flour or whole spelt flour or your favorite GF baking mix
  • 1 cup yellow cornmeal, preferably stone-ground*
  • 2 teaspoons aluminum-free baking powder
  • ½ teaspoon aluminum-free baking soda
  • ½ teaspoon fine grain sea salt
  • 1 cup buttermilk**
  • ½ cup melted unsalted butter (1 stick) or coconut oil or olive oil
  • 2 large eggs***
  • 4-6 Tablespoons honey or Grade A maple syrup (I use 4 Tbs.)
  • 1 cup COOKED quinoa (optional)
  • 1 cup fresh or frozen corn kernels (optional)
Instructions
  1. Preheat the oven to 375 degrees. Line a 12-cup muffin pan with paper liners or grease an 8 x 8-inch baking dish (I usually dip a pastry brush in the melted butter I’m using in the recipe and grease the pan that way.)
  2. In a large bowl, whisk together the flour, cornmeal, baking powder, baking soda and salt. In a medium bowl or a blender, combine buttermilk, melted butter, eggs and honey until well blended. Pour wet ingredients into dry ingredients and stir until just combined. Stir in the corn kernels. Using an ice cream scooper, divide the batter into the muffin pan or pour it into the prepared pan.
  3. Bake the muffins for 15-18 minutes, or until the tops are golden and a toothpick inserted in the center of a muffin comes out clean. Or bake the cornbread in the 8 x 8 pan for 30-35 minutes. Cool for 5 minutes on a wire rack before removing muffins from the pan.
Notes
*If you like a more tender, less grainy cornbread, increase flour by ½ cup and decrease cornmeal by ½ cup.

**Or ½ cup whole unsweetened yogurt + ½ cup milk of choice. Or 1 cup dairy-free milk + 1 Tablespoon lemon juice or apple cider vinegar

***Or 2 Tablespoons ground flax meal mixed with 6 Tablespoons warm water. Allow to sit 10-15 minutes. And then allow batter to sit 5-10 minutes before baking.

****To cook quinoa: Rinse quinoa and then cook 1 cup quinoa in 1 ¾ cups boiling water covered for 15 minutes. Remove from heat and allow to sit for 10 minutes, covered. Makes about 3 cups cooked quinoa.