A buckle is basically a coffee cake with way more fruit than you’d put in an actual cake. Sometimes you’ll see recipes for fruit buckles with a serious crumble topping plus a glaze. But you know my style for desserts is to keep the sugar at a minimum and not go overboard. I am crazy for the combo of stone fruit and berries, which is perfecto for summer. But if you want to change up the fruit, by all means go for it!Continue reading
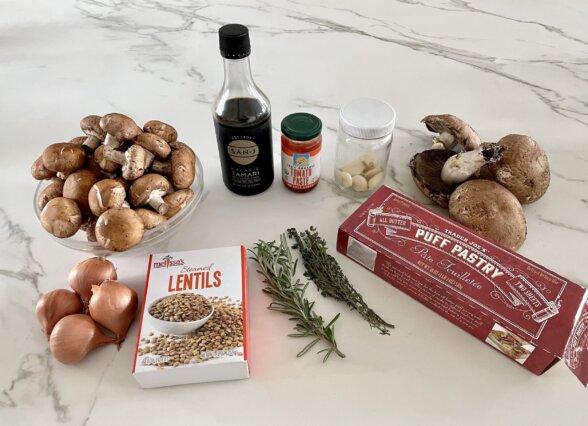
I hope you are having a lovely holiday season! Hubs and I are so enjoying being with all the kids. There is truly nothing better. Once the kids leave, you relish any time you spend with them! We had the best visit with my family on Long Island and now we are in Utah with Hubs’s family. I will pray for good snow but mild temps! I’m such a wimp. If you want a super impressive and delicious main dish for a night in or for a New Year’s dinner, I have you covered. I served this Mushroom Wellington at a dinner party last year, and I couldn’t believe how everyone went crazy for it – even the carnivores!Continue reading
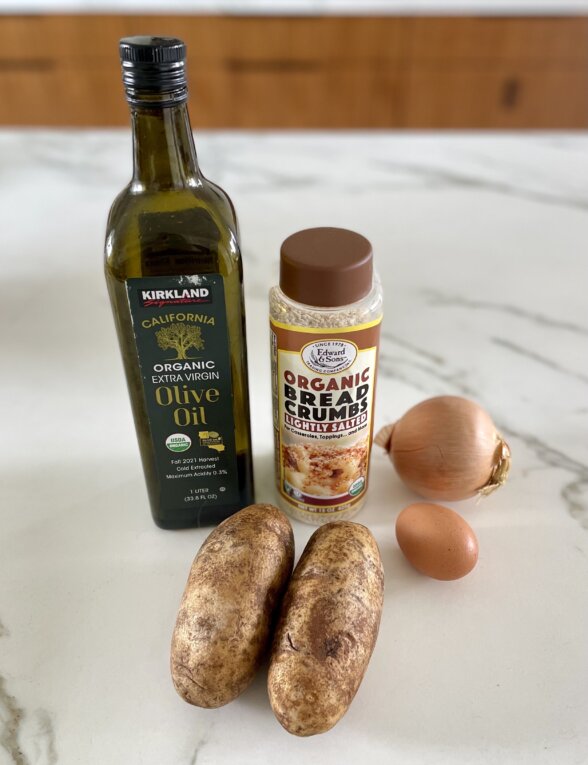
You don’t have to celebrate Hanukkah to love latkes, also known as potato pancakes. What could be better than lacy potatoes and onions made crispy in oil? I think they’re as delicious as the next person but I do not love standing over the stove making them. They’re pretty labor-intensive and they make the house (and my hair) smell like fried food. I have a solution – The Skillet Latke!Continue reading
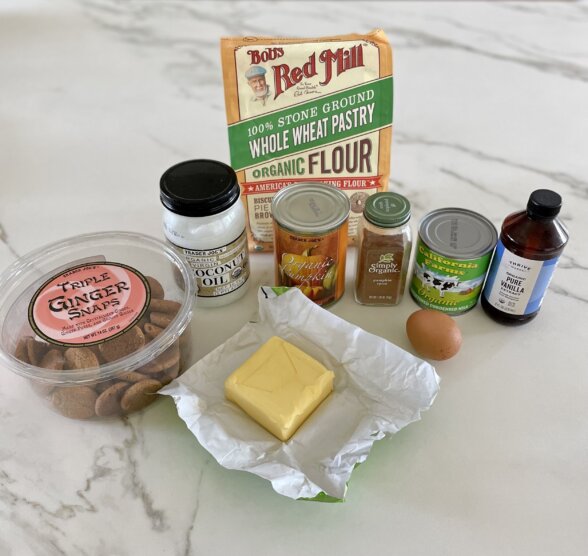
Just when I think I can’t come up with another awesome pumpkin dessert recipe, I do! This is a pumpkin pie meets a crumble meets a gingersnap cookie! What’s not to love? And it’s so easy, has make-ahead written all over it and can be adaptable. There are many twists on this recipe including a graham cracker crust or a chocolate cookie crust and you can omit the crumble topping if you want to keep this simple.Continue reading
I always spend Christmas week in New York with my family and it’s a great time catching up, celebrating and eating. Eating a lot. It’s a bit hard for me to follow my normal food routine when I am there. I don’t have my juicer, or access to the juice bars which are all over the place where I live. We visit with a lot of family and go out to eat more often than I do at home. But one of the main obstacles to my eating beet greens and quinoa as often as I like is that my husband’s favorite food group is pizza. Make that New York pizza. His second favorite food group is pasta, the kind with gluten. And then it’s anything “alla Parmigiana.”
So when we go to New York, he’s like a kid in a candy store, except all the candy has dairy, white flour and tomato sauce! Of course, I have a slight weakness for good NY pizza myself and I partake in the food fest, too (although maybe not quite as much.) Ironically, after we indulge in pizza for most of the week on Long Island and Brooklyn, we get together at the home of one of my cousins in Westchester and have, if you can believe it, a “pizza tasting party” with a few of my cousins and their kids. I swear.
We each bring a few pies from our favorite pizzerias and taste them all. There’s clam pie from Pepe’s and Sicilian from Sal’s; a cheeseless pizza from Polpetina and a classic from Johnny’s. There are others that I can’t even remember. The first few years that we did this, we actually voted to determine which was the best pie. Now we don’t even pretend we care. We just eat it all and wash it down with Chianti. And this year, a heating pad came out at bedtime.
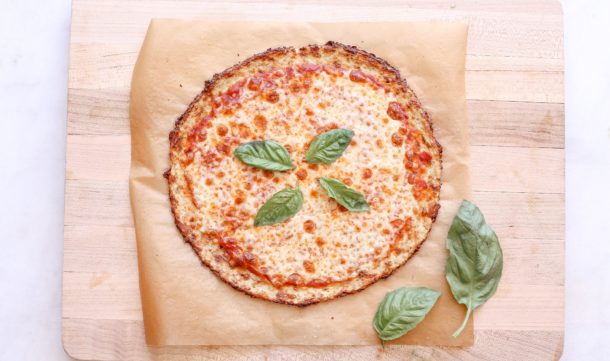
I don’t normally like to mess with a good thing, but sometimes curiosity gets the best of me. A few years ago, I noticed a lot of recipes flying around the internet for pizza crust made out of cauliflower. Life has taught me, among other things, that if something sounds too good to be true, it probably is. And cauliflower crust pizza recipes proved that point. I tried a bunch and didn’t see what all the fuss was about. The cauliflower crust was usually mushy and fell apart, and the pizza would have to be eaten with a fork and knife. That didn’t fly in my house.
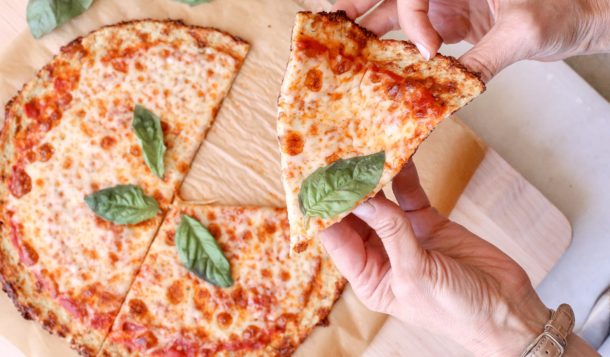
But I have always been intrigued with the idea of making a treat like pizza something I could eat a little more frequently and then I saw the recipe that I knew would work. And I saw the step that was missing from all my previous attempts and I kicked myself. How could I not have thought of squeezing the cauliflower dry?! After another attempt, I was actually able to make a pizza that tasted enough like pizza that I could pick up and eat it out of my hand.
I didn’t think my husband would actually like this at all, so I was pretty close to not even letting him sample it. But he came home one day and the house smelled like pizza and there was no stopping him. He LOVED this! And so did my girls! Mr. Picky still has issues with cheese and isn’t a pizza fan anyway, so he was predictably lukewarm about it.
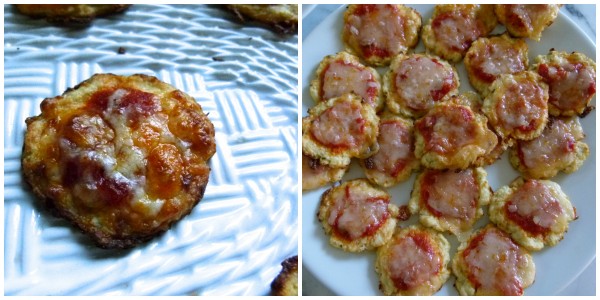
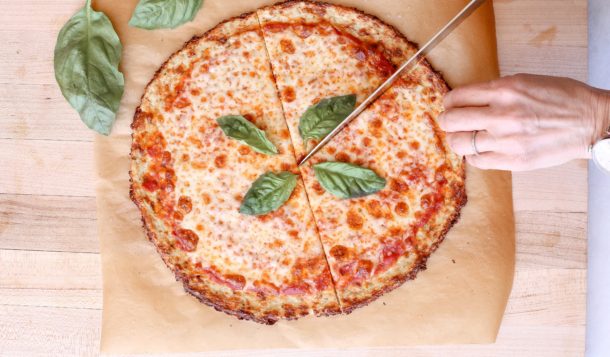
My only caveat here is that it’s not an “instant” recipe. You have to cook and squeeze the cauliflower dry, then make and prebake the crust. All steps I think are worth it for a pretty nutritious pizza. As you can see in the above pictures, I made a large pizza and then many mini pizzettes, which I think would be amazing for a party. So much of this recipe at be done ahead of time, including make the crust batter or even pre-baking the crusts!
Hoping you all may enjoy good health and much happiness in 2014!!
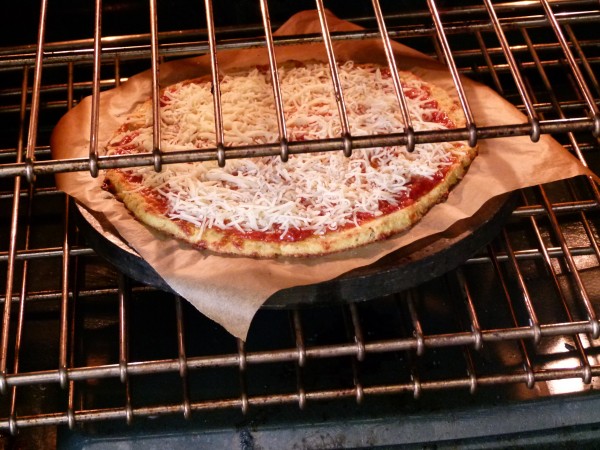
Preheat oven to 450 degrees and place a baking sheet or pizza stone in the oven as it is heating up.
Brush a large piece of parchment paper with olive oil (big enough to fit your pizza stone or baking sheet.)
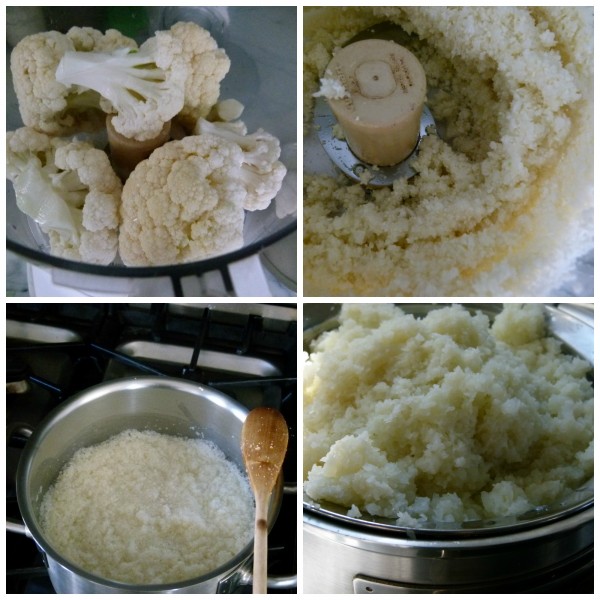
Place the cauliflower in a food processor fitted with a metal blade. Pulse for about 30 seconds until you get very small pieces (resembling snow or rice.) You should end up with about 3 cups of cauliflower.
Place the cauliflower and 2 cups of water in a medium saucepan and bring to a boil, lower the heat to a simmer, cover, and allow to steam for about 5 minutes, or until the cauliflower is tender. Drain in a fine mesh sieve and allow to cool. (If you use a colander to drain, you will lose a lot of cauliflower.)
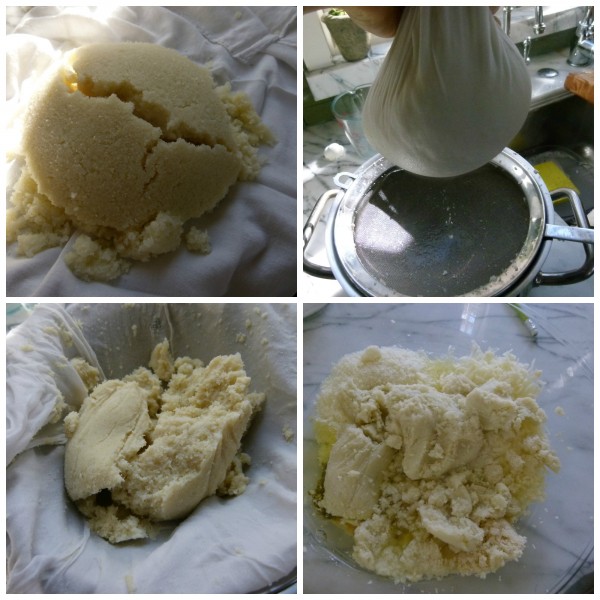
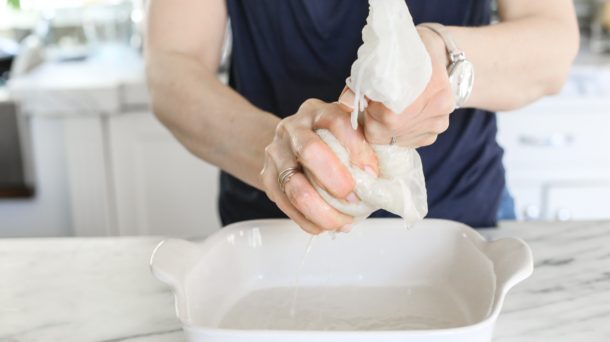
When the cauliflower is cool enough to handle, wrap it all up in a clean, thin dish towel and squeeze out as much excess water as possible. The less moist the cauliflower, the crispier the crust will be.
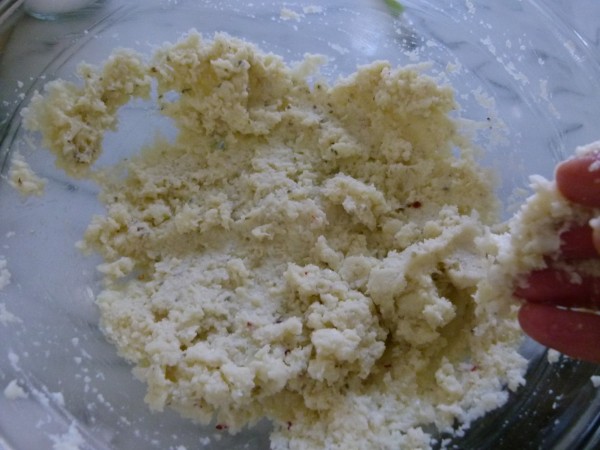
Transfer the squeezed cauliflower to a bowl and stir in the parmesan or pecorino, mozzarella, salt, dried oregano, garlic powder, red pepper flakes and almond meal/flour. Add egg whites and mix with your hands until combined.
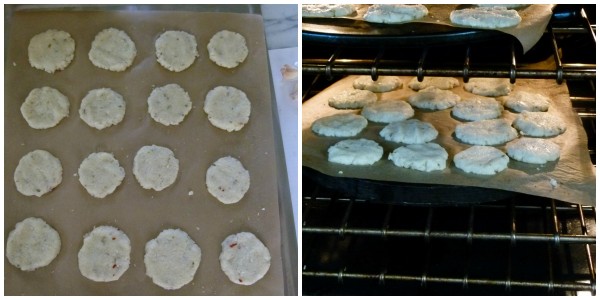
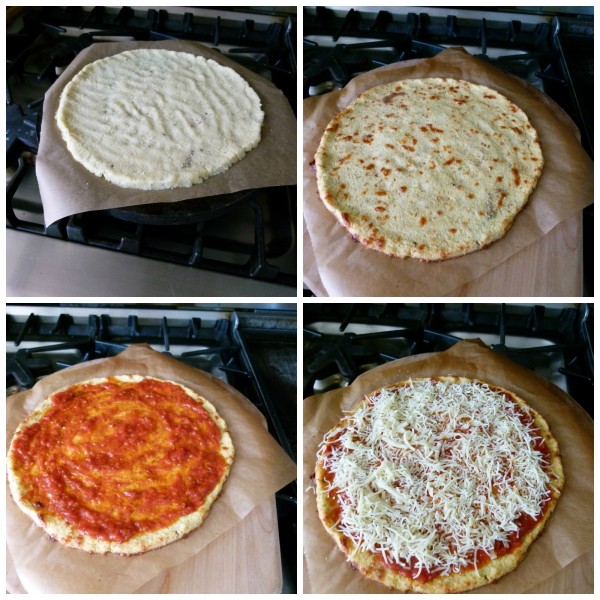
Using your hands, form the mixture into tightly packed 3” rounds or a 10-12” round and place them on the oiled parchment paper.
Slide the parchment paper onto the HOT baking sheet or pizza stone. An inverted baking sheet or a pizza peel can help with this.
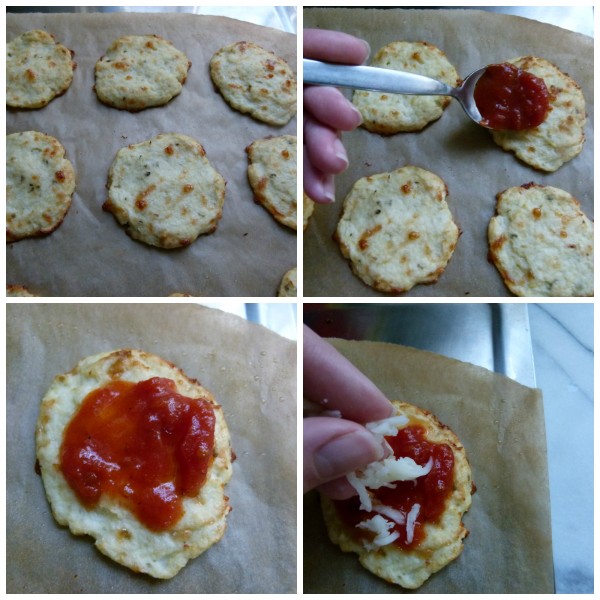
Bake for approximately 15 minutes until the crust starts to turn golden brown.
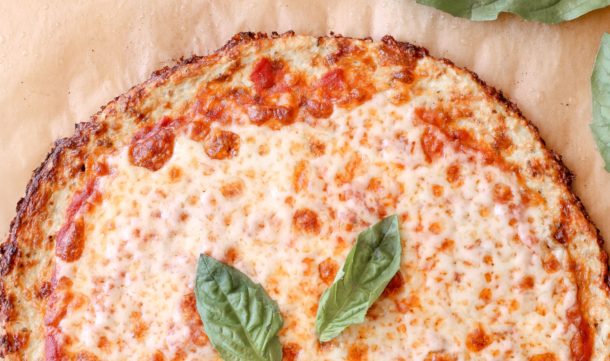
Remove crusts from oven and top with desired toppings, then place back in the oven and cook for another 7 minutes until cheese is melted and bubbly. You just don’t want to overdo it with any toppings that are very wet.
Allow to cool slightly and serve.
Notes
You can bake the crusts earlier in the day and refrigerate them until ready to top and bake. Or you can make the batter the night before.
I’m a happy mama since I picked up Mr. Picky from sleepaway camp on Saturday. 13 days is just too long for me to be apart from that guy. I have been enjoying all the stories, hanging on every word as if he traveled around the world. Bless his heart, Mr. Picky “snuck” some food from camp to bring to my husband and me. Thankfully, it was from breakfast the morning he left and not from last week. From his backpack he pulled out a paper cup with a few pieces of melon for me and a cup with mini cinnamon buns mixed with tater tots for my husband. What does that tell you?
While Mr. Picky can’t stop talking about his counselors, his bunk mates and all the competitions in which he participated, I had to find out about the food. What was your favorite dinner? Did you eat any vegetables? What did you drink? Blah, blah, blah. I’m so predictable, but I have no self control. I have to give the camp props that soda is not served. I don’t know if I could handle that.
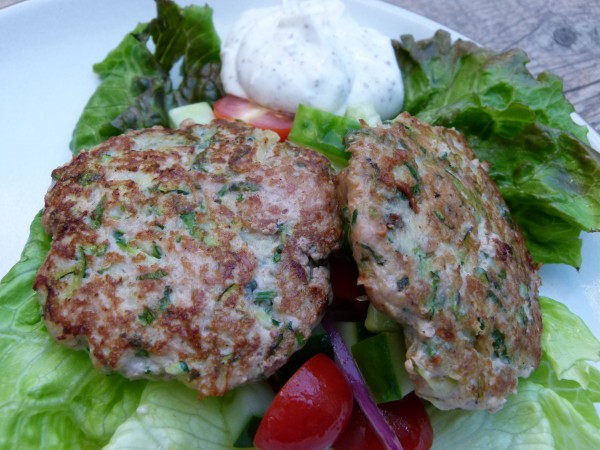
So what I have gathered is that Mr. Picky didn’t eat any protein at breakfast ever since, go figure, the camp doesn’t serve Organic Pastures Raw Organic Milk, and Mr. Picky still doesn’t eat eggs or cheese. And it also sounds like the only vegetable he ate was cucumber. So we have some catching up to do! One thing that my son loves is any type of burger, even veggie burgers. I made these turkey burgers the week before he left and he loved them so they’re going on the dinner menu again this week. It’s another winner recipe from Yotam Ottolenghi’s “Jerusalem” cookbook.
If you’re bored with plain burgers, these are so different and delicious. And a great way to make a (small) dent in your zucchini crop. They are moist, herby and they’ve got a great kick to them. If spicy isn’t your thing, you may want to cut back to a pinch of cayenne. Although if you make the sumac sauce, which is delicious, it really cuts the heat from the burgers. But I’m not really doing dairy these days and Mr. Picky didn’t want any sauce, so I only made half the recipe for the sauce and I thought it was the perfect amount. I also didn’t use traditional buns when I made these. Bread will just detract from the tastiness of these burgers! Instead we ate them on lettuce leaves with some chopped cucumbers and tomatoes, right up my alley. Of course if you want a more traditional burger, you can probably get 6 “standard” size patties and pile them onto buns with all your favorite fixings. Delish!
Author: Pamela, adapted from "Jerusalem" by Yotam Ottolenghi and Sami Tammy
Serves: 4-6 (Makes about 18 1½ ounce burgers or 12 2½ ounce burgers)
Ingredients
1 pound ground turkey (I like dark meat)
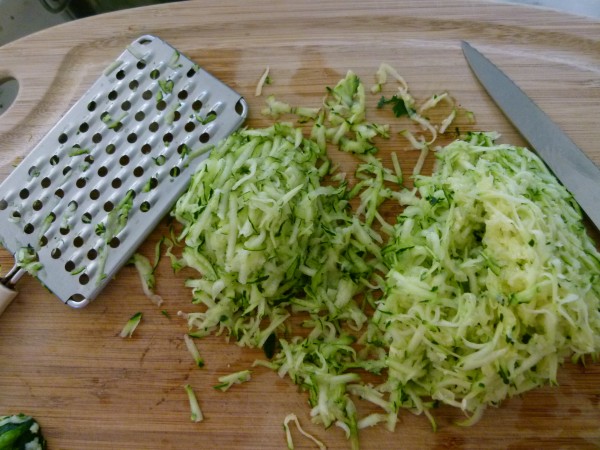
1 large zucchini, coarsely grated (scant 2 cups)
3 scallions, white and green parts, thinly sliced
1 large egg
2 Tablespoons chopped mint
2 Tablespoons chopped cilantro
2 cloves garlic, grated or minced
1 teaspoon ground cumin
1 teaspoon sea salt
½ teaspoon freshly ground black pepper
¼ teaspoon cayenne pepper (perfect for us, but the original recipe called for ½ teaspoon; you can use even less if you don’t want them spicy)
unrefined olive oil, coconut oil or ghee for searing
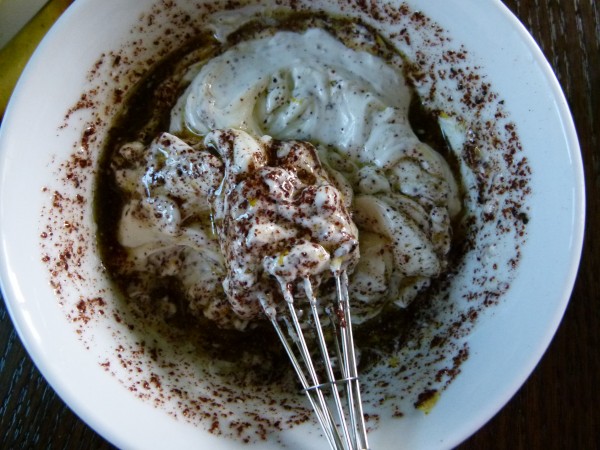
For the Sour Cream & Sumac Sauce:
Scant ⅓ cup full-fat Greek yogurt
Scant ¼ cup sour cream (or use all Greek yogurt)
½ teaspoon grated lemon zest
½ Tablespoon freshly squeezed lemon juice
½ small clove garlic, grated or minced
2 ¼ teaspoons unrefined, cold pressed, extra virgin olive oil
1 ½ teaspoons sumac
¼ teaspoon sea salt
a few grinds of freshly ground black pepper
Instructions
Make the sour cream and sumac sauce by placing all the ingredients in a small bowl. Stir well and set aside or chill until needed.
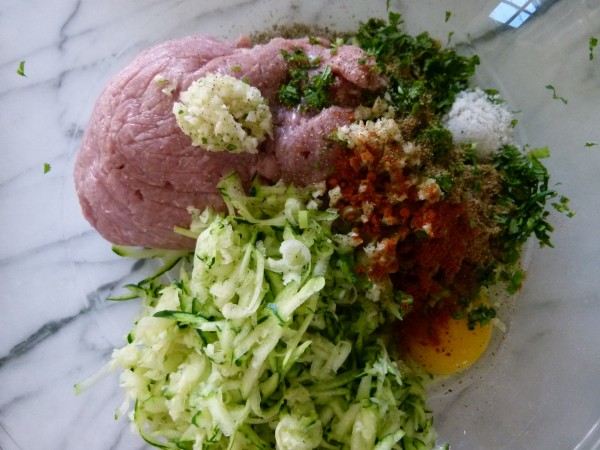
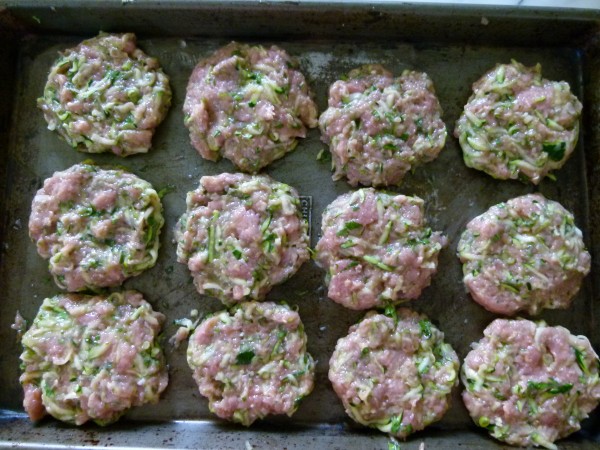
In a large bowl, combine all the ingredients for the patties except the olive oil. Mix gently with your hands and then shape into about 18 burgers, each weighing about 1 ½ ounces or 12 burgers, each weighing about 2 ½ ounces.
Pour enough oil into a large frying pan to form a layer about 1/16 inch thick on the pan bottom. Heat over medium heat until hot, then sear the patties in batches on both sides. Cook each batch for about 5-7 minutes on each side, adding oil as needed, until golden brown and cooked through.
Serve warm or at room temperature, with the sauce spooned over or on the side.
Everyone this week was asking about my Mother’s Day and I realized I completely forgot to recount the day for my dear readers! After all, it has been tradition the last couple of years that my husband and bother-in-law and sometimes my father-in-law too, plan and execute Mother’s Day lunch for the ladies. They even do the dishes! The whole day feels like such a treat since I can even workout in the morning AND wash AND blow dry my hair. Before noon! Now that doesn’t happen very often. But I also really look forward to trying some new eats, like the bulgur-feta burgers they made last year from Maria Speck’s cookbook. Yummers! Eating food that’s not for a class or my blog is a fun experience for me.
This year, the boys were a little behind on their planning and were deciding the menu on Sunday morning. On their way to the grocery store. I guess they figured the easiest place to go for recipes with which they were familiar was my website. Yep. More of my food. Whatever. It’s all fine. They did a great job even though it took them about 5 hours to make 2 salads and strawberry shortcakes. And my husband put his own (unintentional) spin on my avocado, jicama and mango salad when he substituted curry powder for cumin. The first two letters are the same — easy mistake! Nonetheless, it was a perfect Mother’s Day.
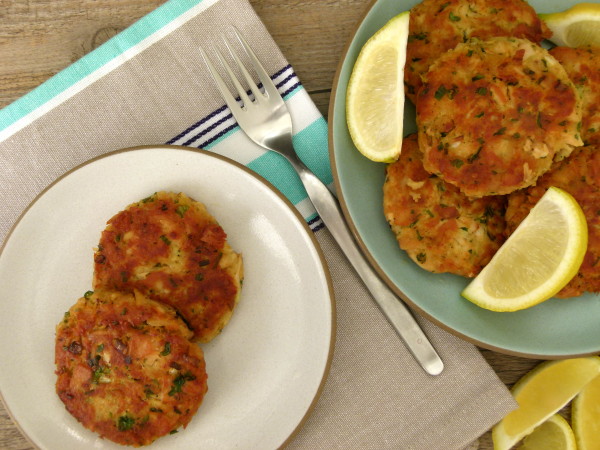
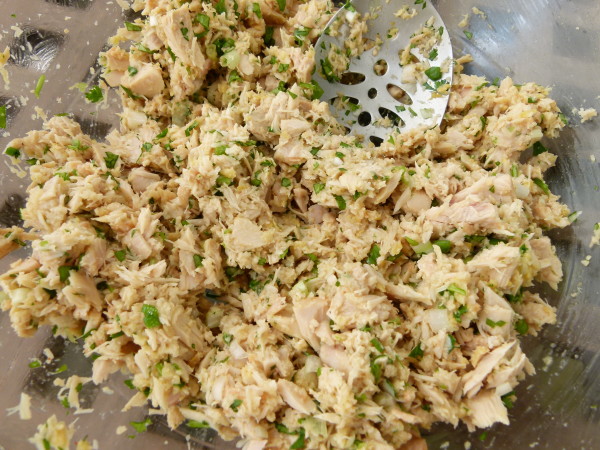
I was working at home the other day with my assistant and normally we throw together leftovers from a class for lunch or make a kale salad with quinoa and whatever is in the vegetable drawer, but yesterday I had a craving for NOT MY FOOD. I was feeling spontaneous and decided to look through my Foodily faves and Pinterest pins. I came upon these tuna patties and nothing could stop me. They reminded me of ones that my mom used to make, except I am fairly certain she used Ritz Crackers as the binder. Gotta love the 70’s.
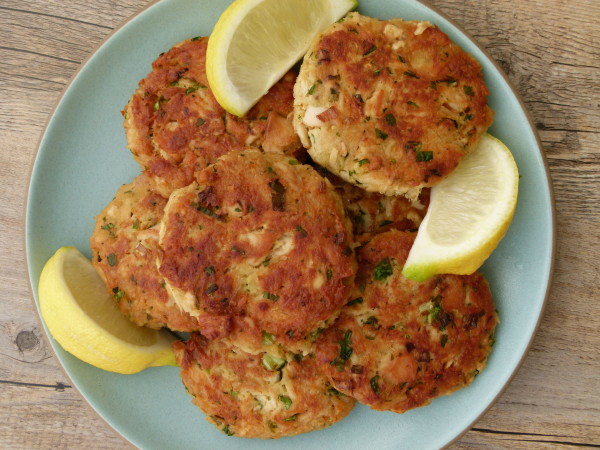
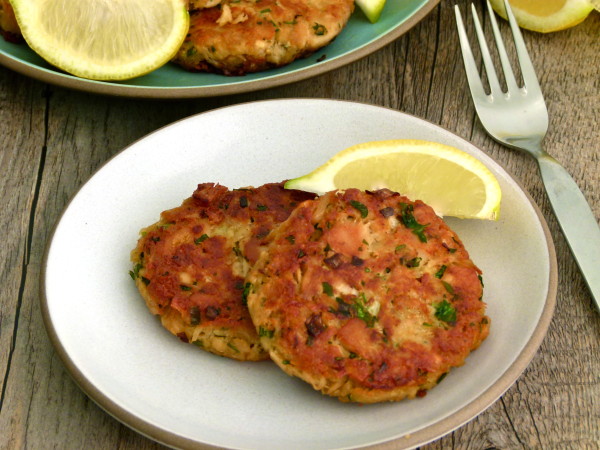
I had all the ingredients handy and we threw these together in no time. They were so delicious and reminded me a little of crab cakes, but much easier on the wallet. Next time I make them, and there will be a next time, I’m going to make a sauce to go with them. I’m thinking something creamy with lemon and capers. I think these could also be great as a mini version for an hors d’oeuvre. We ate them with a mixed green salad and it was a really satisfying lunch.
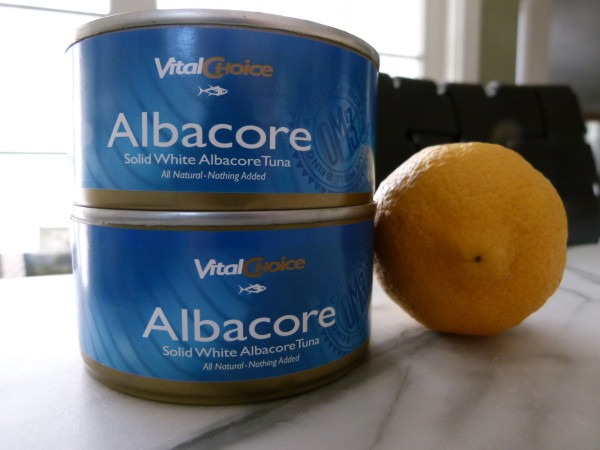
By the way, I have a terrific source for very high quality tuna. I buy it from vitalchoice.com and although it might be one of the more expensive tunas, it’s also the absolute best and Vital Choice doesn’t use BPA in their can liners. Thank you, Vital Choice! This tuna has minimal mercury and is the freshest-tasting I’ve come across. If you have a canned tuna that you love, please share!
Let’s think ahead here. If you want to put the patties together before you leave for the day, or before you start driving everyone to sports practices and music lessons, you can do that and then just saute them right before dinner. You can add some oven fries and a salad or grilled vegetables for a very quick, easy and healthful dinner. Or next year’s Mother’s Day lunch. Hint, hint.
Serves: makes 4 large patties or 7-8 smaller patties
Ingredients
2 6-ounce cans tuna (if you use 5-ounce cans of tuna, decrease lemon juice and water to 2 teaspoons)
2 teaspoons Dijon mustard
½ cup panko bread crumbs (or crumbled crackers or mashed potatoes)
1 teaspoon lemon zest (lemon your lemon before juicing it)
1 Tablespoon fresh lemon juice
1 Tablespoon water (or liquid from the cans of tuna) - omit if your tuna is very wet like some chunk light varieties
2 Tablespoons chopped fresh parsley (measure after it’s chopped)
2 Tablespoons chopped fresh green onions, shallots or chives
Sea salt and freshly ground black pepper to taste (I used ½ tsp. salt and a few grinds of pepper)
A couple dashes of hot sauce or tabasco
1 large egg (I imagine you can substitute 1 Tablespoon ground flax meal mixed with 3 Tablespoons warm water. Just let it sit for 15 minutes before you add it to the tuna mixture.)
3 Tablespoons unrefined olive oil or ghee
1 Tablespoon unsalted butter or ghee
Instructions
Drain the liquid from the tuna cans. If the tuna is packed in water, reserve a tablespoon of the tuna water and also add a teaspoon of olive oil to the tuna mixture in the next step. If your tuna is soggy and not dry, do not add water.
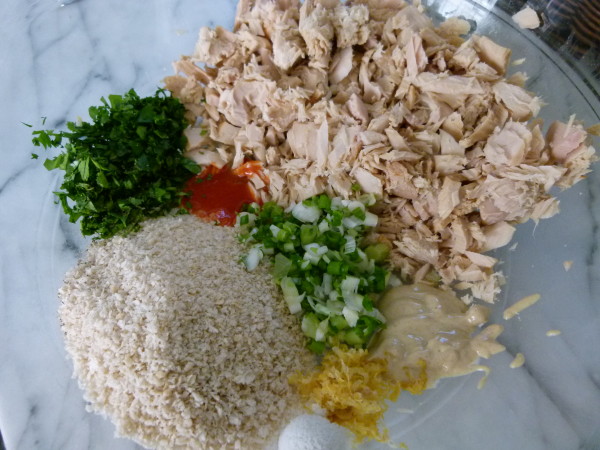
In a medium bowl, mix together the tuna, mustard, bread crumbs, lemon zest, lemon juice, water, parsley, onions, and hot sauce. Add salt and pepper and taste for seasoning before adding in the egg. Add egg to mixture and combine.
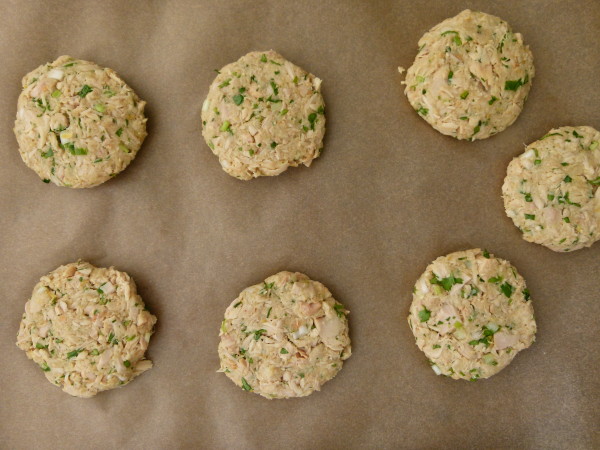
Line a baking sheet or a tray with parchment or waxed paper. To make a patty, shape some of the mixture into a ball and then flatten between your hands. Place all the patties on the prepared tray and refrigerate for an hour so they don’t fall apart when you cook them. If you’re in a hurry, you can stick them in the freezer for 15 minutes.
Heat the oil and butter or ghee in a large skillet over medium heat. Use less fat if you use a smaller skillet. You want the oil and butter to be warm enough so that the patties sizzle when they hit the pan, but you don’t want them to be smoking. Gently transfer the tuna patties to the pan and sauté until browned, about 3-4 minutes on each side.
If I had to pick one cuisine to stick with for the rest of my life, it would be a tough a call. But I could easily live off of Mediterranean food every day. I love the emphasis on fresh vegetables, olive oil, legumes and whole grains, cheeses and fish. Whether it’s Italian, Greek, or Israeli, this way of eating is definitely my comfort zone. And living in Southern California makes cooking Mediterranean-style quite easy with an availability of similar varieties of fresh produce, nuts, dates and olives.
As I’ve mentioned before, one of my favorite things to do is to take a not-so-healthful food that I love and turn it into something I can enjoy regularly. Many years ago I decided to try making falafel (the deep-fried Middle Eastern chickpea nuggets) a little less “deep-fried.” (Ok, not everything Mediterranean is healthful.) Many iterations later I found myself with a delightful, substantial chickpea burger which in turn began my obsession with veggie burgers. I don’t love meat and poultry so much, although I think they are excellent sources of protein if you can find organic, pastured varieties. But I do love hearty, flavorful vegetarian food that makes me feel satisfied, especially anything bean-based which is loaded with low-fat protein and tons of insoluble fiber. I also like having recipes like this for entertaining when I always like to offer a vegetarian option (you’d be surprised how many people choose not to eat meat these days.)
These chickpea burgers are a favorite of mine and my whole family, even Mr. Picky who I am pleased to announce tried one for the first time last week with ketchup. Do what you’ve gotta do, friends. They are definitely a far cry from falafel, though. In fact, the only ingredients that falafel and these chickpea burgers have in common are chickpeas and cumin. But if I do it right, they’re crispy on the outside, moist on the inside and with flavors that remind of falafel. I usually eat veggie burgers sans bun since I find that they are plenty starchy without adding bread. But when serving them to family and friends, I offer warmed, whole wheat pita halves and an array of yummy toppings including sprouts, avocado, tomato slices, lettuce, cooked onion and most importantly, a creamy and refreshing sauce. In my opinion, it’s all about the condiments!
Chickpea burgers (and veggie burgers, in general) are fabulous for entertaining and for busy weeknights since they are best formed in advance and refrigerated so they firm up a bit. Out of the fridge, they cook up in minutes on a hot griddle or skillet. Once you realize how tasty these are, you’ll make a double batch and freeze half. If you freeze them, just don’t forget to place a piece of wax or parchment in between each patty so that they don’t stick together (ask me how I know this.) These burgers may not take you back to your last visit to the Mediterranean, but I hope they’ll keep you from visiting the freezer section of your supermarket! Enjoy~
Place the chickpeas, egg, garlic, salt, cumin, cayenne, lemon zest, flour and parsley in food processor. Pulse until a coarse mixture forms that holds together. It should be moist and sticky.
Place chickpea mixture in a bowl and mix in grated carrot and red onion. Take a ½ cup of the mixture and firmly press it into a patty about 3 ½ inches in diameter and ¼ inch thick. You can also form these into mini-patties for appetizers. Place on a plate or a baking sheet and refrigerate for at least 30 minutes and up to overnight. Cover if refrigerating for more than a few hours.
Heat a couple tablespoons of oil or ghee in a large skillet over medium heat until hot, but not smoking. Add patties to the skillet (do this in batches, if necessary) and cook until crisp and golden brown on the underside, about 6 minutes. Carefully turn over and cook until golden brown on the other side, about 3-5 minutes more.
Serve with or without a warmed pita half or a hamburger bun and suggested toppings.