Vegan apple spice snacking cake recipe (refined sugar-free)

vegan apple spice snacking cake | pamela salzman

I just took stock of my pantry because baking season has officially begun.  It started slowly with a few batches of cookie dough for back to school lunches.  Then Mr. Picky’s birthday rolled around last week and whoosh it’s Rosh Hashana this Wednesday night already!  I don’t need to tell you what is just around the corner, do I?

grease the cake pan and line with parchment if desired

Thankfully, I share the Jewish holiday cooking with my mother-in-law and sister-in-law.  We each host a meal and cook whatever we want.  I have the first day of Rosh Hashana lunch, as well as the break fast on Yom Kippur evening.  The break fast is actually one of my favorite holidays to host because people literally starve themselves for 24 hours (no water either!) and then come to my house to eat.  I could basically serve anything and it would be a hit!

dry ingredients

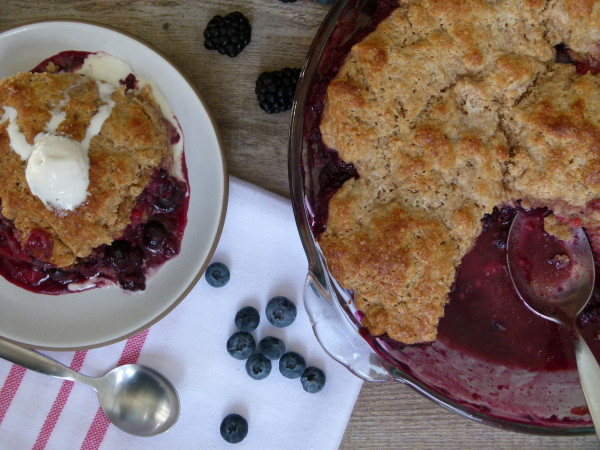
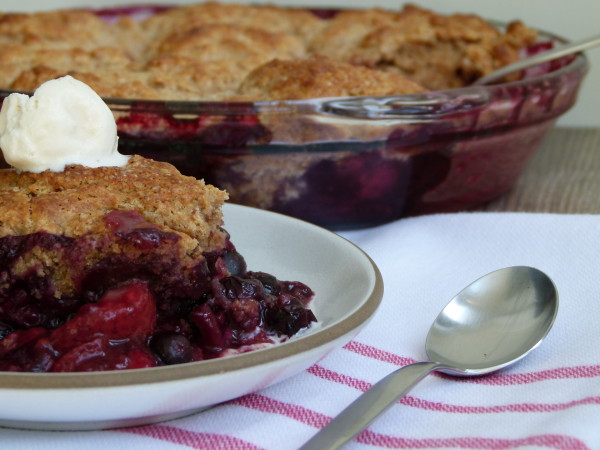
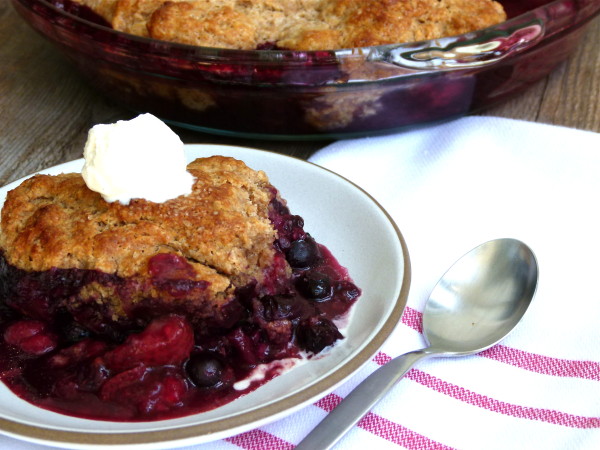
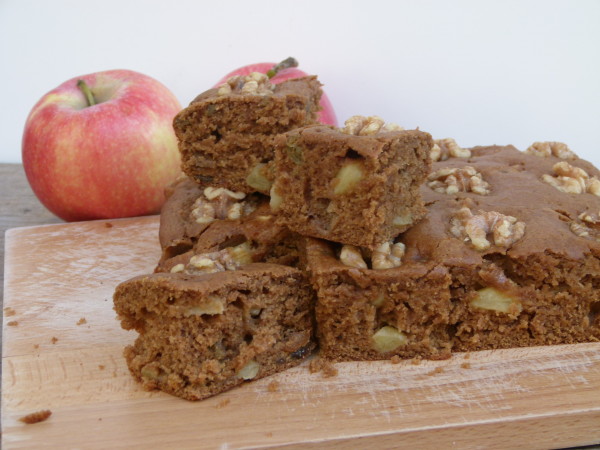
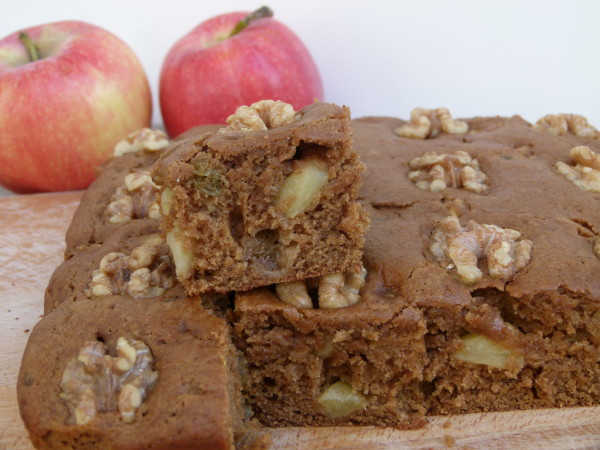
One of the nice traditions of the Jewish new year is eating seasonal foods.  Love that!  Apples are likely the most important food along with honey which symbolize the hope of a sweet year ahead.  I have been loving the new crops of local apples flooding the markets over the past month.  My kids particularly love Honeycrisp, Pink Lady (my personal fave), Granny Smith.  I use apples all over the place at this time of year — turned into applesauce, sautéed on top of pancakes and waffles, cooked into oatmeal, chopped in salads and folded into simple snacking cakes like this one.

wet ingredients

I saw a recipe a few years back for a Depression era chocolate cake called “Wacky Cake.”  The cake didn’t use any “expensive” ingredients like eggs, milk or butter and I think got it’s name “wacky” because somehow the crazy recipe actually produced a moist, delicious cake.  There are a gajillion recipes for the classic chocolate Wacky Cake, but last year I decided to put a twist on the (vegan) recipe and use apples and spices instead.  Delicious!

batter before apples and raisins


diced apples and golden raisins

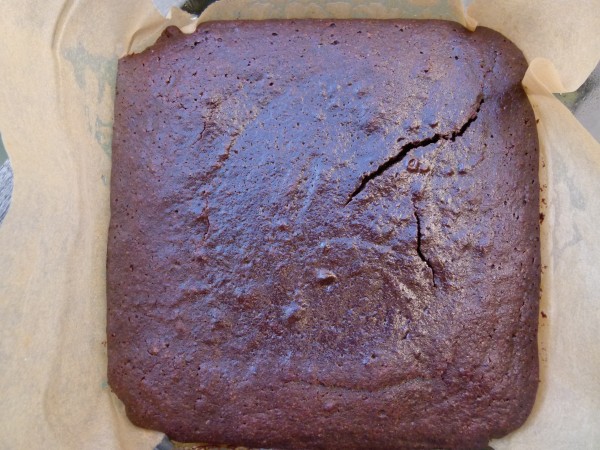
The result was a moist, fragrant and just sweet enough little cake that I think is just perfect for after school snacks, lunch box treats, brunch or anytime you need a seasonal dessert for a fall gathering, like Rosh Hashana!!  I make some sort of apple dessert every year for my luncheon, but I am very fond of this one because it is so darn easy and it freezes amazingly well.  It is also pretty clean: whole grain flour, minimal amount of unrefined coconut sugar, and very little oil (I use unrefined coconut oil.)  My entire family loves it!

add walnuts to the top of the cake

You can do different things with this easy cake.  You can double the recipe and bake the cakes in 9-inch round pans for a 2-layer cake.  I would use this vegan frosting or a classic cream cheese frosting to go between the two cakes and on top.  If you don’t like raisins, leave them out.  Or instead of placing the walnuts halves on the top of the cake, chop them up and fold them into the batter.  Or make this into muffins.  For my do-aheaders, make this today and freeze it for the upcoming holiday (Rosh Hashana, Halloween, Thanksgiving — GASP!)  If you are celebrating the new year this week, may it be a sweet one!
vegan apple spice snacking cake

vegan apple spice snacking cake | pamela salzman


Vegan Apple Spice Snacking Cake
Author: 
Serves: makes 1 8 x8 cake or 12 standard muffins
 
Ingredients
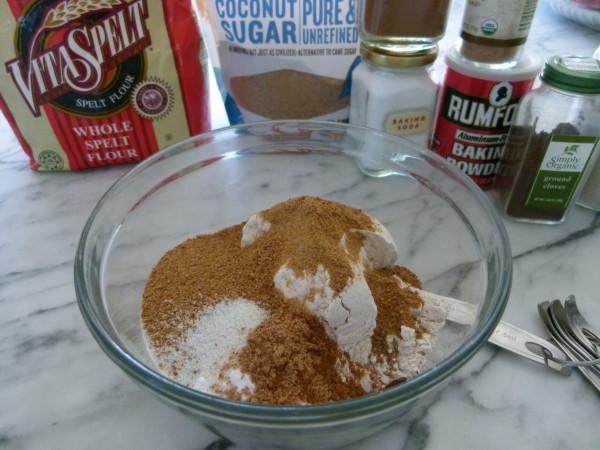
  • 1 ¾ cups whole wheat pastry flour or whole spelt flour
  • ½ cup coconut palm sugar or brown sugar or cane sugar
  • 1 teaspoon baking soda
  • 1 teaspoon ground cinnamon
  • ½ teaspoon aluminum-free baking powder
  • ½ teaspoon sea salt
  • ¼ teaspoon ground nutmeg
  • ⅛ teaspoon cloves (optional)
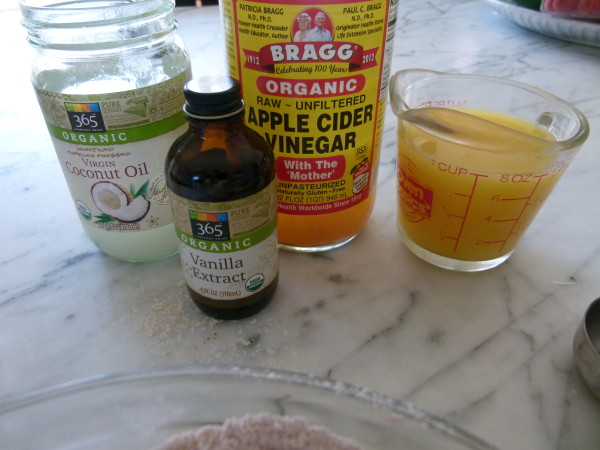
  • ¼ cup melted coconut oil or unsalted butter (not vegan)
  • 1 Tablespoon apple cider vinegar or distilled white vinegar
  • 1 teaspoon pure vanilla extract
  • ½ cup water
  • ½ cup orange juice*
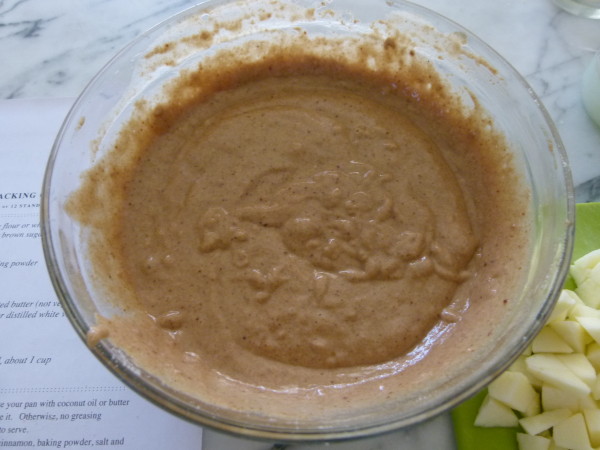
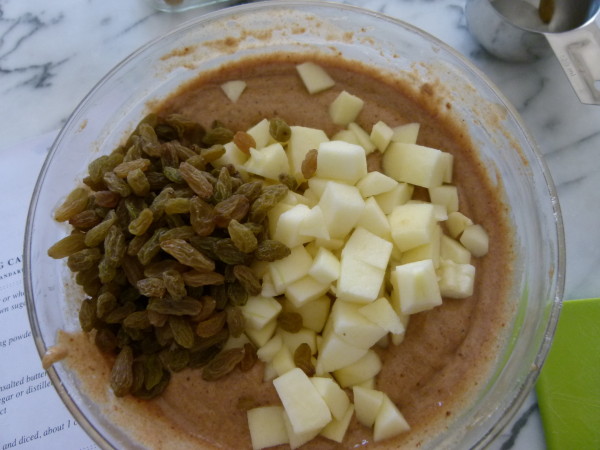
  • 1 large apple, peeled, cored and diced, about 1 cup
  • ½ cup unsulphured raisins (optional)
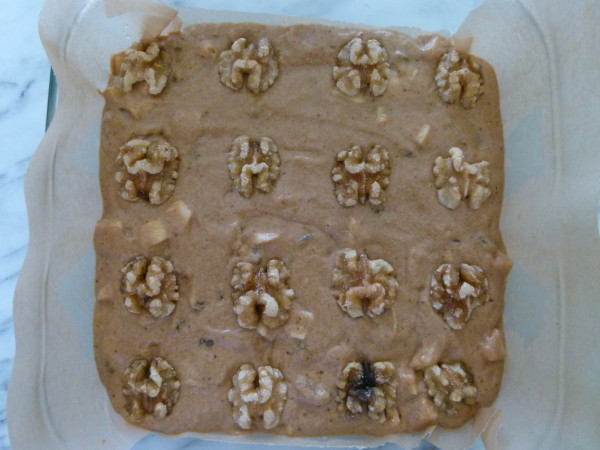
  • 16 raw walnut halves, if desired
Instructions
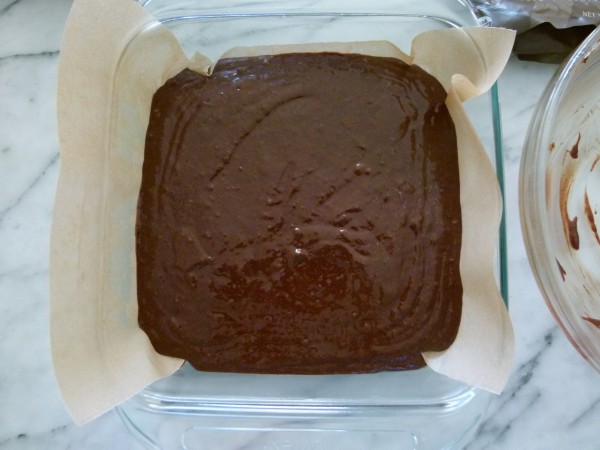
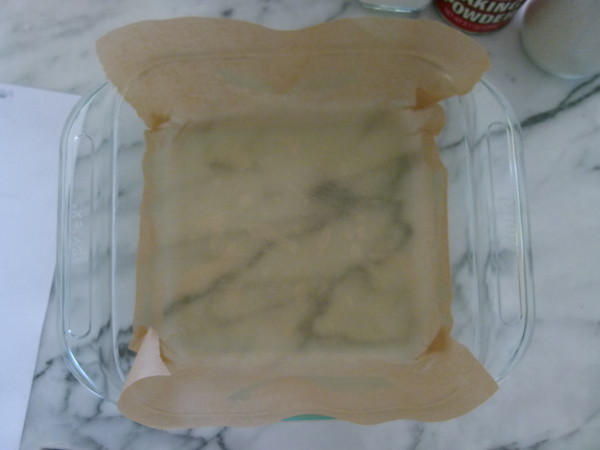
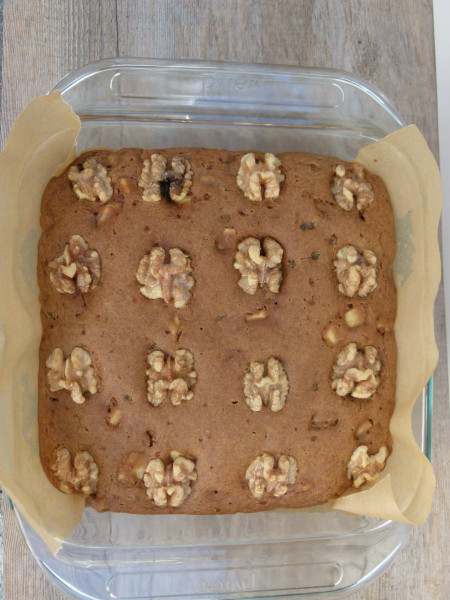
  1. Preheat oven to 350 degrees. You can grease your pan with coconut oil or butter and line it with unbleached parchment paper if you want to remove it from the pan to serve it. Otherwise, no greasing necessary if you will cut pieces from the pan to serve.
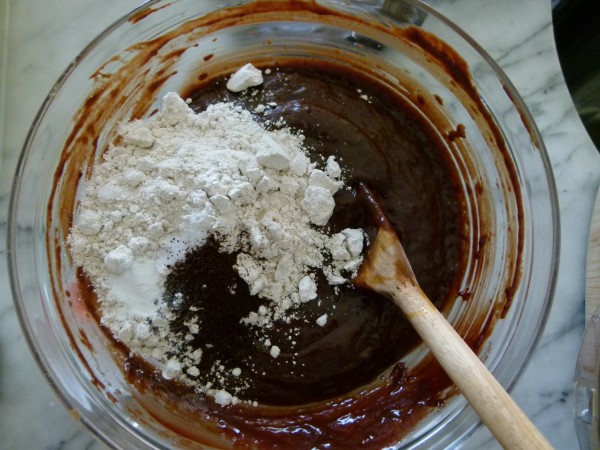
  2. Whisk together the flour, sugar, baking soda, cinnamon, baking powder, salt and nutmeg. Make a well (indentation) in the flour mixture.
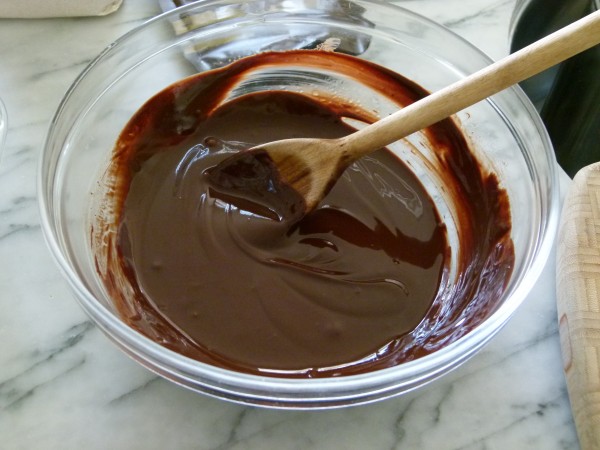
  3. Pour the coconut oil, vinegar, vanilla, water and orange juice in the well and stir until everything is just combined. Do not overmix!
  4. Fold in diced apple pieces and raisins.
  5. Pour batter into pan and smooth out top. If you want, evenly space walnut pieces over batter. Bake for 30 – 40 minutes or until a toothpick inserted in the center comes out clean.
Notes
*Or use all water and up the coconut sugar to ⅔ cup.  You can also add diced dates.

Gluten-free fudgy brownies recipe (refined sugar-free)

gluten-free fudge brownies | pamela salzman

Have you ever noticed that the best food images are usually of desserts?  Every time I go on Tastespotting, it seems like half the photos are sweets.  The irony is that I think desserts are the easiest things to make look and taste good.  Throw together some sugar, butter and chocolate and it’s probably going to be delicious.  Ok fine, I’m simplifying a bit, but I think I’ve tried more new dessert recipes with success than savory.  Anything with the word “crisp,” “cobbler,” “crumble,” or “buckle” is going to be great.  But chicken recipes don’t always provide the same guarantees, don’t you agree?

soak the dates

puree the dates and the soaking liquid

I also feel that way about dessert recipes using unrefined ingredients, especially in the sweetener department.  Show me a chocolate cake using maple syrup and whole grain flour and you have my attention!  It’s not so easy.

brush a little melted butter inside the pan

melt the chocolate and butter in a bowl set over a pan of simmering water

I recently made Ina Garten’s Outrageous Brownies for a large group meeting because they are perfect and it’s what everyone expects out of a brownie — that fudgy flavor and the flaky, crackly top.  (Although how in the world she only gets 20 brownies out of a 12 x 18 pan is a mystery.  I think I got close to 50.)  Unfortunately, I can’t duplicate that texture with honey, coconut sugar or stevia.  I am really committed to using ingredients that are less inflammatory and lower on the glycemic index than white flour and white sugar.  Of course, like I ALWAYS say in my classes, that doesn’t mean higher quality sweeteners are “good” for you or even health supportive.  Your body is just less offended by them.  You should still consume desserts in moderation whether they are made with honey or with sugar.

add in the dry ingredients

My kids and my husband are always the best judges of my cooking because they are brutally honest and they still have a taste for junk.  (People who eat health food 24/7 are much easier to please!)  But what I’ve learned to do is just call it like it is — no sneaky business, no tricky semantics.  These brownies aren’t like Ina’s, but you know what?  They would satisfy any chocoholic’s craving any day.  They’re super moist and fudgy with a rich chocolate flavor.  But they’re sweetened with my two favorite sweeteners, dates and coconut sugar.  I am very sensitive to refined sugars and these brownies don’t affect me at all!  Plus, they’re made with gluten-free oat flour.  Double awesome.  But if you like cake-y brownies, sorry.  This recipe is not what you’ve been waiting for.

ready to bake

I ate one of these brownies warm right out of the pan with some sliced strawberries to cut the sweetness a bit and thought it was fabulous.  Although I wouldn’t argue with you if you wanted to top one with some ice cream.  After a day or two, I pop any extras into the fridge and they are absolutely divine cold.  I taught these brownies in a class last year and I remember making sure I gave all of them away before every class ended because I didn’t want to be left alone with them!  But what you all want to know is — does Mr. Picky like these?  TOTALLY!  In fact, I told him these were gluten-free brownies with dates and he said, “I don’t even care!”

gluten-free fudgy brownies

I think these are best cut into small bites.  And if you have a mini-muffin pan, that would be a great way to go, too.  With Valentine’s Day coming up, these fudgy brownies are perfect for all of your sweethearts!

gluten-free fudge brownies | pamela salzman

5.0 from 1 reviews
Gluten-Free Fudgy Brownies
Author: 
Serves: makes an 8 x 8-inch pan
 
Ingredients
  • 6 Tablespoons unsalted butter or unrefined coconut oil (does infuse a hint of coconut)
  • 8 ounces bittersweet or dark chocolate, coarsely chopped
  • 10 pitted dates (buy the moistest ones you can find), about 1 cup
  • ½ cup hot water
  • ¾ cup coconut palm sugar (or cane sugar)
  • 3 large eggs
  • 1 teaspoon pure vanilla extract
  • ½ cup GF oat flour
  • ½ teaspoon fine grain sea salt
  • ½ teaspoon aluminum-free baking powder
  • ¾ teaspoon instant coffee powder (optional, but makes the brownies taste more chocolate-y)
Instructions
  1. Place butter in a large heatproof bowl set over (but not touching) simmering water; dip a pastry brush in the melted butter and use it to grease the bottom and sides of an 8 x 8-inch baking pan. Add the chocolate to the melted butter and stir frequently until chocolate is melted. Remove bowl from heat; let cool about 10 minutes.
  2. Place the dates and the hot water in a medium the bowl and allow to soak for at least 10 minutes while you prepare everything else.
  3. Preheat the oven to 350 degrees. Line the baking pan with parchment paper, leaving a 1-inch overhang on two sides. Set aside.
  4. Transfer the dates and water to a food processor fitted with the metal blade and process until a smooth paste forms. Add the palm sugar and process until smooth. Alternately you can do this in the bowl of a stand mixer and beat with the paddle attachment. However, the food processor will make the date paste much smoother.
  5. Add the date-sugar mixture to the butter and chocolate mixture and blend well. Add the eggs one at a time, whisking until smooth after each addition. Whisk in vanilla.
  6. Stir in flour, salt, baking powder and instant coffee powder until just combined.
  7. Pour into the prepared pan and bake for 30-35 minutes, or until a toothpick inserted in the center comes out with moist crumbs, but not wet. Do not overbake! Transfer pan to a wire rack to cool completely. They taste best if they have been allowed to sit at least an hour.
  8. Run a knife or offset spatula around the edges of the pan. Pull on the edges of the parchment to lift brownies out of pan. Transfer to a cutting board; cut into 2-inch squares.
Notes
You can fold in ½ cup chopped or halved walnuts and/or ½ cup chocolate chips after the flour.

Vegan Pumpkin Oatmeal Spice Cookies Recipe (gluten-free)

vegan pumpkin oatmeal spice cookies | pamela salzman

Have you made my vegan oatmeal chocolate chip cookies?   If you’re new here, do not hesitate.  They are fantastic!  They’re a staple around here and definitely one of the more healthful (less bad for you?) cookies I’ve tried.  I love that recipe so much I decided to tinker with it and make a fall version with pumpkin puree and delicious spices like cinnamon, ginger, cloves and nutmeg.  Amazing!  It’s like pumpkin pie meets an oatmeal cookie.  And as much I love these cookies fresh out of the oven, they are just as delicious raw.  That’s right, as in cookie dough.  And I’m not the only one who thinks so.  After I posted my secret pumpkin oatmeal cookie dough addiction on Instagram, my students started stealing the bowl out from under my nose during class and having a taste themselves!  The benefits of a vegan dough.

raw cookie dough

I thought I would sneak this recipe in today before you start baking treats for Halloween.  Of course, these are perfect during the entire season of fall and beyond.  They’re a snap to make and like many cookie recipes, you can prepare the dough in advance and bake as many or as few cookies as you need.  I like these best the day they’re made and even the next day.  Because there’s pumpkin in them, they get a little soft after a day.

pumpkin oatmeal spice cookies | pamela salzman

This recipe ended up being more flexible than I imagined.  I had to try it with a nut other than walnuts one day for a student with a walnut allergy and pecans worked great.  I haven’t tried this recipe with sunflower seeds, but I think it would work if you need to go nut-free.  The sunflower seeds just might react with the baking soda, however, and cause the cookies to have a green-ish color to the them.  Might be kind of cool for Halloween!  I know many of you will want to sub chocolate chips for the raisins and I say go for it!  Pumpkin + chocolate + spices isn’t my thing, but that doesn’t mean you won’t love it.  I was serving these in my classes plain and simple, but I found a recipe for a fun sweet potato-cream cheese frosting that was delicious as a filling if you wanted to make a sort of oatmeal cookie whoopie pie.  Just for kicks.

vegan pumpkin oatmeal spice cookies with sweet potato cream cheese frosting | pamela salzman

However, like I always say, just because these cookies are higher quality and not made with junk and chemicals doesn’t mean you can eat them all day long.  Concentrated sweeteners can still raise your blood sugar and will still feed yeast and fungus in your system and will keep you addicted to sugar.  So with the beginning of the season of sweets, which I say starts on Halloween and ends on New Years Day, I try to be conscientious about not going crazy when I am offered candy and treats galore.  But before we start thinking about 2014, we’ve got lots of fun in store.  Thanksgiving is indeed four weeks from Halloween which means you and I are going into planning mode pronto.  See you all back here on Thursday!

vegan pumpkin oatmeal spice cookies | pamela salzman

Vegan Pumpkin Oatmeal Spice Cookies
Author: 
Serves: makes 20 2½-inch cookies
 
Ingredients
  • 1 ½ cups oat flour (see Step #2) (use certified gluten-free oat flour if you are gluten-free)
  • 1 teaspoon baking soda
  • ¾ teaspoon fine grain sea salt
  • ¾ teaspoon ground cinnamon
  • ½ teaspoon ground ginger
  • ¼ teaspoon ground cloves
  • Pinch ground nutmeg
  • 1 ¾ cups raw walnuts or pecans
  • 6 Tablespoons unrefined coconut oil (it doesn’t need to be melted)
  • ¼ cup 100% pure maple syrup (grade A or B)
  • 10 Tablespoons (½ cup + 2 Tbs.) coconut sugar or brown sugar
  • 1 cup pumpkin puree (not pumpkin pie filling) (anywhere between ½ -1 cup works)
  • 2 cups old fashioned rolled oats (use certified gluten-free rolled oats if you are gluten-free)
  • 1 cup unsulphured raisins or chocolate chips
Instructions
  1. Preheat oven to 350 degrees. Line 2 baking sheets with parchment paper.
  2. If you need to make oat flour, place 1 ¾ cups rolled oats in a food processor and process until powdery.
  3. Place oat flour, baking soda, salt cinnamon, ginger, cloves, and nutmeg in a large mixing bowl and whisk together.
  4. Place walnuts in a food processor and blend into a fine meal. Add oil, maple syrup, coconut sugar and pumpkin and process until mixture has the consistency of natural nut butter.
  5. Stir walnut mixture into flour mixture. Fold in 2 cups rolled oats and the raisins.
  6. Use a 1 ¾ -inch ice cream scooper to form dough into balls, and place on baking sheets. You can fit 12 on a sheet. Flatten cookies slightly with a damp hand. Bake 13-15 minutes or until cookies begin to brown and tops look dry.
  7. Cool a few minutes and then transfer to wire rack to cool completely.
Notes
SWEET POTATO-CREAM CHEESE FROSTING:
(adapted from "Feeding the Whole Family")

1 cup mashed baked sweet potatoes
¼ cup softened cream cheese or soft tofu (2 ounces)
1 Tablespoon melted unsalted butter
2 Tablespoons pure maple syrup
1 teaspoon fresh lemon or orange juice

Cream together all ingredients in the bowl of a food processor or with a mixer until smooth and spreadable.


Almond Butter-Millet Blondies Recipe (gluten-free)

almond butter-millet blondies | pamela salzman

We have survived the first week and a half of school and an early Jewish holiday!  I started this year right by having my girls order their own school supplies and Mr. Picky helped me out by writing out a list of lunch box-approved foods.  Not sure we’ve expanded the repertoire since last year, but at least I don’t have to think too hard.  I am also so glad I was inspired to bake and freeze a few treats before school started this year.  Those are coming in very handy for lunchbox and after-school snacks.  Plus it has been so hot here, I can’t imagine turning on my oven to bake banana bread right now!

ingredients

These Almond Butter-Millet Blondies are a new favorite around here.  Don’t automatically say “my kids would never eat those!”  Guess what?  Your kids were probably at my house in the last 6 months and did eat these.  Did I say, “Jimmy, would you like an almond butter-millet blondie?”  What am I, a rookie?  Of course, not.  I ask the kids, “would you like a chocolate chip blondie?!”  Only people that do not like chocolate ever say no.

wet ingredients

Blondies are similar to a non-chocolate brownie.  They are less spongy and a little denser than cake.  I love them right out of the fridge so you can really sink your teeth into them.  Because blondies don’t have the same lift and airiness of a cake, I tried these with two gluten-free flours, millet and quinoa.  Even if you’re not gluten-intolerant, it’s a great idea to not overdo wheat and other gluten-containing grains.  Gluten is not only hard to digest, but acid-forming and pro-inflammatory.

ready to be baked

The quinoa blondies were not a hit because they totally tasted like quinoa.  I love quinoa, but not as much in dessert form.  Millet is much blander and really has no flavor to fight with chocolate.  My kids and I had no idea the millet blondies weren’t made with wheat flour.   I also tried the recipe separately with peanut butter and almond butter and not only were they both delicious, the blondies kind of tasted the same, as in both tasted a bit like peanut butter.  Even though I give my kids peanut butter now and then, it’s actually not a fantastic choice.  The fats in peanut butter are very pro-inflammatory and if you don’t buy organic, you are also consuming a lot of pesticides and fungicides since peanuts are very heavily sprayed.  Even organic peanuts have a tendency to develop a mold called aflotoxin.  In moderation, fine, but almond butter is far and away a better, more healthful choice.  Did you know almonds are the only alkalizing nut?  And if you have a solid food processor, you can make your own almond butter!

almond butter - millet blondies

These blondies are awesome the next day, which is so nice if you have to bring a dessert to a potluck.  If you have leftovers more than a couple days, it’s best to keep them in the fridge.  And if you have no self control like me, you may want to just keep out what you need for the day and freeze the rest.  Happy baking!

almond butter-millet blondies | pamela salzman

Almond Butter-Millet Blondies
Author: 
Serves: makes 16 2 x 2-inch blondies
 
Ingredients
  • ¼ cup (4 Tablespoons) unsalted butter or organic Earth Balance, softened + additional for greasing pan
  • ¾ cup creamy or crunchy almond butter or other natural nut butter
  • 2 large eggs
  • ¾ cup coconut palm sugar (or brown sugar)
  • 1 teaspoon pure vanilla extract
  • ¾ cup millet flour*
  • 1 teaspoon aluminum-free baking powder
  • ¼ teaspoon sea salt
  • ¾ cup semisweet chocolate chips
Instructions
  1. Preheat oven to 350 degrees. Grease an 8-inch square baking pan with butter and line the bottom with parchment paper so that the bars are easy to take out.
  2. Beat butter and almond butter in a mixing bowl with an electric mixer until creamy. Beat in eggs, coconut sugar and vanilla until smooth.
  3. In a small bowl, whisk together the millet flour, baking powder and salt. Mix the flour mixture into the wet ingredients until just combined. Stir in chocolate chips. Spread the batter evenly into the prepared pan.
  4. Bake until a toothpick inserted into the center comes out with just a few moist crumbs on it, about 25 minutes. Let cool in the pan for at least 45 minutes before cutting into 16 squares. Leftovers can stored in the refrigerator for up to a week. These also freeze beautifully.
Notes
*Look for millet flour in the baking section or near gluten-free flours. Or, to make your own, grind whole grains of millet into a powder in a clean coffee grinder.

Mixed berry cobbler recipe (slow cooker version, too!)

Mixed Berry Cobbler Recipe | Pamela Salzman

Do you know the difference between a crisp, a cobbler, a slump, a grunt and a brown betty?  I hear the terms used interchangeably, when of course, they’re not the same at all.  A cobbler has a biscuit topping, a crisp has a crunchy oat and sugar topping, a slump/grunt is like a cobbler, but it is finished on the stovetop so that the biscuits are steamed, rather than browned, and a brown betty is topped with buttered bread crumbs.  Just so we’re all on the same page.  And just so you don’t go ordering a cobbler at a restaurant thinking you are getting something with a buttery, crunchy, oat topping only to be served a bowl of cooked fruit with a biscuit on top.  I hate when that happens.

Mixed Berry Cobbler Recipe | Pamela Salzman

Mixed Berry Cobbler Recipe | Pamela Salzman

Not that a cobbler is bad.  Oh no, friends.  Cobblers are very, very good.  Especially when strawberries are in season and they are about as luscious as can be.  When strawberries debut at our local farmer’s markets, I feel like a bear coming out of hibernation, like I’m taking a breath of fresh air.  It’s spring!  Weeeee!  I can finally tell Mr. Picky, “Yes, it’s finally strawberry season!”  I swear I have been buying strawberries lately like they’re never coming back.  They’re in the kids’ lunches several times a week, in breakfast smoothies and acai bowls and chopped into pancakes.  I even did a crazy thing and added a little bit of chia seed and water to some mashed up strawberries and let it thicken into a raw jam/spread.  I thought it was really good.  Then I smeared some in between two slices of whole grain bread and made a stuffed strawberry French toast, if you will.  Really tasty!

Mixed Berry Cobbler | Pamela Salzman

I was feeling spunky last weekend and thought I would surprise everyone with a special dessert, which I knew had to have strawberries in it.  So I started pulling together my favorite cobbler with strawberries as well as whatever berries I had in the freezer.  I had this moment of genius when I thought, I bet I could do this in a slow cooker!  I bet no one in the world has ever done a cobbler in a slow cooker.  I am going to revolutionize the food world with this brilliant idea!  Of course, one quick search on Foodily and I saw that 20 other people/websites already came up with that same idea.  I hate when that happens.  Grumpy face.  Although one of the recipes called for a can of apple pie filling and a box of yellow cake mix.  I mean, is that even a recipe?   That is such a gross idea.  Don’t even think about trying it.

Mixed Berry Cobbler | Pamela Salzman

Why would you when you can have this wholesome, fresh, clean and YUMMY cobbler for just a little more effort?  I have two versions here, one baked in the oven and the other in the slow cooker.  The oven cobbler has a much prettier presentation, with the classic, nicely browned “cobbled” texture on top and baked in a dish you can actually bring to the table.  But it’s nice to know you can can use your slow cooker for more than just shredded meat.  I was thinking it would be great for the summer so you don’t have to turn your oven on to make a fruit dessert.  The look wasn’t quite as lovely since I spread the dough on the bottom of the insert and laid the fruit on top.  I wanted the fruit to stay intact and not get cooked into a pot of mush.  Which it did not.

Mixed Berry Cobbler | Pamela Salzman

Either way, the ingredients stay the same for both.  I have used whole spelt flour, whole wheat pastry and white whole wheat all with success.  I know that you can use  gluten-free flour like Kind Arthur with a little added xanthan gum and achieve an equally tasty result.  If you’ve made cobbler before, you might think my recipe doesn’t have enough sweetener.  But I promise, give this a go and you’ll be surprised how much you enjoy tasting the actual fruit and not just sugar.  Of course, a little ice cream on top doesn’t taste bad.  Or, I look forward to leftovers the next morning with a dollop of sheep’s yogurt.  Unless someone ate it all and left me none when I couldn’t stop dreaming about it all night.  Ooooh, I hate when that happens!

Mixed Berry Cobbler | Pamela Salzman

Mixed Berry Cobbler | Pamela Salzman

Mixed Berry Cobbler | Pamela Salzman

5.0 from 1 reviews
Mixed Berry Cobbler
Author: 
Serves: 6-8
 
Ingredients
  • 6 cups mixed fresh berries, or frozen, thawed
  • ¼ cup coconut palm sugar organic cane sugar or brown sugar
  • 3 Tablespoons flour, such as spelt or your favorite GF flour such as rice flour
  • 1 teaspoon lemon zest, not packed
  • 1 ½ cups whole spelt flour, whole whet pastry, white whole wheat flour or all-purpose flour OR King Arthur Multi-purpose GF Flour + 1 tsp. xanthan gum
  • 2 teaspoons aluminum-free baking powder
  • ½ teaspoon baking soda
  • 2 Tablespoons pure maple syrup OR organic cane sugar (if you use maple syrup, add to buttermilk; if you use sugar, add to flour)
  • ¼ teaspoon fine grain sea salt
  • 6 Tablespoons cold unsalted butter or organic Earth Balance, cut in small pieces + more for greasing baking dish
  • ¾ cup buttermilk (or unsweetened non-dairy milk + 1 Tbs. apple cider vinegar)
  • 1 Tablespoon unsalted butter or organic Earth Balance, melted or 1 Tablespoon buttermilk*
  • 1 teaspoon sugar (optional)
Instructions
  1. Preheat oven to 400 degrees. Grease a 9–or 10-inch square shallow baking dish or pie plate.
  2. In a medium bowl, gently toss the berries with 3 Tbs. flour, ¼ cup sugar and zest. Transfer berries into the prepared pan. Set aside and reserve the bowl.
  3. To make the cobbler topping, blend the 1 ½ cups flour, baking powder, baking soda, 2 Tbs. sugar (if using), salt and butter with your fingertips or a pastry blender or pulse in a food processor just until most of the mixture resembles coarse meal. Transfer to the same bowl used to mix the berries and stir in the buttermilk and maple syrup (if using) until well combined.
  4. Using your fingertips, rub the buttermilk mixture until it begins to clump together. Take a heaping spoonful of dough and place it on top of the berries. Don’t cover the berries completely. Brush with melted butter or buttermilk and sprinkle with sugar, if desired. Place the dish on a baking sheet and bake for 40 minutes or until the fruit is bubbling and the top is golden and cooked through.
Notes
*For a golden glaze, brush the biscuits with melted butter. For a more brown crust, brush them with buttermilk.

You can use either maple syrup or cane sugar (not both) in the cobbler topping. Pick one sweetener! Please read the directions carefully since the maple syrup is added with the buttermilk and the cane sugar is added to the dry ingredients.

To increase the recipe to serve 12, multiply all ingredients by 1 ½ and use a 13 x 9–inch baking dish. Bake for an additional 5 minutes.

To Make in the Slow Cooker:
Follow all directions for cobbler in the oven except dollop the cobbler topping on the bottom of the slow cooker insert and  pour the fruit mixture on top.  Cover and cook on LOW for 1 ½ to 2 hours, or until biscuit mixture is cooked through.  The time will depend on how wide your slow cooker is.

Homemade graham crackers recipe

There are some things that I just don’t think are worth making from scratch (like puff pastry) and then there are some things I can’t believe can be made from scratch and taste good, like graham crackers.  Wait, not just “good,” but amazing!   Who doesn’t remember eating graham crackers as a child?  But you always got them out of a box, right?  Not anymore.  Be prepared to have your life changed!

Even though my mom didn’t allow many over-the-top sweets in the house, graham crackers sometimes made the cut.  Whereas Ho-Ho’s and Twinkies were definitely taboo, graham crackers seemed relatively benign and not overly sugary.  My mom bought Honeymaid, which we used to smear with peanut butter or cream cheese or just dunk in milk.  My kids would like to do the same, but I rarely buy packaged cookies.  First of all, I think that homemade always beats store-bought.  And it’s hard to find treats made with unrefined ingredients and without lots of scary chemicals.

Last June and July my summer intern Hannah and I went graham cracker crazy, making a new batch or two every week.  I finally settled on this recipe here which my friend Cheryl helped me with.  These graham crackers have just the right amount of sweetness, which makes them a perfect snack for your little guys and for s’mores.  I like using a combination of whole spelt or wheat flour and brown rice flour.  Rice flour is very light and has a grittiness that I think is ideal for graham crackers.  If you don’t have it, just use all spelt or wheat flour and they will still be delicious.  But I think the key with graham crackers is to ask yourself how perfect you want them to look. I so admire people who have the patience for making things look like they popped out of Martha Stewart Living because I don’t.  I will admit, I did my best with the batch I photographed for this post, but normally I leave my ruler in the drawer.  If you are giving these as a gift, using them for s’mores, or offering them to a large group of children, you may want the crackers to be as uniformly sized as possible so it might be worth the effort to measure out the dough and where you cut your lines.

This recipe is otherwise crazy simple,  but makes a great impression.  Last summer my go-to dessert for entertaining was a s’mores bar with these homemade graham crackers which Mr. Picky helped me bake on more than one occasion.  To me, having my kids helping me in the kitchen is the best part of making your favorite treats from scratch.   I also love that you can put into them what you want.  All organic ingredients?  No problem!  Half the sugar of their traditional counterparts?  Go for it!  Lots and lots of love?  Always!

5.0 from 1 reviews
Homemade Graham Crackers
Author: 
Serves: makes 24 3 x 3½ -inch crackers
 
Ingredients
  • 1 ¼ cups whole wheat, whole wheat pastry, white whole wheat or spelt flour
  • 1 ¼ cups brown rice flour (or just use all wheat/spelt flour)
  • ½ cup coconut palm sugar, sucanat or brown sugar
  • 1 teaspoon baking soda
  • 1 teaspoon ground cinnamon
  • ½ teaspoon sea salt
  • ½ cup (1 stick) unsalted butter, cold and cut into pieces
  • ¼ cup honey
  • ¼ cup milk, non-dairy milk or water
  • 1 teaspoon pure vanilla extract
Instructions
  1. Preheat oven to 350 degrees.
  2. In the bowl of a food processor or mixer, pulse or stir the dry ingredients until combined.
  3. Add the butter pieces to the dry mixture and pulse or process until it looks like coarse meal.
  4. Add the honey, water, and vanilla and process until a ball of dough comes together. Pull the ball of dough out of the food processor and cut it in half. It is a very soft dough. But if it’s super sticky or if your kitchen is warm, refrigerate the dough 30 minutes.
  5. Roll out one ball of dough between two sheets of parchment paper to a 10 x 12” rectangle or about ⅛” thick. Remove the top sheet of parchment and slide the bottom sheet of parchment with the rolled out dough to a baking sheet. With a pizza wheel or a sharp knife, cut the dough into rectangles. If desired, prick the dough with the tines of a fork to create the classic graham cracker “dots.” Repeat with second ball of dough.
  6. Bake for 18-22 minutes or until the edges are starting to turn brown. Remove from oven and cut crackers again along the same lines with a pizza wheel or knife. Allow to cool on the pans for about 2 minutes. Separate crackers from each other and cool on racks. If some crackers seem a little thicker than others, put them back in the warm oven with the heat OFF for 10 more minutes and up to an hour. This will dry them out a bit and ensure that they will be crispy.
  7. Cool completely and store in an airtight container.
Notes
To make gluten-free graham crackers, use 2 ½ cups all-purpose gluten-free flour blend, such as King Arthur plus ½ teaspoon of xanthan gum in place of the wheat and rice flours.