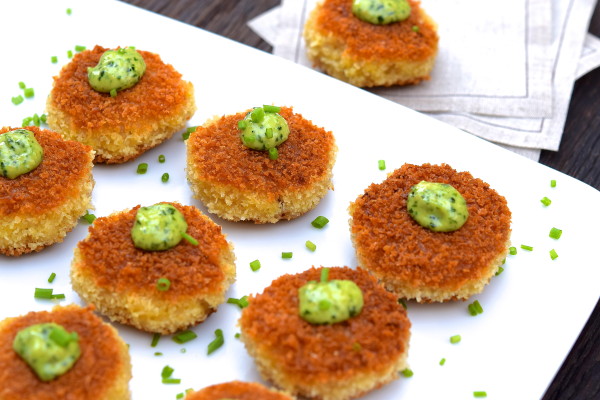
Mini Risotto Cakes Recipe

mini risotto cakes | pamela salzman

One of my resolutions for 2016 is to entertain more at home than I did in 2015.  I used to invite friends over 2-3 times/month before I started teaching cooking classes full-time.  By the time Friday rolls around, I’m kind of over major food prep.  So cooking for friends fell by the wayside.  But I realized it’s also one of my favorite ways to spend my time so I need to find a way to bring that back into my life!

mini risotto cakes | pamela salzman

My goal is to entertain more simply with less pressure to make everything Pinterest and Insta-worthy.  Good friends don’t care.  I know this is true because when someone invites me over for a meal, I am more excited about spending quality time with my friends than what is on the menu.  So for my last blogpost of 2015, I thought I would share an easy, delicious and very popular recipe that might encourage you to invite friends over during the holidays.

mini risotto cakes | pamela salzman

These risotto cakes made an appearance in my Party Foods class last December and I remember the kids hoping there were some extra when they returned home from school.  I love it when I have a recipe which is just as popular with kids as adults!  Essentially, you take leftover risotto and form it into a small patty (1-2 bites each), coat that in beaten egg and bread crumbs and saute in olive oil in a skillet.  The good news is that you don’t have to make proper risotto for this recipe.  No stirring every 5 minutes or standing over the pot.  The only goal is to have a cold rice mixture that is sticky enough to form a little patty.

mini risotto cakes | pamela salzman

I have mixed feelings about rice since there are pros and cons to both brown and white rice (brown you have to soak + contains arsenic, white is lacking the fiber.)  So my rule of thumb is that if I don’t have time to soak brown rice, I go with white.  But I’m sure you could make this with short grain brown rice and just cook it for longer.   Either way, you can make the rice today, form the patties tomorrow and saute them before your friends come over on New Year’s Eve!  Keep them warm in a 250 degree oven for up to an hour if necessary.

mini risotto cakes | pamela salzman

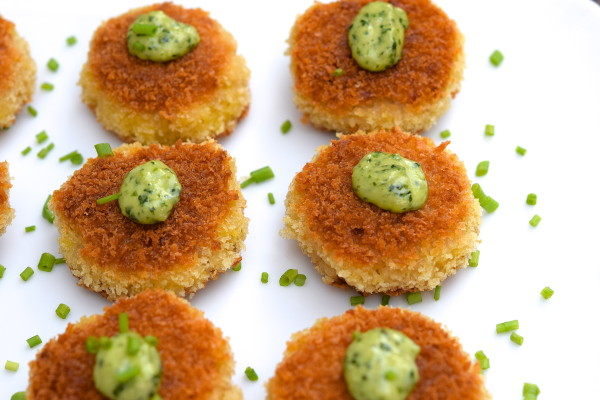
What’s also nice about these little cakes is that you can eat them plain or top them with any number of toppings from store bought tapenade to pesto aioli (shown here — nothing more than pesto mixed with a little Vegenaise) to sautéed mushrooms or garlicky greens or a tomato compote.  You can also make them bigger and serve with a green salad for brunch, lunch or dinner.  A poached egg on top would round it all out.

mini risotto cakes | pamela salzman DSC_0132

In other news, and perhaps to help with possible new year’s resolutions, I am starting a new regular blogpost on Sundays, beginning January 3rd.  It will be a weekly dinner planner to offer inspiration and suggestions on what to make.  Many of my students have asked me for this, despite the fact I post my weekday dinners on Instagram and Facebook ;).  For those of you aspiring to cook more from scratch and use more natural, plant-based foods, I think this new weekly blogpost will come in handy.  Wishing you and yours a safe, happy, and healthy new year! xoxo

mini risotto cakes | pamela salzman

Mini Risotto Cakes
Author: 
Serves: 24 cakes
 
Ingredients
  • 2 Tablespoons unrefined, cold pressed, extra virgin olive oil + more for frying cakes
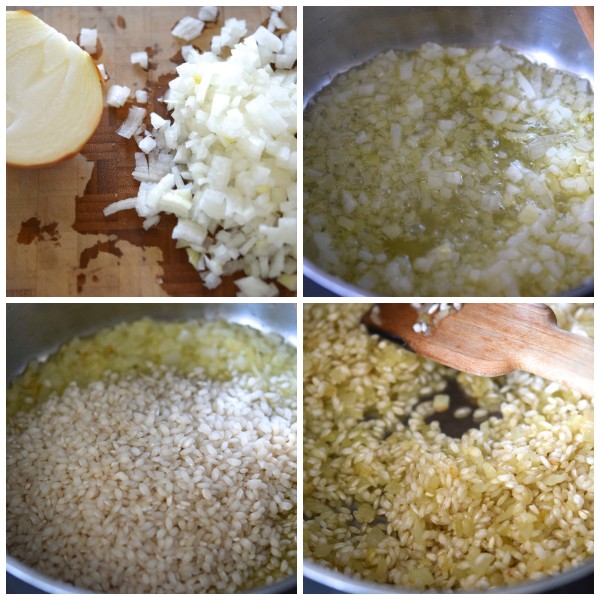
  • ½ medium onion, finely chopped
  • 1 cup Arborio or carnaroli rice (if you want to use short grain brown rice, adjust the cooking time according to the package instructions)
  • 1 ¾ teaspoons sea salt
  • ¼ teaspoon freshly ground black pepper or to taste
  • ½ cup dry white wine
  • 2 ½ cups chicken or vegetable stock, preferably homemade
  • 2 large eggs
  • 1 ½ cups panko bread crumbs (look for gluten-free bread crumbs to make this a GF recipe)
Instructions
  1. Heat 2 Tablespoons of olive oil in a large heavy-bottomed saucepan over medium heat, add the onion and cook until softened, about 5 minutes.
  2. Add the rice and 1 ¾ teaspoons salt and ¼ teaspoon pepper and cook, stirring often, until rice starts to crackle, about 1 minute. Stir in the wine and let simmer, stirring often, until completely absorbed, about 1 to 2 minutes.
  3. Add all the stock, stir to combine and bring to a boil. Reduce the heat to medium low and simmer uncovered, stirring occasionally, until the rice has absorbed the broth and is cooked through, about 10 to 12 minutes.
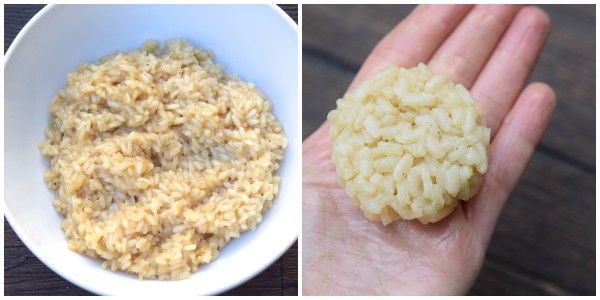
  4. When the rice is done, taste for seasoning and remove to a large bowl and let sit until cooled to room temperature, about 40 minutes. Cover and refrigerate until completely chilled, at least 2 hours or overnight.
  5. When risotto is fully chilled, place the eggs in a shallow dish and beat with a fork. Set aside. Place the panko bread crumbs in a second shallow dish and set aside.
  6. Measuring about 2 Tablespoons per cake, form the risotto into small, round 1 ½ inch patties. If the risotto is sticking to your hands too much, moisten them with a little water. If the rice isn’t sticky enough and the patties aren’t holding together, squeeze the rice in your palm a couple of times until it sticks.
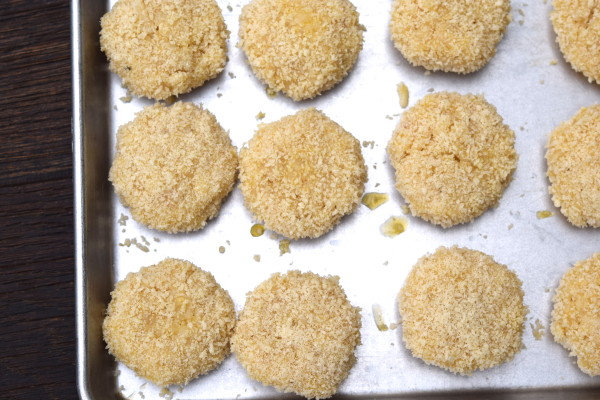
  7. Working with 1 risotto cake at a time, coat it with egg, letting any excess drip off, then coat it evenly with the panko, pressing gently so the breadcrumbs adhere. You can do this in the morning and refrigerate until ready to sauté.
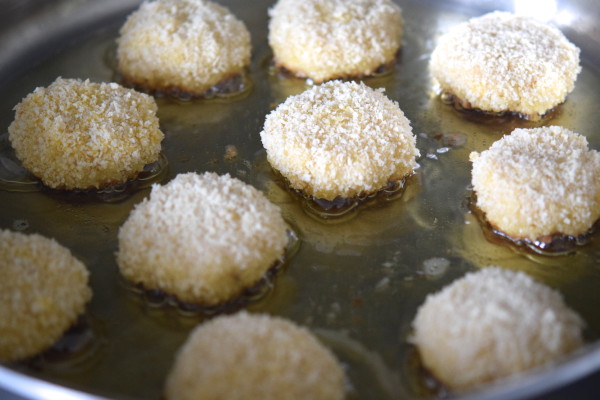
  8. Heat a large frying pan over medium-high heat and add enough olive oil to generously coat the bottom of the pan. When the oil is hot, add the risotto cakes and fry until golden brown, about 2-3 minutes. Flip and continue cooking, adjusting the heat if necessary, until golden brown and heated through, about 2-3 minutes more.
  9. You can keep the cakes warm in a 250 degree oven on a baking sheet if necessary or transfer to a paper towel lined plate. Serve hot.
Notes
You can also add sautéed kale or spinach to the risotto before cooling, or sautéed diced mushrooms. You can serve these with a little pesto or pesto aioli, warm tomato sauce or a red pepper sauce, whipped goat cheese or sautéed mushrooms on top.


Chickpea Burger Recipe

If I had to pick one cuisine to stick with for the rest of my life, it would be a tough a call.  But I could easily live off of Mediterranean food every day.  I love the emphasis on fresh vegetables, olive oil, legumes and whole grains, cheeses and fish.  Whether it’s Italian, Greek, or Israeli, this way of eating is definitely my comfort zone.  And living in Southern California makes cooking Mediterranean-style quite easy with an availability of similar varieties of fresh produce, nuts, dates and olives.

As I’ve mentioned before, one of my favorite things to do is to take a not-so-healthful food that I love and turn it into something I can enjoy regularly.  Many years ago I decided to try making falafel (the deep-fried Middle Eastern chickpea nuggets) a little less “deep-fried.”  (Ok, not everything Mediterranean is healthful.)  Many iterations later I found myself with a delightful, substantial chickpea burger which in turn began my obsession with veggie burgers.  I don’t love meat and poultry so much, although I think they are excellent sources of protein if you can find organic, pastured varieties.  But I do love hearty, flavorful vegetarian food that makes me feel satisfied, especially anything bean-based which is loaded with low-fat protein and tons of insoluble fiber.  I also like having recipes like this for entertaining when I always like to offer a vegetarian option (you’d be surprised how many people choose not to eat meat these days.)

These chickpea burgers are a favorite of mine and my whole family, even Mr. Picky who I am pleased to announce tried one for the first time last week with ketchup.  Do what you’ve gotta do, friends.  They are definitely a far cry from falafel, though.  In fact, the only ingredients that falafel and these chickpea burgers have in common are chickpeas and cumin.  But if I do it right, they’re crispy on the outside, moist on the inside and with flavors that remind of falafel.  I usually eat veggie burgers sans bun since I find that they are plenty starchy without adding bread.  But when serving them to family and friends, I offer warmed, whole wheat pita halves and an array of yummy toppings including sprouts, avocado, tomato slices, lettuce, cooked onion and most importantly, a creamy and refreshing sauce.  In my opinion, it’s all about the condiments!

Chickpea burgers (and veggie burgers, in general) are fabulous for entertaining and for busy weeknights since they are best formed in advance and refrigerated so they firm up a bit.  Out of the fridge, they cook up in minutes on a hot griddle or skillet.  Once you realize how tasty these are, you’ll make a double batch and freeze half.  If you freeze them, just don’t forget to place a piece of wax or parchment in between each patty so that they don’t stick together (ask me how I know this.)  These burgers may not take you back to your last visit to the Mediterranean, but I hope they’ll keep you from visiting the freezer section of your supermarket!  Enjoy~


View this post on Instagram


A post shared by Pamela Salzman (@pamelasalzman)


4.8 from 5 reviews
Chickpea Burgers
Author: 
Serves: makes 8 patties
 
Ingredients
  • 4 cups cooked chickpeas, drained and rinsed if canned
  • 2 large eggs, preferably free-range
  • 2 cloves garlic, minced
  • 2 teaspoons sea salt
  • 2 teaspoon ground cumin
  • ½ teaspoon cayenne pepper (optional)
  • zest of 2 small or 1 super big lemon
  • ¼ cup flour (whole grain flour, cornmeal or almond meal all work)
  • 6 Tablespoons (or a heaping ⅓ cup) chopped parsley
  • 2 carrots, grated
  • ½ red onion, small dice
  • Oil or ghee for sautéing
  • Yogurt-Tahini Sauce
  • ¾ cup plain yogurt (full fat or low fat)
  • 3 Tablespoons tahini
  • 1½ Tablespoons lemon juice
  • ½ cup chopped parsley, mint or a combo (my favorite)
  • ¼ - ½ teaspoon sea salt
  • Oil or ghee for sautéing
  • 4 6½ -inch whole wheat pitas, halved and warmed, if desired
  • Suggested accompaniments: sprouts, avocado, tomato, lettuce, grilled onions
Instructions
  1. Place the chickpeas, egg, garlic, salt, cumin, cayenne, lemon zest, flour and parsley in food processor. Pulse until a coarse mixture forms that holds together. It should be moist and sticky.
  2. Place chickpea mixture in a bowl and mix in grated carrot and red onion. Take a ½ cup of the mixture and firmly press it into a patty about 3 ½ inches in diameter and ¼ inch thick. You can also form these into mini-patties for appetizers. Place on a plate or a baking sheet and refrigerate for at least 30 minutes and up to overnight. Cover if refrigerating for more than a few hours.
  3. Heat a couple tablespoons of oil or ghee in a large skillet over medium heat until hot, but not smoking. Add patties to the skillet (do this in batches, if necessary) and cook until crisp and golden brown on the underside, about 6 minutes. Carefully turn over and cook until golden brown on the other side, about 3-5 minutes more.
  4. Serve with or without a warmed pita half or a hamburger bun and suggested toppings.


Â