My vacation is coming to an end today, like all good things do. But there’s always next time. We were incredibly lucky with the weather this week. It never rained and the humidity was almost nonexistent. This is important because there were lots of children present and we wanted them all outside and not on their devices.
If you’re new here, I am OBSESSED with veggie burgers. I have two posted on this website — a black bean and brown rice burger with smoky red pepper sauce and a chickpea burger. Both are hearty, flavorful and delicious. This black bean and beet burger might just be my favorite. If you don’t like beets (and I know you’re out there,) I’m not sure if this will change your mind since you can definitely see the beets, but the burger tastes like more of the spices in the mix than anything else. Check out my YouTube video here on how to roast beets.
These are great for Meatless Mondays and so perfect for back-to-school since you can make a batch and freeze them for an easy weeknight dinner. I have pulled them straight from the freezer and cooked them frozen, just like you could with a store-bought one. I love to eat a veggie burger on a bed of greens with a sauce or spread of some sort, cooked onions and avocado. Of course the kids and my husband love eating them as a true burger on a bun with or without cheese. My favorite buns are any of the sprouted Food For Life Baking ones, toasted. The family is really into the “Million Dollar Buns” by Dave’s Killer Bread. I wrote about Dave’s Killer Bread in one of my Friday Favorites. Some of the varieties contain canola oil which I avoid like the plague (refined, pro-inflammatory, usually GMO, blech) and the buns contain canola oil so they’re a once-in-a-blue-moon kind of food.
Although I include all types of whole foods on this site, including animal products, I do think we should be eating a mostly plant-based, anti-inflammatory, low-glycemic diet. These burgers fit the bill and still keep all the burger lovers in my house very happy, too.
Quarter the beets and pulse along with 2 cups of the black beans in a food processor until roughly chopped.
Add beet-bean mixture to a large bowl, along with the next 13 ingredients (remaining black beans, brown rice, dried figs, oat flour, red onion, garlic, smoked paprika, brown mustard, ground cumin, ground coriander, thyme leaves, salt, pepper). Stir to combine, mashing the mixture together with a spatula or wooden spoon.
Using a half cup measure, form six patties. Cover them with parchment paper or plastic wrap and transfer to the refrigerator to chill for 30 minutes.
In a large skillet or on a griddle pan, heat an ⅛ inch of oil. Add the burgers and cook over medium heat, turning once, until browned and heated through, about 6 minutes. Serve with desired accompaniments.
I love beets and I will happily eat them raw or cooked, warm or cold. Beets are part of the chenopod family which also includes Swiss chard, spinach and quinoa. They are quite good for you! Beets are high in vitamin C, fiber, and essential minerals like potassium (essential for good nerve and muscle function) and manganese (which contributes to healthy bones, liver, kidneys, and pancreas). They also contain the B vitamin folate, which helps reduce the risk of birth defects.
I recently taught a delicious salad in my summer classes which included roasted beets, burrata, hazelnuts and mint. Most people found it very helpful to watch a demo of how I cooked the beets from scratch. I say “most people” because some already knew how to cook beets, and some didn’t care because they are perfectly content to buy them already cooked at the market.
And believe me, I’m well aware that many grocery stores have cooked beets either cell-wrapped in the produce section or at the salad bar. You will pay a premium of course, and when you watch this video you’ll be convinced how easy it is to do yourself. The only flaw with the video is that my demo of inserting the tip of a knife into the beet to test for doneness was edited out. Frown. But the gist of it is that you want the knife to go into the center easily.
For sure beets take some time to cook, anywhere between 45 and 75 minutes depending on the size. So they’re not “instant.” If you have different sizes, set the cook time based on the largest beet. I generally like to prep them ahead either in the morning or up to three days in advance. Once they have cooled, pull them from the pan and store them in the fridge whole, peeled or peeled and cut.
London has been amazing! Freezing, but amazing! At least we were prepared with our winter outerwear for the unseasonably cold temperatures. We have seen so much and the kids have really enjoyed it all. After our month in Europe this summer, we learned a bit about how to keep the kids engaged and not wanting to kill each other. We also learned that Mr. Picky, who is 9, has a 1 1/2 hour time limit in any museum (2 hours if he just ate breakfast.) Whatever we didn’t get to see will just have to wait until our next visit.
This week we have also booked a private guide each day, which has taken the pressure off my husband from whatever palace or neighborhood we are checking out. Besides going to many of the major sites, we also had a tour of London’s East End and its many outdoor markets, a rock tour (think The Beatles and The Rolling Stones, not One Direction), and a Shakespeare tour. All worth it and much more interesting for the kids! We are leaving London today for Chewton Glen in Hampshire. My husband visited when he was a child and loved it. I’m hoping it’s still as wonderful 30 years later and I’m hoping we make it in one piece since my husband will be driving us there. On the other side of the road. You know I’ll give you all the details either way!
Now I hope you didn’t think I was going to scamper about England this week and forget about you cooks. Rubbish! Although I’ve been tweeting what I’ve been up to and posting a few things on Facebook, I didn’t want the week to go by without something for you to try in the kitchen. Believe me, after a week of scones and mash (not at the same time, of course), I’ll be ready for a few salads like this when I return home.
First of all, if you think you hate beets, you may not hate them raw so stay with me here. This salad converted everyone who thought s/he didn’t like beets. I am fairly obsessed with chopped and grated salads. One of my favorites is my grated carrot salad with avocados and sunflower seeds. I love vegetables cut into small bits so that you get a lot of different flavors in one bite. And grated vegetables can actually be a totally different experience from their whole counterparts. This is completely true with respect to carrots. If you haven’t tried the carrot salad I just mentioned, you absolutely must!
The one thing you do need to do for this salad is go into your garage behind the piece of exercise equipment, pull out the Cuisinart box and find the medium grating disc which I’m hoping you didn’t throw out thinking you would never use it! If you did, go to the manufacturer’s website or thegourmetdepotco.com where you can buy missing or broken parts to almost any appliance. The grating disc is amazing, one of my favorite kitchen tools especially since I broke up with my mandoline. No love lost there. I use my grating disc to make very quick work of shredding cheese, onions, potatoes, zucchini, apples, cabbage, and of course carrots and beets. One tip I can give you is that many food processors give you the option of feeding your food through the wide part or the much narrower feed tube. In the case of carrots, I like to process them horizontally the wide way for longer shreds for a salad and through the feed tube for short shreds which are better for carrot cake or carrot muffins.
I was doing a Moroccan-inspired menu last month and I desperately wanted to include a carrot salad. Many Moroccan salads are too sweet for me and include dried fruit plus lots of honey in the dressing. In my opinion, carrots and beets are already rather sweet, so this salad is dressed with a cumin-orange-lemon dressing, a little tart and just a little sweet. You can leave this as grated veggies and dressing for a fab 5-minute salad or make a little extra effort and add the delightful fresh herbs which turn this into something really awesome. I eat this without feta since I’ve gone dairy-free (moment of silence), but if you can handle a little goat or sheep cheese, add it and you won’t be sorry! Either way, this is a juicy, crunchy, thirst-quenching, gorgeous salad which happens to be super nutritious and alkalizing.
I have served this salad with all sorts of fish dishes, simple roast chicken, frittatas and vegetable stew. I’m sure it would be great with lamb or grilled beef kabobs. My point is that you don’t have to be eating a Moroccan meal to enjoy this. A little heads-up about eating red beets, though. If you’ve never tried them, just be aware that when you eliminate, there will be a tinge of hot pink/red. I can’t tell you how many stories I heard of people calling their doctors or googling “hot pink poop.” On the other hand, eating beets can be a good indication of how efficient your digestive system is. If you see beets later that day or the next, things are moving nice and quickly. But if it takes 4 days for those beets to appear again, you probably need a little more fiber and water in your diet. Just a thought.
Ok, that’s all I have for today, friends. I’m leaving the hustle and bustle of London for the English countryside and hoping to make it in time for Afternoon Tea which has become my favorite way to wind down after a busy day. I know some people like a glass of wine at 5, but I’m not sure they’ve tried sitting down to tea with a warm homemade scone. Brilliant!
4 ounces feta cheese, crumbled (I like goat feta)(optional)
Instructions
Using the shredding disc of your food processor, shred the carrots and beets. Transfer the vegetables to a serving bowl.
Add herbs to serving bowl.
In a medium bowl or in a screw-top jar, combine lemon juice, orange juice, sea salt, cumin, paprika and olive oil.
Pour enough dressing on top of carrot mixture to coat lightly and toss to combine. Add more if desired.
Add feta on top of salad and taste for seasoning. If you dress the salad early, the dressing will pull water from the vegetables and make a pool at the bottom of your serving bowl. You can just serve from the top or pour off some of the liquid no problem.
Notes
Salad can be dressed the day before and herbs and feta added just before serving.
For a delicious, spicy note, add about ¾ teaspoon harissa to the dressing.
Halloween is tomorrow, but to tell you the truth, I don’t make much of an effort to show my “spirit” with cupcakes that look like spiders or swamp slime green Jell-o. Do my kids really need marshmallow ghosts on top of the candy I have not forbidden them to inhale as they trick-or-treat? Silly question! Actually, my only food strategy on Halloween is to make a very hearty , filling dinner, like vegetable chili with brown rice, so the kids aren’t starving while they carry around a sack o’chocolate. Works for me!
If you checked out my post last Thursday, you probably guessed I have bypassed Halloween and gone straight into Thanksgiving mode. Not only have I already taught two Thanksgiving classes, but I am starting to check tasks off my list. Invites — out. Menu — planned. Turkeys — ordered. So if you’re like me and you’re daydreaming about maple-glazed root vegetables instead of witch cakes, let’s get down to business!
The vegetables are really the only part of the menu that I get to have any fun at all. My family and guests would have a rebellion if I didn’t make roasted turkey, mashed potatoes, stuffing and sweet potato casserole. So every year I try some new salads and vegetables just to mix it up a bit. This salad is one of my absolute favorites and not just for Thanksgiving. I have made this for other holiday dinners and for friends, and I always save a little extra for me for the next day’s lunch. This salad is the perfect complement to a Thanksgiving meal consisting of lots of cooked food, much of it soft and beige. Not only will all of these colors brighten up your holiday buffet table like little jewels, but you’ll be happy to have something juicy, crunchy and (is this a crime?) healthful to eat. Even though there are apples, pomegranates and dates in the salad, it doesn’t feel too sweet. It’s more like a tart-sweet, a perfect complement to roast turkey.
This salad is also ideal for Thanksgiving since you can prep almost all of it the day before. Oh yeah! No need to squeeze anything into your already monopolized oven or dirty any measuring spoons the day of. You can blanche the beans the day before, roast the beets two days before, chop fennel the day before and cover with a damp paper towel, seed the pomegranate several days before, chop walnuts whenever you want, and make the salad dressing several days in advance. The only last minute item is the apples which you can dice a few hours in advance and keep in ice water in the refrigerator. Just drain and pat dry before adding to the salad. How’s that for a plan!
3 stalks celery or 1 bulb fennel, diced (I prefer fennel.)
1 cup pomegranate seeds (about 1 medium pomegranate)
1 large crisp apple (e.g. Fuji or Granny Smith), diced (peeled or unpeeled)
1 cup walnuts, chopped
3 dates, pitted and diced (easier to cut when they’re cold)
1 cup diced roasted golden beets (can be done the day before)*
Vinaigrette: (can be prepared several days in advance)
2 Tablespoons fresh lemon juice
2 Tablespoons fresh orange juice
½ teaspoon fine sea salt
a few grinds of black pepper
2 teaspoons minced shallot
2 teaspoons 100% pure maple syrup
3 Tablespoons unrefined, cold-pressed extra virgin olive oil
3 Tablespoons walnut oil (or use all olive oil)
Instructions
Prepare a large bowl with ice water. Blanche green beans for 2 minutes in boiling, salted water. Drain and submerge into ice water. Drain, pat dry and slice on the diagonal into bite sized pieces. (Can be done the day before.)
In a large bowl combine beans, chopped celery, pomegranate, apple, walnuts, dates and beets.
Prepare the vinaigrette: whisk all the ingredients in a small bowl. Pour enough vinaigrette over vegetables to coat lightly. Taste for salt and pepper.
Notes
*To roast 1-2 beets, wrap each one in parchment and then foil. Or follow the photos above to roast a pan of several beets. Roast in a 400 degree oven until tender when pierced with the tip of a knife. Large ones can take about 60 minutes. Allow to cool and then peel off the skins.
I was talking with my summer intern Hannah about how much I love hummus and how easy it is to make. I think I have been making my own hummus since before she was born, but the last couple years I have felt hummus boredom so I’ve had a little fun experimenting with different flavors. Hannah was intrigued since she thought hummus was like puff pastry, which NO ONE makes from scratch. Well, I knew we had a cooking lesson on our hands!
Hummus is a Middle Eastern dip made from cooked chickpeas (a.k.a. garbanzo beans) pureed with tahini (a paste made from ground up sesame seeds), garlic, lemon juice, and salt. I add a little liquid from the pot (or can) of cooked chickpeas and some people add olive oil. Sure you can add cumin or hot sauce, but essentially that’s it. I maintain that hummus tastes so much better when I make my beans from scratch, although really you can use canned and it will still be fabulous. But what kind of a cooking lesson would this be if we used chickpeas from a can? So I started soaking a ton of dried chickpeas that day, cooked them for 90 minutes the next morning and we began our hummus factory.
I had an idea to make several of my favorite flavors just for kicks, so we also roasted a couple beets, a red bell pepper and cut some cilantro from the garden. After we made our first batch, which was the traditional kind, Hannah looked at me in disbelief. “That’s it?! ” Yep. That’s it. “If people knew how easy it was to make hummus, they would never buy it!” I’m so glad that thought was put out there to the universe.
After that, we made hot pink hummus with a roasted beet, which I agreed would be super cute for a (girl) baby shower or a bachelorette party (Hannah’s idea.) Cilantro hummus turned out a lovely pale green with a fresh herby flavor. Lastly, my favorite was roasted red pepper hummus to which I added a little smoked paprika and a dash of cayenne. We tried all the flavors with raw carrot, cucumber and sweet bell pepper slices, as well as some gluten-free chips. But I also love the red pepper version on veggie burgers and the cilantro one on a turkey sandwich. The beet hummus is for pure shock value since despite adding a roasted beet, it just picks up a subtle sweetness and really tastes a lot like the traditional. You can never have enough healthful dips for summer entertaining. With July 4th around the corner, there’s no better time to add some pizzaz to an old classic!
3 cups cooked chickpeas, if canned, drained and rinsed, liquid reserved*
3 garlic cloves
½ cup sesame tahini
4-5 Tablespoons freshly squeezed lemon juice
6 Tablespoons chickpea liquid
1 teaspoon plus a pinch sea salt
Instructions
Place all the ingredients in a food processor fitted with the steel blade and process until the hummus is smooth. Taste for seasoning and texture.
I like it very smooth and creamy, so I let the food processor run for a few minutes. I also prefer to eat it immediately at room temperature, but if you will be refrigerating it, you can add a little extra chickpea liquid since the hummus will thicken after it has been refrigerated.
Beet Hummus: add 1 large roasted and peeled red beet to Traditional Hummus ingredients in food processor. Blend until thoroughly combined.
Cilantro Hummus: add 24 sprigs of cilantro and a few dashes of cayenne pepper to Traditional Hummus ingredients in food processor. You can use either lemon juice or lime juice. Blend until thoroughly combined. Feel free to use more cilantro.
Roasted Red Pepper Hummus: add 1-2 teaspoons smoked paprika, a few dashes cayenne pepper and 1 large roasted, peeled and seeded sweet red bell pepper to Traditional Hummus ingredients in food processor. Reduce lemon juice to 1 Tablespoon and sea salt to ¾ teaspoon. Blend until thoroughly combined. Taste to adjust seasonings.
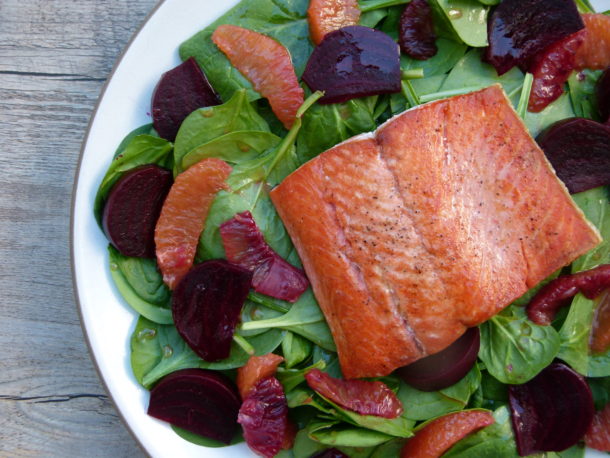
Don’t let the fancy name fool you. This recipe is as easy as it is beautiful and it’s absolutely delicious. All of this is in season right now — from the wild salmon and spinach to the blood oranges and beets — and it comes just in time for the last Friday of Lent.
This dish reminds me of a nutrition lesson I taught to some elementary school students one year about “eating the colors of the rainbow.” Nature provides us with a beautiful spectrum of colors from which to choose and those colors represent different phytonutrients — compounds found in plant foods which help protect the plants from viruses and bacteria, but also support our health, as well.
There are thousands of phytonutrients which are classified by family. But teaching the classification of phytonutrients to fifth graders (or adults) is overwhelming and confusing. All we really need to know is that each color (including white) represents an important set of differenthealth benefits. In order to maximize our exposure to all these health benefits, we need to eat a wide variety of fresh fruits and vegetables everyday in as many colors as possible…..like the colors of the rainbow.
This salad may not cover every color, but it sure gives you a solid start. One colorful addition to the salad which does not contain phytonutrients, but is loaded with anti-oxidants and anti-inflammatory Omega-3 fatty acids is wild salmon. If you don’t eat fish, the salad is fantastic without it, but if you do eat fish I strongly encourage you to find a good source for wild salmon which is one of the richest sources of Omega-3s that you can find. Unfortunately the typical American is both lacking in Omega-3s and out of balance in the Omega 3 – Omega 6 ratio, resulting in a highly inflammatory diet. I bought this lovely piece of sockeye from Vital Choice because I need a consistent source of high quality fish for my classes, but occasionally I can find what I’m looking for in my local markets, including the farmer’s market.
Although I don’t get too worked up about the presentation of my food (I’m much more concerned with how it tastes and its nutritional benefits), it is always nice to eat something that looks as beautiful as it tastes.
To all my students and readers who celebrate Easter, have a lovely holiday!
Seared Wild Salmon with Beet, Blood Orange and Spinach Salad
Author: Pamela
Serves: 6
Ingredients
1 bunch medium beets
5 medium blood oranges (or regular oranges)
2 Tablespoons finely diced shallot
1 ½ Tablespoons fresh lemon juice or white wine vinegar
2 teaspoons raw honey
Sea salt
Freshly ground pepper
½ cup cold-pressed, extra-virgin olive oil
8 ounces baby spinach leaves or arugula, washed and dried
6 filets wild Alaskan salmon, 5 to 6 ounces each
zest of one blood orange (optional)
Sea salt and freshly ground black pepper to season the fish
4 Tablespoons cold-pressed, extra-virgin olive oil or coconut oil
Instructions
Preheat the oven to 400 degrees.
Cut the greens off the beets, leaving about ½ inch of the stems still attached. Save the greens for another time. Wash the beets well and place them in a roasting pan with a ½-inch layer of water on the bottom. Cover tightly with foil (if the foil touches the beets, cover first with parchment, then with foil.) Roast about 50 minutes (or longer for larger beets). When the beets are done, carefully remove the foil. Allow them to cool, and then peel them by slipping off the skins with your fingers. Cut them into ½-inch wedges.
Slice the stem and bottom ends from the blood oranges. Stand the oranges on one end and, following the contour of the fruit with a very sharp knife, remove the peel and white pith. Work from top to bottom, rotating the fruit as you go. Then hold each orange over a bowl and carefully slice between the membranes and the fruit to release the segments in between. Squeeze any juice left in the remaining membrane into a measuring cup. Add any juice from the bowl of blood orange segments to the measuring cup. (Or if you're pressed for time, just slice the oranges into rounds.)
Combine the diced shallot, lemon juice, ¼ cup blood orange juice (if you didn’t reserve enough, you can add regular freshly squeezed orange juice), honey and ¾ teaspoon salt in a small bowl. Whisk in the olive oil slowly. Add black pepper and additional sea salt to taste.
Remove the salmon from the refrigerator 30 minutes before cooking to bring it to room temperature. Season the salmon with the zest, sea salt, and ground pepper.
Heat a large sauté pan over medium heat for about 1 minute. Add the oil to the pan and allow to heat up for 1 minute, until very warm, but not smoking. Lay the fish in the pan, seasoned side down, and cook 3 to 4 minutes, until it is lightly browned. Turn the fish over, lower the heat to medium-low, and cook a few minutes more, until it is almost cooked through. Do your best not to overcook the salmon. When it is done, the fish will begin to flake and separate a little, and the center will be slightly rare. The salmon will continue to cook a bit more while it sits.
Place the spinach in a bowl and toss lightly with some dressing. Transfer to a serving platter. Place the salmon on top of the spinach.
Place the beets and blood oranges in the bowl and toss lightly with some dressing. Arrange the beets and blood oranges around the perimeter of the platter. Drizzle the salmon with additional dressing, if desired.
Notes
Blood oranges are little more tart than regular oranges, so if you are not using blood orange juice in the dressing, you can balance the acidity with a little extra lemon juice or some rice vinegar.
Do-ahead suggestions: You can prepare your beets, oranges, greens and dressing up to 2 days before.
I used to struggle coming up with an hors d’oeuvre that was tasty, fresh and didn’t contain tons of dairy. Have you ever noticed the popular hors d’oeuvres that show up at every cocktail or dinner party – there’s the baked wedge of brie, the spinach and artichoke dip bubbling over with three cheeses AND sour cream, the cheese platter, the mini grilled cheeses and of course, the most sophisticated of all, The Caprese Skewer. Believe me, I’ve made more than my share of boconcini, basil and grape tomatoes on a toothpick, but people, it is no longer 1999! We have got to move on!
So I began thinking about why the Caprese Skewer is so ubiquitous. The Caprese salad is simple and delicious when showcasing perfect tomatoes, aromatic basil and fresh, creamy mozzarella. What could be better than having each of those flavors in one delightful bite? So why not extend the salad-as-skewer idea? What about a Greek Salad Skewer? Grape tomato, spinach or mint-wrapped feta, cucumber, and a pitted kalamata olive sprinkled with dried oregano and drizzled with lemon juice and olive oil. Hmmmm, I like it, but very summery.
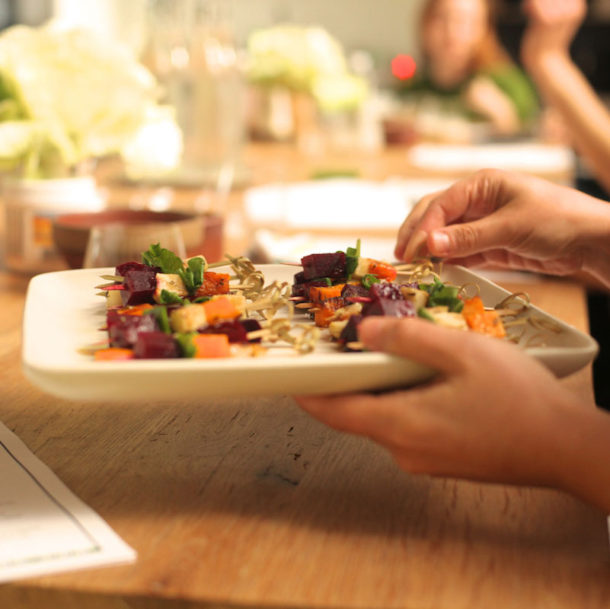
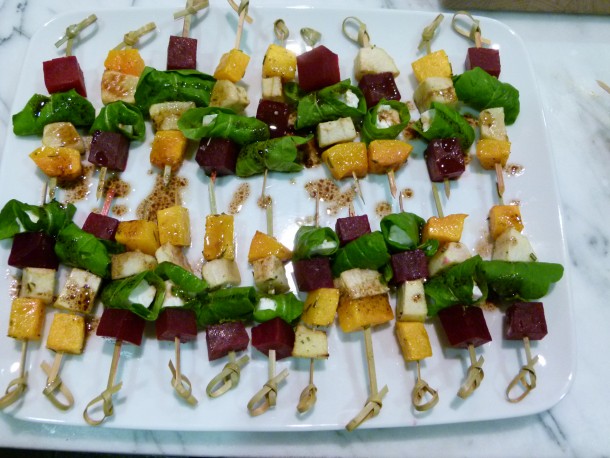
It’s Fall, so I roasted butternut squash and apples with rosemary and skewered them together with red beets. Needs a little green. Take a piece of arugula or spinach and turn it around a piece of feta so that the feta doesn’t crumble when you skewer it. Then drizzle it all with a little balsamic and oil. Who wouldn’t want to eat that?? Don’t answer that.
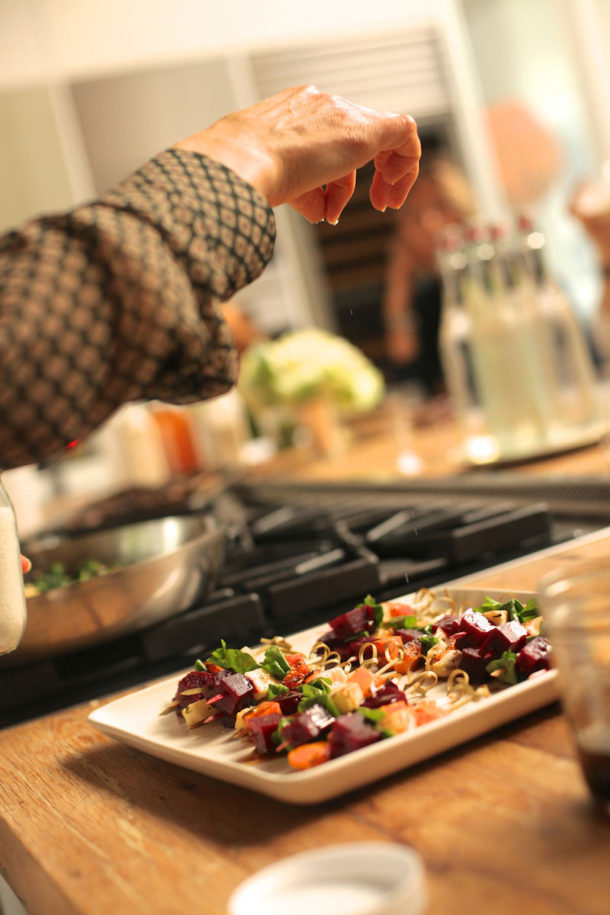
I will forewarn you, there is a bit of prep involved. There’s chopping and roasting and skewering. Ah, I am seeing the lure of the ease of the old standby skewer, but these are so worth it. The colors alone will make your hors d’oeuvre stand out in a sea of cream and you will be a star!
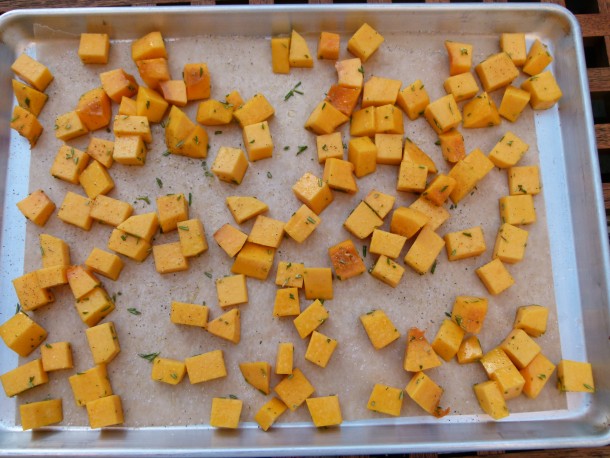
Preheat oven to 400 degrees. Line 2 baking sheets with parchment paper.
Place the butternut squash cubes in a large bowl and drizzle with olive oil to coat. Transfer to prepared sheet pan and spread out in one layer. Season with sea salt, pepper, and half the rosemary.
Place the apple cubes in the same bowl and drizzle with olive oil to coat. Repeat the same procedure as the squash
Place the sheet pans in the oven and roast squash for about 30 minutes, turning halfway, until tender and slightly caramelized. Roast apples until just tender, about 20 minutes. Remove from the oven and allow to cool slightly.
Whisk together the balsamic vinegar and olive oil.
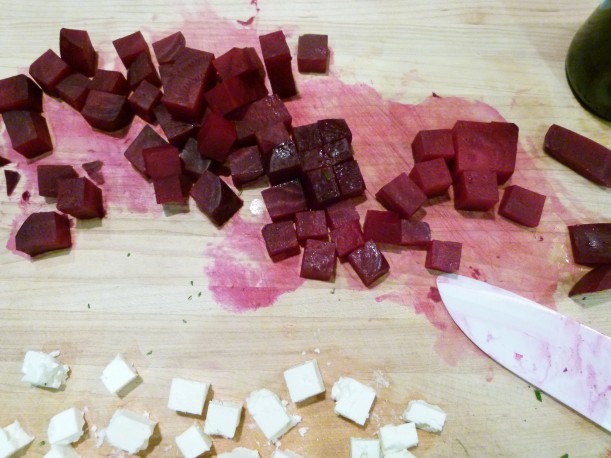
Thread the squash, apple, beet and arugula or spinach on a small skewer or toothpick. If you decide to use feta, wrap the cube of feta with a leaf of arugula/spinach and skewer. Arrange on a serving plate and drizzle with the vinegar and oil.
Notes
*other ideas include parsnips, carrots, sweet potatoes.