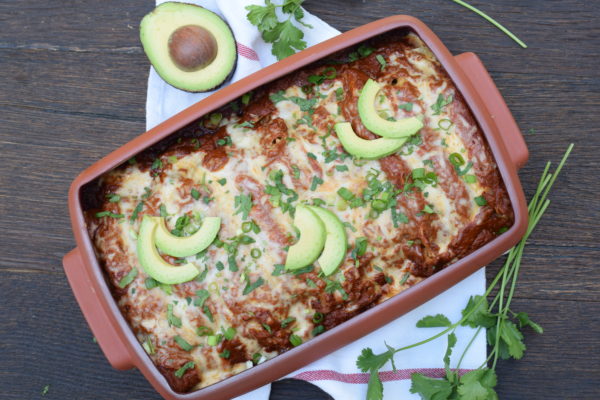
This recipe is “the whole enchilada,” so to speak. I’m giving you a method for poaching the chicken, making the enchilada sauce from scratch, and assembling the actual enchiladas. The only thing we’re not covering today is how to make corn tortillas, and I am sure homemade corn tortillas are the only thing that would make these enchiladas better. If you buy cooked chicken and canned enchilada sauce, you don’t really need a recipe to make enchiladas. Not judging of course, because we’ve all been there and shortcuts have their time and place. But if you can plan ahead, these are amazing. My entire family loves these and let me tell you, they’re a tough crowd.
I grew up on Long Island and didn’t even taste Mexican food until I moved to Los Angeles after college. My kids have grown up in LA and they are Mexican food experts, sometimes having lengthy discussions about which local taco joint has the best this or that. So when I make something Mexican that gets the thumbs-up, I am relieved and proud at the same time. Ironically, these are not my personal favorite enchiladas. I am more of a green (tomatillo) sauce person, so I am obsessed with the enchiladas verdes here. But my family digs these. I’ve been making enchiladas rojas for years and my son (Mr. Picky) used to call these “chicken tacos with Mexican tomato sauce.”
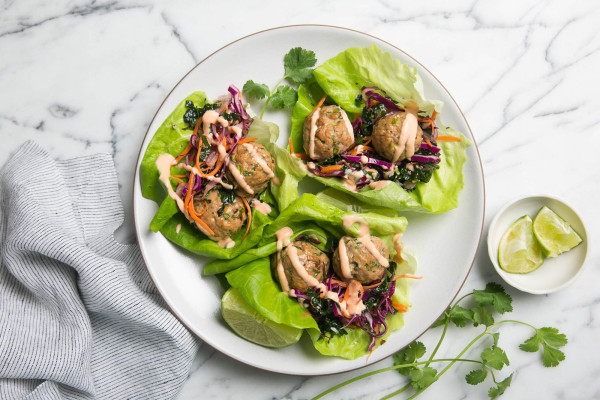
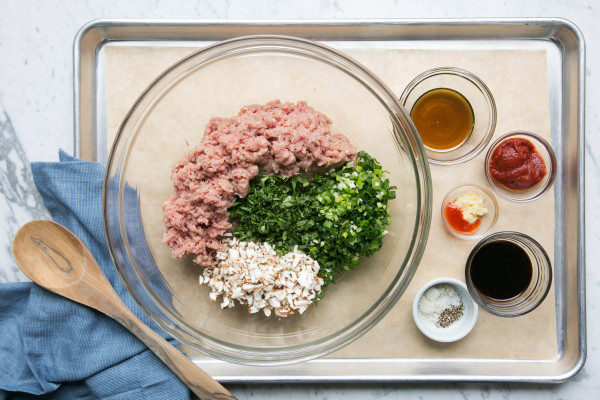
Why is it that I don’t like meat, but I can handle meatballs? Maybe because it doesn’t resemble actual meat? Most people, both kids and adults, like meatballs. I have made many meatball-related recipes in my classes, and they are always quick favorites. I grew up thinking a meatball was only something simmered in a marinara (tomato) sauce and served with pasta. And it usually is, but there are Mexican-flavored meatballs in albondigas soup, sweet and sour meatballs, Swedish meatballs and Greek meatballs, so why can’t there be Asian-flavored meatballs? Indeed there can be.
When I came up with this recipe, they didn’t go into a soup or in a rice and veggie bowl, although those would be great ways to enjoy the meatballs. I served them taco-style, in a big lettuce leaf with crunchy cabbage and a spicy sauce. My family went nuts and the mamas in my classes all ran home to make these for their kiddos. I received lots of great feedback, so I am confident you will receive rave reviews.
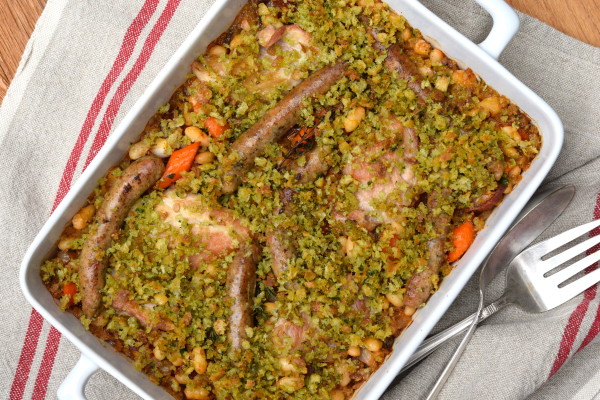
Did you notice a French theme happening on the blog? As soon as I remembered the French onion soup recipe I taught a few years ago, it also occurred to me that I had never posted this chicken and white beans recipe which I developed for a teaching trip in Southwest France many years ago. Cassoulet is an incredible, hearty French dish (actually it refers to the recipe as well as the vessel it’s cooked in) with duck confit and sausages and chicken and white beans all stewy and luscious together. It also requires tons of time, like at least a full day +. And I’m not saying it’s not worth it, but it’s not realistic for me or most of the universe to spend that much time on dinner.
So I came up with a version that can be made quickety quick on a weeknight and although it doesn’t have the richness and depth of a traditional cassoulet (which coincidentally was posted in the New York Times this week by Sam Sifton — check it out here), this one is also lighter and more in line with how I like to eat, i.e. not feeling super weighed down like I need a 3-hour nap after I eating, which is what I did after I ate real cassoulet in France.
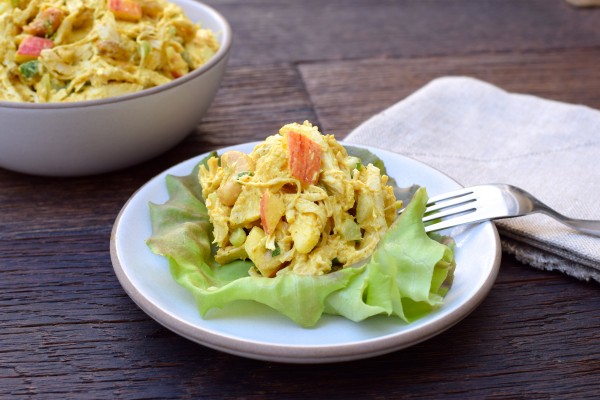
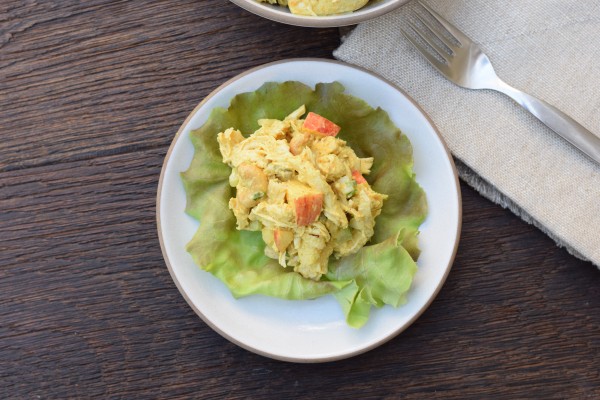
I’m sure you all pushed away your keyboards and ran into the kitchen to poach chicken after Monday’s post, right? Perfect! Now let’s do something healthy and delish with your chicken. I have a recipe for the BEST curried chicken salad I have ever eaten! Even my family, which to my chagrin prefers more “simple” flavors, loves this salad.
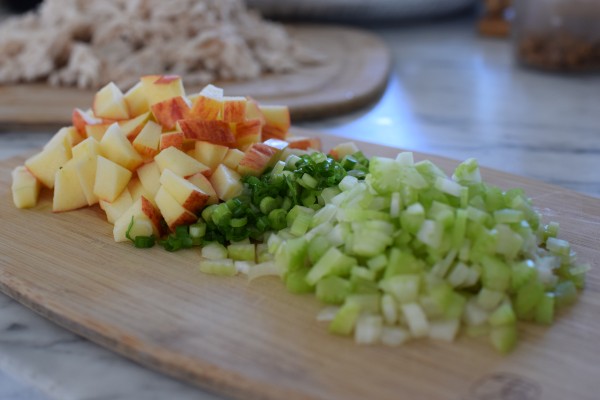
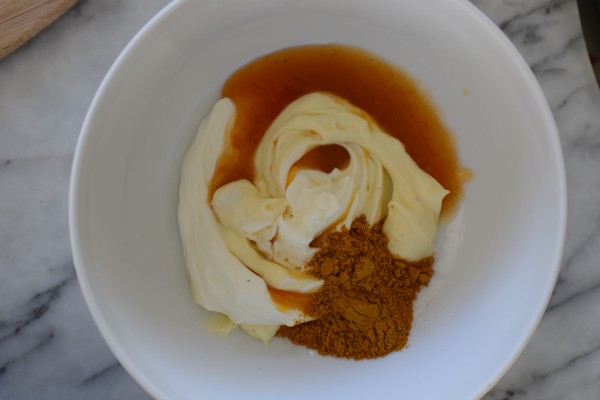
I thought it would be a great time to post this curried chicken salad since you might be looking for some new options for school and/or work lunch. At it’s most basic, curried chicken salad is just what it sounds like — chicken salad with curry mixed in. I use a yellow curry powder, which is a blend of different anti-inflammatory spices like turmeric, cumin, coriander, fenugreek and many others. But as opposed to basic, standard chicken salad to which I add celery and onion, I like to add a little something sweet to balance the curry. My husband and I disagree on whether diced apple or halved grapes is better. I think they’re both good, but since I am a sucker for crunch, I usually add apples.
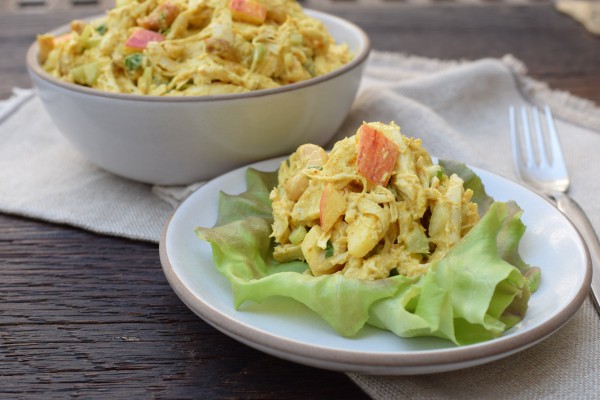
I used to make Ina Garten’s version with Major Grey chutney and white wine, but the chutney is not something I usually use and it was taking up space in the fridge. So I created my own blend of ingredients, including apricot preserves, to mimic the sweet, hot, tart flavor of the chutney. This is the best part of the dressing. So, so good and flavorful! I also like to use shredded, as opposed to cubed or diced chicken, because I think the nooks and crannies of the shredded chicken pick up more of the dressing.
You can make it the day before and tuck it inside of a pita or 2 slices of hearty, whole grain bread. Or, as I like to do it, eat it in a lettuce cup. A little avocado would put this over the top! Feel free to make this spicy or change up the preserves. I think any variation of orange, apricot, peach or kumquat would be great. I like the St. Dalfour brand which is sugar-free and without added preservatives. I think this might become your new favorite chicken salad! For you vegheads, I may try to do a tofu version of this. How does that sound?!
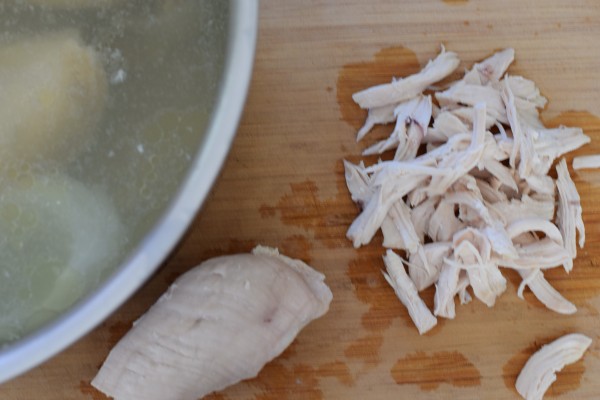
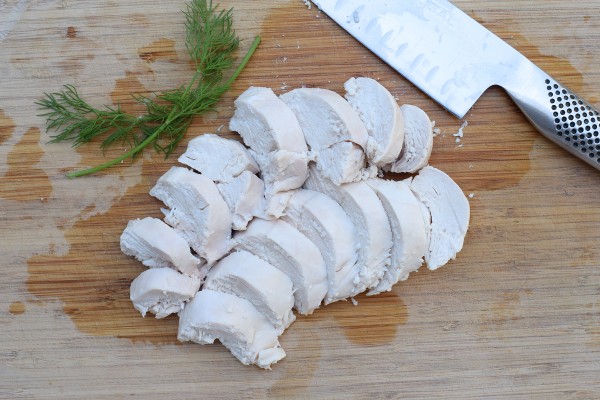
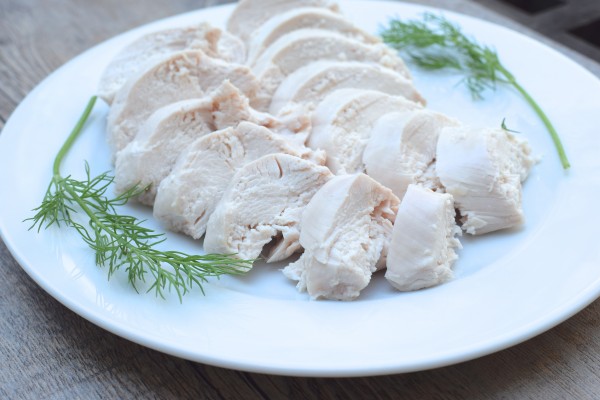
There are a few basic techniques I think are worth knowing how to do, such as scrambling eggs, cooking rice, and making a versatile salad dressing among other things. In that category, I also include poaching chicken (if you eat chicken obviously.) I thought this was a good time to do a refresher on this technique since back to school has made many of us desperate for make-ahead meal tips and fodder for school lunches. Enter poached chicken.
Poached chicken is very easy to do and provides limitless options for meal planning. It is delicious in chicken salad, with mixed greens or grains and a vinaigrette, in enchiladas or quesadillas, in a sandwich or wrap, and so on. Poaching is probably the cleanest way to cook chicken, since we avoid the formation of carcinogenic compounds that are created when we grill and sear, or cook animal protein for long periods of time at high temps. Read this article if you would like to learn more. So if you’re going to eat animal protein, steaming, poaching and low temps are the most healthful ways to go.
If it’s so much better to poach and steam chicken, why don’t we do it all the time? Because unfortunately, it’s not as flavorful as searing and roasting. All those crispy brown bits, albeit carcinogenic, are tasty. So once in a while, it’s a good idea to change it up a bit. And if you’re looking for cooked chicken to add to meals, try poaching. We’ll add some extra flavor by including onion, garlic, salt and pepper to the poaching liquid though.
Poach some chicken on a Sunday and have it for a couple of days’ worth of lunches and dinners during the week. You can also freeze poached chicken, wrap it well in aluminum foil or plastic wrap and use it within 3 months. This week I will also share one of my favorite salads using poached chicken. Stay tuned!
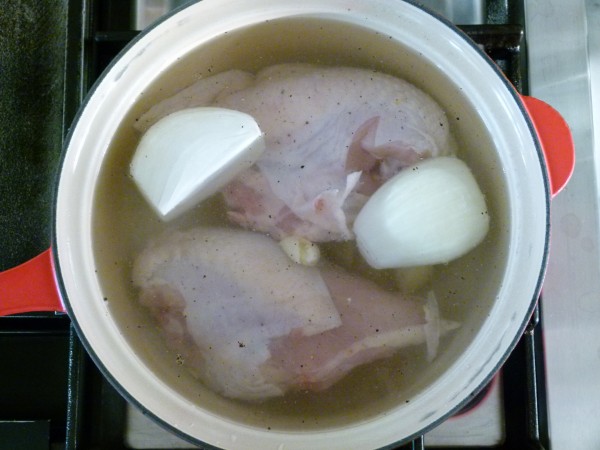
2 large bone-in, skin-on chicken breasts, about 1 ¾ pounds+
½ small onion, peeled
4 large garlic cloves, smashed
1 Tablespoon additive-free kosher salt
½ teaspoon whole black peppercorns
Instructions
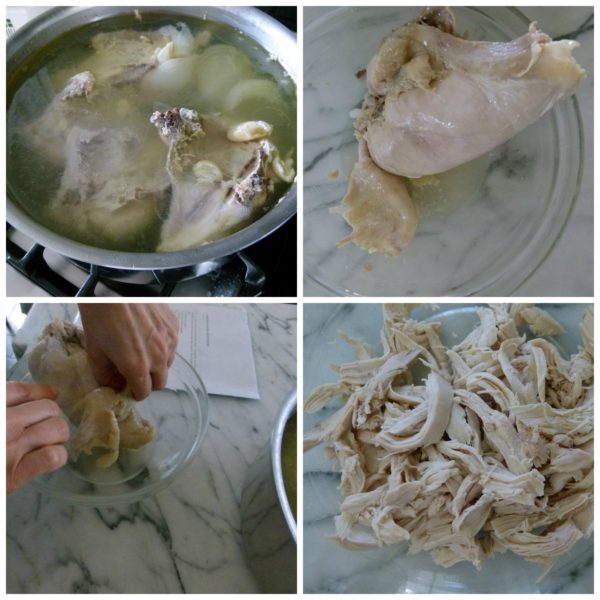
Place the chicken in a saucepan with the onion, garlic, salt and peppercorns and add water to cover.
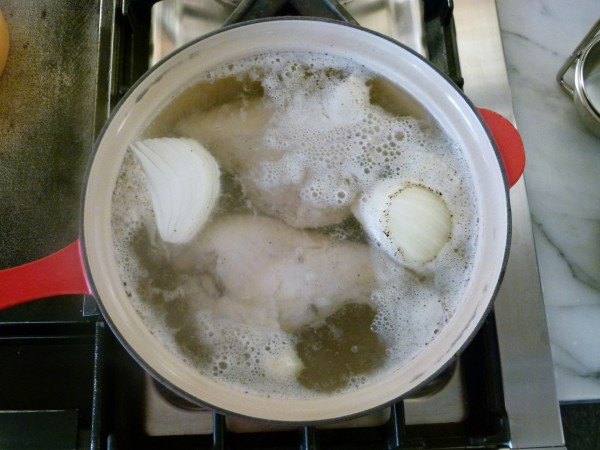
Bring to a boil over high heat, reduce heat to low, cover and simmer until the chicken is just cooked through, about 25 minutes.
Allow chicken to cool in the poaching liquid.
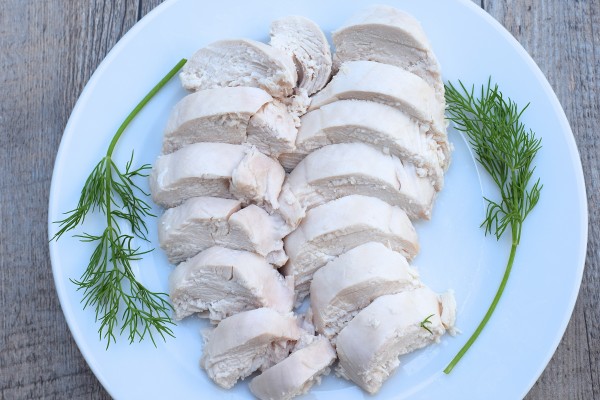
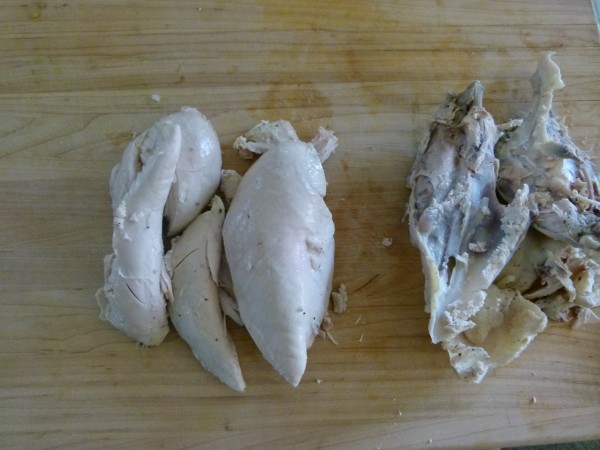
Remove the skin and bones and slice, shred or cube the meat to use as desired.
You can place the bones back in the poaching liquid with some fresh chicken parts and some carrots and celery and simmer very gently to make a stock. Click here for how to make chicken stock.
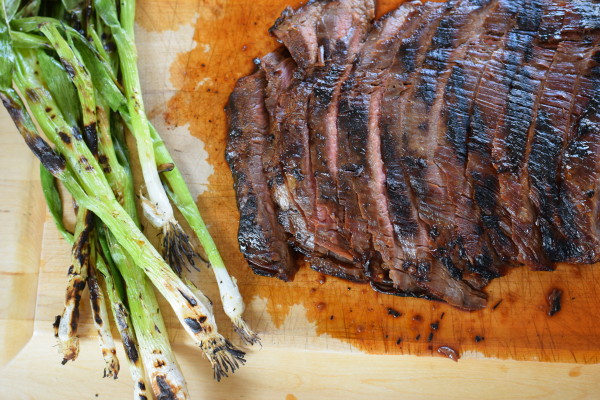
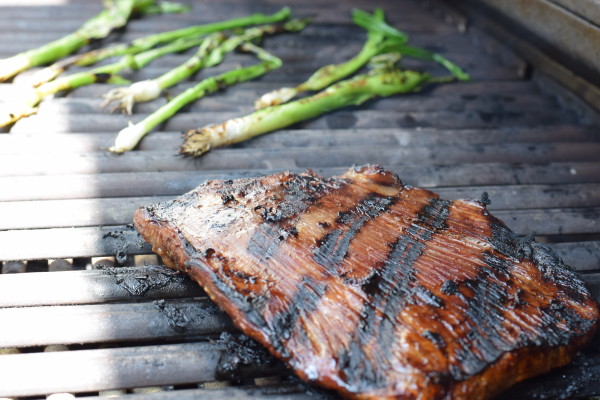
Such a bold claim I am making today with this flank steak recipe! But that’s what Mr. Picky himself declared when I made this the first time many years ago. And that’s what my nieces and nephews say when I cook this up for my family in the summertime. As you know, I actually don’t even eat red meat, but I have tried this and I have to admit… it’s delicious! I figured with Memorial Day weekend coming up (so excited to have a long weekend!), you might have invited a few friends over and are looking for the perfect grilled steak recipe. This is it right here. I also taught this in my classes a couple years ago and everyone loved it. The ingredients are simple, you marinate it in the morning and it cooks up very quickly on the grill. The marinade is what makes it so delicious and I especially love marinating grass-fed meat with a little soy sauce or tamari which really helps tenderize it. Yum!
As opposed to me, my family loves beef, so I do cook it for them a few times a month. I have talked about why I don’t think we should be overeating red meat on the blog before, and I have discussed my reasons for ONLY choosing grass-fed beef when I do buy it. My opinion hasn’t changed at all. When I do make animal protein for the family, it’s a small amount, usually 2-4 ounces. Yes, even my husband eats that amount. And if grass-fed isn’t available, I won’t buy corn-fed. So if you’re going to eat beef — not a lot and make it grass-fed!
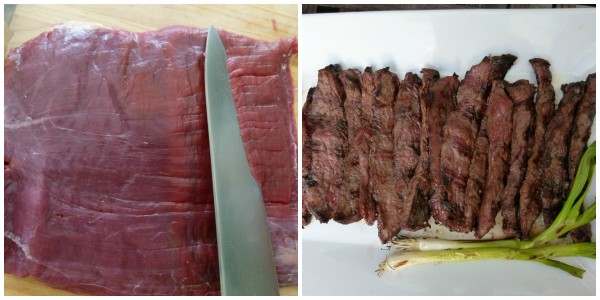
I have made this recipe two different ways. In my classes, I pre-sliced the flank steak and marinated it already cut. The advantage of this method is that it cooks super fast, about a minute per side and the marinade really gets throughout the meat. If you’ve read my post about how to reduce your carcinogens when you grill, you’ll also remember one of the best strategies is to grill thin cuts so exposure to the grill is kept at a minimum. Also, pre-cut meat is easier to serve during a cooking class because I don’t have to slice the meat when hungry people are waiting. If you like rare beef however, you’re better off grilling the whole steak, letting it rest and then slicing it before serving.
Whichever way you prepare it, here a few reminders about cooking steak:
flank steak can be hard to find because there aren’t too many “flanks” on a cow. Other acceptable subs are skirt steak, flap steak, or hanger steak.
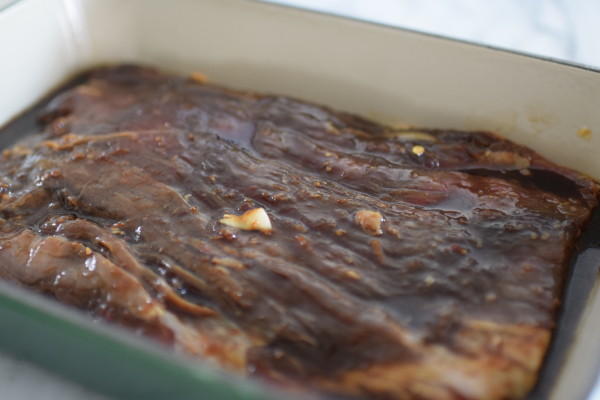
don’t over marinate a thin cut like flank steak. This marinade contains soy sauce which can make the meat mushy if you leave it in too long (like more than 12 hours.)
grass-fed contains less fat and therefore cooks more quickly;
grass-fed doesn’t stay as tender if it’s cooked well-done. My answer for well-done grass-fee meat is to pour the juices from the cutting board on top of the meat and also serve it with a dressing or sauce to add moisture.
take the meat out of the fridge 30 minutes before to bring it to room temp so it cooks evenly;
always allow the cooked meat to rest, covered, for about 10 minutes before slicing so the juices redistribute themselves into the meat. Don’t allow to rest too long, otherwise it will overcook (unless you want it well-done).
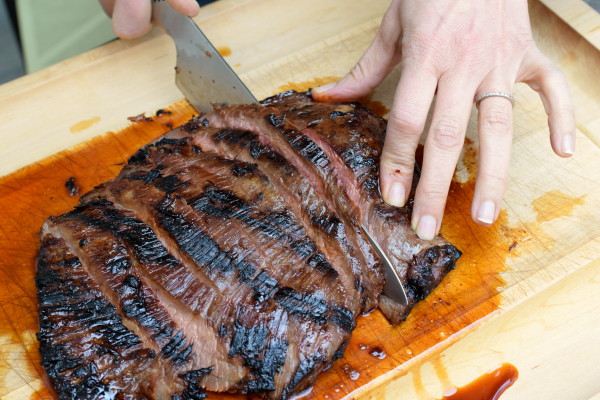
always cut against the grain for a more tender bite. Look at the naturals lines in the meat and cut in the opposite direction. If you cut with the grain, the meat will be chewy.
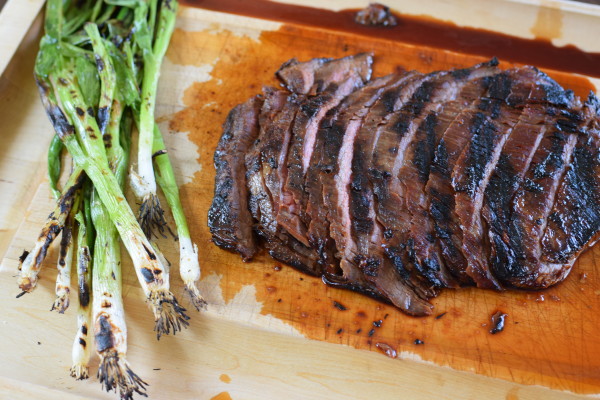
I generally serve this steak as is, but I don’t see why you couldn’t serve a salsa, an herb dressing or chopped grilled scallions on top. Some good accompaniments are sautéed corn, wheat berry salad with lemon-tahini dressing, perfect spring salad, grilled artichokes, heirloom tomatoes with basil, roasted asparagus, just to suggest a few.
2 ½ pounds (or whatever you can get) grass-fed beef flank steak, cut across the grain on a diagonal into 1-inch thick slices or left whole (marinating can be longer if the steak is whole)
Instructions
In a large, shallow dish, combine the soy sauce with the sugar, white wine, chopped garlic, toasted sesame oil olive oil and crushed red pepper, stirring to dissolve the sugar. Add the sliced flank steak and coat thoroughly in the marinade. Cover and refrigerate the steak for 4 hours or up to 8 hours.
Heat a grill or a griddle over medium-high heat. Working in batches, grill the steak until the slices are browned and medium-rare, about 1-2 minutes per side. Transfer the steak to a serving platter and serve immediately.
OR grill the whole steak for 2 ½ to 3 minutes on each side for medium-rare. 4 minutes on each side for medium-well. Transfer meat to a cutting board and cover. Allow to rest for 5-10 minutes before slicing AGAINST the grain. Serve.
Notes
*You can use 1 Tablespoon of sesame oil and omit the olive oil + add a little chopped fresh ginger for a more Asian flavor.
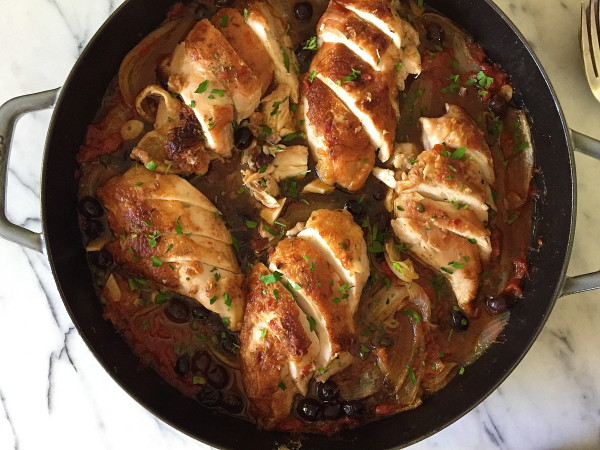
I just finished teaching this recipe in my March classes and it was a huge hit! I don’t even like chicken and I seemed to always be looking for a bite at the end of class. I had so many requests to post this recipe that I had to oblige, even though the images aren’t totally the best. I think this would be perfectly appropriate to prepare for Passover, with one minor adjustment. And it’s a great recipe to adapt as cherry tomatoes and beefsteak tomatoes become available.
The recipe is basically a braise, but the chicken is cooked uncovered for most of the time, which is why I call it Baked Chicken, versus Braised Chicken. But the formula is still very much the same — browning the meat first to create flavor and color, sauteing onions, deglazing, putting meat back in and baking in the oven until cooked through. Once you understand the steps, you can start making up your own recipe or adapting recipes like this one with other ingredients or flavors.
I personally like using bone-in, skin-on pieces of chicken since I think they taste better and stay a little moister, especially breast pieces. Unfortunately, cooking with bone-in, skin-on pieces takes longer than boneless, skinless and may not be a great option for those of you needing a really fast recipe for after work. Fortunately, this recipe can be adapted for cutlets and even a slow cooker, so look for those options in the instructions.
This dish produces very tender, flavorful chicken, as well as the accompanying onions and sauce. In the ingredient list it offers the option of draining the juice from the jar of tomatoes or keeping it. Here’s my thought process on that one: if you will be serving the chicken with noodles or pasta, polenta, mashed potatoes or something that would welcome a lot of sauce, then you should keep the juice. Otherwise, drain the juice and just use the tomato pieces. I also love this dish during cherry tomato season, when I will use 1 1/2 pounds of halved sweet cherry tomatoes in place of the jarred, and basil leaves instead of the thyme. Large vine-ripened tomatoes that have been blanched and chopped are also great. Both of these options create a much lighter, fresher dish. But every variation is very delicious.
Other adaptations I discussed in class:
subbing fennel for half the onion
omitting the olives and adding chopped mushrooms with the onions
adding a healthy pinch of crushed red pepper flakes with the garlic
in the summer, subbing sliced sweet bell pepper for some of the onion
searing cauliflower steaks and using those in place of the chicken for a vegetarian/vegan option
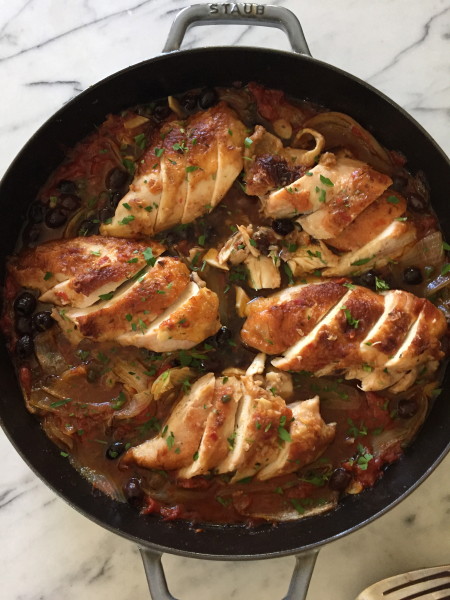
I always use breasts when I teach because most of my students prefer white meat, and therefore it’s just easier for me to buy all breasts. You can certainly use any part of the chicken you want. In fact, it’s more economical to buy a whole chicken and have the butcher cut it into pieces for you. But I highly recommend not buying 1 breast per person. It’s too much meat to eat in one sitting, unless you are an Olympian or a body builder! I have never actually seen anyone at my house or at a dinner party eat an entire breast. I have seen people cut them in half and push one piece off to the side and just each one half. What I love to do is prepare the breasts, allowing for 1/2 per person, and removing the bones after the chicken is cooked and has rested a bit. Then I slice the meat on an angle. It’s much more manageable to eat it this way, as well as more elegant and attractive to serve. See this post on the gloves I use to get down and dirty when I carve chicken!
Let me know if you have specific questions about timing or with what sides to serve this. Hope your holiday planning is going well!
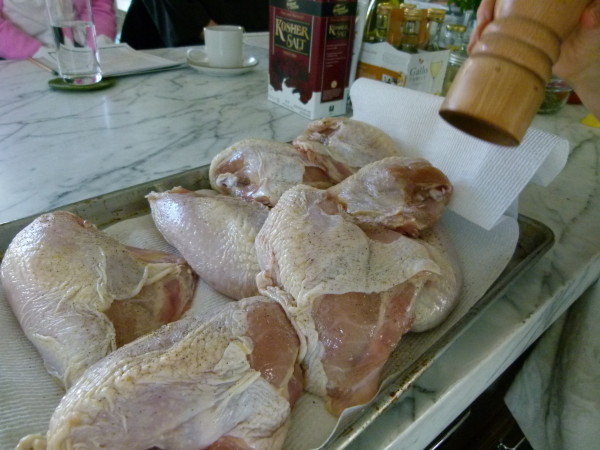
3 ½ pounds bone-in, skin-on chicken pieces, sprinkled with 2 teaspoons kosher salt when you get home from the market unless you are using kosher chicken which you should not salt (read this post on how and why to season your chicken in advance)
¼ teaspoon freshly ground black pepper
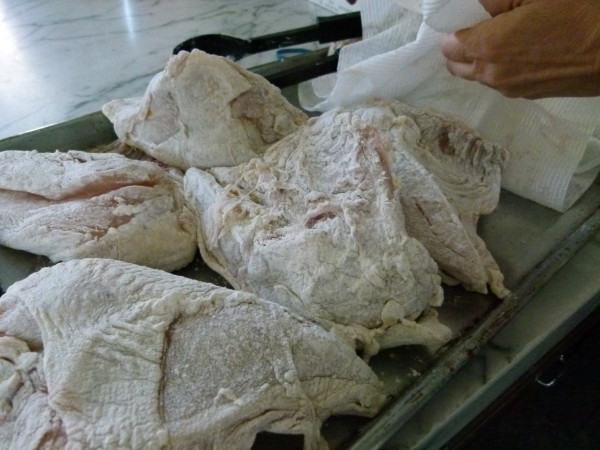
Flour for dredging (all-purpose, spelt, GF flour, etc.) -- use matzoh cake meal for Passover
1 ½ medium onions, cut through the root into sixths or eighths (or sliced thinly, but I like wedges better in this recipe)
3 cloves garlic, thinly sliced
1 teaspoon sea salt
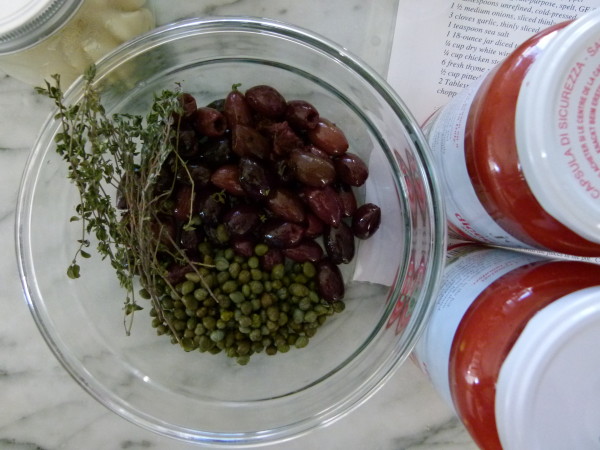
1 18-ounce jar diced tomatoes with the juice (or drain juice for less sauce) (I like Jovial in glass jars. Read this post why.)
¼ cup dry white wine
¼ cup chicken stock, vegetable stock or more white wine
6 fresh thyme sprigs or large basil leaves in the summer/fall
½ cup pitted olives, such as kalamata or Bella di Cerignola
2 Tablespoons capers, drained
chopped parsley for garnish, if desired
Instructions
Preheat the oven to 400 degrees. Pat the chicken dry and season with black pepper. Dredge in flour, shaking off any excess.
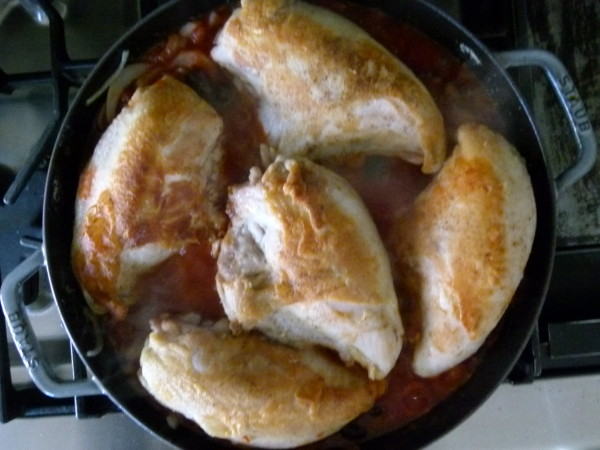
In a 12-inch ovenproof skillet or Dutch oven, heat 1 Tablespoon of the olive oil over medium heat. Add the chicken pieces in one layer and brown on both sides. Transfer to a plate and reserve.
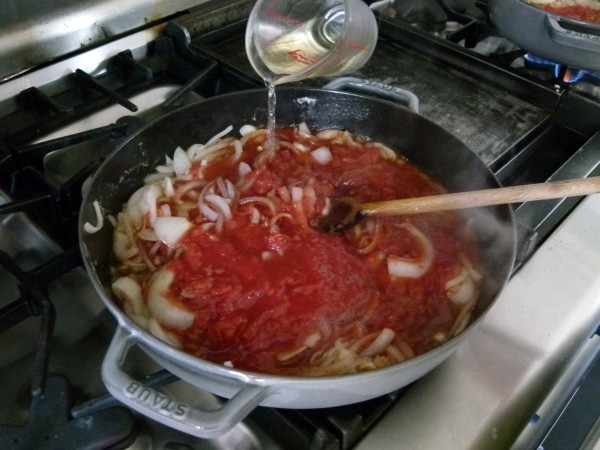
If the pan looks dry, add a little oil. If it looks like there’s more than 2 Tablespoons oil, drain a bit off. Add the onions, cook over medium heat, stirring occasionally, until softened and lightly browned. Add the garlic and sea salt and cook until fragrant, about 1 minute.
Add the tomatoes, white wine, stock and cook, scraping any brown bits on bottom of the pan.
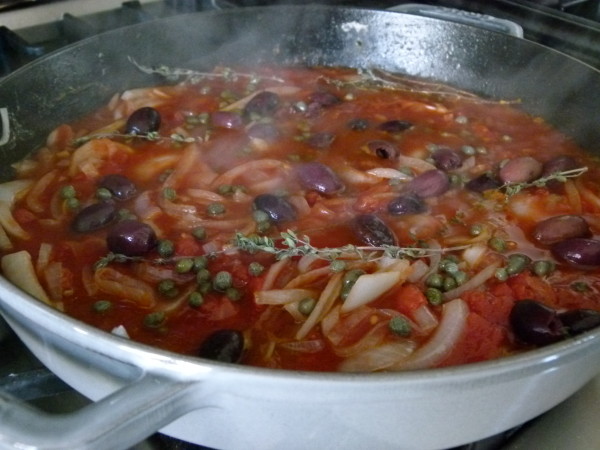
Arrange the thyme, olives and capers over the onion mixture. Place the browned chicken pieces side by side on top. Bring the mixture to a simmer. Cover and place in the oven.
After 15 minutes, baste the chicken with the juices in the pot. Continue cooking, uncovered, for an additional 30-40 minutes (depending on thickness), basting every 10 minutes if you have time. Sprinkle with parsley and serve. (You can also cook covered on the stove over low heat for 30 minutes.)
Notes
For a boneless, skinless version, check out my recipe for Lemon –Thyme Chicken Cutlets and follow the same directions.
For a slow cooker version, use skinless chicken and 3 Tablespoons each of stock and wine instead of 4. Follow same directions, but after deglazing, pour everything into the slow cooker and cook for 4-5 hours on HIGH or 6-8 on LOW.
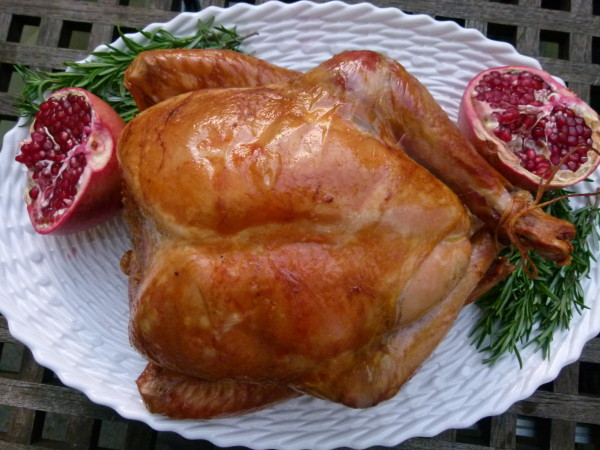
This is it, my last Thanksgiving recipe for you. And it’s my favorite way to make turkey as of late. I taught this method in all my November classes last year and a few this year and I was consistently thrilled with the results. I don’t even like turkey, but this was juicy and so flavorful. Even if you have solidified your Thanksgiving menu, I’m not too late with this one since you are probably making turkey of some sort. Let’s get down to the nitty gritty of making a good turkey:
Buy a fresh, organic turkey (they taste better than frozen and/or Butterball chemically-injected ones). If you bought a frozen turkey, plan for a few days to defrost in the fridge. Do not thaw in brine!
Don’t forget to remove the neck and giblet bag from the cavities (including the neck.)
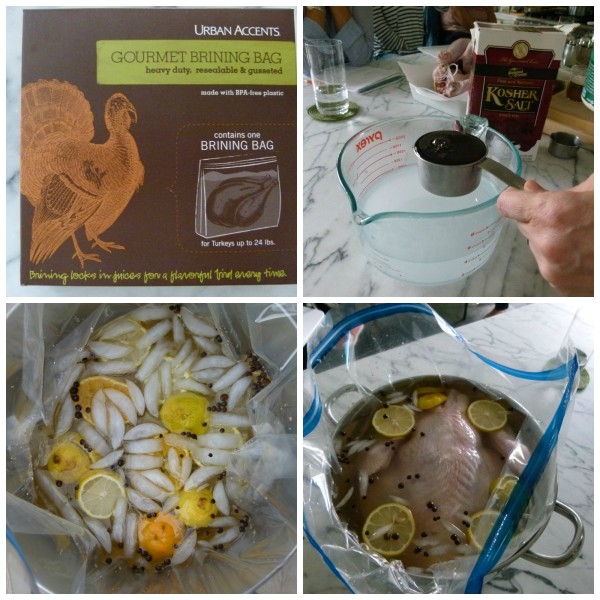
Brine it. You can dry brine (which means you’re rubbing the turkey inside and outside with kosher salt 2-3 days before) or wet brine 24 hours in advance. A wet brine is a salt-water solution, usually with brown sugar and some other flavors. Brining gets the salt deep into the meat to season it well and keeps the turkey juicy. Both brines do this. The advantage of a dry brine is that it’s easier, especially if you’re cooking a super large turkey. All you have to do is rub it with salt. ANd it takes up less space in the fridge. The advantage of a wet brine is that it’s faster and you can add different flavors to the solution. The only time you don’t want to brine a turkey is if it is a KOSHER bird. Those have already been brined. If you can find a good quality organic, kosher turkey, go for it. You don’t have to prep it in advance = easier. I have tried NOT brining a turkey, and instead seasoning it just before cooking. Not the same. DO the brine. If you don’t have room in your fridge, place the turkey in the brine in a pot in a cooler with ice and it will be just fine.
Allow the turkey to come to room temperature before cooking. Promise me you’ll take the turkey out of the refrigerator at least one hour before cooking it, otherwise the interior will be underdone and the exterior will be overcooked and dry. That does not have to happen. For the largest birds (over 20 pounds), leave out of the fridge and out of the wet brine (if you’re using it) for 2 hours before roasting. 12-18 pounds leave out for 90 minutes before roasting. Less than 12 pounds leave out for at least an hour before roasting.
Use a meat thermometer to determine whether or not your turkey is ready. You cannot go by the chart on the turkey wrapping or by a recipe. I have made over 150 turkeys in my life in lots of different ovens and trust me, you need a meat thermometer to say the thickest part of the breast, which is on the side closer to the neck, registers between 160-165 degrees. The thigh should register around 175 degrees. Check this post here to see if your thermometer is accurate!
Allow the turkey to rest for at least 20 minutes before carving. The juice will redistribute and the turkey will be juicer. If you take the turkey out and cut it too soon the juices with pour onto your cutting board. That would be sad. Feel free to allow the turkey to rest a little longer, up to 40 minutes is fine. But keep it covered with a piece of foil so it stays warm while you make gravy and bake your stuffing. Click on this post for carving help.
You don’t have to follow this recipe for a great turkey, but you should employ the above strategy. Here are my other turkey recipes on my site:
You will have a delicious turkey, I am sure. But, if something goes wrong, here are some tips:
If you have dry turkey meat: carve the turkey and pour hot chicken or turkey stock over it. No one will know!
If your turkey is undercooked and you’ve already cut into it, remove the thigh and drumstick and take the breasts off the carcass. Put all the pieces into the roasting pan and put back in the oven until they reached the desired temp.
Good luck!! Leave a comment on any recipe if you have questions!
12-14 pound fresh turkey, giblet bag and neck removed, rinsed
For the brine:
1⅓ cup kosher salt (such as Diamond Crystal)
½ cup maple syrup or brown sugar
1 quart hot water
1 orange, cut into crosswise slices
1 lemon, cut into crosswise slices
1 Tablespoon black peppercorns
2 teaspoons allspice berries
1 gallon ice cold water
1 onion, quartered
3 or 4 parsley sprigs, thyme sprigs and or sage leaves
3 sprigs of fresh rosemary
1 apple, quartered or cores from 2 apples
6 Tablespoons unsalted butter, melted or olive oil
1-2 cups stock or water
Gravy
¼ cup dry white wine
5 Tablespoons all-purpose flour
3 -3 ½ cups chicken or turkey stock, preferably homemade
sea salt and freshly ground black pepper to taste
Instructions
I like to brine the turkey for about 14-18 hours. You can brine it, remove it from the brine and then store it in the refrigerator for a day until you are ready to cook it. To make the brine: Dissolve the salt and maple syrup in the hot water. Take the orange slices and carefully squeeze them into the mixture. Add the lemon, peppercorns and allspice berries.
Place the brining bag in a large stockpot. Add the cold water to the bringing bag and then the warm mixture. Place the turkey in the brine breastside down and make sure the whole bird is covered with liquid. Seal the bag securely and place pot in the refrigerator for 12-18 hours.
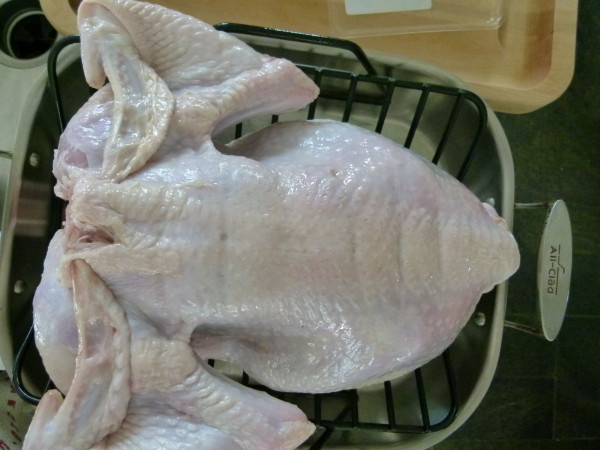
Remove the bird from the brine and rinse with cold water. Pat dry. Refrigerate until ready to cook or proceed with recipe.
The day of roasting, take turkey out of refrigerator and wipe dry with paper towels. Bring to room temperature, about 60-90 minutes.
Preheat oven to 425 degrees. Position a rack in the lowest rung of the oven. Oil a V-shaped rack in a roasting pan.
Sprinkle a little freshly ground black pepper in the cavity and then add in the onion, herbs, and apple. Truss the turkey by tying the legs together. Brush the skin all over with some of the butter or oil.
Place the turkey on the rack in the pan, breast-side down and pull the wings behind the back. Roast for 40 minutes, basting with butter or oil after 20 minutes. Reduce the heat to 325 degrees, turn breast side up (I usually wear clean rubber gloves to do this) and add 1 cup stock or water to the roasting pan. Continue to roast, basting with the remaining butter or oil until used up and then with the pan juices every 20 minutes. Add additional stock to the roasting pan if you notice there are no pan juices with which to baste the turkey.
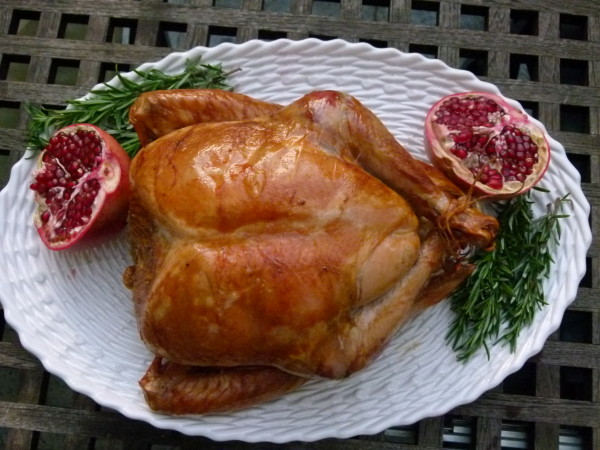
Roast until golden and cooked through. After about 2 hours, start testing for doneness by inserting an instant-read thermometer in the thickest part of the breast away from the bone; it should register 165-170 degrees. You may also test the thigh – it should read 180 degrees. The turkey should roast a total of about 2 ¾ hours, but it can range from about 2 ½ - 3 hours or 12-14 minutes/pound.
Transfer to a cutting board or warmed platter and cover loosely with aluminum foil until ready to carve, at least 20 minutes (I prefer longer.) Use the pan juices to make gravy.
Prepare the gravy:
Pour all the pan juices, including the fat into a fat separator. Allow the fat to separate from the juices.
Heat the roasting pan over medium heat on the stove and add the pan juices, leaving the fat in the fat separator. Add the wine to the roasting pan. Bring to a boil and lower heat to a simmer for 2-3 minutes, stirring with a wooden spoon to dislodge any brown bits that stick to the bottom of the pan. Strain into a bowl or you can use the gravy separator again or wait until Step 4 and strain into the gravy saucepan.
In a saucepan over medium heat, warm the reserved fat from the gravy separator until it is bubbly. You should have at least 3-4 Tablespoons. If you don’t, add some olive oil. Add the flour and whisk rapidly to cook the flour, about 2-3 minutes.
Whisk in the strained pan juices and 3 cups of stock to the saucepan until smooth. Bring to simmer and cook until thickened, about 5 minutes. Season to taste with salt and pepper. Keep warm on lowest heat. Add additional stock as needed to achieve desired consistency.